 |
LMS Reign of Chulainn 1 PBP Commentary |
Undercard bout
|
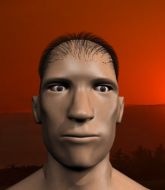
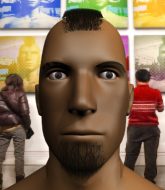
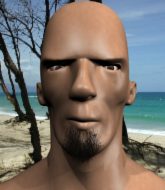
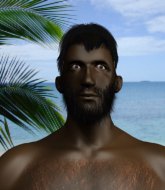
Coming up we have a middleweight MMA rules bout between Hyun Tae Kang (ranked 0 p4p, 0 weight class) and Chi Lazar (ranked 0 p4p, 0 weight class). Both fighters look fresh as a daisy as they make their way towards the cage.
 |
|
 |
| 183 cm
24
190 lbs
1 - 3 - 0 |
|
206 cm
18
203 lbs
0 - 2 - 0 |
BJJ Blue Belt
Solid Muay Thai
Intelligent |
|
BJJ White Belt
Dangerous knees
Good gas tank |
|
| |
|
Ladies and gentlemen. This fight is 3 rounds, in the middleweight division.
Introducing the fighter to my left, fighting out of the red corner.
With a record of
1 - 3 - 0, fighting out of New York, Hyun Tae Kang!
And introducing the fighter to my right, fighting out of the blue corner.
With a record of
0 - 2 - 0, fighting out of Montreal, Chi Lazar!
The judges for this bout are Alyssa Summers, Columbo Gatti and Anthony Taglia.

The bell rings for round one and we are underway!

Kang looks for a takedown. He's got it. We're now in half guard.
Kang working the head and body with strikes.
Kang looks towards his corner to check for any instructions. The corner give him nothing to work with, so he cracks Lazar with a short hammerfist. I guess that's as good as any advice he could get in this position.
Kang looks over to his corner - he wants some instructions but his corner are not responding.
Kang works his way into full mount!
The fighters are pressed up against the cage, both looking to find a bit of space to work.
The fans in attendance giving it up for the two fighters, who have really let it all hang out in the last minute or so!

Kang working for a submission but Lazar is keeping him at bay.
Lazar wants to get back to his feet but in bucking up he's left an arm hanging out! Kang has locked onto it and has pulled off a slick armbar! Lazar taps furiously! This one is all over!
Ladies and gentlemen, after 1:05 of round 1, we have a winner by way of Submission (Armbar). Hyun Tae Kang!
A very excited looking Hyun Tae Kang made sure he remembered to thank all the fans both in the arena and on the internet. He said all the coolest people spend all day on MMA websites, which got a big reaction.
|
|
|
|
|
|
|
|
|
|
|
|
|
|
|
|
|
|
|
|
|
|
|
| S |
C
A |
G |
S |
C
B |
G |
|
S |
C |
G |
|
energy
A | B |
|
hype
A | B |
|
pop
A | B |
|
mgr
A | B |
|
FIGHT
RATING
53% |
|
|
|
|
|
|
|
Undercard bout
|
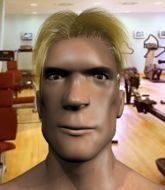
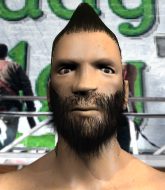
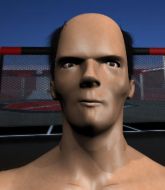
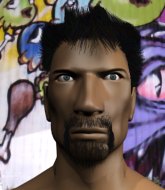
Coming up we have a middleweight MMA rules bout between Jacek Moczymorda (ranked 0 p4p, 0 weight class) and Gabriel Zorg (ranked 0 p4p, 0 weight class). Moczymorda comes to the cage accompanied by Django Unchained OST - Ain't no grave (Johnny Cash). Zorg comes into a darkened arena with his song building. Epic Beat kicks in, the lights come on and the crowd goes wild! What a showman! Jacek Moczymorda could well score a knockout today. He has the power to get to Gabriel Zorg's chin.
 |
|
 |
| 190 cm
19
180 lbs
2 - 0 - 0 |
|
175 cm
25
160 lbs
1 - 1 - 0 |
Good takedowns
Brawler
Good chin |
|
Good takedowns
Counter fighter
Determined |
|
| |
|
Ladies and gentlemen. This fight is 3 rounds, in the middleweight division.
Introducing the fighter to my left, fighting out of the red corner.
With a record of
2 - 0 - 0, fighting out of New York, Jacek Moczymorda!
And introducing the fighter to my right, fighting out of the blue corner.
With a record of
1 - 1 - 0, fighting out of St Petersburg, Gabriel Zorg!
The judges for this bout are Franklyn Lucas, Eddie Farnsworth and Joseph Jones.
The bell rings for round one and we are underway!
Zorg throws out a loose jab but Moczymorda uses good head movement to avoid it.
Moczymorda gets his head snapped back by a nice shot there.

It looks like Jacek Moczymorda has been cut.
We've been informed that Zorg has been sparring a lot of Muay Thai in the buildup to this fight so let's see if that has an impact on the result.
Zorg misses with a series of wild punches.
Moczymorda shoots and misses
and Zorg counters with a good right hand that lands right on the jaw.
Moczymorda misses with a takedown
and Zorg counters with a nice jab to the body that keeps Moczymorda thinking.
Zorg throws a looping overhand right but Moczymorda ducks down to avoid it.
Moczymorda shoots and misses
enabling Zorg to counter with a crisp jab.
That's three failed takedown attempts in the round for Jacek Moczymorda. That's going to take a lot out of him.
Moczymorda uses good head movement to avoid the hook from Zorg.
Moczymorda seems to be moving with more speed, compared to his last bout. He must have been working on that in the gym.
Zorg misses the jab.
Moczymorda with a lazy takedown attempt
and Zorg counters with a quick right hand to the jaw.
This has been an exciting period of action!
Moczymorda shoots in but doesn't get the takedown
enabling Zorg to counter with a crisp jab.
Moczymorda uses good footwork to avoid the strikes from Zorg.
Zorg lunges in with swinging rights and lefts but Moczymorda circles away quickly and effectively.
Zorg misses with a wild body shot.

That's one minute gone in the round.
Zorg misses with a few strikes there.
Zorg connects nicely with a jab. Noted by the judges no doubt.
Moczymorda has his takedown stuffed
and Zorg counters with a good right hand that lands right on the jaw.
Moczymorda fails with the takedown
and Zorg counters with a straight right hand.
Moczymorda misses with a takedown
and Zorg counters with a two punch combo.
Zorg tries to sprawl but Moczymorda drives through with a takedown into half guard.
Moczymorda stops Zorg from getting back to his feet.
We've seen a great period of action over the last minute or so - credit to both fighters for going all out!
Moczymorda is thinking about going for an arm triangle but he can't free his leg.
Moczymorda is working for a kimura but Zorg is defending it quite comfortably.

That's two minutes gone in the round.

Zorg looking for submissions from an awkward position here.
Zorg is trying to get back to full guard.
Moczymorda seems to be looking for submissions.
Moczymorda stops Zorg from getting back to his feet.
Zorg looking for submissions off his back.
The fighters are pressed up against the cage, both looking to find a bit of space to work.
Moczymorda is trying to work for a kimura. This could be trouble! No, Zorg has managed to free his arm - good work.
Zorg tries to get to full guard but Moczymorda has control of the leg.

That's three minutes gone in the round.
Zorg actively working from the bottom here.
Moczymorda is working for submissions here but there's nothing on.
Moczymorda is looking for a kimura here.
Moczymorda is looking for a kimura here.
Moczymorda wants to work for an arm triangle but Zorg is really keeping half guard well and defending the submission attempt.
Moczymorda has hold of the far side arm. He's working for the Kimura, can Zorg defend it? Moczymorda steps over the head and cranks it - Zorg is tapping out! That was textbook stuff right there - nice submission victory for Moczymorda!
Ladies and gentlemen, after 3:59 of round 1, we have a winner by way of Submission (Kimura). Jacek Moczymorda!
Jacek Moczymorda tried to hype himself up post fight but didn't word it too well and it ended up with him sounding like a bit of a tool.
The defeated Gabriel Zorg had this to say: 'My "Cyborg" inside must've stopped working :/'.
|
|
|
|
|
|
|
|
|
|
|
|
|
|
|
|
|
|
|
|
|
|
|
| S |
C
A |
G |
S |
C
B |
G |
|
S |
C |
G |
|
energy
A | B |
|
hype
A | B |
|
pop
A | B |
|
mgr
A | B |
|
FIGHT
RATING
55% |
|
|
|
|
|
|
|
Undercard bout
|
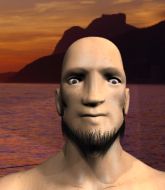
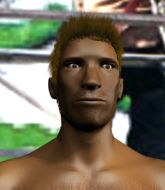
Coming up we have a super heavyweight MMA rules bout between Koji Kanegi (ranked 0 p4p, 0 weight class) and Kawacatoose Toloni (ranked 0 p4p, 0 weight class). Koji Kanegi has the better chin. Will he look to stand and bang today?
 |
|
 |
| 179 cm
18
215 lbs
1 - 1 - 0 |
|
198 cm
18
208 lbs
0 - 0 - 0 |
BJJ Blue Belt
Basic striking
Cardio machine |
|
BJJ Brown Belt
Dangerous knees
Good gas tank |
|
| |
|
Ladies and gentlemen. This fight is 3 rounds, in the super heavyweight division.
Introducing the fighter to my left, fighting out of the red corner.
With a record of
1 - 1 - 0, fighting out of Montreal, Koji Kanegi!
And introducing the fighter to my right, fighting out of the blue corner.
With a record of
0 - 0 - 0, fighting out of Montreal, Kawacatoose Toloni!
The judges for this bout are Russell Pearce, John Kavanagh and Alyssa Summers.
The bell rings for round one and we are underway!
Toloni wants to clinch but Kanegi slips to the side
so Kanegi counters with a double leg into guard. Good agility.
Kanegi trying to land body shots but he keeps hitting the mat.
Kanegi with a nice head shot there.
Kanegi keeps in close for a moment and lands a decent shot to the side of Toloni's head.
Kanegi is working the ground and pound from guard. He might want to try advancing position though to get more of an impact.
Kanegi has improved his flexibility recently so we will have to see if he can use that to his advantage.
This is a great period of action - very entertaining stuff!
Kanegi is in close to Toloni's body, working some short punches and elbows.

Toloni is rocked!
Kanegi stands up over Toloni, holding on to his feet. Kanegi throws the legs to one side and dives in with a huge shot that lands flush on the chin! Toloni is out cold! Kanegi lands a couple more shots and the ref tackles him out of the way! What a brutal finish!
Ladies and gentlemen, after 0:39 of round 1, we have a winner by way of KO (Strikes). Koji Kanegi!
A loyal slave to those sponsorship dollars, Koji Kanegi made sure he mentioned Kore Fight Nutrition [TG], along with how happy he was to win his fight.
|
|
|
|
|
|
|
|
|
|
|
|
|
|
|
|
|
|
|
|
|
|
|
| S |
C
A |
G |
S |
C
B |
G |
|
S |
C |
G |
|
energy
A | B |
|
hype
A | B |
|
pop
A | B |
|
mgr
A | B |
|
FIGHT
RATING
100% |
|
|
|
|
|
|
|
Undercard bout
|
Coming up we have a middleweight MMA rules bout between Matt Hughes (ranked 0 p4p, 0 weight class) and Masahiro Kimura (ranked 0 p4p, 0 weight class). Both these guys have really solid chins. Will we see a standup war or will they both decide that a knockout is unlikely and try to win the fight elsewhere?
 |
|
 |
| 175 cm
25
170 lbs
1 - 0 - 0 |
|
180 cm
25
185 lbs
3 - 0 - 0 |
BJJ Blue Belt
Counter fighter
Good chin |
|
BJJ Brown Belt
Counter fighter
Solid chin |
|
| |
|
Ladies and gentlemen. This fight is 3 rounds, in the middleweight division.
Introducing the fighter to my left, fighting out of the red corner.
With a record of
1 - 0 - 0, fighting out of Las Vegas, Matt Hughes!
And introducing the fighter to my right, fighting out of the blue corner.
With a record of
3 - 0 - 0, fighting out of Tokyo, Masahiro Kimura!
The judges for this bout are Lou da Vinci, Jorge Garcia and Reed Andrews.
The bell rings for round one and we are underway!
Kimura fails with the takedown
and Hughes decides to take the opportunity to score a takedown. He's landed in Kimura's guard.
We must be close to a standup if these guys don't pick up the pace.
Kimura throwing his legs up looking for a triangle.
Kimura has been taking part in the yoga sessions down at Cozad MMA Tokyo. Presumably he's going to look for a slick submission... Or maybe he's looking to avoid one.
Hughes advances position into side control!
Hughes is staying tight to Kimura's torso, preventing him from escaping.
Kimura is trying to improve his position.
Hughes is looking to finish here, going for an Americana. Kimura knows the correct defense though, so he's OK.
Wooooo! Give it up for these two warriors! They are putting on a show!
Kimura is trying to get back to half guard. He's pushing on Hughes's leg. He's managed it. Nice work.
Kimura actively working from the bottom here.
That's one minute gone in the round.
Hughes scores with a couple of good hammerfists.
Kimura slips a foot under and gets full guard. Nice work.
Kimura is looking for a triangle but Hughes pushes his legs off easily.
Hughes trying to control the position from guard on top but Kimura is wriggling around, looking for whatever he can.
Kimura can't do much from the bottom at the moment, as Hughes controls the pace.
Hughes connects with a couple of short punches.
Hughes showing good wrestling skills to control the position.
Hughes wants to control from the top but Kimura keeps moving.
Hughes trying to stand up but can't free himself from Kimura's guard.
That's two minutes gone in the round.

The referee decides to stand the fighters back up, due to lack of activity on the part of Matt Hughes.
Kimura misses with a takedown
and Hughes counters with a series of strikes. Kimura will be more careful next time no doubt.
Wooooo! Give it up for these two warriors! They are putting on a show!
Kimura dives in and grabs Hughes's left leg, looking for a takedown. Hughes pushes down on Kimura's head and hops out.
Matt Hughes has stuffed three takedown attempts in the round now. That's going to take a lot out of Masahiro Kimura.
Hughes stuffs the takedown attempt from Kimura. Kimura gets slowly back to his feet.
Kimura looks winded!
Kimura with a lazy takedown attempt
and Hughes counters with a three punch combination, finished off with a leg kick. Nice work.
Matt Hughes seems to be the more aggressive standup fighter in this bout.

Hughes moves into the clinch.
Hughes manages to pull guard.
Hughes looks to be working for a triangle here. Oh, it looks like he might have it! Kimura has picked Hughes up and slammed him! Hughes can't keep hold of the triangle and Kimura manages to pass to side control!
Hughes knows he needs to get back to his feet asap. He's simply no match for Kimura on the ground.
Hughes is looking for a sweep.
We've been hearing good reports from Hughes's training camp. Apparently he has been rolling around with some good quality BJJ practitioners and has been sharpening his skills. Let's see if that has an impact on the fight today.
Hughes is sneaking out the side here. He's bucked Kimura off and has taken his back!
That's three minutes gone in the round.
Kimura is really stuck here.
Hughes gets his hooks in and is throwing strikes.
Hughes is landing with strikes. Kimura can't take much more of this.
Hughes tries to get the hooks in deep but Kimura pushed the leg off.
Hughes lands strikes to the head.
Kimura rolls and manages to get back to half guard. Nicely done.
Hughes is working for a submission of some sort.
Hughes drops an elbow to the side of Kimura's head.
Kimura is looking to sinch up a guillotine here but Hughes pulls his head out easily.
Kimura is looking to sinch up a guillotine here but Hughes pulls his head out easily.

That's four minutes gone in the round.
Hughes drops an elbow to the side of Kimura's head.
Kimura is defending against the submission attempts here by Hughes.
Hughes controlling the action here.
This has been an exciting period of action!
Kimura is working for an escape here. He's hooked one of Hughes's legs and he's managed to sneak out and take Hughes's back!
Well, with Kimura on his back, surely it's only a matter of time before Hughes is tapping out... Can he escape the position?
Hughes is really stuck here.
The crowd are going absolutely nuts as the round comes to an end - what a fantastic round of action!
Kimura has the hooks in and he's looking for a rear naked choke here. Hughes is defending well but eventually Kimura manages to get an arm under the chin and he's locked on the RNC! Hughes has no choice but to tap now! He does! This one is all over!
Ladies and gentlemen, after 4:56 of round 1, we have a winner by way of Submission (RNC). Masahiro Kimura!
|
|
|
|
|
|
|
|
|
|
|
|
|
|
|
|
|
|
|
|
|
|
|
| S |
C
A |
G |
S |
C
B |
G |
|
S |
C |
G |
|
energy
A | B |
|
hype
A | B |
|
pop
A | B |
|
mgr
A | B |
|
FIGHT
RATING
49% |
|
|
|
|
|
|
|
Undercard bout
|
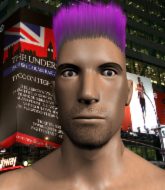
Coming up we have a super heavyweight MMA rules bout between Jim Block (ranked 0 p4p, 0 weight class) and Bubba Slice (ranked 0 p4p, 0 weight class). Slice is bouncing up and down as he enters the arena, backed by Happy. Buckle up people - heeeeeeeeeere we go!
 |
|
 |
| 190 cm
26
300 lbs
4 - 2 - 0 |
|
199 cm
26
253 lbs
3 - 2 - 0 |
Good wrestling
Counter fighter
Experienced |
|
Good wrestler
Counter fighter
Good gas tank |
|
| |
|
Ladies and gentlemen. This fight is 3 rounds, in the super heavyweight division.
Introducing the fighter to my left, fighting out of the red corner.
With a record of
4 - 2 - 0, fighting out of New York, Jim Block!
And introducing the fighter to my right, fighting out of the blue corner.
With a record of
3 - 2 - 0, fighting out of Montreal, Bubba Slice!
The judges for this bout are David Schapiro, Eddie Farnsworth and John Roberts.
The bell rings for round one and we are underway!
Slice wants to clinch.
Slice stuffs a takedown. It's all about dictating where the fight takes place and Slice wants it to stay on the feet.
Slice tries to sprawl but Block drives through with a takedown into half guard.
Slice works his way to full guard. Good work.
Block trying to control the position from guard on top but Slice is wriggling around, looking for whatever he can.
Block chips away with some ground and pound.
The ref warns both fighters not to hold the cage as they work up against the meshing.
Block chips away with some ground and pound.
Slice looking to control.
Block wants to control from the top but Slice keeps moving.
Block stopping the sweep attempt from Slice.
Slice working the defensive guard well to avoid strikes from Block.
That's one minute gone in the round.
Slice keeping moving, preventing Block from controlling successfully.
Block postures up to throw the ground and pound strikes but they don't connect.
Slice seems keen to control rather than go for a submission, at least for now.
Slice keeping moving, preventing Block from controlling successfully.
Slice working the defensive guard well to avoid strikes from Block.

Neither fighter is doing enough for the referee's liking and he's decided to stand them back up.

Slice clinches with his opponent.
Block is looking for a takedown.

Slice breaks the clinch and we're back to striking at distance.
Slice fails in his attempt to clinch.
Slice darts in and clinches Block up against the cage.
That's two minutes gone in the round.
Slice has hold of a leg and is looking for a trip takedown. Block avoids it nicely though and we remain in the clinch.
Slice manages to break the clinch.
Slice's coach down at Werewolf's cave was telling us pre-fight that they have been working on Slice's balance. Obviously they view that as a key factor in the outcome of this fight.
Block misses with a takedown attempt
letting Slice counter with a right hand.
That's three failed takedown attempts in the round for Jim Block. That's going to take a lot out of him.
We've seen a great period of action over the last minute or so - credit to both fighters for going all out!

Excellent takedown into side control there by Slice.
Block has been looking to land a fair amount of strikes on the ground. He might be looking to soften his opponent up in order to work for a submission.
Slice tries to cartwheel into mount but he doesn't manage it.
Slice is looking to take a break and control but Block is keeping him honest, looking to work from the bottom.
That's three minutes gone in the round.
Slice content to control the pace. The referee will try and keep them active though.
Block could do with losing a few pounds - he looks very soft around the mid section, to put it politely.
Slice trying to control the position but Block is working away.
Block trying to remain calm as Slice controls from the top position.
The referee is pacing around the two fighters - he looks like he's thinking about a standup.

The ref calls for a clean break and stands the fighters back up. Bubba Slice wasn't active enough on the ground.
Slice lands with a hook. Block tried to avoid it but it clipped the top of his head.
That's four minutes gone in the round.

Slice throws a left that rocks Block and follows with a right that sends him tumbling to the canvas! Slice dives into side control, looking to finish! Can Block regain composure!
It looks like Jim Block has been cut.
This has been an exciting period of action!
Slice trying to control the position but Block is working away.
Slice in side control, just content to control the action for now.
The crowd are going absolutely nuts as the round comes to an end - what a fantastic round of action!
Slice trying to control the action but Block is working from the bottom.
And thats the end of the round the fighters go back to their corners.
Bubba Slice dominated that round.
The cut man is working on Jim Block's cut.
That's time! Block's corner gives him a slap on the ass as he gets ready to fight.

Slice clinches up with Block and pushes him back against the cage.
Block goes for a takedown attempt but Slice pushes him away and we're back to fighting at a distance.
Block gets cracked there but stands up to it.
Block gets his takedown attempt stuffed easily
and Slice counters with a nice double leg into guard.
That's one minute gone in the round.
Slice controlling from the guard. I say controlling but really, he's stalling.
Slice must be cautious of submissions here, given that his opponent has the superior Jiu Jitsu.
Slice trying to control but Block is working from the bottom.
Slice slows down the pace of the fight, as he sits in guard.
We must be close to a standup if these guys don't pick up the pace.
Slice trying to control but Block is working from the bottom.
Bubba Slice has forced the referee to step in and restart the fight on the feet.
Slice drops down and drives through with a powerful takedown into guard.
That's two minutes gone in the round.
Slice trying to control the position from guard on top but Block is wriggling around, looking for whatever he can.
Block being controlled here, momentarily.
The referee looks like he's ready to step in and stand the fighters back up.
Slice wants to control from the top but Block keeps moving.
That's three minutes gone in the round.
The ref stands the fighters back up. Bubba Slice was stalling too much, according to the referee.
Block doesn't succeed with the takedown
and Slice counters with a nice double leg into half guard.
That's three failed takedown attempts in the round for Jim Block. That's going to take a lot out of him.
Neither fighter is being very active at the moment, with Slice in particular looking to stall.
The fighters are starting to get a bit slippery now, which will make submissions a bit more difficult.
Slice trying to control from half guard but Block is working away.
Slice not doing much here.
Slice is keen to just control but Block is a slippery customer.
That's four minutes gone in the round.
The ref calls for a clean break and stands the fighters back up. Bubba Slice wasn't active enough on the ground.
Slice shoots in looking for a single leg takedown. Block is trying to defend but Slice finishes it well and ends up in half guard. Let's see if he can advance position further.
Fantastic stuff here - a very entertaining period of action, which has drawn cheers from the crowd.
Block is staying active underneath Slice, who seems content to just control the action from this position.
Block is looking to improve his position.
The fighters are pressed up against the cage, both looking to find a bit of space to work.
Block is positioning himself well to prevent Slice advancing to mount.
As the round comes to an end the crowd are showing their appreciation for a great round of action.
And thats the end of the round the fighters go back to their corners.
Bubba Slice showed his class in that round. I'd imagine he'll take it on all the scorecards.
The cut man is working on Jim Block's cut.
The fighters get back to their feet, the hooter sounds and we're back to the action! This is the final round!

Slice with a nice cross.
Slice tries to close the distance and clinch but Block swats him to one side with an open hand palm strike and circles away.
Block misses with a takedown attempt
and Slice counters with a single leg into guard. Block didn't expect that.
This has been an exciting period of action!
Slice wants to control from the top but Block keeps moving.
Block can't do much from the bottom at the moment, as Slice controls the pace.
Slice trying to control the position from guard on top but Block is wriggling around, looking for whatever he can.
That's one minute gone in the round.
Slice engaging in some classic timewasting tactics.
Bubba Slice has forced the referee to step in and restart the fight on the feet.
Block circles away from the clinch attempt.
Bubba Slice seems to be getting the better of the standup.
Slice has Block up against the cage in a clinch.
Slice wants a takedown but no success here.
Slice turns his back and goes for a hip toss. It's a bit messy but it gets the job done and Slice manages to end up in side control.
That's two minutes gone in the round.
Slice wants to lay and pray for a moment but Block keeps working.
Block is trying to get back to half guard.
A bit of a lull in the action. I'm sure it will pick up again soon... even if the ref has to physically pick them up and put them back on their feet.
Bubba Slice has got the better of the ground game so far.
Block is not content to let Slice control the position.
Slice taking a break here but Block is having none of it and regains half guard.
That's three minutes gone in the round.
Slice content to sit in half guard and control for a moment.
The referee must be thinking about standing these guys back up.
Bubba Slice has forced the referee to step in and restart the fight on the feet.
Block takes a big uppercut there. He seems a bit wobbly but no, he's OK.
Slice fails in his attempt to clinch.
Slice fails in his attempt to clinch.
Both fighters are looking to counter, which isn't making for the most exciting fight in the world.
Slice steps into range and cracks Block with a monster punch that buckles his knees! Block flops backwards and Slice dives into his guard looking to finish!
That's four minutes gone in the round.
Wooooo! Give it up for these two warriors! They are putting on a show!
Slice wants to control from the top but Block keeps moving.
Block has control of Slice's left arm, preventing Slice from doing any damage.
Slice stays in close to Block's body and controls the position.
The referee wants the fighters to be more active or he's going to reset them on the feet.
Slice trying to control but Block is working from the bottom.
Jim Block has stepped it up - he knows he needs a finish here!
Bubba Slice is fighting for a decision - hopefully he's judged it right and he's actually winning the fight.
The crowd are going absolutely nuts as the round comes to an end - what a fantastic round of action!
Bubba Slice has forced the referee to step in and restart the fight on the feet.
Block with a poor takedown
and Slice counters with a single leg into guard. Block didn't expect that.
And that's the end of the fight!
Bubba Slice comfortably won the final round on my scorecard.
Well Slice has outworked and out performed his opponent in all aspects of the game today. He was simply too good and the decision should be no more than a formality. Over to the ring announcer for the scorecards.
Ladies and gentlemen, after 3 rounds of action, we go to the scorecards for a decision.
Judge David Schapiro scores the fight 26:30
Judge Eddie Farnsworth scores the fight 26:30
Judge John Roberts scores the fight 26:30
In favor of your winner, by unanimous decision... Bubba Slice!
Bubba Slice spent the whole post fight interview bigging himself up. It didn't go down that well with the fans after a while as they thought it was a bit arrogant.
|
|
|
|
|
|
|
|
|
|
|
|
|
|
|
|
|
|
|
|
|
|
|
| S |
C
A |
G |
S |
C
B |
G |
|
S |
C |
G |
|
energy
A | B |
|
hype
A | B |
|
pop
A | B |
|
mgr
A | B |
|
FIGHT
RATING
63% |
|
|
|
|
|
|
|
Undercard bout
|
Coming up we have a super heavyweight MMA rules bout between Hank Armstrong (ranked 0 p4p, 0 weight class) and Tork Mendez (ranked 0 p4p, 0 weight class). Armstrong comes to the cage accompanied by Iron Man by Black Sabbath. Fingers crossed for an exciting fight - I'm sure both fighters are looking for a nice under the table bonus!
 |
|
 |
| 185 cm
19
200 lbs
3 - 1 - 0 |
|
186 cm
24
233 lbs
6 - 4 - 0 |
BJJ White Belt
Excellent boxer
Very quick |
|
BJJ Purple Belt
Brawler
Granite chin |
|
| |
|
Ladies and gentlemen. This fight is 3 rounds, in the super heavyweight division.
Introducing the fighter to my left, fighting out of the red corner.
With a record of
3 - 1 - 0, fighting out of Sydney, Hank Armstrong!
And introducing the fighter to my right, fighting out of the blue corner.
With a record of
6 - 4 - 0, fighting out of Sydney, Tork Mendez!
The judges for this bout are Dean Styles, Jorge Garcia and Anthony Taglia.
The bell rings for round one and we are underway!
Mendez looks to score with a jab to the body but Armstrong is just out of range.
Armstrong bobs and weaves and throws out a fast jab that snaps Mendez's head backwards.
Armstrong scores with a straight right hand, right through his opponent's guard.
Armstrong avoids the body shot from Mendez.
Mendez ducks down and throws a hook to the body but Armstrong moves away.
Armstrong misses with a looping left.
Armstrong lands a nice hook to Mendez's body. Mendez takes it in his stride and looks to land his own strikes.
Armstrong listening to his corner there, landing a nice uppercut.
The fans in attendance giving it up for the two fighters, who have really let it all hang out in the last minute or so!
Armstrong with a hook.
A slow jab from Mendez misses its intended target.
Mendez walks into a jab.
Mendez uses good footwork to avoid the strikes from Armstrong.
Armstrong lands a vicious shot with the stealth of a sniper and the strength of a viper. Are vipers that strong? I can think of lots of things that are stronger than a viper - not many rhyme with sniper though.
Mendez fails with a takedown attempt from distance.
Mendez throws out a token jab with nothing on it.
A punch lands to the side of Mendez 's head but he takes it in his stride.
Mendez on the wrong end of a vicious looking body shot.
Mendez looks winded!
Mendez with poor footwork there. He got himself in a bit of a tangle, enabling Armstrong to score with a decent uppercut.
That's one minute gone in the round.
Mendez shakes his hands off, looking to compose himself, but takes a jab to the jaw whilst he does it.
Armstrong with a hook.
Nice sprawl there from Armstrong as Mendez shoots in.
Armstrong smiles there as he lands a nice right hand right on the button.
Armstrong lands with a big right hook that stumbles Mendez - he's out on his feet here! Armstrong follows up with another monster hook that separates Mendez from consciousness! Mendez falls, almost in slow motion to the canvas! Armstrong stands and admires his work as the crowd go wild.
Ladies and gentlemen, after 1:22 of round 1, we have a winner by way of KO (Punches). Hank Armstrong!
Hank Armstrong seemed lost for words in his post fight interview but he remembered to thank his fans and directed everyone to his website.
|
|
|
|
|
|
|
|
|
|
|
|
|
|
|
|
|
|
|
|
|
|
|
| S |
C
A |
G |
S |
C
B |
G |
|
S |
C |
G |
|
energy
A | B |
|
hype
A | B |
|
pop
A | B |
|
mgr
A | B |
|
FIGHT
RATING
100% |
|
|
|
|
|
|
|
Undercard bout
|
Coming up we have a heavyweight MMA rules bout between Gibson Rickenbacker v.2 (ranked 0 p4p, 0 weight class) and Marcus Attilius (ranked 0 p4p, 0 weight class). 2 and Marcus Attilius. Rickenbacker v.2 kept the crowd waiting but all that was forgotten when his ring entrance music started. The incomparable musical genius that is Back Stabber!. These two fighters really are very evenly matched on the feet - it will be fascinating to see who can assert themselves in that aspect of the fight.
 |
|
 |
| 175 cm
29
180 lbs
30 - 15 - 0 |
|
200 cm
33
285 lbs
14 - 10 - 0 |
Good wrestling
Dangerous knees
Insanely flexible |
|
BJJ Purple Belt
Excellent boxer
Good gas tank |
|
| |
|
Ladies and gentlemen. This fight is 3 rounds, in the heavyweight division.
Introducing the fighter to my left, fighting out of the red corner.
With a record of
30 - 15 - 0, fighting out of Sydney, Gibson Rickenbacker v.2!
And introducing the fighter to my right, fighting out of the blue corner.
With a record of
14 - 10 - 0, fighting out of New York, Marcus Attilius!
The judges for this bout are John Kavanagh, Chad Campbell and Anthony Taglia.
The bell rings for round one and we are underway!
Rickenbacker v.2 bobs and weaves and then throws a good body kick.
Rickenbacker v.2 throws a looping left and ducks down for a takedown. He's got his arms around Attilius's waist but Attilius gets an underhook and avoids the takedown by throwing Rickenbacker v.2 off to one side.
Rickenbacker v.2 throws a head kick that misses and slips in the process. He scrambles back to his feet and the fighters circle.
Attilius checks a low kick. Bone on bone - not my idea of a good time.
Attilius stuffs the takedown.
A solid body kick from Rickenbacker v.2.
A slow jab from Rickenbacker v.2 misses its intended target.
Rickenbacker v.2 throws a body kick but he wasn't in range.
A big right from Rickenbacker v.2 misses.
Rickenbacker v.2 tries to close the distance and clinch up but Attilius swats him away and circles back towards the center.
That's one minute gone in the round.
Rickenbacker v.2 throws a leg kick but he was too far away and it doesn't land.
Rickenbacker v.2 tries to clinch there but Attilius circles away.
Rickenbacker v.2 throws a hook to the side of Attilius's head but Attilius sees it coming and ducks under it beautifully.
Rickenbacker v.2 shoots in but Attilius avoids the takedown attempt easily.
That's three failed takedown attempts in the round for Gibson Rickenbacker v.2. That's going to take a lot out of him.
Rickenbacker v.2 throws a decent looking leg kick but it doesn't land clean.
Rickenbacker v.2 walks forward and throws out a flicking leg kick. Attilius checks it nicely though, as he moves to the side.
Rickenbacker v.2 throws a leg kick
and Attilius finishes the little exchange by landing a big kick to the body.
Oooooooooooh, not good. A low kick from Rickenbacker v.2 lands where it shouldn't have, right in the... well, you know what he did? He kicked him in the penis. He's injured, injured bad. The referee sends both fighters to their corners and Attilius has 5 minutes to recover. He's OK now though... a thumbs up from Attilius and we're back underway with a touch of gloves.
That's two minutes gone in the round.
Rickenbacker v.2 misses with a head kick.
Rickenbacker v.2 closes this distance looking for a takedown but Attilius circles away.
Rickenbacker v.2 misses with a half-hearted attempt at a head kick.
The fight stays on the outside here - Rickenbacker v.2 looks like he's thinking about clinching though.
Rickenbacker v.2 misses the body punch
and Attilius counters with a left and a right that stings Rickenbacker v.2.
Rickenbacker v.2 misses with an attempted mid kick.
Rickenbacker v.2 shoots in with a takedown attempt and he has Attilius pinned against the cage. Attilius gets the underhooks and manages to circle away.
Rickenbacker v.2 is breathing heavily.
Rickenbacker v.2 looks to land a combination but Attilius avoids it well.
That's three minutes gone in the round.
Attilius keeps the fight on the outside.
Rickenbacker v.2 wants to clinch
and Attilius counters with a stiff right hand.
Rickenbacker v.2 tries to clinch
and Attilius makes him pay by landing a nice hook to the body before moving out of range.
Attilius slaps away a takedown attempt from Rickenbacker v.2, before circling back to the center of the mat.
Marcus Attilius is looking to keep the fight on the feet at all costs.
Rickenbacker v.2 throws a head kick that misses and slips in the process. He scrambles back to his feet and the fighters circle.
That's four minutes gone in the round.
Rickenbacker v.2 connects with a leg kick. He turned his hip over nicely there.
Rickenbacker v.2 misses with a body kick.
A solid leg kick lands there for Rickenbacker v.2.
Good work by Attilius as he checks the leg kick.
Rickenbacker v.2 misses with a kick to the body.
Rickenbacker v.2 throws a body kick, spinning off balance
and Attilius counters with a left to the body.
Rickenbacker v.2 is looking to land body kicks.
The crowd applaud the fighters efforts here as the round comes to an end.
Rickenbacker v.2 tries to score a power double leg takedown but Attilius sees that one coming and sprawls well. That will dishearten Rickenbacker v.2 somewhat.
Rickenbacker v.2 closes the distance and pushes Attilius back into the cage.
And thats the end of the round the fighters go back to their corners.
Gibson Rickenbacker v.2 dominated that round.
The referee calls time. The cornermen exit stage left and we're back to business.
Rickenbacker v.2 wants to land a leg kick but Attilius is out of range.
Rickenbacker v.2 throws a body kick despite being completely out of range
and Attilius cracks him with a counter punch right on the button.
Rickenbacker v.2 throws a decent looking leg kick but it doesn't land clean.
Attilius blocks a leg kick.
Rickenbacker v.2 throws a sloppy head kick and Attilius moves out of range easily.
Rickenbacker v.2 shoots for a takedown but Attilius saw that one coming a mile off and avoided it easily.
Rickenbacker v.2 motions for Attilius to come forward. Rickenbacker v.2 throws a leg kick but it misses it's target.
Rickenbacker v.2 tries to clinch but fails miserably
enabling Attilius to counter with a crisp jab.
Rickenbacker v.2 pulls out of a head kick attempt.
That's one minute gone in the round.
Rickenbacker v.2 pivots, looking for a leg kick but Attilius is out of range and Rickenbacker v.2 settles back down.
Gibson Rickenbacker v.2 is looking to throw some combinations by the looks of things.
Rickenbacker v.2 misses with a combination
and Attilius counters with a nice uppercut.
It really doesn't seem like the step up in weight is hurting Rickenbacker v.2 here at all. He's more than holding his own against the bigger man.
Both fighters are absolutely exhausted here.
Rickenbacker v.2 shoots in for a takedown. "I don't think so" says Attilius as he avoids it easily.
Rickenbacker v.2 tries to close the distance and clinch but Attilius swats him to one side with an open hand palm strike and circles away.
Attilius takes a nice looking leg kick right on the meat of his thigh there.
Rickenbacker v.2 gets a clinch.
Rickenbacker v.2 looks like he'd prefer to be striking at range right now.
Rickenbacker v.2 with an attempt at a knee that misses.
Attilius wants to push off and get back to the center of the mat but Rickenbacker v.2 has him pressed against the cage.
Attilius tries to circle away but Rickenbacker v.2 has him pinned against the cage.
That's two minutes gone in the round.
Rickenbacker v.2 looking to throw knees to the head but Attilius is blocking nicely.
Attilius is trying to push Rickenbacker v.2 away but Rickenbacker v.2 has him pressed against the cage, so he's going nowhere.
Rickenbacker v.2 is looking to control Attilius's arms but Attilius gets an underhook and turns him. Now Rickenbacker v.2 has his back to the cage.
Attilius is trying to push Rickenbacker v.2 away but Rickenbacker v.2 has him pressed against the cage, so he's going nowhere.
Attilius escapes the clinch and we're back to striking.
Attilius moves out of range of the body kick from Rickenbacker v.2.
Gibson Rickenbacker v.2 is winning the standup battle so far.
Rickenbacker v.2 misses with a head kick.
Rickenbacker v.2 throws a leg kick but Attilius checks it.
Rickenbacker v.2 tries to clinch up.
Rickenbacker v.2 takes a swing at Attilius's ribcage but misses.
Rickenbacker v.2 throws a predictable looking body shot
and Attilius counters with a left and a right that stings Rickenbacker v.2.
That's three minutes gone in the round.
The fight stays on the outside here - Rickenbacker v.2 looks like he's thinking about clinching though.
A bone on bone clash there as Attilius blocks the leg kick.
Attilius blocks the body kick.
Rickenbacker v.2 misses with a low kick.
Rickenbacker v.2 goes for a spinning back kick but it misses.
Rickenbacker v.2 fails miserably with a takedown attempt.
That's three failed takedown attempts in the round for Gibson Rickenbacker v.2. That's going to take a lot out of him.
Rickenbacker v.2 tries to clinch but Attilius is having none of it.
That's four minutes gone in the round.
Attilius avoids the head kick by Rickenbacker v.2.
Rickenbacker v.2 wants to slow Attilius down by chopping away at his legs.
Attilius keeps the fight standing with a nice sprawl.
A low kick from Rickenbacker v.2 is predictable there
and Attilius counters with a good right hand that lands right on the jaw.
Rickenbacker v.2 darts in trying to clinch
and Attilius counters with a lovely shot to the body.
The crowd applaud the fighters efforts here as the round comes to an end.
Rickenbacker v.2 shoots in for a takedown - he's clinched up with Attilius but Attilius pushes him off and we're back to square one.
And thats the end of the round the fighters go back to their corners.
Gibson Rickenbacker v.2 dominated that second round.
Well, the break between rounds is over. Let's get back to the scrappin! This is the final round!
Attilius slips under a jab from Rickenbacker v.2.
Gibson Rickenbacker v.2 seems to be the more aggressive standup fighter in this bout.
Rickenbacker v.2 has a takedown stuffed.
Attilius blocks a head kick by Rickenbacker v.2.
Rickenbacker v.2 throws a head kick but Attilius moves out of range.
We've had a slow start to the round here - hopefully the action picks up.
Rickenbacker v.2 fakes with the hands and throws a leg kick but Attilius is out of range.
Both fighters are breathing heavily.
Attilius blocks a head kick by Rickenbacker v.2.
Rickenbacker v.2 throws a front kick aimed at Attilius's knee but Attilius avoids it well.
That's one minute gone in the round.
Rickenbacker v.2 lands a leg kick and bounces back out of range.
Rickenbacker v.2 falls off balance throwing a combination
and Attilius counters with a nice jab to the body that keeps Rickenbacker v.2 thinking.
Rickenbacker v.2 tries to land with a swinging hook to the body but Attilius was well out of range. Poor timing from Rickenbacker v.2.
Nice body kick there by Rickenbacker v.2.
Rickenbacker v.2 pivots, looking for a leg kick but Attilius is out of range and Rickenbacker v.2 settles back down.
Attilius drops his hands momentarily and Rickenbacker v.2 takes advantage with a crisp shot to the head.
Rickenbacker v.2 throws a sloppy head kick
and Attilius counters with a good low kick that Rickenbacker v.2 was not able to check.
Rickenbacker v.2 is looking to score with low kicks.
Marcus Attilius has stepped it up - he knows he needs a finish here!
Gibson Rickenbacker v.2 is fighting for a decision here - he's started to take the cautious approach.
That's two minutes gone in the round.
Rickenbacker v.2 misses with a right hand
and Attilius counters with a big head kick but Rickenbacker v.2 shrugs it off.
Rickenbacker v.2 goes for a double leg but Attilius avoids the attempt and the two fighters end up clinched against the cage as Attilius continues to drive forward.
Attilius breaks the clinch.
Rickenbacker v.2 looks for the body kick but Attilius saw that one coming.
Rickenbacker v.2 throws a wild combination but nothing lands.
Rickenbacker v.2 takes the fight into the clinch.
Fantastic stuff here - a very entertaining period of action, which has drawn cheers from the crowd.
Rickenbacker v.2 working hard to break the clinch.
Rickenbacker v.2 looking to throw knees to the head but Attilius is blocking nicely.
Attilius tries to break the clinch but Rickenbacker v.2 is controlling the position.
That's three minutes gone in the round.
Attilius is trying to force a seperation but Rickenbacker v.2 has the dominant position.
Rickenbacker v.2 misses with a knee to the head.
Rickenbacker v.2 tries to land a knee to the head but misses.
Rickenbacker v.2 has Attilius pressed against the cage, preventing Attilius from circling away and getting back to striking at range.
Attilius lands a shoulder strike.
Attilius tries to break free but Rickenbacker v.2 pushes him back against the cage.
Attilius is trying to break the clinch but Rickenbacker v.2 has him pressed against the cage.
Rickenbacker v.2 prevents Attilius from breaking the clinch.
Attilius is trying to break free.
Rickenbacker v.2 throws a knee to the head but misses.
Attilius pushes off and circles away, back to the middle of the mat.
Rickenbacker v.2 tries a switch kick but it misses it's target.
Rickenbacker v.2 fails with an attempt to clinch.
Rickenbacker v.2 tries to grapple but his opponent circles
and Attilius counters with a hugh head kick that removes Rickenbacker v.2 from consiousness! A brutal head kick knockout!
Ladies and gentlemen, after 4:56 of round 3, we have a winner by way of KO (Head Kick). Marcus Attilius!
Marcus Attilius decided to thank the fans in attendance for making a great atmosphere. It seemed to go down pretty well.
|
|
|
|
|
|
|
|
|
|
|
|
|
|
|
|
|
|
|
|
|
|
|
| S |
C
A |
G |
S |
C
B |
G |
|
S |
C |
G |
|
energy
A | B |
|
hype
A | B |
|
pop
A | B |
|
mgr
A | B |
|
FIGHT
RATING
37% |
|
|
|
|
|
|
|
Undercard bout
|
Coming up we have a middleweight MMA rules bout between Ca Chulainn (ranked 0 p4p, 0 weight class) and Braydon Lee Key (ranked 0 p4p, 0 weight class). Over to our ring announcer for the fighter introductions!
 |
|
 |
| 185 cm
26
193 lbs
6 - 1 - 0 |
|
181 cm
26
182 lbs
6 - 1 - 0 |
BJJ White Belt
Excellent boxer
Granite chin |
|
Good wrestler
Basic striking
Solid chin |
|
| |
|
Ladies and gentlemen. This fight is 3 rounds, for the middleweight championship of the world!
Introducing the champion to my left, fighting out of the red corner.
With a record of
6 - 1 - 0, fighting out of New York, Ca Chulainn!
And introducing the challenger to my right, fighting out of the blue corner.
With a record of
6 - 1 - 0, fighting out of New York, Braydon Lee Key!
The judges for this bout are Jorge Garcia, David Schapiro and Joseph Jones.
The bell rings for round one and we are underway!
Chulainn punishes Lee Key's body with a nice straight punch.
Chulainn keeps the fight standing with a nice sprawl.
Chulainn uses decent footwork to sidestep a right hand from Lee Key.
Chulainn has managed to clinch.
Chulainn lands a hook to the body. It's hard to tell if that hurt Lee Key or not.
Chulainn fails to land with a short punch on the inside.

Chulainn manages to break the clinch.
Lee Key moves out of range of the body kick from Chulainn.
Lee Key throws a looping overhand right but Chulainn ducks down to avoid it.
Lee Key fails to land with the punch combination there - jab, cross, hook, miss, miss, miss.
Chulainn fakes high and swings low for a body shot but Lee Key manages to avoid it.
Chulainn connects with the punch.
This is a great period of action - very entertaining stuff!
Chulainn fakes a couple of low kicks, before throwing one on the third attempt. It connects and Lee Key has to reset his feet before getting ready to engage.
Lee Key avoids the body shot from Chulainn.
Chulainn looks for the body kick but Lee Key saw that one coming.
Chulainn throws an uppercut from half a mile away. Lee Key sees it coming and avoids it easily.
Chulainn lands a beauty of a right hand that gets the crowd cheering.
That's one minute gone in the round.
Chulainn throws out a powerful jab.
Chulainn cracks Lee Key with a nice right hand that draws applause from the crowd.
Lee Key misses with a kick to the body.
Chulainn lands a jab.
Chulainn fakes a couple of low kicks, before throwing one on the third attempt. It connects and Lee Key has to reset his feet before getting ready to engage.
Chulainn is the aggressor but that punch slipped nicely by Lee Key.
No luck with that takedown attempt from Lee Key.
Lee Key changes levels and looks for a double leg takedown. Chulainn tries to avoid it but Lee Key manages to keep hold of a leg and drag Chulainn to the ground. Chulainn escapes though and pops straight back up to his feet.
Chulainn looks to have improved his striking defense since last time we saw him fight.
Ca Chulainn has stuffed three takedown attempts in the round now. That's going to take a lot out of Braydon Lee Key.
Nice cross by Chulainn.
Lee Key takes a jab on the nose there. A little bit of blood seems to be coming out. Hopefully that won't affect his breathing.
Chulainn has Lee Key up against the cage in a clinch.
Lee Key is trying desperately to land a takedown but Chulainn is having absolutely none of it. This is turning into a bit of a nightmare for Lee Key.
Fantastic stuff here - a very entertaining period of action, which has drawn cheers from the crowd.
Chulainn lands with a good tight uppercut to the head.
That's two minutes gone in the round.
Lee Key stalling in the clinch but Chulainn improves position.
Chulainn misses with a hook from the clinch.
Chulainn breaks the clinch and we return to the middle of the mat.
Lee Key has done a lot of speed work in the buildup to this fight.
Chulainn jabs away that one connects to the head of his opponent.
Chulainn throws a hook to the body but it doesn't connect.
Nice sprawl there from Chulainn as Lee Key shoots in.
Chulainn has taken the fight to the clinch.
Chulainn is struggling to control the position.
Lee Key trying to control the position but instead, Chulainn has worked for underhooks and has pushed Lee Key into the cage.
Chulainn misses with some punches.
Lee Key tries to pull guard but Chulainn forces him back to his feet, against the cage.
That's three minutes gone in the round.
Lee Key tries to jump guard but he falls flat on his backside. Chulainn smiles and moves away.
Lee Key throws a hook but Chulainn blocks it.
Lee Key goes for a double leg but Chulainn avoids the attempt and the two fighters end up clinched against the cage as Chulainn continues to drive forward.
Chulainn scores with an uppercut up the middle.
Chulainn breaks the clinch.
Chulainn misses with a straight left.
Lee Key avoids the body shot from Chulainn.
Chulainn slips a jab and a cross from Lee Key.
Lee Key is trying hard to land a takedown here. Chulainn sprawls well and keeps this one on the feet.
Ca Chulainn is looking to keep the fight on the feet at all costs.
Lee Key takes a thudding leg kick, right into the meat of the thigh.
Lee Key tries to score a power double leg takedown but Chulainn sees that one coming and sprawls well. That will dishearten Lee Key somewhat.
Chulainn gets to the clinch - let's see what his plan is here.
That's four minutes gone in the round.
Chulainn doesn't land with the attempted body shot.
Lee Key is working for takedown but Chulainn is calmly controlling the position for now.
Chulainn lands a right hand that snaps the head of Lee Key backwards.
Nice body punch from Chulainn - that landed with a thud.
An uppercut to the body lands inside from Chulainn.
The fans in attendance giving it up for the two fighters, who have really let it all hang out in the last minute or so!
A quick uppercut on the inside from Chulainn.
A nice right hand lands inside from Chulainn.
Lee Key is trying to pull guard but being pressed up against the cage enables Chulainn to keep the fight standing.
Chulainn has Lee Key pressed against the cage, preventing Lee Key from circling away and getting back to striking at range.
The crowd are going absolutely nuts as the round comes to an end - what a fantastic round of action!
Chulainn lands a shoulder strike.
Lee Key has a body lock and is looking for a takedown. Chulainn is bouncing around trying to prevent the takedown and somehow he has indeed managed to stay on his feet.
Chulainn breaks the clinch and we're back to striking at distance.
A telegraphed takedown attempt from Lee Key is defended easily by Chulainn.
And thats the end of the round the fighters go back to their corners.
Ca Chulainn dominated that round.
That's the end of the round. The referee orders the cornermen out of the cage so we can get back down to business.
Lee Key drives through with a takedown into Chulainn's guard. Let's see what he can do from the top position.
Lee Key passes into half guard.
Chulainn knows he needs to get back to his feet asap. He's simply no match for Lee Key on the ground.
Lee Key perhaps working for something from half guard, or maybe not. It looks like he's just sitting there.
The ref warns both fighters not to hold the cage as they work up against the meshing.
Lee Key is trying for a kimura here. Chulainn looks like he's in a lot of pain... and he's tapping out! Lee Key wins by kimura!
Ladies and gentlemen, after 0:43 of round 2, we have a winner by way of Submission (Kimura). Braydon Lee Key!
Braydon Lee Key is the new middleweight champion!
|
|
|
|
|
|
|
|
|
|
|
|
|
|
|
|
|
|
|
|
|
|
|
| S |
C
A |
G |
S |
C
B |
G |
|
S |
C |
G |
|
energy
A | B |
|
hype
A | B |
|
pop
A | B |
|
mgr
A | B |
|
FIGHT
RATING
100% |
|
|
|
|
|
|
|
Co-main event
|
Coming up we have a heavyweight MMA rules bout between Sean McMorrow (ranked 0 p4p, 0 weight class) and Ralfus Presting (ranked 0 p4p, 0 weight class). Both fighter's entrance songs getting the crowd jumping here.
 |
|
 |
| 183 cm
37
273 lbs
43 - 19 - 0 |
|
182 cm
29
180 lbs
15 - 11 - 1 |
Great wrestler
World class boxer
Cardio machine |
|
Excellent grappler
Dangerous knees
Fast |
|
| |
|
Ladies and gentlemen. This fight is 3 rounds, in the heavyweight division.
Introducing the fighter to my left, fighting out of the red corner.
With a record of
43 - 19 - 0, fighting out of New York, Sean McMorrow!
And introducing the fighter to my right, fighting out of the blue corner.
With a record of
15 - 11 - 1, fighting out of Sydney, Ralfus Presting!
The judges for this bout are Columbo Gatti, Bruno Lombardi and Chad Campbell.
The bell rings for round one and we are underway!
McMorrow throws a leg kick but Presting sees it coming and moves out of range.
Presting shoots for a takedown but McMorrow saw that one coming a mile off and avoided it easily.
Presting on the wrong end of a kick to the body.
Presting takes one to the side of the head.

It looks like Ralfus Presting has been cut.
Thud! ouch! good body kick from McMorrow - that will leave a mark!
Presting looks winded!
We've seen a great period of action over the last minute or so - credit to both fighters for going all out!
McMorrow rushes forward with a series of wild hooks but Presting moves out of range and avoids them all easily.
McMorrow throws out a powerful jab.
Ralfus Presting seems to be the more aggressive standup fighter in this bout.
McMorrow looks for a takedown. He's got it. We're now in half guard.
We may be looking at a referee standup if the pace doesn't pick up soon.
McMorrow not landing any meaningful shots this time.
McMorrow is trying to control the action in half guard but Presting is working away on the bottom, looking perhaps to get back to full guard.
McMorrow throwing shots but Presting is blocking nicely.
Nice strikes from McMorrow there.
McMorrow sitting and controlling from the half guard.
Presting avoiding damage under a succession of punches from McMorrow.
Presting trying to keep hold of his opponent's head but McMorrow manages to pass to mount!
That's one minute gone in the round.
Presting in a bad spot here, taking shots to the head.
Presting tries to reverse the position but McMorrow maintains control.
McMorrow lands a big shot there that rocks Presting but he's holding on and managing to survive for now.
McMorrow landing strikes from the mount.
McMorrow can't quite control the action as he would like just now, as Presting is looking to escape.
McMorrow working away from the top, dropping strikes.
Presting is rocked!
That has opened up Ralfus Presting's cut even more.
The fans in attendance giving it up for the two fighters, who have really let it all hang out in the last minute or so!
McMorrow cracks Presting with a big head shot that has him covering up instantly! He's rolled onto his side and the referee has seen enough - this one is aaaaaaaaaaall over!
Ladies and gentlemen, after 1:54 of round 1, we have a winner by way of TKO (Strikes). Sean McMorrow!
A victorious Sean McMorrow thanked his army of followers in his post fight interview, telling people to make sure they follow him on Twitter.
|
|
|
|
|
|
|
|
|
|
|
|
|
|
|
|
|
|
|
|
|
|
|
| S |
C
A |
G |
S |
C
B |
G |
|
S |
C |
G |
|
energy
A | B |
|
hype
A | B |
|
pop
A | B |
|
mgr
A | B |
|
FIGHT
RATING
100% |
|
|
|
|
|
|
|
Main event
|
Coming up we have a heavyweight MMA rules bout between Mustaffa Spliff (ranked 0 p4p, 0 weight class) and Athan Stamatis (ranked 0 p4p, 0 weight class). The crowd seem to be enjoying Stamatis's choice of entrance music: Lose Yourself. There are an array of beautiful celebrities at ringside tonight! I wonder if any of them paid for their tickets.
 |
|
 |
| 188 cm
34
185 lbs
32 - 20 - 0 |
|
176 cm
35
184 lbs
25 - 18 - 0 |
Great wrestler
World class boxer
Insanely flexible |
|
Good wrestler
Lethal high kicks
Good gas tank |
|
| |
|
Ladies and gentlemen. This fight is 3 rounds, in the heavyweight division.
Introducing the fighter to my left, fighting out of the red corner.
With a record of
32 - 20 - 0, fighting out of London, Mustaffa Spliff!
And introducing the fighter to my right, fighting out of the blue corner.
With a record of
25 - 18 - 0, fighting out of New York, Athan Stamatis!
The judges for this bout are Jonathan Paton, Jorge Garcia and Columbo Gatti.
The bell rings for round one and we are underway!
Stamatis shoots in looking for a double leg takedown. Spliff defends it nicely.
Stamatis with a body punch. A glancing blow.
Spliff lands a head kick. Stamatis smiles back at him and beckons him forward.
Spliff chopping away at his opponent's legs.
Stamatis scores with a nice takedown into half guard. Let's see what he's got on the ground.
Spliff gets full guard.
The fighters are pressed up against the cage, both looking to find a bit of space to work.
Spliff had isolated an arm as going for a kimura. Stamatis defends it easily.
Spliff looking for a sweep. Not yet Spliff, not yet.
This has been an exciting period of action!
Spliff had isolated an arm as going for a kimura. Stamatis defends it easily.
Spliff looking to hit a scissor sweep but Stamatis is one step ahead there.
That's one minute gone in the round.
Stamatis trying to control but Spliff is working from the bottom.
Spliff had isolated an arm as going for a kimura. Stamatis defends it easily.
Spliff is trying to control the position from the bottom.
Spliff is looking for a guillotine. You can't force these things though and Stamatis defends well.
Stamatis stands up and looks to throw the legs aside to pass to side control. Spliff swivels though and keeps the full guard.
Spliff manages to land a sweep and now he's in mount on top!
Stamatis tries to lock up and control but Spliff gives him a forearm to the face and pushes him away.
That's two minutes gone in the round.
Spliff lands a couple of good shots and Stamatis has given up his back, trying to escape the position!
Spliff will need to keep those long limbs tucked in whilst he's on the ground, to prevent any submissions.
Stamatis is trying to get back to his feet but Spliff has full control of the position and if anything, Stamatis has just worked his way into a worse spot.
Spliff lands a shot to the body.
Stamatis tries to escape the position - he's now mounted. Is that better or worse? Hard to tell!
The crowd cheering loudly, showing their appreciation for the quality fight we're seeing here.
Spliff unloads with some shots from mount but Stamatis bucks and avoids them well.
Spliff in mount throwing good strikes here, bouncing his opponent's head off the canvas.
Spliff has been looking to land a fair amount of strikes on the ground. He might be looking to soften his opponent up in order to work for a submission.
Stamatis throwing hammer fists to the chest of Spliff. What's that going to do exactly?
Spliff with the ground and pound from mount.
Stamatis holding onto his opponent's waist for dear life, as Spliff tries to land some strikes to get him to release his grip.
The fighters are starting to get a bit slippery now, which will make submissions a bit more difficult.
Spliff thowing strikes but they're hitting the gloves, not doing any damage.
Stamatis tries to reverse the position but Spliff maintains control.
That's three minutes gone in the round.
Spliff throws an elbow from mount that misses. Lucky escape for Stamatis because Spliff loaded up on that one.
Stamatis in a bad spot here, taking shots to the head.
The ref warns both fighters not to hold the cage as they work up against the meshing.
Stamatis sneaks a leg back under and regains half guard and is working straight away to try and get back to guard. He hasn't managed just yet though.
Spliff thumps the canvas. Not on purpose obviously - he just missed Stamatis's head.
Spliff is looking to pass the guard... He's managed it - he's now in full mount!
Stamatis manages to regain half guard. Good work.
Spliff thumps the canvas. Not on purpose obviously - he just missed Stamatis's head.
Stamatis wants to get back to full guard.
Spliff is working hard to pass the guard. He's done it - he's now in full mount! Trouble for Stamatis!
Wooooo! Give it up for these two warriors! They are putting on a show!
Spliff throws some wild stikes that Stamatis manages to avoid easily.
Spliff cracks Stamatis with a nasty head shot there - the crowd let out an audible gasp there, as the noise reverberated around the arena.
Spliff avoids the attempt from Stamatis to control.
That's four minutes gone in the round.
Spliff landing strikes, looking to finish!
Spliff landing strikes, looking to finish!
Stamatis avoids a series of strikes thrown by Spliff.
Spliff sends his fist crashing into the mat - the crowd let out a collective ooooooh. Let's hope he's not broken it!
Stamatis tries to hold on but Spliff pushes him away.
Spliff throwing shots from mount but they're not landing.
Spliff tries to control but Stamatis wriggling away.
Spliff lands with some strikes.
The crowd are going absolutely nuts as the round comes to an end - what a fantastic round of action!
Spliff lands a couple of nice shots there from mount.
Stamatis is rocked!
Spliff pausing momentarily but resumes with a couple of decent strikes that do a bit of damage.
Stamatis is still in real trouble! Can Spliff finish him?
Spliff is in full mount looking to finish with strikes. He lands a big shot, followed by another and Stamatis goes limp! The ref jumps in to end the fight - a big win for Spliff!
Ladies and gentlemen, after 4:55 of round 1, we have a winner by way of KO (Strikes). Mustaffa Spliff!
After the big win, Mustaffa Spliff made sure to do all the important stuff like thanking his sponsors GTI - 1337 sponsors VERSUS and telling the interviewer how much he loves him.
|
|
|
|
|
|
|
|
|
|
|
|
|
|
|
|
|
|
|
|
|
|
|
| S |
C
A |
G |
S |
C
B |
G |
|
S |
C |
G |
|
energy
A | B |
|
hype
A | B |
|
pop
A | B |
|
mgr
A | B |
|
FIGHT
RATING
59% |
|
|
|
|
|
|
|
|
|
|
