 |
EEA 11: Damozzi vs Lieber PBP Commentary |
Undercard bout
|
|
|
|
Undercard bout
|
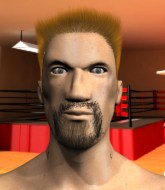
Coming up we have a welterweight MMA rules bout between Marten De Wolfe (ranked 0 p4p, 0 weight class) and Bony McAdams (ranked 0 p4p, 0 weight class). I can't wait for this one - let's get the fighter introductions out of the way and get this one started!
 |
|
 |
| 183 cm
19
175 lbs
1 - 1 - 0 |
|
172 cm
25
170 lbs
2 - 1 - 0 |
BJJ Blue Belt
Brawler
Good chin |
|
BJJ Blue Belt
Decent boxing
Solid chin |
|
| |
|
Ladies and gentlemen. This fight is 3 rounds, in the welterweight division.
Introducing the fighter to my left, fighting out of the red corner.
With a record of
1 - 1 - 0, fighting out of Amsterdam, Marten De Wolfe!
And introducing the fighter to my right, fighting out of the blue corner.
With a record of
2 - 1 - 0, fighting out of Helsinki, Bony McAdams!
The judges for this bout are Albert Achterberg, Radbod Blank and Aafke Stam.

The bell rings for round one and we are underway!
A jab from McAdams finds it's way through De Wolfe's defenses.
De Wolfe throws a looping left and ducks down for a takedown. He's got his arms around McAdams's waist but McAdams gets an underhook and avoids the takedown by throwing De Wolfe off to one side.
De Wolfe lands with a thumping leg kick.

McAdams has De Wolfe up against the cage in a clinch.

McAdams manages to pull guard. Let's see whether he can land a sub off his back.
McAdams utilising some decent striking defenses from the guard, preventing the ground and pound.
McAdams looking for a sweep. Not yet McAdams, not yet.

McAdams pushes De Wolfe off and gets back to his feet.

De Wolfe takes the fight into the clinch.
McAdams wants a takedown.

McAdams manages to break the clinch.
We've seen a great period of action over the last minute or so - credit to both fighters for going all out!
McAdams tries to work over De Wolfe's front leg with a kick but De Wolfe checks it.
De Wolfe throws a body punch but McAdams moves out of range.
De Wolfe forces McAdams back against the cage and clinches.

That's one minute gone in the round.
McAdams lands on the inside with an uppercut.
De Wolfe jumps guard but McAdams turns him against the cage and keeps the fight standing.
De Wolfe landing knees to the body. They look like they could hurt.
We can't be sure of the tactics at this early stage but we have heard that McAdams has been working on his takedowns a lot in the buildup to the fight and we can only assume he's going to look to take this to the mat.
A quick uppercut on the inside from McAdams.
McAdams with an attempt at a knee that misses.
McAdams is trying to work for a single leg takedown but De Wolfe pulls him back up using the underhooks.
De Wolfe tries to pull guard but McAdams won't allow it.
That's three failed takedown attempts in the round for Marten De Wolfe. That's going to take a lot out of him.
McAdams wants a takedown.
McAdams has clasped his hands together around De Wolfe's back... aaand, he's got a takedown into side control. Nicely done.
McAdams is pausing for a moment. What's he doing? It looks like he's clearing his nose. Oh dude! He's shot a load of snot all down De Wolfe's shoulder. That is not cool.
De Wolfe is not content to let McAdams control the position.

That's two minutes gone in the round.

McAdams is trying to get an arm triangle but De Wolfe is defending well.
Wooooo! Give it up for these two warriors! They are putting on a show!
McAdams working the ground and pound but he's contacting the mat, not the fighter.
The ref warns both fighters not to hold the cage as they work up against the meshing.
McAdams taking a breather here.
McAdams working the strikes but De Wolfe uses the opportunity to regain half guard.

That's three minutes gone in the round.
McAdams perhaps working for something from half guard, or maybe not. It looks like he's just sitting there.
Let's hope that McAdams has the urge to step up the pace any second now because for the last 15 or 20 seconds he's just been holding on tight.

Bony McAdams has forced the referee to step in and restart the fight on the feet.
De Wolfe showing good head movement there, avoiding the strikes from McAdams.
De Wolfe clinches up against the cage.
De Wolfe prevents a takedown attempt there.
McAdams looks to throw an elbow but misses.
McAdams is pushing De Wolfe up against the cage, for a bit of lean and pray action. Action being used the in the loosest possible sense of the word.

That's four minutes gone in the round.
McAdams continues to stall. The referee tells him to work or he's going to break them up.
McAdams's corner calls for him to break the clinch, which he does.
De Wolfe looks to have improved his striking defense since last time we saw him fight.
McAdams looking for a takedown here - he's got it.
McAdams throwing shots from guard but he's hitting more mat than opponent.
McAdams showing good wrestling skills to control the position.
And thats the end of the round the fighters go back to their corners.
Bony McAdams dominated that round.
The referee calls time. The cornermen exit stage left and we're back to business.

McAdams drives through with a really nice takedown into side control.
McAdams misses with the ground and pound.
McAdams trying to control the position but De Wolfe is working away.
McAdams controls the position.
De Wolfe is not content to let McAdams control the position.
Bony McAdams has got the better of the ground game so far.
McAdams is pausing for a moment. What's he doing? It looks like he's clearing his nose. Oh dude! He's shot a load of snot all down De Wolfe's shoulder. That is not cool.
The referee wants the fighters to be more active or he's going to reset them on the feet.
McAdams throwing ground and pound but whilst doing so, he forgets to control position and De Wolfe works his way back to half guard. Good composure under pressure.
That's one minute gone in the round.
McAdams trying to control the pace.
The ref calls for a clean break and stands the fighters back up. Bony McAdams wasn't active enough on the ground.
McAdams stuns De Wolfe with a nice body shot, before stepping back out of range.
McAdams has De Wolfe up against the cage in a clinch.
McAdams leaning against his opponent.
McAdams pushes off and circles away, back to the middle of the mat.
McAdams misses with a head kick.
McAdams shoots in for a takedown! He's got it and he's managed to land in side control! That's better than McAdams was expecting from the takedown attempt, I'm sure!
McAdams has the superior BJJ but he's also working some ground strikes into his gameplan.
McAdams in side control lands a decent elbow.
That's two minutes gone in the round.
McAdams decides to stand up, so the ref orders De Wolfe to his feet.
The crowd are loving this. Great action here.
McAdams moves out of range of the body kick from De Wolfe.
McAdams throws a low kick but it's checked well by De Wolfe.
McAdams throws a looping left and ducks down for a takedown. He's got his arms around De Wolfe's waist but De Wolfe gets an underhook and avoids the takedown by throwing McAdams off to one side.
De Wolfe has a takedown stuffed.
Both fighters are absolutely exhausted here.
De Wolfe tries a head kick but it misses.
De Wolfe showing good head movement there, avoiding the strikes from McAdams.
McAdams tries a head kick but it misses.
McAdams has managed to clinch.
A short right hand to the side of the head by McAdams.
A right hook to the body lands for McAdams.
That's three minutes gone in the round.
McAdams breaks from the clinch.
De Wolfe misses with a few strikes there.
McAdams fails with a rather predictable takedown attempt.
McAdams clinches.
McAdams scores with a hook to the body.
McAdams keeps control of De Wolfe as he tries to wriggle out of the double underhooks.
McAdams is trying to work for a single leg takedown but De Wolfe pulls him back up using the underhooks.
Marten De Wolfe has stuffed three takedown attempts in the round now. That's going to take a lot out of Bony McAdams.
McAdams works for underhooks and lands a body shot in the process.

De Wolfe's corner calls for him to break the clinch, which he does.
De Wolfe tries to shoot in for a takedown. He's got hold of a leg but McAdams swivels and escapes.
McAdams fakes a strike and closes the distance, dragging De Wolfe to the ground. McAdams is now in De Wolfe's guard.
McAdams pressing down on his opponent's thigh, looking to pass guard. De Wolfe is keeping the position for now.
That's four minutes gone in the round.
This is a great period of action - very entertaining stuff!
McAdams looking to control the position here, rather than advance.
It looks like the ref is thinking about a standup.
As the round comes to an end the crowd are showing their appreciation for a great round of action.
Bony McAdams has forced the referee to step in and restart the fight on the feet.
McAdams throws a wild combination but nothing lands.
And thats the end of the round the fighters go back to their corners.
Bony McAdams showed his class in that round. I'd imagine he'll take it on all the scorecards.
The fighters get back to their feet, the hooter sounds and we're back to the action! This is the final round!

McAdams gets in close and instigates a clinch.
De Wolfe is trying to break the clinch but McAdams has him pressed against the cage.
McAdams working on landing some head shots here - that one got through nicely.
McAdams pushes off and circles away, back to the middle of the mat.
De Wolfe blocks a low kick nicely.
McAdams shoots in but De Wolfe avoids the takedown attempt easily.
De Wolfe slips a jab and a cross from McAdams.
McAdams rushes forward with a series of wild hooks but De Wolfe moves out of range and avoids them all easily.
McAdams throws a front kick aimed at De Wolfe's knee but De Wolfe avoids it well.
McAdams has been the more effective fighter overall so far.
McAdams walks forward, straight into a front kick from De Wolfe.
McAdams misses with a takedown attempt - De Wolfe sprawls well and throws a nice strike on the way out which just misses.
De Wolfe has taken the fight to the clinch.
McAdams takes a big intake of breath there - he's definitely tired.
McAdams wants to stall.
That's one minute gone in the round.
De Wolfe on the defensive, avoiding the knees to the body.
De Wolfe prevents a takedown attempt there.
Marten De Wolfe has stuffed three takedown attempts in the round now. That's going to take a lot out of Bony McAdams.
McAdams is trying to pull guard but being pressed up against the cage enables De Wolfe to keep the fight standing.
McAdams looking for a takedown.
De Wolfe lands a damaging elbow.
De Wolfe breaks the clinch and we're back to striking at distance.
McAdams throws a wild combination but nothing lands.
De Wolfe shoots in but McAdams avoids the takedown attempt easily.
McAdams lands a jab, followed by a cross and another cross, as De Wolfe backs up against the cage.
De Wolfe moves into range and clinches up with McAdams.
De Wolfe manages to break the clinch.
That's two minutes gone in the round.
De Wolfe instigates a clinch.
De Wolfe scores with a nice hook to the head.
McAdams can't find room to land a body shot as De Wolfe controls the action.
McAdams wants to take the fight to the mat but De Wolfe manages to get underhooks and keep the fight in the clinch.
McAdams doesn't land with the attempted body shot.
With the fighters up against the cage, McAdams throws an elbow but misses.
The crowd are loving this. Great action here.
De Wolfe breaks the clinch and we return to the middle of the mat.
McAdams shoots in and gets a takedown into half guard. McAdams showed some decent athleticism there.
De Wolfe gets back to full guard.
De Wolfe trying to keep a closed guard but McAdams is proving a slippery customer.
That's three minutes gone in the round.
McAdams wants to control from the top but De Wolfe keeps moving.
McAdams sitting in guard, not really doing much.
Bony McAdams is fighting for a decision - hopefully he's judged it right and he's actually winning the fight.
De Wolfe is looking to sweep but instead, McAdams has passed into half guard.
McAdams keeping composed on the top, looking to control the action.
That's four minutes gone in the round.
The ref stands the fighters back up, due to lack of action by Bony McAdams.
De Wolfe throws a solid leg kick but McAdams takes the impact on his shin and smiles at De Wolfe.
McAdams throws a series of punches but De Wolfe avoids them all with ease.
De Wolfe throws a body kick that misses.
McAdams fails to land with a series of punches.
McAdams has a takedown stuffed.
A right-left combo lands from McAdams.
De Wolfe closes the distance and clinches.
As the round comes to an end the crowd are showing their appreciation for a great round of action.
De Wolfe's corner calls for him to break the clinch, which he does.
McAdams closes the distance and lands a one-two.
Marten De Wolfe has stepped it up - he knows he needs a finish here!
McAdams fails to land with the punch combination there - jab, cross, hook, miss, miss, miss.
And that's the end of the fight!
I would just about give that final round to Bony McAdams.
Well McAdams has outworked and out performed his opponent in all aspects of the game today. He was simply too good and the decision should be no more than a formality. Over to the ring announcer for the scorecards.
Ladies and gentlemen, after 3 rounds of action, we go to the scorecards for a decision.
Judge Albert Achterberg scores the fight 27:30
Judge Radbod Blank scores the fight 27:30
Judge Aafke Stam scores the fight 27:30
In favor of your winner, by unanimous decision... Bony McAdams!
A relieved looking Bony McAdams thanked the fans for their support and gave the usual line about them being amazing. They seemed to believe that he actually meant it.
|
|
|
|
|
|
|
|
|
|
|
|
|
|
|
|
|
|
|
|
|
|
|
| S |
C
A |
G |
S |
C
B |
G |
|
S |
C |
G |
|
energy
A | B |
|
hype
A | B |
|
pop
A | B |
|
mgr
A | B |
|
FIGHT
RATING
68% |
|
|
|
|
|
|
|
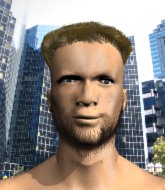
Undercard bout
|
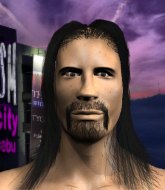
Coming up we have a welterweight MMA rules bout between Mason Marshall (ranked 0 p4p, 0 weight class) and Seth Ryland (ranked 0 p4p, 0 weight class). Man, I cannot wait for this one!
 |
|
 |
| 177 cm
19
180 lbs
3 - 0 - 0 |
|
173 cm
25
177 lbs
1 - 1 - 0 |
BJJ Purple Belt
Counter fighter
Granite chin |
|
Good takedowns
Brawler
Very confident |
|
| |
|
Ladies and gentlemen. This fight is 3 rounds, in the welterweight division.
Introducing the fighter to my left, fighting out of the red corner.
With a record of
3 - 0 - 0, fighting out of Amsterdam, Mason Marshall!
And introducing the fighter to my right, fighting out of the blue corner.
With a record of
1 - 1 - 0, fighting out of Amsterdam, Seth Ryland!
The judges for this bout are Paulsen Ambrosius, Aafke Stam and Paul Aken.
The bell rings for round one and we are underway!
Ryland shoots in but doesn't get the takedown

and Marshall counters with a shoot takedown. Ryland fights it but they end up in guard.
Ryland working a defensive guard here.
Ryland is pulling down on Marshall's head to control his posture.
Marshall stands up and looks to throw the legs aside to pass to side control. Ryland swivels though and keeps the full guard.
Marshall seems content to control from guard here. He's going to have to remain active though if he doesn't want to get stood back up.
Marshall's ground tactics aren't going to win him many fans. Let's hope he's got fireworks for us if he gets back to his feet because he's not doing much on the ground.
Marshall has to be careful here, sitting in the guard of a superior BJJ player.
That's one minute gone in the round.

Well, the referee has seen enough. Neither fighter is active enough on the ground so he's stood them back up.
Ryland fails with the takedown
and Marshall counters with a nice double leg into side control. Ryland won't be happy with that.
Ryland can't do much from the bottom here.
Ryland tries to bench press Marshall off him but Marshall keeps the position.
You can see the frustration on Ryland's face, being in this tough position on the bottom.
Ryland looking for a sweep but Marshall has passed into full mount! Oh no!
Ryland tries to hold on but Marshall pushes him away.
Ryland keeping his composure momentarily, calmly looking to get back to half guard.
That's two minutes gone in the round.
Ryland wants to control but Marshall is having none of it.
Marshall controlling his opponent.
Marshall prevents Ryland from getting the reversal.
The crowd are loving this. Great action here.
Marshall controlling the position easily from mount.
That's three minutes gone in the round.
The referee is asking the fighters to pick up the pace.
Ryland is working to get back to half guard.
Marshall controlling from the full mount.
Ryland is trying to escape the mount.
That's four minutes gone in the round.
Marshall controlling his opponent.
Ryland is trying to escape the mount.
The fighters are starting to perspire pretty heavily.
Marshall controlling from mount.
The crowd applaud the fighters efforts here as the round comes to an end.
And thats the end of the round the fighters go back to their corners.
Mason Marshall dominated that round.
The fighters' corners scream their final instructions, as the referee calls time. Here we go, back to the action!
Ryland doesn't succeed with the takedown
and Marshall counters with a shoot takedown into half guard.
Ryland has no desire to be mounted, so is trying to control. Marshall is working away from the top position though.
Ryland is looking to sinch up a guillotine here but Marshall pulls his head out easily.
Ryland is looking to regain full guard. Not this time though.
Ryland is still trying to improve position.
Marshall is just sitting in half guard, waiting for something to happen.
Ryland gets back to full guard.
That's one minute gone in the round.
Marshall tries to free his leg and advance position but Ryland is retaining full guard.
Ryland isolates an arm and boxes in a triangle. Marshall stacks Ryland on his neck as he steps over and passes to the side. He's now in a much more dominant position where he can look to do some serious damage. Nice move by Marshall!
Marshall advances to mount.
Marshall controlling his opponent.
Ryland is desperately trying to get back to half guard.
That's two minutes gone in the round.
Marshall controlling from the full mount.
Marshall avoids the attempt from Ryland to control.
Marshall controlling the position easily from mount.
Ryland tries to get back to half guard but can't.
That's three minutes gone in the round.
Marshall takes a little breather and maintains the position. The referee will be looking for him to stay active from such a dominant position though.
Ryland sneaks a leg back under and regains half guard and is working straight away to try and get back to guard. He hasn't managed just yet though.
Ryland is looking to sinch up a guillotine here but Marshall pulls his head out easily.
Ryland trying to control but Marshall postures up.
Marshall moves into full mount! Ryland won't be happy about that!
Ryland is looking to improve his position but Marshall isn't that keen on the idea.
Marshall looking to control and managing it successfully.
That's four minutes gone in the round.
Ryland tries to lock up and control but Marshall gives him a forearm to the face and pushes him away.
Marshall controlling from mount.
Ryland wants to control but Marshall is having none of it.
The crowd applaud the fighters efforts here as the round comes to an end.
Ryland is trying to escape the mount.
And thats the end of the round the fighters go back to their corners.
Mason Marshall dominated that second round.
The referee calls time. The cornermen exit stage left and we're back to business. This is the final round!
Ryland drives through with a takedown into guard.
Mason Marshall overall seems to be getting the better of the ground position in the fight so far.
Ryland trying to control the position from guard on top but Marshall is wriggling around, looking for whatever he can.
Ryland pushes down on Marshall's leg and manages to get into half guard.
Ryland prevents Marshall from standing back up.
Ryland is looking to take a break and control but Marshall is keeping him honest, looking to work from the bottom.
Marshall is trying to get back to full guard.
That's one minute gone in the round.
Marshall is trying to stand up here but Ryland is controlling him well.
Ryland is trying to control. Marshall wants to improve his position but can't escape this time.
Seth Ryland has forced the referee to step in and restart the fight on the feet.
Ryland with a lazy takedown attempt
and Marshall counters with a single leg into guard. Ryland didn't expect that.
Ryland working for a triangle but Marshall defends it easily.
Marshall not doing a lot at the moment. He'll have to show some more aggression or the fight will get stood up.
That's two minutes gone in the round.
Ryland looking to control.
Ryland working for a triangle but Marshall defends it easily.
Marshall pressing down on his opponent's thigh, looking to pass guard. Ryland is keeping the position for now.
Marshall passes easily into side control. Nice work.
Marshall happy to just control the position for now.
That's three minutes gone in the round.
Ryland stops Marshall from passing to mount.
Ryland tries to buck Marshall off but Marshall is having none of it.
Ryland sneaks a leg under to get back to half guard.
Marshall is thwarting Ryland's attempts to control the position.
Marshall tries to pass the half guard into mount. Ryland knows what he's doing though and prevents the attempt.
Marshall seems content to maintain position for now, rather than mounting any offense.
That's four minutes gone in the round.
Ryland is trying to get back to full guard.
Seth Ryland has stepped it up - he knows he needs a finish here!
Marshall trying to control the pace.
The crowd applaud the fighters efforts here as the round comes to an end.

The ref stands the fighters back up because Mason Marshall just wasn't active enough.
Ryland looking for a takedown here - he's got it.
And that's the end of the fight!
I would just about give that final round to Seth Ryland.
I think Marshall has won this one but let's see what the judges have to say. Over to the ring announcer for the scorecards.
Ladies and gentlemen, after 3 rounds of action, we go to the scorecards for a decision.
Judge Paulsen Ambrosius scores the fight 29:28
Judge Aafke Stam scores the fight 29:28
Judge Paul Aken scores the fight 29:28
In favor of your winner, by unanimous decision... Mason Marshall!
|
|
|
|
|
|
|
|
|
|
|
|
|
|
|
|
|
|
|
|
|
|
|
| S |
C
A |
G |
S |
C
B |
G |
|
S |
C |
G |
|
energy
A | B |
|
hype
A | B |
|
pop
A | B |
|
mgr
A | B |
|
FIGHT
RATING
39% |
|
|
|
|
|
|
|
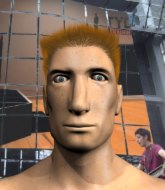
Undercard bout
|
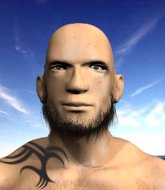
Coming up we have a welterweight MMA rules bout between Dino Saur (ranked 0 p4p, 0 weight class) and Radek Vagner (ranked 0 p4p, 0 weight class). Both fighters look fresh as a daisy as they make their way towards the cage.
 |
|
 |
| 169 cm
25
170 lbs
3 - 0 - 0 |
|
173 cm
20
166 lbs
4 - 2 - 0 |
Good takedowns
Counter fighter
Cuts easily |
|
BJJ Purple Belt
Solid Muay Thai
Powerful |
|
| |
|
Ladies and gentlemen. This fight is 3 rounds, in the welterweight division.
Introducing the fighter to my left, fighting out of the red corner.
With a record of
3 - 0 - 0, fighting out of Amsterdam, Dino Saur!
And introducing the fighter to my right, fighting out of the blue corner.
With a record of
4 - 2 - 0, fighting out of Amsterdam, Radek Vagner!
The judges for this bout are Saam Ante, Aafke Stam and Wagner Zegers.
The bell rings for round one and we are underway!
Saur clinches.
Saur changes levels and goes for a takedown here. Vagner fights it off and pushes away nicely.
Vagner misses with a hook
and Saur counters with a nice double leg into side control. Vagner won't be happy with that.
Saur prevents Vagner from escaping the position.
Saur sitting in side control, looking to soften his opponent up with elbows and hammerfists but Vagner is avoiding damage well and looking to escape the position.

Saur is looking to finish here, going for an Americana. Vagner knows the correct defense though, so he's OK.
Saur goes for an armbar! This could be all over! Wait, no, Vagner rolls with the submission and now he's on top in Saur's guard! Nice work there by Vagner!
Saur working a defensive guard here.
The crowd are loving this. Great action here.
Vagner would like to get this fight back to the feet but can't get free from the closed guard.
Vagner stands and steps away. Saur gets to his feet too and we're back to the striking game.
Vagner tries to close the distance and clinch but Saur swats him to one side with an open hand palm strike and circles away.
That's one minute gone in the round.
Vagner scores with a jab to the jaw of his opponent.
We've been told by Saur's head coaches at Sanitarium that he's been working on his takedown defense in preparation for this fight.
Vagner clinches.
Saur drops down looking for an ankle pick but Vagner pulls his leg out and moves away.
Saur takes a jab on the nose there. A little bit of blood seems to be coming out. Hopefully that won't affect his breathing.
Saur shoots in for a takedown. "I don't think so" says Vagner as he avoids it easily.
That's three failed takedown attempts in the round for Dino Saur. That's going to take a lot out of him.
Saur shoots in and scores a nice double leg takedown into half guard.
Vagner wants to improve his position but Saur is controlling well.
Vagner is looking to escape.
The fighters are pressed up against the cage, both looking to find a bit of space to work.
That's two minutes gone in the round.
Vagner is trying to get back to full guard.
Saur seems to be looking for submissions.
Saur maintaining the dominant position here and is working for a kimura. He's locked it up! Vagner could be in real trouble here! He's trying to wriggle out but Saur has cracked it and Vagner is screaming in pain - he's tapped out! Great finish by Saur!
Ladies and gentlemen, after 2:34 of round 1, we have a winner by way of Submission (Kimura). Dino Saur!
Our winner, Dino Saur, made sure he spent some time buttering up the crowd during his post fight interview, which will no doubt bring him a few more fans.
|
|
|
|
|
|
|
|
|
|
|
|
|
|
|
|
|
|
|
|
|
|
|
| S |
C
A |
G |
S |
C
B |
G |
|
S |
C |
G |
|
energy
A | B |
|
hype
A | B |
|
pop
A | B |
|
mgr
A | B |
|
FIGHT
RATING
46% |
|
|
|
|
|
|
|
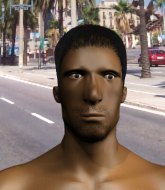
Co-main event
|
Coming up we have a light heavyweight MMA rules bout between Frank Damozzi (ranked 0 p4p, 0 weight class) and Max Lieber (ranked 0 p4p, 0 weight class). Lieber is bobbing his head along to his entrance song: The Dust Brothers- What is Fight Club . Max Lieber acknowledges the crowd's support as he enters the cage.
 |
|
 |
| 187 cm
20
211 lbs
5 - 1 - 0 |
|
196 cm
25
211 lbs
3 - 1 - 0 |
Good wrestling
Basic striking
Granite chin |
|
Good wrestler
Brawler
Determined |
|
| |
|
Ladies and gentlemen. This fight is 5 rounds, for the light heavyweight championship of the world!
Introducing the champion to my left, fighting out of the red corner.
With a record of
5 - 1 - 0, fighting out of Amsterdam, Frank Damozzi!
And introducing the challenger to my right, fighting out of the blue corner.
With a record of
3 - 1 - 0, fighting out of Amsterdam, Max Lieber!
The judges for this bout are Patrick Alders, Nard Betker and Radbod Blank.
The bell rings for round one and we are underway!
Damozzi shoots in and gets a takedown into Lieber's guard.
Damozzi throwing elbows and punches but not connecting, as Lieber works some decent striking defense from the bottom.
Damozzi stopping the sweep attempt from Lieber.
Damozzi has been looking to land a fair amount of strikes on the ground. He might be looking to soften his opponent up in order to work for a submission.
Damozzi postures up to throw the ground and pound strikes but they don't connect.
Damozzi throwing strikes from guard but Lieber blocks nicely.
Damozzi landing some decent shots from guard.
Damozzi postures up and scores with a shot to the body and a follow up elbow to the head.
Lieber trying to control the position.
Lieber is working an open guard here, looking to improve his position. No doubt that will leave him open to counters but at least he's being more offensive.
Lieber working a defensive guard here.
Lieber is avoiding any damage by keeping wrist control.
Damozzi sitting in guard here, content to control.
Lieber is trying to keep Damozzi in close.
That's one minute gone in the round.
Max Lieber has forced the referee to step in and restart the fight on the feet.
Lieber swings wildly with a right hand that was never going to find it's target.
Lieber ducks down and throws a hook to the body but Damozzi moves away.
Damozzi avoids a lazy jab quite easily.
Lieber moves his head to the side to avoid a jab but walks straight into a cross.
Damozzi throws a leg kick but Lieber moved away.
Damozzi slips under a jab from Lieber.
Lieber scores with a jab to the jaw.
Damozzi avoids a lazy jab quite easily.
Damozzi throws a leg kick but he was too far away and it doesn't land.
We've been hearing reports that Damozzi has been drilling takedowns in recent sessions so let's see if that has an impact on the result of this fight.
Damozzi tries to land a leg kick but Lieber saw it coming and moves away.
Lieber misses with an uppercut.
Damozzi scores with a takedown into Lieber's guard.
Lieber is working an open guard here, looking to improve his position. No doubt that will leave him open to counters but at least he's being more offensive.
Damozzi content to strike from guard, landing some decent shots.
Lieber trying to keep a closed guard but Damozzi is proving a slippery customer.
That's two minutes gone in the round.
Lieber throwing his legs up looking for a triangle.
The ref warns both fighters not to hold the cage as they work up against the meshing.
The crowd are loving this. Great action here.
Damozzi throwing strikes from guard but Lieber blocks nicely.
Damozzi pushes down on Lieber's leg and manages to get into half guard.
Damozzi takes advantage of the dominant position to land a couple of big hammer fists.
Damozzi moves into full mount! Lieber won't be happy about that!
Lieber keeping his composure momentarily, calmly looking to get back to half guard.
The fighters are starting to perspire pretty heavily.
Damozzi in mount throwing good strikes here, bouncing his opponent's head off the canvas.
Both fighters really going for it on the ground here!
Lieber can't escape the position.
Damozzi connects with a couple of good shots from mount.

It looks like Max Lieber has been cut.
Damozzi lands a couple of nice shots there from mount.

Lieber is rocked!
That has opened up Max Lieber's cut even more.
Oooh a big shot lands for Damozzi! Lieber is out! The ref dives in to save him from more punishment!
Ladies and gentlemen, after 3:57 of round 1, we have a winner by way of KO (Strikes). Frank Damozzi!
Frank Damozzi retains his light heavyweight title!
Frank Damozzi seemed lost for words in his post fight interview but he remembered to thank his fans and directed everyone to his website.
Max Lieber spoke after the fight, saying 'I known Damozzi would be a hard challange, but i had no solution today for him. I will go Home train and come back even better. And thanks to all the Fans you where a great audience.'.
|
|
|
|
|
|
|
|
|
|
|
|
|
|
|
|
|
|
|
|
|
|
|
| S |
C
A |
G |
S |
C
B |
G |
|
S |
C |
G |
|
energy
A | B |
|
hype
A | B |
|
pop
A | B |
|
mgr
A | B |
|
FIGHT
RATING
70% |
|
|
|
|
|
|
|
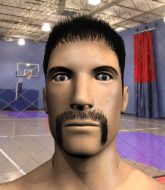
Main event
|
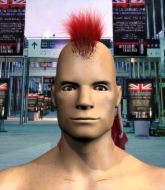
Coming up we have a welterweight MMA rules bout between Takeshi Toriyama (ranked 0 p4p, 0 weight class) and Arc Turian (ranked 0 p4p, 0 weight class). Toriyama comes to the cage accompanied by Maino - Remember My Name. Over to our ring announcer for the fighter introductions!
 |
|
 |
| 170 cm
26
168 lbs
7 - 2 - 0 |
|
173 cm
19
173 lbs
4 - 0 - 0 |
Good takedowns
Counter fighter
Very quick |
|
BJJ Blue Belt
Dangerous knees
Solid chin |
|
| |
|
Ladies and gentlemen. This fight is 3 rounds, in the welterweight division.
Introducing the fighter to my left, fighting out of the red corner.
With a record of
7 - 2 - 0, fighting out of Amsterdam, Takeshi Toriyama!
And introducing the fighter to my right, fighting out of the blue corner.
With a record of
4 - 0 - 0, fighting out of Los Angeles, Arc Turian!
The judges for this bout are Aafke Stam, Paul Aken and Saam Ante.
The bell rings for round one and we are underway!
Crunch! Turian slams his shin into Toriyama's torso.
Toriyama shoots in for a takedown - he's clinched up with Turian but Turian pushes him off and we're back to square one.
Thud! ouch! good body kick from Turian - that will leave a mark!
Turian lands a leg kick and bounces back out of range.
Turian throws a quick inside leg kick.
Ouch! a nice leg kick from Turian, right into the meat.
Turian cracks the inside of Toriyama's front leg.
Turian lands a nice looking kick to the body. Toriyama takes a step back to recover.
Toriyama avoids the head kick by Turian.
Turian throws a leg kick which misses Toriyama's front leg but catches the back leg as Toriyama tries to avoid it.
This has been an exciting period of action!
Nice takedown defense from Turian. No joy for Toriyama on that attempt.
That's one minute gone in the round.
Toriyama shoots in looking for a takedown. Turian tries to sprawl out of it but Toriyama keeps driving through. The fighters are pinned against the cage. Turian manages to get underhooks and after a bit of a struggle, circles away and we're back to standing.
That's three failed takedown attempts in the round for Takeshi Toriyama. That's going to take a lot out of him.
Turian instigates a clinch.
Turian with the Thai clinch, lands a knee to the head.

It looks like Takeshi Toriyama has been cut.
Toriyama misses with a body punch.
Toriyama wants to break free. God knows he wants to breaaaak freeee.
Turian lands a knee to the head.
Turian landing knees to the head.
Knees in the clinch landing for Turian.
Turian is trying to wear down his opponent with knees to the body.
Turian with a knee to the head.
Toriyama is trying to work for a single leg takedown but Turian pulls him back up using the underhooks.
Wooooo! Give it up for these two warriors! They are putting on a show!
Kneeeeees! The crowd are calling for knees to the body. Turian obliges.
Toriyama is breathing heavily.
Turian lands a knee to the head.
Kneeeeees! The crowd are calling for knees to the body. Turian obliges.
That's two minutes gone in the round.
Turian working Toriyama over with knees to the body.
Turian connects with a knee to the head.
A left hand lands to the body for Turian.
A nice left hand lands by Turian.
Turian with a knee to the head.
Turian stalls.
Turian scores with a knee to the head.
Turian is trying to wear down his opponent with knees to the body.
Turian utilising his Muay Thai to score with a knee to the body.
Toriyama has hold of a leg and is looking for a trip takedown. Turian avoids it nicely though and we remain in the clinch.
Turian using the Thai clinch to land knees to the body.
Toriyama goes for a takedown attempt but Turian pushes him away and we're back to fighting at a distance.
Toriyama swats away the attempt to clinch by Turian.
That's three minutes gone in the round.
Turian scores with a jab to the body.
Turian moves into range and clinches up with Toriyama.
Turian on the defensive, avoiding the knees to the body.
Toriyama tries to pull guard but Turian won't allow it.
Turian stays in close to his opponent and throws a right hand to the body.
Turian unloads a knee to the mid-section. Toriyama lets out a prehistoric sounding urrrrgh.
Turian scores a nice knee to the body.
This has been an exciting period of action!
Turian lands with a short head shot on the inside.
Turian works on Toriyama's body with a couple of short punches.
Turian with a knee to the head.
Turian lands a knee to the head.
Turian lands a knee to the head there! That was nasty!
That's four minutes gone in the round.
Turian is defending well against a takedown attempt.
Toriyama takes a knee right on the jaw!
Toriyama takes a knee right on the jaw!
Turian slows down the pace here.
Turian putting his Muay Thai to good use. He has Toriyama in a tight clinch and is doing some damage with knees to the body.
Turian connects with a knee to the head.
Toriyama looking for a takedown.
Turian lands a body shot.
Kneeeeees! The crowd are calling for knees to the body. Turian obliges.
Turian landing some nice looking knees to the body.
Turian landing knees to the body.
The crowd are going absolutely nuts as the round comes to an end - what a fantastic round of action!
Toriyama takes a knee right on the jaw!
Turian scores with a knee to the head.
The pace slowing considerably in the clinch, as Turian takes a break from that fighting nonsense to think about the finer things in life.
Turian landing knees to the body. They look like they could hurt.
And thats the end of the round the fighters go back to their corners.
Arc Turian dominated that round.
The cut man is working on Takeshi Toriyama's cut.
The referee calls time. The cornermen exit stage left and we're back to business.
Turian connects with a leg kick. Toriyama looked like he was expecting something else and didn't defend it.
Toriyama shoots in and drives through. Turian sprawls well.
Turian stuffs a takedown. It's all about dictating where the fight takes place and Turian wants it to stay on the feet.
Toriyama has his front leg slapped to the side - a nice low kick landing there from Turian.
A swing and a miss from Toriyama.
Toriyama takes a thudding leg kick, right into the meat of the thigh.
Turian lands with a slapping head kick.
Turian has been working on his striking defense in training and it's paying off as Toriyama is landing a low percentage of strikes.
We've seen a great period of action over the last minute or so - credit to both fighters for going all out!
Toriyama shoots in looking for a takedown. Turian tries to sprawl out of it but Toriyama keeps driving through. The fighters are pinned against the cage. Turian manages to get underhooks and after a bit of a struggle, circles away and we're back to standing.
That's three failed takedown attempts in the round for Takeshi Toriyama. That's going to take a lot out of him.
Ouch! a nice leg kick from Turian, right into the meat.
Takeshi Toriyama seems to be the more aggressive standup fighter in this bout.
That's one minute gone in the round.
Toriyama takes a nasty kick to the mid section... That should keep him thinking. Does he try and block and risk a head kick landing?
Toriyama is hobbling a little on that front leg after taking quite a few leg kicks so far in this fight.
Both fighters are absolutely exhausted here.
Toriyama takes a nice looking leg kick right on the meat of his thigh there.
Turian connects with a looping right hand.
Arc Turian seems to be getting the better of the standup.
Turian lands with a thumping leg kick.
Turian feints and then cracks Toriyama's leading leg with a nice low kick. He's obviously looking to slow Toriyama down.
Turian throws a hard body shot but it just misses.
Turian jabs Toriyama to the body, keeping him at a distance.
Turian gets to the clinch - let's see what his plan is here.
Turian landing some nice looking knees to the body.
Fantastic stuff here - a very entertaining period of action, which has drawn cheers from the crowd.
Turian scores with a knee to the head.
Turian lands a good knee to the midsection. Toriyama won't want to take too many of those.
That's two minutes gone in the round.
Toriyama takes a knee to the side of the body.
Turian unloads a knee to the mid-section. Toriyama lets out a prehistoric sounding urrrrgh.
Turian with a knee to the head.
Turian scores with a knee to the head.
Toriyama takes a knee right on the jaw!
Turian unloads a knee to the mid-section.
Turian has been the more effective fighter overall so far.
Turian unloads a knee to the mid-section. Toriyama lets out a prehistoric sounding urrrrgh.
Turian lands a knee to the head there! That was nasty!
Toriyama takes a knee right on the jaw!
Turian connects with a nasty looking knee right to Toriyama's face.
Turian landing knees to the body. They look like they could hurt.
Turian with a knee to the head.
Turian leaning his opponent against the cage.
Turian presses Toriyama against the cage and delivers a mid-strength body shot.
Turian scores a nice knee to the body.
Arc Turian seems to be working more effectively in the clinch in the fight so far.
That's three minutes gone in the round.
Turian connects with a nasty looking knee right to Toriyama's face.
Toriyama wants a takedown but no success here.
Turian with a knee to the head.
Turian crunches a lovely knee into Toriyama's ribcage.
Turian is trying to wear down his opponent with knees to the body.
Turian with the Thai clinch, lands a knee to the head.
Turian landing knees to the body. They look like they could hurt.
Toriyama takes a knee right on the jaw!
Toriyama wants a takedown.
Turian using the Thai clinch to land knees to the body.
Turian putting his Muay Thai to good use. He has Toriyama in a tight clinch and is doing some damage with knees to the body.
Turian with the Thai clinch, lands a knee to the head.
Turian landing knees to the body. They look like they could hurt.
Toriyama tries to take the fight to the ground by pulling guard but can't manage it.
A right handed body shot lands from Turian.
That's four minutes gone in the round.
Turian landing knees to the body. They look like they could hurt.
The fans in attendance giving it up for the two fighters, who have really let it all hang out in the last minute or so!
Turian landing knees to the body. They look like they could hurt.
Knees in the clinch landing for Turian.
Knees to the body from Turian.
A body shot lands from Turian.
Turian tries to work over Toriyama's body with a swooping hook but it only glances the target.
Toriyama is trying to break free.
Turian connects with a knee to the head.
Turian unloads a knee to the mid-section.
Turian lands a knee to the head there! That was nasty!
Toriyama goes for a takedown in the clinch but Turian prevents it.
Turian utilising his Muay Thai to score with a knee to the body.
The crowd are going absolutely nuts as the round comes to an end - what a fantastic round of action!
A knee to the head by Turian.
A shot in the inside from Turian.
And thats the end of the round the fighters go back to their corners.
Arc Turian showed his class in that round. I'd imagine he'll take it on all the scorecards.
The cut man is working on Takeshi Toriyama's cut.
OK. That's time! The bell goes and we're back to the action. This is the final round!
Turian keeps Toriyama at a distance using the push kick.
Turian ducks under a wild hook from Toriyama.
Toriyama swings away with a body shot that misses
and Turian counters with a slapping leg kick.
Turian thuds a left hand into Toriyama's body.
Toriyama shoots in for a takedown. "I don't think so" says Turian as he avoids it easily.
Turian throws a front kick that sends Toriyama stumbling back into the cage.
Turian lands a front kick.
A solid body kick from Turian.
Both fighters are breathing heavily.
Toriyama on the wrong end of a nice low kick. He's acting like it's no big deal but he doesn't want to take many more of those.
Turian with a nice looking leg kick. You could hear that one land in a back row.
That's one minute gone in the round.
Turian lands a kick to the ribs of his opponent. Nice work there - in and out in a flash.
Turian connects with a looping left hand that seems like it dazed Toriyama momentarily.
Like a baseball bat into the meat of his leg there - nice leg kick by Turian.
Toriyama has his front leg slapped to the side - a nice low kick landing there from Turian.
Toriyama chopped to the floor by a nice leg kick but he springs right back up before Turian can pounce on him.
Turian lands a nice looking body kick.
Toriyama throws a series of punches but Turian moves out of range.
Toriyama stumbles momentarily as he takes a strong leg kick from Turian.
Toriyama has his front leg slapped to the side - a nice low kick landing there from Turian.
Turian stuffs a takedown. It's all about dictating where the fight takes place and Turian wants it to stay on the feet.
That's two minutes gone in the round.
A telegraphed takedown attempt from Toriyama is defended easily by Turian.
That's three failed takedown attempts in the round for Takeshi Toriyama. That's going to take a lot out of him.
Turian lands with a nice low kick. That'll leave a bruise.
Fantastic stuff here - a very entertaining period of action, which has drawn cheers from the crowd.
Toriyama misses with a straight left.
Turian forces Toriyama back against the cage and clinches.
Turian lands a knee to the body.
Turian throws a blind hook that connects with the side of Toriyamas head.
Toriyama tries to land a shot to the body but it's blocked.
Toriyama will be looking to protect his midsection after taking some solid kicks to the body.
Turian landing some nice looking knees to the body.
Turian scores with a knee to the head.
A nice left hand lands by Turian.
That's three minutes gone in the round.
Turian lands a nice knee to the body.
Turian lands a knee to the head there! That was nasty!
Turian utilising his Muay Thai to score with a knee to the body.
This is turning into a torrid day at the office for Toriyama. He's trying desperately to land a takedown but he's failing miserably and getting slapped silly on the feet to compound his misery.
Turian scores a nice knee to the body.
Turian working some nice short punches in the clinch.
A knee to the head by Turian.
Toriyama is looking for a takedown.
Turian lands a nice knee to the body.
Knees to the body from Turian.
Turian lands a knee to the body.
Turian utilising his Muay Thai to score with a knee to the body.
Toriyama takes a knee right on the jaw!
This has been an exciting period of action!
Turian with a knee to the head.
Toriyama tries to circle away but Turian has him pinned against the cage.
That's four minutes gone in the round.
Turian lands a hook that snaps the head of Toriyama backwards.
Turian with a knee to the head.
Turian tries to land a knee to the body but he is off balance and Toriyama avoids it.
Turian prevents a takedown attempt there.
Toriyama misses with the head strike.
Toriyama wants to break free but Turian has control.
Turian is struggling to control the position.
Toriyama wants to take the fight to the mat but Turian manages to get underhooks and keep the fight in the clinch.
Toriyama can't break the clinch.
The crowd are going absolutely nuts as the round comes to an end - what a fantastic round of action!
Turian landing some nice looking knees to the body.
Turian lands a knee to the body.
Toriyama is trying to force a seperation but Turian has the dominant position.
Takeshi Toriyama has stepped it up - he knows he needs a finish here!
Turian gets double underhooks to prevent a takedown attempt from Toriyama.
And that's the end of the fight!
Arc Turian comfortably won the final round on my scorecard.
Well Turian has outworked and out performed his opponent in all aspects of the game today. He was simply too good and the decision should be no more than a formality. Over to the ring announcer for the scorecards.
Ladies and gentlemen, after 3 rounds of action, we go to the scorecards for a decision.
Judge Aafke Stam scores the fight 25:30
Judge Paul Aken scores the fight 25:30
Judge Saam Ante scores the fight 25:30
In favor of your winner, by unanimous decision... Arc Turian!
In defeat, Takeshi Toriyama stepped up to the mic, saying 'Sadly, I lost, and I want to announce that I'm moving to 155lbs division.'.
|
|
|
|
|
|
|
|
|
|
|
|
|
|
|
|
|
|
|
|
|
|
|
| S |
C
A |
G |
S |
C
B |
G |
|
S |
C |
G |
|
energy
A | B |
|
hype
A | B |
|
pop
A | B |
|
mgr
A | B |
|
FIGHT
RATING
100% |
|
|
|
|
|
|
|
|
|
|
