 |
LMS 16th War PBP Commentary |
Undercard bout
|
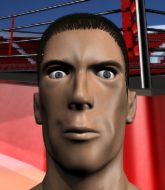
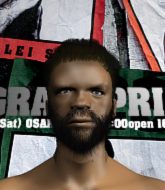
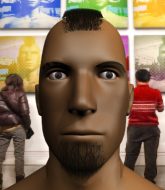
Coming up we have a super heavyweight MMA rules bout between Bobby Hirano (ranked 0 p4p, 0 weight class) and Jack Schittd (ranked 0 p4p, 0 weight class). Schittd has chosen My Name is Hate! as his entrance music. Over to our ring announcer for the fighter introductions!
 |
|
 |
| 194 cm
19
260 lbs
1 - 1 - 0 |
|
179 cm
25
299 lbs
1 - 1 - 0 |
BJJ Blue Belt
Solid Muay Thai
Good chin |
|
BJJ White Belt
Excellent boxer
Solid chin |
|
| |
|
Ladies and gentlemen. This fight is 3 rounds, in the super heavyweight division.
Introducing the fighter to my left, fighting out of the red corner.
With a record of
1 - 1 - 0, fighting out of Tokyo, Bobby Hirano!
And introducing the fighter to my right, fighting out of the blue corner.
With a record of
1 - 1 - 0, fighting out of New York, Jack Schittd!
The judges for this bout are John Kavanagh, Anthony Taglia and Alyssa Summers.

The bell rings for round one and we are underway!
Hirano is looking to clinch.
A slow jab from Schittd misses its intended target.
Hirano looks shocked there as he takes a right hand to the temple.
Schittd throws a series of strikes that have Hirano backpedaling.
The fans in attendance giving it up for the two fighters, who have really let it all hang out in the last minute or so!
Schittd swings wildly with a right hand that was never going to find it's target.
Schittd lunges at Hirano with a hook that half lands and is half blocked by Hirano's hand.
Hirano tries to clinch up.
Hirano tries to close the distance and clinch up but Schittd swats him away and circles back towards the center.
A jab from Schittd does it's job there.
Schittd drops Hirano with a big left hand! Hirano is injured, injured bad! Schittd jumps in and finished him with strikes! The fight is over!
Ladies and gentlemen, after 0:32 of round 1, we have a winner by way of TKO (Strikes). Jack Schittd!
A less than humble Jack Schittd misjudged his post fight interview somewhat and came across a little too arrogant whilst trying to hype up his own abilities.
|
|
|
|
|
|
|
|
|
|
|
|
|
|
|
|
|
|
|
|
|
|
|
| S |
C
A |
G |
S |
C
B |
G |
|
S |
C |
G |
|
energy
A | B |
|
hype
A | B |
|
pop
A | B |
|
mgr
A | B |
|
FIGHT
RATING
100% |
|
|
|
|
|
|
|
Undercard bout
|
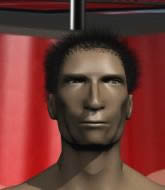
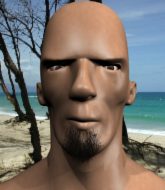
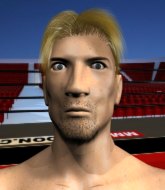
Coming up we have a middleweight MMA rules bout between Ryan Fletcher (ranked 0 p4p, 0 weight class) and Trevis Brayn (ranked 0 p4p, 0 weight class). The key to victory for Ryan Fletcher has got to be keeping the fight on the feet.
 |
|
 |
| 190 cm
25
195 lbs
1 - 1 - 0 |
|
183 cm
25
192 lbs
0 - 1 - 0 |
BJJ Blue Belt
Brawler
Likes comics |
|
Good takedowns
Brawler
Intelligent |
|
| |
|
Ladies and gentlemen. This fight is 3 rounds, in the middleweight division.
Introducing the fighter to my left, fighting out of the red corner.
With a record of
1 - 1 - 0, fighting out of New York, Ryan Fletcher!
And introducing the fighter to my right, fighting out of the blue corner.
With a record of
0 - 1 - 0, fighting out of New York, Trevis Brayn!
The judges for this bout are Eddie Farnsworth, David Schapiro and Joseph Jones.
The bell rings for round one and we are underway!
Fletcher throws a right and a left that both miss.
Fletcher throws a nice looking combination but Brayn bobs and weaves to avoid any damage.
Brayn fakes high and shoots in for a takedown but Fletcher avoids it really well and circles away.
Brayn closes the distance and clinches up with Fletcher, looking for a takedown. Brayn pushes Fletcher against the cage but Fletcher circles to the side and manages to break the clinch.

Brayn drives through with a takedown into guard.
The referee must be thinking about standing these guys back up.
Fletcher wants to stand up but Brayn is controlling him.
Brayn slows down the pace of the fight for a moment. He'll need to remain active if he doesn't want to see the fight stood back up.
Brayn slips effortlessly into side control - very nice.
Brayn wants to lay and pray for a moment but Fletcher keeps working.
Fletcher is trying to escape and get back to his feet.
The ref warns both fighters not to hold the cage as they work up against the meshing.

That's one minute gone in the round.

Brayn tries for an arm triangle. That looks pretty tight to me. Is this one over!?! Possibly, maybe, no Brayn has let go of the choke. Obviously it wasn't as tight as we thought!
Brayn works to advance to full mount. Fletcher defends for a few seconds but eventually he succumbs.
Brayn tucks in and makes sure he doesn't lose the dominant position.
Brayn tries to control but Fletcher wriggling away.
Fletcher is trying to get to the cage to help him get back to his feet.
Brayn tucks in and makes sure he doesn't lose the dominant position.
Fletcher really wants to buck Brayn off and get back to his feet.

That's two minutes gone in the round.
Brayn controlling the position easily from mount.
Brayn trying to control but Fletcher is having none of it.
The fighters are starting to get a bit slippery now, which will make submissions a bit more difficult.
Fletcher is trying to stand up.
Brayn is thinking about an arm triangle here, looking to tighten it up before moving to side control. Fletcher can see it coming though and defends well with a couple of strikes to the head and some good arm positioning.
We've seen a great period of action over the last minute or so - credit to both fighters for going all out!
Brayn content just to control the position here.

That's three minutes gone in the round.
Fletcher is squirming around, avoiding Brayn's attempts to control the action.
You get the feeling that Fletcher really doesn't like being in this position too much.
Brayn trying to control but he's not successful this time.
Fletcher is trying to get back to his feet but can't.
Brayn sitting in mount, just looking to control for the moment.
Brayn's corner are shouting for him to control the position and he seems happy to oblige.

That's four minutes gone in the round.
Brayn is working on an americana here. Ooh, that looks pretty nasty! Nope, Fletcher has managed to escape the submission attempt.
Fletcher is trying to get to the cage to help him get back to his feet.
Brayn looking for an armbar but decides to keep the dominant position instead.
Brayn tries to control but Fletcher wriggling away.
As the round comes to an end the crowd are showing their appreciation for a great round of action.
Brayn sitting in mount, just looking to control for the moment.
And thats the end of the round the fighters go back to their corners.
Trevis Brayn dominated that round.
The referee calls time. The cornermen exit stage left and we're back to business.

Brayn takes an uppercut right on the jaw but it doesn't phase him.
Brayn shoots in for a takedown - he's clinched up with Fletcher but Fletcher pushes him off and we're back to square one.
Brayn misses with a takedown
and Fletcher counters with a straight right hand.
Fletcher lands a brutal head kick. Brayn looks out on his feet and Fletcher throws more strikes until the ref is forced to stop the fight!
Ladies and gentlemen, after 0:28 of round 2, we have a winner by way of TKO (Kick and Punches). Ryan Fletcher!
|
|
|
|
|
|
|
|
|
|
|
|
|
|
|
|
|
|
|
|
|
|
|
| S |
C
A |
G |
S |
C
B |
G |
|
S |
C |
G |
|
energy
A | B |
|
hype
A | B |
|
pop
A | B |
|
mgr
A | B |
|
FIGHT
RATING
100% |
|
|
|
|
|
|
|
Undercard bout
|
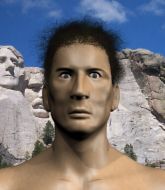
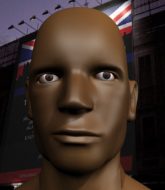
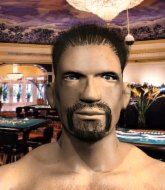
Coming up we have a super heavyweight MMA rules bout between Ilmari Rinne (ranked 0 p4p, 0 weight class) and Antonio Santos (ranked 0 p4p, 0 weight class). Antonio Santos has the eye of the tiger tonight.
 |
|
 |
| 190 cm
22
250 lbs
1 - 0 - 0 |
|
225 cm
26
300 lbs
3 - 4 - 0 |
BJJ White Belt
Solid boxing
Cuts easily |
|
BJJ Brown Belt
Basic striking
Knockout power |
|
| |
|
Ladies and gentlemen. This fight is 3 rounds, in the super heavyweight division.
Introducing the fighter to my left, fighting out of the red corner.
With a record of
1 - 0 - 0, fighting out of St Petersburg, Ilmari Rinne!
And introducing the fighter to my right, fighting out of the blue corner.
With a record of
3 - 4 - 0, fighting out of Rio de Janeiro, Antonio Santos!
The judges for this bout are Bruno Lombardi, Anthony Taglia and David Schapiro.
The bell rings for round one and we are underway!
Santos with poor footwork there. He got himself in a bit of a tangle, enabling Rinne to score with a decent uppercut.
Rinne rushes forward with a series of wild hooks but Santos moves out of range and avoids them all easily.
Santos rushes forward with a series of wild hooks but Rinne moves out of range and avoids them all easily.
Rinne misses with the combination.
Rinne tries to bum rush Santos with a series of wild strikes but Santos uses good footwork to avoid the assault.
Rinne scores with a punch to the head.
Santos has done a lot of speed work in the buildup to this fight.
Rinne circles away from the clinch attempt
and Rinne counters with a three punch combination, finished off with a leg kick. Nice work.
The fighters circling - Santos throws out the jab but it was never going to land.
Rinne's corner calls for a 1, 2 combination and Rinne duly obliges.
Santos looks winded!
This is a great period of action - very entertaining stuff!
Rinne avoids the clinch attempt nicely.
Rinne throws a series of punches but Santos moves out of range.
Rinne scores with a three punch combo!
Rinne throws a right and a left that both miss.
Rinne misses with a jab, cross combination.
Santos has his head slapped from side to side by a 3 punch combination. That must have hurt him.

Santos is rocked!
Rinne misses with a double jab.
Santos is still on wobbly legs! Can Rinne finish him?
Rinne lands an overhand left. A wild punch that just about connected.
Rinne rushes Santos with punches - Santos moves straight backwards instead of circling and gets clipped by the second strike... and the third... and the fourth! Oh, Santos goes down! Rinne follows up with more strikes and the ref steps in to end the bout!
Ladies and gentlemen, after 1:05 of round 1, we have a winner by way of TKO (Strikes). Ilmari Rinne!
|
|
|
|
|
|
|
|
|
|
|
|
|
|
|
|
|
|
|
|
|
|
|
| S |
C
A |
G |
S |
C
B |
G |
|
S |
C |
G |
|
energy
A | B |
|
hype
A | B |
|
pop
A | B |
|
mgr
A | B |
|
FIGHT
RATING
100% |
|
|
|
|
|
|
|
Undercard bout
|
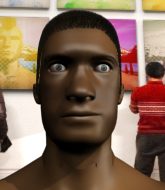
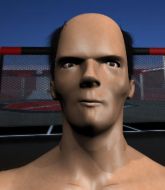
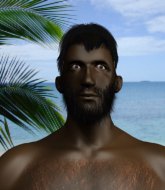
Coming up we have a super heavyweight MMA rules bout between Ville Alasin (ranked 0 p4p, 0 weight class) and Juanito Centurion (ranked 0 p4p, 0 weight class). Alasin comes to the cage accompanied by Be Aggressive - Faith No More. Juanito Centurion has the power to score a knockout today if he connects clean with Ville Alasin's chin.
 |
|
 |
| 185 cm
20
210 lbs
4 - 3 - 0 |
|
210 cm
25
210 lbs
2 - 0 - 0 |
Decent wrestler
Excellent boxer
Cardio machine |
|
BJJ Brown Belt
Brawler
Granite chin |
|
| |
|
Ladies and gentlemen. This fight is 3 rounds, in the super heavyweight division.
Introducing the fighter to my left, fighting out of the red corner.
With a record of
4 - 3 - 0, fighting out of New York, Ville Alasin!
And introducing the fighter to my right, fighting out of the blue corner.
With a record of
2 - 0 - 0, fighting out of Los Angeles, Juanito Centurion!
The judges for this bout are Columbo Gatti, Alyssa Summers and Bruno Lombardi.
The bell rings for round one and we are underway!
Centurion swings wildly with a couple of big hooks
and Alasin counters with a nice uppercut.

It looks like Juanito Centurion has been cut.
Centurion ducks right into an uppercut from Alasin.
Alasin stuns Centurion with a nice body shot, before stepping back out of range.
Fantastic stuff here - a very entertaining period of action, which has drawn cheers from the crowd.
Centurion tries to grapple but his opponent circles

and Alasin counters with a crisp right hand that drops Centurion! Alasin lets Centurion back up to his feet, looking for a finish!
BOOM! Alasin lands a beautiful left hook that drops Centurion. Centurion tries to recover but Alasin is having none of it, landing more punishing shots from mount. One final crushing shot and Centurion lies motionless on the canvas. The fight is over!
Ladies and gentlemen, after 0:29 of round 1, we have a winner by way of TKO (Strikes). Ville Alasin!
Ville Alasin decided to thank the fans in attendance for making a great atmosphere. It seemed to go down pretty well.
|
|
|
|
|
|
|
|
|
|
|
|
|
|
|
|
|
|
|
|
|
|
|
| S |
C
A |
G |
S |
C
B |
G |
|
S |
C |
G |
|
energy
A | B |
|
hype
A | B |
|
pop
A | B |
|
mgr
A | B |
|
FIGHT
RATING
100% |
|
|
|
|
|
|
|
Undercard bout
|
Coming up we have a middleweight MMA rules bout between Yoshi Kamura (ranked 0 p4p, 0 weight class) and Marcos Pontes (ranked 0 p4p, 0 weight class). Over to our ring announcer for the fighter introductions!
 |
|
 |
| 180 cm
23
177 lbs
3 - 2 - 0 |
|
180 cm
26
170 lbs
4 - 3 - 0 |
BJJ Brown Belt
Counter fighter
Self confident |
|
Good takedowns
Counter fighter
Determined |
|
| |
|
Ladies and gentlemen. This fight is 3 rounds, in the middleweight division.
Introducing the fighter to my left, fighting out of the red corner.
With a record of
3 - 2 - 0, fighting out of Las Vegas, Yoshi Kamura!
And introducing the fighter to my right, fighting out of the blue corner.
With a record of
4 - 3 - 0, fighting out of Las Vegas, Marcos Pontes!
The judges for this bout are Joseph Jones, Columbo Gatti and Franklyn Lucas.
The bell rings for round one and we are underway!

Kamura scores with a nice takedown into half guard. Let's see what he's got on the ground.
Kamura is looking to take a break and control but Pontes is keeping him honest, looking to work from the bottom.
Kamura with a momentary lay and pray from half guard.
Pontes actively working from the bottom here.
Pontes tries to roll over but Kamura keeps him under control.
Kamura moves into side control, avoiding a weak kimura attempt from Pontes.

Kamura tries for a kimura but Pontes is defending well.
Pontes manages to work his way to half guard, despite Kamura's best efforts.
Kamura is trying to work for a kimura. This could be trouble! No, Pontes has managed to free his arm - good work.
Pontes is defending against the submission attempts here by Kamura.
That's one minute gone in the round.
Pontes actively working from the bottom here.
Kamura trying to control the action but Pontes is working from the bottom.
Kamura is working for a kimura but Pontes is defending it quite comfortably.
Pontes moves his hips nicely and gets into full guard.
The fighters are going at a pretty good pace and they're both starting to sweat now.
Pontes is active off his back here, looking for submissions.
Pontes looks winded!
Kamura wants to control from the top but Pontes keeps moving.
That's two minutes gone in the round.
Kamura thinks about going for a leg but decides against it, in order to maintain the position.
Kamura avoids a guillotine attempt easily.
Kamura tries to free his leg and advance position but Pontes is retaining full guard.
Pontes is trying to control the position from the bottom.
Pontes looking for submissions from the bottom here. Moving his hips around, possibly looking for an armbar.
Pontes working from the bottom, still in full guard. He's managed to get a loose triangle. Kamura doesn't seem to be doing much to defend here, obviously he feels comfortable in the position. Kamura manages to throw the legs off his shoulder and he's back into guard - no problem.
That's three minutes gone in the round.
Pontes working the defensive guard well to avoid strikes from Kamura.
Kamura drops back looking for a leg! Pontes is in trouble here! The fighters roll with the hold and Pontes manages to kick Kamura off! Kamura jumps back into Pontes's guard.
The fighters are pressed up against the cage, both looking to find a bit of space to work.
Pontes looking for a guillotine here but Kamura defends easily.
Kamura landing some decent shots from guard.
Kamura passes Pontes's right leg, so he's now in half guard.
Kamura is looking to take a break and control but Pontes is keeping him honest, looking to work from the bottom.
Kamura is looking for a kimura here.
That's four minutes gone in the round.
Pontes moves his hips nicely and gets into full guard.
Kamura drops back looking for a leg! Pontes is in trouble here! The fighters roll with the hold and Pontes manages to kick Kamura off! Kamura jumps back into Pontes's guard.
Kamura trying to control but Pontes is working from the bottom.
Kamura throws a big right hand that misses.
As the round comes to an end the crowd are showing their appreciation for a great round of action.
Kamura wants to control from the top but Pontes keeps moving.
Kamura postures up.
Kamura looking to pass the guard.
And thats the end of the round the fighters go back to their corners.
Yoshi Kamura dominated that round.
The fighters get back to their feet, the hooter sounds and we're back to the action!
Kamura looking to shoot here. He's gone for it and he's landed a takedown into side control! Oh, that's bad for Pontes!
Kamura is trying to get an arm triangle but Pontes is defending well.
Kamura misses with an attempted head punch from side control.
Yoshi Kamura overall seems to be getting the better of the ground position in the fight so far.
Kamura in side control, throwing shots but Pontes defends.
Pontes is looking to regain half guard here but Kamura keeps moving and retains side control.
Kamura passes to full mount! That's big trouble for Pontes!
Pontes is working to get back to half guard.
Kamura has hold of Pontes's left arm, perhaps looking for a submission. The two fighters tussle over control of the isolated limb and Pontes manages to get his arm back to his side and away from danger.
Pontes is trying to escape the mount.
Pontes is breathing heavily.
That's one minute gone in the round.
Pontes is writhing around trying to get back to his feet.
Pontes is in all sorts of trouble here.
Kamura is working on an americana here. Ooh, that looks pretty nasty! Nope, Pontes has managed to escape the submission attempt.
The ref warns both fighters not to hold the cage as they work up against the meshing.
Kamura looking to finish Pontes with some ground and pound. This is bad for Pontes!
Kamura looking to secure an arm triangle but Pontes defends it well.
Kamura throwing strikes here but Pontes is writhing around nicely and avoiding any serious damage.
Kamura trying to control but Pontes is having none of it.
Kamura is really struggling to control Pontes but he's trying to hold on to the position.
That's two minutes gone in the round.
Pontes regains half guard.
Pontes wants to improve his position but Kamura is controlling well.
Kamura wants to pass to mount but Pontes is defending the position.
Kamura is keen to just control but Pontes is a slippery customer.
Fantastic stuff here - a very entertaining period of action, which has drawn cheers from the crowd.
Pontes looking for subs from the bottom but Kamura mounts him!
Pontes is trying to escape the mount.
Pontes keeps trying to improve his position.
That's three minutes gone in the round.
Kamura working to secure an arm triangle but it's not happening for him just yet.
Kamura wants to control the pace but Pontes is squirming around nicely.
Pontes is wriggling around trying to escape.
Kamura trying to control but Pontes is having none of it.
Pontes tries to get back to half guard but can't.
Kamura working for a guillotine from mount but Pontes is in no mood to give up.
Kamura working for a guillotine from mount but Pontes is in no mood to give up.
That's four minutes gone in the round.
Kamura trying to control but Pontes is having none of it.
Kamura moves into side control, trying to work for a kimura. That looks painful! Will he finish!!?? No, Pontes has worked his arm free - good work by Pontes!
Pontes struggling a bit here.
As the round comes to an end the crowd are showing their appreciation for a great round of action.
Kamura blocks the strikes from Pontes.
Kamura looking for an arm triangle but it's way too loose to do anything.
This is a great period of action - very entertaining stuff!
Pontes tries to buck Kamura off but Kamura is having none of it.
And thats the end of the round the fighters go back to their corners.
Yoshi Kamura dominated that second round.
That's the end of the interval. I'm sure that seemed a lot quicker than a minute for our two fighters! Back to the action. This is the final round!

Excellent takedown into side control there by Kamura.
Pontes is moving his hips around well on the bottom and has managed to get back to half guard.
Kamura works his foot free and advances to mount.
Kamura looks like he's working for a submission but he's not found anything just yet.
Kamura goes for an armbar but Pontes turns quickly into his guard - lovely anticipation from Pontes.
Pontes advances position into side control!
In the pre-fight buildup videos we saw Pontes working his ground and pound in the gym. He isn't landing a great percentage of his ground strikes so far though.
Pontes is putting a hurting on Kamura here, landing some big shots from side control.
Pontes takes a big intake of breath there - he's definitely tired.
That's one minute gone in the round.
Pontes is trying to get an arm triangle but Kamura is defending well.
Pontes tries for a kimura but Kamura is defending well.
Kamura tries to work a leg under to get back to half guard but Pontes wriggles his own leg back out and remains in side control.
Pontes working hard here to secure a kimura but he's not really in the right position for it.
Kamura tries to work a leg under to get back to half guard but Pontes wriggles his own leg back out and remains in side control.
That's two minutes gone in the round.
Pontes wants to control but Kamura is keeping him busy.
Pontes wants to control for a moment but Kamura uses the opportunity to move back to half guard.
Pontes wants to lay and pray for a moment but Kamura keeps working.
Kamura is looking for a sweep. Pontes is wise to his cunning plan and keeps the top position.
Kamura looking for submissions off his back.
Kamura looking to work for a kimura from the bottom.
That's three minutes gone in the round.
Pontes wants to take a breather but Kamura is having none of it.
Kamura looking for submissions off his back.
Kamura is trying to get back to full guard.
Pontes is looking for a kimura. It's pretty deep but Kamura still has the half guard so he's probably OK. Oh, Kamura has exploded into a beautiful escape there and after a quick scramble, he's ended up in side control on top! Nice work!
Pontes is sneaking out the side here. He's bucked Kamura off and has taken his back!
That's four minutes gone in the round.
Pontes has his hand under the chin of his opponent looking for the choke. He's nearly got it! This one could be all over! But no, Kamura has freed his hand and lives to survive another
well, another couple of seconds at least!
Kamura is in bad spot here.
Pontes trying desperately to keep hold of the dominant position.
Kamura breaks Pontes's hooks off and manages to turn into his guard.
Kamura drops back looking for a leg! Pontes is in trouble here! The fighters roll with the hold and Pontes manages to kick Kamura off! Kamura jumps back into Pontes's guard.
Pontes keeping moving, preventing Kamura from controlling successfully.
Marcos Pontes has stepped it up - he knows he needs a finish here!
Yoshi Kamura is fighting for a decision here - he's started to take the cautious approach.
The crowd applaud the fighters efforts here as the round comes to an end.
Pontes is looking for a triangle but Kamura pushes his legs off easily.
And that's the end of the fight!
I would just about give that final round to Marcos Pontes.
Well Kamura has outscored his opponent in every aspect of the fight today. Only a scarily incompetent judge or two will keep him from a well deserved win... Over to the ring announcer for the scorecards.
Ladies and gentlemen, after 3 rounds of action, we go to the scorecards for a decision.
Judge Joseph Jones scores the fight 29:28
Judge Columbo Gatti scores the fight 29:28
Judge Franklyn Lucas scores the fight 29:28
In favor of your winner, by unanimous decision... Yoshi Kamura!
|
|
|
|
|
|
|
|
|
|
|
|
|
|
|
|
|
|
|
|
|
|
|
| S |
C
A |
G |
S |
C
B |
G |
|
S |
C |
G |
|
energy
A | B |
|
hype
A | B |
|
pop
A | B |
|
mgr
A | B |
|
FIGHT
RATING
62% |
|
|
|
|
|
|
|
Undercard bout
|
Coming up we have a super heavyweight MMA rules bout between Bubba Slice (ranked 0 p4p, 0 weight class) and Albert White (ranked 0 p4p, 0 weight class). Slice comes into the arena with Happy blaring out of the sound system. White has chosen Guerilla Radio by Rage Against the Machine as his entrance music. Albert White looks lathargic as he enters the arena. Wake up son, you're about to have a fight!
 |
|
 |
| 199 cm
26
253 lbs
4 - 2 - 0 |
|
225 cm
19
300 lbs
3 - 1 - 0 |
Good wrestling
Counter fighter
Cardio machine |
|
BJJ White Belt
Excellent boxer
Heavy handed |
|
| |
|
Ladies and gentlemen. This fight is 3 rounds, in the super heavyweight division.
Introducing the fighter to my left, fighting out of the red corner.
With a record of
4 - 2 - 0, fighting out of Montreal, Bubba Slice!
And introducing the fighter to my right, fighting out of the blue corner.
With a record of
3 - 1 - 0, fighting out of Sydney, Albert White!
The judges for this bout are Eddie Farnsworth, Jonathan Paton and Bruno Lombardi.
The bell rings for round one and we are underway!
White connects with a body shot.
Slice takes a punch right to his stomach. That took the wind out of him momentarily.
Slice gets a double leg takedown into White's guard.
White looking for a sweep. Not yet White, not yet.
Slice is stalling in the full guard.
White avoiding any damage from the ground and pound.
Both fighters really going for it on the ground here!
Slice is frustrating his opponent with some stalling tactics from top position.
Slice postures up in White's guard and throws a big left but White blocks it.
The fighters are pressed up against the cage, both looking to find a bit of space to work.
White can't do much from the bottom at the moment, as Slice controls the pace.
We've seen a great period of action over the last minute or so - credit to both fighters for going all out!
Slice might be looking to lock onto one of his opponent's long limbs for a submission, whilst we're on the ground.

The ref stands the fighters back up because Bubba Slice just wasn't active enough.
White dips down and scores with a jab to the body.
White's jab looks to have found its range, popping Slice under the eye.
That's one minute gone in the round.
Slice closes the distance and gets a double leg, slamming White to the mat! White manages to get full guard.
White is working from a closed guard but he's struggling to control his opponent.
Slice with a nice head shot there.
Slice controls from within his opponent's guard.
Slice has been looking to land a fair amount of strikes on the ground. He might be looking to soften his opponent up in order to work for a submission.
White looking to control.
Slice scoring with some ground and pound.
Slice stays in close to White's body and controls the position.
Slice postures up and lands a big shot to White's brow.
White is trying to control the position but Slice postures up.
Slice stays in close to White's body and controls the position.
The crowd cheering loudly, showing their appreciation for the quality fight we're seeing here.
White working the defensive guard well to avoid strikes from Slice.
Slice controls the pace of the fight for a moment.
White trying to control the position.
That's two minutes gone in the round.

Albert White has forced the referee to step in and restart the fight on the feet.
White connects with a lovely jab that went straight through the gap between Slice's hands.
Slice doesn't react quick enough there as he takes a shot to the body.
White stuns Slice with a nice body shot, before stepping back out of range.
White lands with a nice body punch.

Slice moves into range and clinches up with White.
Slice wants a takedown.
White is trying to force a seperation but Slice has the dominant position.
White is working hard here but doesn't seem to be able to control effectively, up against the cage.
Slice goes for a takedown attempt but White pushes him away and we're back to fighting at a distance.
White connects with a body shot that sends Slice's belly button to the back.
That's three minutes gone in the round.
Slice takes a shot to the body in his stride.
White connects with a single shot there.
White has done a lot of speed work in the buildup to this fight.
Albert White seems to be the more aggressive standup fighter in this bout.
White lands a nice hook to Slice's body. Slice takes it in his stride and looks to land his own strikes.
White digs a good hook to Slice's body.
White jabs Slice right on the nose. Slice blinks but takes it well.
The fans in attendance giving it up for the two fighters, who have really let it all hang out in the last minute or so!
White dips down and scores with a jab to the body.
White is throwing a lot of body shots here, looking to wear down Slice rather than just go for the knockout.
A jab lands there for White.
White throws a shot to the body.
Slice definitely looks more muscular than last time we saw him fight.
White connects with a single shot there.

White cracks Slice with a big right hand that sends him to the floor! Slice looks wobbly but he's sprung back up to his feet straight away
can White finish him?

Slice is rocked!
That's four minutes gone in the round.
Slice leaves his chin hanging out and White seizes the opportunity with an uppercut! Slice crumbles to the floor in a heap! The referee steps in and tends to the downed fighter! What a knockout!
Ladies and gentlemen, after 4:07 of round 1, we have a winner by way of KO (Punch). Albert White!
Albert White seemed lost for words in his post fight interview but he remembered to thank his fans and directed everyone to his website.
|
|
|
|
|
|
|
|
|
|
|
|
|
|
|
|
|
|
|
|
|
|
|
| S |
C
A |
G |
S |
C
B |
G |
|
S |
C |
G |
|
energy
A | B |
|
hype
A | B |
|
pop
A | B |
|
mgr
A | B |
|
FIGHT
RATING
86% |
|
|
|
|
|
|
|
Undercard bout
|
Coming up we have a super heavyweight MMA rules bout between Hank Armstrong (ranked 0 p4p, 0 weight class) and Koji Kanegi (ranked 0 p4p, 0 weight class). Armstrong comes into the arena with Iron Man by Black Sabbath blaring out of the sound system. Koji Kanegi has the better chin. Will he look to stand and bang today?
 |
|
 |
| 185 cm
20
200 lbs
4 - 1 - 0 |
|
179 cm
19
215 lbs
2 - 1 - 0 |
BJJ White Belt
Excellent boxer
Cardio machine |
|
BJJ Blue Belt
Basic striking
Good gas tank |
|
| |
|
Ladies and gentlemen. This fight is 3 rounds, in the super heavyweight division.
Introducing the fighter to my left, fighting out of the red corner.
With a record of
4 - 1 - 0, fighting out of New York, Hank Armstrong!
And introducing the fighter to my right, fighting out of the blue corner.
With a record of
2 - 1 - 0, fighting out of Montreal, Koji Kanegi!
The judges for this bout are Joseph Jones, Columbo Gatti and Jonathan Paton.
The bell rings for round one and we are underway!
Armstrong keeping a good distance there, avoiding the body shot.
Armstrong is the aggressor but that punch slipped nicely by Kanegi.
Kanegi has been working on his striking defense in training and it's paying off as Armstrong is landing a low percentage of strikes.
Armstrong uses some good footwork to avoid the body shot by Kanegi.
Armstrong lands a lovely overhand right.
Armstrong connects with a slap. Keep your fist closed son.
Kanegi ducks under a wild hook from Armstrong.
Kanegi throws a hard body shot but it just misses.
Kanegi ducks under an overhand right and circles away with a smile on his face.
Armstrong misses with a straight right.
Kanegi throws a body kick but he was well out of range there.
Kanegi fails to land with the punch combination there - jab, cross, hook, miss, miss, miss.
Armstrong throws a jab but it's blocked by Kanegi.
Armstrong looks to have improved his striking defense since last time we saw him fight.
Kanegi misses with a straight right.
Kanegi throws a shot from downtown. Armstrong moves away and avoids it.
Kanegi just misses with a punch to the body.
Kanegi ducks down and throws a hook to the body but Armstrong moves away.
Armstrong misses with a hook to the body
letting Kanegi counter with a right hand.
Kanegi uses decent footwork to sidestep a right hand from Armstrong.
That's one minute gone in the round.
Kanegi shoots in for a takedown but Armstrong shows good takedown defense there and keeps this one on the feet.
Kanegi is throwing a lot of body shots here, looking to wear down Armstrong rather than just go for the knockout.
Armstrong dips down and scores with a jab to the body.
Kanegi throws a hook to the body but it doesn't connect.
Armstrong scores with a jab to the jaw of his opponent.
Kanegi misses with a body shot. Nice footwork from Armstrong.
Armstrong scores with a punch to the gut of his opponent.
Kanegi needs to keep his hands up - Armstrong had a free shot at his head there.
Kanegi walks into a jab.
The crowd are loving this. Great action here.
Armstrong slips a jab from Kanegi.
Armstrong misses with a looping left.
Kanegi ducks down and throws a hook to the body but Armstrong moves away.
Hank Armstrong is looking to keep the fight on the feet at all costs.
Armstrong misses with an uppercut.
Armstrong lands a right hook to the body.
Armstrong digs a good hook to Kanegi's body.
Kanegi misses with a hook.
That's two minutes gone in the round.
Kanegi throws a monster uppercut resembling something out of street fighter but it doesn't land.
Kanegi showing good head movement there, avoiding the strikes from Armstrong.
Armstrong avoids the body shot from Kanegi.
Kanegi blocks a jab.
Kanegi throws a jab to the body, straight down the pipe. Boom. That sent Armstrong stumbling backwards but he manages to regain his composure quickly.
Kanegi takes a jab on the nose there. A little bit of blood seems to be coming out. Hopefully that won't affect his breathing.
Kanegi slips a jab and a cross from Armstrong.
Hank Armstrong seems to be the more aggressive standup fighter in this bout.
Kanegi steps to the side to avoid the strikes from Armstrong.
Kanegi uses decent footwork to sidestep a right hand from Armstrong.
Kanegi takes an uppercut right on the jaw but it doesn't phase him.
Armstrong swings widly with a right hand
and Kanegi counters nicely by changing levels and landing a hook to the body.
Kanegi uses decent footwork to sidestep a right hand from Armstrong.
A cross from Armstrong lands.
Kanegi steps to the side to avoid the strikes from Armstrong.
Armstrong lands a nice hook to Kanegi's body. Kanegi takes it in his stride and looks to land his own strikes.
That's three minutes gone in the round.
Kanegi misses with an uppercut. Armstrong saw that one coming.
A jab from Armstrong misses.
Armstrong moves into range and throws a combination. A nice jab followed by a hook to the body.
Kanegi closes the distance and gets a double leg, slamming Armstrong to the mat! Armstrong manages to get full guard.
Kanegi is sitting in guard, working some ground and pound.
Kanegi lands a couple of decent looking shots.
Kanegi content to strike from guard, landing some decent shots.
This has been an exciting period of action!
Kanegi postures up and scores with a shot to the body and a follow up elbow to the head.
Kanegi stands up over Armstrong, holding his feet. He dives back in and lands a decent shot to the head.
Kanegi with a couple of shots to the head there. Not particularly brutal.
Kanegi content to strike from guard, landing some decent shots.
Both fighters really going for it on the ground here!
Kanegi working in close now, lands a nice elbow to the side of Armstrong's head.
Hammerfist, elbow! yells Kanegi's corner. There ya go! There ya go!
Kanegi working from the guard for now, landing some ground and pound.
Armstrong is rocked!
Kanegi stands and throws Armstrong's legs to the side, diving into side control.
Oh Armstrong is still in real trouble! Will he be able to recover?!!
Armstrong takes a couple of big shots there - the referee warns him that he has to defend himself better.
Kanegi crunches a massive hammerfist down on Armstrong - he's out! Kanegi Holds back on further strikes and jumps to his feet to celebrate with the crowd!
Ladies and gentlemen, after 4:58 of round 1, we have a winner by way of KO (Strikes). Koji Kanegi!
An out of breath and clearly excited Koji Kanegi thanked Kore Fight Nutrition [TG] for their help and support (and free stuff they sent him).
In defeat, Hank Armstrong stepped up to the mic, saying 'I hope I gave the fans a good performance even though I lost. It just wasn't my night but I'm still alive and if my opponent let's me have another go at him I promise to kill him in the rematch.'.
|
|
|
|
|
|
|
|
|
|
|
|
|
|
|
|
|
|
|
|
|
|
|
| S |
C
A |
G |
S |
C
B |
G |
|
S |
C |
G |
|
energy
A | B |
|
hype
A | B |
|
pop
A | B |
|
mgr
A | B |
|
FIGHT
RATING
81% |
|
|
|
|
|
|
|
Undercard bout
|
Coming up we have a middleweight MMA rules bout between Eddie MacArthur (ranked 0 p4p, 0 weight class) and Mohammed Talebi (ranked 0 p4p, 0 weight class). Mohammed Talebi is staring across the cage at his opponent, tweaking his nipples.
 |
|
 |
| 188 cm
19
197 lbs
3 - 0 - 0 |
|
183 cm
25
186 lbs
5 - 1 - 0 |
Good wrestling
Excellent boxer
Cardio machine |
|
Good wrestler
Counter fighter
Powerful |
|
| |
|
Ladies and gentlemen. This fight is 3 rounds, in the middleweight division.
Introducing the fighter to my left, fighting out of the red corner.
With a record of
3 - 0 - 0, fighting out of Amsterdam, Eddie MacArthur!
And introducing the fighter to my right, fighting out of the blue corner.
With a record of
5 - 1 - 0, fighting out of New York, Mohammed Talebi!
The judges for this bout are Dean Styles, Lou da Vinci and Reed Andrews.
The bell rings for round one and we are underway!
MacArthur thuds a left hand into Talebi's body.
MacArthur lunges in with swinging rights and lefts but Talebi circles away quickly and effectively.
We've been told by MacArthur's head coaches at Victory Gym and Spa that he's been working on his takedown defense in preparation for this fight.
MacArthur stuffs the takedown attempt from Talebi. Talebi gets slowly back to his feet.
MacArthur avoids the clinch attempt nicely.
MacArthur changes levels and scores with a jab to the body.
Talebi shoots in but no luck this time.
Talebi with poor footwork there. He got himself in a bit of a tangle, enabling MacArthur to score with a decent uppercut.
It looks like Mohammed Talebi has been cut.
MacArthur lands a big uppercut and Talebi crumbles to the floor! The ref thinks about stopping the fight but Talebi looks OK. MacArthur waves Talebi back to his feet!
Talebi is rocked!
This is a great period of action - very entertaining stuff!
Talebi misses with a takedown attempt
and MacArthur counters with a massive hook, right on the button! He's out cold! Damn, that was naaaaaasty! Hopefully he'll be OK.
Ladies and gentlemen, after 0:47 of round 1, we have a winner by way of KO (Punch). Eddie MacArthur!
Our winner, Eddie MacArthur, made sure he spent some time buttering up the crowd during his post fight interview, which will no doubt bring him a few more fans.
|
|
|
|
|
|
|
|
|
|
|
|
|
|
|
|
|
|
|
|
|
|
|
| S |
C
A |
G |
S |
C
B |
G |
|
S |
C |
G |
|
energy
A | B |
|
hype
A | B |
|
pop
A | B |
|
mgr
A | B |
|
FIGHT
RATING
89% |
|
|
|
|
|
|
|
Co-main event
|
Coming up we have a heavyweight MMA rules bout between Marcus Attilius (ranked 0 p4p, 0 weight class) and Athan Stamatis (ranked 0 p4p, 0 weight class). Stamatis is bobbing his head along to his entrance song: Lose Yourself. Marcus Attilius has the better chin. Will he look to stand and bang today?
 |
|
 |
| 200 cm
33
285 lbs
17 - 12 - 0 |
|
176 cm
35
184 lbs
27 - 21 - 0 |
BJJ Purple Belt
Excellent boxer
Cardio machine |
|
Good wrestler
Lethal high kicks
Good gas tank |
|
| |
|
Ladies and gentlemen. This fight is 3 rounds, in the heavyweight division.
Introducing the fighter to my left, fighting out of the red corner.
With a record of
17 - 12 - 0, fighting out of New York, Marcus Attilius!
And introducing the fighter to my right, fighting out of the blue corner.
With a record of
27 - 21 - 0, fighting out of New York, Athan Stamatis!
The judges for this bout are Columbo Gatti, Anthony Taglia and John Kavanagh.
The bell rings for round one and we are underway!
Attilius uses good head movement to avoid the hook from Stamatis.
Stamatis throws a hook to the body but it doesn't connect.
Stamatis throws a hook to the body but it doesn't connect.
Stamatis wants to slow Attilius down by chopping away at his legs.
Stamatis throws the left hand but Attilius avoids the punch easily.
Like a baseball bat into the meat of his leg there - nice leg kick by Stamatis.
The fighters circling - Stamatis throws out the jab but it was never going to land.
Stamatis shoots in and drives through. Attilius sprawls well.
Stamatis misses with a takedown attempt. He shot from a bit too far out.
Stamatis looks to land a left hand but Attilius moved out of range nicely.
That's one minute gone in the round.
Attilius ducks under a wild hook from Stamatis.
Attilius avoids a lazy jab quite easily.
Attilius leaves Stamatis with his face pressed against the mat as he sprawls beautifully, defending against a solid takedown attempt.
Marcus Attilius has stuffed three takedown attempts in the round now. That's going to take a lot out of Athan Stamatis.
Stamatis swings for the body but Attilius moves out of range.
Stamatis scores with a shot to the body.
Marcus Attilius is looking to keep the fight on the feet at all costs.
Attilius stuffs the takedown attempt from Stamatis. Stamatis gets slowly back to his feet.
Stamatis throws a hook to the body but it doesn't connect.
Stamatis wants to slow Attilius down by chopping away at his legs.
That's two minutes gone in the round.
Stamatis throws a predictable looking body shot
and Attilius counters with an inside leg kick.
Stamatis is looking to land body kicks.
Stamatis shoots in for a takedown but Attilius shows good takedown defense.
A looping hook to the body misses from Stamatis. Attilius does a little dance to reset his feet.
Stamatis misses with a series of wild punches.
Stamatis misses with a jab and misses with a cross straight after too.
Sloppy strikes from Stamatis. Those never looked like landing.
Stamatis is the aggressor but that punch slipped nicely by Attilius.
Stamatis throws a head kick but Attilius moves out of range.
That's three minutes gone in the round.
Stamatis throws a lazy right hand but Attilius sees it coming a mile off and sidesteps it easily.
Attilius tries to check the leg kick but that clearly hurt him.
Left hook, right uppercut from Stamatis.
Stamatis throws a nice looking combination but Attilius bobs and weaves to avoid any damage.
Attilius avoids the head kick by Stamatis.
Stamatis throws a lazy head kick
and Attilius counters with a good, hard body kick but Stamatis shrugs it off.
Stamatis gets the takedown into side control.
The referee is asking the fighters to pick up the pace.
Stamatis prevents Attilius from escaping the position.
Stamatis trying to control the position but Attilius is working away.
Attilius is trying to escape and get back to his feet.
That's four minutes gone in the round.
Stamatis tries for a kimura but Attilius is defending well.
Wooooo! Give it up for these two warriors! They are putting on a show!
Attilius is trying to get back to his feet.
Attilius is not content to let Stamatis control the position.
Attilius is looking to work his way out of this bad position but Stamatis is controlling him well.
Attilius trying desperately to get back to his feet here but he's not having any joy at all. He's going to tire himself out if he's not careful.
Stamatis wants to lay and pray for a moment but Attilius keeps working.
The crowd applaud the fighters efforts here as the round comes to an end.
Stamatis throws a strike aimed at the side of Attilius's head but Attilius avoids it well.
Attilius wants to get back to his feet.
Stamatis scoring with punches from side control.
And thats the end of the round the fighters go back to their corners.
Athan Stamatis dominated that round.
That's time! Attilius's corner gives him a slap on the ass as he gets ready to fight.
Stamatis throws a series of punches but Attilius moves out of range.
Stamatis throws a monster uppercut resembling something out of street fighter but it doesn't land.
Stamatis scores a trip takedown into side control. Nice.
Attilius wants to escape from the position here - easier said than done!
Stamatis working the ground and pound.
Stamatis working the body and head with strikes.
Attilius takes a nasty elbow to the side of the head.
The crowd are loving this. Great action here.
Stamatis throws an elbow but Attilius slips to the side and avoids it well.
Athan Stamatis has got the better of the ground game so far.
Attilius is working hard to escape and get back to his feet. After a battle for position, Stamatis asserts his dominance and retains side control.
That's one minute gone in the round.
Stamatis wants to lay and pray for a moment but Attilius keeps working.
Attilius is pushing Stamatis's head away, looking to escape. Stamatis manages to hold on to the position though.

Attilius explodes and escapes back to his feet! Nice escape there!
A slow jab from Stamatis misses its intended target.
Attilius checks a low kick from Stamatis.
An inside leg kick lands from Stamatis.
Stamatis throws a chopping leg kick but Attilius manages to avoid taking any serious damage.
Well, he's not going to score with shots like that. A lazy body kick attempt from Stamatis.
Stamatis lands a nice shot to the body.
That's two minutes gone in the round.
Stamatis lands a leg kick that knocks Attilius off balance momentarily.
Stamatis throws a feint and then finishes with a kick to the body.
Marcus Attilius is looking to throw some combinations by the looks of things.
Stamatis lands a leg kick and bounces back out of range.
The crowd are loving this. Great action here.
No joy there for Stamatis, who threw a few shots but didn't land.
Stamatis misses with a double jab.
Stamatis misses with a takedown attempt. He shot from a bit too far out.
Attilius gets taken down but at least he's managed to land in guard.
Stamatis postures up to throw the ground and pound strikes but they don't connect.
That's three minutes gone in the round.
Stamatis trying to control the position from guard on top but Attilius is wriggling around, looking for whatever he can.
Stamatis throws a big right hand that misses.
Attilius manages to wriggle out and sneak his way back up to his feet, so the fighters are now clinched up against the cage.
A frustrated look appears on Attilius's face as he tries to break the clinch.
Good anti-grappling being displayed by Attilius as Stamatis tries to tie him up.
Stamatis lands a hook to the side of the head.
Attilius wants to push off and get back to the center of the mat but Stamatis has him pressed against the cage.
Attilius working hard to break the clinch.
Attilius wants to break free. God knows he wants to breaaaak freeee.

Attilius breaks the clinch and we return to the middle of the mat.
Nice sprawl there from Attilius as Stamatis shoots in.
Stamatis tries to drive through with a takedown attempt but Attilius defends well and Stamatis ends up having to push Attilius into the cage where they will battle it out in the clinch.
Marcus Attilius has stuffed three takedown attempts in the round now. That's going to take a lot out of Athan Stamatis.
That's four minutes gone in the round.
Attilius has had enough of the clinch and is looking to separate.
Stamatis misses with a body punch.
Attilius wants to push off and get back to the center of the mat but Stamatis has him pressed against the cage.
Stamatis keeps control of Attilius as he tries to wriggle out of the double underhooks.
Attilius's corner calls for him to break the clinch, which he does.
Stamatis lands a front kick.
Stamatis throws a head kick that misses and slips in the process. He scrambles back to his feet and the fighters circle.
Oooooooooooh, not good. A low kick from Stamatis lands where it shouldn't have, right in the... well, you know what he did? He kicked him in the penis. He's injured, injured bad. The referee sends both fighters to their corners and Attilius has 5 minutes to recover. He's OK now though... a thumbs up from Attilius and we're back underway with a touch of gloves.
Stamatis gets a takedown into half guard.
We've seen a great period of action over the last minute or so - credit to both fighters for going all out!
The crowd are going absolutely nuts as the round comes to an end - what a fantastic round of action!
Attilius is looking to escape.
And thats the end of the round the fighters go back to their corners.
Athan Stamatis showed his class in that round. I'd imagine he'll take it on all the scorecards.
That's time! Attilius's corner gives him a slap on the ass as he gets ready to fight. And we move into the final round!
Stamatis shoots in for a takedown and gets it.
Stamatis is controlling the pace.
Attilius is trying to stand back up but Stamatis is controlling him
Stamatis controlling the pace.
Stamatis's corner are shouting for him to control the position and he seems happy to oblige.
The ref stands the fighters back up. Athan Stamatis was stalling too much, according to the referee.
A head kick misses from Stamatis.
That's one minute gone in the round.
A swing and a miss from Stamatis.
Stamatis fails with a takedown attempt from distance.
Stamatis closes the distance, clinches up and gets a nice trip takedown into side control. Very smooth.
Attilius is trying to buck Stamatis off.
Stamatis connects with a decent looking elbow from side control that caused Attilius some visible discomfort.
Attilius is working hard to escape and get back to his feet. After a battle for position, Stamatis asserts his dominance and retains side control.
Stamatis is putting a hurting on Attilius here, landing some big shots from side control.
Marcus Attilius has stepped it up - he knows he needs a finish here!
That's two minutes gone in the round.
Attilius takes a nasty elbow to the side of the head.
This has been an exciting period of action!
Stamatis lands some shots froms side control.
Stamatis prevents Attilius from escaping the position.
Stamatis trying to control the action but Attilius is working from the bottom.
Stamatis has the superior BJJ but he's also working some ground strikes into his gameplan.
Stamatis is pausing for a moment. What's he doing? It looks like he's clearing his nose. Oh dude! He's shot a load of snot all down Attilius's shoulder. That is not cool.
Stamatis works a knee to the body and follows up with a nice elbow to the head.
Attilius pushes Stamatis away and creates a bit of space to escape. He's almost out here... but no, Stamatis gets a good hold of his legs and remains firmly in side control.
Stamatis looks up at the clock and then as Attilius takes his cue and looks up at the clock too, Stamatis smacks him right in the chops with a big elbow! How rude!
Stamatis wants to stand but Attilius has his arm trapped.
Stamatis creates a bit of distance and throws down some hard shots.
Attilius takes a couple of big shots there - the referee warns him that he has to defend himself better.
Stamatis lands some shots froms side control.
The step up in weight doesn't seem to be a problem for Stamatis. He's performing admirably here against the bigger man.
That's three minutes gone in the round.
Attilius is trying to escape and get back to his feet.
Check out the look on Stamatis's face as he threw that strike - that's one determined fighter!
Stamatis landing strikes.
Stamatis scores with a couple of short elbows.
Stamatis is looking to finish here, going for an Americana. Attilius knows the correct defense though, so he's OK.
Stamatis cracks Attilius with an elbow. That is naaassty.
Athan Stamatis is fighting for a decision - hopefully he's judged it right and he's actually winning the fight.
Attilius is trying to buck Stamatis off.
Stamatis trying to control the position but Attilius is working away.
Attilius is looking to work his way out of this bad position but Stamatis is controlling him well.
That's four minutes gone in the round.
This is a great period of action - very entertaining stuff!
Stamatis slows the pace down.
We may be looking at a referee standup if the pace doesn't pick up soon.
Attilius is not content to let Stamatis control the position.
Attilius wants to get back to his feet.
A bit of a lull in the action. I'm sure it will pick up again soon... even if the ref has to physically pick them up and put them back on their feet.
The crowd are going absolutely nuts as the round comes to an end - what a fantastic round of action!
Athan Stamatis has forced the referee to step in and restart the fight on the feet.
No luck for Stamatis with that takedown attempt.
Stamatis lands a jab, followed by a cross and another cross, as Attilius backs up against the cage.
And that's the end of the fight!
Athan Stamatis comfortably won the final round on my scorecard.
I've got Stamatis winning every round here. Surely the decision will go his way and he'll pick up a well deserved decision victory. Over to the ring announcer for the scorecards.
Ladies and gentlemen, after 3 rounds of action, we go to the scorecards for a decision.
Judge Columbo Gatti scores the fight 27:30
Judge Anthony Taglia scores the fight 27:30
Judge John Kavanagh scores the fight 27:30
In favor of your winner, by unanimous decision... Athan Stamatis!
A victorious Athan Stamatis thanked his army of followers in his post fight interview, telling people to make sure they follow him on Twitter.
|
|
|
|
|
|
|
|
|
|
|
|
|
|
|
|
|
|
|
|
|
|
|
| S |
C
A |
G |
S |
C
B |
G |
|
S |
C |
G |
|
energy
A | B |
|
hype
A | B |
|
pop
A | B |
|
mgr
A | B |
|
FIGHT
RATING
66% |
|
|
|
|
|
|
|
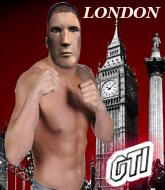
Main event
|
Coming up we have a heavyweight MMA rules bout between Mustaffa Spliff (ranked 0 p4p, 0 weight class) and Sean McMorrow (ranked 0 p4p, 0 weight class). I don't know about you partner, but I'm pumped for this one!
 |
|
 |
| 188 cm
34
185 lbs
36 - 21 - 0 |
|
183 cm
37
273 lbs
46 - 21 - 0 |
Great wrestler
World class boxer
Insanely flexible |
|
Olympic wrestler
World class MT
Heavy handed |
|
| |
|
Ladies and gentlemen. This fight is 3 rounds, in the heavyweight division.
Introducing the fighter to my left, fighting out of the red corner.
With a record of
36 - 21 - 0, fighting out of London, Mustaffa Spliff!
And introducing the fighter to my right, fighting out of the blue corner.
With a record of
46 - 21 - 0, fighting out of New York, Sean McMorrow!
The judges for this bout are Russell Pearce, Anthony Taglia and Alyssa Summers.
The bell rings for round one and we are underway!
McMorrow misses with a telegraphed body shot
and Spliff counters with a right hand to the body.
McMorrow misses with a kick to the body.
McMorrow misses with a body kick.
McMorrow misses with an uppercut. Spliff saw that one coming.
McMorrow throws a hook to the body but it doesn't connect.
A head kick misses from McMorrow.
Jab from McMorrow.
McMorrow takes one on the chin but seems OK.
Sloppy strikes from McMorrow. Those never looked like landing.
Spliff misses with a body shot.
Spliff shoots in but doesn't get the takedown
and McMorrow counters with a nice shoot takedown that brings the fighters to the ground.
The crowd cheering loudly, showing their appreciation for the quality fight we're seeing here.
Spliff is active off his back here, looking for submissions.
Spliff is throwing his legs up, looking for submissions. McMorrow is aware though and is defending well.
Spliff tries to land a sweep but no joy.
McMorrow must be cautious of submissions here, given that his opponent has the superior Jiu Jitsu.
Spliff looking for submissions from the bottom here. Moving his hips around, possibly looking for an armbar.
That's one minute gone in the round.
Spliff working the defensive guard well to avoid strikes from McMorrow.
Spliff keeping moving, preventing McMorrow from controlling successfully.
Spliff wants to sweep but no luck.
McMorrow postures up in Spliff's guard and throws a big left but Spliff blocks it.
Spliff is working an open guard here, looking to improve his position. No doubt that will leave him open to counters but at least he's being more offensive.
McMorrow throwing strikes but missing.
Spliff throwing his legs up looking for a triangle.
McMorrow throwing strikes from guard but Spliff blocks nicely.
McMorrow postures up in Spliff's guard and throws a big left but Spliff blocks it.
That's two minutes gone in the round.
McMorrow stopping the sweep attempt from Spliff.
Spliff is working the butterfly guard. He manages to land a nice scissor sweep and is now in half guard on the top. Nice move.
McMorrow wants to improve his position but Spliff is controlling well.
Spliff is keen to just control but McMorrow is a slippery customer.
McMorrow tries to roll over but Spliff keeps him under control.
McMorrow avoiding damage under a succession of punches from Spliff.
Fantastic stuff here - a very entertaining period of action, which has drawn cheers from the crowd.
McMorrow tries to get to full guard but Spliff has control of the leg.
McMorrow trying to control here.
Spliff trying to mount his opponent but McMorrow defends it.
That's three minutes gone in the round.
Spliff thows a huge punch but McMorrow dodges it nicely.
Spliff trying to mount his opponent but McMorrow defends it.
The fighters are pressed up against the cage, both looking to find a bit of space to work.
Spliff is working hard here to advance position.
Spliff is trying to control. McMorrow wants to improve his position but can't escape this time.
Spliff takes advantage of the dominant position to land a couple of big hammer fists.
Spliff working the head and body with strikes.
Spliff lands a big shot. The thud that echoes around the arena is like music to the fans' ears.
Spliff has been looking to land a fair amount of strikes on the ground. He might be looking to soften his opponent up in order to work for a submission.
Spliff thumps the canvas. Not on purpose obviously - he just missed McMorrow's head.
McMorrow is looking to regain full guard. Not this time though.
McMorrow moves his hips nicely and gets into full guard.
Fantastic stuff here - a very entertaining period of action, which has drawn cheers from the crowd.
Spliff looking to pass the guard.
That's four minutes gone in the round.
Spliff wants to control from the top but McMorrow keeps moving.
Spliff won't allow McMorrow to sweep him here.
Spliff postures up and lands a big shot to McMorrow's brow.
McMorrow looking to hit a scissor sweep but Spliff is one step ahead there.
The ref warns both fighters not to hold the cage as they work up against the meshing.
Spliff landing some decent shots from guard.
Spliff slips effortlessly into side control - very nice.
The crowd are going absolutely nuts as the round comes to an end - what a fantastic round of action!
Spliff wants to control but McMorrow is keeping him busy.
An elbow from Spliff crashes against the mat.
And thats the end of the round the fighters go back to their corners.
Mustaffa Spliff dominated that round.
That's time! Spliff's corner gives him a slap on the ass as he gets ready to fight.
Spliff scores with a big left there. The judges will like that one.
McMorrow throws a leg kick but Spliff checks it.
Spliff defending well as McMorrow loads up on a big left hand.
Spliff lands with a straight right. McMorrow didn't see that one coming.
Spliff lands a leg kick and bounces back out of range.
McMorrow looking to land some kicks to the body here.
McMorrow uses good footwork to get in and out and land a nice right hand before Spliff has time to react.
McMorrow takes an uppercut right on the button but keeps his composure.
It looks like Sean McMorrow has been cut.
McMorrow thows a body shot but no joy.
The crowd are loving this. Great action here.
Spliff wants to clinch.
McMorrow misses with a jab and misses with a cross straight after too.
Spliff lands with a shot to the body.
Spliff closes the distance and clinches up, looking for a takedown. He shifts his weight and gets a nice trip into half guard.
That's one minute gone in the round.
The referee walks around the fighters to get a better view of the action. Spliff lands a nice short elbow.
Spliff is sneakily working for an arm triangle but McMorrow sees it coming and defends easily.
Spliff tries to pass the half guard into mount. McMorrow knows what he's doing though and prevents the attempt.
McMorrow works his way to full guard. Good work.
Spliff throws a big elbow that misses.
Spliff stands up and looks to throw the legs aside to pass to side control. McMorrow swivels though and keeps the full guard.
A big thud reverberates around the arena there as Spliff accidentally thumps the mat. Hopefully he's not broken his hand.
McMorrow looking to sweep here. No luck so far.
McMorrow can't do much from the bottom at the moment, as Spliff controls the pace.
McMorrow preventing the ground and pound from doing any damage.
Spliff throwing strikes but missing.
That's two minutes gone in the round.
Spliff distracts McMorrow with his right hand and drops a big elbow with his other arm.
Spliff wants to control from the top but McMorrow keeps moving.
McMorrow is trying to control the position but Spliff postures up.
This is a great period of action - very entertaining stuff!
McMorrow is in a good position here but he's just trying to control... And he's not even managing to do that successfully.
Spliff in full guard, throwing the ground and pound. No damage this time.
Spliff throwing strikes from guard but McMorrow blocks nicely.
Spliff is looking to work some ground and pound but McMorrow has wrist control.
Spliff scoring with some ground and pound.
Spliff trying to control but McMorrow is working from the bottom.
That's three minutes gone in the round.
McMorrow working the defensive guard well to avoid strikes from Spliff.
Spliff passes easily into side control. Nice work.
McMorrow is trying to improve his position.
McMorrow is still trying to improve position.
Spliff is looking to take a break and control but McMorrow is keeping him honest, looking to work from the bottom.
McMorrow tries to get back to half guard but can't.
McMorrow taking a bit of punishment here - Spliff scoring with strikes.
Spliff wants to lay and pray for a moment but McMorrow keeps working.
You can see the frustration on McMorrow's face, being in this tough position on the bottom.
That's four minutes gone in the round.
McMorrow is positioning himself to get back to half guard.
McMorrow struggling a bit here.
Spliff lands a nice forearm strike.
This is a great period of action - very entertaining stuff!
Sloppy strikes there by Spliff.
It really doesn't seem like the step up in weight is hurting Spliff here at all. He's more than holding his own against the bigger man.
Spliff grinds an elbow into McMorrow's temple.
Spliff misses with a strike but at least he's keeping busy, looking to cause some damage - that will still help him when it comes to the judges scorecards.
The crowd are going absolutely nuts as the round comes to an end - what a fantastic round of action!
Spliff working the head with strikes.
The cut above Sean McMorrow's eye is starting to cause him problems now.
Spliff landing strikes.
McMorrow is rocked!
Spliff wants to lay and pray for a moment but McMorrow keeps working.
McMorrow is still in real trouble! Can Spliff finish him?
And thats the end of the round the fighters go back to their corners.
Mustaffa Spliff dominated that second round.
The cut man is working on Sean McMorrow's cut.
The corners get their ten second warning. Both fighters stand from their stools and stare eachother down, ready to get back to the action. Let's hear some noise people - this is the final round!
Spliff looks to land a body kick but McMorrow moved away.
McMorrow seems to have recovered his senses.
McMorrow takes one on the chin but keeps coming.
McMorrow dances in quickly and lands a nice inside leg kick on Spliff. That did some damage!
Spliff looks frustrated there after his takedown attempt is stuffed easily.
Spliff misses with a straight left.
Spliff is really dominating this fight. Is there anything that McMorrow can do to turn this around?
Spliff misses with a head kick.
McMorrow throws an uppercut from half a mile away. Spliff sees it coming and avoids it easily.
Spliff chopping away at his opponent's legs.
McMorrow shoots in looking for a single leg takedown. Spliff is trying to defend but McMorrow finishes it well and ends up in half guard. Let's see if he can advance position further.
Spliff is looking to sinch up a guillotine here but McMorrow pulls his head out easily.
Spliff manages to get to full guard.
That's one minute gone in the round.
Spliff looking to hit a scissor sweep but McMorrow is one step ahead there.
McMorrow is looking to work some ground and pound but Spliff has wrist control.
McMorrow scores with a decent looking elbow strike.
McMorrow's corner is telling him to maintain position.
Spliff working from the bottom, still in full guard. He's managed to get a loose triangle. McMorrow doesn't seem to be doing much to defend here, obviously he feels comfortable in the position. McMorrow manages to throw the legs off his shoulder and he's back into guard - no problem.
Spliff is actively looking for submissions from his back. He's worked himself a little space on the bottom and seems to be going for a triangle. No, he's switched into an armbar! That was slick! McMorrow rolls with it to try and escape but Spliff cranks on the arm and McMorrow is forced to tap out! This one is aaaaaaaaall over!
Ladies and gentlemen, after 2:55 of round 3, we have a winner by way of Submission (Armbar). Mustaffa Spliff!
Mustaffa Spliff made sure to mention his sponsor, GTI - 1337 sponsors VERSUS in his post fight interview.
|
|
|
|
|
|
|
|
|
|
|
|
|
|
|
|
|
|
|
|
|
|
|
| S |
C
A |
G |
S |
C
B |
G |
|
S |
C |
G |
|
energy
A | B |
|
hype
A | B |
|
pop
A | B |
|
mgr
A | B |
|
FIGHT
RATING
100% |
|
|
|
|
|
|
|
|
|
|
