 |
T$T- Wooo! PBP Commentary |
Undercard bout
|
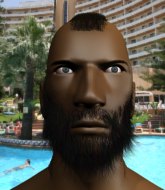
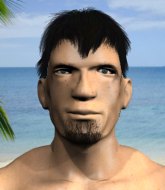
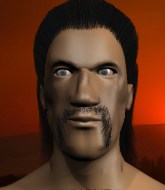
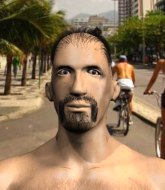
Coming up we have a lightweight MMA rules bout between Kiro Shiage (ranked 0 p4p, 0 weight class) and Shrab Kabovik (ranked 0 p4p, 0 weight class). Shiage comes into the arena with Caffine blaring out of the sound system. These two fighters really are very evenly matched on the feet - it will be fascinating to see who can assert themselves in that aspect of the fight.
 |
|
 |
| 180 cm
19
166 lbs
1 - 0 - 0 |
|
179 cm
26
160 lbs
1 - 6 - 0 |
BJJ Blue Belt
Brawler
Big heart |
|
Decent wrestler
Brawler
Granite chin |
|
| |
|
Ladies and gentlemen. This fight is 3 rounds, in the lightweight division.
Introducing the fighter to my left, fighting out of the red corner.
With a record of
1 - 0 - 0, fighting out of Tokyo, Kiro Shiage!
And introducing the fighter to my right, fighting out of the blue corner.
With a record of
1 - 6 - 0, fighting out of Tokyo, Shrab Kabovik!
The judges for this bout are Tatsuya Matsuyama, Shigeki Sano and Sosuke Kotani.

The bell rings for round one and we are underway!
Kabovik dives in for a single leg takedown but Shiage sprawls and the fighters end up clinched against the ropes.

Kabovik is trying to trip Shiage. He has hold of a leg but Shiage is hopping around, keeping his balance for the moment. Kabovik persists though and gets the takedown into guard.
Kabovik must be cautious of submissions here, given that his opponent has the superior Jiu Jitsu.
The referee claps his hands together and tells the fighters to work.
Kabovik stands up over Shiage, holding his feet. He dives back in and lands a decent shot to the head.
Kabovik is looking to work some ground and pound but Shiage has wrist control.
Shiage wants to get back to his feet but Kabovik is in a dominant position and won't allow it.
Kabovik connects with a couple of short punches.
Kabovik throwing elbows and punches but not connecting, as Shiage works some decent striking defense from the bottom.
Kabovik in full guard, throwing the ground and pound. No damage this time.
Kabovik connects with a couple of short punches.
Kabovik stands up and looks to throw the legs aside to pass to side control. Shiage swivels though and keeps the full guard.
We've seen a great period of action over the last minute or so - credit to both fighters for going all out!
Kabovik trying to control the position from guard on top but Shiage is wriggling around, looking for whatever he can.

That's one minute gone in the round.
Kabovik won't allow Shiage to get back to his feet.
Kabovik sitting in guard here, content to control.
Kabovik prevents Shiage from getting back to his feet.
Kabovik with a nice head shot there.

That's two minutes gone in the round.
Kabovik distracts Shiage with his right hand and drops a big elbow with his other arm.
Shiage wants to get back to his feet but Kabovik is in a dominant position and won't allow it.
Shiage is working an open guard here, looking to improve his position. No doubt that will leave him open to counters but at least he's being more offensive.
Shiage is looking to sweep but instead, Kabovik has passed into half guard.
Shiage wants to get back to his feet.
Kabovik not throwing his punches with enough precision this time.

That's three minutes gone in the round.
Kabovik slows the pace down in half guard.
Shiage won't allow Kabovik to pass to mount.
Kabovik passes the guard and advances to mount!
Kabovik lands a couple of nice shots there from mount.
Kabovik scores with a couple of good head shots there.
Kabovik looking to ground and pound his opponent to a finish here.

That's four minutes gone in the round.
Kabovik takes a little breather and maintains the position. The referee will be looking for him to stay active from such a dominant position though.
Kabovik working Shiage over with strikes here.
Kabovik landing strikes from the mount.
This has been an exciting period of action!
Kabovik putting on the heat here with some good ground and pound!
Kabovik punishing his opponent with strikes.
Shiage is bucking up trying to escape but Kabovik cracks him with another couple of good strikes.
The fighters are tangled up in the ropes here. We might need a restart if the fighters can't break free themselves.
As the round comes to an end the crowd are showing their appreciation for a great round of action.
Kabovik in mount throwing good strikes here, bouncing his opponent's head off the canvas.
The fighters are trapped in the ropes so we're going to have a reposition here. The ref calls for a break and repositions the fighters in the center of the ring.
Kabovik takes a little breather and maintains the position. The referee will be looking for him to stay active from such a dominant position though.
Kabovik is still in mount, landing shots to his trapped opponent. Shiage can't stay in a position like this for much longer.
And thats the end of the round the fighters go back to their corners.
Shrab Kabovik dominated that round.
That's time! Back to the action!

Kabovik changes levels and drives through with a really nice takedown into side control. Shiage looks really pissed at himself for not defending that better.
Kabovik is chipping away with strikes.
Kabovik just content to control the position.
Shiage looks to be in better condition than last time we saw him fight. Obviously he's been working hard on his cardio.
Kabovik wants to lay and pray for a moment but Shiage keeps working.
Shiage takes an elbow right on the bridge of the nose and winces in pain.
Kabovik working the head and body with strikes.
Kabovik misses with an attempted head punch from side control.
That's one minute gone in the round.
Kabovik trying to control the position but Shiage is working away.
Kabovik tries to score with some ground and pound. Shiage controls his posture well this time though and the shots don't do any damage.
Kabovik is looking to take a break and control but Shiage is keeping him honest, looking to work from the bottom.
Kabovik has knee on belly and moves into mount.
Kabovik lands an elbow that was bordering on illegal but the referee lets it go with a warning.
That's two minutes gone in the round.
Kabovik lands a shot to the body, followed up by a shot to the exposed head of his trapped opponent.
Kabovik scoring with some good ground and pound from mount here. Will he manage to finish Shiage?
Kabovik lands with some strikes.
Kabovik really doesn't want to stay on the ground with Shiage. If he can't get it back to his feet, it's only a matter of time before he'll be tapping out.
This is a great period of action - very entertaining stuff!
Kabovik working away from the top, dropping strikes.
Kabovik dominating with strikes here.
Kabovik with shots to the head and body - Shiage looks very uncomfortable down there.
Shiage is squirming around, avoiding Kabovik's attempts to control the action.
Kabovik working Shiage over with strikes here.
Shiage tries to lock up and control but Kabovik gives him a forearm to the face and pushes him away.
That's three minutes gone in the round.
Kabovik lands a couple of nice shots there from mount.
Shiage tries to get back to half guard but can't.
Shiage is in a horrible position here. Kabovik smacks him with another shot as he tries to escape the position.
Kabovik can't quite control the action as he would like just now, as Shiage is looking to escape.
Shiage taking shots to the head.
Kabovik raining down hammerfists from mount.
Kabovik landing strikes from the mount and Shiage is in trouble!
That's four minutes gone in the round.
The crowd cheering loudly, showing their appreciation for the quality fight we're seeing here.
Kabovik cracks Shiage with a nasty head shot there - the crowd let out an audible gasp there, as the noise reverberated around the arena.
Kabovik lands a couple of good shots and Shiage has given up his back, trying to escape the position!

Shiage is rocked!
Both fighters are absolutely exhausted here.
Shiage prevents Kabovik from getting a body triangle.
Kabovik lands a punch that was close to the back of the head but the ref thinks it's OK.
Oh Shiage is still in real trouble! Will he be able to recover?!!
Kabovik tries to get the hooks in deep but Shiage pushed the leg off.
Shiage seems to have got his legs back now.
Kabovik loading up with punches from the back mount - how long can Shiage hold on?
The crowd are going absolutely nuts as the round comes to an end - what a fantastic round of action!
Shiage is trapped and Kabovik is scoring with shots to the head and body.
Kabovik lands punches and elbows.
And thats the end of the round the fighters go back to their corners.
Shrab Kabovik showed his class in that round. I'd imagine he'll take it on all the scorecards.
The referee calls time. The cornermen exit stage left and we're back to business. This is the final round!

Kabovik shoots in for a takedown from distance. He catches Shiage napping and manages to drive through into side control!
Shiage bucks up and tries to throw Kabovik off but instead Kabovik has got his back!
Shiage staying busy and making it hard for Kabovik to control.
Kabovik has his opponent trapped and is landing shots. Not a good position for Shiage.
Kabovik has Shiage flattened out and is raining down punches.
Kabovik lands punches and elbows.
Kabovik throwing strikes from the back - he gets a warning from the referee for striking the back of the head but all these shots are hurting Shiage!
The fans in attendance giving it up for the two fighters, who have really let it all hang out in the last minute or so!
Shiage is trying to get back to his feet but he's not managed it yet.
Both fighters are breathing heavily.
Kabovik is looking to finish with some ground and pound!
That's one minute gone in the round.
Kabovik scores with punches to the body.
Kabovik lands with a big left hand that may well have hurt his opponent. Can Shiage hold on?!
The crowd hopeful of a finish here - Kabovik's supporters are on their feet, screaming for him to go for the rear naked choke.
Kabovik is looking to finish with some ground and pound!
We've been informed that Kabovik has been working hard on his conditioning in the buildup to the fight.
Kabovik trying desperately to keep hold of the dominant position.
Shiage is taking damage to the body and head.
Kabovik is landing with strikes from the back.
Shiage prevents Kabovik from getting a body triangle.
That's two minutes gone in the round.
Good control from Kabovik.
This has been an exciting period of action!
Kabovik is throwing punches to the body, looking to soften Shiage up.
Kabovik lands with a big left hand that may well have hurt his opponent. Can Shiage hold on?!
Kabovik has his opponent trapped and is landing shots. Not a good position for Shiage.
Kabovik scores with punches from the back.
That's three minutes gone in the round.
Kabovik tries to keep control of the position but Shiage is staying busy.
Shiage trying to get back to his feet but Kabovik is in full control for now.
Shiage covers up after that shot from Kabovik.
Kabovik gets his hooks in and is throwing strikes.
The crowd hopeful of a finish here - Kabovik's supporters are on their feet, screaming for him to go for the rear naked choke.
Kabovik throwing strikes from the back - he gets a warning from the referee for striking the back of the head but all these shots are hurting Shiage!
That's four minutes gone in the round.
Kabovik lands with a hammerfist to the side of Shiage's head.
Kabovik really has the hooks in deep now - there seems like no escape for Shiage.
Kabovik scores with a nice shot to the head of his opponent. Shiage is looking for a way out.
The crowd are loving this. Great action here.
Shiage is really stuck here.
Kiro Shiage has stepped it up - he knows he needs a finish here!
Shrab Kabovik is fighting for a decision here - he's started to take the cautious approach.
As the round comes to an end the crowd are showing their appreciation for a great round of action.
Kabovik controls the position.
And that's the end of the fight!
Shrab Kabovik comfortably won the final round on my scorecard.
Well Kabovik has outworked and out performed his opponent in all aspects of the game today. He was simply too good and the decision should be no more than a formality. Over to the ring announcer for the scorecards.
Ladies and gentlemen, after 3 rounds of action, we go to the scorecards for a decision.
Judge Tatsuya Matsuyama scores the fight for Shrab Kabovik!
Judge Shigeki Sano scores the fight for Shrab Kabovik!
Judge Sosuke Kotani scores the fight for Shrab Kabovik!
Shrab Kabovik wins by unanimous decision!
Kiro Shiage was interviewed post fight and said 'Like a storm I just have to get back out there and destroy more of my opponents.'.
|
|
|
|
|
|
|
|
|
|
|
|
|
|
|
|
|
|
|
|
|
|
|
| S |
C
A |
G |
S |
C
B |
G |
|
S |
C |
G |
|
energy
A | B |
|
hype
A | B |
|
pop
A | B |
|
mgr
A | B |
|
FIGHT
RATING
99% |
|
|
|
|
|
|
|
Undercard bout
|
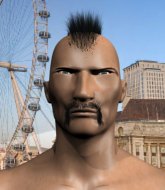
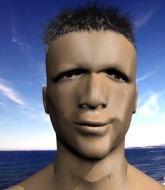
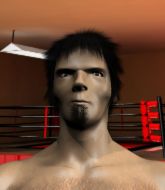
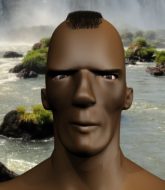
Coming up we have a lightweight MMA rules bout between John Johnson (ranked 0 p4p, 0 weight class) and Asiong Salonga (ranked 0 p4p, 0 weight class). Asiong Salonga has the better chin. Will he look to stand and bang today?
 |
|
 |
| 173 cm
24
165 lbs
0 - 2 - 0 |
|
179 cm
20
164 lbs
0 - 5 - 0 |
BJJ White Belt
Excellent MT
KO power |
|
BJJ Blue Belt
Decent boxing
Heavy handed |
|
| |
|
Ladies and gentlemen. This fight is 3 rounds, in the lightweight division.
Introducing the fighter to my left, fighting out of the red corner.
With a record of
0 - 2 - 0, fighting out of Tokyo, John Johnson!
And introducing the fighter to my right, fighting out of the blue corner.
With a record of
0 - 5 - 0, fighting out of Tokyo, Asiong Salonga!
The judges for this bout are Yasuomi Hirokawa, Hirohito Nitta and Yuuki Gou.
The bell rings for round one and we are underway!
Salonga closes the distance and looks for a trip takedown... aaaand he's got it - Salonga lands in his opponent's guard.
We've had a lack of effective grappling in the last minute or so, which could well see a referee standup.

Johnson looking for submissions from the bottom but instead Salonga passes into side control.

Salonga stands up and beckons Johnson to his feet.
Salonga blocks a head kick by Johnson.

Johnson gets in close and instigates a clinch.
Salonga stops a takedown attempt from Johnson.
Salonga wants to break free but Johnson has control.
Johnson jumps guard but his hands slip and he falls flat on his back. Well, he's made himself look a right mug there, as Salonga walks away with a smile on his face. Johnson gets slowly back to his feet and shakes his head.
Salonga scores with a nice takedown into half guard. Let's see what he's got on the ground.
Johnson knows he needs to get back to his feet asap. He's simply no match for Salonga on the ground.
The fans in attendance giving it up for the two fighters, who have really let it all hang out in the last minute or so!
Salonga performing his best blanket impression for a moment.
That's one minute gone in the round.
The fighters are tangled up in the ropes here. We might need a restart if the fighters can't break free themselves.
Salonga stands, ready to strike. The ref makes him back up and allows Johnson to get to his feet.
Johnson wants to clinch up but Salonga keeps it at a distance.
Johnson moves out of range of the body kick from Salonga.
Salonga throws a head kick but Johnson moves out of range.

Salonga closes the distance and pushes Johnson back into the ropes.
Salonga tries to land knees in the clinch but Johnson avoids the damage to the body.
Johnson jumps guard but Salonga turns him against the ropes and keeps the fight standing.
That's three failed takedown attempts in the round for John Johnson. That's going to take a lot out of him.
That's two minutes gone in the round.
Salonga tries for a takedown. No joy.
Salonga has Johnson pressed up against the ropes. He's trying to work for a single leg takedown. Salonga pulls back from the ropes and twists to the side, sending Johnson tumbling to the mat - Salonga dives into Johnson's guard.
Salonga decides he's had enough of playing guard and decides to stand. Come on Johnson, up you get!
Johnson shoots for a takedown but Salonga saw that one coming a mile off and avoided it easily.
Salonga has been working on his striking defense in training and it's paying off as Johnson is landing a low percentage of strikes.
Wooooo! Give it up for these two warriors! They are putting on a show!
Salonga moves into the clinch.
Johnson looking to stall.
Salonga lands a hook to the body. It's hard to tell if that hurt Johnson or not.
A bit of stalling here from Salonga.
Johnson has Salonga pressed against the ropes, preventing Salonga from circling away and getting back to striking at range.
That's three minutes gone in the round.
Salonga has had enough of the clinch but Johnson keeps him there for the moment.
Salonga wants the takedown. Johnson is fighting it off but Salonga persists and manages to bring the fight to the ground, ending up in Johnson's guard against the ropes.
Johnson can't do much from the bottom at the moment, as Salonga controls the pace.
Salonga decides he's had enough of playing guard and decides to stand. Come on Johnson, up you get!
Johnson is breathing heavily.
Salonga clinches.
Salonga pulls guard effortlessly.

Salonga throwing his legs up looking for a triangle.
Johnson is fighting to break Salonga's control of his arms but Salonga is doing a good job of controlling the position at the moment.
That's four minutes gone in the round.
Salonga is working the butterfly guard. He manages to land a nice scissor sweep and is now in half guard on the top. Nice move.
The fans in attendance giving it up for the two fighters, who have really let it all hang out in the last minute or so!
Salonga is controlling the pace.
As the round comes to an end the crowd are showing their appreciation for a great round of action.
Let's hope that Salonga has the urge to step up the pace any second now because for the last 15 or 20 seconds he's just been holding on tight.
And thats the end of the round the fighters go back to their corners.
Asiong Salonga dominated that round.
Well, the break between rounds is over. Let's get back to the scrappin!
Johnson wants to clinch up but Salonga keeps it at a distance.
Johnson scores with a shot to the body.
Johnson misses with a takedown attempt
and Salonga counters by moving into the clinch. Good anticipation by Salonga.
Salonga stops a takedown attempt from Johnson.
Johnson avoids a wild elbow strike from Salonga.

Salonga breaks the clinch and we're back to striking at distance.
Salonga tries to score a power double leg takedown but Johnson sees that one coming and sprawls well. That will dishearten Salonga somewhat.
Johnson fails with the takedown
and Johnson takes a counter punch right on the button for his troubles.
That's three failed takedown attempts in the round for John Johnson. That's going to take a lot out of him.
Salonga closes the distance and scores a nice trip takedown into half guard. Johnson did well to prevent Salonga getting side control.
Both fighters are absolutely exhausted here.
Salonga stands up from half guard... He's had enough of that ground malarky for the time being.
This is a great period of action - very entertaining stuff!
Salonga looking to shoot here. He's gone for it and he's landed a takedown into side control! Oh, that's bad for Johnson!
That's one minute gone in the round.
Salonga thinks about going for a far side armbar but bails out and retains the dominant position instead.
Salonga controls the position.
Salonga decides to stand back up. Salonga steps back and let's Johnson get back to his feet.
That's two minutes gone in the round.
Johnson gets his takedown attempt stuffed easily
and Salonga counters by moving into the clinch.
Salonga tries to break the clinch but Johnson is controlling the position.
Salonga is trying to trip Johnson. He has hold of a leg but Johnson is hopping around, keeping his balance for the moment. Salonga persists though and gets the takedown into guard.
Salonga content to stall in guard here.
This has been an exciting period of action!
Salonga works over Johnson with some ground and pound from guard.
That's three minutes gone in the round.
Salonga stands and steps away. Johnson gets to his feet too and we're back to the striking game.
Johnson avoids a low kick by using good footwork.
Salonga scores with a shot to the body.
Salonga scores a trip takedown into side control. Nice.
Salonga looking for an arm triangle but it's way too loose to do anything.
Salonga looking for an arm triangle but it's way too loose to do anything.
Salonga has control of an arm but Johnson manages to advance to Salonga's back!
The fighters are trapped in the ropes so we're going to have a reposition here. The ref calls for a break and repositions the fighters in the center of the ring.
That's four minutes gone in the round.
Salonga looks to control his opponent's hands but he's not mananging it at the moment.
We've seen a great period of action over the last minute or so - credit to both fighters for going all out!
Salonga really must keep his cool here. He's controlling one of Johnson's hands and whilst he does that, he's got a chance of escaping the position.
As the round comes to an end the crowd are showing their appreciation for a great round of action.
Salonga breaks Johnson's hooks off and manages to turn into his guard.
And thats the end of the round the fighters go back to their corners.
Asiong Salonga showed his class in that round. I'd imagine he'll take it on all the scorecards.
The fighters get back to their feet, the hooter sounds and we're back to the action! This is the final round!
Salonga clinches with his opponent.
Salonga jumps guard and drags Johnson to the mat. He's obviously going to be looking for submissions off his back.
Salonga controlling Johnson's posture.
Johnson preventing the sweep.
Salonga has Johnson pulled in close to control his posture.

Asiong Salonga has forced the referee to step in and restart the fight on the feet.
Johnson avoids a punch combination nicely.
Johnson with a poor takedown
and Salonga counters with a single leg into guard. Johnson didn't expect that.
That's one minute gone in the round.
Salonga working some ground and pound from guard but it's not doing any damage.
Both fighters are breathing heavily.
Salonga cracks Johnson with a solid left hand.
Salonga scoring with punches to the head and body.
Salonga stands and throws Johnson's legs to the side, diving into side control.
Salonga decides to stand back up. Salonga steps back and let's Johnson get back to his feet.
Salonga closes the distance and gets a trip takedown into side control. Johnson quickly recovers to half guard.
Salonga is figuring out what he wants to do next.
Johnson is looking to regain full guard. Not this time though.
Salonga is trying a forearm choke
I don't think that's going to do much at this level of the game.
That's two minutes gone in the round.
We've seen a great period of action over the last minute or so - credit to both fighters for going all out!
Salonga is taking a breather. Johnson says something to him but it's hard to make out. Perhaps he's telling him to get on with it and actually do something.
Salonga lands a big shot. The thud that echoes around the arena is like music to the fans' ears.
Salonga controlling the action here.
Salonga has been the more effective fighter overall so far.
That's three minutes gone in the round.
Salonga is looking for a kimura but Johnson is holding onto that half guard position, so it's hard for Salonga to get the leverage.
Salonga is thinking about going for an arm triangle but he can't free his leg.
Salonga missing with some ground and pound from the half guard.
Salonga with a momentary lay and pray from half guard.
That's four minutes gone in the round.
Salonga lands with a punch from half guard.
Salonga moves nicely into side control.
Salonga happy to just control the position for now.
Salonga creates a bit of distance and throws down some hard shots.
John Johnson has stepped it up - he knows he needs a finish here!
Asiong Salonga is fighting for a decision here - he's started to take the cautious approach.
As the round comes to an end the crowd are showing their appreciation for a great round of action.
Salonga is maintaining the dominant position - no doubt Johnson will start to get frustrated soon if he's not already.
And that's the end of the fight!
Asiong Salonga comfortably won the final round on my scorecard.
Well Salonga has outworked and out performed his opponent in all aspects of the game today. He was simply too good and the decision should be no more than a formality. Over to the ring announcer for the scorecards.
Ladies and gentlemen, after 3 rounds of action, we go to the scorecards for a decision.
Judge Yasuomi Hirokawa scores the fight for Asiong Salonga!
Judge Hirohito Nitta scores the fight for Asiong Salonga!
Judge Yuuki Gou scores the fight for Asiong Salonga!
Asiong Salonga wins by unanimous decision!
|
|
|
|
|
|
|
|
|
|
|
|
|
|
|
|
|
|
|
|
|
|
|
| S |
C
A |
G |
S |
C
B |
G |
|
S |
C |
G |
|
energy
A | B |
|
hype
A | B |
|
pop
A | B |
|
mgr
A | B |
|
FIGHT
RATING
70% |
|
|
|
|
|
|
|
Undercard bout
|
Coming up we have a lightweight MMA rules bout between Fabrici Gorfal (ranked 0 p4p, 0 weight class) and Hideki Masada (ranked 0 p4p, 0 weight class). Masada comes into a darkened arena with his song building. "Tokyo Drift (Restage Remix)" by Teriyaki Boyz kicks in, the lights come on and the crowd goes wild! What a showman! Fabrici Gorfal has the edge in experience - let's see if he can make that count tonight.
 |
|
 |
| 175 cm
26
160 lbs
5 - 3 - 0 |
|
176 cm
24
155 lbs
1 - 3 - 0 |
BJJ Brown Belt
Basic striking
Experienced |
|
BJJ Blue Belt
Solid Muay Thai
Solid chin |
|
| |
|
Ladies and gentlemen. This fight is 3 rounds, in the lightweight division.
Introducing the fighter to my left, fighting out of the red corner.
With a record of
5 - 3 - 0, fighting out of Tokyo, Fabrici Gorfal!
And introducing the fighter to my right, fighting out of the blue corner.
With a record of
1 - 3 - 0, fighting out of Tokyo, Hideki Masada!
The judges for this bout are Shirou Masuda, Shigeki Fujiwara and Hirohito Nitta.
The bell rings for round one and we are underway!
Masada tries to score a power double leg takedown but Gorfal sees that one coming and sprawls well. That will dishearten Masada somewhat.

Masada gets taken down but at least he's managed to land in guard.
Masada keeping full guard, as Gorfal tries to pass.
Masada escapes his hips to the side and looks to be working for an armbar. Gorfal gives him a little smile and shakes his head. No chance.
Gorfal is in a tricky position. We've heard reports from his gym mates at Tokyo Totally Gym + Sauna that he's been drilling escapes, so let's see if he can get back to his feet.
Gorfal passes Masada's left leg - he's now in half guard.
Gorfal not throwing his punches with enough precision this time.
That's one minute gone in the round.
Masada wants to improve his position but Gorfal is controlling well.
Gorfal takes a deep breath and rests his weight momentarily on top of his opponent, to control the position.
The fighters are tangled up in the ropes here. We might need a restart if the fighters can't break free themselves.
Masada has guillotine here! It looks pretty tight! Could this be all over! No, Gorfal escapes and passes into side control at the same time. Nice work there by Gorfal!
Masada seems a little lost for a moment, as Gorfal dominates the positioning.
Gorfal has worked his way into a potential kimura here. Masada is trying to get out of the position but his squirming has just got him deeper into trouble. Gorfal yanks on the arm and Masada is forced to tap due to a very painful looking submission! Nice work by Gorfal.
Ladies and gentlemen, after 2:55 of round 1, we have a winner by way of Submission (Kimura). Fabrici Gorfal!
|
|
|
|
|
|
|
|
|
|
|
|
|
|
|
|
|
|
|
|
|
|
|
| S |
C
A |
G |
S |
C
B |
G |
|
S |
C |
G |
|
energy
A | B |
|
hype
A | B |
|
pop
A | B |
|
mgr
A | B |
|
FIGHT
RATING
30% |
|
|
|
|
|
|
|
Co-main event
|
Coming up we have a lightweight MMA rules bout between Katuro Tisoaka (ranked 0 p4p, 0 weight class) and Aizen Senshi (ranked 0 p4p, 0 weight class). Tisoaka comes to the ring accompanied by Festivo. The crowd seem to be enjoying Senshi's choice of entrance music: Scumbag. Katuro Tisoaka had real problems making weight for this fight. After initially coming in at 157.6lbs, he had two hours to make the official fight weight. He made it but it will have taken a lot out of him to cut those extra few pounds. Katuro Tisoaka could well score a knockout today. He has the power to get to Aizen Senshi's chin.
 |
|
 |
| 169 cm
19
169 lbs
0 - 0 - 0 |
|
178 cm
23
148 lbs
2 - 0 - 0 |
BJJ Purple Belt
Brawler
Inexperienced |
|
BJJ Blue Belt
Solid Muay Thai
Determined |
|
| |
|
Ladies and gentlemen. This fight is 3 rounds, in the lightweight division.
Introducing the fighter to my left, fighting out of the red corner.
With a record of
0 - 0 - 0, fighting out of Tokyo, Katuro Tisoaka!
And introducing the fighter to my right, fighting out of the blue corner.
With a record of
2 - 0 - 0, fighting out of Tokyo, Aizen Senshi!
The judges for this bout are Yasuomi Hirokawa, Shigeki Sano and Ren Mimura.
The bell rings for round one and we are underway!
Senshi fails to land with a series of punches.
Senshi is looking to clinch.
Tisoaka shoots in but no luck this time.
Tisoaka dives in for a single leg takedown but Senshi sprawls and the fighters end up clinched against the ropes.
Senshi working hard to break the clinch.
Tisoaka is trying to pull guard but Senshi turns him against the ropes and we stay in the clinch.
That's three failed takedown attempts in the round for Katuro Tisoaka. That's going to take a lot out of him.
Senshi breaks the clinch and we're back to striking at distance.
Tisoaka shoots in for a double leg but Senshi sprawls well. That's going to sap some energy.
Tisoaka has a nice red mark on his side after a thudding body kick by Senshi.
Tisoaka misses with a half-hearted attempt at a head kick.
Tisoaka circles away from the clinch attempt
and Tisoaka counters by moving into the clinch.
Senshi is looking to break free of the clinch but Tisoaka has double underhooks.
Tisoaka looking for a takedown.
Senshi breaks the clinch and we're back to striking at distance.
Tisoaka dives in and grabs Senshi's left leg, looking for a takedown. Senshi pushes down on Tisoaka's head and hops out.
That's one minute gone in the round.
Senshi forces Tisoaka back against the ropes and clinches.
Senshi's corner calls for him to break the clinch, which he does.
Senshi rushes Tisoaka and presses him up against the ropes.
Tisoaka tries to pull guard but can't drag his opponent to the mat. Senshi just stands there and leans against the ropes.
Senshi is fighting off a takedown attempt but Tisoaka is just too persistent for him and manages to trip Senshi to the mat. Senshi regains guard as soon as the fighters hit the mat.
Tisoaka stops Senshi from standing up.
The fighters are tangled up in the ropes here. We might need a restart if the fighters can't break free themselves.
Tisoaka trying to control but Senshi is working from the bottom.
Senshi is looking to stand up but Tisoaka isn't so interested in that idea.
Tisoaka passes Senshi's right leg, so he's now in half guard.
That's two minutes gone in the round.
Tisoaka moves nicely into side control.
The fans in attendance giving it up for the two fighters, who have really let it all hang out in the last minute or so!
Tisoaka prevents Senshi from escaping the position.
Tisoaka looking for an arm triangle but it's way too loose to do anything.
Tisoaka looking for an arm triangle but it's way too loose to do anything.
Senshi wants to get back to his feet.
Senshi is letting Tisoaka control him for a moment.
That's three minutes gone in the round.
Tisoaka is trying to land an Americana. He has the arm isolated but Senshi is keeping cool and he's avoided the danger for now.
Tisoaka misses with the ground and pound.
Tisoaka is trying to land an Americana. He has the arm isolated but Senshi is keeping cool and he's avoided the danger for now.
Senshi is trying to escape and get back to his feet.
Senshi dodges the ground and pound from Tisoaka.
That's four minutes gone in the round.
Tisoaka tries for a kimura but Senshi is defending well.
Tisoaka in side control lands a nice looking series of punches and elbows.
Senshi is putting a lot of effort into getting back to his feet here.
Tisoaka is chipping away with strikes.
Wooooo! Give it up for these two warriors! They are putting on a show!
Senshi is pushing Tisoaka's head away, looking to escape. Tisoaka manages to hold on to the position though.
As the round comes to an end the crowd are showing their appreciation for a great round of action.
Tisoaka happy to just control the position for now.
Tisoaka grinds an elbow into Senshi's temple.
And thats the end of the round the fighters go back to their corners.
Katuro Tisoaka dominated that round.
The fighters get back to their feet, the hooter sounds and we're back to the action!
Tisoaka dives in for a single leg takedown but Senshi sprawls and the fighters end up clinched against the ropes.
Senshi breaks the clinch and we return to the middle of the mat.
Tisoaka tries to shoot in for a takedown. He's got hold of a leg but Senshi swivels and escapes.
Senshi lands a high kick!
Senshi drives through and clinches with Tisoaka against the ropes.
Senshi stops a takedown attempt from Tisoaka.
That's three failed takedown attempts in the round for Katuro Tisoaka. That's going to take a lot out of him.
Tisoaka has moved round to his opponent's back and is looking for a suplex! Oh snap! He's tossed Senshi clear over his head and slammed him to the mat!
Tisoaka throws a big right hand but he misses and hits the mat. Ouch.
Tisoaka has his hand under the chin of his opponent looking for the choke. He's nearly got it! This one could be all over! But no, Senshi has freed his hand and lives to survive another
well, another couple of seconds at least!
Senshi showing good submission defense here.
Senshi really doesn't want to stay on the ground with Tisoaka. If he can't get it back to his feet, it's only a matter of time before he'll be tapping out.
That's one minute gone in the round.
Tisoaka lands with a big left hand that may well have hurt his opponent. Can Senshi hold on?!
Senshi looking to stop the rear naked choke attempt by controlling the hands.
Tisoaka thows a huge left but connects with the canvas and not his opponent.
Senshi is trying to stand back up.
Tisoaka controls the action.
That's two minutes gone in the round.
Tisoaka is looking to finish the fight by rear naked choke. Senshi knows exactly what he's got planned though, so he's defending well. Maybe a few strikes would soften Senshi for a finish.
Senshi prevents Tisoaka from getting a body triangle.
Senshi trying to get back to his feet but Tisoaka is in full control for now.
Tisoaka is working on the RNC. He looks like he's got it but Senshi won't tap... Oh, he's out! The ref rips Tisoaka off his unconscious opponent!
Ladies and gentlemen, after 2:57 of round 2, we have a winner by way of Submission (RNC). Katuro Tisoaka!
Aizen Senshi spoke after the fight, saying 'It's okay I'll be back fighting in no time and even harder.'.
|
|
|
|
|
|
|
|
|
|
|
|
|
|
|
|
|
|
|
|
|
|
|
| S |
C
A |
G |
S |
C
B |
G |
|
S |
C |
G |
|
energy
A | B |
|
hype
A | B |
|
pop
A | B |
|
mgr
A | B |
|
FIGHT
RATING
46% |
|
|
|
|
|
|
|
Main event
|
Coming up we have a lightweight MMA rules bout between Tataki Mizuto (ranked 0 p4p, 0 weight class) and Naya Shinoki (ranked 0 p4p, 0 weight class). Mizuto comes to the ring accompanied by The Beginning- One Ok Rock. Shinoki has chosen wadiako as his entrance music. Over to our ring announcer for the fighter introductions!
 |
|
 |
| 188 cm
27
165 lbs
7 - 1 - 0 |
|
180 cm
24
169 lbs
11 - 5 - 0 |
BJJ Purple Belt
Counter fighter
Good chin |
|
BJJ Brown Belt
Brawler
Knockout power |
|
| |
|
Ladies and gentlemen. This fight is 3 rounds, in the lightweight division.
Introducing the fighter to my left, fighting out of the red corner.
With a record of
7 - 1 - 0, fighting out of Tokyo, Tataki Mizuto!
And introducing the fighter to my right, fighting out of the blue corner.
With a record of
11 - 5 - 0, fighting out of Tokyo, Naya Shinoki !
The judges for this bout are Taro Takaoka, Kenichi Hosakawa and Yuuki Gou.
The bell rings for round one and we are underway!
Shinoki with a lazy takedown attempt
so Mizuto counters with a double leg into guard. Good agility.
Shinoki is active off his back here, looking for submissions.
Mizuto has to be careful here, sitting in the guard of a superior BJJ player.
Mizuto with a flurry of punches that miss.
Shinoki wants to sweep here but Mizuto controlling him for the moment.
Mizuto stands up over Shinoki , holding his feet. He dives back in and lands a decent shot to the head.
Shinoki is active off his back here, looking for submissions.
Wooooo! Give it up for these two warriors! They are putting on a show!
Shinoki controls Mizuto momentarily but Mizuto frees himself.
Mizuto working in close now, lands a nice elbow to the side of Shinoki 's head.
Shinoki pulls Mizuto in close to prevent any damage.
Mizuto with a nice head shot there.
Shinoki looking for a sweep. Not yet Shinoki , not yet.
Shinoki keeping moving, preventing Mizuto from controlling successfully.
Mizuto looking to sit in guard and control but Shinoki gets the butterfly guard and sweeps. He's now in the guard on the top.
That's one minute gone in the round.
Shinoki wants to pass the guard but Mizuto is keeping the position.
Shinoki missing there with some ground and pound from the guard.
Shinoki is fighting to break Mizuto's control of his arms but Mizuto is doing a good job of controlling the position at the moment.
Mizuto looking to sweep here. No luck so far.
Shinoki pressing down on his opponent's thigh, looking to pass guard. Mizuto is keeping the position for now.
Mizuto really does look like a pencil wearing a pair of gloves. Let's hope he has a gameplan to suit that ridiculous body shape.
That's two minutes gone in the round.
Mizuto working the defensive guard well to avoid strikes from Shinoki .
Shinoki is frustrating his opponent with some stalling tactics from top position.
Mizuto avoiding any damage from the ground and pound.
Mizuto is doing well to control the posture of his opponent and prevent any damage.
Shinoki throwing elbows and punches but not connecting, as Mizuto works some decent striking defense from the bottom.
Mizuto keeping moving, preventing Shinoki from controlling successfully.
That's three minutes gone in the round.

It looks like we're going to have a standup here. Neither fighter is doing enough on the ground.
Shinoki moves into range and clinches up with Mizuto.
Mizuto is fighting off a takedown attempt but Shinoki is just too persistent for him and manages to trip Mizuto to the mat. Mizuto regains guard as soon as the fighters hit the mat.
Shinoki slows down the pace of the fight, as he sits in guard.
Shinoki tries to free his leg and advance position but Mizuto is retaining full guard.
Mizuto has a butterfly guard looking to sweep but Shinoki has passed into side control.
That's four minutes gone in the round.
Shinoki is looking to take a break and control but Mizuto is keeping him honest, looking to work from the bottom.
Shinoki is looking for a kimura. He might have it! No, Mizuto has escaped the position, nice work there.
As the round comes to an end the crowd are showing their appreciation for a great round of action.
Shinoki misses with the ground and pound.
And thats the end of the round the fighters go back to their corners.
Naya Shinoki dominated that round.
That's time! Mizuto's corner gives him a slap on the ass as he gets ready to fight.
Shinoki shoots in for a takedown. "I don't think so" says Mizuto as he avoids it easily.
Shinoki tries to drive through with a takedown attempt but Mizuto defends well and Shinoki ends up having to push Mizuto into the ropes where they will battle it out in the clinch.
Shinoki drops down for a takedown but doesn't get it.
Mizuto looks to be in better condition than last time we saw him fight. Obviously he's been working hard on his cardio.
Tataki Mizuto has stuffed three takedown attempts in the round now. That's going to take a lot out of Naya Shinoki .
Shinoki has managed to pull guard. Let's see whether he can work an aggressive guard. It will also be interesting to see what tactics Mizuto uses from the top position.
Shinoki working for a triangle but Mizuto defends it easily.
The fighters are trapped in the ropes so we're going to have a reposition here. The ref calls for a break and repositions the fighters in the center of the ring.
Shinoki lands a beautiful switch and he's in full mount! That could spell trouble for Mizuto!
Mizuto is working to get back to half guard.
That's one minute gone in the round.
Mizuto is working hard here to advance position.
Shinoki trying to control but he's not successful this time.
Mizuto wants to hold on but Shinoki pushes him away.
Shinoki looking for a guillotine from mount but Mizuto is having none of it.
The fighters are tangled up in the ropes here. We might need a restart if the fighters can't break free themselves.
Mizuto is desperately trying to improve his position but Shinoki has a good base and remains in mount.
That's two minutes gone in the round.
Shinoki lands a big shot there that rocks Mizuto but he's holding on and managing to survive for now.
Mizuto really trying hard to get back to half guard here.
Shinoki can't quite control the action as he would like just now, as Mizuto is looking to escape.
Shinoki controlling from the full mount.
Shinoki lands with some vicious ground and pound - can Mizuto hang on?
That's three minutes gone in the round.
Poor strikes thrown by Shinoki there. More accuracy and less frantic strikes would help!
Shinoki landing strikes, looking to finish!
Mizuto takes a big shot to the head but keeps on trying to improve his position.
Shinoki landing strikes from the mount and Mizuto is in trouble!
Shinoki looks like he's working for a submission but he's not found anything just yet.
Mizuto is looking to improve his position but Shinoki isn't that keen on the idea.
That's four minutes gone in the round.
Mizuto is trying to stand up.
Shinoki throwing strikes here but Mizuto is writhing around nicely and avoiding any serious damage.
Shinoki misses with a head shot.
Shinoki thowing shots but they're missing.
This has been an exciting period of action!
Mizuto is in all sorts of trouble here.
The crowd applaud the fighters efforts here as the round comes to an end.
Shinoki thowing strikes but they're hitting the gloves, not doing any damage.
Shinoki controlling from mount.
And thats the end of the round the fighters go back to their corners.
Naya Shinoki showed his class in that round. I'd imagine he'll take it on all the scorecards.
The minute break is over - no more time for sponges and pep talks - back to the action! This is the final round!
The fight moves into the clinch position.
Mizuto wants a takedown but no success here.
Shinoki turns his hips and lands a very nice judo throw into side control!
Shinoki has knee on belly and now moves to full mount! Trouble for Mizuto!
Shinoki looking to control but Mizuto is working nicely, looking to advance position himself.
Shinoki scores with a couple of good head shots there.
That's one minute gone in the round.
Shinoki can't quite control the action as he would like just now, as Mizuto is looking to escape.
Naya Shinoki has got the better of the ground game so far.
Shinoki throwing sloppy strikes here. Perhaps if he tightened up his striking from such a dominant position, he'd be able to finish easier.
Shinoki working the ground and pound effectively.
Shinoki looking to finish with strikes here!
Shinoki looking to finish with strikes here!
Shinoki looking to control but Mizuto is working nicely, looking to advance position himself.
That's two minutes gone in the round.
Mizuto throwing punches from his back but nothing is landing.
Shinoki wants to finish this one by submission but Mizuto is holding onto his waist, trying to prevent any attacks from Shinoki .
Shinoki throwing strikes here but Mizuto is writhing around nicely and avoiding any serious damage.
Shinoki punishing his opponent with strikes.
Shinoki trying to control but Mizuto is having none of it.
That's three minutes gone in the round.
Shinoki working away from the top, dropping strikes.
Shinoki trying to control but Mizuto is having none of it.
Shinoki avoids the attempt from Mizuto to control.
Tataki Mizuto has stepped it up - he knows he needs a finish here!
Shinoki punching from mount but Mizuto doing a good job of avoiding damage.
Shinoki content just to control the position here.
Naya Shinoki is fighting for a decision here - he's started to take the cautious approach.
That's four minutes gone in the round.
Mizuto is bucking up trying to escape but Shinoki cracks him with another couple of good strikes.
Mizuto is rocked!
Shinoki working for a submission here. He's tucked his head under his opponent's arm, looking for an arm triangle. He's hopped off into side control, looking to tighten the submission... is it going to work? He's given up a good position looking for it. Mizuto looks OK. Oh, I spoke too soon, he's out! That must have been tighter than I thought! Excellent work there by Shinoki ! Submission of the night perhaps?
Ladies and gentlemen, after 4:43 of round 3, we have a winner by way of Submission (Arm Triangle). Naya Shinoki !
Jumping up and down and very excited, Naya Shinoki waved his t-shirt featuring Kemists ↑ 5x160Q's logo in front of the cameras.
|
|
|
|
|
|
|
|
|
|
|
|
|
|
|
|
|
|
|
|
|
|
|
| S |
C
A |
G |
S |
C
B |
G |
|
S |
C |
G |
|
energy
A | B |
|
hype
A | B |
|
pop
A | B |
|
mgr
A | B |
|
FIGHT
RATING
56% |
|
|
|
|
|
|
|
|
|
|

