 |
Destiny Tuesday 1 PBP Commentary |
Undercard bout
|
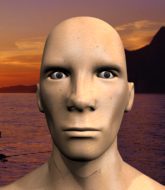
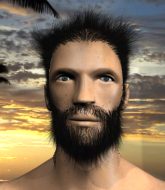
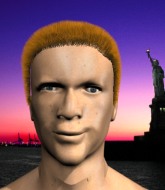
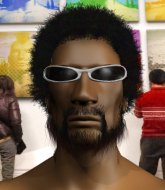
Coming up we have a featherweight MMA rules bout between Keiichi Tsuchiya (ranked 0 p4p, 0 weight class) and Bunta Fujiwara (ranked 0 p4p, 0 weight class). Over to our ring announcer for the fighter introductions!
 |
|
 |
| 171 cm
28
158 lbs
3 - 4 - 0 |
|
185 cm
21
157 lbs
3 - 2 - 0 |
Good takedowns
Basic striking
Experienced |
|
Decent wrestler
Basic striking
Knockout power |
|
| |
|
Ladies and gentlemen. This fight is 3 rounds, in the featherweight division.
Introducing the fighter to my left, fighting out of the red corner.
With a record of
3 - 4 - 0, fighting out of Tokyo, Keiichi Tsuchiya!
And introducing the fighter to my right, fighting out of the blue corner.
With a record of
3 - 2 - 0, fighting out of Tokyo, Bunta Fujiwara!
The judges for this bout are Hirohito Nitta, Ren Mimura and Yasuomi Hirokawa.

The bell rings for round one and we are underway!

Fujiwara shoots in and scores a nice double leg takedown into half guard.
It looks like the ref is thinking about a standup.

Fujiwara postures up and decides to stand up, from the half guard. The ref calls for Tsuchiya to stand up.
Fujiwara moves out of range as Tsuchiya strikes.
Fujiwara avoids a lazy jab quite easily.
Tsuchiya loads up on a big right hand but Fujiwara slips the punch.
Tsuchiya misses with an uppercut.
Fujiwara doesn't succeed with the takedown

so Tsuchiya counters with a double leg into guard. Good agility.
Tsuchiya content to stall in guard here.
The crowd are loving this. Great action here.
Tsuchiya has controlled the position for a good 20 seconds, which will no doubt be starting to frustrate his opponent.

That's one minute gone in the round.
The referee looks like he's ready to step in and stand the fighters back up.
Fujiwara is looking to get back to his feet but can't, whilst Tsuchiya is controlling him.

The ref stands the fighters back up. Keiichi Tsuchiya wasn't doing enough on the ground.
Tsuchiya waving his hands out in front of him, looking to distract Fujiwara.
Tsuchiya misses with a straight left.
Tsuchiya throws a lazy uppercut
and Fujiwara counters with a nice single leg takedown and he's in Tsuchiya's guard now.
Tsuchiya keeping moving, preventing Fujiwara from controlling successfully.
Fujiwara slows down the pace of the fight, as he sits in guard.
Fujiwara wants to control from the top but Tsuchiya keeps moving.
The ref warns both fighters not to hold the cage as they work up against the meshing.
Fujiwara stops Tsuchiya from standing up.
Fujiwara must be cautious of submissions here, given that his opponent has the superior Jiu Jitsu.

That's two minutes gone in the round.

Bunta Fujiwara has forced the referee to step in and restart the fight on the feet.
Tsuchiya throws out a loose jab but Fujiwara uses good head movement to avoid it.
Fujiwara fails with the takedown.
Nice sprawl there from Tsuchiya as Fujiwara shoots in.
We've been told by Tsuchiya's head coaches at [CBK] Punch-kicker Academy that he's been working on his takedown defense in preparation for this fight.
Keiichi Tsuchiya has stuffed three takedown attempts in the round now. That's going to take a lot out of Bunta Fujiwara.
The crowd cheering loudly, showing their appreciation for the quality fight we're seeing here.
Fujiwara darts in looking for a takedown but Tsuchiya gets double underhooks and turns Fujiwara into the cage.
Fujiwara has hold of a leg and is looking for a trip takedown. Tsuchiya avoids it nicely though and we remain in the clinch.
Fujiwara looking for a takedown.
Tsuchiya turns his back and goes for a hip toss. It's a bit messy but it gets the job done and Tsuchiya manages to end up in side control.
Tsuchiya remains in side control and seems content to stay there. It's a versatile position from which he can work both strikes and submissions, whilst maintaining that control, so maybe he'll sit here for a while.

That's three minutes gone in the round.
Fujiwara sneaks out the side door and pushes Tsuchiya away - he's back to his feet. The crowd show their appreciation for the escape.
Tsuchiya pushing out the jab but it's not landing.
Fujiwara shoots in looking for a takedown. Tsuchiya tries to sprawl out of it but Fujiwara keeps driving through. The fighters are pinned against the cage. Tsuchiya manages to get underhooks and after a bit of a struggle, circles away and we're back to standing.
Fujiwara is a painfully thin specimen of a man. You do wonder whether a good body kick would snap him clean in two.
Tsuchiya fakes a head punch and goes low to the body. Nicely done.
Tsuchiya rushes in with a sloppy looking punch
and Fujiwara counters with a nice double leg into side control. Tsuchiya won't be happy with that.
Tsuchiya wants to get back to his feet.
Fujiwara taking a breather here.
The fighters are pressed up against the cage, both looking to find a bit of space to work.

Tsuchiya throws his opponent off and manages to get back to his feet! Nicely done!

That's four minutes gone in the round.
The fans in attendance giving it up for the two fighters, who have really let it all hang out in the last minute or so!
Fujiwara on the wrong end of a nice jab.
Tsuchiya is really head hunting here, hardly looking to strike to the body at all.
A big right from Tsuchiya misses.
Fujiwara throws a loose over hand right and dives in with a double leg takedown. Tsuchiya tries to sprawl but it's too late and the fighters hit the mat. Fujiwara is in Tsuchiya's guard.
Tsuchiya avoiding any damage from the ground and pound.
Fujiwara prevents Tsuchiya from getting back to his feet.
Fujiwara postures up and scores with a shot to the body and a follow up elbow to the head.
The fighters are starting to get a bit slippery now, which will make submissions a bit more difficult.
Tsuchiya is looking to stand up but Fujiwara isn't so interested in that idea.
Fujiwara wants to control from the top but Tsuchiya keeps moving.
Tsuchiya might be looking to lock onto one of his opponent's long limbs for a submission, whilst we're on the ground.
The crowd are going absolutely nuts as the round comes to an end - what a fantastic round of action!
Fujiwara stops Tsuchiya from standing up.
Hammerfist, elbow! yells Fujiwara's corner. There ya go! There ya go!
Both fighters really going for it on the ground here!
Fujiwara sitting in guard, not really doing much.
And thats the end of the round the fighters go back to their corners.
A close round but Bunta Fujiwara will probably get the nod.
The referee calls time. The cornermen exit stage left and we're back to business.

Fujiwara shoots in but no luck this time.
Tsuchiya connects with a lovely right hand, straight down the pipe.
Fujiwara shoots in but Tsuchiya avoids the takedown attempt easily.
Tsuchiya throws a big shot that misses.
Tsuchiya rushes in with a sloppy looking punch
and Fujiwara counters with a good right hand that lands right on the jaw.
Tsuchiya missing with a left hand there. Fujiwara was out of range so wasted energy throwing that one.
Fujiwara fails with the takedown
and Tsuchiya counters with a nice single leg takedown and he's in Fujiwara's guard now.
Keiichi Tsuchiya has stuffed three takedown attempts in the round now. That's going to take a lot out of Bunta Fujiwara.
Fujiwara wants to stand but Tsuchiya is controlling the position.
That's one minute gone in the round.
Tsuchiya advances to half guard.
Fujiwara wants to stand back up but Tsuchiya manages to pass into side control.
Fujiwara is looking to work his way out of this bad position but Tsuchiya is controlling him well.
Tsuchiya content to control the pace. The referee will try and keep them active though.
Fujiwara is trying to escape and get back to his feet.
That's two minutes gone in the round.
Tsuchiya taking a breather here.
Fujiwara is not content to let Tsuchiya control the position.
We get told so often about how wrestlers don't like to be on their backs. Let's see if Fujiwara can do anything to dispel that myth.
Fujiwara being controlled for a moment.
The referee decides to stand the fighters back up, due to lack of activity on the part of Keiichi Tsuchiya.
Tsuchiya misses with the combination.
Nice defenses there by Fujiwara.
That's three minutes gone in the round.
Fujiwara gets his takedown attempt stuffed easily
and Tsuchiya counters with a shot to the ribs. That looked like it hurt.
Tsuchiya throws a right and a left that both miss.
Fujiwara avoids the body shot from Tsuchiya.
Tsuchiya stuns Fujiwara with a nice body shot, before stepping back out of range.
Keiichi Tsuchiya seems to be the more aggressive standup fighter in this bout.
Fujiwara uses good head movement to avoid the hook from Tsuchiya.
Tsuchiya misses with the combination.
Fujiwara misses with a takedown
and Tsuchiya counters with a single leg into guard. Fujiwara didn't expect that.
Fujiwara wants to stand and escape but Tsuchiya is having none of it.
Tsuchiya controlling from the guard. I say controlling but really, he's stalling.
Fujiwara wants to stand up but Tsuchiya is controlling him.
That's four minutes gone in the round.
The crowd are loving this. Great action here.
Tsuchiya sitting in guard here, content to control.
The ref stands the fighters back up because Keiichi Tsuchiya just wasn't active enough.
Fujiwara uses good head movement to avoid the hook from Tsuchiya.
Fujiwara changes levels and looks for a double leg takedown. Tsuchiya tries to avoid it but Fujiwara manages to keep hold of a leg and drag Tsuchiya to the ground. Tsuchiya escapes though and pops straight back up to his feet.
Tsuchiya misses the shot to the body.
Fujiwara misses with a takedown
and Tsuchiya counters with a nice double leg into half guard.
Fujiwara is refusing to be controlled, as Tsuchiya sits in half guard.
Tsuchiya slows the pace down in half guard.
As the round comes to an end the crowd are showing their appreciation for a great round of action.
Fujiwara pushes Tsuchiya off looking to stand but Tsuchiya dives back in and keeps control.
And thats the end of the round the fighters go back to their corners.
Keiichi Tsuchiya dominated that second round.
Well, the break between rounds is over. Let's get back to the scrappin! This is the final round!

Tsuchiya jabbing away but nothing is landing.
Fujiwara blocks a jab.
Fujiwara ducks under a wild hook from Tsuchiya.
A big right from Tsuchiya misses.
The fighters circling - Tsuchiya throws out the jab but it was never going to land.
Fujiwara looks for a takedown here. Will he get it? Tsuchiya is fending him off so far but Fujiwara persists. Nope, Tsuchiya circles away and we're back to standing.
A big left from Tsuchiya misses.
Tsuchiya throws an ugly left hook that misses
and Fujiwara counters with a nice double leg into guard.
Tsuchiya is trying to stand up but he's not managed so far.
Fujiwara is just sitting in guard, looking to avoid any submissions.
Fujiwara prevents Tsuchiya from getting back to his feet.
Fujiwara pressing down on his opponent's thigh, looking to pass guard. Tsuchiya is keeping the position for now.
Fujiwara won't allow Tsuchiya to get back to his feet.
That's one minute gone in the round.

The referee decides to stand the fighters back up.
Fujiwara closes this distance looking for a takedown but Tsuchiya circles away.
Fujiwara changes levels and looks for a double leg takedown. Tsuchiya tries to avoid it but Fujiwara manages to keep hold of a leg and drag Tsuchiya to the ground. Tsuchiya escapes though and pops straight back up to his feet.
Keiichi Tsuchiya has stuffed three takedown attempts in the round now. That's going to take a lot out of Bunta Fujiwara.
Tsuchiya tries to bum rush Fujiwara with a series of wild strikes but Fujiwara uses good footwork to avoid the assault.
Keiichi Tsuchiya is winning the standup battle so far.
Tsuchiya throws a right and a left that Fujiwara avoids nicely.
Tsuchiya misses with a hook.
Fujiwara shoots in for a takedown - he's clinched up with Tsuchiya but Tsuchiya pushes him off and we're back to square one.
Tsuchiya stuffs the takedown attempt from Fujiwara. Fujiwara gets slowly back to his feet.
Fujiwara shoots in for a takedown but Tsuchiya shows good takedown defense.
Keiichi Tsuchiya is looking to keep the fight on the feet at all costs.
Fujiwara ducks under a wild hook from Tsuchiya.
Horrible takedown by Fujiwara or perhaps it was just good defense by Tsuchiya which made him look bad.
Fujiwara with a poor takedown
so Tsuchiya counters with a double leg into guard. Good agility.
Fujiwara takes a big intake of breath there - he's definitely tired.
Tsuchiya slows down the pace of the fight, as he sits in guard.
That's two minutes gone in the round.
We've seen a great period of action over the last minute or so - credit to both fighters for going all out!
Fujiwara wants to stand but Tsuchiya is controlling the position.
The referee is pacing around the two fighters - he looks like he's thinking about a standup.
Tsuchiya controlling from the guard. I say controlling but really, he's stalling.
Keiichi Tsuchiya has forced the referee to step in and bring the fight back to the feet.
Fujiwara will have to do better than that with his takedown attempts.
Tsuchiya misses with a body shot.
Tsuchiya fails to land with the punch combination there - jab, cross, hook, miss, miss, miss.
That's three minutes gone in the round.
Fujiwara darts in looking for a takedown but Tsuchiya gets double underhooks and turns Fujiwara into the cage.
Tsuchiya goes for a takedown in the clinch but Fujiwara prevents it.
Fujiwara has a body lock and is looking for a takedown. Tsuchiya is bouncing around trying to prevent the takedown and somehow he has indeed managed to stay on his feet.
Fujiwara is looking for a takedown up against the cage. Tsuchiya gets underhooks though and prevents the takedown attempt.
Fujiwara drops down looking for an ankle pick but Tsuchiya pulls his leg out and moves away.
That's four minutes gone in the round.
Fujiwara moves away from the strike by Tsuchiya.
Tsuchiya works the jab nicely.
Fujiwara has a takedown stuffed.
Tsuchiya loads up on a big right hand but Fujiwara slips the punch.
Fujiwara fails miserably with a takedown attempt.
Tsuchiya displaying good standup as he scores with a three punch combination.
As the round comes to an end the crowd are showing their appreciation for a great round of action.
Nice sprawl there from Tsuchiya as Fujiwara shoots in.
Boom, another hit is landed. "You're gunna get knocked out" taunts Tsuchiya, as that shot connected.
Tsuchiya looks to land a left hand but Fujiwara moved out of range nicely.
Tsuchiya is really struggling to find his range with his punches. Fujiwara's reach advantage is clearly causing him problems.
Fujiwara uses good footwork to avoid the strikes from Tsuchiya.
And that's the end of the fight!
Keiichi Tsuchiya showed his dominance in that final round.
I think Tsuchiya has won this one but let's see what the judges have to say. Over to the ring announcer for the scorecards.
Ladies and gentlemen, after 3 rounds of action, we go to the scorecards for a decision.
Judge Hirohito Nitta scores the fight 29:28
Judge Ren Mimura scores the fight 29:28
Judge Yasuomi Hirokawa scores the fight 30:28
In favor of your winner, by unanimous decision... Keiichi Tsuchiya!
|
|
|
|
|
|
|
|
|
|
|
|
|
|
|
|
|
|
|
|
|
|
|
| S |
C
A |
G |
S |
C
B |
G |
|
S |
C |
G |
|
energy
A | B |
|
hype
A | B |
|
pop
A | B |
|
mgr
A | B |
|
FIGHT
RATING
67% |
|
|
|
|
|
|
|
Undercard bout
|
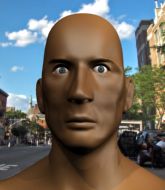
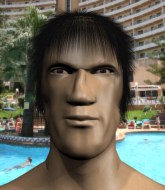
Coming up we have a welterweight MMA rules bout between Okrim Rimdor (ranked 0 p4p, 0 weight class) and Lucien De Bray (ranked 0 p4p, 0 weight class). I'm sure you'll be fascinated to know that I was talking to some pointless Z list celebrity before the fight and he thought that Lucien De Bray was going to win. Let's see if he was right.
 |
|
 |
| 185 cm
27
171 lbs
2 - 3 - 0 |
|
175 cm
19
170 lbs
0 - 0 - 0 |
BJJ Blue Belt
Solid boxing
KO power |
|
Good wrestler
Counter fighter
Good gas tank |
|
| |
|
Ladies and gentlemen. This fight is 3 rounds, in the welterweight division.
Introducing the fighter to my left, fighting out of the red corner.
With a record of
2 - 3 - 0, fighting out of Tokyo, Okrim Rimdor!
And introducing the fighter to my right, fighting out of the blue corner.
With a record of
0 - 0 - 0, fighting out of Amsterdam, Lucien De Bray!
The judges for this bout are Tatsuya Matsuyama, Yasuomi Hirokawa and Kenichi Hosakawa.
The bell rings for round one and we are underway!
Rimdor misses with a few strikes there.
Rimdor misses with an uppercut. De Bray saw that one coming.
Rimdor scores with a jab to the head.
De Bray slips a jab from Rimdor.
Rimdor misses with a body shot. Nice footwork from De Bray.
Rimdor connects with a body shot.
Rimdor misses with a straight right.
Rimdor looks to have improved his striking defense since last time we saw him fight.
De Bray slips a straight right by Rimdor.
De Bray fails to land the takedown.
De Bray shoots in for a takedown but doesn't get it.
De Bray scores with a takedown into Rimdor's guard.
Rimdor utilising some decent striking defenses from the guard, preventing the ground and pound.
Rimdor knows he needs to get back to his feet asap. He's simply no match for De Bray on the ground.
That's one minute gone in the round.
Rimdor working the defensive guard well to avoid strikes from De Bray.
Rimdor keeping moving, preventing De Bray from controlling successfully.
De Bray working in close now, lands a nice elbow to the side of Rimdor's head.
De Bray trying to land body shots but he keeps hitting the mat.
Rimdor preventing the ground and pound from doing any damage.
De Bray trying to pass the guard but can't manage it just yet.
De Bray postures up and lands some nice ground and pound.
De Bray with a couple of shots to the head there. Not particularly brutal.

Rimdor is rocked!
The fighters are pressed up against the cage, both looking to find a bit of space to work.
De Bray with a nice head shot there.
Oh Rimdor is still in real trouble! Will he be able to recover?!!
The fans in attendance giving it up for the two fighters, who have really let it all hang out in the last minute or so!
De Bray gets to his feet and stands over Rimdor, holding his ankles. He dives in with a big left hand that connects! Rimdor felt that one! De Bray unloads more punches and elbows and this one is over! The ref has dived in to save Rimdor from any more punishment!
Ladies and gentlemen, after 2:56 of round 1, we have a winner by way of TKO (Strikes). Lucien De Bray!
A very excited looking Lucien De Bray made sure he remembered to thank all the fans both in the arena and on the internet. He said all the coolest people spend all day on MMA websites, which got a big reaction.
|
|
|
|
|
|
|
|
|
|
|
|
|
|
|
|
|
|
|
|
|
|
|
| S |
C
A |
G |
S |
C
B |
G |
|
S |
C |
G |
|
energy
A | B |
|
hype
A | B |
|
pop
A | B |
|
mgr
A | B |
|
FIGHT
RATING
50% |
|
|
|
|
|
|
|
Undercard bout
|
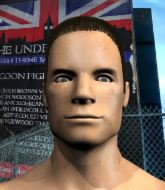
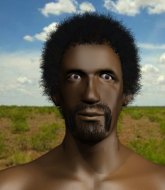
Coming up we have a bantamweight MMA rules bout between Ichi Yakuza (ranked 0 p4p, 0 weight class) and Erik Erikkson (ranked 0 p4p, 0 weight class). Yakuza comes to the cage accompanied by The Legend of Zelda, Overworld. Ichi Yakuza could well score a knockout today. He has the power to get to Erik Erikkson's chin.
 |
|
 |
| 150 cm
26
104 lbs
4 - 11 - 0 |
|
167 cm
20
135 lbs
3 - 4 - 1 |
BJJ Blue Belt
Dangerous knees
KO power |
|
BJJ Blue Belt
Decent boxing
Solid chin |
|
| |
|
Ladies and gentlemen. This fight is 3 rounds, in the bantamweight division.
Introducing the fighter to my left, fighting out of the red corner.
With a record of
4 - 11 - 0, fighting out of Tokyo, Ichi Yakuza!
And introducing the fighter to my right, fighting out of the blue corner.
With a record of
3 - 4 - 1, fighting out of Helsinki, Erik Erikkson!
The judges for this bout are Kenichi Hosakawa, Sosuke Kotani and Shirou Masuda.
The bell rings for round one and we are underway!
Erikkson throws a shot from downtown. Yakuza moves away and avoids it.
Yakuza moves to clinch but Erikkson breaks away

and Erikkson counters into the clinch. Nicely done.
Erikkson tries to circle away but Yakuza has him pinned against the cage.
Erikkson wants to break the clinch but can't.
Yakuza working hard to break the clinch.
Yakuza wants to break free. God knows he wants to breaaaak freeee.
Yakuza is trying to work out of this bad position, with his back against the cage.
Yakuza is trying to break free.
Erikkson keeps control of Yakuza as he tries to wriggle out of the double underhooks.
Erikkson has Yakuza pressed against the cage, preventing Yakuza from circling away and getting back to striking at range.
Erikkson has Yakuza pressed against the cage, preventing Yakuza from circling away and getting back to striking at range.
Yakuza wants to get back to striking at distance but Erikkson won't allow it.
Erikkson jumps guard and drags Yakuza to the mat. He's obviously going to be looking for submissions off his back.
Our spies down at at Lock and Roll Grappling Gym inform us that Erikkson has really been working on his submissions in the buildup to this fight. Will it pay off?
Erikkson has managed to wall walk up one of the corner posts to get back to his feet. Yakuza is pushing him up against the cage, looking to control the position.
Yakuza wants to break free. God knows he wants to breaaaak freeee.
Yakuza is trying to break the clinch but Erikkson is controlling him.
Yakuza working hard to break the clinch.
Erikkson keeps the fight in the clinch, despite Yakuza's efforts to push away.
That's one minute gone in the round.
Erikkson wants to push off and get back to the center of the mat but Yakuza has him pressed against the cage.
Yakuza is trying to break the clinch but Erikkson has him pressed against the cage.
Erikkson wants to push off and get back to the center of the mat but Yakuza has him pressed against the cage.
Erikkson wants to push off and get back to the center of the mat but Yakuza has him pressed against the cage.
Erikkson keeps the fight in the clinch, despite Yakuza's efforts to push away.
Yakuza has had enough of the clinch but Erikkson keeps him there for the moment.
Yakuza wants to break free. God knows he wants to breaaaak freeee.

Yakuza pushes off and circles away, back to the middle of the mat.
Ichi Yakuza is looking to keep the fight on the feet at all costs.
Erikkson throws a nice looking combination but Yakuza bobs and weaves to avoid any damage.
Yakuza is looking to clinch but Erikkson is avoiding it.
Erikkson tries to clinch up but Yakuza circles away and keeps his distance.
Yakuza dodges the punch combination from Erikkson.
Erikkson throws a series of punches but Yakuza avoids them all with ease.
Ichi Yakuza seems to be the more aggressive standup fighter in this bout.
Erikkson keeps the fight on the outside.
Erikkson will need to tighten up his combinations if he doesn't want to gas himself out, swinging at thin air.
That's two minutes gone in the round.
Erikkson fails to land with the punch combination there - jab, cross, hook, miss, miss, miss.
Yakuza tries to clinch up.
Yakuza wants to clinch up but Erikkson keeps it at a distance.
Yakuza fails with an attempt to clinch.
Erikkson swings away but doesn't land with a series of punches.
Yakuza fails with an attempt to clinch.
Some wild striking there from Erikkson.
Erikkson circles away from the clinch attempt
and Yakuza takes a counter punch right on the button for his troubles.
Yakuza takes one on the chin but keeps coming.
Erikkson lands three nice shots there - that looked like it hurt!
Wooooo! Give it up for these two warriors! They are putting on a show!
Erikkson avoids the clinch attempt nicely.
Yakuza is looking to clinch.
Erikkson lunges in with swinging rights and lefts but Yakuza circles away quickly and effectively.
Erikkson keeps the fight on the outside.
Yakuza looks to be in better condition than last time we saw him fight. Obviously he's been working hard on his cardio.
Erikkson avoids the clinch attempt nicely.
Yakuza is looking to take this fight into the clinch.
Yakuza tries to clinch up but Erikkson circles away and keeps his distance.
That's three minutes gone in the round.
Yakuza fails with an attempt to clinch.
Wow, both these guys are really going for it!
Erikkson misses with a two punch combination.
Yakuza tries to clinch but Erikkson moves out of range.
Erikkson tries to bum rush Yakuza with a series of wild strikes but Yakuza uses good footwork to avoid the assault.
Erikkson looks winded!
Yakuza closes the distance but Erikkson moves to the side
and Erikkson counters with a three punch combination, finished off with a leg kick. Nice work.
Yakuza is rocked!
Erikkson cracks Yakuza on the jaw with a powerful right hand and Yakuza falls backwards against the cage. Erikkson follows up with more strikes that drop Yakuza to his knees. Erikkson keeps the pressure on and the referee jumps in to save Yakuza! This one is all over!
Ladies and gentlemen, after 3:26 of round 1, we have a winner by way of TKO (Strikes). Erik Erikkson!
In defeat, Ichi Yakuza stepped up to the mic, saying 'This has not been honorable. Seppuku!'.
|
|
|
|
|
|
|
|
|
|
|
|
|
|
|
|
|
|
|
|
|
|
|
| S |
C
A |
G |
S |
C
B |
G |
|
S |
C |
G |
|
energy
A | B |
|
hype
A | B |
|
pop
A | B |
|
mgr
A | B |
|
FIGHT
RATING
59% |
|
|
|
|
|
|
|
Undercard bout
|
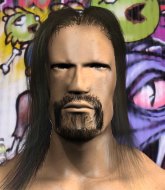
Coming up we have a lightweight MMA rules bout between Jin Mishima (ranked 0 p4p, 0 weight class) and Franz De Epinay (ranked 0 p4p, 0 weight class). Chooooooooon! I think Mishima might be my favorite fighter, now he's come out to All I Do Is Win. Jin Mishima has the edge in experience - let's see if he can make that count tonight.
 |
|
 |
| 175 cm
24
165 lbs
6 - 6 - 0 |
|
167 cm
19
155 lbs
0 - 0 - 0 |
Powerful takedowns
Counter fighter
Very quick |
|
Good wrestler
Dangerous knees
Good gas tank |
|
| |
|
Ladies and gentlemen. This fight is 3 rounds, in the lightweight division.
Introducing the fighter to my left, fighting out of the red corner.
With a record of
6 - 6 - 0, fighting out of Tokyo, Jin Mishima!
And introducing the fighter to my right, fighting out of the blue corner.
With a record of
0 - 0 - 0, fighting out of Amsterdam, Franz De Epinay!
The judges for this bout are Yukihiro Yamamoto, Hirohito Nitta and Shigeki Fujiwara.
The bell rings for round one and we are underway!
Nice takedown defense from De Epinay. No joy for Mishima on that attempt.
De Epinay is looking to take this fight into the clinch.
De Epinay is looking to clinch but Mishima is avoiding it.
De Epinay tries to clinch but Mishima moves away
and Mishima counters with a nice double leg into guard.

Mishima is trying to work a guillotine from the top, or something like that? Don't know how he thinks he's going to get a finish from there.
De Epinay is looking to get back to his feet but can't, whilst Mishima is controlling him.
Mishima postures up as if he's going to throw some strikes but drops back for an ankle! De Epinay is in big trouble! He looks ready to tap! But no, he's escaped and dives on top of Mishima, into his guard.
That's one minute gone in the round.
Mishima is working actively off his back, looking to secure an arm or perhaps work for a triangle.
Mishima had isolated an arm as going for a kimura. De Epinay defends it easily.
Mishima has an omoplata and is looking to use it perhaps as a submission or perhaps to transition. De Epinay is in a bit of discomfort here, but he's managed to free himself and has dived into side control! That didn't work out too well for Mishima.
Mishima tries to work a leg under to get back to half guard but De Epinay wriggles his own leg back out and remains in side control.
That's two minutes gone in the round.
Mishima sneaks back into half guard.
De Epinay seems to have lost interest with the ground game and is thinking about standing back up.
Mishima is looking to sinch up a guillotine here but De Epinay pulls his head out easily.
The fighters are pressed up against the cage, both looking to find a bit of space to work.
De Epinay wants to stand up but Mishima has a hold of him and won't allow it.
Mishima is looking to sinch up a guillotine here but De Epinay pulls his head out easily.
Mishima actively working from the bottom here.
That's three minutes gone in the round.
Mishima actively working from the bottom here.
Mishima is looking to sinch up a guillotine here but De Epinay pulls his head out easily.
Mishima actively working from the bottom here.
Mishima is looking to sinch up a guillotine here but De Epinay pulls his head out easily.
Mishima actively working from the bottom here.
Mishima looking for submissions off his back.
The ref warns both fighters not to hold the cage as they work up against the meshing.
That's four minutes gone in the round.
De Epinay is trying to get back to his feet now but his leg is trapped.
Mishima looking for submissions off his back.
De Epinay really doesn't want to stay on the ground with Mishima. If he can't get it back to his feet, it's only a matter of time before he'll be tapping out.
Mishima looking for submissions off his back.
De Epinay tries to stand but his arm is trapped.
The crowd applaud the fighters efforts here as the round comes to an end.
And thats the end of the round the fighters go back to their corners.
Jin Mishima dominated that round.
The referee calls time. The cornermen exit stage left and we're back to business.
De Epinay closes the distance looking to clinch
so Mishima counters with a double leg into guard. Good agility.
Mishima thinks about going for a leg but decides against it, in order to maintain the position.
Mishima has gone for a leg lock! De Epinay slips out almost immediately though and dives into Mishima's guard.
Mishima has his foot on De Epinay's thigh. He's trying to push off and get in position for a triangle, I think. De Epinay works his way back into a safe position though.
Mishima isolates an arm and boxes in a triangle. De Epinay stacks Mishima on his neck as he steps over and passes to the side. He's now in a much more dominant position where he can look to do some serious damage. Nice move by De Epinay!
Jin Mishima overall seems to be getting the better of the ground position in the fight so far.
That's one minute gone in the round.
De Epinay tries to get to his feet but he's trapped momentarily.
Mishima tries to buck De Epinay off but De Epinay is having none of it.
Mishima is trying to work for a sweep but De Epinay has mounted him!
Mishima is looking to improve his position but De Epinay isn't that keen on the idea.
That's two minutes gone in the round.
Mishima slips a leg in and gets back to half guard.
Mishima looking for submissions from an awkward position here.
Mishima looking for submissions from an awkward position here.
Mishima looking for submissions off his back.
Mishima is looking to sinch up a guillotine here but De Epinay pulls his head out easily.
Mishima tries to kick De Epinay off but De Epinay keeps his base steady and stays in half guard.
That's three minutes gone in the round.
Mishima actively working from the bottom here.
De Epinay wants to stand up but Mishima has a hold of him and won't allow it.
Mishima wants to get back to full guard.
Mishima looking to work for a kimura from the bottom.
Mishima looking to work for a kimura from the bottom.
De Epinay tries to stand and escape but Mishima is controlling the position.
That's four minutes gone in the round.
Mishima looking for submissions off his back.
Mishima tries to roll over but De Epinay keeps him under control.
De Epinay is trying to get back to his feet now but his leg is trapped.
Mishima is looking to sinch up a guillotine here but De Epinay pulls his head out easily.
Mishima actively working from the bottom here.
The crowd applaud the fighters efforts here as the round comes to an end.
Mishima looking to work for a kimura from the bottom.
And thats the end of the round the fighters go back to their corners.
Jin Mishima dominated that second round.
The referee calls time. The cornermen exit stage left and we're back to business. This is the final round!
Mishima changes levels and looks for a double leg takedown. De Epinay tries to avoid it but Mishima manages to keep hold of a leg and drag De Epinay to the ground. De Epinay escapes though and pops straight back up to his feet.
De Epinay tries to clinch but is not successful on this occasion.
De Epinay wants to clinch up but Mishima keeps it at a distance.
Jin Mishima is looking to throw some combinations by the looks of things.
We've had a slow start to the round here - hopefully the action picks up.
De Epinay moves in looking to clinch but Mishima pushes him off.
De Epinay tries to close the distance and clinch up against the cage but Mishima paws at him with a jab and circles away.
That's one minute gone in the round.
De Epinay is looking to clinch.
De Epinay is looking to clinch.
Franz De Epinay seems to be the more aggressive standup fighter in this bout.
De Epinay tries to clinch but Mishima moves out of range.
Mishima shoots in looking for a double leg takedown. De Epinay defends it nicely.
Mishima fails with a takedown attempt from distance.
That's three failed takedown attempts in the round for Jin Mishima. That's going to take a lot out of him.
That's two minutes gone in the round.
De Epinay clinches up against the cage.
De Epinay putting his Muay Thai to good use. He has Mishima in a tight clinch and is doing some damage with knees to the body.
De Epinay landing knees to the head.

It looks like Jin Mishima has been cut.
De Epinay lands a knee to the head there! That was nasty!
Mishima is rocked!
De Epinay lands an elbow just above Mishima 's eye.
Oh Mishima is still all over the place! His legs are completely gone! Will he be able to recover?!!
Mishima takes an elbow to the temple.
Knees to the body from De Epinay.
De Epinay jerks Mishima's head down, straight into the path of a devastating knee! Mishima drops to the floor in a crumpled heap! De Epinay goes to throw a finishing haymaker but pulls out - good sportsmanship from De Epinay because Mishima was completely out of it. That was a nice finish - just the right level of brutality to send everyone home happy.
Ladies and gentlemen, after 2:36 of round 3, we have a winner by way of TKO (Knee). Franz De Epinay!
During a confident post fight interview, Franz De Epinay thanked all his fans. He seemed very genuine when describing how motivated his fans keep him.
|
|
|
|
|
|
|
|
|
|
|
|
|
|
|
|
|
|
|
|
|
|
|
| S |
C
A |
G |
S |
C
B |
G |
|
S |
C |
G |
|
energy
A | B |
|
hype
A | B |
|
pop
A | B |
|
mgr
A | B |
|
FIGHT
RATING
66% |
|
|
|
|
|
|
|
Undercard bout
|
Coming up we have a middleweight MMA rules bout between Michal Materla (ranked 0 p4p, 0 weight class) and JunJun Jones (ranked 0 p4p, 0 weight class). Materla comes to the cage accompanied by Sobota - Do góry łeb. Over to our ring announcer for the fighter introductions!
 |
|
 |
| 182 cm
28
193 lbs
5 - 5 - 0 |
|
183 cm
29
189 lbs
5 - 7 - 0 |
Good takedowns
Counter fighter
Experienced |
|
BJJ Blue Belt
Excellent MT
Determined |
|
| |
|
Ladies and gentlemen. This fight is 3 rounds, in the middleweight division.
Introducing the fighter to my left, fighting out of the red corner.
With a record of
5 - 5 - 0, fighting out of Tokyo, Michal Materla!
And introducing the fighter to my right, fighting out of the blue corner.
With a record of
5 - 7 - 0, fighting out of Tokyo, JunJun Jones!
The judges for this bout are Shigeki Fujiwara, Yuuki Gou and Yukihiro Yamamoto.
The bell rings for round one and we are underway!
Jones goes to the watering hole and comes back with a big thumbs up from the judges as he scores a three punch combo.
It looks like Michal Materla has been cut.
A head kick from Jones lands but Materla takes it in his stride.
Materla shoots in and drives through. Jones sprawls well.
A chopping leg kick lands by Jones.
Materla takes an uppercut right on the button but keeps his composure.
This is a great period of action - very entertaining stuff!

Jones lands a big head kick that sends Materla tumbling to the mat! Jones takes a step backwards and waves Materla back to his feet - he wants the finish!
Materla is rocked!
JunJun Jones seems to be the more aggressive standup fighter in this bout.
Jones lands with a right and another and another! Materla is in big trouble! Jones lands again and this time it's lights out for Materla! A quality knockout there for Jones.
Ladies and gentlemen, after 0:22 of round 1, we have a winner by way of KO (Strikes). JunJun Jones!
As JunJun Jones got his breath back, he grabbed the microphone and managed to blurt out the following: You picked the wrong guy Materla.'.
|
|
|
|
|
|
|
|
|
|
|
|
|
|
|
|
|
|
|
|
|
|
|
| S |
C
A |
G |
S |
C
B |
G |
|
S |
C |
G |
|
energy
A | B |
|
hype
A | B |
|
pop
A | B |
|
mgr
A | B |
|
FIGHT
RATING
100% |
|
|
|
|
|
|
|
Undercard bout
|
Coming up we have a bantamweight MMA rules bout between Kyoji Horiguchi (ranked 0 p4p, 0 weight class) and Orlando Menez (ranked 0 p4p, 0 weight class). The fight MMA fans around the world have waited their entire lives for!
 |
|
 |
| 164 cm
22
145 lbs
9 - 4 - 0 |
|
170 cm
21
144 lbs
4 - 5 - 0 |
BJJ Purple Belt
Lethal high kicks
Cardio machine |
|
Good wrestler
Basic striking
Powerful |
|
| |
|
Ladies and gentlemen. This fight is 3 rounds, in the bantamweight division.
Introducing the fighter to my left, fighting out of the red corner.
With a record of
9 - 4 - 0, fighting out of Tokyo, Kyoji Horiguchi!
And introducing the fighter to my right, fighting out of the blue corner.
With a record of
4 - 5 - 0, fighting out of Tokyo, Orlando Menez!
The judges for this bout are Yasuomi Hirokawa, Shirou Masuda and Taro Takaoka.
The bell rings for round one and we are underway!
Horiguchi throws a hook but Menez blocks it.
Horiguchi keeps the fight standing with a nice sprawl.
Menez with a lazy takedown attempt
and Horiguchi connects with a straight left hand counter down the middle.
Horiguchi fails to land with a series of punches.
Menez shoots in for a takedown - he's clinched up with Horiguchi but Horiguchi pushes him off and we're back to square one.
Kyoji Horiguchi has stuffed three takedown attempts in the round now. That's going to take a lot out of Orlando Menez.
Menez fails with the takedown.
Horiguchi has been working on his boxing with his coaches at Brown House in the buildup to the fight.
Horiguchi connects with a body shot that sends Menez's belly button to the back.
Menez drives through with a takedown into Horiguchi's guard. Let's see what he can do from the top position.
The referee wants the fighters to be more active or he's going to reset them on the feet.
Horiguchi wants to stand but Menez is controlling the position.
Menez makes a bit of distance and scores with some ground and pound, still in guard.
Menez throwing shots from guard but he's hitting more mat than opponent.
The crowd are loving this. Great action here.
Horiguchi utilising some decent striking defenses from the guard, preventing the ground and pound.
That's one minute gone in the round.
Menez stands up and looks to throw the legs aside to pass to side control. Horiguchi swivels though and keeps the full guard.
Menez with a flurry of punches that miss.
Horiguchi keeping moving, preventing Menez from controlling successfully.
Menez has the superior BJJ but he's also working some ground strikes into his gameplan.
Horiguchi not looking particularly offensive just at the moment.
Menez scoring with punches to the head and body.
Menez slows down the pace of the fight, as he sits in guard.
That's two minutes gone in the round.
Horiguchi working the defensive guard well to avoid strikes from Menez.
Menez is looking to work some ground and pound but Horiguchi has wrist control.
Menez stays in close to Horiguchi's body and controls the position.
Well, the referee has seen enough. Neither fighter is active enough on the ground so he's stood them back up.
Menez with a lazy takedown attempt
and Horiguchi counters with a one-two to the body.
Kyoji Horiguchi is looking to keep the fight on the feet at all costs.
Horiguchi fakes a jab and scores with a low kick.
Menez shoots in with a takedown attempt and he has Horiguchi pinned against the cage. Horiguchi gets the underhooks and manages to circle away.
This has been an exciting period of action!
Horiguchi throws a hook to the body but it doesn't connect.
Menez dodges the punch combination from Horiguchi.
That's three minutes gone in the round.
Horiguchi throws out a token jab with nothing on it.
Menez changes levels and drives through with a really nice takedown into side control. Horiguchi looks really pissed at himself for not defending that better.
Horiguchi tries to bench press Menez off him but Menez keeps the position.
Menez gets to mount! Horiguchi was on the offensive and wasn't defending properly.
Horiguchi really trying hard to get back to half guard here.
The ref warns both fighters not to hold the cage as they work up against the meshing.
Menez scores with a couple of good head shots there.
Menez lands a heavy elbow.
The fighters are starting to get a bit slippery now, which will make submissions a bit more difficult.
Menez fakes a shot to the body and cracks his opponent in the head. Nice ground and pound there!
That's four minutes gone in the round.
This has been an exciting period of action!
Menez landing strikes, looking to finish!
Horiguchi is in a horrible position here. Menez smacks him with another shot as he tries to escape the position.
Menez with good strikes from the mount here!
BOOM! Menez connects with a massive shot to the dome!
Horiguchi tries to get back to half guard but can't.
Horiguchi is in a horrible position here. Menez smacks him with another shot as he tries to escape the position.
As the round comes to an end the crowd are showing their appreciation for a great round of action.
Horiguchi is trying desperately to improve position.
And thats the end of the round the fighters go back to their corners.
Orlando Menez dominated that round.
The fighters get back to their feet, the hooter sounds and we're back to the action!
Horiguchi leaves Menez with his face pressed against the mat as he sprawls beautifully, defending against a solid takedown attempt.
Menez has a takedown stuffed.
Menez lands with a two punch combination before moving back out of range.
It looks like Kyoji Horiguchi has been cut.
Horiguchi lands with a hook. Menez tried to avoid it but it clipped the top of his head.
Orlando Menez seems to be the more aggressive standup fighter in this bout.
Horiguchi will need to tighten up his combinations if he doesn't want to gas himself out, swinging at thin air.
Menez tries to shoot in for a takedown. He's got hold of a leg but Horiguchi swivels and escapes.
Kyoji Horiguchi has stuffed three takedown attempts in the round now. That's going to take a lot out of Orlando Menez.
Menez tries for a takedown but Horiguchi sees it coming a mile off and avoids it easily.
Horiguchi keeps the fight standing with a nice sprawl.
Menez needs to keep his hands up - Horiguchi had a free shot at his head there.

It looks like Orlando Menez has been cut.
Menez shoots in for a double leg but Horiguchi sprawls well. That's going to sap some energy.
Horiguchi throws a head kick that misses and slips in the process. He scrambles back to his feet and the fighters circle.
Kyoji Horiguchi is winning the standup battle so far.
Menez shoots in for a takedown but Horiguchi shows good takedown defense there and keeps this one on the feet.
That's one minute gone in the round.
Horiguchi swings wildly with a right hand that was never going to find it's target.
Horiguchi bobs and weaves and throws out a fast jab that snaps Menez's head backwards.
Horiguchi lands an overhand left. A wild punch that just about connected.

Menez is rocked!
Menez gets caught by a big overhand right and goes down! Horiguchi gets on top of him and starts throwing some serious punches until the ref intervenes and stops the fight!
Ladies and gentlemen, after 1:19 of round 2, we have a winner by way of TKO (Strikes). Kyoji Horiguchi!
Kyoji Horiguchi was full of energy after the big win and talked about how he thinks he can do big things in this sport. The crowd were appreciative of his determination to succeed.
The defeated Orlando Menez had this to say: 'I'll be back soon better then ever!! Thanks guys!!!'.
|
|
|
|
|
|
|
|
|
|
|
|
|
|
|
|
|
|
|
|
|
|
|
| S |
C
A |
G |
S |
C
B |
G |
|
S |
C |
G |
|
energy
A | B |
|
hype
A | B |
|
pop
A | B |
|
mgr
A | B |
|
FIGHT
RATING
100% |
|
|
|
|
|
|
|
Undercard bout
|
Coming up we have a heavyweight MMA rules bout between Mophaf Bungradidoa (ranked 0 p4p, 0 weight class) and Qwewetgtfsdr Dsafdsfqw (ranked 0 p4p, 0 weight class). Rumors backstage are that the fighters have been paid to keep it standing but we know that would never happen in MMA!
 |
|
|
| 178 cm
20
250 lbs
5 - 2 - 0 |
|
190 cm
29
220 lbs
6 - 8 - 0 |
Good wrestling
Brawler
Very strong |
|
BJJ Brown Belt
Brawler
Solid chin |
|
| |
|
Ladies and gentlemen. This fight is 3 rounds, in the heavyweight division.
Introducing the fighter to my left, fighting out of the red corner.
With a record of
5 - 2 - 0, fighting out of Tokyo, Mophaf Bungradidoa!
And introducing the fighter to my right, fighting out of the blue corner.
With a record of
6 - 8 - 0, fighting out of Tokyo, Qwewetgtfsdr Dsafdsfqw!
The judges for this bout are Yasuomi Hirokawa, Hirohito Nitta and Shirou Masuda.
The bell rings for round one and we are underway!
Dsafdsfqw fails with the takedown
and Bungradidoa counters with a straight punch to the midsection.
Mophaf Bungradidoa seems to be the more aggressive standup fighter in this bout.

Bungradidoa moves into range and clinches up with Dsafdsfqw.
Dsafdsfqw tries to pull guard but Bungradidoa holds him up against the cage and eventually Dsafdsfqw drops back down to his feet.
Bungradidoa tries to break the clinch but Dsafdsfqw is controlling the position.
The two fighters are working to gain dominance in the clinch.
The crowd are getting pretty annoyed with Bungradidoa for his constant stalling in the clinch and are voicing their displeasure.
Bungradidoa breaks from the clinch.
That's one minute gone in the round.
Jab, cross, leg kick. Nice combination by Bungradidoa!
Bungradidoa tries a low kick but Dsafdsfqw avoids it.
Dsafdsfqw shoots in but doesn't get the takedown
and Bungradidoa counters by clinching up.
Mophaf Bungradidoa has stuffed three takedown attempts in the round now. That's going to take a lot out of Qwewetgtfsdr Dsafdsfqw.
Bungradidoa escapes the clinch and we're back to striking.
Dsafdsfqw misses with a takedown attempt
and Bungradidoa holds on and brings the fighters into a clinch.
Bungradidoa pushes off and circles away, back to the middle of the mat.
Bungradidoa has been working on his boxing with his coaches at Tokyo Totally Gym + Sauna in the buildup to the fight.
Dsafdsfqw with a lazy takedown attempt
and Bungradidoa counters by moving into the clinch.
Bungradidoa manages to break the clinch.

Bungradidoa drops Dsafdsfqw with a beautiful combination! Dsafdsfqw stares up at his opponent, who ushers him back to his feet - Bungradidoa is looking for the KO!
It looks like Qwewetgtfsdr Dsafdsfqw has been cut.
Wooooo! Give it up for these two warriors! They are putting on a show!
Bungradidoa gets a clinch.
That's two minutes gone in the round.
Bungradidoa is stalling here.
Bungradidoa's corner calls for him to break the clinch, which he does.
Dsafdsfqw shoots in but doesn't get the takedown
and Bungradidoa moves into the clinch.
Bungradidoa pressing his opponent against the cage.
Bungradidoa breaks from the clinch.
Bungradidoa throws a good cross that connects.
Dsafdsfqw shoots in but doesn't get the takedown
and Bungradidoa counters into the clinch. Nicely done.
That's three minutes gone in the round.
Bungradidoa holding his opponent close, against the cage.
Bungradidoa breaks from the clinch.
Dsafdsfqw manages to get an easy takedown there - catching Bungradidoa on his heels. He'll look to pass Bungradidoa's guard now, I'm sure.
The fighters are working up against the cage. Bungradidoa manages to wriggle his way back to his feet, so the fighters are now clinched against the cage.
A nice right hand lands inside from Bungradidoa.
Dsafdsfqw fails to pull guard.
Bungradidoa pushes off and circles away, back to the middle of the mat.
Dsafdsfqw shoots in but Bungradidoa avoids the takedown attempt easily.
Bungradidoa fakes with an overhand right and moves in to clinch with Dsafdsfqw, pushing him back against the cage.
That's four minutes gone in the round.
Bungradidoa breaks from the clinch.
Bungradidoa darts in and clinches Dsafdsfqw up against the cage.
Dsafdsfqw tries to take the fight to the ground by pulling guard but can't manage it.
This has been an exciting period of action!
Bungradidoa stays in close to his opponent and throws a right hand to the body.
Dsafdsfqw looks winded!
Bungradidoa breaks the clinch and we're back to striking at distance.
Dsafdsfqw gets his takedown attempt stuffed easily
and Bungradidoa counters with a good right hand that lands right on the jaw.
The crowd are going absolutely nuts as the round comes to an end - what a fantastic round of action!
Dsafdsfqw with a poor takedown
and Dsafdsfqw takes a counter punch right on the button for his troubles.
Bungradidoa rushes Dsafdsfqw and pushes him back against the cage in a clinch.
Bungradidoa breaks the clinch and we return to the middle of the mat.
And thats the end of the round the fighters go back to their corners.
Mophaf Bungradidoa dominated that round.
The cut man is working on Qwewetgtfsdr Dsafdsfqw's cut.
Well, the break between rounds is over. Let's get back to the scrappin!
Bungradidoa clinches up with Dsafdsfqw and pushes him back against the cage.
Dsafdsfqw tries to take the fight to the ground by pulling guard but can't manage it.
Bungradidoa throws an elbow but it misses.
Dsafdsfqw pulls guard.
Bungradidoa content to strike from guard, landing some decent shots.
Bungradidoa is taking a break and basically stalling. The referee will not allow him to do that for long.
Bungradidoa stands up from Dsafdsfqw's guard - Bungradidoa perhaps looking for a knockout.
Bungradidoa thows a body shot but no joy.
Dsafdsfqw with a lazy takedown attempt
and Bungradidoa moves into the clinch.
Bungradidoa's corner calls for him to break the clinch, which he does.
That's one minute gone in the round.
Bungradidoa closes the distance and clinches.
Bungradidoa makes some space for himself and lands an uppercut.
Bungradidoa taking a breather.
Bungradidoa unloads a knee to the mid-section.
Dsafdsfqw is breathing heavily.
Bungradidoa pushes off and circles away, back to the middle of the mat.
Bungradidoa closes the distance and presses his opponent up against the cage.
Bungradidoa taking a breather.
Bungradidoa is really dominating this fight. Is there anything that Dsafdsfqw can do to turn this around?
Bungradidoa lands a body punch in the clinch.
That's two minutes gone in the round.
The crowd are loving this. Great action here.
The pace slowing considerably in the clinch, as Bungradidoa takes a break from that fighting nonsense to think about the finer things in life.
Bungradidoa breaks the clinch and we return to the middle of the mat.
Bungradidoa cracks Dsafdsfqw with a big right hand that sends him crashing to the floor. Bungradidoa has the opportunity to follow him to the ground but instead he's beckoning Dsafdsfqw to stand back up!
Dsafdsfqw is rocked!
Bungradidoa plants his feet and throws a brutal three punch combo that sends Dsafdsfqw swiftly into unconsciousness! Right, left, right! Boom, boom, boom! Dsafdsfqw face plants, battered and bloodied! He might never be the same again after that finish!
Ladies and gentlemen, after 2:32 of round 2, we have a winner by way of KO (Punches). Mophaf Bungradidoa!
Mophaf Bungradidoa took to the microphone after his victory and thanked his sponsors, Kemists ↑ 5x160Q for their support in the buildup to the fight.
|
|
|
|
|
|
|
|
|
|
|
|
|
|
|
|
|
|
|
|
|
|
|
| S |
C
A |
G |
S |
C
B |
G |
|
S |
C |
G |
|
energy
A | B |
|
hype
A | B |
|
pop
A | B |
|
mgr
A | B |
|
FIGHT
RATING
74% |
|
|
|
|
|
|
|
Undercard bout
|
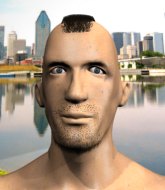
Coming up we have a lightweight MMA rules bout between Kenji Woko (ranked 0 p4p, 0 weight class) and Moritsune Musashi (ranked 0 p4p, 0 weight class). Over to our ring announcer for the fighter introductions!
 |
|
 |
| 170 cm
25
165 lbs
7 - 7 - 0 |
|
170 cm
20
165 lbs
4 - 0 - 0 |
BJJ Purple Belt
Excellent boxer
Granite chin |
|
Good takedowns
Basic striking
Good gas tank |
|
| |
|
Ladies and gentlemen. This fight is 3 rounds, in the lightweight division.
Introducing the fighter to my left, fighting out of the red corner.
With a record of
7 - 7 - 0, fighting out of Tokyo, Kenji Woko !
And introducing the fighter to my right, fighting out of the blue corner.
With a record of
4 - 0 - 0, fighting out of Tokyo, Moritsune Musashi!
The judges for this bout are Shigeki Fujiwara, Yuuki Gou and Kenichi Hosakawa.
The bell rings for round one and we are underway!
Musashi doesn't succeed with the takedown
and Woko counters with a three punch combination, finished off with a leg kick. Nice work.
Musashi looks for a takedown here. Will he get it? Woko is fending him off so far but Musashi persists. Nope, Woko circles away and we're back to standing.
Nice cross by Woko .
Woko connects with a looping left hand that seems like it dazed Musashi momentarily.
Woko bobbing and weaving, closes the distance and lands a hook to the side of Musashi's head.
Musashi tries for a takedown but Woko circles away easily
and Woko counters with a one-two to the body.
Kenji Woko has stuffed three takedown attempts in the round now. That's going to take a lot out of Moritsune Musashi.
Woko punishes Musashi's body with a nice straight punch.
Musashi throws a head kick that misses.
Musashi shoots in for a double leg but Woko sprawls well. That's going to sap some energy.
Woko shoots in for a takedown! He's got it and he's managed to land in side control! That's better than Woko was expecting from the takedown attempt, I'm sure!
We've seen a great period of action over the last minute or so - credit to both fighters for going all out!
Woko lands a nice forearm strike.
Woko wants to control but Musashi is keeping him busy.
Musashi sneaks back into half guard.
That's one minute gone in the round.
Musashi is refusing to be controlled, as Woko sits in half guard.

Musashi actively working from the bottom here.
Musashi is working for an escape here. He's hooked one of Woko 's legs and he's managed to sneak out and take Woko 's back!
Woko looking to stop the rear naked choke attempt by controlling the hands.
Musashi has the hooks in and he's looking for a rear naked choke here. Woko is defending well but eventually Musashi manages to get an arm under the chin and he's locked on the RNC! Woko has no choice but to tap now! He does! This one is all over!
Ladies and gentlemen, after 2:58 of round 1, we have a winner by way of Submission (RNC). Moritsune Musashi!
A loyal slave to those sponsorship dollars, Moritsune Musashi made sure he mentioned Kore Fight Nutrition [TG], along with how happy he was to win his fight.
|
|
|
|
|
|
|
|
|
|
|
|
|
|
|
|
|
|
|
|
|
|
|
| S |
C
A |
G |
S |
C
B |
G |
|
S |
C |
G |
|
energy
A | B |
|
hype
A | B |
|
pop
A | B |
|
mgr
A | B |
|
FIGHT
RATING
52% |
|
|
|
|
|
|
|
Co-main event
|
Coming up we have a light heavyweight MMA rules bout between Keiichi Yamada (ranked 0 p4p, 0 weight class) and Loves To Spooge (ranked 0 p4p, 0 weight class). Spooge has chosen Litte Things - One Direction as his entrance music, which hasn't gone down very well with the crowd. Loves To Spooge will no doubt be looking to use his reach advantage to good effect.
 |
|
 |
| 170 cm
21
205 lbs
3 - 1 - 0 |
|
185 cm
21
219 lbs
5 - 3 - 0 |
Good wrestling
Excellent boxer
Cardio machine |
|
BJJ Purple Belt
Excellent MT
Powerful |
|
| |
|
Ladies and gentlemen. This fight is 3 rounds, in the light heavyweight division.
Introducing the fighter to my left, fighting out of the red corner.
With a record of
3 - 1 - 0, fighting out of Tokyo, Keiichi Yamada!
And introducing the fighter to my right, fighting out of the blue corner.
With a record of
5 - 3 - 0, fighting out of Tokyo, Loves To Spooge!
The judges for this bout are Yukihiro Shimada, Shirou Masuda and Shigeki Fujiwara.
The bell rings for round one and we are underway!
Spooge gets taken down but at least he's managed to land in guard.
Yamada passes into half guard.
Spooge looks like he's trying to stand up.
Spooge moves his hips nicely and gets into full guard.
Yamada slips effortlessly into side control - very nice.
Spooge is trying to get back to his feet.
Yamada looking for an arm triangle but it's way too loose to do anything.
Yamada in side control, working for a kimura. He's got hold of an arm and he's torquing it... Spooge is tapping! That's the end of the fight!
Ladies and gentlemen, after 0:53 of round 1, we have a winner by way of Submission (Kimura). Keiichi Yamada!
|
|
|
|
|
|
|
|
|
|
|
|
|
|
|
|
|
|
|
|
|
|
|
| S |
C
A |
G |
S |
C
B |
G |
|
S |
C |
G |
|
energy
A | B |
|
hype
A | B |
|
pop
A | B |
|
mgr
A | B |
|
FIGHT
RATING
54% |
|
|
|
|
|
|
|
Main event
|
Coming up we have a welterweight MMA rules bout between Dean Thomas (ranked 0 p4p, 0 weight class) and Julian Eduardo Demaestri (ranked 0 p4p, 0 weight class). These two fighters really are very evenly matched on the feet - it will be fascinating to see who can assert themselves in that aspect of the fight.
 |
|
 |
| 185 cm
28
180 lbs
9 - 6 - 0 |
|
180 cm
23
175 lbs
5 - 9 - 0 |
BJJ Purple Belt
Excellent MT
Cardio machine |
|
Good wrestler
Decent boxing
Fast |
|
| |
|
Ladies and gentlemen. This fight is 3 rounds, in the welterweight division.
Introducing the fighter to my left, fighting out of the red corner.
With a record of
9 - 6 - 0, fighting out of Tokyo, Dean Thomas!
And introducing the fighter to my right, fighting out of the blue corner.
With a record of
5 - 9 - 0, fighting out of Tokyo, Julian Eduardo Demaestri!
The judges for this bout are Kenichi Hosakawa, Tatsuya Matsuyama and Shigeki Sano.
The bell rings for round one and we are underway!
Thomas leaves Demaestri with his face pressed against the mat as he sprawls beautifully, defending against a solid takedown attempt.
Demaestri checks the leg kick.
Nice sprawl there from Thomas as Demaestri shoots in.
A slapping body kick lands there for Thomas.
Thomas throws a low kick but his opponent is out of range.
Thomas throws a leg kick but Demaestri checks it.
Thomas misses with a body kick.
Demaestri fakes high and shoots in for a takedown but Thomas avoids it really well and circles away.
Dean Thomas has stuffed three takedown attempts in the round now. That's going to take a lot out of Julian Eduardo Demaestri.
Demaestri looks frustrated there after his takedown attempt is stuffed easily.
Thomas lands with a thumping leg kick.
Thomas misses with a body kick.
Thomas connects with an inside leg kick.
Demaestri shoots in looking for a takedown but Thomas manages to keep the fight standing, pushing Demaestri's face into the canvas for good measure before circling away.
Demaestri takes a push kick to the midsection and stumbles backwards.
We've seen a great period of action over the last minute or so - credit to both fighters for going all out!
Thomas lands with a slapping head kick.
It looks like Julian Eduardo Demaestri has been cut.
A solid body kick from Thomas.
Demaestri looks winded!
Demaestri looks for a takedown but Thomas sprawls well.
That's one minute gone in the round.
Thomas delivers a nice body kick.
A good leg kick by Thomas.
Thomas is looking to score with low kicks.
Thomas lands with a nice body kick.
Ooooh, nice body kick lands from Thomas. Demaestri shrugs it off though.
Thomas buckles his opponent's knee momentarily with a nice leg kick.
Thomas looking to take his opponent's legs away with the low kicks.
This has been an exciting period of action!
Thomas fakes with a right hand and throws a good leg kick, right into the thigh. That had to hurt Demaestri.
Thomas lands a leg kick and bounces back out of range.
Thomas fakes the leg kick and cracks Demaestri in the body.
Thomas throws a head kick but Demaestri moves out of range.
Demaestri will have to do better than that with his takedown attempts.
Demaestri on the receiving end of a decent leg kick there by Thomas. Thomas obviously looking to wear him down.
Demaestri shoots in for a takedown. "I don't think so" says Thomas as he avoids it easily.
A nice leg kick lands there from Thomas.
Thomas lands a leg kick that knocks Demaestri off balance momentarily.
Thomas scores with a leg kick.
Dean Thomas is looking to keep the fight on the feet at all costs.
That's two minutes gone in the round.
That kick from Thomas tenderised Demaestri's leg. Demaestri is trying to keep his angry face on.
Thomas lands a big head kick that sends Demaestri tumbling to the mat! Thomas takes a step backwards and waves Demaestri back to his feet - he wants the finish!
Demaestri is rocked!
Ohhhhhhhhhh, brutal head kick from Thomas! This one is all over!
Ladies and gentlemen, after 2:14 of round 1, we have a winner by way of KO (Head Kick). Dean Thomas!
A relieved looking Dean Thomas thanked the fans for their support and gave the usual line about them being amazing. They seemed to believe that he actually meant it.
|
|
|
|
|
|
|
|
|
|
|
|
|
|
|
|
|
|
|
|
|
|
|
| S |
C
A |
G |
S |
C
B |
G |
|
S |
C |
G |
|
energy
A | B |
|
hype
A | B |
|
pop
A | B |
|
mgr
A | B |
|
FIGHT
RATING
100% |
|
|
|
|
|
|
|
|
|
|
