 |
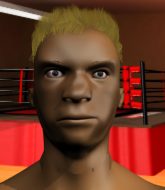
LFC 40 - Jon vs Shaw PBP Commentary |
Undercard bout
|
|
|
|
Undercard bout
|
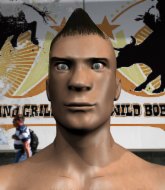
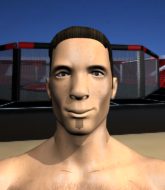
Coming up we have a heavyweight MMA rules bout between Hans Schreilber (ranked 0 p4p, 0 weight class) and Dirk Diggler (ranked 0 p4p, 0 weight class). Schreilber comes to the cage accompanied by Amerika. The atmosphere really building for this one as we go over to our ring announcer for the fighter introductions!
 |
|
 |
| 195 cm
25
275 lbs
0 - 0 - 0 |
|
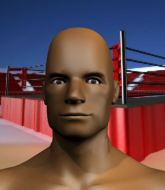
195 cm
27
229 lbs
4 - 2 - 0 |
BJJ White Belt
Excellent boxer
Big right hand |
|
BJJ Blue Belt
Brawler
Knockout power |
|
| |
|
Ladies and gentlemen. This fight is 3 rounds, in the heavyweight division.
Introducing the fighter to my left, fighting out of the red corner.
With a record of
0 - 0 - 0, fighting out of Hilo, Hans Schreilber!
And introducing the fighter to my right, fighting out of the blue corner.
With a record of
4 - 2 - 0, fighting out of Hilo, Dirk Diggler!
The judges for this bout are Paul Gruel, Roger Salmon and Chris Saunders.

The bell rings for round one and we are underway!
Schreilber leaves Diggler with his face pressed against the mat as he sprawls beautifully, defending against a solid takedown attempt.
Diggler shoots in looking for a takedown but Schreilber manages to keep the fight standing, pushing Diggler's face into the canvas for good measure before circling away.
Diggler moves in looking to clinch but Schreilber pushes him off.
Schreilber will need to tighten up his combinations if he doesn't want to gas himself out, swinging at thin air.
A punch combination from Schreilber misses.
Schreilber misses with a series of wild punches.
Schreilber dips down and scores with a jab to the body.
Diggler dives in and grabs Schreilber's left leg, looking for a takedown. Schreilber pushes down on Diggler's head and hops out.
Hans Schreilber has stuffed three takedown attempts in the round now. That's going to take a lot out of Dirk Diggler.
Diggler avoids the body shot from Schreilber.
Schreilber getting the better of the striking in that exchange.

It looks like Dirk Diggler has been cut.
Nice body punch from Schreilber.
We've seen a great period of action over the last minute or so - credit to both fighters for going all out!
Schreilber throws a jab, cross combination which is slipped

and Diggler counters with a driving takedown into guard. Nice work there by Diggler.
Schreilber striking off his back but it's not causing Diggler any problems.

Diggler got a little sloppy there for a moment and Schreilber has worked his way into a loose triangle - can he finish it?! No, Diggler has managed to get both his arms back between Schreilber's legs - danger averted.

That's one minute gone in the round.
Schreilber has a loose triangle. He'll be looking to tighten that up but Diggler can see exactly what he's planning and manages to posture up and free himself.
Diggler content to stall in guard here.
Schreilber throws his legs up looking to secure a triangle. Oh, that looks pretty tight, I gotta say! Diggler escapes and throws Schreilber's legs to the side, diving into side control!
Schreilber tries to improve position but can't.

That's two minutes gone in the round.
Schreilber is not content to let Diggler control the position.
Schreilber stuck in half guard on the bottom here.
Schreilber could do with losing a few pounds - he looks very soft around the mid section, to put it politely.
Schreilber is trying to control Diggler's posture but Diggler avoids it.
Schreilber wants to get back to his feet but Diggler is dominant here and he's now got Schreilber's back!
Diggler tries to get the hooks in deep but Schreilber pushed the leg off.
Schreilber just trying to survive but Diggler is wriggling into a better position, looking to finish.
Diggler is controlling his opponent, waiting for an opportunity to finish.

That's three minutes gone in the round.
Schreilber is defending well here and trying to improve his position.
Diggler is not going to allow Schreilber to sit and survive in this position.
Schreilber knows he needs to get back to his feet asap. He's simply no match for Diggler on the ground.
Can Schreilber hold on?! Diggler is landing more strikes to his hapless foe.

It looks like Hans Schreilber has been cut.
The fighters are pressed up against the cage, both looking to find a bit of space to work.
Schreilber tries to escape the position.

Diggler looking for the choke but no joy.
Schreilber tries to break free.

That's four minutes gone in the round.
We've seen a great period of action over the last minute or so - credit to both fighters for going all out!
Schreilber is working hard here to advance position.
Schreilber trying to control but not successfully.
Schreilber can't escape the position.
Schreilber is trying to get back to his feet but he's not managed it yet.
Diggler wants to control but Schreilber is keeping busy.
As the round comes to an end the crowd are showing their appreciation for a great round of action.
Diggler has the hooks sunk in and you can see the will to fight slowly draining out of Schreilber's body.
Schreilber looking very determined here, making life difficult for Diggler.
And thats the end of the round the fighters go back to their corners.
A close round but Dirk Diggler will probably get the nod.
Both fighters have cut men working on them during the interval.
OK. That's time! The bell goes and we're back to the action.

Diggler takes a body punch but keeps moving.
Diggler closes this distance looking for a takedown but Schreilber circles away.
Schreilber swats away the attempt to clinch by Diggler.
Schreilber swinging wildly here.
Schreilber lands a straight punch to the body, keeping Diggler at a distance.
Schreilber takes a swing at Diggler's ribcage but misses.
Diggler avoids the body shot from Schreilber.
Schreilber thows a body shot but no joy.
Schreilber stuffs the takedown attempt from Diggler. Diggler gets slowly back to his feet.
Schreilber scores with a hook to the body. Diggler takes a step back and tries to catch his breath.
Diggler is breathing heavily.
The fans in attendance giving it up for the two fighters, who have really let it all hang out in the last minute or so!
Diggler swings for the body but Schreilber moves out of range.
Nice shot lands for Schreilber.
That's one minute gone in the round.
Schreilber with a body punch. A glancing blow.
Diggler tries to move into range but Schreilber moves to the side and lands with a nice right hand.
Schreilber connects with a combination that backs up Diggler into the cage. Schreilber lands a flurry of punches that gets past Diggler's guard. Diggler is down and the referee has seen enough. It is all over! Schreilber bursts into tears - this win obviously means a huge amount to him.
Ladies and gentlemen, after 1:16 of round 2, we have a winner by way of TKO (Strikes). Hans Schreilber!
Our winner, Hans Schreilber, made sure he spent some time buttering up the crowd during his post fight interview, which will no doubt bring him a few more fans.
|
|
|
|
|
|
|
|
|
|
|
|
|
|
|
|
|
|
|
|
|
|
|
| S |
C
A |
G |
S |
C
B |
G |
|
S |
C |
G |
|
energy
A | B |
|
hype
A | B |
|
pop
A | B |
|
mgr
A | B |
|
FIGHT
RATING
98% |
|
|
|
|
|
|
|
Undercard bout
|
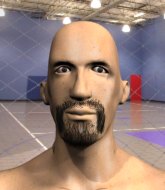
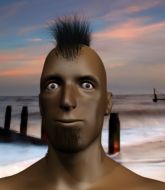
Coming up we have a light heavyweight MMA rules bout between John Rekis (ranked 0 p4p, 0 weight class) and Nush Tully (ranked 0 p4p, 0 weight class). Rekis comes to the cage accompanied by AC/DC - Thunderstruck. John Rekis has the better chin. Will he look to stand and bang today?
 |
|
 |
| 190 cm
25
210 lbs
6 - 4 - 0 |
|
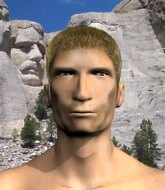
190 cm
25
213 lbs
2 - 1 - 0 |
Decent wrestler
Counter fighter
Granite chin |
|
Decent wrestler
Counter fighter
Likes musicals |
|
| |
|
Ladies and gentlemen. This fight is 3 rounds, in the light heavyweight division.
Introducing the fighter to my left, fighting out of the red corner.
With a record of
6 - 4 - 0, fighting out of Las Vegas, John Rekis!
And introducing the fighter to my right, fighting out of the blue corner.
With a record of
2 - 1 - 0, fighting out of Hilo, Nush Tully!
The judges for this bout are Jeff Smith, Chris Saunders and Ryoma Takatsuka.
The bell rings for round one and we are underway!
Tully swats away the attempt to clinch by Rekis.

Rekis clinches up with Tully and pushes him back against the cage.
Rekis wants a takedown but no success here.
Tully is trying to push Rekis away but Rekis has him pressed against the cage, so he's going nowhere.
Rekis is trying to drag Tully to the mat but Tully just about manages to keep his footing. He used the cage to his advantage there.
Tully swings away with an uppercut that misses.
Tully has had enough of the clinch but Rekis keeps him there for the moment.
Rekis tries for a takedown. No joy.
That's three failed takedown attempts in the round for John Rekis. That's going to take a lot out of him.
Tully is trying to break free.
Rekis is trying to drag Tully to the mat but Tully just about manages to keep his footing. He used the cage to his advantage there.
Rekis tries for a takedown but Tully manages to get underhooks.
We've been hearing reports that Rekis has been drilling takedowns in recent sessions so let's see if that has an impact on the result of this fight.
That's one minute gone in the round.
Tully wants to take the fight to the mat but Rekis manages to get underhooks and keep the fight in the clinch.
Rekis goes for a takedown attempt but Tully pushes him away and we're back to fighting at a distance.
Tully takes a step towards his opponent and connects with a left hand, before circling away.
Tully shoots in for a takedown but Rekis shows good takedown defense.
Tully fails to land with the punch combination there - jab, cross, hook, miss, miss, miss.
Rekis shoots in for a takedown but doesn't get it.
No luck with that takedown attempt from Rekis.
Tully lands a pitter patter jab to the forehead of his opponent.
That's two minutes gone in the round.

Tully tries to sprawl but Rekis drives through with a takedown into half guard.
This has been an exciting period of action!
The referee wants the fighters to be more active or he's going to reset them on the feet.
Rekis controlling the action here.
Rekis passes to full mount!
Tully is in all sorts of trouble here.
Rekis lands a big elbow.

Tully bucks Rekis off and manages to get back to his feet!
Tully throws a right and a left that Rekis avoids nicely.
Rekis fails to land the takedown.
That's three minutes gone in the round.
Tully slaps away a takedown attempt from Rekis, before circling back to the center of the mat.
Tully misses with a few strikes there.
Rekis shoots in for a takedown. "I don't think so" says Tully as he avoids it easily.
Tully lands with a two punch combination before moving back out of range.
Tully lands with an overhand left.
Tully looks to score with a jab to the body but Rekis is just out of range.
No luck with that takedown attempt from Tully.
That's four minutes gone in the round.
Danga de danga de dang - Tully scores with a four punch combination!
This is a great period of action - very entertaining stuff!
Rekis shoots in for a double leg but Tully sprawls well. That's going to sap some energy.
Rekis shoots in for a takedown! He's got it and he's managed to land in side control! That's better than Rekis was expecting from the takedown attempt, I'm sure!
Rekis wants to lay and pray for a moment but Tully keeps working.
Rekis is trying to get an arm triangle but Tully is defending well.
The ref warns both fighters not to hold the cage as they work up against the meshing.
The crowd are going absolutely nuts as the round comes to an end - what a fantastic round of action!
Rekis tries to land with some ground and pound but misses.
And thats the end of the round the fighters go back to their corners.
Nush Tully dominated that round.
The fighters' corners scream their final instructions, as the referee calls time. Here we go, back to the action!
Rekis gets a clinch.
Rekis is working for a takedown up against the cage. He can't get it on this occasion though.
Tully is trying to work for a single leg takedown but Rekis pulls him back up using the underhooks.
Both guys are working to get underhooks.
Rekis keeps the fight in the clinch, despite Tully's efforts to push away.
Tully has had enough of the clinch and is looking to separate.
Rekis has hold of a leg and is looking for a trip takedown. Tully avoids it nicely though and we remain in the clinch.
Both fighters working to control the clinch.
Rekis tries to score a body lock takedown but Tully shows good agility there to stay on his feet.
That's three failed takedown attempts in the round for John Rekis. That's going to take a lot out of him.
Rekis is looking for a takedown up against the cage. Tully gets underhooks though and prevents the takedown attempt.
Rekis wants to take the fight to the mat but Tully manages to get underhooks and keep the fight in the clinch.
Tully looks like he'd prefer to be striking at range right now.
That's one minute gone in the round.
Tully is trying to work out of this bad position, with his back against the cage.
Rekis has Tully pressed up against the cage and is working for takedown. Tully manages to improve position though and keeps the fight standing.
Rekis drops down for a takedown but doesn't get it.
Rekis wants to take the fight to the mat but Tully manages to get underhooks and keep the fight in the clinch.
Both fighters are absolutely exhausted here.
Rekis wants to take the fight to the mat but Tully manages to get underhooks and keep the fight in the clinch.
Rekis has a body lock and is looking for a takedown. Tully is bouncing around trying to prevent the takedown and somehow he has indeed managed to stay on his feet.
Rekis drops down for a takedown but doesn't get it.
Tully tries to break free but Rekis pushes him back against the cage.
That's two minutes gone in the round.
Rekis is looking for a takedown up against the cage. Tully gets underhooks though and prevents the takedown attempt.
Tully is trying to break free.
Rekis tries to pull guard but can't drag his opponent to the mat. Tully just stands there and leans against the cage.
Tully tries to break free but Rekis pushes him back against the cage.
Rekis wants to take the fight to the mat but Tully manages to get underhooks and keep the fight in the clinch.
Rekis prevents Tully from breaking the clinch.
Rekis wants a takedown.
Rekis prevents Tully from breaking the clinch.
Tully has had enough of the clinch but Rekis keeps him there for the moment.
Rekis is looking for a takedown up against the cage. Tully gets underhooks though and prevents the takedown attempt.
Tully is trying to force a seperation but Rekis has the dominant position.
Rekis prevents Tully from breaking the clinch.
Tully has had enough of the clinch but Rekis keeps him there for the moment.
That's three minutes gone in the round.
Rekis tries to pull guard but Tully forces him back to his feet, against the cage.
Nush Tully seems to be working more effectively in the clinch in the fight so far.
Rekis is working for takedown but Tully is calmly controlling the position for now.
Tully is fighting off a takedown attempt but Rekis is just too persistent for him and manages to trip Tully to the mat. Tully regains guard as soon as the fighters hit the mat.
The fighters are starting to get a bit slippery now, which will make submissions a bit more difficult.
Tully is trying to control the position from the bottom.
Rekis stopping the sweep attempt from Tully.
Tully controls Rekis momentarily but Rekis frees himself.
Rekis trying to pass the guard but can't manage it just yet.
That's four minutes gone in the round.
The referee is pacing around the two fighters - he looks like he's thinking about a standup.
Tully is trying to control the position from the bottom.

OK we're going to have a standup here. Nush Tully hasn't been effective enough on the ground and the referee wants a restart.
Tully tries to score a power double leg takedown but Rekis sees that one coming and sprawls well. That will dishearten Tully somewhat.
Tully tries to bum rush Rekis with a series of wild strikes but Rekis uses good footwork to avoid the assault.
The crowd cheers as Tully lands an impressive looking overhand right. Rekis doesn't seem phased though.
This is a great period of action - very entertaining stuff!
The crowd applaud the fighters efforts here as the round comes to an end.
Nice takedown defense from Rekis. No joy for Tully on that attempt.
Tully misses with a body shot. Nice footwork from Rekis.
And thats the end of the round the fighters go back to their corners.
Nush Tully showed his class in that round. I'd imagine he'll take it on all the scorecards.
That's the end of the round. The referee orders the cornermen out of the cage so we can get back down to business. Let's get this one finished - here comes the final round!

Nice shot by Tully.
Rekis fails with a takedown attempt.
Rekis looks for a takedown but Tully sprawls well.
Rekis tries to score a power double leg takedown but Tully sees that one coming and sprawls well. That will dishearten Rekis somewhat.
That's three failed takedown attempts in the round for John Rekis. That's going to take a lot out of him.
Tully ducks low and lands a nice hook to the body of his opponent.
That's one minute gone in the round.
Rekis tries to shoot in for a takedown. He's got hold of a leg but Tully swivels and escapes.
Tully fails to land with the punch combination there - jab, cross, hook, miss, miss, miss.
Tully tries for a takedown but Rekis circles away easily
and Rekis counters with a shoot takedown into half guard.
Tully keeping his head moving to avoid the ground and pound.
Tully really doesn't want to stay on the ground with Rekis. If he can't get it back to his feet, it's only a matter of time before he'll be tapping out.
Tully tries to roll over but Rekis keeps him under control.
Rekis stops Tully from getting back to his feet.
Rekis throwing shots but Tully is blocking nicely.
Tully tries to kick Rekis off but Rekis keeps his base steady and stays in half guard.
Tully is trying to control but Rekis manages to pass to mount!
Tully is trying to stand.
Tully takes a big intake of breath there - he's definitely tired.
That's two minutes gone in the round.
Tully is desperately trying to improve his position but Rekis has a good base and remains in mount.
This has been an exciting period of action!
Rekis pausing momentarily but resumes with a couple of decent strikes that do a bit of damage.
Rekis lands an elbow that was bordering on illegal but the referee lets it go with a warning.
Rekis wants to control the pace but Tully is squirming around nicely.
Rekis lands a heavy elbow.
Rekis controlling the pace for now.
Rekis is still in mount, landing shots to his trapped opponent. Tully can't stay in a position like this for much longer.
Tully can't escape the position.
Rekis working the ground and pound effectively.
That's three minutes gone in the round.
Rekis has his opponent pinned against the cage, landing some nasty ground and pound that is really making a bit of a mess out of Tully's face.
Rekis lands a couple of good shots and Tully has given up his back, trying to escape the position!
Rekis cracks Tully with a big shot to body and one to the head - really punishing Tully from the back mount here, looking to soften him up.

Tully is rocked!
Rekis struggling to keep hold of the position.
Rekis keeps control of the position as Tully tries to break free.
Rekis is not going to allow Tully to sit and survive in this position.
Rekis tightening his grip on Tully, looking for the choke.
John Rekis overall seems to be getting the better of the ground position in the fight so far.
The crowd cheering loudly, showing their appreciation for the quality fight we're seeing here.
Rekis tries to get the hooks in deep but Tully pushed the leg off.
That's four minutes gone in the round.
Rekis lands with a couple of good shots - one to the side of the head and one questionable shot that could be viewed as to the back of the head but the referee lets it go.
Tully is still in real trouble! Can Rekis finish him?
Tully rolls, trying to escape but Rekis keeps control of the position.
Tully seems to have recovered his senses.
Rekis looking to soften up his opponent with punches.
Tully is trapped and Rekis is scoring with shots to the head and body.
Rekis lands a good shot there. Tully covers up! Rekis smells blood and goes for the finish - the referee warns Tully to improve his position but he's not intelligently defending himself and the referee has no choice but to step in and end the fight! Rekis jumps to his feet and celebrates the important win with his cornermen!
Ladies and gentlemen, after 4:37 of round 3, we have a winner by way of TKO (Strikes). John Rekis!
A victorious John Rekis thanked his army of followers in his post fight interview, telling people to make sure they follow him on Twitter.
Nush Tully spoke after the fight, saying '1st round tournament ousting. wow nope don't like it.... "Arnie qoute'.
|
|
|
|
|
|
|
|
|
|
|
|
|
|
|
|
|
|
|
|
|
|
|
| S |
C
A |
G |
S |
C
B |
G |
|
S |
C |
G |
|
energy
A | B |
|
hype
A | B |
|
pop
A | B |
|
mgr
A | B |
|
FIGHT
RATING
61% |
|
|
|
|
|
|
|
Undercard bout
|
|
|
|
Undercard bout
|
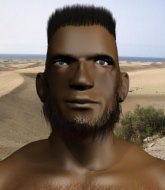
Coming up we have a middleweight MMA rules bout between Alexander Jo (ranked 0 p4p, 0 weight class) and Samir King (ranked 0 p4p, 0 weight class). King has chosen When I Die - Genocide(Jusuf Dzilic) as his entrance music. Samir King has the eye of the tiger tonight.
 |
|
 |
| 225 cm
26
190 lbs
12 - 5 - 0 |
|
187 cm
27
184 lbs
6 - 6 - 0 |
Good wrestling
Basic striking
Experienced |
|
Good wrestler
Basic striking
Solid chin |
|
| |
|
Ladies and gentlemen. This fight is 3 rounds, in the middleweight division.
Introducing the fighter to my left, fighting out of the red corner.
With a record of
12 - 5 - 0, fighting out of Hilo, Alexander Jo!
And introducing the fighter to my right, fighting out of the blue corner.
With a record of
6 - 6 - 0, fighting out of Hilo, Samir King!
The judges for this bout are Ryoma Takatsuka, Paul Gruel and Josh West.
The bell rings for round one and we are underway!
The fight stays on the outside here - Jo looks like he's thinking about clinching though.
Jo doesn't manage to clinch there - King circles away.
Jo darts in and clinches King up against the cage.
Jo tries to score a body lock takedown but King shows good agility there to stay on his feet.
Jo landing knees to the head.
King gets double underhooks to prevent a takedown attempt from Jo.
King drops down looking for an ankle pick but Jo pulls his leg out and moves away.
King bobs and weaves into range and then changes levels and scores with a nice takedown into side control.
King looking to punish the body of his opponent here but Jo is avoiding damage well.
Jo sneaks back into half guard.
King thows a huge punch but Jo dodges it nicely.
King misses with a head shot. Jo uses the momentum to regain guard.
Jo wants to sweep here but King controlling him for the moment.
That's one minute gone in the round.
King throws a big right hand that misses.
King missing there with some ground and pound from the guard.
King throws a strike but Jo rolls with it and manages to sweep. Now he's in guard on top.
King has his feet on Jo's thighs here. He's pushed Jo off and worked for a very quick armbar from the bottom! He's flipped onto his stomach and he's cranking hard on the arm! Jo screams in pain and taps out! This one is all over!
Ladies and gentlemen, after 1:46 of round 1, we have a winner by way of Submission (Armbar). Samir King!
Samir King made sure to mention his sponsor, Atlantis - 155qR/$20 - 140qB&C/$10 - 90%L, limit - in his post fight interview.
|
|
|
|
|
|
|
|
|
|
|
|
|
|
|
|
|
|
|
|
|
|
|
| S |
C
A |
G |
S |
C
B |
G |
|
S |
C |
G |
|
energy
A | B |
|
hype
A | B |
|
pop
A | B |
|
mgr
A | B |
|
FIGHT
RATING
46% |
|
|
|
|
|
|
|
Undercard bout
|
Coming up we have a light heavyweight MMA rules bout between Mike Mad (ranked 0 p4p, 0 weight class) and Kurko Tyrma (ranked 0 p4p, 0 weight class). Well, the cameraman is lingering on a pretty young lady for a bit too long there. Keep your eyes on the prize buddy or you'll miss the fighter intros!
 |
|
 |
| 185 cm
27
210 lbs
11 - 5 - 0 |
|
188 cm
20
225 lbs
9 - 3 - 0 |
BJJ White Belt
Excellent MT
Cardio machine |
|
BJJ Blue Belt
Decent boxing
Good gas tank |
|
| |
|
Ladies and gentlemen. This fight is 3 rounds, in the light heavyweight division.
Introducing the fighter to my left, fighting out of the red corner.
With a record of
11 - 5 - 0, fighting out of London, Mike Mad!
And introducing the fighter to my right, fighting out of the blue corner.
With a record of
9 - 3 - 0, fighting out of Helsinki, Kurko Tyrma!
The judges for this bout are Ryoma Takatsuka, Jeff Smith and Micheangelo Fripello.
The bell rings for round one and we are underway!
Mad keeping a good distance there, avoiding the body shot.
Kurko Tyrma seems to be the more aggressive standup fighter in this bout.
Mad tries to close the distance and clinch up but Tyrma swats him away and circles back towards the center.
Tyrma swats away the attempt to clinch by Mad.
Mad tries to clinch but Tyrma is having none of it.
Tyrma connects with a jab.
Tyrma fakes low and throws an overhand right that catches Mad on the side of the head.
Mad tries to close the distance and clinch but Tyrma swats him to one side with an open hand palm strike and circles away.
Mad takes one on the chin but keeps coming.
Tyrma lands a jab to Mad's midsection.
The crowd are loving this. Great action here.
Mad takes one on the button.
Mad moves in looking to clinch but Tyrma pushes him off.
A right-left combo lands from Tyrma.
Tyrma has been spending a lot of time sparring his boxing in the run up to the fight, trying to sharpen up those hands and look for a knockout.
Mad tries to close the distance and clinch up against the cage but Tyrma paws at him with a jab and circles away.
Tyrma avoids the clinch attempt nicely.
Mad tries to close the distance and clinch but Tyrma swats him to one side with an open hand palm strike and circles away.
Tyrma just misses with a punch to the body.
That's one minute gone in the round.
Mad takes a jab right on the nose. That must have hurt but he shrugs his shoulders and looks to return the favor.
Mad fails in his attempt to clinch.
Tyrma tries to keep at a distance but Mad has taken the fight into the clinch.
Mad misses with a knee to the head.
Mad trying to land knees to the body.
Mad manages to get underhooks and slows down the pace for a moment.
Tyrma has had enough of the clinch and is looking to separate.
Mad with the Thai clinch. He's looking to land a big knee but he's not managed it this time.
Mad tries to land knees in the clinch but Tyrma avoids the damage to the body.
Mad tries to land knees in the clinch but Tyrma avoids the damage to the body.
That's two minutes gone in the round.
Mad lands an elbow inside.
Kneeeeees! The crowd are calling for knees to the body. Mad obliges.
Mad trying to land knees to the body.
Mad tries a knee to the head but he's missed.
Mad working Tyrma over with knees to the body.
The fans in attendance giving it up for the two fighters, who have really let it all hang out in the last minute or so!
Tyrma avoiding damage as Mad throws knees to the body.
Mad lands an elbow that stopped Tyrma in his tracks for a moment.
Mad tries to land a knee to the head but Tyrma blocks with his arms.
Mad leaning his opponent against the cage.
Mad tries to land a knee to the head but Tyrma blocks with his arms.
That's three minutes gone in the round.
Mad crunches a lovely knee into Tyrma's ribcage.
Mad pushes off an throws an elbow but Tyrma leans to the side and avoids it. We're back to clinching against the cage.
Mad misses with a knee strike.
Tyrma avoiding damage as Mad throws knees to the body.
Our sources have told us that Mad has been working on his elbows in the gym.
Mad connects with a nasty looking knee right to Tyrma's face.
Mad tries a knee to the head but Tyrma blocks it.
Mad throws an elbow but it's blocked.
Mad throws an elbow but it misses.
Tyrma working hard to break the clinch.
Tyrma wants to break free but Mad has control.
Mad will no doubt start fighting again in a minute but for now he's just having a little rest, leaning Tyrma up against the cage.
Mad looking to throw knees to the head but Tyrma is blocking nicely.
That's four minutes gone in the round.
Mad looking to throw knees to the head but Tyrma is blocking nicely.
Mad with a knee to the head.
Tyrma trying to control the position but instead, Mad has worked for underhooks and has pushed Tyrma into the cage.
Tyrma can't break the clinch.
Mad looks to throw an elbow but misses.
Tyrma has had enough of the clinch but Mad keeps him there for the moment.
As the round comes to an end the crowd are showing their appreciation for a great round of action.
Mad is looking to control Tyrma's arms but Tyrma gets an underhook and turns him. Now Mad has his back to the cage.
Mad misses with a knee strike.
Tyrma blocks a knee to the body. He'll have a nicely bruised forearm in the morning.
And thats the end of the round the fighters go back to their corners.
That was a close round but I would say that Mike Mad will probably get the nod.
That's time! Mad's corner gives him a slap on the ass as he gets ready to fight.
Mad moves to clinch but Tyrma breaks away
letting Tyrma counter with a right hand.
Mike Mad is looking to throw some combinations by the looks of things.
Mad tries to clinch but is not successful on this occasion.
Kurko Tyrma seems to be getting the better of the standup.
Mad takes an uppercut right on the button but keeps his composure.
Tyrma with a jab.
Mad looks to clinch
and Tyrma counters with a quick right hand to the jaw.
Mad wants to clinch
and Tyrma counters with a right hand to the body.
Tyrma lands a straight punch to the body, keeping Mad at a distance.
This is a great period of action - very entertaining stuff!
Tyrma lunges at Mad with a hook that half lands and is half blocked by Mad's hand.
Tyrma misses with a jab and misses with a cross straight after too.
Tyrma lands a jab.
Tyrma just misses with a punch to the body.
Mad tries to clinch but is not successful on this occasion.
That's one minute gone in the round.
Mad keeping a good distance there, avoiding the body shot.
Mad tries to grapple but his opponent circles
and Tyrma counters with a series of strikes. Mad will be more careful next time no doubt.
Tyrma lands an overhand right.
Tyrma ducks low and lands a nice hook to the body of his opponent.
Mad darts in and clinches Tyrma up against the cage.
Mad misses the knee to the body. Nice hip positioning from Tyrma.
Mad misses the knee to the body. Nice hip positioning from Tyrma.
Tyrma is trying to force a seperation but Mad has the dominant position.
Mad prevents Tyrma from breaking the clinch.
The crowd are loving this. Great action here.
Mad misses the knee to the body. Nice hip positioning from Tyrma.
The fighters are pressed against the cage, as the pace of the fight slows.
That's two minutes gone in the round.
Tyrma wants to break free. God knows he wants to breaaaak freeee.
Mad landing knees to the body. They look like they could hurt.
Mad stalling the fight.
Mad tries to land a knee to the body but he is off balance and Tyrma avoids it.
Mad tries a knee to the head but Tyrma blocks it.
Tyrma takes an elbow to the forehead.
Mad with the Thai clinch. He's looking to land a big knee but he's not managed it this time.
The pace really dropping off here, momentarily.
Tyrma avoids the elbow strike from Mad, against the cage.
That's three minutes gone in the round.
Tyrma wants to break free but Mad has control.
Tyrma slowing the pace effectively.
Mad throws an elbow but it misses.
Mad misses the knee to the body. Nice hip positioning from Tyrma.
Tyrma blocks the elbow strike.
Mad is looking to score with knees to the body. Maybe he'll change it up and go body then head. Tyrma is defending well for now.
Mad leaning against his opponent.
Mad creates a bit of distance and throws an elbow that only just misses.
Mad misses the knee to the body. Nice hip positioning from Tyrma.
The fighters are starting to perspire pretty heavily.
Mad tries to land a knee to the body but he is off balance and Tyrma avoids it.
Mad trying to control the position but instead, Tyrma has worked for underhooks and has pushed Mad into the cage.
That's four minutes gone in the round.
Mad unloads a knee to the mid-section.
Mad missing with knees to the body.
Mad slowing the pace effectively.
Mad using the Thai plumb to throw knees but Tyrma has his back arched nicely, preventing the strike.
Mad misses the knee to the body. Nice hip positioning from Tyrma.
Tyrma working hard to break the clinch.
Tyrma managing to block the knees to the body from Mad.
Mad slows down the pace here.
As the round comes to an end the crowd are showing their appreciation for a great round of action.

Tyrma manages to break the clinch.
And thats the end of the round the fighters go back to their corners.
Kurko Tyrma showed his class in that round. I'd imagine he'll take it on all the scorecards.
The minute break is over - no more time for sponges and pep talks - back to the action! This is the final round!
A swing and a miss from Tyrma.
Mad takes a really solid shot there but just smiles back and shrugs his shoulders.
Tyrma scores with the left hand. Mad knows he should have avoided that one.
Mad wants to clinch
and Tyrma counters with a nice body shot.
Mad moves in looking to clinch but Tyrma pushes him off.
Tyrma avoids the clinch attempt nicely.
Tyrma bobs and weaves and unloads with a good uppercut.
Mad tries to close the distance and clinch but Tyrma swats him to one side with an open hand palm strike and circles away.
Tyrma lands a nice shot that snaps Mad's head back.
This is a great period of action - very entertaining stuff!
Tyrma lands a glancing blow to the side of Mad's head.
Mad moves in looking to clinch but Tyrma pushes him off.
Mad tries to clinch but Tyrma moves away
and Tyrma counters nicely by changing levels and landing a hook to the body.
Tyrma closes the distance and lands a one-two.
Tyrma keeps the fight on the outside.
That's one minute gone in the round.
Mad takes a solid shot to the body. That one hurt him but he's trying not to show it.
Mad on the wrong end of a nice hook.
Mad darts in trying to clinch
and Tyrma counters with a left right combination that sends Mad crashing to the mat - Tyrma wastes no time in diving on top of him and pounding Mad out for a TKO! Devastating finish!
Ladies and gentlemen, after 1:18 of round 3, we have a winner by way of TKO (Strikes). Kurko Tyrma!
After winning the bout, Kurko Tyrma thanked all his fans and promised he'd do even better in his next fight. The crowd seemed to love his humility.
|
|
|
|
|
|
|
|
|
|
|
|
|
|
|
|
|
|
|
|
|
|
|
| S |
C
A |
G |
S |
C
B |
G |
|
S |
C |
G |
|
energy
A | B |
|
hype
A | B |
|
pop
A | B |
|
mgr
A | B |
|
FIGHT
RATING
100% |
|
|
|
|
|
|
|
Undercard bout
|
Coming up we have a lightweight MMA rules bout between Blagojevic Batakovic (ranked 0 p4p, 0 weight class) and Nigel Diaz (ranked 0 p4p, 0 weight class). Nigel Diaz will no doubt be trying to keep this one on the feet, where he has a distinct advantage.
 |
|
 |
| 180 cm
27
153 lbs
7 - 8 - 0 |
|
180 cm
27
164 lbs
11 - 5 - 0 |
BJJ Purple Belt
Solid Muay Thai
Granite chin |
|
BJJ White Belt
Excellent boxer
Powerful |
|
| |
|
Ladies and gentlemen. This fight is 3 rounds, in the lightweight division.
Introducing the fighter to my left, fighting out of the red corner.
With a record of
7 - 8 - 0, fighting out of Hilo, Blagojevic Batakovic!
And introducing the fighter to my right, fighting out of the blue corner.
With a record of
11 - 5 - 0, fighting out of London, Nigel Diaz!
The judges for this bout are Paul Gruel, Chris Saunders and Roger Salmon.
The bell rings for round one and we are underway!
Batakovic misses with a double jab.
A telegraphed right hand from Diaz misses the target.
Diaz dodges the punch combination from Batakovic.
A punch combination from Batakovic misses.
Batakovic throws a hook but Diaz avoids it easily.
Batakovic misses with the combination.
Diaz with a hook.
Batakovic loads up on a big right hand but Diaz slips the punch.
Batakovic has been talking about how he's improved his wrestling in the run up to the fight so let's see if that's enough to sway the balance.
Batakovic throws a wild combination but nothing lands.
Diaz bobs and weaves and unloads with a good uppercut.
Diaz circles away from the clinch attempt.
Batakovic thows a body shot but no joy.
Diaz displays some good footwork, moving neatly out of range as Batakovic throws out the jab.
Batakovic closes the distance and clinches.
That's one minute gone in the round.
Diaz scores with a nice hook to the head.
Batakovic is trying to pull guard but Diaz has him pressed against the cage.
Diaz looking to slow down the pace here.
With the fighters up against the cage, Batakovic throws an elbow but misses.
Diaz wants to stall.
Diaz blocks a punch to the side of the head.
Batakovic throws a punch but it's blocked by Diaz.
Some stalling of biblical proportions here from Diaz.
Diaz blocks a couple of punches on the inside.
Batakovic misses with a punch on the inside.
Good anti-grappling being displayed by Batakovic as Diaz tries to tie him up.
Batakovic is trying to pull guard but being pressed up against the cage enables Diaz to keep the fight standing.
That's two minutes gone in the round.
Diaz blocks a couple of punches on the inside.
Batakovic tries to take the fight to the ground by pulling guard but can't manage it.
That's three failed takedown attempts in the round for Blagojevic Batakovic. That's going to take a lot out of him.
Batakovic misses with a punch on the inside.
Batakovic swings wildly with an uppercut but Diaz uses good head movement to avoid it.
Diaz blocks an uppercut.
Diaz pushes off and circles away, back to the middle of the mat.
Diaz displays some good footwork, moving neatly out of range as Batakovic throws out the jab.
Batakovic lands a jab to the head.
Batakovic fails to land with a series of punches.
Batakovic closes the distance and clinches.
Batakovic throws a head punch that misses.
Batakovic is pushing Diaz up against the cage, for a bit of lean and pray action. Action being used the in the loosest possible sense of the word.
Fantastic stuff here - a very entertaining period of action, which has drawn cheers from the crowd.
Batakovic throws a head punch that misses.
That's three minutes gone in the round.
A head punch on the inside from Batakovic fails to land.
Batakovic tries a shoulder strike but it doesn't do any damage.
A head punch blocked on the inside by Diaz.
An uppercut on the inside fails to land for Batakovic.
Diaz blocks an uppercut.
Diaz blocks an uppercut.

Batakovic breaks the clinch and we return to the middle of the mat.
Batakovic lunges in with swinging rights and lefts but Diaz circles away quickly and effectively.
Diaz ducks low and lands a nice hook to the body of his opponent.
Batakovic misses with the combination.
Batakovic throws a nice looking combination but Diaz bobs and weaves to avoid any damage.
Diaz throws a looping overhand right but Batakovic ducks down to avoid it.
Batakovic on the wrong end of a nice jab.
That's four minutes gone in the round.
Batakovic throws a combination but it was largely blocked by Diaz.
Batakovic throws a nice looking combination but Diaz bobs and weaves to avoid any damage.
Diaz scores with a crisp jab that stopped Batakovic in his tracks.
Wooooo! Give it up for these two warriors! They are putting on a show!
Diaz throws the left hand but Batakovic avoids the punch easily.
A combination from Batakovic does no damage.
Batakovic uses good head movement to avoid the hook from Diaz.
Batakovic clinches up against the cage.
Diaz lands a body punch - he's looking to wear down Batakovic.
Batakovic is trying to pull guard but being pressed up against the cage enables Diaz to keep the fight standing.
Batakovic misses with some punches.
As the round comes to an end the crowd are showing their appreciation for a great round of action.
Diaz controlling the action here for a moment.
Batakovic misses with a punch on the inside.
And thats the end of the round the fighters go back to their corners.
That was a close round but I would say that Blagojevic Batakovic will probably get the nod.
The fighters get back to their feet, the hooter sounds and we're back to the action!
Batakovic throws a series of punches but Diaz avoids them all with ease.
A telegraphed right hand from Diaz misses the target.
Batakovic misses with a jab, cross combination.
Blagojevic Batakovic is looking to throw some combinations by the looks of things.
Diaz connects with a slap. Keep your fist closed son.
Batakovic throws a jab when Diaz was well out of range.
Batakovic gets a clinch.
Batakovic throws a head punch that misses.
Batakovic working aggressively here.
A short right from Batakovic.
Diaz wants to stall.
Batakovic throws a head punch that misses.
Batakovic turns his hips and lands a very nice judo throw into side control!
Batakovic tries for a kimura. Not really close to a finish though.
Fantastic stuff here - a very entertaining period of action, which has drawn cheers from the crowd.
Batakovic trying to control the action but Diaz is working from the bottom.
That's one minute gone in the round.
Batakovic takes a little break here. Diaz wants to take advantage but he is being controlled well.
Batakovic is looking to finish here, going for an Americana. Diaz knows the correct defense though, so he's OK.
Batakovic in side control, just content to control the action for now.
That's two minutes gone in the round.
Batakovic is looking to finish here, going for an Americana. Diaz knows the correct defense though, so he's OK.
Batakovic wants to control but Diaz is keeping him busy.
That's three minutes gone in the round.
Batakovic advances to full mount.
Batakovic trying to control but Diaz is having none of it.
Diaz really trying hard to get back to half guard here.
Batakovic working to secure an arm triangle but it's not happening for him just yet.
Batakovic is looking to secure an arm. He's managed it! He's pivoting for an armbar - that looks tight! But Diaz has managed to get out of it and now he's in a dominant position. Nice work from Diaz!
That's four minutes gone in the round.
Batakovic pushes a forearm under Diaz's chin to create some space. He's escaped his hips and pivoted quickly for an armbar! Can he extend the arm? Yes, Diaz is tapping out! Damn, that was fast!
Ladies and gentlemen, after 4:34 of round 2, we have a winner by way of Submission (Armbar). Blagojevic Batakovic!
Blagojevic Batakovic seemed lost for words in his post fight interview but he remembered to thank his fans and directed everyone to his website.
Nigel Diaz spoke after the fight, saying 'It's like, you know... Whatever man.'.
|
|
|
|
|
|
|
|
|
|
|
|
|
|
|
|
|
|
|
|
|
|
|
| S |
C
A |
G |
S |
C
B |
G |
|
S |
C |
G |
|
energy
A | B |
|
hype
A | B |
|
pop
A | B |
|
mgr
A | B |
|
FIGHT
RATING
32% |
|
|
|
|
|
|
|
Undercard bout
|
Coming up we have a heavyweight MMA rules bout between Wayne Wade (ranked 0 p4p, 0 weight class) and Raju Armo (ranked 0 p4p, 0 weight class). Wade comes to the cage accompanied by Dance Gavin Dance - Strawberry Swisher pt. III . This should be fireworks!
 |
|
 |
| 205 cm
27
282 lbs
14 - 4 - 0 |
|
195 cm
27
245 lbs
8 - 9 - 0 |
Decent wrestler
Solid boxing
KO power |
|
BJJ Blue Belt
Good kicks
Solid chin |
|
| |
|
Ladies and gentlemen. This fight is 3 rounds, in the heavyweight division.
Introducing the fighter to my left, fighting out of the red corner.
With a record of
14 - 4 - 0, fighting out of Hilo, Wayne Wade!
And introducing the fighter to my right, fighting out of the blue corner.
With a record of
8 - 9 - 0, fighting out of New York, Raju Armo!
The judges for this bout are Jeff Smith, Roger Salmon and Micheangelo Fripello.
The bell rings for round one and we are underway!
Wade has managed to clinch.
Armo lands with a left to the head.
Wade blocks an uppercut.
Wade blocking some punches.
Armo fails to land with a short punch on the inside.
Wade scores with a nice hook to the head.
Armo tries to stall but Wade uses the opportunity to gain a better position.
Some stalling of biblical proportions here from Wade.
Wade scores with an uppercut up the middle.
It looks like Raju Armo has been cut.
Armo is trying to break the clinch but Wade has him pressed against the cage.
The two fighters are working to gain dominance in the clinch.
A short right from Wade.
Wade lands with a short punch from the clinch.
Wooooo! Give it up for these two warriors! They are putting on a show!
Wade blocks a punch to the side of the head.
Both guys are working to get underhooks.
Wade is pushing Armo up against the cage, for a bit of lean and pray action. Action being used the in the loosest possible sense of the word.
That's one minute gone in the round.
A short left from Armo.
Armo is trying to push Wade away but Wade has him pressed against the cage, so he's going nowhere.
Wade digs a right hand underneath Armo's ribcage. Armo let out a lung full of air as it connected.
Wade blocks a punch to the side of the head.
Wade manages to get underhooks and slows down the pace for a moment.
A head punch blocked on the inside by Wade.
A short left from Wade.
Fantastic stuff here - a very entertaining period of action, which has drawn cheers from the crowd.
Wade throws a blind hook that connects with the side of Armos head.
Wade scores with a shoulder strike.
Wade taking a breather.

Wade drops Armo onto one knee with a big uppercut from the clinch! Armo is propped up by the cage and works his way back to his feet!
Armo is rocked!
That's two minutes gone in the round.
A battle for position here, against the cage.
Armo is still on wobbly legs! Can Wade finish him?
Wade taking a breather.
Wade dips a shoulder and cracks Armo with a mighty uppercut! Armo falls back against the cage and Wade unloads with a barrage of strikes! Armo is completely out with his eyes open, only supported by the cage! Save him ref! Eventually the ref decides to do his job and jumps in - Wade screams abuse at the incompetent official before going over to celebrate with his corner. Brutal stuff!
Ladies and gentlemen, after 2:17 of round 1, we have a winner by way of TKO (Strikes). Wayne Wade!
Wayne Wade spent the whole post fight interview bigging himself up. It didn't go down that well with the fans after a while as they thought it was a bit arrogant.
|
|
|
|
|
|
|
|
|
|
|
|
|
|
|
|
|
|
|
|
|
|
|
| S |
C
A |
G |
S |
C
B |
G |
|
S |
C |
G |
|
energy
A | B |
|
hype
A | B |
|
pop
A | B |
|
mgr
A | B |
|
FIGHT
RATING
85% |
|
|
|
|
|
|
|
Co-main event
|
Coming up we have a light heavyweight MMA rules bout between Jake Belcher (ranked 0 p4p, 0 weight class) and Hermes Lykourgos (ranked 0 p4p, 0 weight class). Both fighters look fresh as a daisy as they make their way towards the cage.
 |
|
 |
| 187 cm
26
207 lbs
9 - 2 - 0 |
|
185 cm
26
213 lbs
11 - 2 - 0 |
Dangerous GnP
Basic striking
Cardio machine |
|
BJJ Blue Belt
Excellent boxer
Good gas tank |
|
| |
|
Ladies and gentlemen. This fight is 5 rounds, for the light heavyweight championship of the world!
Introducing the champion to my left, fighting out of the red corner.
With a record of
9 - 2 - 0, fighting out of London, Jake Belcher!
And introducing the challenger to my right, fighting out of the blue corner.
With a record of
11 - 2 - 0, fighting out of Hilo, Hermes Lykourgos!
The judges for this bout are Micheangelo Fripello, Colin Fray and Jeff Smith.
The bell rings for round one and we are underway!
Lykourgos thuds a left hand into Belcher's body.
Lykourgos stuns Belcher with a nice body shot, before stepping back out of range.
Belcher fails with a takedown attempt from distance.
Lykourgos misses with a jab, cross combination.
Lykourgos feints a jab promting Belcher to slip. Lykourgos then demonstrates his capabilities by jabbing again. Belcher slips again and ducks right into an uppercut.
The crowd are loving this. Great action here.
Lykourgos throws out a powerful jab.
Belcher uses good footwork to avoid the strikes from Lykourgos.
Belcher closes the distance and scores a nice trip takedown into half guard. Lykourgos did well to prevent Belcher getting side control.
Lykourgos wants to control but Belcher is keeping busy and won't allow it.
Lykourgos is refusing to be controlled, as Belcher sits in half guard.
Ground and pound from Belcher.
Lykourgos is looking to escape.
Belcher has been looking to land a fair amount of strikes on the ground. He might be looking to soften his opponent up in order to work for a submission.
Belcher is nestled in close to Lykourgos, controlling him well. He's worked in a nice elbow to the side of the head as well, for good measure.
Belcher throwing punches and elbows but they're not doing any damage.
Belcher definitely looks more muscular than last time we saw him fight.
Lykourgos avoiding damage under a succession of punches from Belcher.
Belcher scoring with strikes to the body and head.
Lykourgos tries to roll over but Belcher keeps him under control.
The ref warns both fighters not to hold the cage as they work up against the meshing.
That's one minute gone in the round.
Belcher tries to pass to full mount but Lykourgos defends it.
Lykourgos is looking to control Belcher's leg but it's slowly edging free. Can Lykourgos avoid being mounted?
Lykourgos tries to get to full guard but Belcher has control of the leg.
Lykourgos is trying to stand back up but Belcher is controlling him
Lykourgos blocking the ground and pound attempt from Belcher.
Lykourgos is looking to control Belcher's leg but it's slowly edging free. Can Lykourgos avoid being mounted?
Belcher controlling the action here.
Lykourgos is trying to get back to full guard.
Lykourgos is trying to defend against the ground and pound but Belcher scores with a couple of nice shots.
That's two minutes gone in the round.
Belcher throwing shots but they're hitting the canvas more than the man.
Lykourgos trying to control from the bottom.
Belcher thows a wild elbow that connects with the canvas.
Belcher passes the guard and advances to mount!
Belcher with the ground and pound from mount.
Fantastic stuff here - a very entertaining period of action, which has drawn cheers from the crowd.
Belcher looking to finish Lykourgos with some ground and pound. This is bad for Lykourgos!
Belcher prevents Lykourgos from getting the reversal.
The fighters are pressed up against the cage, both looking to find a bit of space to work.
Belcher has his opponent pinned against the cage, landing some nasty ground and pound that is really making a bit of a mess out of Lykourgos's face.
Belcher trying to control but Lykourgos is having none of it.
Lykourgos is in all sorts of trouble here.
Belcher scoring with strikes but Lykourgos is staying in there.
Belcher is landing with some decent strikes but Lykourgos is trying to advance his position so the referee is letting the fight continue.
That's three minutes gone in the round.
Belcher breaks from Lykourgos's wrist control and lands an elbow.
Belcher can't quite control the action as he would like just now, as Lykourgos is looking to escape.
Belcher scoring with some good ground and pound from mount here. Will he manage to finish Lykourgos?
BOOM! Belcher connects with a massive shot to the dome!
Belcher avoids the attempt from Lykourgos to control.
Belcher lands a couple of good shots and Lykourgos has given up his back, trying to escape the position!
Lykourgos is taking damage to the body and head.
The fans in attendance giving it up for the two fighters, who have really let it all hang out in the last minute or so!
A lull in the action here.
Lykourgos is trying to get back to his feet but he's not managed it yet.
Belcher scores with strikes from the back.
Lykourgos really doesn't want to stay on the ground with Belcher. If he can't get it back to his feet, it's only a matter of time before he'll be tapping out.
Lykourgos is taking damage to the body and head.
Belcher looking for the RNC.
That's four minutes gone in the round.
Belcher is trying to stick to Lykourgos's back but Lykourgos is turning into Belcher. He's managed to reverse the position - now he's in Belcher's guard. Polite applause from the crowd in appreciation of some nice Jiu Jitsu by Lykourgos.
Lykourgos sitting in guard, not really doing much.
Lykourgos must be cautious of submissions here, given that his opponent has the superior Jiu Jitsu.
Lykourgos wants to stand but Belcher has a closed guard, so he can't escape.
Belcher trying to keep a closed guard but Lykourgos is proving a slippery customer.
Belcher tries to land a sweep but no joy.
Lykourgos has decided he wants to stand but the closed guard of Belcher is proving hard to escape from.
Belcher seems keen to control Lykourgos's posture.
The crowd are going absolutely nuts as the round comes to an end - what a fantastic round of action!

The referee decides to stand the fighters back up.
Lykourgos throws a jab but it's blocked by Belcher.
Lykourgos misses with a wild combination.
And thats the end of the round the fighters go back to their corners.
Jake Belcher dominated that round.
The referee calls time. The cornermen exit stage left and we're back to business.
Lykourgos scores with a hook to the body. Belcher takes a step back and tries to catch his breath.
Lykourgos connects with a slap. Keep your fist closed son.
Lykourgos bobbing and weaving, closes the distance and lands a hook to the side of Belcher's head.
Belcher scores with a takedown into Lykourgos's guard.
We've seen a great period of action over the last minute or so - credit to both fighters for going all out!
Belcher stands up and looks to throw the legs aside to pass to side control. Lykourgos swivels though and keeps the full guard.
Belcher sitting in guard here, content to control.
Belcher is working the ground and pound from guard. He might want to try advancing position though to get more of an impact.
Belcher is in close to Lykourgos's body, working some short punches and elbows.
Belcher stands up and looks to throw the legs aside to pass to side control. Lykourgos swivels though and keeps the full guard.
Lykourgos controls Belcher momentarily but Belcher frees himself.
That's one minute gone in the round.
Belcher lands a couple of decent looking shots.
We've been informed that Lykourgos has been working hard on his conditioning in the buildup to the fight.
Lykourgos trying to keep a closed guard but Belcher is proving a slippery customer.
Belcher throwing elbows and punches but not connecting, as Lykourgos works some decent striking defense from the bottom.
Belcher looking to sit in guard and control but Lykourgos gets the butterfly guard and sweeps. He's now in the guard on the top.
Belcher is pulling down on Lykourgos's head. It's preventing any offense from Lykourgos, at least for the moment.
Lykourgos trying to stand up but can't free himself from Belcher's guard.
Lykourgos is using up a lot of energy trying to get back to his feet. Perhaps he should improve his position first.
Belcher looking to hit a scissor sweep but Lykourgos is one step ahead there.
That's two minutes gone in the round.
Belcher manages to land a sweep and now he's in mount on top!
Belcher breaks from Lykourgos's wrist control and lands an elbow.
Belcher lands with some strikes.
This has been an exciting period of action!
Belcher lands with some strikes.
Belcher postures up and cracks his opponent a couple of times before moving back into close ground control. Lykourgos looks a forlorn figure.
Belcher sitting in mount, just looking to control for the moment.
Belcher landing strikes from the mount and Lykourgos is in trouble!
Belcher working away from the top, dropping strikes.
Belcher working the ground and pound effectively.
That's three minutes gone in the round.
Lykourgos taking shots to the head.
Belcher is still in mount, landing shots to his trapped opponent. Lykourgos can't stay in a position like this for much longer.
Lykourgos is rocked!
BOOM! Belcher connects with a massive shot to the dome!
Lykourgos is still in real trouble! Can Belcher finish him?
Lykourgos tries to reverse the position but Belcher maintains control.
Belcher punishing his opponent with strikes.
The crowd are loving this. Great action here.
Belcher is in full mount looking to finish with strikes. He lands a big shot, followed by another and Lykourgos goes limp! The ref jumps in to end the fight - a big win for Belcher!
Ladies and gentlemen, after 3:39 of round 2, we have a winner by way of KO (Strikes). Jake Belcher!
Jake Belcher retains his light heavyweight title!
After winning the bout, Jake Belcher thanked all his fans and promised he'd do even better in his next fight. The crowd seemed to love his humility.
|
|
|
|
|
|
|
|
|
|
|
|
|
|
|
|
|
|
|
|
|
|
|
| S |
C
A |
G |
S |
C
B |
G |
|
S |
C |
G |
|
energy
A | B |
|
hype
A | B |
|
pop
A | B |
|
mgr
A | B |
|
FIGHT
RATING
79% |
|
|
|
|
|
|
|
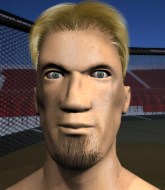
Main event
|
Coming up we have a lightweight MMA rules bout between Duncan Jon (ranked 0 p4p, 0 weight class) and Brad Shaw (ranked 0 p4p, 0 weight class). Over to our ring announcer for the fighter introductions!
 |
|
 |
| 165 cm
27
157 lbs
10 - 3 - 0 |
|
175 cm
27
160 lbs
13 - 4 - 0 |
BJJ White Belt
Excellent boxer
KO power |
|
Good takedowns
Counter fighter
Granite chin |
|
| |
|
Ladies and gentlemen. This fight is 3 rounds, in the lightweight division.
Introducing the fighter to my left, fighting out of the red corner.
With a record of
10 - 3 - 0, fighting out of New York, Duncan Jon!
And introducing the fighter to my right, fighting out of the blue corner.
With a record of
13 - 4 - 0, fighting out of New York, Brad Shaw!
The judges for this bout are Ryoma Takatsuka, Jeff Smith and Chris Saunders.
The bell rings for round one and we are underway!
Shaw tries to clinch but Jon is having none of it.
A punch lands to the side of Shaw 's head but he takes it in his stride.
Shaw thuds his right hand into Jon's forehead from close range. That could be painful for both fighters.
Jon throws out a token jab with nothing on it.
No luck for Shaw with that takedown attempt.
Jon throws a hard body shot but it just misses.
Shaw avoids the body shot from Jon.
Jon throws a lazy uppercut
and Shaw counters with a nice single leg takedown and he's in Jon's guard now.
We could do with one of the fighters taking the initiative a bit more on the ground - they're both waiting to capitalize on a mistake.
The crowd are loving this. Great action here.
Jon being controlled here, momentarily.
Jon on his back here. We all know that wrestlers don't like being on their back so let's see if Jon tries to get out of the position.
Shaw throwing elbows and punches but not connecting, as Jon works some decent striking defense from the bottom.
Shaw trying to control the position from guard on top but Jon is wriggling around, looking for whatever he can.
Jon knows he needs to get back to his feet asap. He's simply no match for Shaw on the ground.
Shaw is frustrating his opponent with some stalling tactics from top position.
The ref warns both fighters not to hold the cage as they work up against the meshing.
Shaw wants to control from the top but Jon keeps moving.
That's one minute gone in the round.
The ref calls for a clean break and stands the fighters back up. Brad Shaw wasn't active enough on the ground.
Jon pushes forward with a 1-2 combination that forces Shaw back to the cage. Jon follows up with a solid lead hook to the liver.
It looks like Brad Shaw has been cut.
Shaw lands a nice looking body kick.
Jon bobbing and weaving, closes the distance and lands a hook to the side of Shaw's head.
A momentary lapse in concentration from Jon enables Shaw to shoot in and score with a neat double leg. Jon manages to secure a closed guard as the fighters hit the mat.
Shaw missing there with some ground and pound from the guard.
Jon keeping moving, preventing Shaw from controlling successfully.
Jon wants to get back to his feet but Shaw is in a dominant position and won't allow it.
Shaw postures up and scores with a shot to the body and a follow up elbow to the head.
This has been an exciting period of action!
Shaw trying to control but Jon is working from the bottom.
Jon is trying to stand up but he's not managed so far.
That's two minutes gone in the round.
Shaw throwing elbows and punches but not connecting, as Jon works some decent striking defense from the bottom.
Jon keeping full guard, as Shaw tries to pass.
Jon wants to stand and escape but Shaw is having none of it.
Shaw slips effortlessly into side control - very nice.
Shaw has the superior BJJ but he's also working some ground strikes into his gameplan.
Jon is pushing Shaw's head away, looking to escape. Shaw manages to hold on to the position though.
Shaw thinks about going for a far side armbar but bails out and retains the dominant position instead.
Shaw advances to mount.
Shaw lands a couple of nice shots there from mount.
Jon looks to be in better condition than last time we saw him fight. Obviously he's been working hard on his cardio.
Jon is squirming around, avoiding Shaw's attempts to control the action.
The fighters are pressed up against the cage, both looking to find a bit of space to work.
Shaw misses with a head shot.
Shaw trying to control but Jon is having none of it.
That's three minutes gone in the round.
Jon is really trying hard to get back to his feet.
Shaw punching from mount but Jon doing a good job of avoiding damage.
Jon is trying to escape but when you're mounted that's not too easy.
Shaw controlling his opponent.
Shaw won't let Jon get back to his feet... He wants to keep the fight where it is for now.
Shaw thowing strikes but they're hitting the gloves, not doing any damage.
Jon wants to try and get back to his feet.
Shaw is working for a guillotine from mount but Jon frees his head quite easily.
Shaw looking for an armbar but decides to keep the dominant position instead.
That's four minutes gone in the round.
Shaw unloads with some shots from mount but Jon bucks and avoids them well.
Shaw lands a couple of nice shots there from mount.
The fans in attendance giving it up for the two fighters, who have really let it all hang out in the last minute or so!
Shaw unloading with bombs!
Shaw wants to control the pace but Jon is squirming around nicely.
Shaw working to secure an arm triangle but it's not happening for him just yet.
Shaw putting on the heat here with some good ground and pound!
Shaw trying to control but Jon is having none of it.
The crowd are going absolutely nuts as the round comes to an end - what a fantastic round of action!
Shaw cracks Jon with a nasty head shot there - the crowd let out an audible gasp there, as the noise reverberated around the arena.
Shaw is in full mount, looking to secure a guillotine but Jon is surviving well by controlling Shaw's body position as best he can.
And thats the end of the round the fighters go back to their corners.
Brad Shaw dominated that round.
The cut man is working on Brad Shaw's cut.
The referee calls time. The cornermen exit stage left and we're back to business.
No luck for Shaw with that takedown attempt.
Jon misses with a series of wild punches.
Shaw is looking to clinch but Jon is avoiding it.
Jon leaves Shaw with his face pressed against the mat as he sprawls beautifully, defending against a solid takedown attempt.
Jon misses with a straight left.
Jon moves out of range of the body kick from Shaw.
Jon is the aggressor but that punch slipped nicely by Shaw.
Jon steps to the side to avoid the strikes from Shaw.
A telegraphed right hand from Jon misses the target.
Shaw throws a shot from downtown. Jon moves away and avoids it.
That's one minute gone in the round.
Shaw defending well as Jon loads up on a big left hand.
Jon with poor footwork there. He got himself in a bit of a tangle, enabling Shaw to score with a decent uppercut.
Jon throws an off balance right hand
and Shaw counters with a nice double leg into half guard.
Ground and pound from Shaw.
Shaw works his way into full mount!
Shaw trying to control but Jon is having none of it.
Shaw working to secure an arm triangle but it's not happening for him just yet.
Jon is trying to get to the cage to help him get back to his feet.

Jon bucks Shaw off and manages to get back to his feet!
The fans in attendance giving it up for the two fighters, who have really let it all hang out in the last minute or so!
Shaw slips a jab from Jon.
That's two minutes gone in the round.
Jon throws out a token jab with nothing on it.
Shaw changes levels and drives through with a really nice takedown into side control. Jon looks really pissed at himself for not defending that better.
Jon is trying to buck Shaw off.
Shaw trying to control the position but Jon is working away.
Jon wants to get back to his feet.
Jon tries to get back to his feet but has found himself mounted instead. Damn, that's gotta suck.
Jon is squirming around, avoiding Shaw's attempts to control the action.
Shaw with a couple of short strikes.
That's three minutes gone in the round.
Jon takes a big shot to the head but keeps on trying to improve his position.
Shaw has his opponent pinned against the cage, landing some nasty ground and pound that is really making a bit of a mess out of Jon's face.
Shaw is trying to take his opponent's back.
Shaw has his opponent pinned against the cage, landing some nasty ground and pound that is really making a bit of a mess out of Jon's face.
Shaw throwing shots from mount but they're not landing.
Brad Shaw has got the better of the ground game so far.
Jon is trying to stand up.
Shaw looking to ground and pound but Jon is blocking nicely.
Jon is trying to escape the mount but Shaw keeps good control and instead manages to take Jon's back.
Shaw working from the back looking to end the fight with a rear naked choke. Jon is doing well to defend. Shaw seems to have got his hand under the chin though and he's sunk the choke in! Jon is forced to tap and this one is over!
Ladies and gentlemen, after 3:55 of round 2, we have a winner by way of Submission (RNC). Brad Shaw!
After the fight, Brad Shaw was humble in paying tribute to his opponent but made it clear he wants to go on to bigger and better things. It seemed to go down well with the crowd who cheered him loudly.
|
|
|
|
|
|
|
|
|
|
|
|
|
|
|
|
|
|
|
|
|
|
|
| S |
C
A |
G |
S |
C
B |
G |
|
S |
C |
G |
|
energy
A | B |
|
hype
A | B |
|
pop
A | B |
|
mgr
A | B |
|
FIGHT
RATING
62% |
|
|
|
|
|
|
|
|
|
|
