 |
The Island Season 2, 170 lbs, Round 3 PBP Commentary |
Undercard bout
|
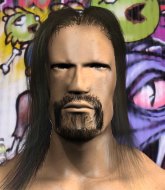
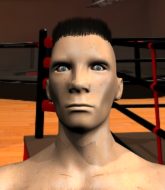
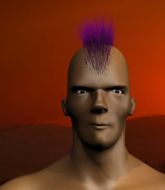
Coming up we have a welterweight MMA rules bout between Malcolm Mitchell (ranked 0 p4p, 0 weight class) and Harry Farrow (ranked 0 p4p, 0 weight class). Mitchell comes to the cage accompanied by Joe Jackson- I'm the Man. Man, I cannot wait for this one!
 |
|
 |
| 185 cm
20
184 lbs
6 - 1 - 0 |
|
178 cm
25
180 lbs
6 - 2 - 0 |
BJJ Purple Belt
Solid boxing
Cardio machine |
|
BJJ White Belt
Excellent boxer
Determined |
|
| |
|
Ladies and gentlemen. This fight is 3 rounds, in the welterweight division.
Introducing the fighter to my left, fighting out of the red corner.
With a record of
6 - 1 - 0, fighting out of The Island, Malcolm Mitchell!
And introducing the fighter to my right, fighting out of the blue corner.
With a record of
6 - 2 - 0, fighting out of The Island, Harry Farrow!
The judges for this bout are Winston Alpacca, Bart Greer and Michael Johnstone.

The bell rings for round one and we are underway!
Farrow slips under a jab from Mitchell.
Mitchell drops his hands momentarily and Farrow takes advantage with a crisp shot to the head.
Farrow misses with a body shot.
Farrow throws the left hand but Mitchell avoids the punch easily.
Farrow is looking to clinch.
Farrow misses with the combination.
Mitchell does a little shimmy and throws a leg kick. The leg kick missed by a considerable margin though, making him look a little bit silly for doing the shimmy.
A looping hook to the body misses from Mitchell. Farrow does a little dance to reset his feet.
Mitchell misses with the combination.
Mitchell jabbing away but nothing is landing.
Mitchell darts in looking for a takedown but Farrow gets double underhooks and turns Mitchell into the cage.
Farrow fails to land with a short punch on the inside.
Farrow misses with a hook from the clinch.
A short left from Farrow.
Mitchell drops down looking for an ankle pick but Farrow pulls his leg out and moves away.
Farrow dips down and scores with a jab to the body.

That's one minute gone in the round.
Farrow is looking to clinch but Mitchell is avoiding it.
Farrow wants to clinch up but Mitchell keeps it at a distance.
Mitchell throws a jab when Farrow was well out of range.
Farrow misses with a wild body shot.
Farrow doesn't manage to clinch there - Mitchell circles away.
Mitchell missing with a left hand there. Farrow was out of range so wasted energy throwing that one.

Mitchell throws a loose over hand right and dives in with a double leg takedown. Farrow tries to sprawl but it's too late and the fighters hit the mat. Mitchell is in Farrow's guard.
The referee is pacing around the two fighters - he looks like he's thinking about a standup.
Mitchell advances position into side control!
Mitchell scores with a couple of short elbows.
Mitchell wants to lay and pray for a moment but Farrow keeps working.
The fighters are pressed up against the cage, both looking to find a bit of space to work.
Farrow tries to escape but Mitchell is in control.
Mitchell misses with the ground and pound.
Mitchell scores with a couple of short elbows.
The fans in attendance giving it up for the two fighters, who have really let it all hang out in the last minute or so!
Mitchell trying to control the position but Farrow is working away.

That's two minutes gone in the round.
Farrow is pushing Mitchell's head away, looking to escape. Mitchell manages to hold on to the position though.
Sloppy strikes there by Mitchell.
Farrow is not content to let Mitchell control the position.
Mitchell passes to full mount! That's big trouble for Farrow!
Mitchell throwing sloppy strikes here. Perhaps if he tightened up his striking from such a dominant position, he'd be able to finish easier.
We've been hearing good reports from Mitchell's training camp. Apparently he has been rolling around with some good quality BJJ practitioners and has been sharpening his skills. Let's see if that has an impact on the fight today.
Mitchell lands a couple of nice shots there from mount.
Mitchell is in the full mount, landing strikes.
Mitchell drops a big elbow. That's hurt Farrow! More shots from Mitchell and the ref steps in! The fight is over!
Ladies and gentlemen, after 3:59 of round 1, we have a winner by way of TKO (Strikes). Malcolm Mitchell!
After winning the bout, Malcolm Mitchell thanked all his fans and promised he'd do even better in his next fight. The crowd seemed to love his humility.
|
|
|
|
|
|
|
|
|
|
|
|
|
|
|
|
|
|
|
|
|
|
|
| S |
C
A |
G |
S |
C
B |
G |
|
S |
C |
G |
|
energy
A | B |
|
hype
A | B |
|
pop
A | B |
|
mgr
A | B |
|
FIGHT
RATING
52% |
|
|
|
|
|
|
|
Undercard bout
|
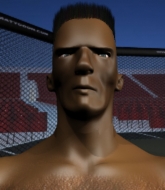
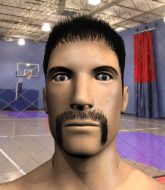
Coming up we have a welterweight MMA rules bout between Lucius Hill (ranked 0 p4p, 0 weight class) and Andrei Diamondback (ranked 0 p4p, 0 weight class). The key to victory for Lucius Hill has got to be keeping the fight on the feet.
 |
|
 |
| 180 cm
25
182 lbs
6 - 0 - 0 |
|
180 cm
27
175 lbs
8 - 3 - 1 |
BJJ White Belt
Excellent boxer
KO power |
|
Good wrestler
Lethal high kicks
Good gas tank |
|
| |
|
Ladies and gentlemen. This fight is 3 rounds, in the welterweight division.
Introducing the fighter to my left, fighting out of the red corner.
With a record of
6 - 0 - 0, fighting out of The Island, Lucius Hill!
And introducing the fighter to my right, fighting out of the blue corner.
With a record of
8 - 3 - 1, fighting out of The Island, Andrei Diamondback!
The judges for this bout are David Hoff, Michael Johnstone and Daniel Franklin.
The bell rings for round one and we are underway!
Hill tries to check the leg kick but that clearly hurt him.
Diamondback's coach down at was telling us pre-fight that they have been working on Diamondback's balance. Obviously they view that as a key factor in the outcome of this fight.
A shot to the liver by Diamondback. Beautiful body shot.
Hill has his front leg slapped to the side - a nice low kick landing there from Diamondback.
Diamondback throws a head kick that looked like it stung.
Diamondback turns his hip over beautifully as he lands a nice leg kick.
Diamondback throws a body kick that digs right into the meat.
A nice inside leg kick there by Diamondback. That's going to slow Hill down.
Diamondback throws a good cross that connects.
Diamondback lands a leg kick. The shin dug right into the meat of the thigh.
Andrei Diamondback seems to be the more aggressive standup fighter in this bout.
This has been an exciting period of action!
Hill misses with a body shot. Nice footwork from Diamondback.
Diamondback scores with a sloppy punch to the body. Not much technique there but it did the business.
Diamondback misses with a series of wild punches.
Hill takes a shot right to the bread basket.
Diamondback thumps Hill with a low kick.
Hill stumbles momentarily as he takes a strong leg kick from Diamondback.
That's one minute gone in the round.
Hill has his front leg slapped to the side - a nice low kick landing there from Diamondback.
Hill stumbles momentarily as he takes a strong leg kick from Diamondback.
Hill tries to check the leg kick but that clearly hurt him.
Hill misses with a body shot. Nice footwork from Diamondback.
Diamondback throws a head kick that connects with a bit of head and a bit of hand.
Hill on the wrong end of a decent looking cross there.
Diamondback scores with a leg kick.
Hill takes a swing at Diamondback's ribcage but misses.
Hill throws an overhand right that lands on Diamondback's shoulder, as Diamondback tries to avoid the shot.
Hill misses with a wild body shot.
Hill takes a head kick and keeps coming.
This has been an exciting period of action!
Ouch! a nice leg kick from Diamondback, right into the meat.
Diamondback fakes with a right hand and throws a good leg kick, right into the thigh. That had to hurt Hill.
Diamondback moves into range and lands a nice leg kick.
That's two minutes gone in the round.
Hill stumbles momentarily as he takes a strong leg kick from Diamondback.
Diamondback connects with a body shot that sends Hill's belly button to the back.
Hill is hobbling a little on that front leg after taking quite a few leg kicks so far in this fight.
An inside leg kick lands from Diamondback.
Hill drops his hands momentarily and Diamondback takes advantage with a crisp shot to the head.
Hill wants to clinch up but Diamondback keeps it at a distance.
Diamondback uses decent footwork to sidestep a right hand from Hill.
Diamondback with a body punch. A glancing blow.
Diamondback connects with a solid leg kick.
Some wild striking there from Diamondback.
Hill looks to score with a jab to the body but Diamondback is just out of range.
An inside leg kick lands from Diamondback.
Diamondback connects with an inside leg kick.

That's three minutes gone in the round.
Diamondback dips down and scores with a jab to the body.
Diamondback scores with a punch to the head.
Hill takes a big uppercut there. He seems a bit wobbly but no, he's OK.
Diamondback lands a nice looking body shot.
Diamondback buckles his opponent's knee momentarily with a nice leg kick.
Hill steps to his left, right into the path of a big body kick from Diamondback. That one must have hurt.
Diamondback feints and then cracks Hill's leading leg with a nice low kick. He's obviously looking to slow Hill down.
Diamondback showing good head movement there, avoiding the strikes from Hill.
A chopping leg kick lands by Diamondback.
A slow jab from Hill misses its intended target.
Diamondback connects with a leg kick. Hill looked like he was expecting something else and didn't defend it.
Hill stumbles momentarily as he takes a strong leg kick from Diamondback.
Fantastic stuff here - a very entertaining period of action, which has drawn cheers from the crowd.
Hill takes a nasty kick to the mid section... That should keep him thinking. Does he try and block and risk a head kick landing?

That's four minutes gone in the round.
Diamondback throws a jab to the body, straight down the pipe. Boom. That sent Hill stumbling backwards but he manages to regain his composure quickly.
A solid leg kick lands there for Diamondback.
Hill takes a jab right on the nose. That must have hurt but he shrugs his shoulders and looks to return the favor.
Diamondback connects with a leg kick. Hill looked like he was expecting something else and didn't defend it.
Diamondback avoids the clinch attempt nicely.
Diamondback lands a leg kick that knocks Hill off balance momentarily.
Diamondback throws a head kick that half lands.
Diamondback throws a right and a left that both miss.
Diamondback looking to take his opponent's legs away with the low kicks.
Nice uppercut there from Diamondback.
The crowd are going absolutely nuts as the round comes to an end - what a fantastic round of action!
Diamondback scores with a slapping inside leg kick.
Diamondback throws a nice inside leg kick.
Hill tries to clinch up against the cage, rushing in to close the distance. Diamondback manages to break the clinch and circles back to the middle of the mat.
And thats the end of the round the fighters go back to their corners.
Andrei Diamondback dominated that round.
That's the end of the round. The referee orders the cornermen out of the cage so we can get back down to business.

Diamondback bobs and weaves and throws out a fast jab that snaps Hill's head backwards.
Diamondback with a nice looking leg kick. You could hear that one land in a back row.
Diamondback delivers a nice body kick.
Hill takes an uppercut right on the jaw but it doesn't phase him.
That kick from Diamondback tenderised Hill's leg. Hill is trying to keep his angry face on.
Hill takes a head kick and keeps coming.
Hill misses with a hook.
Diamondback fakes the leg kick and cracks Hill in the body.
The fans in attendance giving it up for the two fighters, who have really let it all hang out in the last minute or so!
Diamondback connects with an inside leg kick.
Diamondback connects with a solid leg kick.
Diamondback connects with a single shot there.
Diamondback connects with an inside leg kick.
Diamondback connects with an inside leg kick.
Hill throws a right and a left that both miss.
That's one minute gone in the round.
Diamondback fakes low and throws an overhand right that catches Hill on the side of the head.
Like a baseball bat into the meat of his leg there - nice leg kick by Diamondback.
Diamondback lands with a thumping leg kick.
Hill stumbles momentarily as he takes a strong leg kick from Diamondback.
Diamondback chopping away at his opponent's legs.
Both fighters are absolutely exhausted here.
Hill takes a head kick and keeps coming.
Diamondback scoring well with a low kick there.
Hill swings and misses with a hook to the body.
Diamondback throws a head kick that looked like it stung.
Diamondback looking to take his opponent's legs away with the low kicks.
Diamondback fails to land with a series of punches.
A head kick from Diamondback lands but Hill takes it in his stride.
The fans in attendance giving it up for the two fighters, who have really let it all hang out in the last minute or so!
Hill on the wrong end of an overhand right that came out of nowhere.
That's two minutes gone in the round.
Hill takes a thudding leg kick, right into the meat of the thigh.
Diamondback jabs Hill right on the nose. Hill blinks but takes it well.
Hill takes one on the chin but keeps coming.
Diamondback lands a really nice looking cross but Hill seems unphased.
Diamondback fakes a jab and scores with a low kick.
Diamondback throws a right high kick that is partially blocked by Hill.
Diamondback feints and then cracks Hill's leading leg with a nice low kick. He's obviously looking to slow Hill down.
Diamondback lands a leg kick and bounces back out of range.
Diamondback keeping a good distance there, avoiding the body shot.
Hill is looking to clinch.
Hill swings and misses with a hook to the body.
Diamondback throws a quick inside leg kick.
Diamondback throws a quick inside leg kick.
That's three minutes gone in the round.
Diamondback fakes and then throws a beautiful body shot. Hill looks a bit winded and takes a step backwards to take a breath.
Diamondback connects with an inside leg kick.
That kick from Diamondback tenderised Hill's leg. Hill is trying to keep his angry face on.
A nice leg kick lands there from Diamondback.
Diamondback lands with a nice body punch.
Hill on the receiving end of a decent leg kick there by Diamondback. Diamondback obviously looking to wear him down.
A chopping leg kick lands by Diamondback.
Diamondback buckles his opponent's knee momentarily with a nice leg kick.
Diamondback stooping low to avoid any incoming strikes and then lunges in with an uppercut come cross that lands flush.
Andrei Diamondback seems to be getting the better of the standup.
Diamondback connects with a solid leg kick.
Diamondback avoids the body shot from Hill.
This has been an exciting period of action!
Diamondback looking to take his opponent's legs away with the low kicks.
Diamondback ducks low and lands a nice hook to the body of his opponent.
That's four minutes gone in the round.
Hill misses with a double jab.
Diamondback throws a couple of head shots and lands with the final one - a decent hook, which struck Hill on the side of the head.
Diamondback lands with a nice low kick. That'll leave a bruise.
Diamondback throws a nice hook to the body that draws an oooh from the crowd.
Diamondback lands with a slapping head kick.
Diamondback throws a feint and then finishes with a kick to the body.
A slapping leg kick lands for Diamondback.
Diamondback dances in quickly and lands a nice inside leg kick on Hill. That did some damage!
Diamondback fakes a couple of low kicks, before throwing one on the third attempt. It connects and Hill has to reset his feet before getting ready to engage.
Diamondback fakes with a right hand and throws a good leg kick, right into the thigh. That had to hurt Hill.
Diamondback has been the more effective fighter overall so far.
The crowd are going absolutely nuts as the round comes to an end - what a fantastic round of action!
Diamondback scores to the head and body with a nice combination!
Diamondback cracks a nice hook into Hill's ribs.
Diamondback moving in and out of range nicely, whilst landing the scoring shot.
And thats the end of the round the fighters go back to their corners.
Andrei Diamondback showed his class in that round. I'd imagine he'll take it on all the scorecards.
The corners get their ten second warning. Both fighters stand from their stools and stare eachother down, ready to get back to the action. This is the final round!

An inside leg kick lands from Diamondback.
Diamondback feints and then cracks Hill's leading leg with a nice low kick. He's obviously looking to slow Hill down.
Diamondback lands a leg kick. The shin dug right into the meat of the thigh.
Hill thows a left - swing and a miss!
Diamondback throws a leg kick which misses Hill's front leg but catches the back leg as Hill tries to avoid it.
Diamondback scores with a kick to the body.
A solid leg kick lands there for Diamondback.
A nice inside leg kick there by Diamondback. That's going to slow Hill down.
Hill takes one on the chin but seems OK.
Both fighters are breathing heavily.
Diamondback throws a feint and then finishes with a kick to the body.
Fantastic stuff here - a very entertaining period of action, which has drawn cheers from the crowd.
Diamondback turns his hip over beautifully as he lands a nice leg kick.
Diamondback connects with an inside leg kick.
Hill takes a thudding leg kick, right into the meat of the thigh.
That's one minute gone in the round.
A slapping leg kick lands for Diamondback.
Diamondback cracks Hill with a hook to the jaw. Both fighters smile at eachother and high-five before getting back down to business.
Diamondback cracks Hill with an open hand slap.
Hill on the wrong end of a nice low kick. He's acting like it's no big deal but he doesn't want to take many more of those.
A nice leg kick lands there from Diamondback.
Diamondback connects with a good right hand that stumbles Hill. Hill circles away out of range and recomposes himself.
Hill takes a jab right on the nose. That must have hurt but he shrugs his shoulders and looks to return the favor.
Hill looks like he's developed a pretty tasty lump over his left eye. He'll need to avoid taking much more damage to that.
Hill has his front leg slapped to the side - a nice low kick landing there from Diamondback.
Diamondback connects with a leg kick. Hill looked like he was expecting something else and didn't defend it.
Hill has his hands up protecting his head but a hook from Diamondback finds it's way round the side to connect with Hill's head.
The fans in attendance giving it up for the two fighters, who have really let it all hang out in the last minute or so!
Diamondback takes a step towards his opponent and connects with a left hand, before circling away.
An inside leg kick lands from Diamondback.
Diamondback connects with a leg kick. He turned his hip over nicely there.
That's two minutes gone in the round.
A slapping leg kick lands for Diamondback.
Diamondback lands a jab to the nose.
Diamondback feints and then cracks Hill's leading leg with a nice low kick. He's obviously looking to slow Hill down.
Good leg kick by Diamondback there. It's the ones that make that thud noise that hurt and that was an almighty thud.
Diamondback connects with an inside leg kick.
Hill is looking to wear down Diamondback with body shots, infact he's throwing more body shots than head shots at the moment.
Diamondback lands a nice looking body kick.
Diamondback scores with a one two! Hill had his feet all tangled up there and couldn't avoid the strikes.
Diamondback lands with a nice body kick.
Hill takes a punch to the jaw and another one to the bread basket.
Hill has his front leg slapped to the side - a nice low kick landing there from Diamondback.
Hill tries to clinch but Diamondback is having none of it.
Hill takes a kick to the side of the head.
That's three minutes gone in the round.
Diamondback moves out of range of the strikes.
Hill takes a head kick and shrugs it off.

Hill is rocked!
A solid leg kick lands there for Diamondback.
Diamondback tests Hill's chin there with a solid looking shot.
Diamondback scores with a punch to the head.
Oh Hill is still all over the place! His legs are completely gone! Will he be able to recover?!!
Diamondback throws a head kick that half lands.
Diamondback jabs at Hill's body.
Diamondback moves into range and lands a nice leg kick.
Hill seems to have got his legs back now.
Diamondback lands with a kick to the temple. Hill shrugs as if to say "is that all you've got?"
Diamondback moves into range and lands a nice leg kick.
Diamondback scores with a slapping inside leg kick.
Lucius Hill has stepped it up - he knows he needs a finish here!
That's four minutes gone in the round.
This has been an exciting period of action!
Diamondback lands with a two punch combination before moving back out of range.
A chopping leg kick lands by Diamondback.
Andrei Diamondback is fighting for a decision here - he's started to take the cautious approach.
Diamondback throws a nice inside leg kick.
A decent looking body kick lands there for Diamondback.
Diamondback looks to land a combination but Hill avoids it well.
Hill on the wrong end of a nice low kick. He's acting like it's no big deal but he doesn't want to take many more of those.
Diamondback lands a leg kick that knocks Hill off balance momentarily.
Diamondback with a nice looking leg kick. You could hear that one land in a back row.
Diamondback moves into range and lands a nice leg kick.
The crowd are going absolutely nuts as the round comes to an end - what a fantastic round of action!
An inside leg kick lands from Diamondback.
Diamondback throws a leg kick which misses Hill's front leg but catches the back leg as Hill tries to avoid it.
Hill has his front leg slapped to the side - a nice low kick landing there from Diamondback.
And that's the end of the fight!
Andrei Diamondback comfortably won the final round on my scorecard.
Well Diamondback has outworked and out performed his opponent in all aspects of the game today. He was simply too good and the decision should be no more than a formality. Over to the ring announcer for the scorecards.
Ladies and gentlemen, after 3 rounds of action, we go to the scorecards for a decision.
Judge David Hoff scores the fight for Andrei Diamondback!
Judge Michael Johnstone scores the fight for Andrei Diamondback!
Judge Daniel Franklin scores the fight for Andrei Diamondback!
Andrei Diamondback wins by unanimous decision!
Post fight, Andrei Diamondback stared into the camera and said 'Kemists ↑ 5x160Q!!!!!!!!'.
|
|
|
|
|
|
|
|
|
|
|
|
|
|
|
|
|
|
|
|
|
|
|
| S |
C
A |
G |
S |
C
B |
G |
|
S |
C |
G |
|
energy
A | B |
|
hype
A | B |
|
pop
A | B |
|
mgr
A | B |
|
FIGHT
RATING
100% |
|
|
|
|
|
|
|
Undercard bout
|
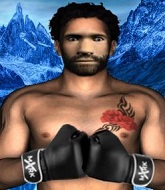
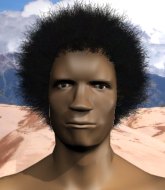
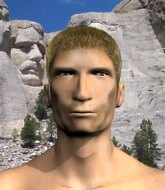
Coming up we have a welterweight MMA rules bout between Isaac Frost (ranked 0 p4p, 0 weight class) and Carlos Danger (ranked 0 p4p, 0 weight class). Carlos Danger acknowledges the crowd's support as he enters the cage.
 |
|
 |
| 182 cm
19
170 lbs
9 - 2 - 0 |
|
186 cm
20
185 lbs
9 - 2 - 0 |
BJJ Brown Belt
Basic striking
Granite chin |
|
Good wrestler
Brawler
Good gas tank |
|
| |
|
Ladies and gentlemen. This fight is 3 rounds, in the welterweight division.
Introducing the fighter to my left, fighting out of the red corner.
With a record of
9 - 2 - 0, fighting out of The Island, Isaac Frost!
And introducing the fighter to my right, fighting out of the blue corner.
With a record of
9 - 2 - 0, fighting out of The Island, Carlos Danger!
The judges for this bout are Peter Branson, Winston Alpacca and Daniel Franklin.
The bell rings for round one and we are underway!
Nice sprawl there from Danger as Frost shoots in.
Frost has a takedown stuffed.
Frost shoots in for a takedown. He's persisting with it as Danger sprawls well. Danger wins this battle and keeps the fight standing. Frost gets slowly back to his feet.
That's three failed takedown attempts in the round for Isaac Frost. That's going to take a lot out of him.
Frost closes this distance looking for a takedown but Danger circles away.
Danger's coach down at was telling us pre-fight that they have been working on Danger's balance. Obviously they view that as a key factor in the outcome of this fight.
Frost shoots in with a takedown attempt and he has Danger pinned against the cage. Danger gets the underhooks and manages to circle away.
Frost shoots in but Danger avoids the takedown attempt easily.
Frost gets his head snapped back by a nice shot there.
Frost definitely looks more muscular than last time we saw him fight.
Frost fails with a takedown attempt.
Frost looks frustrated there after his takedown attempt is stuffed easily.
Danger leaves Frost with his face pressed against the mat as he sprawls beautifully, defending against a solid takedown attempt.
Carlos Danger is looking to keep the fight on the feet at all costs.
That's one minute gone in the round.
Frost takes a hook to the side of the head. I wonder if that's got his ears ringing.
Frost has a takedown stuffed.
Jab, cross, leg kick. Nice combination by Danger!
Frost shoots in for a takedown. "I don't think so" says Danger as he avoids it easily.
Frost fails with a takedown attempt from distance.
Frost will have to do better than that with his takedown attempts.
Isaac Frost seems to be the more aggressive standup fighter in this bout.
Frost tries to shoot in for a takedown. He's got hold of a leg but Danger swivels and escapes.
Frost misses with an uppercut
and Danger counters with a shot to the ribs. That looked like it hurt.
Frost is breathing heavily.
The crowd cheering loudly, showing their appreciation for the quality fight we're seeing here.
Frost shoots in looking for a takedown but Danger manages to keep the fight standing, pushing Frost's face into the canvas for good measure before circling away.

Danger lands a big right hand that sends Frost crashing to the mat! Danger stays standing though and waves Frost back to his feet!
Frost is rocked!
Danger lands with a big right hook that stumbles Frost - he's out on his feet here! Danger follows up with another monster hook that separates Frost from consciousness! Frost falls, almost in slow motion to the canvas! Danger stands and admires his work as the crowd go wild.
Ladies and gentlemen, after 1:49 of round 1, we have a winner by way of KO (Punches). Carlos Danger!
After the big win, Carlos Danger made sure to do all the important stuff like thanking his sponsors Atlantis - Inventory Liquidation! and telling the interviewer how much he loves him.
|
|
|
|
|
|
|
|
|
|
|
|
|
|
|
|
|
|
|
|
|
|
|
| S |
C
A |
G |
S |
C
B |
G |
|
S |
C |
G |
|
energy
A | B |
|
hype
A | B |
|
pop
A | B |
|
mgr
A | B |
|
FIGHT
RATING
100% |
|
|
|
|
|
|
|
Undercard bout
|
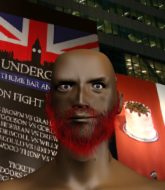
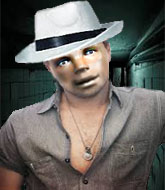
Coming up we have a welterweight MMA rules bout between Crushing Cows (ranked 0 p4p, 0 weight class) and Buster Knott (ranked 0 p4p, 0 weight class). Knott has chosen Kanye West vs. The xx - Touch The Sky (Carlos Serrano Mix) as his entrance music. Well, I have no idea who's going to take this one!
 |
|
 |
| 165 cm
27
170 lbs
9 - 2 - 0 |
|
188 cm
19
176 lbs
11 - 5 - 0 |
Good wrestling
Basic striking
Granite chin |
|
BJJ Purple Belt
Brawler
Good gas tank |
|
| |
|
Ladies and gentlemen. This fight is 3 rounds, in the welterweight division.
Introducing the fighter to my left, fighting out of the red corner.
With a record of
9 - 2 - 0, fighting out of The Island, Crushing Cows!
And introducing the fighter to my right, fighting out of the blue corner.
With a record of
11 - 5 - 0, fighting out of The Island, Buster Knott!
The judges for this bout are Michael Johnstone, Daniel Franklin and Peter Branson.
The bell rings for round one and we are underway!
A looping hook to the body misses from Cows. Knott does a little dance to reset his feet.
Excellent takedown into side control there by Cows.
You can see the frustration on Knott's face as Cows controls the position.
An elbow from Cows crashes against the mat.
Cows lands a few punches from side control.
Cows misses with the ground and pound.
Cows is chipping away with strikes.
Knott is looking to reverse the position.
Cows working the head and body with strikes.
We've seen a great period of action over the last minute or so - credit to both fighters for going all out!
Cows landing with strikes to the head and body from side control.
That's one minute gone in the round.
Cows scoring with punches from side control.
Knott has found himself in a tricky position here. He's been working his transitions in training so let's see if he can work his way out of it.
Cows sitting in side control, looking to soften his opponent up with elbows and hammerfists but Knott is avoiding damage well and looking to escape the position.
Cows works a knee to the body and follows up with a nice elbow to the head.
Cows working away diligently from side control. Landing strikes effectively there - that will score him some points on the judges scorecards.
Knott sneaks back into half guard.
Cows sitting in half guard, looking to land shots. Knott defending well though.
Cows moves nicely into side control.
Cows scoring with punches from side control.
Cows working the ground and pound.

Knott is rocked!
That's two minutes gone in the round.
Fantastic stuff here - a very entertaining period of action, which has drawn cheers from the crowd.
A big shot lands for Cows! That's hurt Knott! Will he recover? Cows fires away with more strikes and the referee has to step in to stop the fight!
Ladies and gentlemen, after 2:19 of round 1, we have a winner by way of TKO (Strikes). Crushing Cows!
Buster Knott spoke after the fight, saying 'I still have heaps of improvement, and I'm coming for you next time!'.
|
|
|
|
|
|
|
|
|
|
|
|
|
|
|
|
|
|
|
|
|
|
|
| S |
C
A |
G |
S |
C
B |
G |
|
S |
C |
G |
|
energy
A | B |
|
hype
A | B |
|
pop
A | B |
|
mgr
A | B |
|
FIGHT
RATING
58% |
|
|
|
|
|
|
|
Undercard bout
|
Coming up we have a welterweight MMA rules bout between Razor Sharp (ranked 0 p4p, 0 weight class) and Sheldon Cooper (ranked 0 p4p, 0 weight class). Chooooooooon! I think Sharp might be my favorite fighter, now he's come out to All I Need (Razor Sharp Remix). The key to victory for Razor Sharp has got to be keeping the fight on the feet.
 |
|
 |
| 175 cm
23
180 lbs
9 - 2 - 0 |
|
170 cm
27
180 lbs
12 - 3 - 0 |
BJJ Purple Belt
Counter fighter
KO power |
|
Good takedowns
Basic striking
Determined |
|
| |
|
Ladies and gentlemen. This fight is 3 rounds, in the welterweight division.
Introducing the fighter to my left, fighting out of the red corner.
With a record of
9 - 2 - 0, fighting out of The Island, Razor Sharp!
And introducing the fighter to my right, fighting out of the blue corner.
With a record of
12 - 3 - 0, fighting out of The Island, Sheldon Cooper!
The judges for this bout are Santiago Holmes, Dirk Anderson and Winston Alpacca.
The bell rings for round one and we are underway!

Cooper clinches.
Sharp tries to land a shot to the body but it's blocked.
Sharp lands with a good tight uppercut to the head.
Cooper blocks a couple of punches on the inside.
Cooper fails to pull the fight into his guard.
We can't be sure of the tactics at this early stage but we have heard that Cooper has been working on his takedowns a lot in the buildup to the fight and we can only assume he's going to look to take this to the mat.
Sharp trying to control the position but instead, Cooper has worked for underhooks and has pushed Sharp into the cage.
Sharp tries to throw a body punch but Cooper avoids it by throwing Sharp back against the cage.
Cooper changes levels and goes for a takedown here. Sharp fights it off and pushes away nicely.
Sharp lands a leg kick that knocks Cooper off balance momentarily.

Cooper looking for a takedown here - he's got it.
The referee looks like he's ready to step in and stand the fighters back up.
Cooper wants to control from the top but Sharp keeps moving.
The ref warns both fighters not to hold the cage as they work up against the meshing.
Cooper controlling from the guard. I say controlling but really, he's stalling.
That's one minute gone in the round.
Cooper looking to sit in guard and control but Sharp gets the butterfly guard and sweeps. He's now in the guard on the top.
Cooper tries to land a sweep but no joy.
Sharp trying to control the position from guard on top but Cooper is wriggling around, looking for whatever he can.
Cooper pulls Sharp in to control the position.

Cooper is working actively from the bottom, looking for submissions. He's escaped his hips to the side and he's going for an armbar! Sharp has his hands clasped together but Cooper extends and breaks Sharp's desperate grasp, forcing a tap out due to armbar! Nice BJJ displayed there by Cooper.
Ladies and gentlemen, after 2:59 of round 1, we have a winner by way of Submission (Armbar). Sheldon Cooper!
A victorious Sheldon Cooper thanked his army of followers in his post fight interview, telling people to make sure they follow him on Twitter.
|
|
|
|
|
|
|
|
|
|
|
|
|
|
|
|
|
|
|
|
|
|
|
| S |
C
A |
G |
S |
C
B |
G |
|
S |
C |
G |
|
energy
A | B |
|
hype
A | B |
|
pop
A | B |
|
mgr
A | B |
|
FIGHT
RATING
33% |
|
|
|
|
|
|
|
Undercard bout
|
Coming up we have a welterweight MMA rules bout between Rod Stiffington (ranked 0 p4p, 0 weight class) and Arturas Rudokas (ranked 0 p4p, 0 weight class). Stiffington comes to the cage accompanied by I'm Too Sexy by Right Said Fred. Over to our ring announcer for the fighter introductions!
 |
|
 |
| 178 cm
26
180 lbs
9 - 1 - 0 |
|
179 cm
20
185 lbs
5 - 2 - 0 |
Powerful takedowns
Counter fighter
KO power |
|
Powerful takedowns
Counter fighter
Good gas tank |
|
| |
|
Ladies and gentlemen. This fight is 3 rounds, in the welterweight division.
Introducing the fighter to my left, fighting out of the red corner.
With a record of
9 - 1 - 0, fighting out of The Island, Rod Stiffington!
And introducing the fighter to my right, fighting out of the blue corner.
With a record of
5 - 2 - 0, fighting out of The Island, Arturas Rudokas!
The judges for this bout are David Hoff, Winston Alpacca and Santiago Holmes.
The bell rings for round one and we are underway!
Stiffington lands an overhand right.
Rudokas misses with a takedown
and Stiffington counters with a nice double leg into half guard.
Rudokas felt the need to train up his defensive grappling in the buildup to the fight. Presumably he was expecting to be in a difficult position like this, so let's see if he can get out of it.
The referee wants the fighters to be more active or he's going to reset them on the feet.
Rudokas is staying active underneath Stiffington, who seems content to just control the action from this position.
Rudokas wants to improve his position but Stiffington is controlling well.

Stiffington is sneakily working for an arm triangle but Rudokas sees it coming and defends easily.
Rudokas actively working from the bottom here.
We've seen a great period of action over the last minute or so - credit to both fighters for going all out!
Stiffington is taking a breather. Rudokas says something to him but it's hard to make out. Perhaps he's telling him to get on with it and actually do something.
Rudokas looking for submissions from an awkward position here.
Stiffington tries to pass to full mount but Rudokas defends it.
Stiffington seems to be looking for submissions.
Stiffington is looking for a kimura here.
That's one minute gone in the round.
Stiffington is trying to work for a kimura but Rudokas is defending well.
Rudokas looking for submissions from an awkward position here.
Rudokas is looking to improve his position.
Rudokas looking for submissions from an awkward position here.
Rudokas moves his hips nicely and gets into full guard.
Rudokas can't keep his opponent in guard - Stiffington advances to half guard, no doubt looking to mount.
Stiffington wants to pass to mount but Rudokas is defending the position.
Stiffington seems to be looking for submissions.
That's two minutes gone in the round.
Stiffington seems to be working for a kimura but Rudokas defends the submission attempt.
Rudokas looking to work for a kimura from the bottom.
Stiffington wants to work for an arm triangle but Rudokas is really keeping half guard well and defending the submission attempt.
The ref warns both fighters not to hold the cage as they work up against the meshing.
Rudokas trying to control here but he's found himself mounted! Oh no!
Stiffington tucks in and makes sure he doesn't lose the dominant position.
Rudokas has given up his back here.
The crowd are loving this. Great action here.
Rudokas trying to control the action but Stiffington just sinks the hooks in.
Rudokas turns into Stiffington and is now in his guard.
That's three minutes gone in the round.
Stiffington keeping moving, preventing Rudokas from controlling successfully.
Rudokas tries to free his leg and advance position but Stiffington is retaining full guard.
Stiffington has improved his flexibility recently so we will have to see if he can use that to his advantage.
Stiffington is pulling down on Rudokas's head. It's preventing any offense from Rudokas, at least for the moment.
Rudokas stands up and looks to throw the legs aside to pass to side control. Stiffington swivels though and keeps the full guard.
Stiffington has his foot on Rudokas's thigh. He's trying to push off and get in position for a triangle, I think. Rudokas works his way back into a safe position though.
Rudokas won't allow Stiffington to sweep him here.
Stiffington preventing the ground and pound from doing any damage.
Rudokas stopping the sweep attempt from Stiffington.
Rudokas drops back looking for a leg! Stiffington is in trouble here! The fighters roll with the hold and Stiffington manages to kick Rudokas off! Rudokas jumps back into Stiffington's guard.
Rudokas drops back for a leg! It's a sloppy attempt though and Rudokas jumps back into guard quickly, to retain the dominant position.
That's four minutes gone in the round.
Rudokas wants to pass the guard but Stiffington is keeping the position.
Stiffington looking for submissions from the bottom here. Moving his hips around, possibly looking for an armbar.
Stiffington is working an open guard here, looking to improve his position. No doubt that will leave him open to counters but at least he's being more offensive.
Rudokas throwing elbows and punches but not connecting, as Stiffington works some decent striking defense from the bottom.
Stiffington escapes his hips to the side and looks to be working for an armbar. Rudokas gives him a little smile and shakes his head. No chance.
This has been an exciting period of action!
Rudokas pressing down on his opponent's thigh, looking to pass guard. Stiffington is keeping the position for now.
As the round comes to an end the crowd are showing their appreciation for a great round of action.
Rudokas is trying to work a guillotine from the top, or something like that? Don't know how he thinks he's going to get a finish from there.
Stiffington keeping moving, preventing Rudokas from controlling successfully.
And thats the end of the round the fighters go back to their corners.
Rod Stiffington dominated that round.
OK. That's time! The bell goes and we're back to the action.
Rudokas avoids the body shot from Stiffington.
Rudokas slips under a jab from Stiffington.
Rudokas doesn't succeed with the takedown
and Stiffington counters with a single leg into guard. Rudokas didn't expect that.
Stiffington works a leg free and moves into half guard.
Stiffington is looking for a kimura but he's never going to get it from there.
Rudokas is looking to regain full guard. Not this time though.
Rudokas is working for an escape here. He's hooked one of Stiffington's legs and he's managed to sneak out and take Stiffington's back!
Stiffington trying to control but he's just got himself in more trouble.
Rudokas working for a RNC but it's not happening just yet.
That's one minute gone in the round.
Rudokas tries to keep control of the position but Stiffington is staying busy.
Stiffington trying to control but not successfully.
Stiffington fending off the submission attempt from Rudokas.
Rudokas has the hooks in. Stiffington is trying to push off one leg but he has to do so cautiously to avoid being submitted.
Rudokas is looking for the choke from the back position but Stiffington is controlling his hands well.
Rudokas is remaining active here, looking for the choke. The more discerning members of the crowd will appreciate his efforts.
Stiffington breaks Rudokas's hooks off and manages to turn into his guard.
Stiffington wants to pass the guard but Rudokas is keeping the position.
Stiffington got a little sloppy there for a moment and Rudokas has worked his way into a loose triangle - can he finish it?! No, Stiffington has managed to get both his arms back between Rudokas's legs - danger averted.
That's two minutes gone in the round.
We've seen a great period of action over the last minute or so - credit to both fighters for going all out!
Stiffington is intent on slowing down the pace of the fight, simply looking to control.
Stiffington wants to control from the top but Rudokas keeps moving.
Rudokas looking for submissions from the bottom here. Moving his hips around, possibly looking for an armbar.
Stiffington wants to pass the guard but Rudokas is keeping the position.
Rudokas had isolated an arm as going for a kimura. Stiffington defends it easily.
The fighters are pressed up against the cage, both looking to find a bit of space to work.
Rudokas keeping moving, preventing Stiffington from controlling successfully.
Rudokas is looking for a guillotine. You can't force these things though and Stiffington defends well.
That's three minutes gone in the round.
Stiffington looking to control the position here, rather than advance.
Rudokas controls Stiffington momentarily but Stiffington frees himself.
Stiffington tries to free his leg and advance position but Rudokas is retaining full guard.
Rudokas keeping moving, preventing Stiffington from controlling successfully.
Stiffington pushing down on Rudokas's thigh, trying to pass to half guard. He's managed it... Nice work.
Rudokas looking for submissions off his back.
Stiffington is working hard to pass the guard. He's done it - he's now in full mount! Trouble for Rudokas!
Rudokas is squirming around, avoiding Stiffington's attempts to control the action.
That's four minutes gone in the round.
Rudokas sneaks a leg back under and regains half guard and is working straight away to try and get back to guard. He hasn't managed just yet though.
Rudokas misses with some strikes from the bottom.
Rudokas trying to control here.
Stiffington is working for submissions here but there's nothing on.
Rudokas throws a strike from the bottom that misses.
We've seen a great period of action over the last minute or so - credit to both fighters for going all out!
Rudokas looking to work for a kimura from the bottom.
Rudokas is defending against the submission attempts here by Stiffington.
As the round comes to an end the crowd are showing their appreciation for a great round of action.
Rudokas looking for submissions from an awkward position here.
And thats the end of the round the fighters go back to their corners.
That was a close second round but I would say that Rod Stiffington will probably get the nod.
That's time! Back to the action! So, we enter the final round. Let's see if either fighter can bring us a finish, or whether we're going to the judges scorecards.
Stiffington dives in and scores a takedown into Rudokas's guard.
Stiffington sitting in guard, not really doing much.
Stiffington got a little sloppy there for a moment and Rudokas has worked his way into a loose triangle - can he finish it?! No, Stiffington has managed to get both his arms back between Rudokas's legs - danger averted.
Rudokas keeping moving, preventing Stiffington from controlling successfully.
Stiffington works a leg free and moves into half guard.
Stiffington is working for a kimura but Rudokas is defending it quite comfortably.
Rudokas looking for submissions from an awkward position here.
Stiffington moves into side control, avoiding a weak kimura attempt from Rudokas.
That's one minute gone in the round.
Rudokas gets one leg under and gets the fight to half guard.
Rudokas is staying active underneath Stiffington, who seems content to just control the action from this position.
Stiffington wants to work for an arm triangle but Rudokas is really keeping half guard well and defending the submission attempt.
Rod Stiffington overall seems to be getting the better of the ground position in the fight so far.
Stiffington seems content to maintain position for now, rather than mounting any offense.
Rudokas is staying active underneath Stiffington, who seems content to just control the action from this position.
Stiffington is working for a submission here. He's got hold of the far side arm and he's looking for a kimura. He's cranking on the arm and he's got it! Rudokas is tapping out! Ouch, that looked like it hurt!
Ladies and gentlemen, after 2:56 of round 3, we have a winner by way of Submission (Kimura). Rod Stiffington!
A very excited looking Rod Stiffington rambled incoherently for about 5 minutes post fight about how awesome he is. It was kinda funny for a while but then everyone got annoyed.
|
|
|
|
|
|
|
|
|
|
|
|
|
|
|
|
|
|
|
|
|
|
|
| S |
C
A |
G |
S |
C
B |
G |
|
S |
C |
G |
|
energy
A | B |
|
hype
A | B |
|
pop
A | B |
|
mgr
A | B |
|
FIGHT
RATING
100% |
|
|
|
|
|
|
|
Co-main event
|
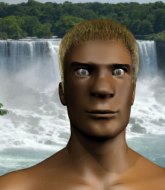
Coming up we have a welterweight MMA rules bout between Eye Land (ranked 0 p4p, 0 weight class) and Stirling Sanguin (ranked 0 p4p, 0 weight class). Both fighters look fresh as a daisy as they make their way towards the cage.
 |
|
 |
| 181 cm
27
174 lbs
8 - 2 - 0 |
|
178 cm
26
170 lbs
7 - 6 - 0 |
BJJ White Belt
Excellent MT
Cardio machine |
|
Good takedowns
Brawler
Knockout power |
|
| |
|
Ladies and gentlemen. This fight is 3 rounds, in the welterweight division.
Introducing the fighter to my left, fighting out of the red corner.
With a record of
8 - 2 - 0, fighting out of The Island, Eye Land!
And introducing the fighter to my right, fighting out of the blue corner.
With a record of
7 - 6 - 0, fighting out of The Island, Stirling Sanguin!
The judges for this bout are Dirk Anderson, David Hoff and Sandra Marshall.
The bell rings for round one and we are underway!
Land scoring well with a low kick there.
Land tries a head kick but it misses.
Sanguin is the aggressor but that punch slipped nicely by Land.
Land seems to be moving with more speed, compared to his last bout. He must have been working on that in the gym.
Sanguin getting the better of the striking in that exchange.
Nice sprawl there from Land as Sanguin shoots in.
Sanguin smiles there as he lands a nice right hand right on the button.

Land drives through and clinches with Sanguin against the cage.
Sanguin drops to a knee looking for a takedown but Land gets the underhooks and prevents it.
The crowd are loving this. Great action here.
Land misses with a punch on the inside.
Sanguin is looking for a takedown.
We can't be sure of the tactics at this early stage but we have heard that Sanguin has been working on his takedowns a lot in the buildup to the fight and we can only assume he's going to look to take this to the mat.
Eye Land has stuffed three takedown attempts in the round now. That's going to take a lot out of Stirling Sanguin.
A knee to the head by Land.
Land misses with a body punch.
Sanguin is working for takedown but Land is calmly controlling the position for now.

Land breaks the clinch and we're back to striking at distance.
Sanguin shoots in but no luck this time.
Land feints a jab and as Sanguin dips his head, Land unleashes a brutal head kick that catches Sanguin right on the jaw! Timbeeer! Sanguin falls backwards in slow motion, only propped up by the cage! Land smiles a psychotic smile as he stares down his unconscious opponent. That is a scary man.
Ladies and gentlemen, after 0:57 of round 1, we have a winner by way of KO (Head Kick). Eye Land!
|
|
|
|
|
|
|
|
|
|
|
|
|
|
|
|
|
|
|
|
|
|
|
| S |
C
A |
G |
S |
C
B |
G |
|
S |
C |
G |
|
energy
A | B |
|
hype
A | B |
|
pop
A | B |
|
mgr
A | B |
|
FIGHT
RATING
78% |
|
|
|
|
|
|
|
Main event
|
Coming up we have a welterweight MMA rules bout between Edward Teach (ranked 0 p4p, 0 weight class) and Danny Barns (ranked 0 p4p, 0 weight class). Danny Barns has the better chin. Will he look to stand and bang today?
 |
|
 |
| 175 cm
27
180 lbs
6 - 3 - 0 |
|
177 cm
20
174 lbs
9 - 2 - 1 |
Powerful takedowns
Basic striking
Very quick |
|
Powerful takedowns
Counter fighter
Granite chin |
|
| |
|
Ladies and gentlemen. This fight is 3 rounds, in the welterweight division.
Introducing the fighter to my left, fighting out of the red corner.
With a record of
6 - 3 - 0, fighting out of The Island, Edward Teach!
And introducing the fighter to my right, fighting out of the blue corner.
With a record of
9 - 2 - 1, fighting out of The Island, Danny Barns!
The judges for this bout are Daniel Franklin, Winston Alpacca and Bart Greer.
The bell rings for round one and we are underway!
Teach keeping his hands up high there, blocking the jab from Barns.
Barns shoots in from a long way out. He's driving through with the takedown attempt and he eventually gets it, landing in Teach's guard.
The fighters are pressed up against the cage, both looking to find a bit of space to work.
The referee looks like he's ready to step in and stand the fighters back up.
Barns loading up with the ground and pound but he's missing more than he's landing in this flurry.
Teach preventing the ground and pound from doing any damage.
Barns preventing the sweep.
Barns controlling from the guard. I say controlling but really, he's stalling.
Teach tries to land a sweep but no joy.
Teach is active off his back here, looking for submissions.
Teach working for a triangle but Barns defends it easily.
Teach looking for submissions off his back, moving his hips, looking for an opening.
The crowd cheering loudly, showing their appreciation for the quality fight we're seeing here.
Barns wants to control from the top but Teach keeps moving.
Teach is working an open guard here, looking to improve his position. No doubt that will leave him open to counters but at least he's being more offensive.
That's one minute gone in the round.
Hammerfist, elbow! yells Barns's corner. There ya go! There ya go!
Barns postures up in Teach's guard and throws a big left but Teach blocks it.
Teach throwing his legs up looking for a triangle.
Barns avoids a guillotine attempt easily.
Barns won't allow Teach to sweep him here.
Teach has his foot on Barns's thigh. He's trying to push off and get in position for a triangle, I think. Barns works his way back into a safe position though.
Barns postures up to throw the ground and pound strikes but they don't connect.
Barns wants to pass the guard but Teach is keeping the position.
In the pre-fight buildup videos we saw Barns working his ground and pound in the gym. He isn't landing a great percentage of his ground strikes so far though.
Teach has momentary wrist control but Barns slips an elbow through the middle.
Barns is pushing down on Teach's leg trying to pass to half guard. Teach is fighting to maintain full guard but Barns has managed to sneak the leg through.
That's two minutes gone in the round.
Barns trying to control from half guard but Teach is working away.
Teach wants to improve his position but Barns is controlling well.
The two fighters exchange a few words. I couldn't hear what they were saying but maybe it's more fun if you make it up yourself. Barns connects with a nice short shot to Teach's temple.
The crowd cheering loudly, showing their appreciation for the quality fight we're seeing here.
Barns with a momentary lay and pray from half guard.
Barns is looking for a kimura here.
Teach looking for submissions off his back.
Teach works his way to full guard. Good work.
The ref warns both fighters not to hold the cage as they work up against the meshing.
Barns trying to control the position from guard on top but Teach is wriggling around, looking for whatever he can.
That's three minutes gone in the round.
Barns is posturing up here but Teach has hold of an arm and he's gone for an armbar! Barns tries to roll out but it's too tight and Barns has to tap! Slick submission there by Teach!
Ladies and gentlemen, after 3:19 of round 1, we have a winner by way of Submission (Armbar). Edward Teach!
|
|
|
|
|
|
|
|
|
|
|
|
|
|
|
|
|
|
|
|
|
|
|
| S |
C
A |
G |
S |
C
B |
G |
|
S |
C |
G |
|
energy
A | B |
|
hype
A | B |
|
pop
A | B |
|
mgr
A | B |
|
FIGHT
RATING
51% |
|
|
|
|
|
|
|
|
|
|
