 |
SEMPI FC 3: Survival PBP Commentary |
Undercard bout
|
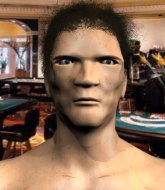
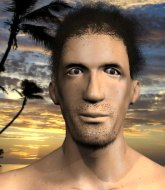
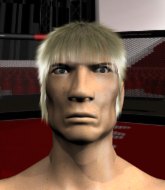
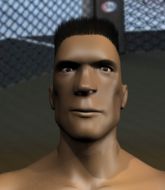
Coming up we have a heavyweight MMA rules bout between Tom Walker (ranked 0 p4p, 0 weight class) and Harry Potter (ranked 0 p4p, 0 weight class). Both fighters look fresh as a daisy as they make their way towards the cage.
 |
|
 |
| 190 cm
18
235 lbs
0 - 0 - 0 |
|
190 cm
23
285 lbs
4 - 0 - 0 |
Good takedowns
Brawler
Cuts easily |
|
Good wrestler
Counter fighter
Heavy handed |
|
| |
|
Ladies and gentlemen. This fight is 3 rounds, in the heavyweight division.
Introducing the fighter to my left, fighting out of the red corner.
With a record of
0 - 0 - 0, fighting out of London, Tom Walker!
And introducing the fighter to my right, fighting out of the blue corner.
With a record of
4 - 0 - 0, fighting out of London, Harry Potter!
The judges for this bout are Steven Brown, James Ackerman and William Gold.

The bell rings for round one and we are underway!
Walker fails with the takedown
and Potter counters with a two punch combo.
Walker with a poor takedown
and Walker takes a counter punch right on the button for his troubles.
Walker gets his takedown attempt stuffed easily
and Potter counters with a crisp right that sends Walker to the canvas! Potter follows up with punches from the mount and this one is all over!
Ladies and gentlemen, after 0:25 of round 1, we have a winner by way of TKO (Strikes). Harry Potter!
|
|
|
|
|
|
|
|
|
|
|
|
|
|
|
|
|
|
|
|
|
|
|
| S |
C
A |
G |
S |
C
B |
G |
|
S |
C |
G |
|
energy
A | B |
|
hype
A | B |
|
pop
A | B |
|
mgr
A | B |
|
FIGHT
RATING
90% |
|
|
|
|
|
|
|
Undercard bout
|
|
|
|
Undercard bout
|
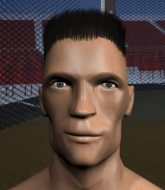
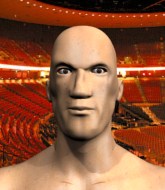
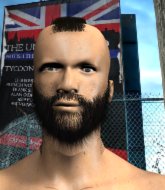
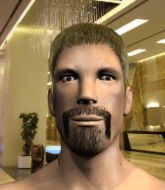
Coming up we have a heavyweight MMA rules bout between Alfe Turnner (ranked 0 p4p, 0 weight class) and Bradley Wallace (ranked 0 p4p, 0 weight class). Buckle up people - heeeeeeeeeere we go!
 |
|
 |
| 175 cm
23
240 lbs
5 - 3 - 0 |
|
225 cm
23
275 lbs
1 - 0 - 0 |
BJJ Purple Belt
Basic striking
Experienced |
|
BJJ Blue Belt
Brawler
Tends to cut |
|
| |
|
Ladies and gentlemen. This fight is 3 rounds, in the heavyweight division.
Introducing the fighter to my left, fighting out of the red corner.
With a record of
5 - 3 - 0, fighting out of London, Alfe Turnner!
And introducing the fighter to my right, fighting out of the blue corner.
With a record of
1 - 0 - 0, fighting out of London, Bradley Wallace!
The judges for this bout are Chris Edwards, Daniel Bishop and Steven Brown.
The bell rings for round one and we are underway!

Turnner shoots in and gets a takedown into Wallace's guard.
Wallace trying to strike from the bottom but really, it's not the best position to be doing that from!

Turnner drops back for a leg! It's a sloppy attempt though and Turnner jumps back into guard quickly, to retain the dominant position.
Turnner is trying to work a guillotine from the top, or something like that? Don't know how he thinks he's going to get a finish from there.
Turnner is fighting to break Wallace's control of his arms but Wallace is doing a good job of controlling the position at the moment.
Turnner wants to control from the top but Wallace keeps moving.
Turnner advances position into side control!
We've had a slow start to the round here - hopefully the action picks up.
Turnner is looking to finish here, going for an Americana. Wallace knows the correct defense though, so he's OK.
Turnner wants to work for a kimura but he's foiled early by Wallace, who protects the arm well.

That's one minute gone in the round.
Wallace is working hard to escape and get back to his feet. After a battle for position, Turnner asserts his dominance and retains side control.
Wallace tries to improve position but can't.
Wallace is still trying to improve position.
Turnner really is a fat lump.
Turnner tries for a kimura. Not really close to a finish though.
Wallace is a painfully thin specimen of a man. You do wonder whether a good body kick would snap him clean in two.

That's two minutes gone in the round.
A few boos can be heard. I'm sure they will multiply if the fighters don't pick up the pace.
Wallace is looking for a sweep.
Turnner is trying to land an Americana. He has the arm isolated but Wallace is keeping cool and he's avoided the danger for now.
Wallace can't do much from the bottom here.
Wallace tries to control the position but he's not in luck - Turnner easily slips into full mount!
Wallace can't escape the position.
Turnner looks like he's working for a submission but he's not found anything just yet.

That's three minutes gone in the round.
Turnner looking to secure an arm triangle but Wallace defends it well.
Turnner is working for a guillotine from mount but Wallace frees his head quite easily.
Wallace tries to hold on but Turnner pushes him away.
Wallace looking to escape from mount but he's given up his back!
Turnner working from the back looking to end the fight with a rear naked choke. Wallace is doing well to defend. Turnner seems to have got his hand under the chin though and he's sunk the choke in! Wallace is forced to tap and this one is over!
Ladies and gentlemen, after 4:58 of round 1, we have a winner by way of Submission (RNC). Alfe Turnner!
|
|
|
|
|
|
|
|
|
|
|
|
|
|
|
|
|
|
|
|
|
|
|
| S |
C
A |
G |
S |
C
B |
G |
|
S |
C |
G |
|
energy
A | B |
|
hype
A | B |
|
pop
A | B |
|
mgr
A | B |
|
FIGHT
RATING
15% |
|
|
|
|
|
|
|
Undercard bout
|
Coming up we have a lightweight MMA rules bout between Chef Kenji (ranked 0 p4p, 0 weight class) and Hilmar Halldorsson (ranked 0 p4p, 0 weight class). Well, the cameraman is lingering on a pretty young lady for a bit too long there. Keep your eyes on the prize buddy or you'll miss the fighter intros!
 |
|
 |
| 179 cm
18
163 lbs
0 - 1 - 0 |
|
182 cm
18
165 lbs
1 - 0 - 0 |
Good takedowns
Excellent MT
Good chin |
|
BJJ Purple Belt
Counter fighter
Granite chin |
|
| |
|
Ladies and gentlemen. This fight is 3 rounds, in the lightweight division.
Introducing the fighter to my left, fighting out of the red corner.
With a record of
0 - 1 - 0, fighting out of Tokyo, Chef Kenji!
And introducing the fighter to my right, fighting out of the blue corner.
With a record of
1 - 0 - 0, fighting out of London, Hilmar Halldorsson!
The judges for this bout are Chris Edwards, Paul Tew and Sam Margolis.
The bell rings for round one and we are underway!
Kenji fails with an attempt to clinch.
Kenji tries to clinch but is not successful on this occasion.
Kenji throws a decent looking leg kick but it doesn't land clean.
Kenji gets the takedown into side control.
Halldorsson gets one leg under and gets the fight to half guard.
Halldorsson is pressing down on Kenji's left leg trying to get back to full guard. He's managed it.
Halldorsson controlling Kenji's posture.

Halldorsson looking for a triangle here. Kenji is fighting it but it looks tight! Halldorsson pulls the arm across and this one won't last much longer! Nope, Kenji is tapping out - this one is all over!
Ladies and gentlemen, after 0:52 of round 1, we have a winner by way of Submission (Triangle Choke). Hilmar Halldorsson!
An out of breath Hilmar Halldorsson thanked his loyal fans in his post fight interview, giving them credit for his success over the course of his career.
|
|
|
|
|
|
|
|
|
|
|
|
|
|
|
|
|
|
|
|
|
|
|
| S |
C
A |
G |
S |
C
B |
G |
|
S |
C |
G |
|
energy
A | B |
|
hype
A | B |
|
pop
A | B |
|
mgr
A | B |
|
FIGHT
RATING
74% |
|
|
|
|
|
|
|
Undercard bout
|
Coming up we have a lightweight MMA rules bout between Jack Blake (ranked 0 p4p, 0 weight class) and Gaspard Wasp (ranked 0 p4p, 0 weight class). Both these guys have solid standup skills and neither is particularly fantastic on the ground, so let's hope for a nice standup war!
 |
|
 |
| 176 cm
18
165 lbs
0 - 0 - 0 |
|
170 cm
18
164 lbs
0 - 1 - 0 |
BJJ White Belt
Excellent boxer
Big right hand |
|
BJJ White Belt
Excellent boxer
Granite chin |
|
| |
|
Ladies and gentlemen. This fight is 3 rounds, in the lightweight division.
Introducing the fighter to my left, fighting out of the red corner.
With a record of
0 - 0 - 0, fighting out of London, Jack Blake!
And introducing the fighter to my right, fighting out of the blue corner.
With a record of
0 - 1 - 0, fighting out of Amsterdam, Gaspard Wasp!
The judges for this bout are Sam Margolis, Chris Edwards and William Gold.
The bell rings for round one and we are underway!
Wasp tries to land with a swinging hook to the body but Blake was well out of range. Poor timing from Wasp.
Blake tries to drive through with a takedown attempt but Wasp defends well and Blake ends up having to push Wasp into the cage where they will battle it out in the clinch.
Wasp tries to jump guard but he falls flat on his backside. Blake smiles and moves away.
Blake moves in looking to clinch but Wasp pushes him off.
Wasp lands a slapping body shot.

Wasp has managed to clinch.
Wasp throws a nice elbow but it doesn't land.
Blake is trying to break the clinch but Wasp has him pressed against the cage.

Wasp manages to break the clinch.
Wasp moves into range and clinches up with Blake.
Wasp pushes off an throws an elbow but Blake leans to the side and avoids it. We're back to clinching against the cage.
Wasp softening up his opponent with strikes, against the cage.
We've had a slow start to the round here - hopefully the action picks up.
Both guys are working to get underhooks.
Blake tries to pull guard but Wasp forces him back to his feet, against the cage.
Wasp gets through Blake's defenses to land a nice punch to the side of the head.
Blake is working hard here but doesn't seem to be able to control effectively, up against the cage.
Blake can't break the clinch.
That's one minute gone in the round.
Wasp breaks the clinch.
Wasp scores with a jab to the head.
Wasp uses good footwork to get in and out and land a nice right hand before Blake has time to react.
Blake dives in and grabs Wasp's left leg, looking for a takedown. Wasp pushes down on Blake's head and hops out.
That's three failed takedown attempts in the round for Jack Blake. That's going to take a lot out of him.
Blake shoots for a takedown but Wasp saw that one coming a mile off and avoided it easily.
Good work by Wasp as he checks the leg kick.
Blake darts in trying to clinch
and Wasp counters with a left and a right that stings Blake.
Blake tries to land a leg kick but Wasp saw it coming and moves away.
Wasp throws a leg kick but Blake checks it.
Wow, both these guys are really going for it!
Wasp misses with a body kick.
Wasp fakes with an overhand right and moves in to clinch with Blake, pushing him back against the cage.
Wasp told us before the fight that he's been working on his elbows. An under utilised technique these days - let's see if it can sway the outcome of the fight.
Blake tries for a takedown but Wasp manages to get underhooks.
Wasp escapes the clinch and we're back to striking.
Wasp closes the distance and pushes Blake back into the cage.
Wooooo! Give it up for these two warriors! They are putting on a show!
Wasp escapes the clinch and we're back to striking.
Jack Blake seems to be the more aggressive standup fighter in this bout.
That's two minutes gone in the round.
Blake avoids the head kick by Wasp.
Blake closes the distance and clinches up with Wasp, looking for a takedown. Blake pushes Wasp against the cage but Wasp circles to the side and manages to break the clinch.
Wasp ducks down and throws a hook to the body but Blake moves away.
Blake lands with a straight right. Wasp didn't see that one coming.
Blake closes the distance looking to clinch
and Wasp makes him pay by landing a nice hook to the body before moving out of range.
Wasp gets in close and instigates a clinch.
Blake can't break the clinch.
Wasp escapes the clinch and we're back to striking.
Wasp shoots in looking for a double leg takedown. Blake defends it nicely.
Nice cross by Wasp.
Blake misses with a takedown attempt - Wasp sprawls well and throws a nice strike on the way out which just misses.
Wasp avoids the clinch attempt nicely.
That's three minutes gone in the round.
Blake goes for a double leg but Wasp avoids the attempt and the two fighters end up clinched against the cage as Wasp continues to drive forward.
Blake goes for a takedown attempt but Wasp pushes him away and we're back to fighting at a distance.
Wasp misses with a head kick.
Wasp avoids the body shot from Blake.
Blake dives in for a single leg takedown but Wasp sprawls and the fighters end up clinched against the cage.
Blake wants to break free but Wasp has control.

Wasp pulls guard.
Blake wants to stand and escape but instead Wasp has hit a sweep and he's now on top in guard.

Wasp's corner is telling him to maintain position.

Wasp stands up from guard. Let's bang!
Blake throws a poor cross that misses
and Wasp makes him pay by landing a nice hook to the body before moving out of range.

That's four minutes gone in the round.
Wasp scores with a sloppy punch to the body. Not much technique there but it did the business.
Wasp moves into range and clinches up with Blake.
A short body shot lands from Wasp as the two fighters clinch.
Blake throws an elbow but it misses.
Blake tries to break the clinch but Wasp is controlling the position.
Blake tries to pull guard but Wasp holds him up against the cage and eventually Blake drops back down to his feet.
Wasp lands a body shot.
The crowd cheering loudly, showing their appreciation for the quality fight we're seeing here.
Wasp throws a blind hook that connects with the side of Blakes head.
Blake jumps guard but his hands slip and he falls flat on his back. Well, he's made himself look a right mug there, as Wasp walks away with a smile on his face. Blake gets slowly back to his feet and shakes his head.
Blake fails to land the takedown.
Wasp ducks low and lands a nice hook to the body of his opponent.
Wasp closes the distance and clinches.
Wasp lands a left hand.
Blake wants to strike at distance but he can't break free of the clinch.
And thats the end of the round the fighters go back to their corners.
Gaspard Wasp dominated that round.
That's time! Blake's corner gives him a slap on the ass as he gets ready to fight.

Blake wants to clinch but Wasp slips to the side
enabling Wasp to counter with a crisp jab.
Wasp circles away from the clinch attempt
and Wasp counters by moving into the clinch.
Wasp lands a shot to the body.
Blake wants to get back to striking at distance but Wasp won't allow it.
Wasp has been the more effective fighter overall so far.
Blake is trying to force a seperation but Wasp has the dominant position.
Wasp can't find room to land a body shot as Blake controls the action.
Blake has had enough of the clinch but Wasp keeps him there for the moment.
A short left from Wasp.
A right hand to the body from Wasp.
Blake tries to circle away but Wasp has him pinned against the cage.
We've had a slow start to the round here - hopefully the action picks up.
Wasp pushes off and circles away, back to the middle of the mat.
Blake tries to clinch up
and Wasp counters with a quick right hand to the jaw.
Blake swings away with a leg kick that misses.
That's one minute gone in the round.
Blake throws a push kick but Wasp slaps the foot to one side.
Blake is pinned up against the cage taking some big shots here. The referee is looking closely deciding whether he should stop the fight.
Wasp rushes Blake and presses him up against the cage.
Wasp blocks an uppercut.
Wasp manages to pull guard.
Wasp pulls Blake in close to his closed guard and prevents Blake from doing any damage or advancing position.
Wasp pushes Blake off and gets back to his feet.
A bone on bone clash there as Blake blocks the leg kick.
That's two minutes gone in the round.
Blake tries to clinch up.
Gaspard Wasp seems to be getting the better of the standup.
Blake drops his hands and takes a jab to the jaw for his troubles.
Blake tries to grapple but his opponent circles
and Wasp counters with a right hand to the body.
Blake walks straight into an uppercut. Luckily it didn't land flush.
This is a great period of action - very entertaining stuff!
Blake misses with a takedown attempt - Wasp sprawls well and throws a nice strike on the way out which just misses.
Jack Blake is looking to throw some combinations by the looks of things.
Blake tries to clinch up.
Blake doesn't manage to clinch there - Wasp circles away.
Wasp misses with a two punch combination.
Wasp lands with a good body shot.
Blake throws a head kick that misses.
Wasp lands a jab, followed by a cross and another cross, as Blake backs up against the cage.

Blake is rocked!
Blake tries to grapple but his opponent circles
and Wasp counters with a shot to the ribs. That looked like it hurt.
Oh Blake is still all over the place! His legs are completely gone! Will he be able to recover?!!
Wasp walks forward and throws a big overhand right! Blake drops to the floor like a sack of potatoes! Wasp swarms on him with more punches until the referee wrestles him away from Blake's unconscious body! Wow, that was brutal!
Ladies and gentlemen, after 3:57 of round 2, we have a winner by way of TKO (Strikes). Gaspard Wasp!
|
|
|
|
|
|
|
|
|
|
|
|
|
|
|
|
|
|
|
|
|
|
|
| S |
C
A |
G |
S |
C
B |
G |
|
S |
C |
G |
|
energy
A | B |
|
hype
A | B |
|
pop
A | B |
|
mgr
A | B |
|
FIGHT
RATING
30% |
|
|
|
|
|
|
|
Undercard bout
|
Coming up we have a welterweight MMA rules bout between Trent Baxendine (ranked 0 p4p, 0 weight class) and Tobias Tattsyrup (ranked 0 p4p, 0 weight class). Tobias Tattsyrup will no doubt be trying to keep this one on the feet, where he has a distinct advantage.
 |
|
 |
| 182 cm
19
185 lbs
4 - 1 - 0 |
|
182 cm
18
182 lbs
3 - 1 - 0 |
Good wrestling
Counter fighter
Good chin |
|
BJJ Blue Belt
Basic striking
Determined |
|
| |
|
Ladies and gentlemen. This fight is 3 rounds, in the welterweight division.
Introducing the fighter to my left, fighting out of the red corner.
With a record of
4 - 1 - 0, fighting out of London, Trent Baxendine!
And introducing the fighter to my right, fighting out of the blue corner.
With a record of
3 - 1 - 0, fighting out of London, Tobias Tattsyrup!
The judges for this bout are James Glass, Daniel Bishop and Colin Fotheringham.
The bell rings for round one and we are underway!
Baxendine shoots in for a takedown and gets it.
Tattsyrup is pressing down on Baxendine's left leg trying to get back to full guard. He's managed it.
Tattsyrup bucks up whilst keeping hold of a body lock, managing to reverse the position. Now he's in top in Baxendine's guard.
Tattsyrup postures up in Baxendine's guard and throws a big left but Baxendine blocks it.
Tattsyrup won't allow Baxendine to get back to his feet.
Tattsyrup in full guard, throwing the ground and pound. No damage this time.
Tattsyrup postures up in Baxendine's guard and throws a big left but Baxendine blocks it.
Baxendine wants to get back to his feet but Tattsyrup is in a dominant position and won't allow it.
Tattsyrup looks more muscular than last time we saw him. He must have been on the weights.
We've had a slow start to the round here - hopefully the action picks up.
Tattsyrup throwing elbows and punches but not connecting, as Baxendine works some decent striking defense from the bottom.
Tattsyrup throws a strike but Baxendine rolls with it and manages to sweep. Now he's in guard on top.

Baxendine knows he needs to get back to his feet asap. He's simply no match for Tattsyrup on the ground.
That's one minute gone in the round.
Baxendine throws a big elbow that misses.
Baxendine content to strike from guard, landing some decent shots.
The ref warns both fighters not to hold the cage as they work up against the meshing.
Tattsyrup lands a beautiful sweep and he's now moved into his opponent's guard.
Tattsyrup throws a big elbow that misses.
A big thud reverberates around the arena there as Tattsyrup accidentally thumps the mat. Hopefully he's not broken his hand.
Tattsyrup trying to control the position from guard on top but Baxendine is wriggling around, looking for whatever he can.
Baxendine on his back here. We all know that wrestlers don't like being on their back so let's see if Baxendine tries to get out of the position.
Tattsyrup with a flurry of punches that miss.
Tattsyrup has the superior BJJ but he's also working some ground strikes into his gameplan.
Baxendine preventing the ground and pound from doing any damage.
Tattsyrup landing some decent shots from guard.
Baxendine keeping moving, preventing Tattsyrup from controlling successfully.
That's two minutes gone in the round.
Tattsyrup not doing a lot at the moment. He'll have to show some more aggression or the fight will get stood up.
Baxendine seems to have improved his submission grappling technique since last time we saw him. Let's see if he can pull off a submission.
Tattsyrup in full guard, throwing the ground and pound. No damage this time.
We must be close to a standup if these guys don't pick up the pace.
Tattsyrup trying to control but Baxendine is working from the bottom.

The referee decides to stand the fighters back up.
Tattsyrup closes the distance and after a bit of a stuggle, scores a takedown into Baxendine's guard.
Baxendine being controlled here, momentarily.
Tattsyrup passes easily into side control. Nice work.
That's three minutes gone in the round.
Tattsyrup working the ground and pound.
Baxendine is not content to let Tattsyrup control the position.
Tattsyrup postures up a little and throws a couple of hammerfists but they don't connect properly.
Tattsyrup just content to control the position.
Tattsyrup throws an elbow but Baxendine slips to the side and avoids it well.
That's four minutes gone in the round.
Well. There's a bit of a lull in the action here and the crowd are starting to get restless.
Tattsyrup wants to control but Baxendine is keeping him busy.
Tattsyrup throwing ground and pound but whilst doing so, he forgets to control position and Baxendine works his way back to half guard. Good composure under pressure.
Tattsyrup thumps the canvas. Not on purpose obviously - he just missed Baxendine's head.
Tattsyrup thows a wild elbow that connects with the canvas.
The fighters are pressed up against the cage, both looking to find a bit of space to work.
Tattsyrup missing with some ground and pound from the half guard.
Boooooooooooooooooooo!!! God, this has been a terrible round. Come on you two, sort yourselves out!
Tattsyrup throwing shots but they're hitting the canvas more than the man.
Tattsyrup prevents Baxendine from standing back up.
The referee has stepped in and called for a break in the action. We'll restart on the feet.
Baxendine drives through with a takedown into Tattsyrup's guard. Let's see what he can do from the top position.
And thats the end of the round the fighters go back to their corners.
Tobias Tattsyrup dominated that round.
That's the end of the interval. I'm sure that seemed a lot quicker than a minute for our two fighters! Back to the action.
Baxendine scores with a nice takedown into half guard. Let's see what he's got on the ground.
Tattsyrup looks like he's trying to stand up.
Tattsyrup is looking to control Baxendine's leg but it's slowly edging free. Can Tattsyrup avoid being mounted?
Tattsyrup regains full guard. Nicely done.
Tattsyrup tries to land a sweep but no joy.
Tattsyrup is doing well to control the posture of his opponent and prevent any damage.
Baxendine wants to control from the top but Tattsyrup keeps moving.
We've had a slow start to the round here - hopefully the action picks up.
Tattsyrup working a defensive guard but Baxendine manages to pass into side control anyway.
That's one minute gone in the round.
Tattsyrup is positioning himself to get back to half guard.
Tattsyrup wants to control but Baxendine postures up.
Baxendine misses with an attempted head punch from side control.
Tattsyrup struggling a bit here.
Tattsyrup is trying to get back to half guard.
Baxendine is looking to take a break and control but Tattsyrup is keeping him honest, looking to work from the bottom.
That's two minutes gone in the round.
The crowd are hurling abuse towards the fighters... You can hardly blame them though because there isn't a lot going on in the fight.
Tattsyrup is moving his hips around well on the bottom and has managed to get back to half guard.
Baxendine is scoring with some nice ground and pound from the dominant position.
Baxendine is keeping good posture, landing some ground and pound.
Tattsyrup controlling the position well.
Tattsyrup has no desire to be mounted, so is trying to control. Baxendine is working away from the top position though.
Baxendine missing with the ground and pound from half guard.
That's three minutes gone in the round.
Baxendine throws a big elbow that misses, also allowing Tattsyrup to regain full guard.
Tattsyrup tries to land a sweep but no joy.
Baxendine postures up to throw the ground and pound strikes but they don't connect.
Baxendine lands a couple of elbows.
Baxendine trying to pass the guard. He's being very persistent here but Tattsyrup manages to land a sweep and now he's on top!
Baxendine utilising some decent striking defenses from the guard, preventing the ground and pound.
Tattsyrup working some ground and pound from guard but it's not doing any damage.
Tattsyrup scoring with punches to the head and body.
Tattsyrup distracts Baxendine with his right hand and drops a big elbow with his other arm.
That's four minutes gone in the round.
Baxendine avoiding any damage from the ground and pound.
A big thud reverberates around the arena there as Tattsyrup accidentally thumps the mat. Hopefully he's not broken his hand.
Baxendine wants to stand but Tattsyrup is controlling the position.
Tattsyrup throws a strike but Baxendine rolls with it and manages to sweep. Now he's in guard on top.
Tattsyrup escapes his hips to the side and looks to be working for an armbar. Baxendine gives him a little smile and shakes his head. No chance.
Tattsyrup had isolated an arm as going for a kimura. Baxendine defends it easily.
Boooooooooooooooooooo!!! God, this has been a terrible round. Come on you two, sort yourselves out!
Tattsyrup is working an open guard here, looking to improve his position. No doubt that will leave him open to counters but at least he's being more offensive.
And thats the end of the round the fighters go back to their corners.
Trent Baxendine dominated that second round.
The referee calls time. The cornermen exit stage left and we're back to business. And we move into the final round!

Tattsyrup tries to bum rush Baxendine with a series of wild strikes but Baxendine uses good footwork to avoid the assault.
Tattsyrup throws a jab to the body, straight down the pipe. Boom. That sent Baxendine stumbling backwards but he manages to regain his composure quickly.
Tattsyrup misses with a double jab.
Tattsyrup looking to shoot here. He's gone for it and he's landed a takedown into side control! Oh, that's bad for Baxendine!
Tattsyrup sitting in side control, looking to soften his opponent up with elbows and hammerfists but Baxendine is avoiding damage well and looking to escape the position.
Tattsyrup in side control lands a decent elbow.
We've had a slow start to the round here - hopefully the action picks up.
Tattsyrup lands an elbow.
Tattsyrup looking to punish the body of his opponent here but Baxendine is avoiding damage well.
Tattsyrup working the ground and pound but Baxendine is defending the strikes.
Baxendine dodges the ground and pound from Tattsyrup.
That's one minute gone in the round.
Tattsyrup grinds an elbow into Baxendine's temple.
Tattsyrup prevents Baxendine from escaping the position.
Tattsyrup throwing strikes but Baxendine manages to buck up and roll into a nice reversal - now he's on top in side control!
Baxendine trying to control the action but Tattsyrup is working from the bottom.
Tattsyrup avoids any damage from the ground and pound of Baxendine.
Tattsyrup manages to get back to half guard.
Baxendine looks to land a strike but Tattsyrup avoids it nicely and regains full guard.
Baxendine preventing the sweep.
That's two minutes gone in the round.
Baxendine wants to pass the guard but Tattsyrup is keeping the position.
Baxendine is fighting to break Tattsyrup's control of his arms but Tattsyrup is doing a good job of controlling the position at the moment.
Tattsyrup looking for a sweep. Not yet Tattsyrup, not yet.
Baxendine throws a strike but Tattsyrup rolls with it and manages to sweep. Now he's in guard on top.
Baxendine wants to stand and escape but Tattsyrup is having none of it.
Tattsyrup stands up over Baxendine, holding his feet. He dives back in and lands a decent shot to the head.
Tattsyrup trying to control the position from guard on top but Baxendine is wriggling around, looking for whatever he can.
Baxendine wants to stand up but Tattsyrup is controlling him.
That's three minutes gone in the round.
Tattsyrup missing there with some ground and pound from the guard.
Tattsyrup working some ground and pound from guard but it's not doing any damage.
Tattsyrup prevents Baxendine from getting back to his feet.
The referee has stepped in and called for a break in the action. We'll restart on the feet.
Tattsyrup misses with a takedown
and Baxendine counters with a nice double leg into guard.
Tattsyrup tries to land a sweep but no joy.
A big thud reverberates around the arena there as Baxendine accidentally thumps the mat. Hopefully he's not broken his hand.
Baxendine trying to control the position from guard on top but Tattsyrup is wriggling around, looking for whatever he can.
Tattsyrup lands a beautiful sweep and he's now moved into his opponent's guard.
That's four minutes gone in the round.
Tattsyrup throws an elbow that misses. Baxendine uses the momentum to reverse the position. He's now in Tattsyrup's guard. Nice move by Baxendine!
Tattsyrup seems keen to control rather than go for a submission, at least for now.
Tattsyrup working the defensive guard well to avoid strikes from Baxendine.
Baxendine throwing elbows and punches but not connecting, as Tattsyrup works some decent striking defense from the bottom.
There's a bit of a scramble here and now Tattsyrup is on top in guard.
Tattsyrup distracts Baxendine with his right hand and drops a big elbow with his other arm.
And that's the end of the fight!
Tobias Tattsyrup comfortably won the final round on my scorecard.
Well Tattsyrup has outworked and out performed his opponent in all aspects of the game today. He was simply too good and the decision should be no more than a formality. Over to the ring announcer for the scorecards.
Ladies and gentlemen, after 3 rounds of action, we go to the scorecards for a decision.
Judge James Glass scores the fight 28:29
Judge Daniel Bishop scores the fight 28:29
Judge Colin Fotheringham scores the fight 28:29
In favor of your winner, by unanimous decision... Tobias Tattsyrup!
Tobias Tattsyrup decided to go for the less than humble approach in his post fight interview, telling everyone how he is going to conquer the world. The crowd seemed to like it when really that sort of approach could have gone either way.
|
|
|
|
|
|
|
|
|
|
|
|
|
|
|
|
|
|
|
|
|
|
|
| S |
C
A |
G |
S |
C
B |
G |
|
S |
C |
G |
|
energy
A | B |
|
hype
A | B |
|
pop
A | B |
|
mgr
A | B |
|
FIGHT
RATING
18% |
|
|
|
|
|
|
|
Co-main event
|
Coming up we have a featherweight MMA rules bout between Bradley Franco (ranked 0 p4p, 0 weight class) and Bradley Nowell (ranked 0 p4p, 0 weight class). Bradley Nowell acknowledges the crowd's support as he enters the cage.
 |
|
 |
| 173 cm
23
153 lbs
3 - 0 - 0 |
|
178 cm
22
152 lbs
1 - 1 - 0 |
BJJ Purple Belt
Brawler
Self confident |
|
BJJ Blue Belt
Good low kicks
Good gas tank |
|
| |
|
Ladies and gentlemen. This fight is 3 rounds, in the featherweight division.
Introducing the fighter to my left, fighting out of the red corner.
With a record of
3 - 0 - 0, fighting out of London, Bradley Franco!
And introducing the fighter to my right, fighting out of the blue corner.
With a record of
1 - 1 - 0, fighting out of London, Bradley Nowell!
The judges for this bout are James Atkins, Phil Schofield and Chris Edwards.
The bell rings for round one and we are underway!
Nowell throws a nice outside leg kick.

Franco takes the fight into the clinch.
Franco lands a right uppercut that snaps the head of Nowell backwards.
Franco blocks an elbow strike from Nowell.
Nowell gets an overhook and lands an elbow to the side of the head.
Nowell misses with a knee strike.
Franco definitely looks more muscular than last time we saw him fight.
Nowell has Franco pressed against the cage, preventing Franco from circling away and getting back to striking at range.
Nowell gets an overhook and lands an elbow to the side of the head.

It looks like Bradley Franco has been cut.
Nowell pushes off an throws an elbow but Franco leans to the side and avoids it. We're back to clinching against the cage.
Nowell using the Thai plumb to throw knees but Franco has his back arched nicely, preventing the strike.
Franco blocks an elbow strike from Nowell.
Nowell misses with an elbow strike.
Nowell pushes off an throws an elbow but Franco leans to the side and avoids it. We're back to clinching against the cage.
Franco blocks an elbow strike from Nowell.
Nowell gets double underhooks to prevent a takedown attempt from Franco.
Franco avoids a wild elbow strike from Nowell.
That's one minute gone in the round.
Franco is working for a takedown up against the cage. He can't get it on this occasion though.
Franco tries to pull guard but Nowell holds him up against the cage and eventually Franco drops back down to his feet.
That's three failed takedown attempts in the round for Bradley Franco. That's going to take a lot out of him.
Nowell's corner calls for him to break the clinch, which he does.
Franco swats away the attempt to clinch by Nowell.
Franco fakes with an overhand right and moves in to clinch with Nowell, pushing him back against the cage.
Franco avoids a wild elbow strike from Nowell.
Franco blocks an elbow strike from Nowell.
Nowell managing to block the knees to the body from Franco.
Franco dodges an elbow strike from Nowell.
Franco pulls guard.
Nowell tries to stand but Franco is controlling from the bottom.
Franco is trying to keep Nowell in close.
Nowell must be cautious of submissions here, given that his opponent has the superior Jiu Jitsu.
That's two minutes gone in the round.
Franco is working an open guard so Nowell takes the opportunity to get back to his feet.
Nowell scores with a big left there. The judges will like that one.
Franco misses with a series of wild punches.
Nowell throws a head kick but Franco moves out of range.
Nowell tries a switch kick but it misses it's target.
Franco throws a half hearted mid kick.
Nowell tries to clinch but is not successful on this occasion.
Nowell throws out a powerful jab.
The crowd cheering loudly, showing their appreciation for the quality fight we're seeing here.
Nowell tries a switch kick but it misses it's target.
Nowell fakes a right and follows up with a big left that drops Franco to one knee - oooooh, he's wobbly! Franco looks to clinch but Nowell throws him off and pummels him into the canvas! Franco taps out under the strikes! The fight is over!
Ladies and gentlemen, after 2:52 of round 1, we have a winner by way of Submission (Strikes). Bradley Nowell!
|
|
|
|
|
|
|
|
|
|
|
|
|
|
|
|
|
|
|
|
|
|
|
| S |
C
A |
G |
S |
C
B |
G |
|
S |
C |
G |
|
energy
A | B |
|
hype
A | B |
|
pop
A | B |
|
mgr
A | B |
|
FIGHT
RATING
29% |
|
|
|
|
|
|
|
Main event
|
Coming up we have a middleweight MMA rules bout between Jack Long (ranked 0 p4p, 0 weight class) and Jock Fletcher (ranked 0 p4p, 0 weight class). Long comes into the arena with remember the name blaring out of the sound system. The key to victory for Jack Long has got to be keeping the fight on the feet.
 |
|
 |
| 187 cm
25
198 lbs
7 - 9 - 0 |
|
180 cm
25
190 lbs
0 - 0 - 0 |
BJJ Blue Belt
Brawler
Experienced |
|
Good wrestler
Brawler
Experienced |
|
| |
|
Ladies and gentlemen. This fight is 5 rounds, for the middleweight championship of the world!
Introducing the champion to my left, fighting out of the red corner.
With a record of
7 - 9 - 0, fighting out of London, Jack Long!
And introducing the challenger to my right, fighting out of the blue corner.
With a record of
0 - 0 - 0, fighting out of London, Jock Fletcher!
The judges for this bout are Chris Edwards, William Gold and James Glass.
The bell rings for round one and we are underway!
Fletcher gets the takedown into side control.
Long gets back to half guard.
Long is trying to defend against the ground and pound but Fletcher scores with a couple of nice shots.
Fletcher is trying to control. Long wants to improve his position but can't escape this time.
Long wants to improve his position but Fletcher is controlling well.
Fletcher tries to pass the half guard into mount. Long knows what he's doing though and prevents the attempt.
Long is trying to get back to full guard.
We've had a slow start to the round here - hopefully the action picks up.
Fletcher drops an elbow to the side of Long's head.
Long avoiding damage under a succession of punches from Fletcher.
Fletcher is keen to just control but Long is a slippery customer.
That's one minute gone in the round.
Fletcher might have to switch it up a bit here because his efforts to control Long haven't been going to plan, at least at the current moment in time.
Long wants to improve his position but Fletcher is controlling well.
Long trying to control here but he's found himself mounted! Oh no!
A nice elbow there by Fletcher.
The fighters are pressed up against the cage, both looking to find a bit of space to work.
Long is bucking up trying to escape but Fletcher cracks him with another couple of good strikes.
The ref warns both fighters not to hold the cage as they work up against the meshing.
Fletcher cracks Long with a nasty head shot there - the crowd let out an audible gasp there, as the noise reverberated around the arena.
Fletcher landing strikes from the mount.
The crowd growing excited in anticipation of a finish here! Right on cue, Fletcher cracks his opponent with a massive right hand that draws loud cheers!
Fletcher lands a big shot there that rocks Long but he's holding on and managing to survive for now.
Long is rocked!
That's two minutes gone in the round.
Long wants to hold on but Fletcher pushes him away.
Oh Long is still in real trouble! Will he be able to recover?!!
Oooooh, big shot lands for Fletcher! Long is hurt baaadly! Fletcher is firing away with more strikes - Long is covering up... the ref is warning him to do something. He's just covering up though still and the ref has to step in to end the fight! This one is all over!
Ladies and gentlemen, after 2:27 of round 1, we have a winner by way of TKO (Strikes). Jock Fletcher!
Jock Fletcher is the new middleweight champion!
In defeat, Jack Long stepped up to the mic, saying 'I will be back. Fitter. Faster. Stronger. And I will come away with the win'.
|
|
|
|
|
|
|
|
|
|
|
|
|
|
|
|
|
|
|
|
|
|
|
| S |
C
A |
G |
S |
C
B |
G |
|
S |
C |
G |
|
energy
A | B |
|
hype
A | B |
|
pop
A | B |
|
mgr
A | B |
|
FIGHT
RATING
30% |
|
|
|
|
|
|
|
|
|
|
