 |
AXFC 2 PBP Commentary |
Undercard bout
|
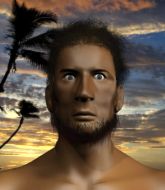
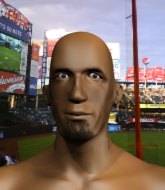
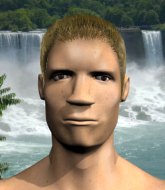
Coming up we have a heavyweight MMA rules bout between Marck Dundee (ranked 0 p4p, 0 weight class) and Jason Kill (ranked 0 p4p, 0 weight class). Over to our ring announcer for the fighter introductions!
 |
|
 |
| 205 cm
19
257 lbs
0 - 1 - 0 |
|
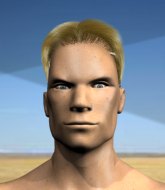
190 cm
25
235 lbs
2 - 2 - 0 |
BJJ White Belt
Brawler
Granite chin |
|
BJJ Blue Belt
Counter striker
Intelligent |
|
| |
|
Ladies and gentlemen. This fight is 3 rounds, in the heavyweight division.
Introducing the fighter to my left, fighting out of the red corner.
With a record of
0 - 1 - 0, fighting out of Sydney, Marck Dundee!
And introducing the fighter to my right, fighting out of the blue corner.
With a record of
2 - 2 - 0, fighting out of Sydney, Jason Kill!
The judges for this bout are Skip Squint, John Mangel and Donatello Bradman.

The bell rings for round one and we are underway!
Dundee looks for a takedown here. Will he get it? Kill is fending him off so far but Dundee persists. Nope, Kill circles away and we're back to standing.
Dundee shoots in and drives through. Kill sprawls well.
Dundee shoots for a double leg takedown but Kill sprawls well. He's pushed Dundee's face into the mat and manages to get back to his feet relatively easily.
That's three failed takedown attempts in the round for Marck Dundee. That's going to take a lot out of him.
Kill fails with the takedown.

Dundee feints and as Kill raises his hands in defense, Dundee changes levels and drives through with a takedown into guard.
Dundee is stalling in the full guard.
Kill wants to get back to his feet but Dundee is in a dominant position and won't allow it.
Dundee trying to control but Kill is working from the bottom.
Kill working the defensive guard well to avoid strikes from Dundee.
Both fighters really going for it on the ground here!
Dundee content to strike from guard, landing some decent shots.
Kill is trying to stand up but he's not managed so far.
The fighters are pressed up against the cage, both looking to find a bit of space to work.

That's one minute gone in the round.

The referee decides to stand the fighters back up.
A punch combination from Dundee misses.
Kill takes an uppercut right on the button but keeps his composure.
Dundee shoots and misses
and Kill counters with a good low kick that Dundee was not able to check.
Dundee looks to clinch
and Kill counters with a takedown into side control.
Dundee is breathing heavily.
Dundee is looking to reverse the position.
Kill scores with a couple of nice shots to the head there. The referee takes a look at Dundee to see if he's OK.
Dundee can't do much from the bottom here.
Dundee is positioning himself to get back to half guard.
Kill advances to full mount.
Kill lands a big shot there that rocks Dundee but he's holding on and managing to survive for now.

That's two minutes gone in the round.
Dundee is trying to escape the mount.
BOOM! Kill connects with a massive shot to the dome!
Fantastic stuff here - a very entertaining period of action, which has drawn cheers from the crowd.
Kill breaks from Dundee's wrist control and lands an elbow.
The fighters are starting to get a bit slippery now, which will make submissions a bit more difficult.
Dundee is wriggling around trying to escape.
Kill throwing strikes here but Dundee is writhing around nicely and avoiding any serious damage.
Kill sends his fist crashing into the mat - the crowd let out a collective ooooooh. Let's hope he's not broken it!
Dundee tries to get back to half guard but can't.
Dundee is working hard here to advance position.
The ref warns both fighters not to hold the cage as they work up against the meshing.
Dundee swinging wildly from the bottom but he's not landing.
Dundee manages to regain half guard. Good work.
Dundee is looking to regain full guard. Not this time though.
Kill looks towards his corner to check for any instructions. The corner give him nothing to work with, so he cracks Dundee with a short hammerfist. I guess that's as good as any advice he could get in this position.

That's three minutes gone in the round.
Kill working over Dundee with some ground and pound. Dundee looks like he wants out of this position, which is understandable.
Dundee wants to control but Kill is keeping busy and won't allow it.
Kill blocks the strikes from Dundee.
Dundee knows he needs to get back to his feet asap. He's simply no match for Kill on the ground.
Dundee is trying to get back to full guard.
Well, the referee has seen enough. Neither fighter is active enough on the ground so he's stood them back up.
Kill takes a shot to the body in his stride.
Kill moves in looking to clinch but Dundee pushes him off.
Dundee works over Kill's head and body with a nice combination.
Nice uppercut there from Kill.
Dundee throws a wild combination but nothing lands.

That's four minutes gone in the round.
The crowd are hurling abuse towards the fighters... You can hardly blame them though because there isn't a lot going on in the fight.
Dundee tries to clinch but fails miserably
and Kill counters with a lovely straight right hand!
Kill shoots in for a takedown and gets it. Let's see what he's got on the mat.
Dundee tries to land a sweep but no joy.
Dundee is pulling down on Kill's head. It's preventing any offense from Kill, at least for the moment.
Kill tries to free his leg and advance position but Dundee is retaining full guard.
Dundee will need to keep those long limbs tucked in whilst he's on the ground, to prevent any submissions.
Kill landing some decent shots from guard.
Kill won't allow Dundee to sweep him here.
Dundee pulls Kill in close to prevent any damage.
Kill in full guard, throwing the ground and pound. No damage this time.
Kill won't allow Dundee to get back to his feet.
The referee decides to stand the fighters back up.
Dundee circles away from the clinch attempt.
Dundee tries for a takedown but Kill circles away easily
and Kill counters with a two punch combo.
And thats the end of the round the fighters go back to their corners.
Jason Kill dominated that round.
The fighters get back to their feet, the hooter sounds and we're back to the action!

Dundee shoots in for a takedown but doesn't get it.
Dundee slips a jab and a cross from Kill.
Dundee shoots in with a takedown attempt and he has Kill pinned against the cage. Kill gets the underhooks and manages to circle away.
Dundee with a poor takedown

and Kill moves into the clinch.
That's three failed takedown attempts in the round for Marck Dundee. That's going to take a lot out of him.
Kill drops to a knee looking for a takedown but Dundee gets the underhooks and prevents it.
Kill has clasped his hands together around Dundee's back... aaand, he's got a takedown into side control. Nicely done.
Dundee tries to buck Kill off but Kill is having none of it.

Kill decides to take the fight back to the feet.
The fight stays on the outside here - Kill looks like he's thinking about clinching though.
Kill tests Dundee's chin there with a solid looking shot.
Both fighters are absolutely exhausted here.
Dundee closes the distance and gets a double leg, slamming Kill to the mat! Kill manages to get full guard.
That's one minute gone in the round.
Dundee won't allow Kill to get back to his feet.
Dundee connects with a couple of short punches.
Kill wriggles free and stands up.
A lazy left from Dundee finds it's target.
Kill misses with a double jab.
Dundee misses with a combination
and Kill counters with a three punch combo that has Dundee backing up. Dundee nods at Kill to acknowledge the strikes.
Dundee throws out a token jab with nothing on it.
Dundee misses with a jab and misses with a cross straight after too.
Kill circles away from the clinch attempt.
Dundee moves in looking to clinch but Kill pushes him off.
Dundee wants to clinch.
That's two minutes gone in the round.
Neither fighter has done anything of merit for a good minute or two here and the crowd are not happy about it.
Kill fails to land with the punch combination there - jab, cross, hook, miss, miss, miss.
Dundee throws a jab, cross combination which is slipped
and Kill counters with a single leg into guard. Dundee didn't expect that.
Kill preventing the sweep.
Dundee has control of Kill's left arm, preventing Kill from doing any damage.
Dundee not looking particularly offensive just at the moment.
Kill thows a big elbow that misses.
Dundee pulls Kill in close to prevent any damage.
Dundee is edging up against the cage. He's using the cage to get back to his feet. Nice work there - the fighters are clinched.
Kill lands a hook that snaps the head of Dundee backwards.
That's three minutes gone in the round.
Dundee jumps into guard, dragging Kill to the mat.
Kill tries to stand but Dundee is controlling from the bottom.
Kill takes a decent strike to the side of the head.
Kill postures up in Dundee's guard and throws a big left but Dundee blocks it.
Dundee on his back here. We all know that wrestlers don't like being on their back so let's see if Dundee tries to get out of the position.
Dundee wants to sweep but no luck.
Kill scores with a decent looking elbow strike.
Kill won't allow Dundee to sweep him here.
Dundee lands a beautiful switch and he's in full mount! That could spell trouble for Kill!
Kill taking shots to the head.
Kill somehow manages to escape the mount and get back to his feet!
Dundee throws a right hand that Kill ducks under and follows up with a left that Kill also avoids with ease.
That's four minutes gone in the round.
Dundee fails in his attempt to clinch.
Dundee tries to clinch but Kill moves away
and Kill counters with a nice single leg takedown and he's in Dundee's guard now.
Kill is looking to work some ground and pound but Dundee has wrist control.
Dundee trying to control the position.
A real slowdown in the pace of the fight for a moment, as Dundee holds on and takes a little breather.
Kill gets to his feet - Dundee follows without any prompting.
Kill swings away but doesn't land with a series of punches.
Dundee blocks a head kick by Kill.
Dundee misses with a takedown
and Kill makes him pay by landing a thudding low kick.
The crowd applaud the fighters efforts here as the round comes to an end.
Dundee shoots in for a takedown but doesn't get it.
No joy there for Dundee, who threw a few shots but didn't land.
Kill fails in his attempt to clinch.
And thats the end of the round the fighters go back to their corners.
Jason Kill showed his class in that round. I'd imagine he'll take it on all the scorecards.
The fighters get back to their feet, the hooter sounds and we're back to the action! This is the final round!

Dundee lands a jab to the nose.
Dundee digs a good body shot into Kill's ribs.
Kill shoots in for a takedown. He's persisting with it as Dundee sprawls well. Dundee wins this battle and keeps the fight standing. Kill gets slowly back to his feet.
Nice sprawl there from Kill as Dundee shoots in.
Marck Dundee is looking to throw some combinations by the looks of things.
Dundee takes the fight into the clinch.
Dundee has managed to pull guard. Let's see whether he can work an aggressive guard. It will also be interesting to see what tactics Kill uses from the top position.
Dundee tries to land a sweep but no joy.
Kill tries to free his leg and advance position but Dundee is retaining full guard.
Kill wanted to stand there but Dundee had control of the position.
Both fighters are breathing heavily.
Dundee throws a couple of heel strikes.
Kill has the superior BJJ but he's also working some ground strikes into his gameplan.
Dundee pulls Kill in close to prevent any damage.
Dundee has controlled the position for a good 20 seconds, which will no doubt be starting to frustrate his opponent.
That's one minute gone in the round.
Dundee wants to sweep here but Kill controlling him for the moment.
Kill thows a big elbow that misses.
Neither fighter is doing enough for the referee's liking and he's decided to stand them back up.
Dundee rushes forward with a series of wild hooks but Kill moves out of range and avoids them all easily.
Dundee throws a combination but it was largely blocked by Kill.
Kill gets taken down but at least he's managed to land in guard.
Kill is looking to get back to his feet but can't, whilst Dundee is controlling him.
Dundee trying to control the position from guard on top but Kill is wriggling around, looking for whatever he can.
Kill is working an open guard so Dundee takes the opportunity to get back to his feet.
That's two minutes gone in the round.
Kill lands a head kick. Dundee smiles back at him and beckons him forward.
Some wild striking there from Dundee.
Dundee closes the distance and lands a one-two.
Dundee throws a combination that misses
and Kill counters with a driving takedown into guard. Nice work there by Kill.
Kill stands and throws Dundee's legs to the side, diving into side control.
Kill tries to move into full mount but can't pass Dundee's legs.
Kill lands a decent elbow from side control.
Dundee is trying to get back to half guard.
Dundee can't do much from the bottom here.
Dundee throws a couple of punches but he's in a bad position and they don't land.
That's three minutes gone in the round.
Kill is working Dundee over with some ground and pound from side control.
Dundee gets one leg under and gets the fight to half guard.
Dundee gets full guard.
Kill postures up.
Kill is looking to stand up but Dundee won't let him.
Kill pressing down on his opponent's thigh, looking to pass guard. Dundee is keeping the position for now.
Jason Kill has got the better of the ground game so far.
Dundee tries to strike from the bottom.
Kill won't allow Dundee to sweep him here.
Dundee working a defensive guard here.
Dundee wants to sweep here but Kill controlling him for the moment.
The referee decides to stand the fighters back up.
Kill misses with a takedown attempt - Dundee sprawls well and throws a nice strike on the way out which just misses.
Dundee tries to clinch but Kill moves away
and Kill counters with a shoot takedown. Dundee fights it but they end up in guard.
That's four minutes gone in the round.
Kill trying to pass the guard but can't manage it just yet.
Kill won't allow Dundee to sweep him here.
Kill passes easily into side control. Nice work.
Dundee prevents Kill from improving position.
Dundee tries to work a leg under to get back to half guard but Kill wriggles his own leg back out and remains in side control.
Dundee is trying to stand back up. He's worked his way up against the cage but Kill has just dragged him back down to the mat.
The crowd applaud the fighters efforts here as the round comes to an end.
The referee decides to stand the fighters back up.
Jab, jab by Dundee - just one landing.
Dundee looks to score with a jab to the body but Kill is just out of range.
Marck Dundee has stepped it up - he knows he needs a finish here!
Jason Kill is fighting for a decision here - he's started to take the cautious approach.
Dundee lands with a cross to side of his opponent's head.
And that's the end of the fight!
Jason Kill comfortably won the final round on my scorecard.
I've got Kill winning every round here. Surely the decision will go his way and he'll pick up a well deserved decision victory. Over to the ring announcer for the scorecards.
Ladies and gentlemen, after 3 rounds of action, we go to the scorecards for a decision.
Judge Skip Squint scores the fight 27:30
Judge John Mangel scores the fight 27:30
Judge Donatello Bradman scores the fight 27:30
In favor of your winner, by unanimous decision... Jason Kill!
|
|
|
|
|
|
|
|
|
|
|
|
|
|
|
|
|
|
|
|
|
|
|
| S |
C
A |
G |
S |
C
B |
G |
|
S |
C |
G |
|
energy
A | B |
|
hype
A | B |
|
pop
A | B |
|
mgr
A | B |
|
FIGHT
RATING
81% |
|
|
|
|
|
|
|
Undercard bout
|
|
|
|
Undercard bout
|
Coming up we have a lightweight MMA rules bout between Keiji Numa (ranked 0 p4p, 0 weight class) and Justin Hopkins (ranked 0 p4p, 0 weight class). Numa kept the crowd waiting but all that was forgotten when his ring entrance music started. The incomparable musical genius that is Welcome to the World. Hopkins has chosen Gold Medal as his entrance music. Keiji Numa is staring across the cage at his opponent, tweaking his nipples... Tweaking his own nipples that is.
 |
|
 |
| 169 cm
20
156 lbs
0 - 0 - 0 |
|
173 cm
18
160 lbs
2 - 0 - 0 |
BJJ White Belt
Excellent MT
Prefers standup |
|
BJJ White Belt
Counter striker
Determined |
|
| |
|
Ladies and gentlemen. This fight is 3 rounds, in the lightweight division.
Introducing the fighter to my left, fighting out of the red corner.
With a record of
0 - 0 - 0, fighting out of Sydney, Keiji Numa!
And introducing the fighter to my right, fighting out of the blue corner.
With a record of
2 - 0 - 0, fighting out of Sydney, Justin Hopkins!
The judges for this bout are Hugh Johnson, Bruno Hogan and Damien Edna.
The bell rings for round one and we are underway!
Good leg kick by Numa there. It's the ones that make that thud noise that hurt and that was an almighty thud.
Hopkins fails with a takedown attempt.
Numa chopping away at his opponent's legs.
Hopkins shoots in for a takedown but Numa shows good takedown defense.
Hopkins has a takedown stuffed.
Keiji Numa has stuffed three takedown attempts in the round now. That's going to take a lot out of Justin Hopkins.
Hopkins shoots for a takedown but Numa saw that one coming a mile off and avoided it easily.
We've had a slow start to the round here - hopefully the action picks up.
Numa moves into range and lands a nice leg kick.
Hopkins tries to shoot in for a takedown. He's got hold of a leg but Numa swivels and escapes.
That's one minute gone in the round.
Hopkins is looking to clinch but Numa is avoiding it.
Hopkins blocks a head kick by Numa.
Nice takedown defense from Numa. No joy for Hopkins on that attempt.
Hopkins stumbles momentarily as he takes a strong leg kick from Numa.
Hopkins looks for a takedown but Numa sprawls well.
Numa lands with a nice low kick. That'll leave a bruise.
Hopkins tries to clinch but is not successful on this occasion.
Hopkins fails to land the takedown.
That's two minutes gone in the round.
A lull in the action here being met with boos from the crowd.
Numa tries a head kick but it misses.
Numa lands a nice leg kick that just misses Hopkins's sensitive parts.
Numa lands a head kick. Hopkins smiles back at him and beckons him forward.
Numa digs a good hook to Hopkins's body.
Numa fakes a jab and then connects with a hook.
A solid leg kick lands there for Numa.
Hopkins shoots in for a takedown from distance. He catches Numa napping and manages to drive through into side control!
That's three minutes gone in the round.
Hopkins wants to stand but Numa has his arm trapped.

Hopkins tries for a kimura. Not really close to a finish though.
Hopkins looks gassed!
Numa tries to get back to half guard but can't.
That's four minutes gone in the round.
A lull in the action here being met with boos from the crowd.
The crowd thankful this round is nearly over.
Numa is trying to control Hopkins's posture but Hopkins avoids it.
And thats the end of the round the fighters go back to their corners.
Keiji Numa dominated that round.
The fighters' corners scream their final instructions, as the referee calls time. Here we go, back to the action!
Hopkins has a takedown stuffed.
Hopkins closes the distance and clinches up with Numa, looking for a takedown. Hopkins pushes Numa against the cage but Numa circles to the side and manages to break the clinch.
Hopkins on the wrong end of a nice jab.
Numa lands a high kick!
Keiji Numa is looking to throw some combinations by the looks of things.
We've had a slow start to the round here - hopefully the action picks up.
Hopkins shoots in for a double leg but Numa sprawls well. That's going to sap some energy.
Keiji Numa has stuffed three takedown attempts in the round now. That's going to take a lot out of Justin Hopkins.
A good leg kick by Numa.
Ouch! a nice leg kick from Numa, right into the meat.
That's one minute gone in the round.
Hopkins dives in and grabs Numa's left leg, looking for a takedown. Numa pushes down on Hopkins's head and hops out.
Numa throws a nice outside leg kick.
Hopkins walks forward, straight into a front kick from Numa.
Ouch! a nice leg kick from Numa, right into the meat.
Hopkins dives in and grabs Numa's left leg, looking for a takedown. Numa pushes down on Hopkins's head and hops out.
Numa displays good takedown defense there as he swats away a double leg from Hopkins.
Hopkins is breathing heavily.
Hopkins throws a lazy head kick
and Numa counters with a leg kick that reverborates around the arena.
Hopkins's leg has a nasty welt from taking a succession of leg kicks. That must be slowing him down.
Numa with a hook.
That's two minutes gone in the round.
Hopkins takes one on the chin but seems OK.
Hopkins misses with a double jab
and Numa counters with a left and a right that stings Hopkins.
Justin Hopkins seems to be the more aggressive standup fighter in this bout.
Hopkins misses with a double jab
and Numa counters with an inside leg kick.
Numa scores with a head kick.
Numa throws a head kick that connects with a bit of head and a bit of hand.
Numa stuffs the takedown attempt from Hopkins. Hopkins gets slowly back to his feet.
That's three minutes gone in the round.
A good leg kick by Numa.
Numa throws a shot to the body.
Numa cracks the inside of Hopkins's front leg.
Numa scores with a slapping inside leg kick.
Numa stuffs the takedown.
Hopkins throws a sloppy head kick
and Numa counters with a low kick, right behind Hopkins 's knee.
That's four minutes gone in the round.
Numa swats away the attempt to clinch by Hopkins.
Numa scores with a punch to the gut of his opponent.
Nice takedown defense from Numa. No joy for Hopkins on that attempt.
Hopkins misses with a body shot
and Numa counters with a nice jab to the body that keeps Hopkins thinking.
A low kick from Hopkins is predictable there
and Numa counters with a head kick. That will keep Hopkins thinking before he tries any more sloppy attacks!
A slapping leg kick lands for Numa.
No luck with that takedown attempt from Hopkins.
And thats the end of the round the fighters go back to their corners.
Keiji Numa dominated that second round.
That's time! Back to the action! This is the final round!
Hopkins with a lazy takedown attempt
enabling Numa to counter with a crisp jab.
Numa throws a leg kick which misses Hopkins's front leg but catches the back leg as Hopkins tries to avoid it.
Numa throws a quick head kick that skims the top of Hopkins's head.
Numa scores with a kick to the body.
Hopkins takes a thudding leg kick, right into the meat of the thigh.
Hopkins shoots in for a takedown but Numa shows good takedown defense there and keeps this one on the feet.
Numa circles away from the clinch attempt
and Numa counters with a head kick.
Hopkins takes a big intake of breath there - he's definitely tired.
That's one minute gone in the round.
A solid leg kick lands there for Numa.
Numa paws at his opponent with the jab and then lunges in with a straight, right on the button.
Numa cracks a nice hook into Hopkins's ribs.
Numa jabs away that one connects to the head of his opponent.
Numa fakes a head punch and goes low to the body. Nicely done.
Numa is moving around nicely and scores here with a single head shot.
Hopkins dives in and grabs Numa's left leg, looking for a takedown. Numa pushes down on Hopkins's head and hops out.
Keiji Numa has stuffed three takedown attempts in the round now. That's going to take a lot out of Justin Hopkins.
That's two minutes gone in the round.
A few boos can be heard. I'm sure they will multiply if the fighters don't pick up the pace.
Numa uses decent footwork to sidestep a right hand from Hopkins.
Numa scores with a leg kick.
Hopkins closes the distance and clinches up with Numa, looking for a takedown. Hopkins pushes Numa against the cage but Numa circles to the side and manages to break the clinch.
Numa fakes and then throws a beautiful body shot. Hopkins looks a bit winded and takes a step backwards to take a breath.
Numa moves out of range of the strikes.
Hopkins shoots in for a takedown. "I don't think so" says Numa as he avoids it easily.
Numa chopping away at his opponent's legs.
Numa moves into range and lands a nice leg kick.
That's three minutes gone in the round.
Hopkins shoots and misses
and Numa counters with a nice body shot.
Numa fakes a head shot and lands one to the body.
Numa lands a leg kick. The shin dug right into the meat of the thigh.
A slapping leg kick lands for Numa.
A good leg kick by Numa.
A head kick by Hopkins misses
and Numa counters with a thumping low kick.
Numa chopping away at his opponent's legs.
Like a baseball bat into the meat of his leg there - nice leg kick by Numa.
Keiji Numa is looking to keep the fight on the feet at all costs.
That's four minutes gone in the round.
Numa displays good takedown defense there as he swats away a double leg from Hopkins.
Numa thumps Hopkins with a low kick.
Keiji Numa is fighting for a decision here - he's started to take the cautious approach.
Hopkins gets his takedown attempt stuffed easily
and Numa counters with an outside leg kick.
Ouch! a nice leg kick from Numa, right into the meat.
Numa scores with a jab to the jaw of his opponent.
And that's the end of the fight!
Keiji Numa showed his dominance in that final round.
Well I reckon that's a shut out for Numa, winning every round. Will the judges agree? They are the ones who matter, even if they are often depressingly incompetent. Over to the ring announcer for the scorecards.
Ladies and gentlemen, after 3 rounds of action, we go to the scorecards for a decision.
Judge Hugh Johnson scores the fight 30:27
Judge Bruno Hogan scores the fight 30:27
Judge Damien Edna scores the fight 30:27
In favor of your winner, by unanimous decision... Keiji Numa!
|
|
|
|
|
|
|
|
|
|
|
|
|
|
|
|
|
|
|
|
|
|
|
| S |
C
A |
G |
S |
C
B |
G |
|
S |
C |
G |
|
energy
A | B |
|
hype
A | B |
|
pop
A | B |
|
mgr
A | B |
|
FIGHT
RATING
19% |
|
|
|
|
|
|
|
Undercard bout
|
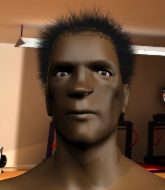
Coming up we have a heavyweight MMA rules bout between Sven Hammer (ranked 0 p4p, 0 weight class) and Kimbo Slice (ranked 0 p4p, 0 weight class). Kimbo Slice has the power to score a knockout today if he connects clean with Sven Hammer's chin.
 |
|
 |
| 185 cm
22
245 lbs
1 - 0 - 0 |
|
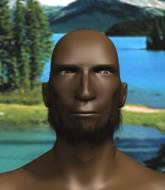
200 cm
18
243 lbs
1 - 0 - 0 |
BJJ Blue Belt
Brawler
Good in bed |
|
BJJ White Belt
Decent boxing
Good gas tank |
|
| |
|
Ladies and gentlemen. This fight is 3 rounds, in the heavyweight division.
Introducing the fighter to my left, fighting out of the red corner.
With a record of
1 - 0 - 0, fighting out of Sydney, Sven Hammer!
And introducing the fighter to my right, fighting out of the blue corner.
With a record of
1 - 0 - 0, fighting out of Sydney, Kimbo Slice!
The judges for this bout are Eliza Hachem, Bruno Hogan and John Mangel.
The bell rings for round one and we are underway!
Slice lands a straight punch to the body, keeping Hammer at a distance.
Hammer walks into a stiff left hand from Slice.
Hammer takes a body punch but keeps moving.
Slice stalks Hammer and leaps in with a furious combination of punches. Uppercuts and crosses smash into Hammer's face. Hammer staggers backwards, shaken.
The crowd cheering loudly, showing their appreciation for the quality fight we're seeing here.
Hammer tries to move into range but Slice moves to the side and lands with a nice right hand.
Slice uses good footwork to get in and out, landing a nice hook.
Hammer takes a body punch that cleary hurt but he's trying not to show any weakness.
Hammer is breathing heavily.
Slice lands a nice looking body shot.

Slice lands a left and a right that send Hammer crashing to the mat, dazed. Slice thinks about following him to the mat but decides to wave him back up to his feet!

Hammer is rocked!
Slice darts in and lands a big hook, right on the button! Hammer's legs crumble underneath him as he falls to the canvas! The ref tackles Slice before he gets to land any more shots to his stricken foe.
Ladies and gentlemen, after 0:32 of round 1, we have a winner by way of KO (Punch). Kimbo Slice!
|
|
|
|
|
|
|
|
|
|
|
|
|
|
|
|
|
|
|
|
|
|
|
| S |
C
A |
G |
S |
C
B |
G |
|
S |
C |
G |
|
energy
A | B |
|
hype
A | B |
|
pop
A | B |
|
mgr
A | B |
|
FIGHT
RATING
100% |
|
|
|
|
|
|
|
Undercard bout
|
|
|
|
Undercard bout
|
|
|
|
Undercard bout
|
Coming up we have a middleweight MMA rules bout between Magnum Gunn (ranked 0 p4p, 0 weight class) and John The Submission Machine (ranked 0 p4p, 0 weight class). The Submission Machine has chosen I came to play as his entrance music. We have two fighters making their debuts here, so let's see who comes out of this one with their first professional victory.
 |
|
 |
| 190 cm
19
195 lbs
0 - 0 - 0 |
|
177 cm
22
195 lbs
0 - 0 - 0 |
Decent wrestler
Solid boxing
KO power |
|
BJJ Purple Belt
Solid Muay Thai
Solid chin |
|
| |
|
Ladies and gentlemen. This fight is 3 rounds, in the middleweight division.
Introducing the fighter to my left, fighting out of the red corner.
With a record of
0 - 0 - 0, fighting out of Sydney, Magnum Gunn!
And introducing the fighter to my right, fighting out of the blue corner.
With a record of
0 - 0 - 0, fighting out of Sydney, John The Submission Machine!
The judges for this bout are Steve Erwin, Damien Edna and Donatello Bradman.
The bell rings for round one and we are underway!
Gunn lands a right hook to the body.
Gunn stuffs the takedown.
The Submission Machine moves out of range of the strikes.
Gunn throws a jab but it's blocked by The Submission Machine.
Gunn misses with a hook.
The Submission Machine slips under a jab.
Gunn is moving around nicely and scores here with a single head shot.

It looks like John The Submission Machine has been cut.
The Submission Machine has taken the fight to the clinch.

Gunn's corner calls for him to break the clinch, which he does.
A big left from Gunn misses.
Gunn swings and misses with a hook to the body.
A punch combination from Gunn misses.
Gunn bobs and weaves and unloads with a good uppercut.
Fantastic stuff here - a very entertaining period of action, which has drawn cheers from the crowd.
The Submission Machine shoots in for a takedown but Gunn shows good takedown defense there and keeps this one on the feet.
Gunn misses with a wild combination.
Gunn throws a combination but it was largely blocked by The Submission Machine.
Magnum Gunn seems to be the more aggressive standup fighter in this bout.
The Submission Machine blocks a head kick by Gunn.
That's one minute gone in the round.
Gunn displays good takedown defense there as he swats away a double leg from The Submission Machine.
Magnum Gunn has stuffed three takedown attempts in the round now. That's going to take a lot out of John The Submission Machine.
The Submission Machine is trying hard to land a takedown here. Gunn sprawls well and keeps this one on the feet.
Gunn lands a glancing blow to the side of The Submission Machine's head.
The Submission Machine shoots in for a takedown but Gunn shows good takedown defense.
Gunn throws a combination but comes up with nothing but fresh air.
Gunn scores with a nice head shot.
Some wild striking there from Gunn.
No luck with that takedown attempt from The Submission Machine.
The Submission Machine looks gassed!
The Submission Machine fakes high and shoots in for a takedown but Gunn avoids it really well and circles away.
The Submission Machine is trying desperately to land a takedown but Gunn is having absolutely none of it. This is turning into a bit of a nightmare for The Submission Machine.
The Submission Machine is looking to clinch but Gunn is avoiding it.
The Submission Machine ducks under a wild hook from Gunn.
The Submission Machine is trying hard to land a takedown here. Gunn sprawls well and keeps this one on the feet.
That's two minutes gone in the round.
Gunn throws a hook but The Submission Machine avoids it easily.
The Submission Machine uses some good footwork to avoid the body shot by Gunn.
Gunn cracks The Submission Machine with a nice right hand that draws applause from the crowd.
That has opened up John The Submission Machine's cut even more.
The crowd are loving this. Great action here.
Gunn looks to land a left hand but The Submission Machine moved out of range nicely.
Gunn tries to land with a swinging hook to the body but The Submission Machine was well out of range. Poor timing from Gunn.
The Submission Machine takes an uppercut right on the jaw but it doesn't phase him.
The Submission Machine is rocked!
Gunn misses with a half-hearted attempt at a head kick.
The Submission Machine is still on wobbly legs! Can Gunn finish him?
Gunn throws an overhand right that has The Submission Machine reeling! Gunn follows up with more punches and The Submission Machine is out cold! This one is all over!
Ladies and gentlemen, after 2:34 of round 1, we have a winner by way of KO (Punches). Magnum Gunn!
|
|
|
|
|
|
|
|
|
|
|
|
|
|
|
|
|
|
|
|
|
|
|
| S |
C
A |
G |
S |
C
B |
G |
|
S |
C |
G |
|
energy
A | B |
|
hype
A | B |
|
pop
A | B |
|
mgr
A | B |
|
FIGHT
RATING
94% |
|
|
|
|
|
|
|
Undercard bout
|
|
|
|
Co-main event
|
|
|
|
Main event
|
|
|
|
|
|
|
