 |
HFC Challengers 41 PBP Commentary |
Undercard bout
|
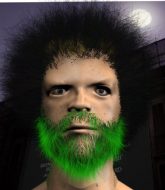
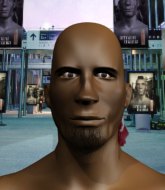
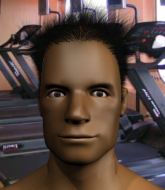
Coming up we have a heavyweight MMA rules bout between Alexander Medved (ranked 0 p4p, 0 weight class) and Rick Sampson (ranked 0 p4p, 0 weight class). Sampson has chosen "Off the Chain" by Serg Salinas as his entrance music. Rick Sampson is the more experienced fighter, so let's see if that makes a difference tonight.
 |
|
 |
| 187 cm
25
270 lbs
4 - 3 - 0 |
|
179 cm
29
252 lbs
0 - 11 - 0 |
BJJ Purple Belt
Counter fighter
KO power |
|
BJJ Blue Belt
Good kicks
Knockout power |
|
| |
|
Ladies and gentlemen. This fight is 3 rounds, in the heavyweight division.
Introducing the fighter to my left, fighting out of the red corner.
With a record of
4 - 3 - 0, fighting out of Los Angeles, Alexander Medved !
And introducing the fighter to my right, fighting out of the blue corner.
With a record of
0 - 11 - 0, fighting out of Los Angeles, Rick Sampson!
The judges for this bout are Jack Bonds, Don Winkell and Frank Antenori.

The bell rings for round one and we are underway!
Medved keeps the fight on the outside.
Rick Sampson seems to be the more aggressive standup fighter in this bout.

Medved scores a trip takedown into side control. Nice.
Sampson wants to control but Medved postures up.
Medved landing a few strikes.
Medved has been looking to land a fair amount of strikes on the ground. He might be looking to soften his opponent up in order to work for a submission.
Sampson can't do much from the bottom here.

Medved is looking to finish here, going for an Americana. Sampson knows the correct defense though, so he's OK.
The referee tells the fighters to keep busy.
We've had a slow start to the round here - hopefully the action picks up.
Medved 's ground tactics aren't going to win him many fans. Let's hope he's got fireworks for us if he gets back to his feet because he's not doing much on the ground.
Medved scoring with punches and elbows.
Medved controlling from side mount.

That's one minute gone in the round.
Sampson struggling a bit here.
Sampson really doesn't want to stay on the ground with Medved . If he can't get it back to his feet, it's only a matter of time before he'll be tapping out.
Sampson looks winded!
Medved thinks about going for a far side armbar but bails out and retains the dominant position instead.
Medved grinds an elbow into Sampson's temple.

It looks like Rick Sampson has been cut.
Medved cracks Sampson with an elbow. That is naaassty.

Sampson is rocked!
Medved lands a strong strike to the head of Sampson. That's dazed him! Medved looking to finish here. Sampson is waving his arms around trying to block but he's hurt badly - Medved lands more strikes and the referee steps in to end the fight!
Ladies and gentlemen, after 1:56 of round 1, we have a winner by way of TKO (Strikes). Alexander Medved !
|
|
|
|
|
|
|
|
|
|
|
|
|
|
|
|
|
|
|
|
|
|
|
| S |
C
A |
G |
S |
C
B |
G |
|
S |
C |
G |
|
energy
A | B |
|
hype
A | B |
|
pop
A | B |
|
mgr
A | B |
|
FIGHT
RATING
50% |
|
|
|
|
|
|
|
Undercard bout
|
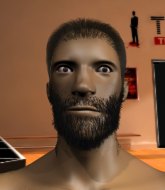
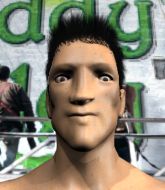
Coming up we have a middleweight MMA rules bout between Max Handle (ranked 0 p4p, 0 weight class) and Don Jonstown (ranked 0 p4p, 0 weight class). Handle comes into the arena with Right On blaring out of the sound system. Don Jonstown has the better chin. Will he look to stand and bang today?
 |
|
 |
| 170 cm
24
190 lbs
6 - 9 - 0 |
|
190 cm
26
190 lbs
2 - 2 - 0 |
BJJ Blue Belt
Excellent boxer
Cardio machine |
|
BJJ White Belt
Great elbows
Solid chin |
|
| |
|
Ladies and gentlemen. This fight is 3 rounds, in the middleweight division.
Introducing the fighter to my left, fighting out of the red corner.
With a record of
6 - 9 - 0, fighting out of Los Angeles, Max Handle!
And introducing the fighter to my right, fighting out of the blue corner.
With a record of
2 - 2 - 0, fighting out of Los Angeles, Don Jonstown!
The judges for this bout are , Jack Bonds and Don Winkell.
The bell rings for round one and we are underway!
Handle swings and misses with a hook to the body.
Jonstown thumps Handle with a low kick.
Handle fakes a jab and scores with a low kick.
Jonstown misses with a head kick.
Handle lands a nice looking body shot.
Handle paws at his opponent with the jab and then lunges in with a straight, right on the button.
Handle wants to land a leg kick but Jonstown is out of range.
Handle lands a vicious shot with the stealth of a sniper and the strength of a viper. Are vipers that strong? I can think of lots of things that are stronger than a viper - not many rhyme with sniper though.
Handle throws a hook to the side of Jonstown's head but Jonstown sees it coming and ducks under it beautifully.
Handle throws a wild combination but nothing lands.
Jonstown looks like he wanted to counter with a high kick but didn't throw it.
Handle fakes a head punch and goes low to the body. Nicely done.
Jonstown tries to land a front kick but Handle steps back. That was a bit too telegraphed.
Handle on the wrong end of a nice low kick. He's acting like it's no big deal but he doesn't want to take many more of those.
Fantastic stuff here - a very entertaining period of action, which has drawn cheers from the crowd.

The fight moves into the clinch position.
Jonstown throws an elbow that misses.
Jonstown creates a bit of space for himself and sneaks an elbow through Handle's defenses.
Handle tries to break the clinch but Jonstown is controlling the position.
Handle can't break the clinch.
Handle is trying to break free.
Handle wants to take the fight to the mat but Jonstown manages to get underhooks and keep the fight in the clinch.
That's one minute gone in the round.
Jonstown lands a nice elbow from the clinch.
Handle blocks an elbow strike from Jonstown.
Handle is looking to break free of the clinch but Jonstown has double underhooks.
Jonstown comes over the top with an elbow. That landed flush.
Jonstown looks to throw an elbow but misses.
Jonstown throws an elbow but it misses.
Jonstown throws an elbow but it's blocked.
With the fighters up against the cage, Jonstown throws an elbow but misses.
With the two fighters working up against the cage, Jonstown just misses with a elbow thrown towards Handle's brow.
With the fighters up against the cage, Jonstown throws an elbow but misses.
Jonstown misses with an elbow over the top.
Jonstown looks to throw an elbow but misses.
Handle working hard to break the clinch.
Handle is trying to break the clinch but Jonstown has him pressed against the cage.
Handle avoids the elbow strike from Jonstown, against the cage.
Jonstown pushes off and fires off an elbow that misses, before clinching up again, against the cage.
Jonstown throws a nice elbow but it doesn't land.
Handle looks to be in better condition than last time we saw him fight. Obviously he's been working hard on his cardio.
Handle jumps guard but his hands slip and he falls flat on his back. Well, he's made himself look a right mug there, as Jonstown walks away with a smile on his face. Handle gets slowly back to his feet and shakes his head.
Jonstown slips under a jab.
Nice defenses there by Jonstown.
Handle tries to land a front kick but Jonstown steps back. That was a bit too telegraphed.

That's two minutes gone in the round.
Jonstown takes one on the chin but seems OK.
Handle swings widly with a right hand

and Jonstown counters by clinching up.
Handle avoids a wild elbow strike from Jonstown.
Fantastic stuff here - a very entertaining period of action, which has drawn cheers from the crowd.
Handle is trying to push Jonstown away but Jonstown has him pressed against the cage, so he's going nowhere.
Handle wants to break free. God knows he wants to breaaaak freeee.
Handle takes an elbow to the forehead.
With the fighters up against the cage, Jonstown throws an elbow but misses.
Handle wants to strike at distance but he can't break free of the clinch.
Handle avoids a wild elbow strike from Jonstown.
Jonstown throws an elbow but it's blocked.
Jonstown throws an elbow that misses.
Handle wants to take the fight to the mat but Jonstown manages to get underhooks and keep the fight in the clinch.
That's three failed takedown attempts in the round for Max Handle. That's going to take a lot out of him.
Jonstown blocks a knee to the body. He'll have a nicely bruised forearm in the morning.
Jonstown comes over the top with an elbow. That landed flush.
Jonstown throws an elbow but it's blocked.
Nice elbow from Jonstown.
Jonstown lands an elbow inside.

Handle pushes off and circles away, back to the middle of the mat.
Jonstown looks to land a body kick but Handle moved away.
Jonstown throws a head kick that Handle semi-blocks.
Handle throws a hook but Jonstown blocks it.

That's three minutes gone in the round.
Jonstown connects with a solid leg kick.
A head kick misses from Jonstown.
Handle checks a low kick from Jonstown.
Handle avoids the head kick by Jonstown.
Jonstown clinches.
Handle blocks an elbow strike.
Jonstown lands an elbow inside that Handle shrugs off.
Jonstown misses with an elbow over the top.
Handle blocks the elbow strike.
Jonstown pushes off an throws an elbow but Handle leans to the side and avoids it. We're back to clinching against the cage.
Jonstown is defending well against a takedown attempt.
Handle looking for a takedown.
Handle takes an elbow to the forehead.
Handle blocks an elbow strike from Jonstown.
Handle is trying to work out of this bad position, with his back against the cage.
Handle can't break the clinch.
Jonstown looks to throw an elbow but misses.
Jonstown lands an elbow inside.
Jonstown looks to throw an elbow but misses.

That's four minutes gone in the round.
Handle is trying to work for a single leg takedown but Jonstown pulls him back up using the underhooks.
Jonstown throws an elbow but it misses.
Handle tries to break the clinch but Jonstown is controlling the position.
With the two fighters working up against the cage, Jonstown just misses with a elbow thrown towards Handle's brow.
We've seen a great period of action over the last minute or so - credit to both fighters for going all out!
Handle avoids a wild elbow strike from Jonstown.
Jonstown is defending well against a takedown attempt.
Jonstown pushes off an throws an elbow but Handle leans to the side and avoids it. We're back to clinching against the cage.
Handle breaks the clinch and we return to the middle of the mat.
Handle on the receiving end of a decent leg kick there by Jonstown. Jonstown obviously looking to wear him down.
Handle throws a series of punches but Jonstown moves out of range.
Jonstown rushes Handle and presses him up against the cage.
A nice glancing elbow lands by Jonstown.
Jonstown lands a nice elbow from the clinch.
Jonstown looks to throw an elbow but misses.
Handle takes an elbow to the forehead.
The crowd applaud the fighters' efforts here as the round comes to an end.
Handle wants to get back to striking at distance but Jonstown won't allow it.
With the fighters up against the cage, Jonstown throws an elbow but misses.
Handle wants to break free but Jonstown has control.
Jonstown prevents Handle from breaking the clinch.
Jonstown misses with an elbow strike.
And thats the end of the round the fighters go back to their corners.
Don Jonstown dominated that round.
The corners get their ten second warning. Both fighters stand from their stools and stare eachother down, ready to get back to the action.

Jonstown throws a head kick that misses.
Handle lands the left hand.
Jonstown uses good head movement to avoid the hook from Handle.
Jonstown fails in his attempt to clinch.
Jonstown throws a sloppy head kick and Handle moves out of range easily.
Some bone on bone action there as Handle checks a low kick. Luckily it wasn't a particularly hard one.
Jonstown throws a leg kick but Handle moved away.
Handle tries to counter with a takedown but Jonstown is quick to defend against it.
Handle throws a sloppy head kick and Jonstown moves out of range easily.
Jonstown keeping his hands up high there, blocking the jab from Handle.
Jonstown tries to clinch up.
Handle avoids the head kick by Jonstown.
Handle turns his hip over beautifully as he lands a nice leg kick.
Jonstown gets in close and instigates a clinch.
We've had a slow start to the round here - hopefully the action picks up.
A frustrated look appears on Handle's face as he tries to break the clinch.
Handle is looking to break free of the clinch but Jonstown has double underhooks.
Handle avoids the elbow strike from Jonstown, against the cage.
Handle blocks an elbow strike.
Handle misses with a punch to the body.
Jonstown gets an overhook and lands an elbow to the side of the head.
Jonstown misses with an elbow strike.
That's one minute gone in the round.
Handle is trying to break free.
Jonstown pushes off and fires off an elbow that misses, before clinching up again, against the cage.
Handle's corner calls for him to break the clinch, which he does.
Handle throws a right and a left that Jonstown avoids nicely.
Jonstown throws a head kick that misses and slips in the process. He scrambles back to his feet and the fighters circle.
Jonstown with a nice looking leg kick. You could hear that one land in a back row.
Handle clobbers Jonstown with an overhand right that has the crowd gasping. That made a horrendous noise.
Jonstown misses with a head kick.
Handle jabs Jonstown to the body, keeping him at a distance.
Jonstown has been the more effective fighter overall so far.
Handle blocks a head kick by Jonstown.
Handle cracks Jonstown with a hook to the jaw. Both fighters smile at eachother and high-five before getting back down to business.
Handle moves into range and connects with a jab.
Jonstown moves into range and lands a nice leg kick.
The fight moves into the clinch position.
This has been an exciting period of action!
Handle tries to break free but Jonstown pushes him back against the cage.
Handle is trying to push Jonstown away but Jonstown has him pressed against the cage, so he's going nowhere.
Handle jumps into guard, dragging Jonstown to the mat.
Handle is pulling down on Jonstown's head to control his posture.
That's two minutes gone in the round.
Handle is trying to control the position but Jonstown postures up.
The ref warns both fighters not to hold the cage as they work up against the meshing.
Jonstown sitting in guard, not really doing much.

Handle kicks Jonstown off and gets to his feet.
Jonstown throws a head kick that misses.
Jonstown is looking to chop away at Handle's legs.
Handle was looking to counter that last move with a shot to the body but he didn't commit.
Handle misses with a jab, cross combination.
Max Handle is winning the standup battle so far.
Jonstown lands with a head kick! That's gotta hurt.
Handle moves into range and lands a nice leg kick.
Jonstown gets his head snapped back by a nice shot there.
That's three minutes gone in the round.
A leg kick checked by Handle.
Handle lands a beauty of a right hand that gets the crowd cheering.
Jonstown takes a jab on the nose. He smiles like he loves it and keeps coming.
Jonstown dances in quickly and lands a nice inside leg kick on Handle. That did some damage!
Handle looks to throw the jab but Jonstown is out of range.
Jonstown misses with a half-hearted attempt at a head kick.
Jonstown avoids a lazy jab quite easily.
Jonstown wants to counter the offense by Handle and move into the clinch position.
Jonstown checks a leg kick nicely.
Handle tries to score with an inside leg kick but telegraphs it and Jonstown is able to avoid easily.
Handle backing away here, and Jonstown unleashes a leg kick that just misses.
Thud! ouch! good body kick from Jonstown - that will leave a mark!
Jonstown closes the distance and presses his opponent up against the cage.
Handle blocks an elbow strike from Jonstown.
Jonstown pushes off and fires off an elbow that misses, before clinching up again, against the cage.
Handle working hard to break the clinch.
Handle avoids a wild elbow strike from Jonstown.
Jonstown throws an elbow that misses.
Handle is looking to break free of the clinch but Jonstown has double underhooks.
Handle blocks the elbow strike.
That's four minutes gone in the round.
Jonstown pushes off and fires off an elbow that misses, before clinching up again, against the cage.
Jonstown throws an elbow that misses.
Jonstown prevents Handle from breaking the clinch.
Handle breaks from the clinch.
The crowd cheering loudly, showing their appreciation for the quality fight we're seeing here.
Jonstown forces Handle back against the cage and clinches.
Handle wants to get back to striking at distance but Jonstown won't allow it.
Jonstown lands a damaging elbow.
Jonstown lands an elbow inside that Handle shrugs off.
Handle avoids a wild elbow strike from Jonstown.
Handle wants to break the clinch but can't.
Jonstown creates a bit of space for himself and sneaks an elbow through Handle's defenses.
Jonstown creates a bit of distance and throws an elbow that only just misses.
Handle tries to break free but Jonstown pushes him back against the cage.
Handle working hard to break the clinch.
Handle wants to push off and get back to the center of the mat but Jonstown has him pressed against the cage.
Jonstown misses with an elbow strike.
Jonstown lands an elbow inside that Handle shrugs off.
Handle wants to break the clinch but can't.
Handle wants to strike at distance but he can't break free of the clinch.
Don Jonstown seems to be working more effectively in the clinch in the fight so far.
Handle takes an elbow to the forehead.
And thats the end of the round the fighters go back to their corners.
A close second round but Don Jonstown will probably get the nod - 10:9.
The referee calls time. The cornermen exit stage left and we're back to business. This is the final round!

Jonstown avoids a punch combination nicely.
Handle will need to tighten up his combinations if he doesn't want to gas himself out, swinging at thin air.
Jonstown ducks under an overhand right and circles away with a smile on his face.
Handle has taken the fight to the clinch.
Handle takes an elbow to the temple.
Handle dodges an elbow strike from Jonstown.
Jonstown looks to throw an elbow but misses.
Handle avoids a wild elbow strike from Jonstown.
Handle has a couple of punches blocked by Jonstown.
Jonstown lands a damaging elbow.
Jonstown lands an elbow that stopped Handle in his tracks for a moment.
We've had a slow start to the round here - hopefully the action picks up.
Nice elbow from Jonstown.
Handle is trying to push Jonstown away but Jonstown has him pressed against the cage, so he's going nowhere.
Handle avoids a wild elbow strike from Jonstown.
Nice elbow from Jonstown.
Jonstown lands an elbow just above Handle 's eye.

It looks like Max Handle has been cut.
This has been an exciting period of action!
Handle has had enough of the clinch and is looking to separate.
Handle is looking to break free of the clinch but Jonstown has double underhooks.
That's one minute gone in the round.
Handle blocks the elbow strike.
Jonstown lands a glancing elbow in the clinch.
Jonstown lands a nice elbow.

Handle is rocked!
A nice glancing elbow lands by Jonstown.
Oh Handle is still all over the place! His legs are completely gone! Will he be able to recover?!!
Jonstown throws an elbow but it misses.
Jonstown lands an elbow inside.
Handle tries to break free but Jonstown pushes him back against the cage.
Jonstown misses with an elbow strike.
Jonstown lands an elbow inside that Handle shrugs off.
Jonstown prevents the takedown attempt.
Jonstown lands an elbow that stopped Handle in his tracks for a moment.
Jonstown prevents Handle from breaking the clinch.
Jonstown lands an elbow just above Handle 's eye.
With the fighters up against the cage, Jonstown throws an elbow but misses.
Handle avoids the elbow strike from Jonstown, against the cage.
Jonstown comes over the top with an elbow. That landed flush.
The crowd cheering loudly, showing their appreciation for the quality fight we're seeing here.
Jonstown creates a bit of space for himself and sneaks an elbow through Handle's defenses.
Jonstown lands a nice elbow.
Jonstown prevents the takedown attempt.
Jonstown lands an elbow inside.
Jonstown keeps the fight in the clinch, despite Handle's efforts to push away.
That's two minutes gone in the round.
Handle wants to get back to striking at distance but Jonstown won't allow it.
Jonstown has Handle pressed against the cage, preventing Handle from circling away and getting back to striking at range.
With the two fighters working up against the cage, Jonstown just misses with a elbow thrown towards Handle's brow.
Jonstown gets an overhook and lands an elbow to the side of the head.
Nice elbow from Jonstown.
Handle wants to break the clinch but can't.
Jonstown lands a nice elbow from the clinch.
Jonstown lands an elbow just above Handle 's eye.
Clinched against the cage, Jonstown lands a big elbow that drops Handle! The ref dives in to save him from more shots - Handle is complaining that he's OK but he was done.
Ladies and gentlemen, after 2:34 of round 3, we have a winner by way of TKO (Strikes). Don Jonstown!
A very excited looking Don Jonstown made sure he remembered to thank all the fans both in the arena and on the internet. He said all the coolest people spend all day on MMA websites, which got a big reaction.
|
|
|
|
|
|
|
|
|
|
|
|
|
|
|
|
|
|
|
|
|
|
|
| S |
C
A |
G |
S |
C
B |
G |
|
S |
C |
G |
|
energy
A | B |
|
hype
A | B |
|
pop
A | B |
|
mgr
A | B |
|
FIGHT
RATING
82% |
|
|
|
|
|
|
|
Undercard bout
|
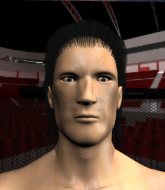
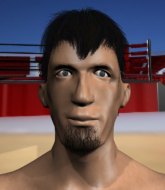
Coming up we have a super heavyweight MMA rules bout between Miquel Ketchum (ranked 0 p4p, 0 weight class) and Rham Kota (ranked 0 p4p, 0 weight class). Kota is bobbing his head along to his entrance song: Won't Let You Down - Chamillionaire. Rham Kota will no doubt be looking to use his reach advantage to good effect.
 |
|
 |
| 200 cm
20
280 lbs
4 - 5 - 0 |
|
225 cm
28
307 lbs
6 - 4 - 0 |
BJJ Blue Belt
Basic striking
Cardio machine |
|
BJJ Brown Belt
Counter fighter
Knockout power |
|
| |
|
Ladies and gentlemen. This fight is 3 rounds, in the super heavyweight division.
Introducing the fighter to my left, fighting out of the red corner.
With a record of
4 - 5 - 0, fighting out of Los Angeles, Miquel Ketchum!
And introducing the fighter to my right, fighting out of the blue corner.
With a record of
6 - 4 - 0, fighting out of St Petersburg, Rham Kota!
The judges for this bout are , Timothy Bukovac and Don Winkell.
The bell rings for round one and we are underway!
Ketchum darts in and clinches Kota up against the cage.
Kota wants to take the fight to the mat but Ketchum manages to get underhooks and keep the fight in the clinch.
Ketchum prevents a takedown attempt there.
Ketchum decides to pull guard.
Kota wants to pass the guard but Ketchum is keeping the position.

Kota postures up as if he's going to throw some strikes but drops back for an ankle! Ketchum is in big trouble! He looks ready to tap! But no, he's escaped and dives on top of Kota, into his guard.

Kota had isolated an arm as going for a kimura. Ketchum defends it easily.
We've had a slow start to the round here - hopefully the action picks up.
Kota working from the bottom, still in full guard. He's managed to get a loose triangle. Ketchum doesn't seem to be doing much to defend here, obviously he feels comfortable in the position. Ketchum manages to throw the legs off his shoulder and he's back into guard - no problem.
Kota working for a triangle but Ketchum defends it easily.
Ketchum knows he needs to get back to his feet asap. He's simply no match for Kota on the ground.
That's one minute gone in the round.
Ketchum trying to control but Kota is working from the bottom.
Kota is working actively from the bottom, looking for submissions. He's escaped his hips to the side and he's going for an armbar! Ketchum has his hands clasped together but Kota extends and breaks Ketchum's desperate grasp, forcing a tap out due to armbar! Nice BJJ displayed there by Kota.
Ladies and gentlemen, after 1:35 of round 1, we have a winner by way of Submission (Armbar). Rham Kota!
A victorious Rham Kota thanked his army of followers in his post fight interview, telling people to make sure they follow him on Twitter.
|
|
|
|
|
|
|
|
|
|
|
|
|
|
|
|
|
|
|
|
|
|
|
| S |
C
A |
G |
S |
C
B |
G |
|
S |
C |
G |
|
energy
A | B |
|
hype
A | B |
|
pop
A | B |
|
mgr
A | B |
|
FIGHT
RATING
51% |
|
|
|
|
|
|
|
Undercard bout
|
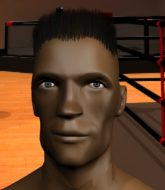
Coming up we have a bantamweight MMA rules bout between Sam Crow (ranked 0 p4p, 0 weight class) and Marlon Griffin (ranked 0 p4p, 0 weight class). Griffin comes into a darkened arena with his song building. "Don't Waste My Time" by Jim Johnston kicks in, the lights come on and the crowd goes wild! What a showman! Sam Crow has the better chin. Will he look to stand and bang today?
 |
|
 |
| 170 cm
26
140 lbs
3 - 1 - 0 |
|
177 cm
28
135 lbs
1 - 12 - 1 |
BJJ White Belt
Excellent boxer
Very quick |
|
BJJ White Belt
Excellent boxer
Knockout power |
|
| |
|
Ladies and gentlemen. This fight is 3 rounds, in the bantamweight division.
Introducing the fighter to my left, fighting out of the red corner.
With a record of
3 - 1 - 0, fighting out of Los Angeles, Sam Crow!
And introducing the fighter to my right, fighting out of the blue corner.
With a record of
1 - 12 - 1, fighting out of Los Angeles, Marlon Griffin!
The judges for this bout are Jack Bonds, Don Winkell and Frank Antenori.
The bell rings for round one and we are underway!
Griffin throws a series of punches but Crow avoids them all with ease.
Crow swung with a counter right hand that didn't connect.
Crow closes the distance and clinches.

Griffin breaks from the clinch.
Griffin is sent reeling backwards by a solid uppercut. He barely regains his balance and Crow moves in for the kill throwing a continuous barrage of punches that force the ref to step in.
Ladies and gentlemen, after 0:17 of round 1, we have a winner by way of TKO (Strikes). Sam Crow!
The defeated Marlon Griffin had this to say: 'The miracle is comin!'.
|
|
|
|
|
|
|
|
|
|
|
|
|
|
|
|
|
|
|
|
|
|
|
| S |
C
A |
G |
S |
C
B |
G |
|
S |
C |
G |
|
energy
A | B |
|
hype
A | B |
|
pop
A | B |
|
mgr
A | B |
|
FIGHT
RATING
100% |
|
|
|
|
|
|
|
Undercard bout
|
Coming up we have a lightweight MMA rules bout between Kane Kimball (ranked 0 p4p, 0 weight class) and Edu Fola (ranked 0 p4p, 0 weight class). Edu Fola is staring across the cage at his opponent, tweaking his nipples.
 |
|
 |
| 180 cm
25
155 lbs
2 - 0 - 0 |
|
173 cm
24
165 lbs
1 - 4 - 0 |
BJJ Blue Belt
Solid boxing
Good chin |
|
BJJ Blue Belt
Good kicks
Likes musicals |
|
| |
|
Ladies and gentlemen. This fight is 3 rounds, in the lightweight division.
Introducing the fighter to my left, fighting out of the red corner.
With a record of
2 - 0 - 0, fighting out of Los Angeles, Kane Kimball!
And introducing the fighter to my right, fighting out of the blue corner.
With a record of
1 - 4 - 0, fighting out of Los Angeles, Edu Fola!
The judges for this bout are Frank Antenori, Timothy Bukovac and Jack Bonds.
The bell rings for round one and we are underway!
Kimball cracks Fola with a nice right hand that draws applause from the crowd.
Fola moves into the clinch.
A bit of stalling here from Fola.
Fola throws a blind hook that connects with the side of Kimballs head.
The referee calls for Fola to work.
Fola lands a right uppercut that snaps the head of Kimball backwards.
Kimball tries to land a knee to the body but he is off balance and Fola avoids it.
Fola lands a left hand that snaps the head of Kimball backwards.
Kimball tries a shoulder strike but it doesn't do any damage.
Kimball is looking to control Fola's arms but Fola gets an underhook and turns him. Now Kimball has his back to the cage.
Kimball drops to a knee looking for a takedown but Fola gets the underhooks and prevents it.
Fola pushes Kimball back against the cage and lands a hook to the side of the head.
Kimball letting Fola take a breather here.
Fola lands a hook to the body. It's hard to tell if that hurt Kimball or not.
That's one minute gone in the round.
Fola goes for a body shot but it's blocked.
Fola has Kimball pressed against the cage.
Fola can't find room to land a body shot as Kimball controls the action.
Fola blocks a punch to the side of the head.
Fola prevents a body shot from Kimball.
Fola dictating the pace here, as the fighters clinch against the cage.
Fola lands a body punch - he's looking to wear down Kimball.
Fola pushes Kimball back against the cage and unloads with a body punch.
Kimball lands a right hand that snaps the head of Fola backwards.
Kimball throws a punch but it's blocked by Fola.
A nice right hand lands inside from Fola.
Kimball scores with a nice hook to the head.
Kimball taking a breather.
Kimball trying to control the position but instead, Fola has worked for underhooks and has pushed Kimball into the cage.
Kimball can't seem to implement his control oriented gameplan at the moment. That's no bad thing of course, for those of us who want to see a good fight.
Fola scores with an uppercut up the middle.
That's two minutes gone in the round.
Kimball fails to pull the fight into his guard.
Fola scores with a shoulder strike.
Still in the clinch, Fola scores with a nice short uppercut.
Kimball tries to circle away but Fola has him pinned against the cage.
Fola misses with a hook to the ribs.
The fans in attendance giving it up for the two fighters, who have really let it all hang out in the last minute or so!
Kimball letting Fola take a breather here.
Kimball missing with knees to the body.
Kimball misses with a knee to the head.
Kimball is looking to take this one to the mat.
That's three failed takedown attempts in the round for Kane Kimball. That's going to take a lot out of him.
Kimball is trying to break the clinch but Fola has him pressed against the cage.
Fola content to slow the pace in the clinch.
Kimball can't break the clinch.
Kimball has had enough of the clinch but Fola keeps him there for the moment.
That's three minutes gone in the round.
Come on Fola - let's have some action - none of this stalling nonsense.
Fola makes some space for himself and lands an uppercut.
Fola has Kimball pressed against the cage.
A battle for position here, against the cage.
Kimball goes for a takedown attempt but Fola pushes him away and we're back to fighting at a distance.
Fola gets to the clinch - let's see what his plan is here.
Fola lands an uppercut.
Fola works on Kimball's body with a couple of short punches.
Fola lands a body punch in the clinch.
Kimball trying to land knees to the body.
Kimball tries to land a knee to the head but misses.
Fola working on landing some head shots here - that one got through nicely.
That's four minutes gone in the round.
Some stalling of biblical proportions here from Fola.
Fola lands a left hand.
Kimball tries to land a knee to the body but he is off balance and Fola avoids it.
Kimball swings wildly with an uppercut but Fola uses good head movement to avoid it.
Our sources have told us that Kimball has been working on his elbows in the gym.
Fola lands a body punch.
Kimball tries to land a shot to the body but it's blocked.
This is a great period of action - very entertaining stuff!
Kimball is looking to take this one to the mat.
Fola goes for a body shot but it's blocked.
Fola is stalling here.
Fola digs a right hand underneath Kimball's ribcage. Kimball let out a lung full of air as it connected.
Kimball drops down looking for an ankle pick but Fola pulls his leg out and moves away.

Fola feints and then dives in with a takedown. That was a long way out but the feint bought him enough time to close the distance and complete the takedown. Now we'll play guard for a bit and see who can get the better of that position.
Kimball can't keep his opponent in guard - Fola advances to half guard, no doubt looking to mount.
And thats the end of the round the fighters go back to their corners.
Edu Fola dominated that round.
OK. That's time! The bell goes and we're back to the action.

Fola lands a high kick to the side of Kimball's head that stuns him and send him tumbling down to the canvas! Fola dives into guard, looking to finish.
It looks like Kane Kimball has been cut.
Kimball keeping full guard, as Fola tries to pass.
Fola scoring with some ground and pound.
Fola has the superior BJJ but he's also working some ground strikes into his gameplan.
Fola wanted to stand there but Kimball had control of the position.
Kimball keeping moving, preventing Fola from controlling successfully.
My spies in The Power Plant inform me that Fola has been getting involved in the gym's BJJ sparring sessions. Let's see whether that pays dividends!
Fola won't allow Kimball to sweep him here.
Fola slows down the pace of the fight, as he sits in guard.
Fola throws a big right hand that misses.
That's one minute gone in the round.
Kimball keeping moving, preventing Fola from controlling successfully.

The referee has decided to stand the fighters back up, so we'll restart on the feet.
Fola shoots in and gets a takedown into half guard. Fola showed some decent athleticism there.
Fola is trying to control the action in half guard but Kimball is working away on the bottom, looking perhaps to get back to full guard.
The ref warns both fighters not to hold the cage as they work up against the meshing.
Kimball slips a foot under and gets full guard. Nice work.
Fola controlling from the top position.
Fola has been the more effective fighter overall so far.
Kimball tries to land a sweep but no joy.
That's two minutes gone in the round.
Fola is just sitting in guard, looking to avoid any submissions.
Kimball working the defensive guard well to avoid strikes from Fola.
Fola sitting in guard here, content to control.
The referee looks like he's ready to step in and stand the fighters back up.
The fighters are pressed up against the cage, both looking to find a bit of space to work.
Fola trying to land body shots but he keeps hitting the mat.
The referee has motioned to the fighters to stand back up. He just wasn't happy with the level of activity.
Fola scores with a nice takedown into half guard. Let's see what he's got on the ground.
Fola is looking for a kimura but he's never going to get it from there.
Kimball misses with some strikes from the bottom.
That's three minutes gone in the round.
Kimball is in trouble now - Fola has advanced to mount!
Kimball regains half guard.
Kimball tries to roll over but Fola keeps him under control.
Fola lands strikes from half guard.
Kimball is looking to improve his position.
Fola is sneakily working for an arm triangle but Kimball sees it coming and defends easily.
Kimball works his way to full guard. Good work.
That's four minutes gone in the round.
Fola preventing the sweep.
Kimball working a defensive guard but Fola manages to pass into side control anyway.
Kimball is looking to reverse the position.
Fola works to advance to full mount. Kimball defends for a few seconds but eventually he succumbs.
Fola is looking to stand but Kimball has his arms wrapped tightly around him, looking to prevent the damage.
Kimball wants to control but Fola is having none of it.
The crowd thankful this round is nearly over.
Fola prevents Kimball from getting the reversal.
Kimball defends a decent attempt at a guillotine from Fola.
And thats the end of the round the fighters go back to their corners.
Edu Fola showed his class in that round. I'd imagine he'll take it on all the scorecards.
The cut man is working on Kane Kimball's cut.
OK. That's time! The bell goes and we're back to the action. This is the final round!
Kimball sees a low kick coming and goes to check it, but it's actually a body kick and it thuds into his unprotected ribs.
Kimball tries to keep at a distance but Fola has taken the fight into the clinch.
Fola letting Kimball take a breather here.
Fola taking a break, stalling in the clinch.
Kimball is looking to break free of the clinch but Fola has double underhooks.
Kimball takes a shot to the head.
Fola scores with an uppercut up the middle.
Fola lands a body shot.
We've had a slow start to the round here - hopefully the action picks up.
Kimball tries a knee to the head but he's missed.
Fola blocks the elbow strike.
Fola's corner are urging him to control the action in the clinch for a moment, rather than mount any serious offense. I'm sure the crowd appreciate those instructions... not.
A short uppercut from Fola.
That's one minute gone in the round.
Kimball has had enough of the clinch but Fola keeps him there for the moment.
Fola lands a body punch.
Fola makes some space for himself and lands an uppercut.
Nice body punch from Fola - that landed with a thud.
Kimball blocks a body shot from Fola.
A nice left hand lands by Fola.
Fola is leaning against Kimball and scores with a nice uppercut to the body.
Both fighters are breathing heavily.
A hook to the body from Fola.
A hook to the body from Fola.
Fola lands a body punch in the clinch.
Fola lands a body punch in the clinch.
A shot in the inside from Fola.
Fola scores with a shot to the side of Kimball's head.
Fola is pressed up against the cage. Kimball has hold of a leg and is looking to drag Fola down to the mat. Fola avoids the attempt though and has circled away. We're back to striking at a distance.
Fola has closed the distance and engaged Kimball in a clinch.
That's two minutes gone in the round.
Fola displaying some good clinch control by pressing Kimball up against the cage.
This has been an exciting period of action!
Fola works on Kimball's body with a couple of short punches.
A right handed body shot lands from Fola.
Fola working on landing some head shots here - that one got through nicely.
Kimball fails to land with a short punch on the inside.
Fola presses Kimball against the cage and delivers a mid-strength body shot.
Fola avoiding damage.
Fola digs a right hand into Kimball's ribs. Those have got to be taking their toll on Kimball's gas tank.
Nice body punch from Fola.
Edu Fola seems to be working more effectively in the clinch in the fight so far.
Fola working some nice short punches in the clinch.
Fola lands on the inside with an uppercut.
Fola throws a blind hook that connects with the side of Kimballs head.
That's three minutes gone in the round.
Fola dictating the pace here, as the fighters clinch against the cage.
Good body shot from Fola.
Kimball doesn't land with the attempted body shot.
Kimball goes for a takedown attempt but Fola pushes him away and we're back to fighting at a distance.
Thud! ouch! good body kick from Fola - that will leave a mark!
Edu Fola is fighting for a decision - hopefully he's judged it right and he's actually winning the fight.
Fola gets a double leg takedown into Kimball's guard.
Fola is in close to Kimball's body, working some short punches and elbows.
Fola throwing strikes from guard but Kimball blocks nicely.
Fola engaging in some classic timewasting tactics.
Fola sneaks a leg through and gets to half guard. That was like a knife through butter how easily he passed Kimball's guard.
That's four minutes gone in the round.
Fola is working for a kimura but Kimball is defending it quite comfortably.
Fola is controlling the pace.
And that's the end of the fight!
Edu Fola comfortably won the final round on my scorecard.
Well Fola has outworked and out performed his opponent in all aspects of the game today. He was simply too good and the decision should be no more than a formality. Over to the ring announcer for the scorecards.
Ladies and gentlemen, after 3 rounds of action, we go to the scorecards for a decision.
Judge Frank Antenori scores the fight 26:30
Judge Timothy Bukovac scores the fight 26:30
Judge Jack Bonds scores the fight 26:30
In favor of your winner, by unanimous decision... Edu Fola!
|
|
|
|
|
|
|
|
|
|
|
|
|
|
|
|
|
|
|
|
|
|
|
| S |
C
A |
G |
S |
C
B |
G |
|
S |
C |
G |
|
energy
A | B |
|
hype
A | B |
|
pop
A | B |
|
mgr
A | B |
|
FIGHT
RATING
45% |
|
|
|
|
|
|
|
Undercard bout
|
Coming up we have a bantamweight MMA rules bout between Terrance Hendershot (ranked 0 p4p, 0 weight class) and Manof TheDingos (ranked 0 p4p, 0 weight class). Terrance Hendershot has the edge in experience - let's see if he can make that count tonight.
 |
|
 |
| 165 cm
21
135 lbs
7 - 3 - 0 |
|
175 cm
21
142 lbs
2 - 0 - 0 |
Good takedowns
Good kicks
Experienced |
|
BJJ Brown Belt
Decent boxing
Good gas tank |
|
| |
|
Ladies and gentlemen. This fight is 3 rounds, in the bantamweight division.
Introducing the fighter to my left, fighting out of the red corner.
With a record of
7 - 3 - 0, fighting out of Los Angeles, Terrance Hendershot!
And introducing the fighter to my right, fighting out of the blue corner.
With a record of
2 - 0 - 0, fighting out of Los Angeles, Manof TheDingos!
The judges for this bout are Jack Bonds, Frank Antenori and .
The bell rings for round one and we are underway!
TheDingos pivots, looking for a leg kick but Hendershot is out of range and TheDingos settles back down.
TheDingos misses the jab.
TheDingos looks to throw the jab but Hendershot is out of range.
Hendershot is trying to close the distance and clinch up, after that failed offence from TheDingos.
TheDingos fakes a jab and scores with a low kick.
TheDingos misses the shot to the body.
Hendershot quickly followed up with a counter body kick but doesn't connect.
Manof TheDingos seems to be the more aggressive standup fighter in this bout.
Hendershot takes one to the side of the head.
TheDingos darts in trying to clinch
enabling Hendershot to counter with a crisp jab.
Decent striking displayed by TheDingos there.
TheDingos lands with a good body shot.
We've had a slow start to the round here - hopefully the action picks up.
TheDingos fakes the leg kick and cracks Hendershot in the body.
Hendershot dives in and scores a takedown into TheDingos's guard.
The ref warns both fighters not to hold the cage as they work up against the meshing.
The crowd cheering loudly, showing their appreciation for the quality fight we're seeing here.
Hendershot postures up.
Hendershot trying to control but TheDingos is working from the bottom.
That's one minute gone in the round.
TheDingos managing to control the position.
Hendershot with a flurry of punches that miss.
TheDingos tries to land a sweep but no joy.
Hendershot trying to control the position from guard on top but TheDingos is wriggling around, looking for whatever he can.
Hendershot throwing shots from guard but he's hitting more mat than opponent.
Hendershot with a nice head shot there.
TheDingos is trying to control the position from the bottom.
Hendershot lands a couple of digs.
TheDingos looking for a sweep. Not yet TheDingos, not yet.
That's two minutes gone in the round.
A few boos can be heard. I'm sure they will multiply if the fighters don't pick up the pace.
There's a bit of a scramble here and now TheDingos is on top in guard.

Hendershot on his back here. We all know that wrestlers don't like being on their back so let's see if Hendershot tries to get out of the position.
Hendershot has his hands on TheDingos's head, controlling the position.
TheDingos sneaks a leg through and gets to half guard. That was like a knife through butter how easily he passed Hendershot's guard.
TheDingos wants to work for an arm triangle but Hendershot is really keeping half guard well and defending the submission attempt.
Hendershot is not content to let TheDingos control the position.
Hendershot is trying to control but can't.
TheDingos wants to work for an arm triangle but Hendershot is really keeping half guard well and defending the submission attempt.
That's three minutes gone in the round.
Hendershot is positioning himself well to prevent TheDingos advancing to mount.
Hendershot is looking for a sweep. TheDingos is wise to his cunning plan and keeps the top position.
TheDingos is trying to work for a kimura. This could be trouble! No, Hendershot has managed to free his arm - good work.
TheDingos is working for submissions here but there's nothing on.
Hendershot slips a foot under and gets full guard. Nice work.
TheDingos drops back looking for a leg! Hendershot is in trouble here! The fighters roll with the hold and Hendershot manages to kick TheDingos off! TheDingos jumps back into Hendershot's guard.
That's four minutes gone in the round.
The crowd are showing their displeasure at the lack of action as loud boos ring out around the arena.
TheDingos trying to control the position from guard on top but Hendershot is wriggling around, looking for whatever he can.
Hendershot bucks up whilst keeping hold of a body lock, managing to reverse the position. Now he's in top in TheDingos's guard.
TheDingos throwing some rather feeble looking strikes off his back.
TheDingos throwing some rather feeble looking strikes off his back.
TheDingos wants to sweep here but Hendershot controlling him for the moment.
TheDingos tries to strike from the bottom.
The crowd thankful this round is nearly over.
Hammerfist, elbow! yells Hendershot's corner. There ya go! There ya go!
TheDingos looking for a guillotine here but Hendershot defends easily.
And thats the end of the round the fighters go back to their corners.
Manof TheDingos dominated that round.
The fighters get back to their feet, the hooter sounds and we're back to the action!
Hendershot decides to change it up a bit and drives through with a nice takedown into half guard.
TheDingos moves his hips nicely and gets into full guard.
Terrance Hendershot overall seems to be getting the better of the ground position in the fight so far.
Hendershot postures up and lands a big shot to TheDingos's brow.
Hendershot working from the guard for now, landing some ground and pound.
TheDingos throws a couple of shots from the bottom but they don't land.
Hendershot lands a nice shot whilst sitting in his opponent's guard.
We've had a slow start to the round here - hopefully the action picks up.
TheDingos trying to strike off his back.
Hendershot knows he needs to get back to his feet asap. He's simply no match for TheDingos on the ground.
Hendershot keeps in close for a moment and lands a decent shot to the side of TheDingos's head.
TheDingos trying to keep a closed guard but Hendershot is proving a slippery customer.
Hendershot scores with a decent looking elbow strike.
That's one minute gone in the round.
Hendershot postures up and lands a big shot to TheDingos's brow.
Hendershot postures up in TheDingos's guard and throws a big left but TheDingos blocks it.
TheDingos wants to sweep but no luck.
TheDingos manages to sweep nicely, so he's now on top. Hendershot manages to get himself to full guard.
TheDingos's corner is telling him to maintain position.
Hendershot keeping moving, preventing TheDingos from controlling successfully.
Hendershot looking to hit a scissor sweep but TheDingos is one step ahead there.
We've been informed that TheDingos has been working hard on his conditioning in the buildup to the fight.
TheDingos thinks about going for a leg but decides against it, in order to maintain the position.
That's two minutes gone in the round.
TheDingos wants to pass the guard but Hendershot is keeping the position.
TheDingos works a leg free and moves into half guard.
Hendershot wants to control but TheDingos is keeping busy and won't allow it.
Hendershot is looking for a sweep. TheDingos is wise to his cunning plan and keeps the top position.
Hendershot is looking to control TheDingos's leg but it's slowly edging free. Can Hendershot avoid being mounted?
TheDingos maintaining the dominant position here and is working for a kimura. He's locked it up! Hendershot could be in real trouble here! He's trying to wriggle out but TheDingos has cracked it and Hendershot is screaming in pain - he's tapped out! Great finish by TheDingos!
Ladies and gentlemen, after 3:58 of round 2, we have a winner by way of Submission (Kimura). Manof TheDingos!
|
|
|
|
|
|
|
|
|
|
|
|
|
|
|
|
|
|
|
|
|
|
|
| S |
C
A |
G |
S |
C
B |
G |
|
S |
C |
G |
|
energy
A | B |
|
hype
A | B |
|
pop
A | B |
|
mgr
A | B |
|
FIGHT
RATING
35% |
|
|
|
|
|
|
|
Undercard bout
|
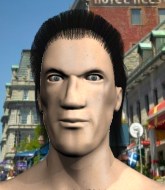
Coming up we have a welterweight MMA rules bout between Juan Gabaldon (ranked 0 p4p, 0 weight class) and Segrate Klouse (ranked 0 p4p, 0 weight class). The crowd seem to be enjoying Klouse's choice of entrance music: Gucci Mane-My own worst enemy. Segrate Klouse will no doubt be looking to use his reach advantage to good effect.
 |
|
 |
| 175 cm
28
182 lbs
5 - 3 - 1 |
|
195 cm
23
184 lbs
5 - 4 - 1 |
Good wrestling
Counter fighter
Granite chin |
|
BJJ Purple Belt
Brawler
Knockout power |
|
| |
|
Ladies and gentlemen. This fight is 3 rounds, in the welterweight division.
Introducing the fighter to my left, fighting out of the red corner.
With a record of
5 - 3 - 1, fighting out of Los Angeles, Juan Gabaldon!
And introducing the fighter to my right, fighting out of the blue corner.
With a record of
5 - 4 - 1, fighting out of Los Angeles, Segrate Klouse!
The judges for this bout are , Frank Antenori and Timothy Bukovac.
The bell rings for round one and we are underway!
Klouse moves into range and clinches up with Gabaldon.
Klouse lands a hook that snaps the head of Gabaldon backwards.
It looks like Juan Gabaldon has been cut.
Klouse throws a head punch that misses.
Gabaldon blocks a punch to the side of the head.
Klouse fails to land with a short punch on the inside.
Klouse misses with a short punch on the inside.
Gabaldon blocking some punches.
Klouse lands with a light punch inside.
Klouse misses with some punches.
Gabaldon breaks from the clinch.
Klouse tries to clinch
and Gabaldon counters with a takedown into side control.
Wooooo! Give it up for these two warriors! They are putting on a show!
Gabaldon trying to control the position but Klouse is working away.
Gabaldon in side control, trying to ground and pound but not landing this time.
Gabaldon is pausing for a moment. What's he doing? It looks like he's clearing his nose. Oh dude! He's shot a load of snot all down Klouse's shoulder. That is not cool.
That's one minute gone in the round.
Gabaldon with the ground and pound but Klouse regains half guard under the barage of strikes.
Gabaldon stops Klouse from getting back to his feet.
Gabaldon is trying to advance to mount but he's lost his balance and Klouse reverses the position - he's now on top in Gabaldon's guard.
Klouse is a painfully thin specimen of a man. You do wonder whether a good body kick would snap him clean in two.
Klouse with a flurry of punches that miss.
Klouse throws a strike but Gabaldon rolls with it and manages to sweep. Now he's in guard on top.
Gabaldon with a nice head shot there.
Gabaldon works over Klouse with some ground and pound from guard.
Gabaldon's corner is telling him to maintain position.
That's two minutes gone in the round.
Gabaldon slips nicely into half guard.
We've been hearing that Gabaldon has been drilling a lot of ground and pound in training, so let's see if he get the finish.
Klouse wants to get back to his feet.
Gabaldon misses with a head shot. Klouse uses the momentum to regain guard.
Gabaldon is looking to work some ground and pound but Klouse has wrist control.
Gabaldon is looking to advance position but Klouse has hit a scissor sweep - now he's on top in mount!
That's three minutes gone in the round.
Gabaldon holding onto his opponent's waist for dear life, as Klouse tries to land some strikes to get him to release his grip.
Gabaldon trying desperately to get to his feet.
Klouse throws an elbow from mount that misses. Lucky escape for Gabaldon because Klouse loaded up on that one.
Klouse sends his fist crashing into the mat - the crowd let out a collective ooooooh. Let's hope he's not broken it!
Klouse lands a heavy elbow.
Klouse unloading with bombs!
Gabaldon is writhing around trying to get back to his feet.
Klouse throwing strikes here but Gabaldon is writhing around nicely and avoiding any serious damage.
Klouse with a couple of short strikes.
The ref warns both fighters not to hold the cage as they work up against the meshing.
Gabaldon is in a horrible position here, under a barrage of strikes, he's managing to avoid any damage.
That's four minutes gone in the round.
Gabaldon is trying to escape but when you're mounted that's not too easy.
Gabaldon is in a horrible position here, under a barrage of strikes, he's managing to avoid any damage.
Klouse throwing strikes but Gabaldon uses the opportunity to regain half guard.
Klouse throwing punches and elbows but they're not doing any damage.
Klouse has the superior BJJ but he's also working some ground strikes into his gameplan.
Klouse looks to score some points with some ground and pound.
Klouse with the ground and pound but Gabaldon uses the opportunity to regain guard.
Gabaldon is looking to stand up but Klouse isn't so interested in that idea.
Klouse throws a big elbow that misses.
Klouse throws a big right hand that misses.
Gabaldon controls Klouse momentarily but Klouse frees himself.
And thats the end of the round the fighters go back to their corners.
Segrate Klouse dominated that round.
The cut man is working on Juan Gabaldon's cut.
Well, the break between rounds is over. Let's get back to the scrappin!
Klouse gets in close and instigates a clinch.
Gabaldon is pushing Klouse up against the cage, for a bit of lean and pray action. Action being used the in the loosest possible sense of the word.
Klouse tries a shoulder strike but it doesn't do any damage.
An uppercut on the inside fails to land for Klouse.
Gabaldon is looking for a takedown up against the cage. Klouse gets underhooks though and prevents the takedown attempt.
Gabaldon blocks a punch to the side of the head.
Klouse gets double underhooks to prevent a takedown attempt from Gabaldon.
We've had a slow start to the round here - hopefully the action picks up.
Klouse throws a head punch that misses.
Klouse misses with the head strike.
An uppercut on the inside fails to land for Klouse.
That's one minute gone in the round.
Klouse swings away with an uppercut that misses.
An uppercut on the inside fails to land for Klouse.
Klouse working aggressively here.
Klouse has been the more effective fighter overall so far.
Gabaldon blocks a couple of punches on the inside.
Gabaldon looking for a takedown.
That's three failed takedown attempts in the round for Juan Gabaldon. That's going to take a lot out of him.
Gabaldon blocking some punches.
Klouse lands with a right to the head.
Gabaldon has a body lock and is looking for a takedown. Klouse is bouncing around trying to prevent the takedown and somehow he has indeed managed to stay on his feet.
Still in the clinch, Klouse scores with a nice short uppercut.
Klouse misses with a punch on the inside.
Gabaldon's corner calls for him to break the clinch, which he does.
Gabaldon moves in looking to clinch but Klouse pushes him off.
Klouse tries to clinch but Gabaldon moves out of range.
Gabaldon avoids the clinch attempt nicely.
That's two minutes gone in the round.
Klouse wants to clinch up but Gabaldon keeps it at a distance.
Gabaldon attempts a counter takedown but Klouse avoids it well and moves away.
Gabaldon shoots for a double leg takedown but Klouse sprawls well. He's pushed Gabaldon's face into the mat and manages to get back to his feet relatively easily.
Gabaldon swats away the attempt to clinch by Klouse.
Gabaldon feinted with a counter takedown.
Klouse wants to clinch.
Gabaldon dives in for a single leg takedown but Klouse sprawls and the fighters end up clinched against the cage.
Segrate Klouse seems to be the more aggressive standup fighter in this bout.
Klouse wants to clinch up but Gabaldon keeps it at a distance.
Gabaldon feinted with a counter takedown.
Klouse tries to clinch there but Gabaldon circles away.
Klouse is looking to clinch but Gabaldon is avoiding it.
Gabaldon feinted with a counter takedown.
Klouse tries to clinch but is not successful on this occasion.
Klouse tries to clinch but is not successful on this occasion.
Gabaldon shoots in for a takedown and gets it. Let's see what he's got on the mat.
Both fighters are absolutely exhausted here.
The fans in attendance giving it up for the two fighters, who have really let it all hang out in the last minute or so!

Klouse manages to wriggle out and sneak his way back up to his feet, so the fighters are now clinched up against the cage.
That's three minutes gone in the round.
A short right from Klouse on the inside.
A head punch blocked on the inside by Gabaldon.
Gabaldon blocks an uppercut.
Klouse misses with a short punch on the inside.
Gabaldon is trying to slow down the pace in the clinch, to catch his breath.
Klouse misses with a punch on the inside.
Segrate Klouse seems to be working more effectively in the clinch in the fight so far.
Gabaldon looks like he'd prefer to be striking at range right now.
Klouse misses with the head strike.
Gabaldon drops to a knee looking for a takedown but Klouse gets the underhooks and prevents it.
Gabaldon blocks a couple of punches on the inside.
That's four minutes gone in the round.
Klouse swings away with an uppercut that misses.
Klouse working aggressively here.
Klouse throws a head punch that misses.
Klouse lands a short shot on the inside that snaps the head of Gabaldon backwards.
Gabaldon has Klouse pressed up against the cage and is working for takedown. Klouse manages to improve position though and keeps the fight standing.
Klouse misses with a punch on the inside.
Klouse misses with a short punch on the inside.
Klouse throws a punch but it's blocked by Gabaldon.
A head punch blocked on the inside by Gabaldon.
A head punch blocked on the inside by Gabaldon.
An uppercut on the inside fails to land for Klouse.
Klouse tries a shoulder strike but it doesn't do any damage.
Klouse fails to land with a short punch on the inside.
Gabaldon has a body lock and is looking for a takedown. Klouse is bouncing around trying to prevent the takedown and somehow he has indeed managed to stay on his feet.
And thats the end of the round the fighters go back to their corners.
Segrate Klouse showed his class in that round. I'd imagine he'll take it on all the scorecards.
The cut man is working on Juan Gabaldon's cut.
That's time! Gabaldon's corner gives him a slap on the ass as he gets ready to fight. So, we enter the final round. Let's see if either fighter can bring us a finish, or whether we're going to the judges scorecards.
Klouse wants to clinch but Gabaldon slips to the side
and Gabaldon counters with a takedown into side control! That could mean trouble for Klouse!
Gabaldon wants to lay and pray for a moment but Klouse keeps working.
Gabaldon throwing shots but missing, from side control.
Klouse is pushing Gabaldon's head away, looking to escape. Gabaldon manages to hold on to the position though.
Gabaldon wants to lay and pray for a moment but Klouse keeps working.
Klouse wants to get back to his feet but Gabaldon drags him back down.
We've had a slow start to the round here - hopefully the action picks up.
Gabaldon trying to control the action but Klouse is working from the bottom.
Klouse is putting a lot of effort into getting back to his feet here.
The ref stands the fighters back up due to a lack of activity.
That's one minute gone in the round.
Klouse takes the fight into the clinch.
Klouse prevents the takedown attempt.
Gabaldon blocks an uppercut.
Klouse misses with a short punch on the inside.
Klouse working aggressively here.
Gabaldon is trying to break the clinch but Klouse has him pressed against the cage.
Gabaldon breaks from the clinch.
Klouse rushes Gabaldon and pushes him back against the cage in a clinch.
Klouse working aggressively here.
Segrate Klouse is fighting for a decision - hopefully he's judged it right and he's actually winning the fight.
That's two minutes gone in the round.
Gabaldon blocking some punches.
Gabaldon has picked Klouse up - he's going for a ride! Gabaldon dumps his opponent to the mat with a thud and settles into half guard.
Gabaldon is trying to control. Klouse wants to improve his position but can't escape this time.
Gabaldon is going to have to think about doing something other than just controlling because Klouse is managing to avoid having the position dictated to him.
Klouse manages to escape and get back to his feet!
The crowd are loving this. Great action here.
Klouse takes the fight into the clinch.
Klouse prevents Gabaldon from breaking the clinch.
That's three minutes gone in the round.
Klouse misses with a hook from the clinch.
Gabaldon wants a takedown.
Gabaldon goes for a takedown in the clinch but Klouse prevents it.
That's three failed takedown attempts in the round for Juan Gabaldon. That's going to take a lot out of him.
Gabaldon drops down looking for an ankle pick but Klouse pulls his leg out and moves away.
That's four minutes gone in the round.
The crowd are starting to boo a lack of action.
Klouse fails in his attempt to clinch.
Nice sprawl there from Klouse as Gabaldon shoots in.
Both fighters are breathing heavily.
Klouse closes the distance and clinches.
Gabaldon has hold of a leg and is looking for a trip takedown. Klouse avoids it nicely though and we remain in the clinch.
The crowd thankful this round is nearly over.
Gabaldon blocks a couple of punches on the inside.
Juan Gabaldon has stepped it up - he knows he needs a finish here!
Gabaldon changes levels and goes for a takedown here. Klouse fights it off and pushes away nicely.
And that's the end of the fight!
I would just about give that final round to Segrate Klouse.
I've got Klouse winning every round here. Surely the decision will go his way and he'll pick up a well deserved decision victory. Over to the ring announcer for the scorecards.
Ladies and gentlemen, after 3 rounds of action, we go to the scorecards for a decision.
Judge Percy O'Donnell scores the fight 27:30
Judge Frank Antenori scores the fight 27:30
Judge Timothy Bukovac scores the fight 27:30
In favor of your winner, by unanimous decision... Segrate Klouse!
In his post fight interview, Segrate Klouse started talking himself up. Luckily his charisma kept the crowd on side and gave him a good reception.
|
|
|
|
|
|
|
|
|
|
|
|
|
|
|
|
|
|
|
|
|
|
|
| S |
C
A |
G |
S |
C
B |
G |
|
S |
C |
G |
|
energy
A | B |
|
hype
A | B |
|
pop
A | B |
|
mgr
A | B |
|
FIGHT
RATING
37% |
|
|
|
|
|
|
|
Undercard bout
|
Coming up we have a bantamweight MMA rules bout between Lou Nahtic (ranked 0 p4p, 0 weight class) and Viper Prince (ranked 0 p4p, 0 weight class). Nahtic kept the crowd waiting but all that was forgotten when his ring entrance music started. The incomparable musical genius that is Sleeping My Day Away. The crowd seem to be enjoying Prince's choice of entrance music: Don Trip-Feelin like mike. The key to victory for Lou Nahtic has got to be keeping the fight on the feet.
 |
|
 |
| 180 cm
26
140 lbs
5 - 8 - 0 |
|
188 cm
20
130 lbs
3 - 1 - 0 |
BJJ Blue Belt
Excellent boxer
Cardio machine |
|
BJJ Purple Belt
Counter fighter
Solid chin |
|
| |
|
Ladies and gentlemen. This fight is 3 rounds, in the bantamweight division.
Introducing the fighter to my left, fighting out of the red corner.
With a record of
5 - 8 - 0, fighting out of Los Angeles, Lou Nahtic!
And introducing the fighter to my right, fighting out of the blue corner.
With a record of
3 - 1 - 0, fighting out of St Petersburg, Viper Prince!
The judges for this bout are Timothy Bukovac, Frank Antenori and Don Winkell.
The bell rings for round one and we are underway!

Nahtic lands a big head kick that sends Prince tumbling to the mat! Nahtic takes a step backwards and waves Prince back to his feet - he wants the finish!
Prince is rocked!
It looks like Viper Prince has been cut.
Prince walks right into a perfectly timed right hook and goes down hard! He's out cold! The ref cradles Prince limp body while Nahtic jumps on to the cage and waves to the roaring crowd. Wow that was just a brutal knockout!
Ladies and gentlemen, after 0:05 of round 1, we have a winner by way of KO (Punch). Lou Nahtic!
After winning the bout, Lou Nahtic thanked all his fans and promised he'd do even better in his next fight. The crowd seemed to love his humility.
In defeat, Viper Prince stepped up to the mic, saying 'Guess the gods chose it to be the other guys night.'.
|
|
|
|
|
|
|
|
|
|
|
|
|
|
|
|
|
|
|
|
|
|
|
| S |
C
A |
G |
S |
C
B |
G |
|
S |
C |
G |
|
energy
A | B |
|
hype
A | B |
|
pop
A | B |
|
mgr
A | B |
|
FIGHT
RATING
100% |
|
|
|
|
|
|
|
Co-main event
|
Coming up we have a lightweight MMA rules bout between Elmer Paez (ranked 0 p4p, 0 weight class) and Mike Shipwreck (ranked 0 p4p, 0 weight class). Over to our ring announcer for the fighter introductions!
 |
|
 |
| 174 cm
25
156 lbs
3 - 0 - 0 |
|
175 cm
27
166 lbs
4 - 1 - 0 |
BJJ Blue Belt
Solid boxing
KO power |
|
Powerful takedowns
Brawler
Good gas tank |
|
| |
|
Ladies and gentlemen. This fight is 3 rounds, in the lightweight division.
Introducing the fighter to my left, fighting out of the red corner.
With a record of
3 - 0 - 0, fighting out of Los Angeles, Elmer Paez!
And introducing the fighter to my right, fighting out of the blue corner.
With a record of
4 - 1 - 0, fighting out of Los Angeles, Mike Shipwreck!
The judges for this bout are Don Winkell, and Frank Antenori.
The bell rings for round one and we are underway!
Paez misses with a two punch combination.
Shipwreck looking for a takedown here - he's got it.
Shipwreck looking to pass the guard.
Shipwreck drops back, looking for a kneebar! Paez looks panicked! The fighters roll across the mat, one looking to finish, one looking to escape. Paez looks to have wriggled free... Yes, he's got his leg free and he's dived into side control! Good work there from Paez!
Shipwreck is looking for a sweep.
We've had a slow start to the round here - hopefully the action picks up.
Shipwreck sneaks back into half guard.
Shipwreck is looking to sinch up a guillotine here but Paez pulls his head out easily.
Shipwreck looking to work for a kimura from the bottom.
That's one minute gone in the round.
Shipwreck actively working from the bottom here.
Shipwreck actively working from the bottom here.
Shipwreck actively working from the bottom here.
Shipwreck wants to get back to full guard.
Shipwreck manages to get to full guard.
Shipwreck looking for submissions off his back, moving his hips, looking for an opening.
That's two minutes gone in the round.
Shipwreck had isolated an arm as going for a kimura. Paez defends it easily.
Shipwreck looking for submissions from the bottom but instead Paez passes into half guard.
Shipwreck looking to work for a kimura from the bottom.
The fighters are pressed up against the cage, both looking to find a bit of space to work.
Shipwreck looking for submissions off his back.
That's three minutes gone in the round.
Shipwreck looking for submissions from an awkward position here.
Paez tries to stand and escape but Shipwreck is controlling the position.
Shipwreck actively working from the bottom here.
Paez is trying to get back to his feet now but his leg is trapped.
Shipwreck is looking to sinch up a guillotine here but Paez pulls his head out easily.
That's four minutes gone in the round.
A lull in the action here being met with boos from the crowd.
Shipwreck is looking to sinch up a guillotine here but Paez pulls his head out easily.
Shipwreck looking for submissions from an awkward position here.
Shipwreck looking for submissions from an awkward position here.
Shipwreck looking for submissions off his back.
Shipwreck actively working from the bottom here.
Boooooooooooooooooooo!!! God, this has been a terrible round. Come on you two, sort yourselves out!
Shipwreck actively working from the bottom here.
And thats the end of the round the fighters go back to their corners.
Mike Shipwreck dominated that round.
That's the end of the interval. I'm sure that seemed a lot quicker than a minute for our two fighters! Back to the action.
Shipwreck gets a double leg takedown into Paez's guard.
Paez is looking to get back to his feet but can't, whilst Shipwreck is controlling him.
Shipwreck drops back for a leg! It's a sloppy attempt though and Shipwreck jumps back into guard quickly, to retain the dominant position.
Paez keeping full guard, as Shipwreck tries to pass.
Paez knows he needs to get back to his feet asap. He's simply no match for Shipwreck on the ground.
Shipwreck drops back looking for a leg! Paez is in trouble here! The fighters roll with the hold and Paez manages to kick Shipwreck off! Shipwreck jumps back into Paez's guard.
We've had a slow start to the round here - hopefully the action picks up.
Shipwreck slips effortlessly into side control - very nice.
That's one minute gone in the round.
Shipwreck looking for an arm triangle but it's way too loose to do anything.
We've been informed that Shipwreck has been working hard on his conditioning in the buildup to the fight.
Shipwreck is trying to get an arm triangle but Paez is defending well.
Shipwreck tries for a kimura. Not really close to a finish though.
Shipwreck goes for an armbar! This could be all over! Wait, no, Paez rolls with the submission and now he's on top in Shipwreck's guard! Nice work there by Paez!
That's two minutes gone in the round.
Shipwreck has his feet on Paez's thighs here. He's pushed Paez off and worked for a very quick armbar from the bottom! He's flipped onto his stomach and he's cranking hard on the arm! Paez screams in pain and taps out! This one is all over!
Ladies and gentlemen, after 2:28 of round 2, we have a winner by way of Submission (Armbar). Mike Shipwreck!
|
|
|
|
|
|
|
|
|
|
|
|
|
|
|
|
|
|
|
|
|
|
|
| S |
C
A |
G |
S |
C
B |
G |
|
S |
C |
G |
|
energy
A | B |
|
hype
A | B |
|
pop
A | B |
|
mgr
A | B |
|
FIGHT
RATING
27% |
|
|
|
|
|
|
|
Main event
|
Coming up we have a lightweight MMA rules bout between Ron Dogg (ranked 0 p4p, 0 weight class) and Jake Miller (ranked 0 p4p, 0 weight class). Chooooooooon! I think Dogg might be my favorite fighter, now he's come out to Kickstart My Heart. Both fighters really staring each other down here, as Jake Miller enters the cage!
 |
|
 |
| 166 cm
24
160 lbs
7 - 9 - 0 |
|
175 cm
27
164 lbs
4 - 1 - 0 |
Good takedowns
Basic striking
Cardio machine |
|
Powerful takedowns
Counter fighter
Powerful |
|
| |
|
Ladies and gentlemen. This fight is 3 rounds, in the lightweight division.
Introducing the fighter to my left, fighting out of the red corner.
With a record of
7 - 9 - 0, fighting out of Los Angeles, Ron Dogg!
And introducing the fighter to my right, fighting out of the blue corner.
With a record of
4 - 1 - 0, fighting out of Los Angeles, Jake Miller!
The judges for this bout are Frank Antenori, and Timothy Bukovac.
The bell rings for round one and we are underway!
Dogg throws a loose over hand right and dives in with a double leg takedown. Miller tries to sprawl but it's too late and the fighters hit the mat. Dogg is in Miller's guard.
We could do with one of the fighters taking the initiative a bit more on the ground - they're both waiting to capitalize on a mistake.
Dogg scoring with punches to the head and body.
Dogg pressing down on his opponent's thigh, looking to pass guard. Miller is keeping the position for now.
Miller has been taking part in the yoga sessions down at Rancid Fight Club. Presumably he's going to look for a slick submission... Or maybe he's looking to avoid one.
Miller trying to punch from his back but it's not doing any damage.
Dogg wants to pass the guard but Miller is keeping the position.
Miller is active off his back here, looking for submissions.
The ref warns both fighters not to hold the cage as they work up against the meshing.
Miller had isolated an arm as going for a kimura. Dogg defends it easily.
We've had a slow start to the round here - hopefully the action picks up.
Dogg won't allow Miller to sweep him here.
Dogg trying to control but Miller is working from the bottom.
Miller has Dogg pulled in close to control his posture.
That's one minute gone in the round.
Miller utilising some decent striking defenses from the guard, preventing the ground and pound.
Dogg trying to control but Miller is working from the bottom.
Dogg tries to free his leg and advance position but Miller is retaining full guard.
Dogg looking to sit in guard and control but Miller gets the butterfly guard and sweeps. He's now in the guard on the top.
Miller trying to control the position from guard on top but Dogg is wriggling around, looking for whatever he can.
Dogg throwing his legs up looking for a triangle.
Miller trying to control the position from guard on top but Dogg is wriggling around, looking for whatever he can.
That's two minutes gone in the round.
Miller tries to free his leg and advance position but Dogg is retaining full guard.
Dogg looking for submissions off his back, moving his hips, looking for an opening.
Miller sneaks a leg through and gets to half guard. That was like a knife through butter how easily he passed Dogg's guard.
Miller is pressing down on Dogg's thigh, looking to free his foot. Dogg is holding on for now.
Miller drops an elbow to the side of Dogg's head.
Miller takes advantage of the dominant position to land a couple of big hammer fists.
Dogg punching from the bottom.
Dogg wants to control but Miller is keeping busy.
That's three minutes gone in the round.
Miller tries to pass the half guard into mount. Dogg knows what he's doing though and prevents the attempt.
Miller is trying to work for a kimura. This could be trouble! No, Dogg has managed to free his arm - good work.
Dogg on the receiving end of some nice ground and pound.
Miller is trying to work for a kimura. This could be trouble! No, Dogg has managed to free his arm - good work.
Dogg trying to control from the bottom.
Dogg works his way to full guard. Good work.
That's four minutes gone in the round.
Neither fighter has done anything of merit for a good minute or two here and the crowd are not happy about it.
Miller passes Dogg's left leg - he's now in half guard.
Miller seems very keen to just sit and control from half guard but Dogg does not like that idea so much and is remaining active off his back.
Miller controlling the action here.
Miller throwing shots but they're hitting the canvas more than the man.
Dogg has his hands clasped together around Miller's back. He's all about the action.
Miller wants to take a breather but Dogg is having none of it.
If this pace continues, the referee will definitely step in and force a standup.
Boooooooooooooooooooo!!! God, this has been a terrible round. Come on you two, sort yourselves out!
Miller scoring with strikes to the body and head.
And thats the end of the round the fighters go back to their corners.
Jake Miller dominated that round.
The referee calls time. The cornermen exit stage left and we're back to business.
Miller gets caught flat footed, as Dogg shoots in with a quick takedown into guard.
Miller throws some sloppy strikes off his back.
Miller throws a couple of shots from the bottom but they don't land.
Dogg throws a big right hand that misses.
Dogg sitting in guard here, content to control.
Miller has thrown up a leg looking for a triangle. Dogg doesn't defend quickly enough and Miller has managed to lock this one up! Can Dogg escape?! NO! He's tapping out! Damn, that was a quick submission - congrats to Miller on a fantastic submission victory.
Ladies and gentlemen, after 0:39 of round 2, we have a winner by way of Submission (Triangle). Jake Miller!
Jake Miller decided to hype himself up post fight. It was going well but he went on about it a bit too long and the crowd turned on him a little.
|
|
|
|
|
|
|
|
|
|
|
|
|
|
|
|
|
|
|
|
|
|
|
| S |
C
A |
G |
S |
C
B |
G |
|
S |
C |
G |
|
energy
A | B |
|
hype
A | B |
|
pop
A | B |
|
mgr
A | B |
|
FIGHT
RATING
28% |
|
|
|
|
|
|
|
|
|
|
