 |
CEFC 122 PBP Commentary |
Undercard bout
|
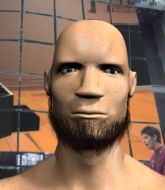
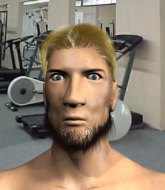
Coming up we have a light heavyweight MMA rules bout between Chris Punter (ranked 0 p4p, 0 weight class) and Fred Flintstone (ranked 0 p4p, 0 weight class). Over to our ring announcer for the fighter introductions!
 |
|
 |
| 190 cm
24
222 lbs
7 - 6 - 0 |
|
170 cm
24
205 lbs
0 - 15 - 0 |
Good wrestling
Excellent boxer
Very quick |
|
BJJ Blue Belt
Brawler
Determined |
|
| |
|
Ladies and gentlemen. This fight is 3 rounds, in the light heavyweight division.
Introducing the fighter to my left, fighting out of the red corner.
With a record of
7 - 6 - 0, fighting out of Montreal, Chris Punter!
And introducing the fighter to my right, fighting out of the blue corner.
With a record of
0 - 15 - 0, fighting out of Montreal, Fred Flintstone!
The judges for this bout are Dillan Fox, Yves DeLean and Robert Douchet.

The bell rings for round one and we are underway!
Flintstone gets his takedown attempt stuffed easily

and Punter counters by clinching up.

Punter escapes the clinch and we're back to striking.

Punter gets tackled into the cage by Flintstone. Flintstone maintains the clinch.
An uppercut to the body lands inside from Punter.
Flintstone wants to break free. God knows he wants to breaaaak freeee.
Flintstone tries to take the fight to the ground by pulling guard but can't manage it.
Punter lands a shot to the body.
Flintstone looks winded!
Punter stalling.
A short left from Punter.
Flintstone looks like he'd prefer to be striking at range right now.
Punter scores with a nice hook to the head.
Punter has been talking about how he's improved his wrestling in the run up to the fight so let's see if that's enough to sway the balance.
We've had a slow start to the round here - hopefully the action picks up.
Punter lands an uppercut.
Flintstone looking to slow down the pace here.
Punter misses with a shot to the kidneys.
Punter lands with a short shot to the head.
Punter tries to throw a body punch but Flintstone avoids it by throwing Punter back against the cage.

That's one minute gone in the round.

Punter has picked Flintstone up - he's going for a ride! Punter dumps his opponent to the mat with a thud and settles into half guard.
Punter works his foot free and advances to mount.
The ref warns both fighters not to hold the cage as they work up against the meshing.
Punter lands with some strikes.
Punter is in the full mount, landing strikes.
Punter content just to control the position here.
Flintstone tries to hold on but Punter pushes him away.
Punter lands with some vicious ground and pound - can Flintstone hang on?
The fans in attendance giving it up for the two fighters, who have really let it all hang out in the last minute or so!
Punter lands a big shot there that rocks Flintstone but he's holding on and managing to survive for now.

Flintstone is rocked!
Punter softens up his opponent with a couple of shots there and then CRACK! One massive shot lands there and Flintstone is out cold! Punter jumps to his feet and celebrates on the cage with the fans, who are, quite frankly, going absolutely mental!
Ladies and gentlemen, after 2:57 of round 1, we have a winner by way of TKO (Strikes). Chris Punter!
In defeat, Fred Flintstone stepped up to the mic, saying 'sorry to the fans out there.next time.'.
|
|
|
|
|
|
|
|
|
|
|
|
|
|
|
|
|
|
|
|
|
|
|
| S |
C
A |
G |
S |
C
B |
G |
|
S |
C |
G |
|
energy
A | B |
|
hype
A | B |
|
pop
A | B |
|
mgr
A | B |
|
FIGHT
RATING
64% |
|
|
|
|
|
|
|
Undercard bout
|
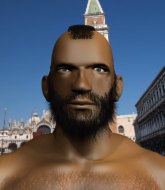
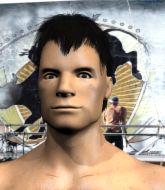
Coming up we have a heavyweight MMA rules bout between Barney Rubble (ranked 0 p4p, 0 weight class) and Victor Zangief (ranked 0 p4p, 0 weight class). Barney Rubble has the edge in experience - let's see if he can make that count tonight.
 |
|
 |
| 180 cm
23
265 lbs
1 - 13 - 0 |
|
187 cm
25
247 lbs
4 - 1 - 0 |
BJJ Blue Belt
Basic striking
Experienced |
|
Good wrestler
Brawler
Good gas tank |
|
| |
|
Ladies and gentlemen. This fight is 3 rounds, in the heavyweight division.
Introducing the fighter to my left, fighting out of the red corner.
With a record of
1 - 13 - 0, fighting out of Montreal, Barney Rubble!
And introducing the fighter to my right, fighting out of the blue corner.
With a record of
4 - 1 - 0, fighting out of Montreal, Victor Zangief!
The judges for this bout are Robert Douchet, Alec Ball and Dillan Fox.
The bell rings for round one and we are underway!
Rubble shoots in for a takedown. "Ole!" shouts Zangief as he jumps to the side.
Zangief moves into range and clinches up with Rubble.
Rubble drags the fight down to the ground.
Rubble can't keep his opponent in guard - Zangief advances to half guard, no doubt looking to mount.
Zangief tries to stand and escape but Rubble is controlling the position.
Rubble is looking to improve his position.
The ref warns both fighters not to hold the cage as they work up against the meshing.
Zangief not landing any meaningful shots this time.
We've had a slow start to the round here - hopefully the action picks up.
Rubble is trying to control but Zangief manages to pass to mount!
Zangief controlling his opponent.
Zangief throws some wild stikes that Rubble manages to avoid easily.
That's one minute gone in the round.

Zangief is looking to secure an arm. He's managed it! He's pivoting for an armbar - that looks tight! But Rubble has managed to get out of it and now he's in a dominant position. Nice work from Rubble!
Zangief pulls Rubble in close to his closed guard and prevents Rubble from doing any damage or advancing position.
Zangief is looking to stand up but Rubble isn't so interested in that idea.
Rubble wants to control from the top but Zangief keeps moving.
Rubble being controlled here momentarily.
Rubble stops Zangief from standing up.
The fighters are pressed up against the cage, both looking to find a bit of space to work.

That's two minutes gone in the round.
Well. There's a bit of a lull in the action here and the crowd are starting to get restless.
Zangief pulls Rubble in close to prevent any damage.
Rubble is looking to stand up but Zangief won't let him.
Zangief controlling the position.
Zangief's corner are shouting for him to control the position and he seems happy to oblige.
Rubble in full guard, throwing the ground and pound. No damage this time.
Zangief is controlling Rubble's posture.

The ref stands the fighters back up due to a lack of activity.
Rubble gets tackled into the cage by Zangief. Zangief maintains the clinch.

That's three minutes gone in the round.

Zangief wants the takedown. Rubble is fighting it off but Zangief persists and manages to bring the fight to the ground, ending up in Rubble's guard against the cage.
Zangief tries to free his leg and advance position but Rubble is retaining full guard.
Rubble is trying to control the position but Zangief postures up.
Zangief content to stall in guard here.
Rubble trying to control the position.
Zangief slips nicely into half guard.
Rubble is trying to control but Zangief passes into side control!
Rubble tries to get back to half guard but can't.

That's four minutes gone in the round.
Zangief slows the pace down.
Zangief in side control, trying to ground and pound but not landing this time.
Zangief controlling the position.
Zangief advances to full mount.
Zangief controlling from the full mount.
Boooooooooooooooooooo!!! God, this has been a terrible round. Come on you two, sort yourselves out!
Zangief working for a guillotine from mount but Rubble is in no mood to give up.
And thats the end of the round the fighters go back to their corners.
Victor Zangief dominated that round.
That's time! Rubble's corner gives him a slap on the ass as he gets ready to fight.

Rubble misses with a double jab
and Zangief counters with a nice double leg into half guard.
Zangief is just sitting in half guard, waiting for something to happen.
Victor Zangief has got the better of the ground game so far.
Zangief thows a wild elbow that connects with the canvas.
Rubble trying to hold on to Zangief's head to control him but Zangief postures up.
We've had a slow start to the round here - hopefully the action picks up.
Zangief throwing shots but they're hitting the canvas more than the man.
Zangief tries to pass the half guard into mount. Rubble knows what he's doing though and prevents the attempt.
Rubble is looking for a sweep. Zangief is wise to his cunning plan and keeps the top position.
That's one minute gone in the round.
Zangief throwing punches and elbows but they're not doing any damage.
Zangief tries to pass the half guard into mount. Rubble knows what he's doing though and prevents the attempt.
Zangief is trying to get back to his feet now but his leg is trapped.
The referee is asking the fighters to pick up the pace.
Zangief is thwarting Rubble's attempts to control the position.
The ref stands the fighters back up due to a lack of activity.
Rubble shoots for a double leg takedown but Zangief sprawls well. He's pushed Rubble's face into the mat and manages to get back to his feet relatively easily.
Zangief shoots in and scores a nice double leg takedown into half guard.
Zangief is working for a kimura but Rubble is defending it quite comfortably.
Rubble trying to control here.
That's two minutes gone in the round.
Zangief stalling.
Rubble is controlling Zangief's trapped leg to prevent Zangief from advancing to side control.
Zangief takes a deep breath and rests his weight momentarily on top of his opponent, to control the position.
Zangief wants to stand but Rubble has hold of a leg and an arm, so he's trapped for now.
Zangief is trying to work for a kimura. This could be trouble! No, Rubble has managed to free his arm - good work.
That's three minutes gone in the round.
Zangief not doing much here.
Rubble is looking to control Zangief's leg but it's slowly edging free. Can Rubble avoid being mounted?
The referee has stepped in and called for a break in the action. We'll restart on the feet.
Rubble throws a head kick that misses and slips in the process. He scrambles back to his feet and the fighters circle.
A countering left hand to the body from Zangief misses.
Rubble shoots and misses
and Zangief counters by moving into the clinch. Good anticipation by Zangief.
Zangief pulls guard successfully.
Rubble being controlled here momentarily.
Zangief looking for submissions from the bottom here. Moving his hips around, possibly looking for an armbar.
That's four minutes gone in the round.
There's a bit of a scramble here and now Zangief is on top in guard.

Rubble is trying to keep Zangief in close.
Zangief advances to half guard.
Zangief throwing punches and elbows but they're not doing any damage.
Rubble wants to control but Zangief is keeping busy.
Rubble wants to control the action here but instead Zangief manages to pass to full mount!
Boooooooooooooooooooo!!! God, this has been a terrible round. Come on you two, sort yourselves out!
Zangief misses with a head shot.
Zangief controlling the pace for now.
And thats the end of the round the fighters go back to their corners.
Victor Zangief showed his class in that round. I'd imagine he'll take it on all the scorecards.
The corners get their ten second warning. Both fighters stand from their stools and stare eachother down, ready to get back to the action. This is the final round!

Zangief goes for a high kick. It partially lands.
Rubble fails with an attempt to clinch.
Zangief blocks a head kick by Rubble.
Zangief has taken the fight to the clinch.
Rubble wants to strike at distance but he can't break free of the clinch.
Zangief pulls guard successfully.
Zangief has control of Rubble's left arm, preventing Rubble from doing any damage.
Zangief manages to sweep nicely, so he's now on top. Rubble manages to get himself to full guard.
We've had a slow start to the round here - hopefully the action picks up.
Zangief is frustrating his opponent with some stalling tactics from top position.
Rubble wants to improve his position but instead Zangief has moved into half guard.
Rubble knows he needs to get back to his feet asap. He's simply no match for Zangief on the ground.
That's one minute gone in the round.
Zangief sitting and controlling from the half guard.
Zangief prevents Rubble from improving his position.
Zangief controlling the action here.
That's two minutes gone in the round.
A lull in the action here being met with boos from the crowd.
Zangief works his way into side control.
Zangief wants to stand but Rubble is controlling his arm.
Zangief tries for a kimura but Rubble is defending well.
Zangief tries for a kimura but Rubble is defending well.
Zangief wants to work for a kimura but he's foiled early by Rubble, who protects the arm well.
That's three minutes gone in the round.
Rubble is looking for a sweep.
Rubble being controlled for a moment.
Zangief is trying to get an arm triangle but Rubble is defending well.
Rubble is looking to regain half guard here but Zangief keeps moving and retains side control.
Rubble trying his best to control but Zangief has mounted him.
That's four minutes gone in the round.
The crowd are starting to boo a lack of action.
Rubble tries to hold on but Zangief pushes him away.
Zangief punching from mount but Rubble doing a good job of avoiding damage.
Rubble blocking the ground and pound.
Zangief controlling from mount.
Rubble wants to improve position but instead he's given up his back.
Rubble preventing the rear naked choke attempt from Zangief.
Zangief biding his time, looking for the opening.
Boooooooooooooooooooo!!! God, this has been a terrible round. Come on you two, sort yourselves out!
Zangief has his opponent's back and is working for the choke.
And that's the end of the fight!
Victor Zangief comfortably won the final round on my scorecard.
Well Zangief has outworked and out performed his opponent in all aspects of the game today. He was simply too good and the decision should be no more than a formality. Over to the ring announcer for the scorecards.
Ladies and gentlemen, after 3 rounds of action, we go to the scorecards for a decision.
Judge Robert Douchet scores the fight 25:30
Judge Alec Ball scores the fight 25:30
Judge Dillan Fox scores the fight 25:30
In favor of your winner, by unanimous decision... Victor Zangief!
After winning the bout, Victor Zangief thanked all his fans and promised he'd do even better in his next fight. The crowd seemed to love his humility.
Barney Rubble spoke after the fight, saying 'sorry to fans across the nation.'.
|
|
|
|
|
|
|
|
|
|
|
|
|
|
|
|
|
|
|
|
|
|
|
| S |
C
A |
G |
S |
C
B |
G |
|
S |
C |
G |
|
energy
A | B |
|
hype
A | B |
|
pop
A | B |
|
mgr
A | B |
|
FIGHT
RATING
26% |
|
|
|
|
|
|
|
Undercard bout
|
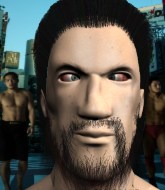
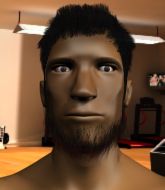
Coming up we have a welterweight MMA rules bout between Warren Parker (ranked 0 p4p, 0 weight class) and Rcrs Sarabjit (ranked 0 p4p, 0 weight class). Rumors backstage are that the fighters have been paid to keep it standing but we know that would never happen in MMA!
 |
|
 |
| 175 cm
27
170 lbs
5 - 2 - 0 |
|
155 cm
25
180 lbs
4 - 24 - 0 |
Good takedowns
Brawler
Experienced |
|
BJJ Blue Belt
Basic striking
Determined |
|
| |
|
Ladies and gentlemen. This fight is 3 rounds, in the welterweight division.
Introducing the fighter to my left, fighting out of the red corner.
With a record of
5 - 2 - 0, fighting out of Montreal, Warren Parker!
And introducing the fighter to my right, fighting out of the blue corner.
With a record of
4 - 24 - 0, fighting out of Montreal, Rcrs Sarabjit!
The judges for this bout are Dillan Fox, Alec Ball and Elvis Blanc.
The bell rings for round one and we are underway!
Sarabjit forces Parker back against the cage and clinches.
Parker drops to a knee looking for a takedown but Sarabjit gets the underhooks and prevents it.
Sarabjit wants to break free but Parker has control.
Parker is working for a takedown up against the cage. He can't get it on this occasion though.
Some stalling of biblical proportions here from Parker.
Parker has a body lock and is looking for a takedown. Sarabjit is bouncing around trying to prevent the takedown and somehow he has indeed managed to stay on his feet.
That's three failed takedown attempts in the round for Warren Parker. That's going to take a lot out of him.
Parker successfully pulls guard.
The ref warns both fighters not to hold the cage as they work up against the meshing.
Parker trying to keep a closed guard but Sarabjit is proving a slippery customer.
Parker manages to sweep nicely, so he's now on top. Sarabjit manages to get himself to full guard.

We've had a slow start to the round here - hopefully the action picks up.

Parker drops back looking for a leg! Sarabjit is in trouble here! The fighters roll with the hold and Sarabjit manages to kick Parker off! Parker jumps back into Sarabjit's guard.
Parker trying to control but Sarabjit is working from the bottom.
That's one minute gone in the round.
Parker drops back for a leg but he's not going to get it - he lets go and Sarabjit dives on top into guard.
There's a bit of a scramble here and now Parker is on top in guard.
Parker passes easily into side control. Nice work.
Parker in side control, working for a kimura. He's got hold of an arm and he's torquing it... Sarabjit is tapping! That's the end of the fight!
Ladies and gentlemen, after 2:18 of round 1, we have a winner by way of Submission (Kimura). Warren Parker!
During a confident post fight interview, Warren Parker thanked all his fans. He seemed very genuine when describing how motivated his fans keep him.
|
|
|
|
|
|
|
|
|
|
|
|
|
|
|
|
|
|
|
|
|
|
|
| S |
C
A |
G |
S |
C
B |
G |
|
S |
C |
G |
|
energy
A | B |
|
hype
A | B |
|
pop
A | B |
|
mgr
A | B |
|
FIGHT
RATING
37% |
|
|
|
|
|
|
|
Undercard bout
|
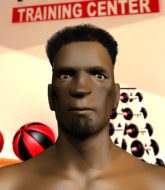
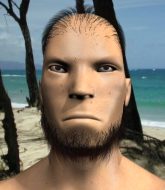
Coming up we have a middleweight MMA rules bout between Bryan Dawes (ranked 0 p4p, 0 weight class) and Yuuga Ikeda (ranked 0 p4p, 0 weight class). Dawes comes to the cage accompanied by why can't we be friends. Both fighters really staring each other down here, as Yuuga Ikeda enters the cage!
 |
|
 |
| 180 cm
27
195 lbs
5 - 4 - 0 |
|
189 cm
23
197 lbs
7 - 11 - 0 |
Decent wrestler
Solid boxing
Experienced |
|
Good takedowns
Decent boxing
Knockout power |
|
| |
|
Ladies and gentlemen. This fight is 3 rounds, in the middleweight division.
Introducing the fighter to my left, fighting out of the red corner.
With a record of
5 - 4 - 0, fighting out of Montreal, Bryan Dawes!
And introducing the fighter to my right, fighting out of the blue corner.
With a record of
7 - 11 - 0, fighting out of Montreal, Yuuga Ikeda!
The judges for this bout are William Peck, Alec Ball and Ian Loll.
The bell rings for round one and we are underway!
Ikeda misses with the combination.
Dawes pushes Ikeda up against the cage in a clinch.
Dawes lands with a short head shot on the inside.
Dawes lands a hook to the side of the head.
Ikeda avoids the elbow strike from Dawes, against the cage.
Ikeda takes a shot to the head.
With the two fighters working up against the cage, Dawes just misses with a elbow thrown towards Ikeda's brow.
Dawes lands a shoulder strike.
Ikeda wants to stall.
Ikeda is trying to break free.
We've had a slow start to the round here - hopefully the action picks up.
Ikeda has Dawes pressed up against the cage and is working for takedown. Dawes manages to improve position though and keeps the fight standing.
Nice elbow from Dawes.

It looks like Yuuga Ikeda has been cut.
Ikeda is trying to break the clinch but Dawes is controlling him.
Ikeda tries for a takedown but Dawes manages to get underhooks.

Ikeda breaks from the clinch.
That's one minute gone in the round.
Ikeda gets a double leg takedown into Dawes's guard.
Ikeda throwing elbows and punches but not connecting, as Dawes works some decent striking defense from the bottom.
Dawes knows he needs to get back to his feet asap. He's simply no match for Ikeda on the ground.
Dawes wants to sweep here but Ikeda controlling him for the moment.
Ikeda throwing elbows and punches but not connecting, as Dawes works some decent striking defense from the bottom.
Ikeda has the superior BJJ but he's also working some ground strikes into his gameplan.
Ikeda won't allow Dawes to sweep him here.
Dawes preventing the ground and pound from doing any damage.
The fighters are pressed up against the cage, both looking to find a bit of space to work.
Dawes preventing the ground and pound from doing any damage.
Ikeda with a flurry of punches that miss.
Ikeda wants to control from the top but Dawes keeps moving.
Ikeda content to strike from guard, landing some decent shots.
Ikeda trying to control but Dawes is working from the bottom.
Ikeda scoring with punches to the head and body.
Dawes looking to sweep here. No luck so far.
The ref warns both fighters not to hold the cage as they work up against the meshing.
That's two minutes gone in the round.
Dawes has control of Ikeda's left arm, preventing Ikeda from doing any damage.
Dawes wants to control the position but Ikeda says "no thanks buddy" and passes to half guard.
Ikeda throwing shots but Dawes is blocking nicely.

Ikeda postures up and decides to stand up, from the half guard. The ref calls for Dawes to stand up.
Bryan Dawes is looking to keep the fight on the feet at all costs.
Dawes misses with a body shot
and Ikeda counters with a straight right hand.
Dawes slaps away a takedown attempt from Ikeda, before circling back to the center of the mat.
Bryan Dawes has stuffed three takedown attempts in the round now. That's going to take a lot out of Yuuga Ikeda.
Dawes misses with a wild body shot.
Dawes drives through and clinches with Ikeda against the cage.
Dawes lands a damaging elbow.
The crowd cheering loudly, showing their appreciation for the quality fight we're seeing here.
Dawes misses with an elbow over the top.
Ikeda prevents Dawes from breaking the clinch.
Ikeda tries for a takedown. No joy.
Ikeda wants to break free. God knows he wants to breaaaak freeee.
Dawes lands a nice uppercut.
That's three minutes gone in the round.
Ikeda blocks a punch to the side of the head.
Dawes throws an elbow but it's blocked.
Dawes misses with an elbow over the top.
Dawes lands a hook to the body. It's hard to tell if that hurt Ikeda or not.
Ikeda breaks the clinch and we return to the middle of the mat.
Ikeda has been working on his striking defense in training and it's paying off as Dawes is landing a low percentage of strikes.
Good exchange - Dawes coming out on top.
A really sloppy takedown attempt there from Ikeda.
Bryan Dawes seems to be the more aggressive standup fighter in this bout.
Ikeda keeping his hands up high there, blocking the jab from Dawes.
Ikeda on the wrong end of a decent looking cross there.
We've been told by Dawes's head coaches at STRIKE FORCE 10 ELITE COACHES that he's been working on his takedown defense in preparation for this fight.
Ikeda needs to keep his hands up - Dawes had a free shot at his head there.
Dawes slaps away a takedown attempt from Ikeda, before circling back to the center of the mat.
Nice uppercut lands for Dawes. That snapped Ikeda's head back.
Ikeda is rocked!
and Dawes counters with a massive uppercut that badly hurts Ikeda! He's just covering up as Dawes starts to tee off till the referee steps in and stops the fight!
Ladies and gentlemen, after 4:58 of round 1, we have a winner by way of TKO (Strikes). Bryan Dawes!
A relieved looking Bryan Dawes thanked the fans for their support and gave the usual line about them being amazing. They seemed to believe that he actually meant it.
|
|
|
|
|
|
|
|
|
|
|
|
|
|
|
|
|
|
|
|
|
|
|
| S |
C
A |
G |
S |
C
B |
G |
|
S |
C |
G |
|
energy
A | B |
|
hype
A | B |
|
pop
A | B |
|
mgr
A | B |
|
FIGHT
RATING
45% |
|
|
|
|
|
|
|
Undercard bout
|
|
|
|
Undercard bout
|
Coming up we have a lightweight MMA rules bout between Dirt McGirt (ranked 0 p4p, 0 weight class) and Alexi Takala (ranked 0 p4p, 0 weight class). McGirt's ring entrance music is that housewives' favourite, Shimmy Shimmy Ya. Both fighters will be looking to make this an exciting fight for the fans, I'm sure!
 |
|
 |
| 175 cm
29
160 lbs
7 - 9 - 0 |
|
182 cm
34
164 lbs
7 - 19 - 1 |
BJJ Purple Belt
Excellent boxer
Very strong |
|
BJJ Blue Belt
Decent boxing
Knockout power |
|
| |
|
Ladies and gentlemen. This fight is 3 rounds, in the lightweight division.
Introducing the fighter to my left, fighting out of the red corner.
With a record of
7 - 9 - 0, fighting out of Montreal, Dirt McGirt!
And introducing the fighter to my right, fighting out of the blue corner.
With a record of
7 - 19 - 1, fighting out of Amsterdam, Alexi Takala!
The judges for this bout are William Peck, Elvis Blanc and Steve Smith.
The bell rings for round one and we are underway!

McGirt drops Takala with a right and a left! McGirt comes rushing in but Takala regains his composure and manages to keep McGirt in guard.
Takala is rocked!
The ref warns both fighters not to hold the cage as they work up against the meshing.
McGirt is frustrating his opponent with some stalling tactics from top position.
Takala is still in real trouble! Can McGirt finish him?
McGirt gets to his feet and stands over Takala, holding his ankles. He dives in with a big left hand that connects! Takala felt that one! McGirt unloads more punches and elbows and this one is over! The ref has dived in to save Takala from any more punishment!
Ladies and gentlemen, after 0:23 of round 1, we have a winner by way of TKO (Strikes). Dirt McGirt!
In his post fight interview, Dirt McGirt gave a big smile as he said 'I'd like to thank all my fans and my sponsor GREEN! 160. '.
|
|
|
|
|
|
|
|
|
|
|
|
|
|
|
|
|
|
|
|
|
|
|
| S |
C
A |
G |
S |
C
B |
G |
|
S |
C |
G |
|
energy
A | B |
|
hype
A | B |
|
pop
A | B |
|
mgr
A | B |
|
FIGHT
RATING
100% |
|
|
|
|
|
|
|
Co-main event
|
Coming up we have a welterweight MMA rules bout between Four Loko (ranked 0 p4p, 0 weight class) and Bittor Xavier (ranked 0 p4p, 0 weight class). Tired and clearly flustered, he entered the arena late and after a little discussion it was decided that the bout should take place.
Coming up we have a welterweight MMA rules bout between Four Loko and Bittor Xavier. Chooooooooon! I think Loko might be my favorite fighter, now he's come out to marry yourdaughter. Xavier has chosen Jane's Addiction- Mountain Song as his entrance music. Bittor Xavier has the power to score a knockout today if he connects clean with Four Loko's chin.
 |
|
 |
| 185 cm
35
181 lbs
22 - 14 - 0 |
|
180 cm
42
184 lbs
32 - 28 - 0 |
Abu Dhabi Champ
World class boxer
Insanely flexible |
|
Excellent grappler
Excellent boxer
Good gas tank |
|
| |
|
Ladies and gentlemen. This fight is 3 rounds, in the welterweight division.
Introducing the fighter to my left, fighting out of the red corner.
With a record of
22 - 14 - 0, fighting out of Los Angeles, Four Loko!
And introducing the fighter to my right, fighting out of the blue corner.
With a record of
32 - 28 - 0, fighting out of Montreal, Bittor Xavier!
The judges for this bout are Trevor Gratis, Yves DeLean and Alec Ball.
The bell rings for round one and we are underway!
Loko throws a head kick that misses and slips in the process. He scrambles back to his feet and the fighters circle.
Xavier has his takedown stuffed
and Loko counters with a right hand to the body.
Xavier darts in and lands a nice takedown into half guard.
Xavier is thwarting Loko's attempts to control the position.
Xavier is working for a kimura here but Loko manages to reverse the position and he's now in Xavier's guard.
We've had a slow start to the round here - hopefully the action picks up.
Xavier keeping moving, preventing Loko from controlling successfully.
Xavier had isolated an arm as going for a kimura. Loko defends it easily.
That's one minute gone in the round.
Xavier keeping full guard, as Loko tries to pass.
Xavier keeping moving, preventing Loko from controlling successfully.
Xavier has his foot on Loko's thigh. He's trying to push off and get in position for a triangle, I think. Loko works his way back into a safe position though.
Loko trying to control the position from guard on top but Xavier is wriggling around, looking for whatever he can.
Loko is going to have to think about doing something other than just controlling because Xavier is managing to avoid having the position dictated to him.
That's two minutes gone in the round.
Well. There's a bit of a lull in the action here and the crowd are starting to get restless.
Xavier is looking for a triangle but Loko pushes his legs off easily.
Loko thinks about going for a leg but decides against it, in order to maintain the position.
Loko wanted to stand there but Xavier had control of the position.
Loko stands up and looks to throw the legs aside to pass to side control. Xavier swivels though and keeps the full guard.
Xavier tries to land a sweep but no joy.
Loko advances position into side control!
Xavier is looking to regain half guard here but Loko keeps moving and retains side control.
That's three minutes gone in the round.
Loko trying to control the position but Xavier is working away.
Loko tries to advance to mount but can't.
The fighters are pressed up against the cage, both looking to find a bit of space to work.
Xavier is sneaking out the side here. He's bucked Loko off and has taken his back!
Xavier looking for the RNC.
Loko preventing the rear naked choke attempt from Xavier.
Loko wants to escape the position.
Loko is trying to stand back up.
Loko trying to control the hands but Xavier won't let him.
That's four minutes gone in the round.
Xavier trying to control momentarily.
Watch the back of the head! Comes the shout from the referee towards Xavier.
Loko defends a rear naked choke attempt by controlling one of Xavier's arms.
Xavier is remaining active here, looking for the choke. The more discerning members of the crowd will appreciate his efforts.
The crowd thankful this round is nearly over.
Loko defending nicely against the rear naked choke attempt.
Xavier not allowing Loko to control his hands.
And thats the end of the round the fighters go back to their corners.
Bittor Xavier dominated that round.
That's the end of the round. The referee orders the cornermen out of the cage so we can get back down to business.
Xavier fails to land the takedown.
Loko appeared to be looking to counter that last move with a leg kick.
Xavier misses with a takedown attempt
and Xavier takes a counter punch right on the button for his troubles.
Xavier misses with a takedown attempt. He shot from a bit too far out.
Four Loko has stuffed three takedown attempts in the round now. That's going to take a lot out of Bittor Xavier.
Loko fails to land with a series of punches.
We've had a slow start to the round here - hopefully the action picks up.
Loko throws a low kick, looking for Xavier's leg but Xavier calmly moves out of range.
Xavier shoots and misses
enabling Loko to counter with a crisp jab.
Loko scores with a jab to the jaw.
Loko looks to have improved his striking defense since last time we saw him fight.
That's one minute gone in the round.
Xavier fails with a takedown attempt.
Loko jabs. That one connects to the head of his opponent.
Xavier with a poor takedown
and Loko counters nicely by changing levels and landing a hook to the body.
Loko misses with a jab, cross combination.
That's two minutes gone in the round.
Loko jabs at Xavier's body.
Xavier will have to do better than that with his takedown attempts.
Loko appears to be looking for a big counter.
Loko keeps the fight standing with a nice sprawl.
Bittor Xavier seems to be the more aggressive standup fighter in this bout.
Loko stuffs the takedown.
A head kick misses from Loko.
Four Loko is looking to keep the fight on the feet at all costs.
Loko stuffs the takedown.
Xavier shoots in and drives through. Loko sprawls well.
Loko throws a big counter combination but Xavier scrambles out of danger and avoids any damage.
Loko scores with a nice one two combo and darts back out of range to avoid anything coming in the opposite direction.
That's three minutes gone in the round.
Xavier avoids the body shot from Loko.
Xavier doesn't succeed with the takedown
and Xavier takes a counter punch right on the button for his troubles.
Four Loko is winning the standup battle so far.
Xavier gets his takedown attempt stuffed easily
and Loko counters with a lovely straight right hand!
Loko lands a pitter patter jab to the forehead of his opponent.
Loko lands a right hook to the body.
Loko scores with a leg kick.
That's four minutes gone in the round.
Xavier fails miserably with a takedown attempt.
Loko lands a leg kick that knocks Xavier off balance momentarily.
Loko displays good takedown defense there as he swats away a double leg from Xavier.
Loko feinted there with a counter leg kick.
The crowd thankful this round is nearly over.
Xavier chopped to the floor by a nice leg kick but he springs right back up before Loko can pounce on him.
And thats the end of the round the fighters go back to their corners.
Four Loko dominated that second round.
The corners get their ten second warning. Both fighters stand from their stools and stare eachother down, ready to get back to the action. This is the final round!
Xavier closes this distance looking for a takedown but Loko circles away.
Xavier avoids a punch combination nicely.
Nice takedown defense from Loko. No joy for Xavier on that attempt.
Loko misses with a double jab.
Xavier drops down looking to force a counter takedown but Loko defends it well.
Loko connects with a body shot that sends Xavier's belly button to the back.
We've had a slow start to the round here - hopefully the action picks up.
Xavier closes the distance and scores a nice trip takedown into half guard. Loko did well to prevent Xavier getting side control.
Loko makes his way to full guard. A much better position for Loko.
Xavier stands up and looks to throw the legs aside to pass to side control. Loko swivels though and keeps the full guard.
The ref warns both fighters not to hold the cage as they work up against the meshing.
That's one minute gone in the round.
Loko is active off his back here, looking for submissions.
Both fighters are breathing heavily.
Xavier trying to control the position from guard on top but Loko is wriggling around, looking for whatever he can.
Loko is really dominating this fight. Is there anything that Xavier can do to turn this around?
Loko tries to land a sweep but no joy.
Xavier trying to move into half guard but instead Loko has managed to sweep!
Loko got a little sloppy there for a moment and Xavier has worked his way into a loose triangle - can he finish it?! No, Loko has managed to get both his arms back between Xavier's legs - danger averted.
Xavier throws his legs up looking for a submission but Loko uses it to pass to side control.
Loko tries for a kimura but Xavier is defending well.
Loko advances to full mount.
That's two minutes gone in the round.
Xavier is trying to escape the mount.
Loko jumps to side control looking for an arm triangle but Xavier manages to avoid the submission attempt.
Loko wants to control but Xavier is keeping him busy.
Loko tries to get to his feet but he's trapped momentarily.
Xavier regains half guard.
That's three minutes gone in the round.
Loko trying to pass the guard but Xavier defending well.
Xavier wants to get back to full guard.
Xavier wants to get back to full guard but Loko has mounted him!
Xavier tries to lock up and control but Loko gives him a forearm to the face and pushes him away.
Bittor Xavier has got the better of the ground game so far.
Xavier regains half guard.
Loko is thwarting Xavier's attempts to control the position.
Xavier is defending against the submission attempts here by Loko.
Xavier looking for submissions from an awkward position here.
That's four minutes gone in the round.
Loko is thinking about going for an arm triangle but he can't free his leg.
Loko is looking for a kimura but Xavier is holding onto that half guard position, so it's hard for Loko to get the leverage.
Loko trying to control the action but Xavier is working from the bottom.
Boooooooooooooooooooo!!! God, this has been a terrible round. Come on you two, sort yourselves out!
Xavier wants to control but Loko is keeping busy.
Loko content to sit in half guard and control for a moment.
And that's the end of the fight!
Four Loko showed his dominance in that final round.
I think Loko has won this one but let's see what the judges have to say. Over to the ring announcer for the scorecards.
Ladies and gentlemen, after 3 rounds of action, we go to the scorecards for a decision.
Judge Trevor Gratis scores the fight 29:27
Judge Yves DeLean scores the fight 29:27
Judge Alec Ball scores the fight 29:27
In favor of your winner, by unanimous decision... Four Loko!
Jumping up and down and very excited, Four Loko waved his t-shirt featuring AnonymouS's logo in front of the cameras.
|
|
|
|
|
|
|
|
|
|
|
|
|
|
|
|
|
|
|
|
|
|
|
| S |
C
A |
G |
S |
C
B |
G |
|
S |
C |
G |
|
energy
A | B |
|
hype
A | B |
|
pop
A | B |
|
mgr
A | B |
|
FIGHT
RATING
31% |
|
|
|
|
|
|
|
Main event
|
Coming up we have a middleweight MMA rules bout between Jack Rackham (ranked 0 p4p, 0 weight class) and Brownie Anderson (ranked 0 p4p, 0 weight class). Over to our ring announcer for the fighter introductions!
 |
|
 |
| 182 cm
29
193 lbs
23 - 11 - 0 |
|
185 cm
38
186 lbs
31 - 21 - 1 |
Good wrestling
World class boxer
Insanely flexible |
|
Good wrestler
World class MT
Good gas tank |
|
| |
|
Ladies and gentlemen. This fight is 5 rounds, for the middleweight championship of the world!
Introducing the champion to my left, fighting out of the red corner.
With a record of
23 - 11 - 0, fighting out of Montreal, Jack Rackham!
And introducing the challenger to my right, fighting out of the blue corner.
With a record of
31 - 21 - 1, fighting out of Montreal, Brownie Anderson!
The judges for this bout are Elvis Blanc, Yves DeLean and William Peck.
The bell rings for round one and we are underway!
Rackham is looking to land body kicks.
Good leg kick by Anderson there. It's the ones that make that thud noise that hurt and that was an almighty thud.
Rackham rushes forward with a series of wild hooks but Anderson moves out of range and avoids them all easily.
Anderson does a little shimmy and throws a leg kick. The leg kick missed by a considerable margin though, making him look a little bit silly for doing the shimmy.
Rackham loads up on a big right hand but Anderson slips the punch.
Anderson slips a jab from Rackham.
Anderson swats away the attempt to clinch by Rackham.
Anderson replies with a solid counter kick to the body but Rackham blocks it well.
Rackham uses good head movement to avoid the hook from Anderson.
Rackham throws an off balance right hand
and Anderson counters with a thumping low kick.
Anderson has a nice red mark on his side after a thudding body kick by Rackham.
Anderson clinches with his opponent.
We've had a slow start to the round here - hopefully the action picks up.
Good anti-grappling being displayed by Rackham as Anderson tries to tie him up.
Rackham blocks a couple of punches on the inside.
Anderson lands a glancing elbow in the clinch.
Rackham presses Anderson against the cage and delivers a mid-strength body shot.
A short uppercut from Anderson.
That's one minute gone in the round.
Anderson avoiding damage as Rackham throws knees to the body.
Anderson lands a hook that snaps the head of Rackham backwards.
Anderson blocks an elbow strike from Rackham.
Rackham is clearly stalling here... Pick up the pace son.
Rackham working Anderson over with knees to the body.
Anderson with an attempt at a knee that misses.
Rackham connects with a knee to the head.
It looks like Brownie Anderson has been cut.
Nice body punch from Rackham.
Anderson leaning against his opponent.
Anderson throws a vicious knee straight up the middle but Rackham blocks it with crossed arms.
Rackham misses with a shot to the kidneys.
Rackham throws a nice elbow but it doesn't land.
Rackham misses the knee to the body. Nice hip positioning from Anderson.
Anderson has a couple of punches blocked by Rackham.
Anderson tries a knee to the head but he's missed.
That's two minutes gone in the round.
Anderson lands an elbow just above Rackham 's eye.
Anderson connects with a knee to the head.
The fans in attendance giving it up for the two fighters, who have really let it all hang out in the last minute or so!
Anderson with the Thai clinch. He's looking to land a big knee but he's not managed it this time.
Anderson blocks a knee to the body. He'll have a nicely bruised forearm in the morning.
Anderson with the Thai clinch, lands a knee to the head.
Rackham throws a punch but it's blocked by Anderson.
Anderson lands a right uppercut that snaps the head of Rackham backwards.
Both guys are working to get underhooks.
Anderson avoids the elbow strike from Rackham, against the cage.
Rackham tries to land a knee to the head but Anderson blocks with his arms.
Anderson avoiding damage as Rackham throws knees to the body.
Rackham trying to land knees to the body.
A shot in the inside from Rackham.
Rackham throws a nice elbow but it doesn't land.
Rackham tries a shoulder strike but it doesn't do any damage.
Rackham tried to land a shot to the body but connects with Anderson's elbow.
Anderson throws a vicious knee straight up the middle but Rackham blocks it with crossed arms.
Anderson fails to land with a short punch on the inside.
That's three minutes gone in the round.
Anderson tries a knee to the head but he's missed.
Anderson with the Thai clinch, lands a knee to the head.
Anderson looks to throw an elbow but misses.
Anderson lands a hook that snaps the head of Rackham backwards.
Anderson with an attempt at a knee that misses.
Rackham blocks the elbow strike.
Anderson landing knees to the head.
Rackham trying to land knees to the body.
Anderson with the Thai clinch, lands a knee to the head.
Our sources have told us that Rackham has been working on his knees in the buildup to the fight.
Rackham tries to land a knee to the body but he is off balance and Anderson avoids it.
Anderson scores with a shot to the side of Rackham's head.
Rackham pushes off an throws an elbow but Anderson leans to the side and avoids it. We're back to clinching against the cage.
Rackham on the defensive, avoiding the knees to the body.
Anderson using the Thai plumb to throw knees but Rackham has his back arched nicely, preventing the strike.
Rackham lands an elbow inside.
This is a great period of action - very entertaining stuff!
Rackham lands an elbow that stopped Anderson in his tracks for a moment.
Anderson lands a knee to the head.
That's four minutes gone in the round.
With the fighters clinched against the cage, Rackham creates a bit of distance for himself and scores with a nice uppercut.
Anderson tries a body shot but Rackham blocks it.
Rackham tries a body shot but Anderson blocks it.
Anderson avoids the elbow strike from Rackham, against the cage.
Anderson misses with a knee to the head.
Anderson misses with a knee to the head.
Anderson misses with some punches.
Anderson lands a knee to the head there! That was nasty!
Anderson tries to work over Rackham's body with a swooping hook but it only glances the target.
Knees to the body from Rackham.
Rackham lands an elbow just above Anderson 's eye.
Rackham escapes the clinch and we're back to striking.
Nice straight punches there by Rackham. You know Roy Jones Jr respects the hands of Rackham.
The crowd applaud the fighters' efforts here as the round comes to an end.
Rackham clinches with his opponent.
A nice right hand lands inside from Anderson.
Anderson blocks the elbow strike.
Anderson tries a knee to the head but he's missed.
And thats the end of the round the fighters go back to their corners.
A close round but Brownie Anderson will probably get the nod.
The cut man is working on Brownie Anderson's cut.
That's the end of the round. The referee orders the cornermen out of the cage so we can get back down to business.
Anderson showing good head movement there, avoiding the strikes from Rackham.
Anderson tries a head kick but it misses.
Rackham throws a low kick but Anderson avoids it.
Anderson lands a leg kick. The shin dug right into the meat of the thigh.
Rackham throws a leg kick which misses Anderson's front leg but catches the back leg as Anderson tries to avoid it.
Jack Rackham is looking to throw some combinations by the looks of things.
Anderson connects with a leg kick. Rackham looked like he was expecting something else and didn't defend it.
A head kick misses from Rackham.
Rackham fails to land with a series of punches.
Anderson throws an overhand right that lands on Rackham's shoulder, as Rackham tries to avoid the shot.
Rackham throwing a counter right hand but Anderson manages to avoid it.
Rackham throws a lazy right hand but Anderson sees it coming a mile off and sidesteps it easily.
We've had a slow start to the round here - hopefully the action picks up.
Rackham throws a wild combination but nothing lands.
Rackham throws a series of punches but Anderson moves out of range.
Rackham misses with a body kick.
Anderson blocks a head kick by Rackham.
Anderson uses good footwork to get in and out, landing a nice hook.
That's one minute gone in the round.
Rackham throws a leg kick that misses.
Rackham wants to clinch up but Anderson keeps it at a distance.
Anderson looking to throw a kick but he's pulled out of it.
A kick lands to the mid section there for Rackham.
Anderson swats away the attempt to clinch by Rackham.
A shot to the body from Rackham misses
and Anderson counters with a leg kick that reverborates around the arena.
Rackham tries to clinch but Anderson moves away
and Anderson counters with a nice body shot.
Rackham throws a combination that misses
and Anderson counters with a good, hard body kick but Rackham shrugs it off.
Both fighters are absolutely exhausted here.
Anderson misses with a half-hearted attempt at a head kick.
Anderson lands a body shot.
Decent striking displayed by Rackham there.
A punch combination from Rackham misses.
Anderson tries to clinch but is not successful on this occasion.
Rackham fails to land with the punch combination there - jab, cross, hook, miss, miss, miss.
That's two minutes gone in the round.
Anderson turns his hip over beautifully as he lands a nice leg kick.
This is a great period of action - very entertaining stuff!
Anderson connects with a crisp jab.
Rackham is looking to score with low kicks.
Rackham on the wrong end of a nice low kick. He's acting like it's no big deal but he doesn't want to take many more of those.
Rackham throws a big shot that misses.
Anderson scores with a slapping inside leg kick.
Anderson misses with a low kick.
Anderson lands a pitter patter jab to the forehead of his opponent.
Rackham is hobbling a little on that front leg after taking quite a few leg kicks so far in this fight.
Anderson cracks Rackham with a good jab.
Anderson throws a jab but it's blocked by Rackham.
Anderson blocks a head kick by Rackham.
Rackham throws a looping overhand right but Anderson ducks down to avoid it.
Rackham thows a left - swing and a miss!
Anderson follows through with a counter body kick but it doesn't land.
An inside leg kick lands from Anderson.
That's three minutes gone in the round.
Rackham misses with a looping left.
Anderson scores with a leg kick.
Anderson throws a hook to the side of Rackham's head but Rackham sees it coming and ducks under it beautifully.
Anderson has managed to clinch.
Rackham blocking some punches.
Anderson tries to land a knee to the body but he is off balance and Rackham avoids it.
Nice elbow from Anderson.
A short uppercut from Anderson.
Rackham looking to throw knees to the head but Anderson is blocking nicely.
With the fighters up against the cage, Rackham throws an elbow but misses.
We are yet to see a takedown attempt from Anderson in the fight. On paper you would think he is the more dominant ground fighter so let's see if these unusual tactics pay off.
Rackham goes for a body shot but it's blocked.
Anderson blocks an elbow strike from Rackham.
Anderson lands on the inside with an uppercut.
Anderson has been the more effective fighter overall so far.
Anderson lands with a short head shot on the inside.
Rackham swings away with an uppercut that misses.
Anderson using the Thai plumb to throw knees but Rackham has his back arched nicely, preventing the strike.
That's four minutes gone in the round.
Rackham working Anderson over with knees to the body.
Fantastic stuff here - a very entertaining period of action, which has drawn cheers from the crowd.
A short right from Rackham.
Anderson is working hard here but doesn't seem to be able to control effectively, up against the cage.
Anderson tries to work over Rackham's body with a swooping hook but it only glances the target.
Rackham with the Thai clinch. He's looking to land a big knee but he's not managed it this time.
Rackham tries to land knees in the clinch but Anderson avoids the damage to the body.
Anderson tries to land a knee to the body but he is off balance and Rackham avoids it.
Anderson lands a right hand that snaps the head of Rackham backwards.
Anderson blocks an elbow strike from Rackham.
Rackham lands an elbow inside that Anderson shrugs off.
Rackham tries to stall but Anderson uses the opportunity to gain a better position.
Kneeeeees! The crowd are calling for knees to the body. Rackham obliges.
Anderson is working hard here but doesn't seem to be able to control effectively, up against the cage.
Rackham throws a punch but it's blocked by Anderson.
And thats the end of the round the fighters go back to their corners.
A close second round but Brownie Anderson will probably get the nod - 10:9.
The cut man is working on Brownie Anderson's cut.
The minute break is over - no more time for sponges and pep talks - back to the action!
Rackham connects with a jab, followed by a picture perfect straight right that sends Anderson to the canvas, out cold! What a finish by Rackham!
Ladies and gentlemen, after 0:05 of round 3, we have a winner by way of KO (Punches). Jack Rackham!
Jack Rackham retains his middleweight title!
Jack Rackham seemed lost for words in his post fight interview but he remembered to thank his fans and directed everyone to his website.
|
|
|
|
|
|
|
|
|
|
|
|
|
|
|
|
|
|
|
|
|
|
|
| S |
C
A |
G |
S |
C
B |
G |
|
S |
C |
G |
|
energy
A | B |
|
hype
A | B |
|
pop
A | B |
|
mgr
A | B |
|
FIGHT
RATING
58% |
|
|
|
|
|
|
|
|
|
|

