 |
Highland Games 86 PBP Commentary |
Undercard bout
|
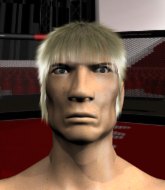
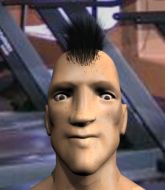
Coming up we have a bantamweight MMA rules bout between Yuki Masakazu (ranked 0 p4p, 0 weight class) and Carlos Lehder Rivas (ranked 0 p4p, 0 weight class). Masakazu comes to the cage accompanied by Sepultura - Attitude. Carlos Lehder Rivas is the more experienced fighter, so let's see if that makes a difference tonight.
 |
|
 |
| 225 cm
25
133 lbs
3 - 0 - 0 |
|
166 cm
25
130 lbs
3 - 3 - 0 |
Good takedowns
Basic striking
Granite chin |
|
Decent wrestler
Dangerous knees
Intelligent |
|
| |
|
Ladies and gentlemen. This fight is 3 rounds, in the bantamweight division.
Introducing the fighter to my left, fighting out of the red corner.
With a record of
3 - 0 - 0, fighting out of St Petersburg, Yuki Masakazu!
And introducing the fighter to my right, fighting out of the blue corner.
With a record of
3 - 3 - 0, fighting out of Rio de Janeiro, Carlos Lehder Rivas!
The judges for this bout are Donald Grub, Chris Edwards and Colin Fotheringham.

The bell rings for round one and we are underway!
Masakazu walks into a straight right hand from Lehder Rivas.
Masakazu darts in looking for a takedown but Lehder Rivas gets double underhooks and turns Masakazu into the cage.
Masakazu looks for a takedown but Lehder Rivas sprawls well.
Lehder Rivas tries to clinch but is not successful on this occasion.
Masakazu darts in looking for a takedown but Lehder Rivas gets double underhooks and turns Masakazu into the cage.
That's three failed takedown attempts in the round for Yuki Masakazu. That's going to take a lot out of him.
Masakazu shoots in for a takedown. "Ole!" shouts Lehder Rivas as he jumps to the side.
Lehder Rivas moves in looking to clinch but Masakazu pushes him off.
Lehder Rivas moves in looking to clinch but Masakazu pushes him off.
Masakazu seems to be moving with more speed, compared to his last bout. He must have been working on that in the gym.
Masakazu shoots in looking for a takedown but Lehder Rivas manages to keep the fight standing, pushing Masakazu's face into the canvas for good measure before circling away.
Masakazu misses with a takedown attempt
and Lehder Rivas counters with a nice uppercut.
Lehder Rivas tries to clinch but Masakazu is having none of it.
We've had a slow start to the round here - hopefully the action picks up.
Masakazu takes one to the chin there.

Masakazu gets tackled into the cage by Lehder Rivas. Lehder Rivas maintains the clinch.
Lehder Rivas gets double underhooks to prevent a takedown attempt from Masakazu.
Knees to the body from Lehder Rivas.

That's one minute gone in the round.
Lehder Rivas unloads a knee to the mid-section. Masakazu lets out a prehistoric sounding urrrrgh.
Lehder Rivas lands an uppercut.
A short right from Lehder Rivas on the inside.
Lehder Rivas scores with a shot to the side of Masakazu's head.
Lehder Rivas dictating the pace here, as the fighters clinch against the cage.
Knees in the clinch landing for Lehder Rivas.
Lehder Rivas landing knees to the body.
Lehder Rivas putting his Muay Thai to good use. He has Masakazu in a tight clinch and is doing some damage with knees to the body.
Lehder Rivas connects with a knee to the head.
Lehder Rivas makes some space for himself and lands an uppercut.
Lehder Rivas unloads a knee to the mid-section. Masakazu lets out a prehistoric sounding urrrrgh.
Wooooo! Give it up for these two warriors! They are putting on a show!
Lehder Rivas landing knees to the body.
Masakazu takes a knee right on the jaw!

That's two minutes gone in the round.
A nice right hand lands inside from Lehder Rivas.
Lehder Rivas unloads a knee to the mid-section.
Masakazu tries for a takedown but Lehder Rivas manages to get underhooks.
Lehder Rivas lands a shot to the body.
A nice left hand lands by Lehder Rivas.
A short right from Lehder Rivas.
Lehder Rivas tries to land a knee to the head but Masakazu blocks with his arms.
Masakazu takes a shot to the head.
Lehder Rivas unloads a knee to the mid-section. Masakazu lets out a prehistoric sounding urrrrgh.
Lehder Rivas working some nice short punches in the clinch.
Lehder Rivas lands a right uppercut that snaps the head of Masakazu backwards.
Lehder Rivas lands a short shot on the inside that snaps the head of Masakazu backwards.
Lehder Rivas scores a nice knee to the body.

That's three minutes gone in the round.
Lehder Rivas lands on the inside with an uppercut.
Lehder Rivas lands a knee to the body.
Masakazu fails to pull the fight into his guard.
Lehder Rivas misses with a knee to the head.
Lehder Rivas utilising his Muay Thai to score with a knee to the body.
Lehder Rivas lands with a quick shot inside that doesn't really do much damage.
Masakazu really does look like a pencil wearing a pair of gloves. Let's hope he has a gameplan to suit that ridiculous body shape.
Lehder Rivas lands punches inside but they're not really causing much damage.
Lehder Rivas makes some space for himself and lands an uppercut.
Lehder Rivas landing knees to the body. They look like they could hurt.
Lehder Rivas lands with a right to the head.
Lehder Rivas scores with an uppercut up the middle.
Lehder Rivas slows down the pace here.

That's four minutes gone in the round.
Lehder Rivas gets through Masakazu's defenses to land a nice punch to the side of the head.
We've seen a great period of action over the last minute or so - credit to both fighters for going all out!
Lehder Rivas unloads a knee to the mid-section.
Lehder Rivas lands with a left to the head.
Masakazu takes a knee right on the jaw!
Lehder Rivas misses with a knee strike.
Lehder Rivas lands a left hand that snaps the head of Masakazu backwards.
Lehder Rivas with a knee to the head.
Masakazu takes a knee right on the jaw!
The crowd applaud the fighters' efforts here as the round comes to an end.
Masakazu tries to pull guard but can't drag his opponent to the mat. Lehder Rivas just stands there and leans against the cage.
A short left from Lehder Rivas.
Knees to the body from Lehder Rivas.
Lehder Rivas lands a left hand.
And thats the end of the round the fighters go back to their corners.
Carlos Lehder Rivas dominated that round.
That's the end of the interval. I'm sure that seemed a lot quicker than a minute for our two fighters! Back to the action.

Lehder Rivas has Masakazu up against the cage in a clinch.
With the fighters clinched against the cage, Lehder Rivas creates a bit of distance for himself and scores with a nice uppercut.
Lehder Rivas unloads a knee to the mid-section. Masakazu lets out a prehistoric sounding urrrrgh.
Lehder Rivas lands a left hand that snaps the head of Masakazu backwards.
A short right hand to the side of the head by Lehder Rivas.
Lehder Rivas landing some nice looking knees to the body.
A short right from Lehder Rivas on the inside.
Masakazu drops down looking for an ankle pick but Lehder Rivas pulls his leg out and moves away.
Lehder Rivas has closed the distance and engaged Masakazu in a clinch.
Lehder Rivas lands a nice uppercut.
Lehder Rivas is trying to wear down his opponent with knees to the body.
Carlos Lehder Rivas seems to be working more effectively in the clinch in the fight so far.
The fans in attendance giving it up for the two fighters, who have really let it all hang out in the last minute or so!
A quick uppercut on the inside from Lehder Rivas.
That's one minute gone in the round.
Knees in the clinch landing for Lehder Rivas.
Lehder Rivas lands with a quick shot inside that doesn't really do much damage.
Lehder Rivas lands a shoulder strike that jolts his opponent's head backwards.
Masakazu tries to pull guard but Lehder Rivas won't allow it.
Lehder Rivas using the Thai plumb to throw knees but Masakazu has his back arched nicely, preventing the strike.
Lehder Rivas lands a shoulder strike.
Lehder Rivas lands a shoulder strike.
Lehder Rivas using the Thai clinch to land knees to the body.
Lehder Rivas throws a blind hook that connects with the side of Masakazus head.
Lehder Rivas looking to throw knees to the head but Masakazu is blocking nicely.
A short right from Lehder Rivas.
Lehder Rivas with an attempt at a knee that misses.
Lehder Rivas lands a hook to the side of the head.
That's two minutes gone in the round.
Fantastic stuff here - a very entertaining period of action, which has drawn cheers from the crowd.
Lehder Rivas using the Thai clinch to land knees to the body.
Lehder Rivas misses with a knee strike.
Lehder Rivas lands a nice uppercut.
Masakazu jumps guard but his hands slip and he falls flat on his back. Well, he's made himself look a right mug there, as Lehder Rivas walks away with a smile on his face. Masakazu gets slowly back to his feet and shakes his head.
That's three failed takedown attempts in the round for Yuki Masakazu. That's going to take a lot out of him.
Masakazu gets his takedown attempt stuffed easily
and Masakazu takes a counter punch right on the button for his troubles.

Masakazu is rocked!
Masakazu doesn't succeed with the takedown
The fighters are starting to get sweaty, which will make takedowns a bit more tricky.
enabling Lehder Rivas to counter with a crisp jab.
Oh Masakazu is still all over the place! His legs are completely gone! Will he be able to recover?!!
Lehder Rivas closes the distance and pushes Masakazu back into the cage.
Lehder Rivas scores with a shoulder strike.
Lehder Rivas gets through Masakazu's defenses to land a nice punch to the side of the head.
Lehder Rivas lands a body shot in the clinch.
Lehder Rivas softening up his opponent with strikes, against the cage.
Lehder Rivas landing knees to the body. They look like they could hurt.
Lehder Rivas lands a nice uppercut.
Lehder Rivas lands a big knee! That's hurt Masakazu! Oh, he's all over the place! Lehder Rivas lands another knee that sends Masakazu to the floor and the referee steps in to end the fight!
Ladies and gentlemen, after 2:46 of round 2, we have a winner by way of TKO (Strikes). Carlos Lehder Rivas!
Carlos Lehder Rivas bigged himself up after the win. The crowd seemed to love it.
In defeat, Yuki Masakazu stepped up to the mic, saying 'He got lucky! I'll be back!'.
|
|
|
|
|
|
|
|
|
|
|
|
|
|
|
|
|
|
|
|
|
|
|
| S |
C
A |
G |
S |
C
B |
G |
|
S |
C |
G |
|
energy
A | B |
|
hype
A | B |
|
pop
A | B |
|
mgr
A | B |
|
FIGHT
RATING
72% |
|
|
|
|
|
|
|
Undercard bout
|
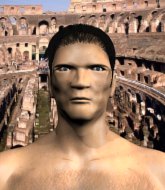
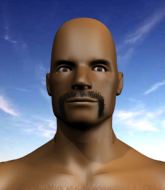
Coming up we have a bantamweight MMA rules bout between Stuart Dew (ranked 0 p4p, 0 weight class) and Neil Herstag (ranked 0 p4p, 0 weight class). Stuart Dew has the edge in experience - let's see if he can make that count tonight.
 |
|
 |
| 168 cm
26
135 lbs
4 - 3 - 0 |
|
165 cm
25
141 lbs
3 - 2 - 0 |
Good wrestling
Brawler
Very strong |
|
BJJ White Belt
Excellent MT
Determined |
|
| |
|
Ladies and gentlemen. This fight is 3 rounds, in the bantamweight division.
Introducing the fighter to my left, fighting out of the red corner.
With a record of
4 - 3 - 0, fighting out of Sydney, Stuart Dew!
And introducing the fighter to my right, fighting out of the blue corner.
With a record of
3 - 2 - 0, fighting out of Rio de Janeiro, Neil Herstag!
The judges for this bout are Andrew Berry, James Atkins and Steven Brown.
The bell rings for round one and we are underway!
Herstag rushes Dew and presses him up against the cage.
Herstag tries a body shot but Dew blocks it.

Dew has picked Herstag up - he's going for a ride! Dew dumps his opponent to the mat with a thud and settles into half guard.
Dew definitely looks more muscular than last time we saw him fight.
Dew passes into side control, despite Herstag's attempt to control the position.
Herstag is trying to get back to half guard.
A lull in the action here as Dew stalls from top position.

Dew thinks about going for a far side armbar but bails out and retains the dominant position instead.
We've had a slow start to the round here - hopefully the action picks up.
Dew goes for an armbar here - this could be all over! But no, Herstag has escaped beautifully and is now on top in side control! Oh, that's unlucky for Dew but great work by Herstag.
The ref warns both fighters not to hold the cage as they work up against the meshing.
That's one minute gone in the round.
Herstag in side control, trying to ground and pound but not landing this time.
Dew isn't going anywhere.
Herstag working away.
Dew manages to get one leg in to regain half guard.

Herstag looking for a kimura but he'll have to free his other leg if he wants to finish that. Perhaps he's just using it as a distraction technique.
Dew keeping his head moving to avoid the ground and pound.
That's two minutes gone in the round.
Well. There's a bit of a lull in the action here and the crowd are starting to get restless.
Dew moves his hips nicely and gets into full guard.
Dew looking for submissions from the bottom here. Moving his hips around, possibly looking for an armbar.
Herstag trying to control the position from guard on top but Dew is wriggling around, looking for whatever he can.

Dew is edging up against the cage. He's using the cage to get back to his feet. Nice work there - the fighters are clinched.
That's three minutes gone in the round.
Dew goes for a takedown in the clinch but Herstag prevents it.
Herstag digs a right hand underneath Dew's ribcage. Dew let out a lung full of air as it connected.
Dew looking for a takedown.
Dew tries to pull guard but Herstag holds him up against the cage and eventually Dew drops back down to his feet.
That's three failed takedown attempts in the round for Stuart Dew. That's going to take a lot out of him.
Dew working hard to break the clinch.
Herstag throws a head punch that misses.
Dew dodges an elbow strike from Herstag.
Dew wants a takedown.
Herstag scores with an uppercut up the middle.
Herstag manages to get underhooks and slows down the pace for a moment.
That's four minutes gone in the round.
Herstag lands a left hand.
With the fighters clinched against the cage, Herstag creates a bit of distance for himself and scores with a nice uppercut.
Dew prevents a body shot from Herstag.
Herstag will no doubt start fighting again in a minute but for now he's just having a little rest, leaning Dew up against the cage.
Herstag tried to land a shot to the body but connects with Dew's elbow.
Herstag misses with an elbow strike.
Herstag misses with the head strike.
The crowd thankful this round is nearly over.
Herstag gets double underhooks to prevent a takedown attempt from Dew.
Herstag misses with a punch on the inside.
And thats the end of the round the fighters go back to their corners.
A close round but Neil Herstag will probably get the nod.
OK. That's time! The bell goes and we're back to the action.
Dew changes levels and drives through with a really nice takedown into side control. Herstag looks really pissed at himself for not defending that better.
Dew is working for what looks like an arm triangle here. Herstag is trying to escape and Dew transitions quickly into an armbar! He's slapped it on tight and Herstag is forced to tap! Nice work there by Dew! Very nice indeed!
Ladies and gentlemen, after 0:23 of round 2, we have a winner by way of Submission (Armbar). Stuart Dew!
After the big win, Stuart Dew made sure to do all the important stuff like thanking his sponsors Voodoo Nutrition and telling the interviewer how much he loves him.
|
|
|
|
|
|
|
|
|
|
|
|
|
|
|
|
|
|
|
|
|
|
|
| S |
C
A |
G |
S |
C
B |
G |
|
S |
C |
G |
|
energy
A | B |
|
hype
A | B |
|
pop
A | B |
|
mgr
A | B |
|
FIGHT
RATING
35% |
|
|
|
|
|
|
|
Undercard bout
|
Coming up we have a lightweight MMA rules bout between Tom Hebster (ranked 0 p4p, 0 weight class) and Monster Old (ranked 0 p4p, 0 weight class). The atmosphere really building for this one as we go over to our ring announcer for the fighter introductions!
 |
|
 |
| 180 cm
26
160 lbs
4 - 0 - 0 |
|
170 cm
25
153 lbs
4 - 0 - 0 |
BJJ White Belt
Excellent MT
Good chin |
|
Good wrestler
Basic striking
Powerful |
|
| |
|
Ladies and gentlemen. This fight is 3 rounds, in the lightweight division.
Introducing the fighter to my left, fighting out of the red corner.
With a record of
4 - 0 - 0, fighting out of London, Tom Hebster!
And introducing the fighter to my right, fighting out of the blue corner.
With a record of
4 - 0 - 0, fighting out of Rio de Janeiro, Monster Old!
The judges for this bout are James Glass, Chris Edwards and Steven Brown.
The bell rings for round one and we are underway!
Old tries to shoot in for a takedown. He's got hold of a leg but Hebster swivels and escapes.

Old bobs and weaves into range and then changes levels and scores with a nice takedown into side control.
Old tries for an arm triangle. That looks pretty tight to me. Is this one over!?! Possibly, maybe, no Old has let go of the choke. Obviously it wasn't as tight as we thought!
Old is looking to finish here, going for an Americana. Hebster knows the correct defense though, so he's OK.
Old is trying to get an arm triangle but Hebster is defending well.
We've had a slow start to the round here - hopefully the action picks up.
Old is trying to get an arm triangle but Hebster is defending well.
The fighters are pressed up against the cage, both looking to find a bit of space to work.
That's one minute gone in the round.
Old has an Americana. Hebster didn't react quickly enough there and he's in big trouble now! He tries to squirm out but is forced to tap! Old is delighted and gyrates in front of the ring girls. They seem to like the attention - it'll be interesting to see if Old hooks up with any of them at the after show party.
Ladies and gentlemen, after 1:26 of round 1, we have a winner by way of Submission (Americana). Monster Old!
Monster Old gave a mention to OG King Of Laundry (Fast Response 80%) in his post fight interview. That will please them (and hopefully generate some sales).
|
|
|
|
|
|
|
|
|
|
|
|
|
|
|
|
|
|
|
|
|
|
|
| S |
C
A |
G |
S |
C
B |
G |
|
S |
C |
G |
|
energy
A | B |
|
hype
A | B |
|
pop
A | B |
|
mgr
A | B |
|
FIGHT
RATING
54% |
|
|
|
|
|
|
|
Undercard bout
|
Coming up we have a bantamweight MMA rules bout between Claudius Calaeabius (ranked 0 p4p, 0 weight class) and Tyresse Thomson (ranked 0 p4p, 0 weight class). Tyresse Thomson will no doubt be trying to keep this one on the feet, where he has a distinct advantage.
 |
|
 |
| 150 cm
26
145 lbs
5 - 2 - 0 |
|
175 cm
26
127 lbs
4 - 0 - 0 |
Good wrestling
Brawler
Good chin |
|
BJJ White Belt
Excellent MT
Determined |
|
| |
|
Ladies and gentlemen. This fight is 3 rounds, in the bantamweight division.
Introducing the fighter to my left, fighting out of the red corner.
With a record of
5 - 2 - 0, fighting out of Los Angeles, Claudius Calaeabius!
And introducing the fighter to my right, fighting out of the blue corner.
With a record of
4 - 0 - 0, fighting out of London, Tyresse Thomson!
The judges for this bout are James Glass, Chris Edwards and James Ackerman.
The bell rings for round one and we are underway!
Calaeabius goes for a double leg but Thomson avoids the attempt and the two fighters end up clinched against the cage as Thomson continues to drive forward.

Calaeabius closes the distance and presses his opponent up against the cage.
Thomson gets underhooks to prevent Calaeabius's takedown attempt.
Thomson fails to land with a short punch on the inside.
Calaeabius works for the underhooks and manages to get a trip takedown into guard.
Calaeabius in full guard, throwing the ground and pound. No damage this time.
Thomson utilising some decent striking defenses from the guard, preventing the ground and pound.
Thomson preventing the ground and pound from doing any damage.
Calaeabius really is a fat lump.
Thomson wants to stand up but Calaeabius is controlling him.
Calaeabius postures up in Thomson's guard and throws a big left but Thomson blocks it.
We've had a slow start to the round here - hopefully the action picks up.
Calaeabius trying to land body shots but he keeps hitting the mat.
Thomson really doesn't want to stay on the ground with Calaeabius. If he can't get it back to his feet, it's only a matter of time before he'll be tapping out.
Calaeabius is working the ground and pound from guard. He might want to try advancing position though to get more of an impact.
Calaeabius is looking to work some ground and pound but Thomson has wrist control.
That's one minute gone in the round.
Thomson preventing the ground and pound from doing any damage.
Calaeabius stands up over Thomson, holding his feet. He dives back in and lands a decent shot to the head.
Calaeabius landing some decent shots from guard.
Calaeabius throwing strikes but missing.
Thomson avoiding any damage from the ground and pound.
Calaeabius prevents Thomson from getting back to his feet.
Calaeabius scoring with some ground and pound.
Calaeabius with a couple of shots to the head there. Not particularly brutal.
Calaeabius loading up with the ground and pound but he's missing more than he's landing in this flurry.
That's two minutes gone in the round.
Thomson preventing the ground and pound from doing any damage.
A big thud reverberates around the arena there as Calaeabius accidentally thumps the mat. Hopefully he's not broken his hand.
If this pace continues, the referee will definitely step in and force a standup.
Calaeabius working some ground and pound from guard but it's not doing any damage.
Calaeabius with a flurry of punches that miss.

The ref stands the fighters back up due to a lack of activity.
Calaeabius gets to the clinch - let's see what his plan is here.
Calaeabius looking for a takedown.
That's three failed takedown attempts in the round for Claudius Calaeabius. That's going to take a lot out of him.
Thomson misses with a hook from the clinch.
Calaeabius tries for a takedown. No joy.
Thomson stops a takedown attempt from Calaeabius.
Thomson misses with a hook to the ribs.
Thomson prevents a takedown attempt there.
A right handed body shot lands from Thomson.
Thomson is a painfully thin specimen of a man. You do wonder whether a good body kick would snap him clean in two.
Calaeabius has hold of one of Thomson's legs. Thomson is fighting the takedown attempt but Calaeabius gets the trip and lands the takedown into guard.
Thomson utilising some decent striking defenses from the guard, preventing the ground and pound.
That's three minutes gone in the round.
Calaeabius in full guard, throwing the ground and pound. No damage this time.
Calaeabius has been looking to land a fair amount of strikes on the ground. He might be looking to soften his opponent up in order to work for a submission.
The fighters are going at a pretty good pace and they're both starting to sweat now.
Thomson avoiding any damage from the ground and pound.
Calaeabius throwing strikes from guard but Thomson blocks nicely.
Thomson keeping full guard, as Calaeabius tries to pass.
Calaeabius is looking to work some ground and pound but Thomson has wrist control.
Calaeabius throws a big elbow that misses.
Calaeabius with a nice head shot there.
Calaeabius might be looking to lock onto one of his opponent's long limbs for a submission, whilst we're on the ground.
Calaeabius trying to land body shots but he keeps hitting the mat.
Calaeabius trying to land body shots but he keeps hitting the mat.
That's four minutes gone in the round.
The crowd are showing their displeasure at the lack of action as loud boos ring out around the arena.
Thomson avoiding any damage from the ground and pound.
Calaeabius throws a big right hand that misses.
The referee has stepped in and called for a break in the action. We'll restart on the feet.
Calaeabius instigates a clinch.
Calaeabius is looking for a takedown.
An uppercut on the inside fails to land for Thomson.
Calaeabius is looking for a takedown up against the cage. Thomson gets underhooks though and prevents the takedown attempt.
Thomson lands an uppercut.
Calaeabius is trying to work for a single leg takedown but Thomson pulls him back up using the underhooks.
Calaeabius wants to take the fight to the mat but Thomson manages to get underhooks and keep the fight in the clinch.
Calaeabius tries for a takedown but Thomson manages to get underhooks.
Calaeabius is breathing heavily.
Calaeabius is trying to drag Thomson to the mat but Thomson just about manages to keep his footing. He used the cage to his advantage there.
Thomson softening up his opponent with strikes, against the cage.
The crowd thankful this round is nearly over.
Thomson stops a takedown attempt from Calaeabius.
Calaeabius blocks a body shot from Thomson.
Calaeabius tries to score a body lock takedown but Thomson shows good agility there to stay on his feet.
And thats the end of the round the fighters go back to their corners.
Claudius Calaeabius dominated that round.
Well, the break between rounds is over. Let's get back to the scrappin!
The fight moves into the clinch position.
Thomson has a couple of punches blocked by Calaeabius.
A short uppercut from Thomson.
A head punch blocked on the inside by Calaeabius.
Calaeabius managing to block the knees to the body from Thomson.
Thomson works for underhooks and lands a body shot in the process.
Calaeabius goes for a takedown attempt but Thomson pushes him away and we're back to fighting at a distance.
Thomson closes the distance and pushes Calaeabius back into the cage.
Thomson pushes Calaeabius back against the cage and lands a hook to the side of the head.
Thomson lands with a good tight uppercut to the head.
Thomson misses with a shot to the kidneys.
We've had a slow start to the round here - hopefully the action picks up.
Thomson lands a right hand that snaps the head of Calaeabius backwards.
Calaeabius has a body lock and is looking for a takedown. Thomson is bouncing around trying to prevent the takedown and somehow he has indeed managed to stay on his feet.
Thomson misses with some punches.
Calaeabius works for the underhooks and manages to get a trip takedown into guard.
The crowd are loving this. Great action here.
Calaeabius throwing shots from guard but he's hitting more mat than opponent.
Thomson wants to get back to his feet but Calaeabius is in a dominant position and won't allow it.
That's one minute gone in the round.
Calaeabius throwing strikes from guard but Thomson blocks nicely.
Calaeabius with a flurry of punches that miss.
Calaeabius stops Thomson from standing up.
Calaeabius postures up in Thomson's guard and throws a big left but Thomson blocks it.
The ref warns both fighters not to hold the cage as they work up against the meshing.
Calaeabius throws a big right hand that misses.
The referee claps his hands together and tells the fighters to work.
Calaeabius lands a couple of decent looking shots.
Calaeabius with a flurry of punches that miss.
A big thud reverberates around the arena there as Calaeabius accidentally thumps the mat. Hopefully he's not broken his hand.
The ref stands the fighters back up due to a lack of activity.
That's two minutes gone in the round.
The crowd are hurling abuse towards the fighters... You can hardly blame them though because there isn't a lot going on in the fight.
The fight moves into the clinch position.
Calaeabius looking for a takedown.
That's three failed takedown attempts in the round for Claudius Calaeabius. That's going to take a lot out of him.
With the fighters clinched against the cage, Thomson creates a bit of distance for himself and scores with a nice uppercut.
Thomson lands a short shot on the inside that snaps the head of Calaeabius backwards.
Thomson lands with a right to the head.
Thomson tries to land a shot to the body but it's blocked.
Thomson lands with a good tight uppercut to the head.
Calaeabius is working on a leg, looking for a takedown but Thomson is defending well.
Calaeabius goes for a takedown attempt but Thomson pushes him away and we're back to fighting at a distance.
Thomson moves into range and clinches up with Calaeabius.
Thomson is trying to wear down his opponent with knees to the body.
Both fighters are absolutely exhausted here.
Thomson stops a takedown attempt from Calaeabius.
Thomson lands a hook to the side of the head.
Calaeabius tries to score a body lock takedown but Thomson shows good agility there to stay on his feet.
Thomson lands a hook that snaps the head of Calaeabius backwards.
Still in the clinch, Thomson scores with a nice short uppercut.
That's three minutes gone in the round.
A short uppercut from Thomson.
Thomson pushes Calaeabius back against the cage and lands a hook to the side of the head.
The step up in weight doesn't seem to be a problem for Thomson. He's performing admirably here against the bigger man.
A right handed body shot lands from Thomson.
Thomson lands punches inside but they're not really causing much damage.
Thomson misses the knee to the body. Nice hip positioning from Calaeabius.
Thomson lands a shoulder strike.
Calaeabius is looking for a takedown up against the cage. Thomson gets underhooks though and prevents the takedown attempt.
A short right hand to the side of the head by Thomson.
Calaeabius is trying to work for a single leg takedown but Thomson pulls him back up using the underhooks.
Calaeabius is looking for a takedown.
A nice right hand lands inside from Thomson.
A short right from Thomson.
Thomson lands with a short punch from the clinch.
The fans in attendance giving it up for the two fighters, who have really let it all hang out in the last minute or so!
Calaeabius wants to take the fight to the mat but Thomson manages to get underhooks and keep the fight in the clinch.
Thomson makes some space for himself and lands an uppercut.
Thomson scores with an uppercut up the middle.
A short left from Thomson.
Thomson has been looking to improve his clinch game in recent weeks. Calaeabius seems to have the measure of him in the clinch so far, so let's see if Thomson can turn it around.
Thomson lands a left hand that snaps the head of Calaeabius backwards.
Thomson lands a left hand that snaps the head of Calaeabius backwards.
That's four minutes gone in the round.
Thomson lands a shoulder strike.
Still in the clinch, Thomson scores with a nice short uppercut.
Thomson trying to land knees to the body.
Thomson scores with a nice hook to the head.
Thomson lands a body punch - he's looking to wear down Calaeabius.
Thomson lands on the inside with an uppercut.
A right hand to the body from Thomson.
Thomson lands a hook to the side of the head.
A body shot lands from Thomson.
Thomson lands a body shot.
Calaeabius is working for a takedown up against the cage. He can't get it on this occasion though.
A quick uppercut on the inside from Thomson.
Thomson lands with a left to the head.
Thomson lands on the inside with an uppercut.
Thomson misses the knee to the body. Nice hip positioning from Calaeabius.
The crowd applaud the fighters' efforts here as the round comes to an end.
Thomson working on landing some head shots here - that one got through nicely.
Thomson doesn't land with the attempted body shot.
Thomson prevents the takedown attempt.
Thomson throws a blind hook that connects with the side of Calaeabiuss head.
Calaeabius is trying to drag Thomson to the mat but Thomson just about manages to keep his footing. He used the cage to his advantage there.
And thats the end of the round the fighters go back to their corners.
Tyresse Thomson showed his class in that round. I'd imagine he'll take it on all the scorecards.
OK. That's time! The bell goes and we're back to the action. This is the final round!

Thomson gets a clinch.
Thomson lands a right uppercut that snaps the head of Calaeabius backwards.
Thomson lands with a light punch inside.
Thomson swings wildly with an uppercut but Calaeabius uses good head movement to avoid it.
Thomson swings away with an uppercut that misses.
Thomson has been the more effective fighter overall so far.
Thomson throws a punch but it's blocked by Calaeabius.
Calaeabius takes a shot to the head.
Thomson tries to land knees in the clinch but Calaeabius avoids the damage to the body.
A short right from Thomson.
Calaeabius on the defensive, avoiding the knees to the body.
We've had a slow start to the round here - hopefully the action picks up.
Thomson tries to work over Calaeabius's body with a swooping hook but it only glances the target.
A short right from Thomson on the inside.
Thomson lands with a right to the head.
Calaeabius has a body lock and is looking for a takedown. Thomson is bouncing around trying to prevent the takedown and somehow he has indeed managed to stay on his feet.
Thomson misses with a hook from the clinch.
The fans in attendance giving it up for the two fighters, who have really let it all hang out in the last minute or so!
Thomson lands a left hand that snaps the head of Calaeabius backwards.
Thomson lands a good knee to the midsection. Calaeabius won't want to take too many of those.
Both fighters are breathing heavily.
That's one minute gone in the round.
Thomson is pressed up against the cage. Calaeabius has hold of a leg and is looking to drag Thomson down to the mat. Thomson avoids the attempt though and has circled away. We're back to striking at a distance.
The fight moves into the clinch position.
Thomson lands with a right to the head.
Thomson is defending well against a takedown attempt.
That's three failed takedown attempts in the round for Claudius Calaeabius. That's going to take a lot out of him.
A nice right hand lands inside from Thomson.
Thomson lands a body punch in the clinch.
Thomson misses the knee to the body. Nice hip positioning from Calaeabius.
Thomson lands an uppercut.
Thomson scores with an uppercut up the middle.
Thomson lands with a good tight uppercut to the head.
Thomson throws a blind hook that connects with the side of Calaeabiuss head.
A hook to the body from Thomson.
Thomson throws a blind hook that connects with the side of Calaeabiuss head.
The crowd cheering loudly, showing their appreciation for the quality fight we're seeing here.
Thomson misses with a hook from the clinch.
Calaeabius is trying to work for a single leg takedown but Thomson pulls him back up using the underhooks.
Thomson pushes Calaeabius back against the cage and lands a hook to the side of the head.
Calaeabius is working for a takedown up against the cage. He can't get it on this occasion though.
A short uppercut from Thomson.
That's two minutes gone in the round.
A left hand lands to the body for Thomson.
Thomson is working Calaeabius over against the cage.
Thomson lands with a light punch inside.
A quick uppercut on the inside from Thomson.
Thomson scores with a nice hook to the head.
Calaeabius has dropped down and is looking to force the takedown but it's defended by Thomson after a bit of a struggle.
Thomson makes some space for himself and lands an uppercut.
Still in the clinch, Thomson scores with a nice short uppercut.
Thomson scores with a shoulder strike.
Calaeabius is rocked!
Thomson lands with a short shot to the head.
Oh Calaeabius is still all over the place! His legs are completely gone! Will he be able to recover?!!
With the fighters clinched against the cage, Thomson creates a bit of distance for himself and scores with a nice uppercut.
An uppercut to the body lands inside from Thomson.
Thomson lands a nice uppercut.
With the fighters clinched against the cage, Thomson creates a bit of distance for himself and scores with a nice uppercut.
Thomson makes some space for himself and lands an uppercut.
Calaeabius is looking to take this one to the mat.
A short body shot lands from Thomson as the two fighters clinch.
A quick uppercut on the inside from Thomson.
That's three minutes gone in the round.
A hook to the body from Thomson.
Thomson lands with a left to the head.
Thomson lands a short shot on the inside that snaps the head of Calaeabius backwards.
Thomson lands with a light punch inside.
Thomson lands a right uppercut that snaps the head of Calaeabius backwards.
Thomson throws a hook to the body. More of an arm punch but it's all scoring with the judges.
Thomson is leaning against Calaeabius and scores with a nice uppercut to the body.
Calaeabius's head jolts backwards as he takes an uppercut right on the button!
Thomson working Calaeabius over with knees to the body.
Tyresse Thomson seems to be working more effectively in the clinch in the fight so far.
Calaeabius takes a shot to the head.
Thomson lands a right hand.
Fantastic stuff here - a very entertaining period of action, which has drawn cheers from the crowd.
Thomson tries to throw a body punch but Calaeabius avoids it by throwing Thomson back against the cage.
A shot in the inside from Thomson.
Calaeabius goes for a takedown in the clinch but Thomson prevents it.
Thomson scores with a hook to the body.
Calaeabius takes a shot to the head.
That's four minutes gone in the round.
Thomson scores with a nice hook to the head.
Thomson lands with a quick shot inside that doesn't really do much damage.
Thomson lands a right hand.
Thomson misses with a punch to the body.
Calaeabius is looking for a takedown.
Thomson lands a right uppercut that snaps the head of Calaeabius backwards.
A shot in the inside from Thomson.
Thomson misses with a short punch on the inside.
Thomson prevents a takedown attempt there.
Calaeabius avoiding damage as Thomson throws knees to the body.
Thomson lands a shoulder strike that jolts his opponent's head backwards.
Thomson lands a hook that snaps the head of Calaeabius backwards.
The crowd applaud the fighters' efforts here as the round comes to an end.
Calaeabius wants to take the fight to the mat but Thomson manages to get underhooks and keep the fight in the clinch.
A nice left hand lands by Thomson.
Thomson tries to land a knee to the body but he is off balance and Calaeabius avoids it.
Thomson lands a shoulder strike that jolts his opponent's head backwards.
Thomson throws a hook to the body. More of an arm punch but it's all scoring with the judges.
And that's the end of the fight!
Tyresse Thomson comfortably won the final round on my scorecard.
I think Thomson has won this one but let's see whether the judges agree with me. Over to the ring announcer for the scorecards.
Ladies and gentlemen, after 3 rounds of action, we go to the scorecards for a decision.
Judge James Glass scores the fight 26:29
Judge Chris Edwards scores the fight 27:29
Judge James Ackerman scores the fight 27:29
In favor of your winner, by unanimous decision... Tyresse Thomson!
|
|
|
|
|
|
|
|
|
|
|
|
|
|
|
|
|
|
|
|
|
|
|
| S |
C
A |
G |
S |
C
B |
G |
|
S |
C |
G |
|
energy
A | B |
|
hype
A | B |
|
pop
A | B |
|
mgr
A | B |
|
FIGHT
RATING
73% |
|
|
|
|
|
|
|
Undercard bout
|
Coming up we have a middleweight MMA rules bout between Peter Green (ranked 0 p4p, 0 weight class) and Ney Schincariol (ranked 0 p4p, 0 weight class). Rumors backstage are that the fighters have been paid to keep it standing but we know that would never happen in MMA!
 |
|
 |
| 190 cm
26
170 lbs
5 - 2 - 0 |
|
188 cm
25
187 lbs
5 - 2 - 0 |
Good wrestling
Brawler
Granite chin |
|
BJJ Brown Belt
Brawler
Granite chin |
|
| |
|
Ladies and gentlemen. This fight is 3 rounds, in the middleweight division.
Introducing the fighter to my left, fighting out of the red corner.
With a record of
5 - 2 - 0, fighting out of Hilo, Peter Green!
And introducing the fighter to my right, fighting out of the blue corner.
With a record of
5 - 2 - 0, fighting out of Hilo, Ney Schincariol!
The judges for this bout are Donald Grub, James Atkins and James Glass.
The bell rings for round one and we are underway!
Schincariol tries a head kick but it misses.
Green ducks down and throws a hook to the body but Schincariol moves away.
Schincariol fails with a rather predictable takedown attempt.
Green throws a leg kick but Schincariol checks it.
Green shoots in for a double leg but Schincariol sprawls well. That's going to sap some energy.
Schincariol shoots in for a takedown. "Ole!" shouts Green as he jumps to the side.
Green connects with a single shot there.
We've had a slow start to the round here - hopefully the action picks up.
Schincariol with a poor takedown
and Green counters with a shoot takedown into half guard.
Peter Green has stuffed three takedown attempts in the round now. That's going to take a lot out of Ney Schincariol.
Schincariol moves his hips nicely and gets into full guard.
Green lands a couple of digs.
That's one minute gone in the round.
Green throws an elbow that misses. Schincariol uses the momentum to reverse the position. He's now in Green's guard. Nice move by Schincariol!

Schincariol won't allow Green to sweep him here.
Schincariol is pushing down on Green's leg trying to pass to half guard. Green is fighting to maintain full guard but Schincariol has managed to sneak the leg through.
Green is looking to improve his position.
Green wants to get back to full guard but Schincariol has mounted him!
Green holds on for dear life, controlling Schincariol's posture momentarily.
Schincariol throwing sloppy strikes here. Perhaps if he tightened up his striking from such a dominant position, he'd be able to finish easier.
Green really trying hard to get back to half guard here.
Green's coaches at English Top Team - THE Hybrid Gym (11 ELITE ) have been working on his defensive grappling in preparation for this fight so let's see if he can get out of this tricky position.
Green tries to hold on but Schincariol pushes him away.
That's two minutes gone in the round.
Green knows he needs to get back to his feet asap. He's simply no match for Schincariol on the ground.
Schincariol tries to control but Green wriggling away.
Schincariol has control of Green's right arm, working for a kimura. It's a bit of a token attempt though and Green regains control of the situation pretty easily.
Green tries to hold on but Schincariol postures up.
The ref warns both fighters not to hold the cage as they work up against the meshing.
Green is looking to get to half guard.
Schincariol throwing sloppy strikes, which aren't doing any damage.
That's three minutes gone in the round.
Schincariol manages to capitalize on a mistake by Green to take his back!
You can see the frustration on Green's face
He knows he is in trouble unless he improves his position sooner rather than later.
Green is breathing heavily.
Schincariol tries to keep control of the position but Green is staying busy.
Schincariol is looking for the choke from the back position but Green is controlling his hands well.
Green has his hands over his head blocking the strikes from Schincariol.
Green wants to control his opponent's hands but Schincariol gets his hands free.
Green avoids the strikes from Schincariol.
The fighters are starting to perspire pretty heavily.
Schincariol throwing lazy shots from the back mount that aren't doing any damage.
Schincariol controls the position.
Green covers up after that shot from Schincariol.
That's four minutes gone in the round.
Schincariol wants to control but Green is keeping busy.
Schincariol is working really hard to secure the rear naked choke. Green defends successfully for a significant amount of time. Both fighters are looking very determined.
Schincariol is looking to control Green but Green is wriggling around and keeping busy.
Green trying to control the hands but Schincariol won't let him.
Schincariol working for the choke.
Green tries to break free.
And thats the end of the round the fighters go back to their corners.
Ney Schincariol dominated that round.
The fighters' corners scream their final instructions, as the referee calls time. Here we go, back to the action!
Green looks to land a body kick but Schincariol moved away.
Some wild striking there from Schincariol.
Schincariol fails miserably with a takedown attempt.
Schincariol tries a switch kick but it misses it's target.
Schincariol fails with the takedown.
Green fails miserably with a takedown attempt.
We've had a slow start to the round here - hopefully the action picks up.
Schincariol darts in looking for a takedown but Green gets double underhooks and turns Schincariol into the cage.
Peter Green has stuffed three takedown attempts in the round now. That's going to take a lot out of Ney Schincariol.
Green throws a leg kick but Schincariol moved away.
Green closes the distance and presses his opponent up against the cage.
That's one minute gone in the round.
Green lands a hook that snaps the head of Schincariol backwards.
Green drops down looking for an ankle pick but Schincariol pulls his leg out and moves away.
Schincariol tries to close the distance and clinch up but Green swats him away and circles back towards the center.
Ney Schincariol is looking to throw some combinations by the looks of things.
Green closes the distance and clinches.
Green has a body lock and is looking for a takedown. Schincariol is bouncing around trying to prevent the takedown and somehow he has indeed managed to stay on his feet.
Green tried to land a shot to the body but connects with Schincariol's elbow.
Green really does look like a pencil wearing a pair of gloves. Let's hope he has a gameplan to suit that ridiculous body shape.
Schincariol blocks a body shot from Green.
Green turns his hips and lands a very nice judo throw into side control!
Both fighters are absolutely exhausted here.
Schincariol is trying to control Green's posture but Green avoids it.
Ney Schincariol has got the better of the ground game so far.
Schincariol is holding Green down, trying to stall.
Schincariol is trying to get back to half guard. He's pushing on Green's leg. He's managed it. Nice work.
That's two minutes gone in the round.
Green missing with the ground and pound from half guard.
Schincariol regains full guard. Nicely done.
Green throws a big right hand that misses.
Schincariol is working the butterfly guard. He manages to land a nice scissor sweep and is now in half guard on the top. Nice move.
We've seen a great period of action over the last minute or so - credit to both fighters for going all out!
Schincariol passes the guard and advances to mount!
Schincariol prevents Green from getting the reversal.
Green tries to lock up and control but Schincariol gives him a forearm to the face and pushes him away.
That's three minutes gone in the round.
The referee warns Green that he has to improve his position here as he takes two more clean shots to the head.
Green working to try and regain half guard.
Green tries to lock up and control but Schincariol gives him a forearm to the face and pushes him away.
Schincariol can't quite control the action as he would like just now, as Green is looking to escape.
Schincariol is in the full mount, landing strikes.
That's four minutes gone in the round.
A nice elbow there by Schincariol.
Schincariol avoids the attempt from Green to control.
Schincariol looking to secure an arm triangle but Green defends it well.
Schincariol trying to control but Green is having none of it.
Schincariol has been the more effective fighter overall so far.
The crowd thankful this round is nearly over.
And thats the end of the round the fighters go back to their corners.
A close second round but Ney Schincariol will probably get the nod - 10:9.
The corners get their ten second warning. Both fighters stand from their stools and stare eachother down, ready to get back to the action. This is the final round!
Green rushes forward with a series of wild hooks but Schincariol moves out of range and avoids them all easily.
Schincariol has his takedown stuffed
and Green counters into the clinch. Nicely done.
Schincariol misses with a punch on the inside.
Green makes some space for himself and lands an uppercut.
A short right from Green on the inside.
Green lands with a light punch inside.
Green drops to a knee looking for a takedown but Schincariol gets the underhooks and prevents it.
Green doesn't land with the attempted body shot.
We've had a slow start to the round here - hopefully the action picks up.
Schincariol wants to break the clinch but can't.
Green is looking to take this one to the mat.
Schincariol misses with a shot to the kidneys.
Both fighters are breathing heavily.
Green goes for a takedown in the clinch but Schincariol prevents it.
That's three failed takedown attempts in the round for Peter Green. That's going to take a lot out of him.
Schincariol prevents a body shot from Green.
That's one minute gone in the round.
Schincariol wants to take the fight to the mat but Green manages to get underhooks and keep the fight in the clinch.
Schincariol tries to break the clinch but Green is controlling the position.
Green gets the body lock takedown. After a quick scramble, Schincariol regains guard.
Green throwing strikes from guard but Schincariol blocks nicely.
The fighters are pressed up against the cage, both looking to find a bit of space to work.
Schincariol is working from a closed guard but he's struggling to control his opponent.
Schincariol preventing the ground and pound from doing any damage.
Schincariol trying to control the position.
Schincariol looking for submissions off his back, moving his hips, looking for an opening.
Schincariol looking to control the pace of the fight rather than finish it.
That's two minutes gone in the round.
Schincariol is looking to cinch up a triangle. Green throws the leg off to one side though and gets in tight to Schincariol's body to avoid the submission. Schincariol has instead reached around Green's neck and now has a guillotine! Oh, this is biiiig trouble! Schincariol arches his back and squeezes and forces the tap from his hapless opponent.
Ladies and gentlemen, after 2:22 of round 3, we have a winner by way of Submission (Guillotine). Ney Schincariol!
|
|
|
|
|
|
|
|
|
|
|
|
|
|
|
|
|
|
|
|
|
|
|
| S |
C
A |
G |
S |
C
B |
G |
|
S |
C |
G |
|
energy
A | B |
|
hype
A | B |
|
pop
A | B |
|
mgr
A | B |
|
FIGHT
RATING
47% |
|
|
|
|
|
|
|
Undercard bout
|
Coming up we have a lightweight MMA rules bout between Tim Woods (ranked 0 p4p, 0 weight class) and Chester Emerson (ranked 0 p4p, 0 weight class). Emerson has chosen Inner Circle - Bad Boys as his entrance music. Tim Woods has the edge in experience - let's see if he can make that count tonight.
 |
|
 |
| 185 cm
27
154 lbs
9 - 4 - 1 |
|
177 cm
26
160 lbs
5 - 1 - 1 |
BJJ White Belt
Excellent MT
Cardio machine |
|
Good wrestler
Counter fighter
Powerful |
|
| |
|
Ladies and gentlemen. This fight is 3 rounds, in the lightweight division.
Introducing the fighter to my left, fighting out of the red corner.
With a record of
9 - 4 - 1, fighting out of London, Tim Woods!
And introducing the fighter to my right, fighting out of the blue corner.
With a record of
5 - 1 - 1, fighting out of Las Vegas, Chester Emerson!
The judges for this bout are Daniel Bishop, Sam Margolis and Donald Grub.
The bell rings for round one and we are underway!
The fight stays on the outside here - Emerson looks like he's thinking about clinching though.
Emerson uses some good footwork to avoid the body shot by Woods.
Woods wants to clinch.
Woods throws a hook to the body but it doesn't connect.
It seemed like Emerson was going to counter with the hook but didn't fully commit to it.
Woods ducks down and throws a hook to the body but Emerson moves away.
Emerson doesn't react quick enough there as he takes a shot to the body.
Woods scores with a decent looking hook.
Woods fakes high and swings low for a body shot but Emerson manages to avoid it.
Woods throws a shot to the body.
We've had a slow start to the round here - hopefully the action picks up.
Emerson is looking to clinch but Woods is avoiding it.
Woods misses with a body shot. Nice footwork from Emerson.
Emerson tries to clinch up but Woods circles away and keeps his distance.
Woods paws at his opponent with the jab and then lunges in with a straight, right on the button.
Emerson keeping a good distance there, avoiding the body shot.
Emerson wants to counter the offense by Woods and move into the clinch position.
That's one minute gone in the round.
Nice body punch from Woods.
Emerson avoids the body shot from Woods.
Tim Woods seems to be the more aggressive standup fighter in this bout.
Woods takes a step towards his opponent and connects with a left hand, before circling away.
Emerson is looking to clinch.
Emerson walks into a left hand.
Emerson on the wrong end of a nice hook.
Woods scores with a reasonable looking shot to the body. Emerson doesn't seem bothered though.
Emerson takes a shot right to the liver - Bas would have been proud of that punch.
Emerson slips a jab and a cross from Woods.
Emerson tries to clinch but is not successful on this occasion.
Emerson clinches.
A head punch blocked on the inside by Emerson.
This is a great period of action - very entertaining stuff!
Emerson takes a shot to the head.
Woods swings away with an uppercut that misses.
Woods throws a head punch that misses.
Woods really does look like a pencil wearing a pair of gloves. Let's hope he has a gameplan to suit that ridiculous body shape.
Emerson's head jolts backwards as he takes an uppercut right on the button!
An uppercut on the inside fails to land for Emerson.
That's two minutes gone in the round.
Nice body punch from Woods - that landed with a thud.
Emerson misses with a hook from the clinch.
Emerson misses with a hook from the clinch.
Woods misses with the head strike.
Woods blocks an uppercut.
Woods misses with the head strike.
Woods lands with a left to the head.
Woods softening up his opponent with strikes, against the cage.
Woods lands a nice shot to the body.
Emerson lands a right hand.
Woods tries to throw a body punch but Emerson avoids it by throwing Woods back against the cage.
A head punch blocked on the inside by Emerson.
Woods misses with a shot to the kidneys.
Woods misses with some punches.
Woods working aggressively here.
Emerson misses with a hook from the clinch.
Emerson lands with a short head shot on the inside.
Emerson blocks a punch to the side of the head.

Woods breaks the clinch and we're back to striking at distance.
Woods scores with a hook.
We've been told by Woods's head coaches at The Highland Gym that he's been working on his takedown defense in preparation for this fight.
Emerson tries to clinch there but Woods circles away.
That's three minutes gone in the round.
Woods throws a jab, cross combination which is slipped
and Emerson counters by clinching up.
Woods working aggressively here.
Woods's head jolts backwards as he takes an uppercut right on the button!
Woods lands a hook that snaps the head of Emerson backwards.
Woods doesn't land with the attempted body shot.
Emerson working on landing some head shots here - that one got through nicely.
A head punch on the inside from Woods fails to land.
Woods blocks a couple of punches on the inside.
Woods struggles to land a body shot inside as Emerson controls his hands.
Woods misses with a hook to the ribs.
Woods blocks an uppercut.
Emerson blocks a punch to the side of the head.
An uppercut on the inside fails to land for Emerson.
Woods tries to throw a body punch but Emerson avoids it by throwing Woods back against the cage.
Woods swings wildly with an uppercut but Emerson uses good head movement to avoid it.
Woods misses with a punch on the inside.
Woods scores with a nice hook to the head.
Woods misses with a hook from the clinch.
Woods blocks an uppercut.
Emerson lands a right uppercut that snaps the head of Woods backwards.
We've seen a great period of action over the last minute or so - credit to both fighters for going all out!
Emerson throws a punch but it's blocked by Woods.
That's four minutes gone in the round.
Woods swings away with an uppercut that misses.
Emerson working aggressively here.
Woods working some nice short punches in the clinch.
Woods lands with a left to the head.
Emerson throws a punch but it's blocked by Woods.
Woods scores with a nice hook to the head.
A short right hand to the side of the head by Emerson.
Woods working some nice short punches in the clinch.
Emerson swings wildly with an uppercut but Woods uses good head movement to avoid it.
Emerson is stalling here. The referee will be looking to step in if he doesn't pick up the pace.
Emerson has been looking to improve his clinch game in recent weeks. Woods seems to have the measure of him in the clinch so far, so let's see if Emerson can turn it around.
Woods has a couple of punches blocked by Emerson.
A nice right hand lands inside from Emerson.
Emerson misses with some punches.
Emerson scores with an uppercut up the middle.
The crowd applaud the fighters' efforts here as the round comes to an end.
Emerson fails to land with a short punch on the inside.
Woods fails to land with a short punch on the inside.
Woods working aggressively here.
Emerson misses with the head strike.
Emerson blocks a body shot from Woods.
Emerson misses with a hook from the clinch.
And thats the end of the round the fighters go back to their corners.
Tim Woods dominated that round.
That's the end of the interval. I'm sure that seemed a lot quicker than a minute for our two fighters! Back to the action.
Woods connects with a body shot.
Woods avoids the clinch attempt nicely.
Woods tries to land with a swinging hook to the body but Emerson was well out of range. Poor timing from Woods.
We are yet to see a takedown attempt from Emerson in the fight. On paper you would think he is the more dominant ground fighter so let's see if these unusual tactics pay off.
Woods swings and misses with a shot to the body
and Emerson counters by clinching up.
Emerson tries a shoulder strike but it doesn't do any damage.
A short left from Emerson.
Woods tries to throw a body punch but Emerson avoids it by throwing Woods back against the cage.
Emerson blocks a punch to the side of the head.
Woods has a couple of punches blocked by Emerson.
Emerson softening up his opponent with strikes, against the cage.
Woods lands a hook to the side of the head.
Emerson lands a right hand.
Woods lands a hook that snaps the head of Emerson backwards.
Woods throws a blind hook that connects with the side of Emersons head.
This is a great period of action - very entertaining stuff!
Woods working aggressively here.
Woods throws a head punch that misses.
Woods is trying to force a seperation but Emerson has the dominant position.
A quick uppercut on the inside from Emerson.
Emerson softening up his opponent with strikes, against the cage.
An uppercut on the inside fails to land for Emerson.
Emerson lands a short shot on the inside that snaps the head of Woods backwards.
That's one minute gone in the round.
A right hook to the body lands for Emerson.
Woods blocks a punch to the side of the head.
A head punch on the inside from Emerson fails to land.
Woods misses with the head strike.
Woods throws a head punch that misses.
Woods tries to throw a body punch but Emerson avoids it by throwing Woods back against the cage.
Woods tried to land a shot to the body but connects with Emerson's elbow.
Woods is really dominating this fight. Is there anything that Emerson can do to turn this around?
An uppercut on the inside fails to land for Emerson.
Woods misses with a punch to the body.
Woods misses with a body punch.
Woods working aggressively here.
Emerson blocks an uppercut.
Emerson taking a break, stalling in the clinch.
A short right from Emerson.
Woods misses with a punch on the inside.
Woods struggles to land a body shot inside as Emerson controls his hands.
Woods lands a hook that snaps the head of Emerson backwards.
Emerson blocks an uppercut.
Woods doesn't land with the attempted body shot.
Woods misses with the head strike.
Woods misses with the head strike.
Woods lands a left hand that snaps the head of Emerson backwards.
That's two minutes gone in the round.
Woods blocks a couple of punches on the inside.
Woods blocks a punch to the side of the head.
Emerson blocking some punches.
Emerson misses with a hook from the clinch.
Wooooo! Give it up for these two warriors! They are putting on a show!
Emerson makes some space for himself and lands an uppercut.
Woods lands a short shot on the inside that snaps the head of Emerson backwards.
Woods softening up his opponent with strikes, against the cage.
Woods fails to land with a short punch on the inside.
Woods misses with some punches.
Emerson scores with a hook to the body.
A short right from Emerson.
Woods misses with a punch on the inside.
Emerson lands a short shot on the inside that snaps the head of Woods backwards.
Woods is using his height advantage well here, landing a good percentage of his punches.
Emerson blocks a couple of punches on the inside.
Emerson misses with the head strike.
Woods misses with the head strike.
A hook to the body from Emerson.
Woods misses with a short punch on the inside.
Woods misses with the head strike.
A head punch on the inside from Woods fails to land.
A shot in the inside from Woods.
That's three minutes gone in the round.
An uppercut on the inside fails to land for Emerson.
An uppercut on the inside fails to land for Woods.
Emerson blocks a punch to the side of the head.
Emerson's corner are urging him to control the action in the clinch for a moment, rather than mount any serious offense. I'm sure the crowd appreciate those instructions... not.
A short left from Emerson.
Woods working aggressively here.
Woods's head jolts backwards as he takes an uppercut right on the button!
Woods working some nice short punches in the clinch.
Woods misses with a body punch.
Woods doesn't land with the attempted body shot.
Woods lands a left hand that snaps the head of Emerson backwards.
Woods throws a head punch that misses.
Tim Woods has scored more points in the clinch so far.
Woods throws a head punch that misses.
Woods misses with a body punch.
Woods gets through Emerson's defenses to land a nice punch to the side of the head.
A shot in the inside from Emerson.
Emerson misses with a punch on the inside.
Woods pushes off and circles away, back to the middle of the mat.
The crowd cheering loudly, showing their appreciation for the quality fight we're seeing here.
A big left from Woods misses.
That's four minutes gone in the round.
Woods circles away from the clinch attempt.
Woods throws a body punch but Emerson moves out of range.
Woods comes forward and lands a shot to the body, then darts back out of range.
Emerson wants to clinch.
Woods throws a body shot but no joy.
The fight stays on the outside here - Emerson looks like he's thinking about clinching though.
Woods throws a hard body shot but it just misses.
Emerson keeping a good distance there, avoiding the body shot.
Woods fakes high and swings low for a body shot but Emerson manages to avoid it.
Emerson keeping a good distance there, avoiding the body shot.
Emerson takes a punch right to his stomach. That took the wind out of him momentarily.
The crowd applaud the fighters' efforts here as the round comes to an end.
Woods fakes high and swings low for a body shot but Emerson manages to avoid it.
Emerson tries to counter by closing the distance.
Emerson tries to close the distance and clinch up against the cage but Woods paws at him with a jab and circles away.
And thats the end of the round the fighters go back to their corners.
Tim Woods dominated that second round.
The referee calls time. The cornermen exit stage left and we're back to business. And we move into the final round!
Emerson fails with an attempt to clinch.
Woods throws a hook to the side of Emerson's head but Emerson sees it coming and ducks under it beautifully.
Woods swings for the body but Emerson moves out of range.
Emerson is looking to clinch.
Woods seem to be loading up, looking for a big counter.
Emerson has closed the distance and engaged Woods in a clinch.
Emerson throws a punch but it's blocked by Woods.
Emerson prevents a body shot from Woods.
Woods struggles to land a body shot inside as Emerson controls his hands.
Emerson lands a nice shot to the body.
Woods's head jolts backwards as he takes an uppercut right on the button!
Woods misses with a shot to the kidneys.
Woods lands with a left to the head.
A shot in the inside from Woods.
We've had a slow start to the round here - hopefully the action picks up.
Woods swings away with an uppercut that misses.
Emerson lands a right hand that snaps the head of Woods backwards.
Woods tried to land a shot to the body but connects with Emerson's elbow.
Woods blocks an uppercut.
Woods tries a shoulder strike but it doesn't do any damage.
Woods tries to land a shot to the body but it's blocked.
Emerson misses with a punch on the inside.
That's one minute gone in the round.
Emerson lands with a light punch inside.
Woods misses with some punches.
Woods tried to land a shot to the body but connects with Emerson's elbow.
Woods tries a shoulder strike but it doesn't do any damage.
Woods swings away with an uppercut that misses.
Still in the clinch, Woods scores with a nice short uppercut.
A nice left hand lands by Woods.
Emerson lands with a short punch from the clinch.
A short right hand to the side of the head by Emerson.
Emerson lands with a quick shot inside that doesn't really do much damage.
Emerson pushes Woods back against the cage and lands a hook to the side of the head.
Emerson lands a hook to the side of the head.
Emerson tries a shoulder strike but it doesn't do any damage.
This has been an exciting period of action!
Emerson cracks Woods with a nice body shot.
Woods tries to work over Emerson's body with a swooping hook but it only glances the target.
Emerson misses with some punches.
Emerson lands a right uppercut that snaps the head of Woods backwards.
Emerson lands with a short head shot on the inside.
Woods blocks an uppercut.
Woods misses with a shot to the kidneys.
Woods swings away with an uppercut that misses.
That's two minutes gone in the round.
Emerson lands with a short head shot on the inside.
Woods lands a hook to the side of the head.
A short body shot lands from Woods as the two fighters clinch.
Emerson fails to land with a short punch on the inside.
Emerson tries a body shot but Woods blocks it.
A short uppercut from Emerson.
Woods is trying to push Emerson away but Emerson has him pressed against the cage, so he's going nowhere.
A short right from Woods on the inside.
Woods misses with the head strike.
Emerson blocks a couple of punches on the inside.
Emerson lands on the inside with an uppercut.
Emerson prevents a body shot from Woods.
A head punch blocked on the inside by Emerson.
Woods tried to land a shot to the body but connects with Emerson's elbow.
A head punch blocked on the inside by Emerson.
Woods blocks a punch to the side of the head.
Woods has a couple of punches blocked by Emerson.
Emerson is trying to slow down the pace of the fight but Woods is keeping busy.
Emerson swings away with an uppercut that misses.
Still in the clinch, Emerson scores with a nice short uppercut.
That's three minutes gone in the round.
Emerson lands a body punch in the clinch.
Emerson lands a hook to the side of the head.
Woods has a couple of punches blocked by Emerson.
Woods fails to land with a short punch on the inside.
Woods scores with a nice hook to the head.
Emerson blocks an uppercut.
Emerson lands a right uppercut that snaps the head of Woods backwards.
Emerson blocks an uppercut.
A head punch on the inside from Woods fails to land.
An uppercut on the inside fails to land for Woods.
Woods misses with the head strike.
Woods fails to land with a short punch on the inside.
Emerson scores with a shoulder strike.
Woods is rocked!

It looks like Tim Woods has been cut.
Woods misses with a hook from the clinch.
Oh Woods is still all over the place! His legs are completely gone! Will he be able to recover?!!
Emerson swings wildly with an uppercut but Woods uses good head movement to avoid it.
An uppercut on the inside fails to land for Woods.
Tim Woods is fighting for a decision here - he's started to take the cautious approach.
Emerson swings away with an uppercut that misses.
Woods seems to have got his legs back now.
Emerson has a couple of punches blocked by Woods.
A quick uppercut on the inside from Emerson.
Chester Emerson has stepped it up - he knows he needs a finish here!
That's four minutes gone in the round.
Fantastic stuff here - a very entertaining period of action, which has drawn cheers from the crowd.
Emerson lands with a short shot to the head.
A nice right hand lands inside from Emerson.
Woods doesn't land with the attempted body shot.
Woods misses with a hook from the clinch.
Woods working aggressively here.
Woods misses with a punch to the body.
Woods can't find room to land a body shot as Emerson controls the action.
Woods tries to break free but Emerson pushes him back against the cage.
Emerson misses with a punch on the inside.
Woods tries to throw a body punch but Emerson avoids it by throwing Woods back against the cage.
Emerson makes some space for himself and lands an uppercut.
Woods tries to land a shot to the body but it's blocked.
With the fighters clinched against the cage, Woods creates a bit of distance for himself and scores with a nice uppercut.
Emerson lands with a short shot to the head.
The crowd applaud the fighters' efforts here as the round comes to an end.
Woods misses with a hook from the clinch.
Woods lands a hook to the side of the head.
Emerson swings wildly with an uppercut but Woods uses good head movement to avoid it.
Emerson lands with a left to the head.
And that's the end of the fight!
Chester Emerson comfortably won the final round on my scorecard.
I think Woods has won this one but let's see what the judges have to say. Over to the ring announcer for the scorecards.
Ladies and gentlemen, after 3 rounds of action, we go to the scorecards for a decision.
Judge Daniel Bishop scores the fight 29:28
Judge Sam Margolis scores the fight 29:28
Judge Donald Grub scores the fight 29:28
In favor of your winner, by unanimous decision... Tim Woods!
Tim Woods seemed lost for words in his post fight interview but he remembered to thank his fans and directed everyone to his website.
|
|
|
|
|
|
|
|
|
|
|
|
|
|
|
|
|
|
|
|
|
|
|
| S |
C
A |
G |
S |
C
B |
G |
|
S |
C |
G |
|
energy
A | B |
|
hype
A | B |
|
pop
A | B |
|
mgr
A | B |
|
FIGHT
RATING
79% |
|
|
|
|
|
|
|
Undercard bout
|
Coming up we have a heavyweight MMA rules bout between Vitaly Karelin (ranked 0 p4p, 0 weight class) and Sailele Lealofi (ranked 0 p4p, 0 weight class). Karelin comes to the cage accompanied by Russian National Anthem. Lealofi is bouncing up and down as he enters the arena, backed by Mata Mata Me. Vitaly Karelin has the better chin. Will he look to stand and bang today?
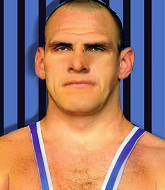 |
|
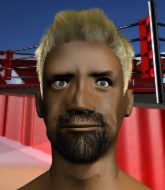 |
| 183 cm
26
286 lbs
4 - 1 - 0 |
|
199 cm
27
255 lbs
8 - 6 - 0 |
Good wrestling
Counter fighter
Granite chin |
|
Good takedowns
Basic striking
Knockout power |
|
| |
|
Ladies and gentlemen. This fight is 3 rounds, in the heavyweight division.
Introducing the fighter to my left, fighting out of the red corner.
With a record of
4 - 1 - 0, fighting out of London, Vitaly Karelin!
And introducing the fighter to my right, fighting out of the blue corner.
With a record of
8 - 6 - 0, fighting out of Helsinki, Sailele Lealofi!
The judges for this bout are Chris Edwards, Steven Brown and Andrew Berry.
The bell rings for round one and we are underway!
Lealofi ducks under an overhand right and circles away with a smile on his face.
Nice takedown defense from Karelin. No joy for Lealofi on that attempt.
Sailele Lealofi seems to be the more aggressive standup fighter in this bout.
Lealofi shoots for a takedown but Karelin saw that one coming a mile off and avoided it easily.
Lealofi looks for a takedown but Karelin sprawls well.
Vitaly Karelin has stuffed three takedown attempts in the round now. That's going to take a lot out of Sailele Lealofi.
Lealofi throws a looping left and ducks down for a takedown. He's got his arms around Karelin's waist but Karelin gets an underhook and avoids the takedown by throwing Lealofi off to one side.
Karelin throws a hook to the body but it doesn't connect.
Karelin ducks down and throws a hook to the body but Lealofi moves away.
Karelin definitely looks more muscular than last time we saw him fight.
Nice defenses there by Lealofi.
Karelin keeps the fight standing with a nice sprawl.
We've had a slow start to the round here - hopefully the action picks up.
Lealofi misses with a takedown attempt
and Karelin counters by clinching up.
Lealofi goes for a takedown in the clinch but Karelin prevents it.
Karelin lands a hook that snaps the head of Lealofi backwards.
Lealofi tries a shoulder strike but it doesn't do any damage.
Lealofi letting Karelin take a breather here.
That's one minute gone in the round.
Lealofi tries to score a body lock takedown but Karelin shows good agility there to stay on his feet.
Karelin throws a punch but it's blocked by Lealofi.
Karelin tries to land a shot to the body but it's blocked.
Lealofi wants to push off and get back to the center of the mat but Karelin has him pressed against the cage.
Lealofi is trying to pull guard but Karelin has him pressed against the cage.
Karelin misses the knee to the body. Nice hip positioning from Lealofi.
Lealofi has a body lock and is looking for a takedown. Karelin is bouncing around trying to prevent the takedown and somehow he has indeed managed to stay on his feet.
Karelin swings away with an uppercut that misses.
Lealofi scores with a hook to the body.
Lealofi tries to jump guard but he falls flat on his backside. Karelin smiles and moves away.
Nice takedown defense from Karelin. No joy for Lealofi on that attempt.
Karelin is trying to close the distance and clinch up, after that failed offence from Lealofi.
No luck for Lealofi with that takedown attempt.
Karelin wants to take advantage of his opponent's missed offense by moving into the clinch.
A looping hook to the body misses from Lealofi. Karelin does a little dance to reset his feet.
Horrible takedown attempt by Lealofi or perhaps it was just good defense by Karelin, which made it look bad.
That's two minutes gone in the round.
Karelin throws a body punch but Lealofi moves out of range.
Some bone on bone action there as Lealofi checks a low kick. Luckily it wasn't a particularly hard one.
Lealofi shoots in with a takedown attempt and he has Karelin pinned against the cage. Karelin gets the underhooks and manages to circle away.
Vitaly Karelin is looking to keep the fight on the feet at all costs.
Karelin rushes Lealofi and pushes him back against the cage in a clinch.
Lealofi is looking for a takedown up against the cage. Karelin gets underhooks though and prevents the takedown attempt.
Lealofi has Karelin pressed up against the cage and is working for takedown. Karelin manages to improve position though and keeps the fight standing.
Lealofi fails to pull guard.
A short right from Karelin on the inside.
Karelin lands on the inside with an uppercut.
Lealofi tries to take the fight to the ground by pulling guard but can't manage it.
The fans in attendance giving it up for the two fighters, who have really let it all hang out in the last minute or so!
Karelin controlling the action here for a moment.
That's three minutes gone in the round.
Karelin tries a body shot but Lealofi blocks it.
Lealofi has been looking to improve his clinch game in recent weeks. Karelin seems to have the measure of him in the clinch so far, so let's see if Lealofi can turn it around.
Karelin gets through Lealofi's defenses to land a nice punch to the side of the head.
Lealofi is trying to drag Karelin to the mat but Karelin just about manages to keep his footing. He used the cage to his advantage there.
Lealofi has Karelin pressed up against the cage and is working for takedown. Karelin manages to improve position though and keeps the fight standing.
Lealofi looks winded!
Lealofi is looking for a takedown.
Karelin cracks Lealofi with a nice body shot.
Karelin lands a right uppercut that snaps the head of Lealofi backwards.
Karelin gets through Lealofi's defenses to land a nice punch to the side of the head.

Lealofi is rocked!
With the two fighters working up against the cage, Karelin just misses with a elbow thrown towards Lealofi's brow.
Lealofi is still on wobbly legs! Can Karelin finish him?
Karelin has Lealofi pressed against the cage. Lealofi drops his hands and Karelin takes advantage by unloading with a massive hook that sends Lealofi tumbling to the canvas! Karelin rains down with more punches but Lealofi was already out! That's a highlight reel knockout for Karelin!
Ladies and gentlemen, after 3:56 of round 1, we have a winner by way of KO (Punch). Vitaly Karelin!
After the fight, Vitaly Karelin was humble in paying tribute to his opponent but made it clear he wants to go on to bigger and better things. It seemed to go down well with the crowd who cheered him loudly.
In defeat, Sailele Lealofi stepped up to the mic, saying 'I will come back stronger.'.
|
|
|
|
|
|
|
|
|
|
|
|
|
|
|
|
|
|
|
|
|
|
|
| S |
C
A |
G |
S |
C
B |
G |
|
S |
C |
G |
|
energy
A | B |
|
hype
A | B |
|
pop
A | B |
|
mgr
A | B |
|
FIGHT
RATING
36% |
|
|
|
|
|
|
|
Undercard bout
|
Coming up we have a light heavyweight MMA rules bout between James Helm (ranked 0 p4p, 0 weight class) and Renato Gracie (ranked 0 p4p, 0 weight class). Chooooooooon! I think Helm might be my favorite fighter, now he's come out to Spazzin - Gary Podunk. Over to our ring announcer for the fighter introductions!
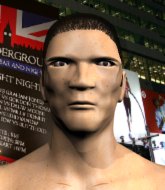 |
|
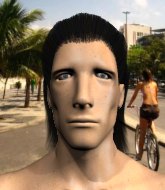 |
| 190 cm
28
215 lbs
12 - 5 - 0 |
|
178 cm
28
197 lbs
9 - 5 - 0 |
BJJ Blue Belt
Excellent boxer
KO power |
|
Good takedowns
Counter fighter
Granite chin |
|
| |
|
Ladies and gentlemen. This fight is 3 rounds, in the light heavyweight division.
Introducing the fighter to my left, fighting out of the red corner.
With a record of
12 - 5 - 0, fighting out of London, James Helm!
And introducing the fighter to my right, fighting out of the blue corner.
With a record of
9 - 5 - 0, fighting out of Las Vegas, Renato Gracie!
The judges for this bout are Andrew Berry, Phil Schofield and Donald Grub.
The bell rings for round one and we are underway!
Helm scores with a sloppy right hand. Gracie should have avoided that one.
Helm misses the jab.
Gracie tries a counter takedown but it's more of a dummy move, and he uses it to push himself away.
Helm smiles there as he lands a nice right hand right on the button.
Gracie avoids a punch combination nicely.
Helm connects with a lovely right hand, straight down the pipe.
Gracie takes a shot right to the bread basket.
Gracie steps to the side to avoid the strikes from Helm.
Gracie drops down looking to force a counter takedown but Helm defends it well.
Helm misses with a jab, cross combination.
Helm punishes Gracie's body with a nice straight punch.
Helm getting the better of the striking in that exchange.
Helm throws out a powerful jab.
We've seen a great period of action over the last minute or so - credit to both fighters for going all out!
Gracie dodges the punch combination from Helm.
Helm is using his reach advantage well here, landing the more effective single shots from range.
That's one minute gone in the round.
Gracie drops his hands momentarily and Helm takes advantage with a crisp shot to the head.
Helm misses with a body shot.
Gracie with the counter takedown but Helm avoids it easily.
Helm missing with a left hand there. Gracie was out of range so wasted energy throwing that one.
Gracie changes levels for a counter takedown but doesn't follow through with his attempt.
Helm throws a right and a left that Gracie avoids nicely.
Gracie is definitely looking for the counter takedowns here.
Helm throws a looping overhand right but Gracie ducks down to avoid it.
James Helm is looking to keep the fight on the feet at all costs.
Helm throws a hook but Gracie blocks it.
And Gracie tries to counter it with a takedown but Helm pushes his down on his head and steps out.
Helm is using his height advantage well here, landing a good percentage of his punches.
Gracie keeping his hands up high there, blocking the jab from Helm.
Helm throws a lazy right hand but Gracie sees it coming a mile off and sidesteps it easily.
Helm swinging wildly here.
That's two minutes gone in the round.
Gracie moves out of range as Helm strikes.
Gracie is definitely looking for the counter takedowns here.
Helm fails to land with a series of punches.
Helm misses with a wild combination.
Helm misses with a looping left.
Gracie drops down looking to force a counter takedown but Helm defends it well.
A looping hook to the body misses from Helm. Gracie does a little dance to reset his feet.
Helm jabs Gracie to the body, keeping him at a distance.
Helm takes a swing at Gracie's ribcage but misses.
Gracie slips a jab and a cross from Helm.
Gracie changes levels for a counter takedown but doesn't follow through with his attempt.
The crowd are loving this. Great action here.
Helm throws an ugly left hook that misses
and Gracie counters with a driving takedown into guard. Nice work there by Gracie.
Gracie drops back for a leg but he's not going to get it - he lets go and Helm dives on top into guard.

That's three minutes gone in the round.
Gracie throws his legs up looking for a submission but Helm uses it to pass to side control.
Gracie is looking for a sweep.
Helm wants to stand but Gracie has his arm trapped.
Gracie is looking for a sweep.
Helm stands up and beckons Gracie to his feet.
That's four minutes gone in the round.
Well. There's a bit of a lull in the action here and the crowd are starting to get restless.
Helm scores with a nice right hand.
Helm scores with a straight right hand, right through his opponent's guard.
Helm connects nicely with a jab. Noted by the judges no doubt.
Helm connects with a jab.
A jab from Helm misses.
Helm loads up on a big right hand but Gracie slips the punch.
Gracie with the counter takedown but Helm avoids it easily.
Nice cross by Helm.
Gracie has his head snapped back a nice jab. A little nod from Gracie there as he acknowledges the shot.
A big left from Helm misses.
Helm throws a right and a left that both miss.
And thats the end of the round the fighters go back to their corners.
James Helm dominated that round.
The minute break is over - no more time for sponges and pep talks - back to the action!
Helm misses with a straight right.
Helm lands with a shot to the body.
Gracie ducks under a wild hook from Helm.
Helm misses with a combination
and Gracie counters with a shoot takedown. Helm fights it but they end up in guard.
Helm knows he needs to get back to his feet asap. He's simply no match for Gracie on the ground.
Gracie won't allow Helm to get back to his feet.
Gracie trying to control but Helm is working from the bottom.
We've had a slow start to the round here - hopefully the action picks up.
That's one minute gone in the round.
Gracie passes into half guard.
Gracie stops Helm from getting back to his feet.
We've been hearing good reports from Helm's training camp. Apparently he has been rolling around with some good quality BJJ practitioners and has been sharpening his skills. Let's see if that has an impact on the fight today.
Gracie is working for submissions here but there's nothing on.
Gracie seems to be working for a kimura but Helm defends the submission attempt.
Helm on his back here. We all know that wrestlers don't like being on their back so let's see if Helm tries to get out of the position.
Gracie trying to control the action but Helm is working from the bottom.
That's two minutes gone in the round.
A lull in the action here being met with boos from the crowd.
The fighters are starting to perspire pretty heavily.
Gracie is sneakily working for an arm triangle but Helm sees it coming and defends easily.
Gracie seems to be looking for submissions.
Gracie is looking for a kimura but Helm is holding onto that half guard position, so it's hard for Gracie to get the leverage.
Helm wants to get back to his feet.
Gracie is trying to control the action in half guard but Helm is working away on the bottom, looking perhaps to get back to full guard.
The referee has decided to stand the fighters back up, so we'll restart on the feet.
Helm thuds his right hand into Gracie's forehead from close range. That could be painful for both fighters.
That's three minutes gone in the round.
Helm lands a jab to the nose.
Helm moving in and out of range nicely, whilst landing the scoring shot.
Gracie ducks under a wild hook from Helm.
Gracie drops down looking to force a counter takedown but Helm defends it well.
Gracie takes a punch to the jaw and another one to the bread basket.
Helm scores with a shot to the body.
Helm throws a combination but comes up with nothing but fresh air.
Sloppy strikes from Helm. Those never looked like landing.
Gracie gets his head snapped back by a nice shot there.
Helm lands a jab to Gracie's midsection.
Wooooo! Give it up for these two warriors! They are putting on a show!
Helm lands with a nice body punch.
That's four minutes gone in the round.
Helm fakes low and throws an overhand right that catches Gracie on the side of the head.
Renato Gracie is looking to throw some combinations by the looks of things.
Helm connects with a lovely jab that went straight through the gap between Gracie's hands.
Helm is really dominating this fight. Is there anything that Gracie can do to turn this around?
Helm misses with a body shot.
Helm cracks Gracie with a good shot that sees him stumbling back into the cage.
Helm throws a two punch combo that lands nicely.
Gracie walks into a straight right hand from Helm.
Helm listening to his corner there, landing a nice uppercut.
Helm lands with a shot to the body.
Gracie tries to move into range but Helm moves to the side and lands with a nice right hand.
Gracie is rocked!
Helm cracks Gracie with a nasty uppercut that draws ooohs from the crowd and sends Gracie tumbling backwards onto the mat. He tries to recover but Helm pounces and lands a hail of unanswered strikes that forces the referee to step in to end the fight! Gracie is not happy but he gave the referee no choice!
Ladies and gentlemen, after 4:56 of round 2, we have a winner by way of TKO (Strikes). James Helm!
In defeat, Renato Gracie stepped up to the mic, saying 'Massimo must get me drunk now that's are bet. I must say I am devastated but I will be back'.
|
|
|
|
|
|
|
|
|
|
|
|
|
|
|
|
|
|
|
|
|
|
|
| S |
C
A |
G |
S |
C
B |
G |
|
S |
C |
G |
|
energy
A | B |
|
hype
A | B |
|
pop
A | B |
|
mgr
A | B |
|
FIGHT
RATING
53% |
|
|
|
|
|
|
|
Co-main event
|
Coming up we have a heavyweight MMA rules bout between Keijo Virtanen (ranked 0 p4p, 0 weight class) and Mitchel Thompson (ranked 0 p4p, 0 weight class). Virtanen comes to the cage accompanied by Maamme Laulu. Thompson is bouncing up and down as he enters the arena, backed by Smashing pumpkins - Disarm. Mitchel Thompson has the better chin. Will he look to stand and bang today?
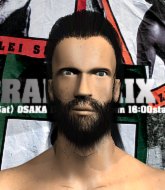 |
|
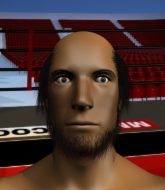 |
| 188 cm
27
250 lbs
11 - 4 - 0 |
|
205 cm
28
278 lbs
12 - 6 - 0 |
Powerful takedowns
Counter fighter
Very quick |
|
BJJ Blue Belt
Excellent boxer
Granite chin |
|
| |
|
Ladies and gentlemen. This fight is 3 rounds, in the heavyweight division.
Introducing the fighter to my left, fighting out of the red corner.
With a record of
11 - 4 - 0, fighting out of London, Keijo Virtanen!
And introducing the fighter to my right, fighting out of the blue corner.
With a record of
12 - 6 - 0, fighting out of London, Mitchel Thompson!
The judges for this bout are Sam Margolis, Richard Clark and James Glass.
The bell rings for round one and we are underway!
Virtanen closes the distance and takes a jab right on the nose as he does so.
Virtanen ducks under a wild hook from Thompson.
Virtanen appears to be looking for a counter takedown.
Thompson throws a monster uppercut resembling something out of street fighter but it doesn't land.
Virtanen feinted with a counter takedown.
Virtanen swings wildly with a right hand that was never going to find it's target.
Thompson has been spending a lot of time sparring his boxing in the run up to the fight, trying to sharpen up those hands and look for a knockout.
Some wild striking there from Thompson.
Thompson cracks Virtanen with a nice right hand that draws applause from the crowd.
Thompson is looking to take this fight into the clinch.
Virtanen attempts a counter takedown but Thompson avoids it well and moves away.
Thompson connects with a lovely jab that went straight through the gap between Virtanen's hands.
We've had a slow start to the round here - hopefully the action picks up.
Virtanen keeping his hands up high there, blocking the jab from Thompson.
Virtanen feinted with a counter takedown.
Thompson swings for the body but Virtanen moves out of range.
Virtanen tries to counter with a takedown but Thompson is quick to defend against it.
Virtanen tries to clinch but is not successful on this occasion.
That's one minute gone in the round.
Thompson misses with a body shot.
Virtanen drops down looking for a counter takedown but Thompson sprawls and moves away.
A telegraphed right hand from Thompson misses the target.
Virtanen tries to counter with a takedown but Thompson is quick to defend against it.
Thompson swings wildly with a couple of big hooks
and Virtanen counters with a nice double leg into half guard.
Thompson tries to kick Virtanen off in order to stand up. Virtanen Avoids the leg push though and dives into side control.
Virtanen is looking to finish here, going for an Americana. Thompson knows the correct defense though, so he's OK.
Virtanen tries for an arm triangle. That looks pretty tight to me. Is this one over!?! Possibly, maybe, no Virtanen has let go of the choke. Obviously it wasn't as tight as we thought!
Virtanen tries for a kimura but Thompson is defending well.
That's two minutes gone in the round.
Virtanen thinks about going for a far side armbar but bails out and retains the dominant position instead.
Thompson is trying to stand back up. He's worked his way up against the cage but Virtanen has just dragged him back down to the mat.
Virtanen is looking to finish here, going for an Americana. Thompson knows the correct defense though, so he's OK.
The ref warns both fighters not to hold the cage as they work up against the meshing.
Virtanen tries to move into full mount but can't pass Thompson's legs.
That's three minutes gone in the round.
Virtanen is working to tighten his grip on Thompson's neck. He's isolated an arm and is working for an arm triangle. Thompson has recognised the danger and is trying to turn with the submission but Virtanen is really squeezing tight and eventually Thompson passes out! Virtanen breaks the hold and jumps onto the cage to celebrate! Submission of the night, I'd say!
Ladies and gentlemen, after 3:36 of round 1, we have a winner by way of Submission (Arm Triangle). Keijo Virtanen!
After winning the bout, Keijo Virtanen thanked all his fans and promised he'd do even better in his next fight. The crowd seemed to love his humility.
Mitchel Thompson was interviewed post fight and said 'I hope my fans enjoyed the fight as much as I did...'.
|
|
|
|
|
|
|
|
|
|
|
|
|
|
|
|
|
|
|
|
|
|
|
| S |
C
A |
G |
S |
C
B |
G |
|
S |
C |
G |
|
energy
A | B |
|
hype
A | B |
|
pop
A | B |
|
mgr
A | B |
|
FIGHT
RATING
35% |
|
|
|
|
|
|
|
Main event
|
Coming up we have a bantamweight MMA rules bout between Serge Ibaka (ranked 0 p4p, 0 weight class) and Dominic Domain (ranked 0 p4p, 0 weight class). Ibaka's ring entrance music is that housewives' favourite, Eros Ramazzotti - Un'Emozione Per Sempre . Dominic Domain acknowledges the crowd's support as he enters the cage.
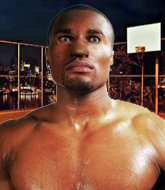 |
|
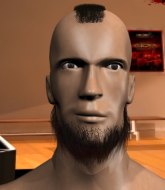 |
| 170 cm
28
143 lbs
20 - 2 - 0 |
|
178 cm
26
140 lbs
10 - 3 - 0 |
Good wrestling
Excellent boxer
Cardio machine |
|
Good takedowns
Counter fighter
Solid chin |
|
| |
|
Ladies and gentlemen. This fight is 3 rounds, in the bantamweight division.
Introducing the fighter to my left, fighting out of the red corner.
With a record of
20 - 2 - 0, fighting out of London, Serge Ibaka!
And introducing the fighter to my right, fighting out of the blue corner.
With a record of
10 - 3 - 0, fighting out of Las Vegas, Dominic Domain!
The judges for this bout are Steven Brown, Donald Grub and Richard Clark.
The bell rings for round one and we are underway!
Domain tries to shoot in for a takedown. He's got hold of a leg but Ibaka swivels and escapes.
It looked like Ibaka was looking amped, ready to throw a big counter but didn't commit.
Domain with a poor takedown
and Ibaka counters with a nice body shot.
Ibaka fakes with an overhand right and moves in to clinch with Domain, pushing him back against the cage.
Ibaka softening up his opponent with strikes, against the cage.
Ibaka gets through Domain's defenses to land a nice punch to the side of the head.
Ibaka lands a right hand.
Domain fails to pull guard.
Serge Ibaka has stuffed three takedown attempts in the round now. That's going to take a lot out of Dominic Domain.
Ibaka lands punches inside but they're not really causing much damage.
Domain is a painfully thin specimen of a man. You do wonder whether a good body kick would snap him clean in two.
Ibaka working some nice short punches in the clinch.
Ibaka slowing the pace effectively.
Good body shot from Ibaka.
Ibaka lands a nice shot to the body.
The fans in attendance giving it up for the two fighters, who have really let it all hang out in the last minute or so!
Nice body punch from Ibaka - that landed with a thud.
Ibaka cracks Domain with a nice body shot.
Ibaka lands with a short punch from the clinch.
Domain fails to pull the fight into his guard.
Domain looks winded!
Domain takes a shot to the head.
That's one minute gone in the round.
A nice left hand lands by Ibaka.
Domain is trying to pull guard but being pressed up against the cage enables Ibaka to keep the fight standing.
Ibaka scores with an uppercut up the middle.
A short left from Ibaka.
Domain is rocked!
Ibaka lands a body punch - he's looking to wear down Domain.
Ibaka lands punches inside but they're not really causing much damage.
Domain is still on wobbly legs! Can Ibaka finish him?
Ibaka lands a left hand that snaps the head of Domain backwards.
Nice body punch from Ibaka - that landed with a thud.
Ibaka creates a bit of space for himself and rocks Domain with a big uppercut! Domain tries to clinch up but Ibaka pushes him back against the cage and lands another monster strike that crumples Domain to the mat! Domain covers up and Ibaka unloads with more strikes until the referee steps in to end the bout!
Ladies and gentlemen, after 1:33 of round 1, we have a winner by way of TKO (Punches). Serge Ibaka!
An out of breath Serge Ibaka thanked his loyal fans in his post fight interview, giving them credit for his success over the course of his career.
In defeat, Dominic Domain stepped up to the mic, saying 'you are still Bj bitch boy!'.
|
|
|
|
|
|
|
|
|
|
|
|
|
|
|
|
|
|
|
|
|
|
|
| S |
C
A |
G |
S |
C
B |
G |
|
S |
C |
G |
|
energy
A | B |
|
hype
A | B |
|
pop
A | B |
|
mgr
A | B |
|
FIGHT
RATING
72% |
|
|
|
|
|
|
|
|
|
|
