 |
K009 PBP Commentary |
Undercard bout
|
|
|
|
Undercard bout
|
|
|
|
Undercard bout
|
|
|
|
Undercard bout
|
|
|
|
Undercard bout
|
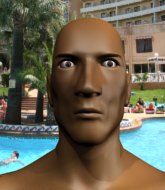
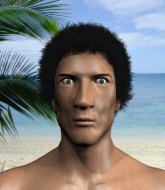
Coming up we have a light heavyweight MMA rules bout between Stefan Burczymucha (ranked 0 p4p, 0 weight class) and Brandon Stone (ranked 0 p4p, 0 weight class). This should be fireworks!
 |
|
 |
| 190 cm
25
215 lbs
1 - 0 - 0 |
|
188 cm
25
219 lbs
1 - 1 - 0 |
BJJ White Belt
Excellent MT
Good chin |
|
BJJ White Belt
Excellent boxer
Heavy handed |
|
| |
|
Ladies and gentlemen. This fight is 3 rounds, in the light heavyweight division.
Introducing the fighter to my left, fighting out of the red corner.
With a record of
1 - 0 - 0, fighting out of The Island, Stefan Burczymucha!
And introducing the fighter to my right, fighting out of the blue corner.
With a record of
1 - 1 - 0, fighting out of The Island, Brandon Stone!
The judges for this bout are Peter Branson, Sandra Marshall and Daniel Franklin.

The bell rings for round one and we are underway!
Stone misses with a looping right.
As Stone looks to move away, Burczymucha throws a big counter combo bu Stone just gets out of the way.
Stone misses with a body shot.
Burczymucha is looking for a counter combo.
Burczymucha takes a jab on the nose there. A little bit of blood seems to be coming out. Hopefully that won't affect his breathing.
Stone throws a hook to the body but it doesn't connect.
Burczymucha staying out of range there.
Burczymucha seem to be loading up, looking for a big counter.
Stone fakes high and swings low for a body shot but Burczymucha manages to avoid it.
Burczymucha is looking for a counter combo.
We've had a slow start to the round here - hopefully the action picks up.
Stone lands an overhand left. A wild punch that just about connected.
Stone misses with a hook to the body
and Burczymucha counters with a one-two to the body.
Burczymucha displays some good footwork, moving neatly out of range as Stone throws out the jab.

That's one minute gone in the round.
Burczymucha uses decent footwork to sidestep a right hand from Stone.
The fighters circling - Stone throws out the jab but it was never going to land.
A looping hook to the body misses from Stone. Burczymucha does a little dance to reset his feet.
As Stone looks to move away, Burczymucha throws a big counter combo bu Stone just gets out of the way.
Burczymucha bobs and weaves well there to avoid the strikes.
It looked like Burczymucha was looking amped, ready to throw a big counter but didn't commit.
Stone missing with a left hand there. Burczymucha was out of range so wasted energy throwing that one.
Burczymucha throws a big counter combination but Stone scrambles out of danger and avoids any damage.
Stone thows a left - swing and a miss!
Stone misses with a shot to the body
and Burczymucha counters with a three punch combo that has Stone backing up. Stone nods at Burczymucha to acknowledge the strikes.
No joy there for Stone, who threw a few shots but didn't land.

That's two minutes gone in the round.
Stone misses with a body shot.
As Stone looks to move away, Burczymucha throws a big counter combo bu Stone just gets out of the way.
Burczymucha slips a straight right by Stone.
Stone throws a body punch but Burczymucha moves out of range.
Burczymucha appears to be looking for a big counter.
Stone misses with a body shot. Nice footwork from Burczymucha.
Burczymucha is looking for a counter combo.
Stone swings and misses with a hook to the body.
Burczymucha appears to be looking for a big counter.
Burczymucha ducks under an overhand right and circles away with a smile on his face.
Stone throws a predictable looking body shot
and Burczymucha counters with a three punch combo that has Stone backing up. Stone nods at Burczymucha to acknowledge the strikes.

That's three minutes gone in the round.
Stone misses with a left hand
and Burczymucha counters with a left and a right that stings Stone.
Stone throws a good cross that connects.
Stone throws a lazy right hand but Burczymucha sees it coming a mile off and sidesteps it easily.
Stone comes forward and lands a shot to the body, then darts back out of range.
Stone throws a sloppy body shot
and Burczymucha counters with a one-two to the body.
Burczymucha takes an uppercut right on the button but keeps his composure.
Brandon Stone seems to be the more aggressive standup fighter in this bout.
Stone throws a body punch but Burczymucha moves out of range.
Burczymucha went nuts there looking for a big combo counter but none of the flurry connected.
Stone throws the left hand but Burczymucha avoids the punch easily.

That's four minutes gone in the round.
Stone swings widly with a right hand
and Burczymucha counters with a one-two to the body.
The crowd cheering loudly, showing their appreciation for the quality fight we're seeing here.
Stone looks to throw the jab but Burczymucha is out of range.
Burczymucha ducks under a wild hook from Stone.
Burczymucha went nuts there looking for a big combo counter but none of the flurry connected.
Burczymucha ducks under a wild hook from Stone.
As Stone looks to move away, Burczymucha throws a big counter combo bu Stone just gets out of the way.
A shot to the body from Stone misses
and Burczymucha counters with a series of strikes. Stone will be more careful next time no doubt.
Burczymucha moves away from the strike by Stone.
Burczymucha seem to be loading up, looking for a big counter.
Burczymucha slips a straight right by Stone.
Stone throws a jab but it's blocked by Burczymucha.
And thats the end of the round the fighters go back to their corners.
A close round but Brandon Stone will probably get the nod.
The fighters get back to their feet, the hooter sounds and we're back to the action!

Burczymucha takes a really solid shot there but just smiles back and shrugs his shoulders.
Brandon Stone seems to be getting the better of the standup.
Burczymucha drops his hands and takes a jab to the jaw for his troubles.
Stone throws a hook but Burczymucha blocks it.
Burczymucha avoids a punch combination nicely.
Burczymucha appears to be looking for a big counter.
Stone throws a shot from downtown. Burczymucha moves away and avoids it.
We've had a slow start to the round here - hopefully the action picks up.
Stone misses with a jab to the body
and Burczymucha counters with a three punch combination, finished off with a leg kick. Nice work.
Burczymucha steps to the side to avoid the strikes from Stone.
That's one minute gone in the round.
Stone takes a swing at Burczymucha's ribcage but misses.
Burczymucha throws a big counter combination but Stone scrambles out of danger and avoids any damage.
Stone misses with a wild body shot.
Stone swings away with a body shot that misses
and Burczymucha counters with a series of strikes. Stone will be more careful next time no doubt.
Burczymucha uses good footwork to avoid the strikes from Stone.
Burczymucha is working the combinations to good effect here.
Stone connects with a body shot that sends Burczymucha's belly button to the back.
Stone rushes forward with a series of wild hooks but Burczymucha moves out of range and avoids them all easily.
Burczymucha is looking for a counter combo.
Stone dips down and scores with a jab to the body.
Stone throws a hook to the side of Burczymucha's head but Burczymucha sees it coming and ducks under it beautifully.
That's two minutes gone in the round.
Stone throws a jab, cross combination which is slipped
and Burczymucha counters with a series of strikes. Stone will be more careful next time no doubt.
A punch combination from Stone misses.
Stefan Burczymucha is looking to throw some combinations by the looks of things.
Stone fakes high and swings low for a body shot but Burczymucha manages to avoid it.
Stone throws an off balance right hand
and Burczymucha counters with a two punch combo.
We've seen a great period of action over the last minute or so - credit to both fighters for going all out!
A shot to the body from Stone misses
and Burczymucha counters with a two punch combo.
Burczymucha moves out of range as Stone strikes.
We've been informed that Stone has been working hard on his conditioning in the buildup to the fight.
Stone misses with a right hand
and Burczymucha counters with a three punch combo that has Stone backing up. Stone nods at Burczymucha to acknowledge the strikes.
That's three minutes gone in the round.
Stone throws a lazy uppercut
and Burczymucha counters with a three punch combination, finished off with a leg kick. Nice work.

Stone is rocked!
Stone misses with a combination
and Burczymucha counters with a monster hook and another for good measure! Stone falls to the ground, out cold! Stick some heavy metal music over the top of that clip and it's one for the highlight makers!
Ladies and gentlemen, after 3:15 of round 2, we have a winner by way of KO (Strikes). Stefan Burczymucha!
|
|
|
|
|
|
|
|
|
|
|
|
|
|
|
|
|
|
|
|
|
|
|
| S |
C
A |
G |
S |
C
B |
G |
|
S |
C |
G |
|
energy
A | B |
|
hype
A | B |
|
pop
A | B |
|
mgr
A | B |
|
FIGHT
RATING
47% |
|
|
|
|
|
|
|
Undercard bout
|
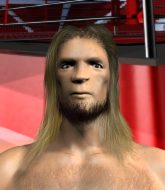
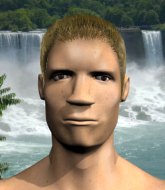
Coming up we have a featherweight MMA rules bout between Jacek Brozinek (ranked 0 p4p, 0 weight class) and David Harper (ranked 0 p4p, 0 weight class). Jacek Brozinek has the better chin. Will he look to stand and bang today?
 |
|
 |
| 173 cm
25
154 lbs
2 - 1 - 0 |
|
173 cm
25
146 lbs
1 - 1 - 0 |
BJJ Purple Belt
Solid boxing
Self confident |
|
BJJ White Belt
Excellent boxer
Very confident |
|
| |
|
Ladies and gentlemen. This fight is 3 rounds, in the featherweight division.
Introducing the fighter to my left, fighting out of the red corner.
With a record of
2 - 1 - 0, fighting out of The Island, Jacek Brozinek!
And introducing the fighter to my right, fighting out of the blue corner.
With a record of
1 - 1 - 0, fighting out of The Island, David Harper!
The judges for this bout are Daniel Franklin, David Hoff and Dirk Anderson.
The bell rings for round one and we are underway!
Harper lands with a shot to the body.
Harper throws a combination that misses
and Brozinek counters with a three punch combination, finished off with a leg kick. Nice work.
Harper connects with a good right hand that stumbles Brozinek. Brozinek circles away out of range and recomposes himself.
Decent striking displayed by Harper there.
Brozinek needs to keep his hands up - Harper had a free shot at his head there.
Harper misses with a double jab
and Brozinek counters with a series of strikes that really hurt Harper! The ref looks into his eyes and sees nobody home - he's called the fight! This one is all over!
Ladies and gentlemen, after 0:23 of round 1, we have a winner by way of TKO (Strikes). Jacek Brozinek!
|
|
|
|
|
|
|
|
|
|
|
|
|
|
|
|
|
|
|
|
|
|
|
| S |
C
A |
G |
S |
C
B |
G |
|
S |
C |
G |
|
energy
A | B |
|
hype
A | B |
|
pop
A | B |
|
mgr
A | B |
|
FIGHT
RATING
100% |
|
|
|
|
|
|
|
Undercard bout
|
Coming up we have a featherweight MMA rules bout between Seen Kyle (ranked 0 p4p, 0 weight class) and Moka Moka (ranked 0 p4p, 0 weight class). Moka Moka is staring across the cage at his opponent, tweaking his nipples.
 |
|
 |
| 161 cm
25
148 lbs
2 - 1 - 0 |
|
165 cm
25
145 lbs
2 - 1 - 0 |
Good takedowns
Brawler
Very quick |
|
Good wrestler
Counter fighter
Granite chin |
|
| |
|
Ladies and gentlemen. This fight is 3 rounds, in the featherweight division.
Introducing the fighter to my left, fighting out of the red corner.
With a record of
2 - 1 - 0, fighting out of The Island, Seen Kyle!
And introducing the fighter to my right, fighting out of the blue corner.
With a record of
2 - 1 - 0, fighting out of The Island, Moka Moka!
The judges for this bout are Winston Alpacca, Peter Branson and Michael Johnstone.
The bell rings for round one and we are underway!
Kyle with a lazy takedown attempt
and Moka counters with a crisp hook to the side of the head.

It looks like Seen Kyle has been cut.

Kyle shoots in looking for a single leg takedown. Moka is trying to defend but Kyle finishes it well and ends up in half guard. Let's see if he can advance position further.
Moka gets back to full guard.
The fighters are pressed up against the cage, both looking to find a bit of space to work.
Moka is trying to keep Kyle in close.
Moka looking to sweep here. No luck so far.
We've had a slow start to the round here - hopefully the action picks up.
Kyle tries to free his leg and advance position but Moka is retaining full guard.
Moka looks more muscular than last time we saw him. He must have been on the weights.
Moka trying to keep a closed guard but Kyle is proving a slippery customer.
Moka looking to sweep here. No luck so far.
That's one minute gone in the round.
Moka keeping moving, preventing Kyle from controlling successfully.

The referee has stepped in and called for a break in the action. We'll restart on the feet.
Kyle tries to drive through with a takedown attempt but Moka defends well and Kyle ends up having to push Moka into the cage where they will battle it out in the clinch.
Moka stuffs the takedown attempt from Kyle. Kyle gets slowly back to his feet.
Moka throws out a counter right but Kyle avoids it with no problem.
That's three failed takedown attempts in the round for Seen Kyle. That's going to take a lot out of him.
Kyle fails with a rather predictable takedown attempt.
Kyle shoots in looking for a takedown but Moka manages to keep the fight standing, pushing Kyle's face into the canvas for good measure before circling away.
Kyle has been talking about how he's improved his wrestling in the run up to the fight so let's see if that's enough to sway the balance.
Moka connects with a lovely right hand, straight down the pipe.
Kyle goes for a double leg but Moka avoids the attempt and the two fighters end up clinched against the cage as Moka continues to drive forward.
That's two minutes gone in the round.
Kyle avoids the head kick by Moka.
Moka lands a leg kick that knocks Kyle off balance momentarily.
Kyle tries to drive through with a takedown attempt but Moka defends well and Kyle ends up having to push Moka into the cage where they will battle it out in the clinch.

Moka changes levels and drives through with a really nice takedown into side control. Kyle looks really pissed at himself for not defending that better.
Kyle is looking for a sweep.
This is a great period of action - very entertaining stuff!
Kyle is not content to let Moka control the position.
Moka working the ground and pound.
Kyle avoids any damage from the ground and pound of Moka.
Moka in side control lands a nice looking series of punches and elbows.
Moka scoring with punches from side control.
That's three minutes gone in the round.
Kyle is trying to get back to half guard.
Sloppy strikes there by Moka.
Moka is looking to take a break and control but Kyle is keeping him honest, looking to work from the bottom.
Kyle prevents Moka from moving into mount.
Kyle manages to get one leg in to regain half guard.
Kyle could do with losing a few pounds - he looks very soft around the mid section, to put it politely.
Moka scores with a couple of good hammerfists.
The ref warns both fighters not to hold the cage as they work up against the meshing.
Moka trying to mount his opponent but Kyle defends it.
Moka slips a nice elbow through Kyle's hands, connecting with Kyle's forehead.
Kyle tries to get to full guard but Moka has control of the leg.
That's four minutes gone in the round.
Moka seems very keen to just sit and control from half guard but Kyle does not like that idea so much and is remaining active off his back.
Kyle trying to hold on to Moka's head to control him but Moka postures up.
Kyle is trying to get back to full guard.
The fighters are battling for position here. Kyle manages to regain full guard. Nice work.
The crowd thankful this round is nearly over.
Moka postures up to throw the ground and pound strikes but they don't connect.
Kyle looking to control.
Moka stays in close to Kyle's body and controls the position.
The referee has decided to stand the fighters back up, so we'll restart on the feet.
And thats the end of the round the fighters go back to their corners.
Moka Moka dominated that round.
The cut man is working on Seen Kyle's cut.
OK. That's time! The bell goes and we're back to the action.
Moka feints a straight left to the body, then turns around with a flashy move and hits Kyles jaw with a dramatic spinning back fist!
Moka ducks down and throws a hook to the body.
Kyle gets his takedown attempt stuffed easily
and Moka counters with a stiff right hand.
A telegraphed takedown attempt from Kyle is defended easily by Moka.
Kyle changes levels and looks for a double leg takedown. Moka tries to avoid it but Kyle manages to keep hold of a leg and drag Moka to the ground. Moka escapes though and pops straight back up to his feet.
That's three failed takedown attempts in the round for Seen Kyle. That's going to take a lot out of him.
We've had a slow start to the round here - hopefully the action picks up.
Kyle moves forwards but Moka connects with a nice, crisp jab.
Kyle fails with the takedown.
Moka scores with a nice right hand.

Kyle is rocked!
That's one minute gone in the round.
Kyle looks for a takedown but Moka sprawls well.
Moka connects with a jab and follows up with a big overhand right! Oh that's hurt Kyle! He's out on his feet! Moka rushes in and drops Kyle with another big right hand, forcing the referee to stop the fight!
Ladies and gentlemen, after 1:28 of round 2, we have a winner by way of TKO (Punches). Moka Moka!
|
|
|
|
|
|
|
|
|
|
|
|
|
|
|
|
|
|
|
|
|
|
|
| S |
C
A |
G |
S |
C
B |
G |
|
S |
C |
G |
|
energy
A | B |
|
hype
A | B |
|
pop
A | B |
|
mgr
A | B |
|
FIGHT
RATING
34% |
|
|
|
|
|
|
|
Undercard bout
|
Coming up we have a middleweight MMA rules bout between Bo Taka (ranked 0 p4p, 0 weight class) and PJ Stock (ranked 0 p4p, 0 weight class). The crowd giving both fighters a great reception on their way into the arena. That's good to see.
 |
|
 |
| 187 cm
25
189 lbs
2 - 1 - 0 |
|
181 cm
25
190 lbs
2 - 1 - 0 |
BJJ White Belt
Excellent boxer
Granite chin |
|
Good wrestler
Basic striking
Experienced |
|
| |
|
Ladies and gentlemen. This fight is 3 rounds, in the middleweight division.
Introducing the fighter to my left, fighting out of the red corner.
With a record of
2 - 1 - 0, fighting out of The Island, Bo Taka!
And introducing the fighter to my right, fighting out of the blue corner.
With a record of
2 - 1 - 0, fighting out of The Island, PJ Stock!
The judges for this bout are David Hoff, Santiago Holmes and Peter Branson.
The bell rings for round one and we are underway!
Stock gets the takedown into side control.

Stock has worked his way into a potential kimura here. Taka is trying to get out of the position but his squirming has just got him deeper into trouble. Stock yanks on the arm and Taka is forced to tap due to a very painful looking submission! Nice work by Stock.
Ladies and gentlemen, after 0:18 of round 1, we have a winner by way of Submission (Kimura). PJ Stock!
|
|
|
|
|
|
|
|
|
|
|
|
|
|
|
|
|
|
|
|
|
|
|
| S |
C
A |
G |
S |
C
B |
G |
|
S |
C |
G |
|
energy
A | B |
|
hype
A | B |
|
pop
A | B |
|
mgr
A | B |
|
FIGHT
RATING
100% |
|
|
|
|
|
|
|
Co-main event
|
Coming up we have a featherweight MMA rules bout between Shermy Gipson (ranked 0 p4p, 0 weight class) and Nick Force (ranked 0 p4p, 0 weight class). Shermy Gipson has a significant reach advantage - let's see if he can make it count.
 |
|
 |
| 165 cm
25
140 lbs
2 - 0 - 0 |
|
150 cm
25
145 lbs
3 - 1 - 0 |
Good takedowns
Counter fighter
KO power |
|
Good takedowns
Brawler
Prefers standup |
|
| |
|
Ladies and gentlemen. This fight is 3 rounds, in the featherweight division.
Introducing the fighter to my left, fighting out of the red corner.
With a record of
2 - 0 - 0, fighting out of The Island, Shermy Gipson!
And introducing the fighter to my right, fighting out of the blue corner.
With a record of
3 - 1 - 0, fighting out of The Island, Nick Force!
The judges for this bout are David Hoff, Dirk Anderson and Winston Alpacca.
The bell rings for round one and we are underway!
Gipson tries to close the distance and clinch up but Force swats him away and circles back towards the center.
Force throws a shot from downtown. Gipson moves away and avoids it.
A combination from Gipson does no damage.
Gipson throws a low kick but Force avoids it.
Force misses with a low kick.
Gipson keeps his opponent at a distance with a nice jab.
Force scores with a hook to the body. Gipson takes a step back and tries to catch his breath.
Gipson darts in and lands a nice takedown into half guard.
Force is in trouble now - Gipson has advanced to mount!
Gipson landing strikes, looking to finish!
That's one minute gone in the round.
Gipson scoring with some good ground and pound from mount here. Will he manage to finish Force?
Force's corner are shouting for him to stand up but that's bad cornering - how is he meant to stand up when he's mounted? He should be looking to improve his position on the ground before trying to stand back up.
Gipson wants to control the pace but Force is squirming around nicely.
Force manages to regain half guard. Good work.
Force avoiding damage under a succession of punches from Gipson.
Force is looking to regain full guard. Not this time though.
Force wants to get back to his feet.
Gipson wants to pass to mount but Force is defending the position.
Gipson lands with a punch from half guard.
That's two minutes gone in the round.
The referee calls for the fighters to work.
We're hearing some news coming in from back stage. It's official - Force has eaten all the pies!
Gipson drops an elbow to the side of Force's head.

Gipson is sneakily working for an arm triangle but Force sees it coming and defends easily.
Gipson trying to mount his opponent but Force defends it.
Gipson stops Force from getting back to his feet.
The fighters are pressed up against the cage, both looking to find a bit of space to work.
Force trying to control from the bottom.
Force is trying to stand up here but Gipson is controlling him well.
Force is looking for a sweep. Gipson is wise to his cunning plan and keeps the top position.
That's three minutes gone in the round.
Force wants to get back to his feet.
The referee has motioned to the fighters to stand back up. He just wasn't happy with the level of activity.
Gipson tries to clinch but Force is having none of it.
Force misses with a few strikes there.
A head kick misses from Force.
Gipson is looking to take this fight into the clinch.
Gipson comes forward and lands a shot to the body, then darts back out of range.
Nice takedown defense from Force. No joy for Gipson on that attempt.
Gipson swings and misses with a hook to the body.
Gipson moves in looking to clinch but Force pushes him off.
Force throws a series of strikes that have Gipson backpedaling.
That's four minutes gone in the round.
Force keeping a good distance there, avoiding the body shot.
Force goes for a spinning back kick but it misses.
It looked like Gipson wanted to counter with a hook but didn't fully commit.
Force looking to throw a kick but he's pulled out of it.
Gipson tries to clinch up against the cage, rushing in to close the distance. Force manages to break the clinch and circles back to the middle of the mat.
Force tries a head kick but it misses.
Gipson fails with a takedown attempt.
Force feints a jab promting Gipson to slip. Force then demonstrates his capabilities by jabbing again. Gipson slips again and ducks right into an uppercut.
And thats the end of the round the fighters go back to their corners.
That was a close round but I would say that Shermy Gipson will probably get the nod.
The referee calls time. The cornermen exit stage left and we're back to business.
A really sloppy takedown attempt there from Gipson.
Nick Force seems to be getting the better of the standup.
Gipson just misses with a punch to the body.
Force throws the kick towards the body but Gipson avoids it.
Force ducks down and throws a hook to the body but Gipson moves away.
Force misses with a wild body shot.
Gipson misses with a few strikes there.
Force swings for the body but Gipson moves out of range.
We've had a slow start to the round here - hopefully the action picks up.
Force takes a shot right to the bread basket.
Gipson is looking to wear down Force with body shots, infact he's throwing more body shots than head shots at the moment.
Gipson misses with a hook
and Force counters with a two punch combo.
Gipson shoots for a double leg takedown but Force sprawls well. He's pushed Gipson's face into the mat and manages to get back to his feet relatively easily.
Force misses with a series of wild punches.
Gipson feinted with a counter takedown.
That's one minute gone in the round.
Force throws a nice looking combination but Gipson bobs and weaves to avoid any damage.
Force tries a head kick but it misses.
Gipson is looking to counter the offense by Force and move into the clinch.
Nick Force seems to be the more aggressive standup fighter in this bout.
Gipson avoids the head kick by Force.
Force misses with a body shot. Nice footwork from Gipson.
Gipson bobs and weaves into range and then changes levels and scores with a nice takedown into side control.
Gipson goes for an armbar! This could be all over! Wait, no, Force rolls with the submission and now he's on top in Gipson's guard! Nice work there by Force!
Gipson trying to control the position.
Gipson working away from the bottom but not quite defensive enough there because Force has passed into half guard!
That's two minutes gone in the round.
Force works his way into full mount!
Force takes a little breather and maintains the position. The referee will be looking for him to stay active from such a dominant position though.
This has been an exciting period of action!
Gipson regains half guard.
Gipson tries to roll over but Force keeps him under control.
That's three minutes gone in the round.
Force works his way into full mount!
Force throws an elbow from mount that misses. Lucky escape for Gipson because Force loaded up on that one.
Force tucks in and makes sure he doesn't lose the dominant position.
Force prevents Gipson from getting the reversal.
Force lands a big elbow.
That's four minutes gone in the round.
Gipson is wriggling around trying to escape.
Force in mount throwing good strikes here, bouncing his opponent's head off the canvas.
Shermy Gipson overall seems to be getting the better of the ground position in the fight so far.
BOOM! Force connects with a massive shot to the dome!
Force trying to control but he's not successful this time.
Gipson is desperately trying to improve his position but Force has a good base and remains in mount.
Gipson regains half guard.
Gipson trying to hold on to Force's head to control him but Force postures up.
And thats the end of the round the fighters go back to their corners.
Nick Force showed his class in that round. I'd imagine he'll take it on all the scorecards.
That's time! Gipson's corner gives him a slap on the ass as he gets ready to fight. This is the final round!

Force tests Gipson's chin there with a solid looking shot.
Gipson is rocked!
Force is throwing punches like he's double parked. Oh my word! Huge right hand from Force shuts the power down on Gipson. Lights out, game over! Force is your winner.
Ladies and gentlemen, after 0:16 of round 3, we have a winner by way of KO (Punches). Nick Force!
|
|
|
|
|
|
|
|
|
|
|
|
|
|
|
|
|
|
|
|
|
|
|
| S |
C
A |
G |
S |
C
B |
G |
|
S |
C |
G |
|
energy
A | B |
|
hype
A | B |
|
pop
A | B |
|
mgr
A | B |
|
FIGHT
RATING
43% |
|
|
|
|
|
|
|
Main event
|
Coming up we have a heavyweight MMA rules bout between Silvain Bourcier (ranked 0 p4p, 0 weight class) and Abu Rat (ranked 0 p4p, 0 weight class). Bourcier comes to the cage accompanied by Misha Calvin - Ready or not. Silvain Bourcier has the edge in experience - let's see if he can make that count tonight.
 |
|
 |
| 188 cm
25
266 lbs
3 - 1 - 0 |
|
185 cm
25
250 lbs
3 - 0 - 0 |
Good wrestling
Solid boxing
KO power |
|
Powerful takedowns
Basic striking
Granite chin |
|
| |
|
Ladies and gentlemen. This fight is 5 rounds, for the heavyweight championship of the world!
Introducing the champion to my left, fighting out of the red corner.
With a record of
3 - 1 - 0, fighting out of The Island, Silvain Bourcier!
And introducing the challenger to my right, fighting out of the blue corner.
With a record of
3 - 0 - 0, fighting out of The Island, Abu Rat!
The judges for this bout are Michael Johnstone, Bart Greer and Sandra Marshall.
The bell rings for round one and we are underway!
Bourcier defends well against a solid takedown attempt from Rat.
Rat shoots in and drives through. Bourcier sprawls well.
Bourcier feinted with a counter takedown.
Rat throws a hook to the body but it doesn't connect.
Rat shoots in for a takedown but Bourcier shows good takedown defense.
Silvain Bourcier has stuffed three takedown attempts in the round now. That's going to take a lot out of Abu Rat.
Rat tries to score a power double leg takedown but Bourcier sees that one coming and sprawls well. That will dishearten Rat somewhat.
Bourcier half commits to a counter takedown before pushing away, out of range.
Rat shoots in for a double leg but Bourcier sprawls well. That's going to sap some energy.
Bourcier appears to be looking for a counter takedown.
Rat dives in for a single leg takedown but Bourcier sprawls and the fighters end up clinched against the cage.
We've had a slow start to the round here - hopefully the action picks up.
Rat shoots in for a takedown but doesn't get it.
Bourcier drops down looking for a counter takedown but Rat sprawls and moves away.
Abu Rat seems to be the more aggressive standup fighter in this bout.
Rat shoots in for a takedown. "I don't think so" says Bourcier as he avoids it easily.
Bourcier slaps away a takedown attempt from Rat, before circling back to the center of the mat.
That's one minute gone in the round.
Bourcier leaves Rat with his face pressed against the mat as he sprawls beautifully, defending against a solid takedown attempt.
Bourcier feinted with a counter takedown.
Rat throws a hook to the side of Bourcier's head but Bourcier sees it coming and ducks under it beautifully.
Bourcier defends well against a solid takedown attempt from Rat.
Bourcier tries to counter with a takedown but Rat is quick to defend against it.
Rat throws a looping left and ducks down for a takedown. He's got his arms around Bourcier's waist but Bourcier gets an underhook and avoids the takedown by throwing Rat off to one side.
Bourcier attempts a counter takedown but Rat avoids it well and moves away.
Rat closes this distance looking for a takedown but Bourcier circles away.
Rat misses with a hook
and Bourcier counters with a single leg into guard. Rat didn't expect that.
Rat looks winded!
Bourcier looking to pass the guard.
Rat has momentary wrist control but Bourcier slips an elbow through the middle.
Rat looking for a sweep. Not yet Rat, not yet.
Bourcier with a couple of shots to the head there. Not particularly brutal.
Rat lands a beautiful sweep and he's now moved into his opponent's guard.

That's two minutes gone in the round.
Bourcier keeping moving, preventing Rat from controlling successfully.
Rat looking to pass the guard.
Bourcier working the defensive guard well to avoid strikes from Rat.
Rat won't allow Bourcier to sweep him here.
Bourcier is trying to control the position from the bottom.
Rat trying to control the position from guard on top but Bourcier is wriggling around, looking for whatever he can.
A big thud reverberates around the arena there as Rat accidentally thumps the mat. Hopefully he's not broken his hand.
Bourcier working a defensive guard here.
Bourcier wants to stand but Rat is controlling the position.
That's three minutes gone in the round.
Bourcier is adopting a defensive guard.
Rat postures up in Bourcier's guard and throws a big left but Bourcier blocks it.
Rat trying to pass the guard but can't manage it just yet.
Bourcier looking to control.
The referee decides to stand the fighters back up.
Rat fails with the takedown.
Bourcier drops down looking for a counter takedown but Rat sprawls and moves away.
No luck for Rat with that takedown attempt.
Bourcier half commits to a counter takedown before pushing away, out of range.
Rat throws a right hand that misses
and Bourcier counters with a takedown into side control! That could mean trouble for Rat!
Bourcier definitely looks more muscular than last time we saw him fight.
The fighters are pressed up against the cage, both looking to find a bit of space to work.
Rat is moving his hips around well on the bottom and has managed to get back to half guard.
That's four minutes gone in the round.
Bourcier lands strikes from half guard.
Bourcier not landing any meaningful shots this time.
Bourcier trying to pass the guard but Rat defending well.
Bourcier is looking to take a break and control but Rat is keeping him honest, looking to work from the bottom.
Rat gets full guard.
Rat is looking to cinch up a triangle. Bourcier throws the leg off to one side though and gets in tight to Rat's body to avoid the submission. Rat has instead reached around Bourcier's neck and now has a guillotine! Oh, this is biiiig trouble! Rat arches his back and squeezes and forces the tap from his hapless opponent.
Ladies and gentlemen, after 4:51 of round 1, we have a winner by way of Submission (Guillotine). Abu Rat! Abu Rat retains his heavyweight title!
An out of breath Abu Rat thanked his loyal fans in his post fight interview, giving them credit for his success over the course of his career.
|
|
|
|
|
|
|
|
|
|
|
|
|
|
|
|
|
|
|
|
|
|
|
| S |
C
A |
G |
S |
C
B |
G |
|
S |
C |
G |
|
energy
A | B |
|
hype
A | B |
|
pop
A | B |
|
mgr
A | B |
|
FIGHT
RATING
29% |
|
|
|
|
|
|
|
|
|
|
