 |
CTS 13 Whhaaatttt PBP Commentary |
Undercard bout
|
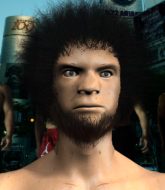
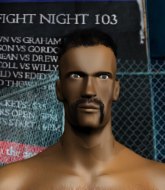
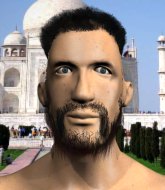
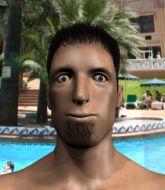
Coming up we have a featherweight MMA rules bout between Vato Loco (ranked 0 p4p, 0 weight class) and Thorben Bentsen (ranked 0 p4p, 0 weight class). The key to victory for Vato Loco has got to be keeping the fight on the feet.
 |
|
 |
| 165 cm
25
148 lbs
2 - 8 - 0 |
|
185 cm
18
147 lbs
0 - 2 - 0 |
Powerful takedowns
Solid boxing
KO power |
|
BJJ Blue Belt
Brawler
Granite chin |
|
| |
|
Ladies and gentlemen. This fight is 3 rounds, in the featherweight division.
Introducing the fighter to my left, fighting out of the red corner.
With a record of
2 - 8 - 0, fighting out of New York, Vato Loco!
And introducing the fighter to my right, fighting out of the blue corner.
With a record of
0 - 2 - 0, fighting out of New York, Thorben Bentsen!
The judges for this bout are Bruno Lombardi, Dean Styles and Alyssa Summers.

The bell rings for round one and we are underway!
Loco misses with a double jab.
Loco clobbers Bentsen with an overhand right that has the crowd gasping. That made a horrendous noise.
Bentsen swinging wildly here.
Loco drops down looking for a counter takedown but Bentsen sprawls and moves away.
Bentsen fails to land the takedown.
Loco definitely looks more muscular than last time we saw him fight.
Bentsen is a painfully thin specimen of a man. You do wonder whether a good body kick would snap him clean in two.
Loco stuffs the takedown.
Loco tries to bum rush Bentsen with a series of wild strikes but Bentsen uses good footwork to avoid the assault.
Loco throws an ugly left hook that misses

and Bentsen counters by clinching up.
Bentsen wants a takedown.
Vato Loco has stuffed three takedown attempts in the round now. That's going to take a lot out of Thorben Bentsen.

Loco manages to break the clinch.
Bentsen shoots in for a takedown. He's persisting with it as Loco sprawls well. Loco wins this battle and keeps the fight standing. Bentsen gets slowly back to his feet.

Loco lands a jab followed by a vicious hook that sends Bentsen sprawling to the canvas. Loco follows him down, looking for the kill. Can Bentsen hang on?

It looks like Thorben Bentsen has been cut.
This has been an exciting period of action!
Bentsen is trying to get back to full guard.

That's one minute gone in the round.

Loco is looking for a kimura. It's going to be difficult to finish that from half guard though and Bentsen defends it well.
Loco scores with a couple of good hammerfists.
Bentsen is holding on to half guard well.
Loco is looking for a kimura here.
Loco is thinking about going for an arm triangle but he can't free his leg.
Loco thows a wild elbow that connects with the canvas.

That's two minutes gone in the round.
Loco throwing punches and elbows but they're not doing any damage.
Loco is looking for a kimura. It's going to be difficult to finish that from half guard though and Bentsen defends it well.
Loco has been looking to land a fair amount of strikes on the ground. He might be looking to soften his opponent up in order to work for a submission.
Loco is looking for a kimura but he's never going to get it from there.
Bentsen is looking to escape.
Loco is sneakily working for an arm triangle but Bentsen sees it coming and defends easily.
Loco works his way into side control.
Bentsen parries the strikes from Loco easily there. Loco is wary of posturing up too much because it might enable Bentsen to escape.
Loco has worked his way into a potential kimura here. Bentsen is trying to get out of the position but his squirming has just got him deeper into trouble. Loco yanks on the arm and Bentsen is forced to tap due to a very painful looking submission! Nice work by Loco.
Ladies and gentlemen, after 3:55 of round 1, we have a winner by way of Submission (Kimura). Vato Loco!
A less than humble Vato Loco misjudged his post fight interview somewhat and came across a little too arrogant whilst trying to hype up his own abilities.
|
|
|
|
|
|
|
|
|
|
|
|
|
|
|
|
|
|
|
|
|
|
|
| S |
C
A |
G |
S |
C
B |
G |
|
S |
C |
G |
|
energy
A | B |
|
hype
A | B |
|
pop
A | B |
|
mgr
A | B |
|
FIGHT
RATING
49% |
|
|
|
|
|
|
|
Undercard bout
|
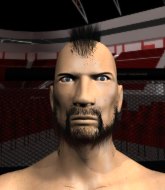
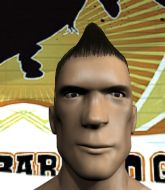
Coming up we have a featherweight MMA rules bout between Joe Baroni (ranked 0 p4p, 0 weight class) and Kid Diddler (ranked 0 p4p, 0 weight class). Baroni comes to the cage accompanied by Beastie Boys- Fight for your right. Kid Diddler looks lathargic as he enters the arena. Wake up son, you're about to have a fight!
 |
|
 |
| 175 cm
29
155 lbs
8 - 3 - 0 |
|
200 cm
29
150 lbs
6 - 13 - 0 |
Decent wrestler
Solid boxing
Very strong |
|
Good takedowns
Counter fighter
Determined |
|
| |
|
Ladies and gentlemen. This fight is 3 rounds, in the featherweight division.
Introducing the fighter to my left, fighting out of the red corner.
With a record of
8 - 3 - 0, fighting out of New York, Joe Baroni!
And introducing the fighter to my right, fighting out of the blue corner.
With a record of
6 - 13 - 0, fighting out of New York, Kid Diddler!
The judges for this bout are Dean Styles, Reed Andrews and Russell Pearce.
The bell rings for round one and we are underway!
Baroni fakes a jab and then connects with a hook.
It looks like Kid Diddler has been cut.
Diddler looks really tired already! That doesn't bode well for a good, competitive fight!
Diddler cracks Baroni with a right hand to the side of the head.
Diddler misses with a jab, cross combination.
Baroni misses with a two punch combination.
Diddler blocks the body kick.
Diddler slips a jab and a cross from Baroni.
Baroni misses with a two punch combination.
A decent looking cross lands there for Baroni.

Diddler is rocked!
Baroni lunges in with a left hook that violently twists Diddler head around and knocks him out cold! Baroni hops onto the cage and yells out at the top of his lungs - Yeeeeeeeeaaaaaaaaah! They're showing the replay on the big screens now; that was nasty! I hope one of the photographers got a good shot of it.
Ladies and gentlemen, after 0:34 of round 1, we have a winner by way of KO (Punch). Joe Baroni!
|
|
|
|
|
|
|
|
|
|
|
|
|
|
|
|
|
|
|
|
|
|
|
| S |
C
A |
G |
S |
C
B |
G |
|
S |
C |
G |
|
energy
A | B |
|
hype
A | B |
|
pop
A | B |
|
mgr
A | B |
|
FIGHT
RATING
100% |
|
|
|
|
|
|
|
Undercard bout
|
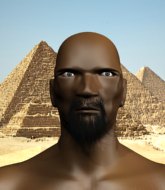
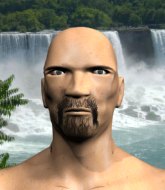
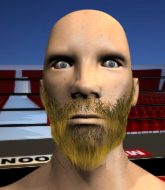
Coming up we have a light heavyweight MMA rules bout between Fionn McCool (ranked 0 p4p, 0 weight class) and John Joe Ward (ranked 0 p4p, 0 weight class). McCool's entrance music is Dearg Doom. A fine choice. Ward comes into a darkened arena with his song building. Aint nobody got time for dat kicks in, the lights come on and the crowd goes wild! What a showman! Fionn McCool could well score a knockout today. He has the power to get to John Joe Ward's chin.
 |
|
 |
| 188 cm
23
215 lbs
9 - 3 - 0 |
|
185 cm
20
202 lbs
4 - 3 - 0 |
Decent wrestler
Excellent boxer
Cardio machine |
|
Decent wrestler
Brawler
Knockout power |
|
| |
|
Ladies and gentlemen. This fight is 3 rounds, in the light heavyweight division.
Introducing the fighter to my left, fighting out of the red corner.
With a record of
9 - 3 - 0, fighting out of New York, Fionn McCool!
And introducing the fighter to my right, fighting out of the blue corner.
With a record of
4 - 3 - 0, fighting out of New York, John Joe Ward!
The judges for this bout are David Schapiro, Russell Pearce and Lou da Vinci.
The bell rings for round one and we are underway!
McCool lands a big uppercut and Ward crumbles to the floor! The ref thinks about stopping the fight but Ward looks OK. McCool waves Ward back to his feet!
Ward is rocked!
It looks like John Joe Ward has been cut.
McCool drops a shoulder and throws a monster hook that connects perfectly to the side of Ward's head, knocking him out cold! McCool is extatic as he celebrates with his cornermen.
Ladies and gentlemen, after 0:05 of round 1, we have a winner by way of KO (Punch). Fionn McCool!
Post fight, an emotional Fionn McCool said 'I hunted the Saxon with Cú Chulainn, after that battle hold no surprises for me'.
The defeated John Joe Ward had this to say: 'I'm so handsome i'm not surprised this guy was all over me the way he was!'.
|
|
|
|
|
|
|
|
|
|
|
|
|
|
|
|
|
|
|
|
|
|
|
| S |
C
A |
G |
S |
C
B |
G |
|
S |
C |
G |
|
energy
A | B |
|
hype
A | B |
|
pop
A | B |
|
mgr
A | B |
|
FIGHT
RATING
100% |
|
|
|
|
|
|
|
Undercard bout
|
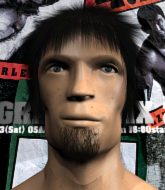
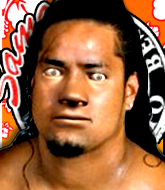
Coming up we have a bantamweight MMA rules bout between AC Mann (ranked 0 p4p, 0 weight class) and Josh Watson (ranked 0 p4p, 0 weight class). AC Mann looks tired to me. Hopefully he has got enough gas left in the tank to put in a good performance.
 |
|
 |
| 175 cm
25
135 lbs
0 - 1 - 0 |
|
181 cm
25
142 lbs
5 - 10 - 0 |
BJJ White Belt
Excellent boxer
Cuts easily |
|
Good takedowns
Counter fighter
Knockout power |
|
| |
|
Ladies and gentlemen. This fight is 3 rounds, in the bantamweight division.
Introducing the fighter to my left, fighting out of the red corner.
With a record of
0 - 1 - 0, fighting out of New York, AC Mann!
And introducing the fighter to my right, fighting out of the blue corner.
With a record of
5 - 10 - 0, fighting out of New York, Josh Watson!
The judges for this bout are Dean Styles, Franklyn Lucas and Joseph Jones.
The bell rings for round one and we are underway!
Watson circles away from the clinch attempt.
Mann looks exhausted already! Oh dear, he should have come in in better shape than this!
Mann missing with a left hand there. Watson was out of range so wasted energy throwing that one.
AC Mann seems to be the more aggressive standup fighter in this bout.
Mann throws a combination but comes up with nothing but fresh air.
Mann swings and misses with a hook to the body.
A little jabbing left from Watson on the counter but it doesn't find it's target.
Mann misses with a body shot. Nice footwork from Watson.
It seemed like Watson was going to counter with the hook but didn't fully commit to it.
Mann throws a combination but comes up with nothing but fresh air.
Mann will need to tighten up his combinations if he doesn't want to gas himself out, swinging at thin air.
Watson looked like he wanted to counter with a punch but didn't throw it.
Mann throws a hook to the body but it doesn't connect.
Mann fakes high and swings low for a body shot but Watson manages to avoid it.
We've had a slow start to the round here - hopefully the action picks up.
Mann rushes forward with a series of wild hooks but Watson moves out of range and avoids them all easily.
Watson uses some good footwork to avoid the body shot by Mann.
Mann fails with an attempt to clinch.
A countering left hand to the body from Watson misses.
Mann throws a body shot but no joy.
That's one minute gone in the round.
Some wild striking there from Mann.
Mann will need to tighten up his combinations if he doesn't want to gas himself out, swinging at thin air.
Mann throws a hook to the body but it doesn't connect.
Watson throws out a counter right but Mann avoids it with no problem.
Mann throws a hard body shot but it just misses.
Mann moves in looking to clinch but Watson pushes him off.
Mann looks to land a left hand but Watson moved out of range nicely.
Mann tries to bum rush Watson with a series of wild strikes but Watson uses good footwork to avoid the assault.
Mann misses with a jab, cross combination.
It seemed like Watson was going to counter with the hook but didn't fully commit to it.
Mann misses with a body shot. Nice footwork from Watson.
Mann misses with a jab, cross combination.
Watson avoids a lazy jab quite easily.
Mann misses with a few strikes there.
Watson let fly with a counter punch to the body but it didn't land.
That's two minutes gone in the round.
Watson keeping a good distance there, avoiding the body shot.
Mann misses with an uppercut.
And an attempted straight right on the counter from Watson! But no joy.
Mann is looking to wear down Watson with body shots, infact he's throwing more body shots than head shots at the moment.
Mann throws a series of punches but Watson avoids them all with ease.
Mann throws a combination but comes up with nothing but fresh air.
Watson looks like he wants to counter punch here.
Mann tries to close the distance and clinch up but Watson swats him away and circles back towards the center.
Watson looks like he wants to counter punch here.
Mann ducks down and throws a hook to the body but Watson moves away.
Mann just misses with a punch to the body.
Watson throws out a counter right but Mann avoids it with no problem.
Watson showing good head movement there, avoiding the strikes from Mann.
Mann throws a combination but comes up with nothing but fresh air.
Fantastic stuff here - a very entertaining period of action, which has drawn cheers from the crowd.
Mann will need to tighten up his combinations if he doesn't want to gas himself out, swinging at thin air.
Mann waving his hands out in front of him, looking to distract Watson.
A little jabbing left from Watson on the counter but it doesn't find it's target.

That's three minutes gone in the round.
Mann throws a right and a left that Watson avoids nicely.
Watson looked like he wanted to counter with a punch but didn't throw it.
Mann misses the shot to the body.
A little jabbing left from Watson on the counter but it doesn't find it's target.
Watson bobs and weaves well there to avoid the strikes.
Mann throws the left hand but Watson avoids the punch easily.
Watson uses good footwork to avoid the strikes from Mann.
Watson feints a counter leg kick.
Mann tries to close the distance and clinch up against the cage but Watson paws at him with a jab and circles away.
Watson throws out a counter right but Mann avoids it with no problem.
Watson avoids a lazy jab quite easily.
Watson looked like he wanted to counter with a punch but didn't throw it.
Mann tries to close the distance and clinch but Watson swats him to one side with an open hand palm strike and circles away.
Watson avoids the body shot from Mann.
Watson appeared to try and counter that last move with a leg kick.
Mann tries to clinch up against the cage, rushing in to close the distance. Watson manages to break the clinch and circles back to the middle of the mat.
Watson looks like he wants to counter punch here.
Mann misses with a two punch combination.
Mann missing with a left hand there. Watson was out of range so wasted energy throwing that one.
Watson tries a quick counter leg kick but Mann is wise to it.
Watson ducks under a wild hook from Mann.
Watson doesn't fully commit to the body shot counter.

That's four minutes gone in the round.
Mann throws a body shot but no joy.
Mann tries to clinch up against the cage, rushing in to close the distance. Watson manages to break the clinch and circles back to the middle of the mat.
Mann swings for the body but Watson moves out of range.
Watson swings away with a counter right hand but no contact made.
Mann misses with a body shot.
Mann throws a big shot that misses.
Mann swings wildly with a right hand that was never going to find it's target.
A little jabbing left from Watson on the counter but it doesn't find it's target.
Mann just misses with a punch to the body.
Watson tries a quick counter leg kick but Mann is wise to it.
Mann throws a combination but comes up with nothing but fresh air.
It seemed like Watson was going to counter with the hook but didn't fully commit to it.
Mann misses with a body shot. Nice footwork from Watson.
Mann misses with a few strikes there.
Mann swinging wildly here.
Mann throws a series of punches but Watson moves out of range.
Watson looks like he wanted to counter with a high kick but didn't throw it.
And thats the end of the round the fighters go back to their corners.
AC Mann dominated that round.
That's the end of the interval. I'm sure that seemed a lot quicker than a minute for our two fighters! Back to the action.

Some wild striking there from Mann.
Mann throws a looping overhand right but Watson ducks down to avoid it.
A looping hook to the body misses from Mann. Watson does a little dance to reset his feet.
Watson tries a quick counter leg kick but Mann is wise to it.
Mann looks to be in better condition than last time we saw him fight. Obviously he's been working hard on his cardio.
Mann misses with a jab and misses with a cross straight after too.
Watson uses good footwork to avoid the strikes from Mann.
Mann really does look like a pencil wearing a pair of gloves. Let's hope he has a gameplan to suit that ridiculous body shape.
Mann misses with a series of wild punches.
Mann tries to clinch but is not successful on this occasion.
We've had a slow start to the round here - hopefully the action picks up.
Mann swings away but doesn't land with a series of punches.
Mann swings and misses with a hook to the body.
Watson ducks under an overhand right and circles away with a smile on his face.
The fighters circling - Mann throws out the jab but it was never going to land.
Both fighters are absolutely exhausted here.
Watson moves out of range as Mann strikes.
That's one minute gone in the round.
Mann swinging wildly here.
Watson keeping a good distance there, avoiding the body shot.
Watson looks like he wants to counter punch here.
Mann misses with a series of wild punches.
Mann throws a hook to the body but it doesn't connect.
And an attempted straight right on the counter from Watson! But no joy.
Mann is looking to clinch but Watson is avoiding it.
Watson looks like he wants to counter punch here.
Mann misses with a body shot.
Watson looks like he wants to counter punch here.
Watson slips a jab from Mann.
Watson throws out a counter right but Mann avoids it with no problem.
Mann throws out a loose jab but Watson uses good head movement to avoid it.
Watson uses some good footwork to avoid the body shot by Mann.
Watson swings away with a counter right hand but no contact made.
Watson avoids a lazy jab quite easily.
Watson bobs and weaves well there to avoid the strikes.
Watson throws out a counter right but Mann avoids it with no problem.
That's two minutes gone in the round.
A slow jab from Mann misses its intended target.
Watson swings away with a counter right hand but no contact made.
Watson circles away from the clinch attempt.
Watson looked like he wanted to counter with a punch but didn't throw it.
Mann is really dominating this fight. Is there anything that Watson can do to turn this around?
Mann misses with a straight left.
Mann tries to clinch but is not successful on this occasion.
A big left from Mann misses.
Watson swings away with a counter right hand but no contact made.
Mann fails to land with a series of punches.
Watson tries a quick counter leg kick but Mann is wise to it.
Mann swings away but doesn't land with a series of punches.
Watson looks like he wanted to counter with a high kick but didn't throw it.
Mann fails in his attempt to clinch.
It seemed like Watson was going to counter with the hook but didn't fully commit to it.
Mann misses with a jab, cross combination.
It seemed like Watson was going to counter with the hook but didn't fully commit to it.
Watson defending well as Mann loads up on a big left hand.
Watson let fly with a counter punch to the body but it didn't land.
Mann throws a series of punches but Watson moves out of range.
Mann throws a lazy right hand but Watson sees it coming a mile off and sidesteps it easily.
And an attempted straight right on the counter from Watson! But no joy.
Mann wants to clinch.
That's three minutes gone in the round.
Mann misses with the combination.
Watson looked like he wanted to counter with a punch but didn't throw it.
Mann tries to land with a swinging hook to the body but Watson was well out of range. Poor timing from Mann.
Watson dodges the punch combination from Mann.
Watson swings away with a counter right hand but no contact made.
Watson swats away the attempt to clinch by Mann.
Watson looks like he wants to counter punch here.
Mann swings for the body but Watson moves out of range.
Watson appeared to try and counter that last move with a leg kick.
Mann misses with a double jab.
A little jabbing left from Watson on the counter but it doesn't find it's target.
Mann misses with a wild combination.
A little jabbing left from Watson on the counter but it doesn't find it's target.
AC Mann is winning the standup battle so far.
That's four minutes gone in the round.
Mann looks to land a left hand but Watson moved out of range nicely.
A little jabbing left from Watson on the counter but it doesn't find it's target.
Mann rushes forward with a series of wild hooks but Watson moves out of range and avoids them all easily.
Mann wants to clinch.
Watson appears to be waiting to throw a counter punch to the body.
Mann fails to land with the punch combination there - jab, cross, hook, miss, miss, miss.
Mann misses with an uppercut.
Watson raises up his leg as if looking to counter with a high kick.

Mann closes the distance and presses his opponent up against the cage.
Mann throws a punch but it's blocked by Watson.
The crowd thankful this round is nearly over.
Watson has Mann pressed up against the cage and is working for takedown. Mann manages to improve position though and keeps the fight standing.
Watson has dropped down and is looking to force the takedown but it's defended by Mann after a bit of a struggle.
Watson can't get the takedown.
AC Mann has stuffed three takedown attempts in the round now. That's going to take a lot out of Josh Watson.
Watson wants a takedown.
And thats the end of the round the fighters go back to their corners.
AC Mann dominated that second round.
That's the end of the round. The referee orders the cornermen out of the cage so we can get back down to business. This is the final round!

Watson ducks under a wild hook from Mann.
Mann misses with a straight left.
Mann throws a series of punches but Watson moves out of range.
Mann ducks down and throws a hook to the body but Watson moves away.
Watson looks like he wants to counter punch here.
Mann fakes high and swings low for a body shot but Watson manages to avoid it.
Watson now looks to counter with a shot at the body.
A looping hook to the body misses from Mann. Watson does a little dance to reset his feet.
Watson uses good head movement to avoid the hook from Mann.
A little jabbing left from Watson on the counter but it doesn't find it's target.
Mann tries to clinch but is not successful on this occasion.
Watson let fly with a counter punch to the body but it didn't land.
Watson blocks a jab.
We've had a slow start to the round here - hopefully the action picks up.
No joy there for Mann, who threw a few shots but didn't land.
A nice side step and Watson releases a counter shot to the body, but it doesn't find it's home.
AC Mann is looking to throw some combinations by the looks of things.
Both fighters are breathing heavily.
Mann misses with a hook.
It seemed like Watson was going to counter with the hook but didn't fully commit to it.
Mann tries to land with a swinging hook to the body but Watson was well out of range. Poor timing from Mann.
Mann lunges in with swinging rights and lefts but Watson circles away quickly and effectively.
That's one minute gone in the round.
Mann throws a hook to the body but it doesn't connect.
Mann looks to throw the jab but Watson is out of range.
Watson slips a jab and a cross from Mann.
Sloppy strikes from Mann. Those never looked like landing.
Mann throws a body punch but Watson moves out of range.
A little jabbing left from Watson on the counter but it doesn't find it's target.
Mann throws a nice looking combination but Watson bobs and weaves to avoid any damage.
Mann misses with a series of wild punches.
Mann throws a shot from downtown. Watson moves away and avoids it.
Watson is clearly trying to counter these attacks from Mann with a body shot.
Watson keeping his hands up high there, blocking the jab from Mann.
Watson avoids the body shot from Mann.
Mann misses with a double jab.
Mann misses with a series of wild punches.
Watson looked like he wanted to counter with a punch but didn't throw it.
That's two minutes gone in the round.
Mann misses with a body shot.
Mann is looking to take this fight into the clinch.
Watson throws out a counter right but Mann avoids it with no problem.
Mann tries to clinch up against the cage, rushing in to close the distance. Watson manages to break the clinch and circles back to the middle of the mat.
Watson looks like he wants to counter punch here.
A looping hook to the body misses from Mann. Watson does a little dance to reset his feet.
And an attempted straight right on the counter from Watson! But no joy.
Mann wants to clinch up but Watson keeps it at a distance.
A little jabbing left from Watson on the counter but it doesn't find it's target.
Mann fails with an attempt to clinch.
Mann throws an uppercut from half a mile away. Watson sees it coming and avoids it easily.
Mann swings for the body but Watson moves out of range.
Watson throws out a counter right but Mann avoids it with no problem.
Mann fails with a rather predictable takedown attempt.
Watson looks like he wants to counter punch here.
That's three minutes gone in the round.
Mann is the aggressor but that punch slipped nicely by Watson.
Watson looked like he wanted to counter with a punch but didn't throw it.
Mann throws a left and a right that both miss
and Watson counters with a good right hand that lands right on the jaw.
Mann misses with a two punch combination.
Mann swings away but doesn't land with a series of punches.
A little jabbing left from Watson on the counter but it doesn't find it's target.
Mann misses with a looping left.
Mann fakes high and swings low for a body shot but Watson manages to avoid it.
It seemed like Watson was going to counter with the hook but didn't fully commit to it.
Mann ducks down and throws a hook to the body but Watson moves away.
Watson moves out of range as Mann strikes.
AC Mann is fighting for a decision here - he's started to take the cautious approach.
Watson circles away from the clinch attempt.
Watson steps to the side to avoid the strikes from Mann.
Mann doesn't manage to clinch there - Watson circles away.
It seemed like Watson was going to counter with the hook but didn't fully commit to it.
Mann fails to land with a series of punches.
That's four minutes gone in the round.
Mann shoots in for a takedown. He's persisting with it as Watson sprawls well. Watson wins this battle and keeps the fight standing. Mann gets slowly back to his feet.
A looping hook to the body misses from Mann. Watson does a little dance to reset his feet.
Mann misses with a series of wild punches.
A little jabbing left from Watson on the counter but it doesn't find it's target.
Mann throws a right and a left that Watson avoids nicely.
A punch combination from Mann misses.
It seemed like Watson was going to counter with the hook but didn't fully commit to it.
Mann throws a hook but Watson avoids it easily.
It seemed like Watson was going to counter with the hook but didn't fully commit to it.
Sloppy strikes from Mann. Those never looked like landing.
Watson now looks to counter with a shot at the body.
The crowd thankful this round is nearly over.
Mann misses with a double jab.
Watson throws out a counter right but Mann avoids it with no problem.
Mann throws a right hand that Watson ducks under and follows up with a left that Watson also avoids with ease.
Watson swings away with a counter right hand but no contact made.
Josh Watson has stepped it up - he knows he needs a finish here!
This has been an exciting period of action!
Mann takes a swing at Watson's ribcage but misses.
And that's the end of the fight!
AC Mann showed his dominance in that final round.
Well Mann has outscored his opponent in every aspect of the fight today. Only a scarily incompetent judge or two will keep him from a well deserved win... Over to the ring announcer for the scorecards.
Ladies and gentlemen, after 3 rounds of action, we go to the scorecards for a decision.
Judge Dean Styles scores the fight 30:26
Judge Franklyn Lucas scores the fight 30:25
Judge Joseph Jones scores the fight 30:26
In favor of your winner, by unanimous decision... AC Mann!
|
|
|
|
|
|
|
|
|
|
|
|
|
|
|
|
|
|
|
|
|
|
|
| S |
C
A |
G |
S |
C
B |
G |
|
S |
C |
G |
|
energy
A | B |
|
hype
A | B |
|
pop
A | B |
|
mgr
A | B |
|
FIGHT
RATING
37% |
|
|
|
|
|
|
|
Undercard bout
|
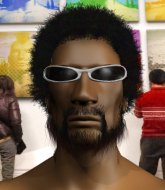
Coming up we have a lightweight MMA rules bout between Gerald Minor (ranked 0 p4p, 0 weight class) and Superior Nucleus (ranked 0 p4p, 0 weight class). Nucleus has chosen Tupac - Hit 'Em Up as his entrance music. I can't wait for this one - let's get the fighter introductions out of the way and get this one started!
 |
|
 |
| 170 cm
31
162 lbs
7 - 6 - 0 |
|
180 cm
22
160 lbs
7 - 3 - 1 |
Powerful takedowns
Solid boxing
Cardio machine |
|
Good wrestler
Good kicks
Good gas tank |
|
| |
|
Ladies and gentlemen. This fight is 3 rounds, in the lightweight division.
Introducing the fighter to my left, fighting out of the red corner.
With a record of
7 - 6 - 0, fighting out of New York, Gerald Minor!
And introducing the fighter to my right, fighting out of the blue corner.
With a record of
7 - 3 - 1, fighting out of New York, Superior Nucleus!
The judges for this bout are Eddie Farnsworth, Russell Pearce and Chad Campbell.
The bell rings for round one and we are underway!
Minor keeping a good distance there, avoiding the body shot.
Minor is looking to counter punch.
Minor just misses with a punch to the body.
Nucleus needs to keep his hands up - Minor had a free shot at his head there.
A really sloppy takedown attempt there from Minor.
Nice body kick from Nucleus.
Nucleus connects with an inside leg kick.
Minor throws a front kick aimed at Nucleus's knee but Nucleus avoids it well.
Nucleus appears to be waiting to throw a counter punch to the body.
We've had a slow start to the round here - hopefully the action picks up.
Nucleus throws a head kick that misses and slips in the process. He scrambles back to his feet and the fighters circle.
Nucleus lands with a shot to the body.
Minor lands with an uppercut that bounces Nucleus off the cage and back into range.
Nucleus goes for a spinning back kick but it misses.
Minor tries to counter with a takedown but Nucleus is quick to defend against it.
That's one minute gone in the round.
Minor tries to score with an inside leg kick but telegraphs it and Nucleus is able to avoid easily.
Nucleus thuds his right hand into Minor's forehead from close range. That could be painful for both fighters.
Minor lands with a shot to the body.
Minor fakes high and swings low for a body shot but Nucleus manages to avoid it.
A solid leg kick lands there for Nucleus.
Minor gets cracked there but stands up to it.
Minor cracks Nucleus with a hook to the jaw. Both fighters smile at eachother and high-five before getting back down to business.
Minor pivots, looking for a leg kick but Nucleus is out of range and Minor settles back down.
Nucleus tries to land a leg kick but Minor saw it coming and moves away.
An attempted straight right counter from Minor misses the target.
Minor misses with a body shot.
Minor takes a shot right to the bread basket.
A slapping body kick lands there for Nucleus.
That's two minutes gone in the round.
Minor ducks down and throws a hook to the body but Nucleus moves away.
Minor takes a push kick to the midsection and stumbles backwards.
The fans in attendance giving it up for the two fighters, who have really let it all hang out in the last minute or so!
Nucleus looks to score with a combo but nothing lands.
Good leg kick by Minor there. It's the ones that make that thud noise that hurt and that was an almighty thud.
Minor's hands are dropping dangerously low here and Nucleus connects clean with a right hook that sends him down to one knee! Minor scrambles back to his feet.
Nucleus scores with a reasonable looking shot to the body. Minor doesn't seem bothered though.
Minor misses with a series of wild punches.
Minor cracks Nucleus with a good shot that sees him stumbling back into the cage.
Sloppy strikes from Minor. Those never looked like landing.
Nucleus fakes with the hands and throws a leg kick but Minor is out of range.
That's three minutes gone in the round.
Minor swings and misses with a hook to the body.
Minor bobbing and weaving, closes the distance and lands a hook to the side of Nucleus's head.
Nucleus gets cracked there but stands up to it.
Nucleus looks to score with a jab to the body but Minor is just out of range.
Nucleus throws a hook but Minor blocks it.
A swing and a miss from Minor.
Well, he's not going to score with shots like that. A lazy body kick attempt from Nucleus.
Nucleus throws a hook to the body but it doesn't connect.
Minor throws a poor cross that misses
and Minor takes a counter punch right on the button for his troubles.
Nucleus tries a head kick but it misses.
Nucleus lands a leg kick and bounces back out of range.
Minor moves out of range of the body kick from Nucleus.
Minor half committed to a counter leg kick.
That's four minutes gone in the round.
Minor keeping a good distance there, avoiding the body shot.
Nucleus throws a head kick that misses and slips in the process. He scrambles back to his feet and the fighters circle.
Minor throws a body shot but no joy.
No joy there for Minor, who threw a few shots but didn't land.
Minor throws out a token jab with nothing on it.
Minor slips a jab and a cross from Nucleus.
This has been an exciting period of action!
Nucleus scores with a jab to the body.
Nucleus rushes forward with a series of wild hooks but Minor moves out of range and avoids them all easily.
Nucleus misses with the combination.
Nucleus comes forward and lands a shot to the body, then darts back out of range.
And thats the end of the round the fighters go back to their corners.
Superior Nucleus dominated that round.
That's time! Back to the action!
Nucleus takes a swing at Minor's ribcage but misses.
Superior Nucleus seems to be getting the better of the standup.
Minor misses with a lunging right hand
and Nucleus counters with a lovely shot to the body.
Minor misses with a wild body shot.
Minor swings for the body but Nucleus moves out of range.
Nucleus misses with a half-hearted attempt at a head kick.
Minor slips under a jab.
Minor seem to be loading up, looking for a big counter.
Minor blocks a head kick by Nucleus.
Nucleus slips under a jab from Minor.
We've had a slow start to the round here - hopefully the action picks up.
Minor moves out of range as Nucleus throws a body kick.
Nucleus fakes high and swings low for a body shot but Minor manages to avoid it.
Minor is looking to counter with a shot to the body.
Nucleus tries a head kick but it misses.
Minor misses with a takedown attempt
and Nucleus counters with a flying knee. Nice.
That's one minute gone in the round.
Nucleus lands a glancing blow to the side of Minor's head.
Nucleus misses with a head kick.
Minor changes levels looking for a counter takedown but doesn't commit.
Nucleus buckles his opponent's knee momentarily with a nice leg kick.
Minor dips down and scores with a jab to the body.
Nucleus has been the more effective fighter overall so far.
Minor misses with the combination.
Minor looks to land a left hand but Nucleus moved out of range nicely.
Minor fakes high and swings low for a body shot but Nucleus manages to avoid it.
Nucleus misses with a head kick.
This entire fight has taken place on the feet so far and you wonder whether Minor might be better served trying to take this one to the ground because he's losing the standup battle so far.
Minor misses with a wild body shot.
Nucleus misses with a body shot. Nice footwork from Minor.
Sloppy strikes from Minor. Those never looked like landing.
Nucleus was about to counter that last move with a leg kick but changes his mind.
That's two minutes gone in the round.
Minor tries to land with a swinging hook to the body but Nucleus was well out of range. Poor timing from Minor.
This fight brought to you by 5M nutrition - it's mmmmm tasty. Nice jab by Minor.
Nucleus uses some good footwork to avoid the body shot by Minor.
Nucleus takes a really solid shot there but just smiles back and shrugs his shoulders.
Minor throws an uppercut from half a mile away. Nucleus sees it coming and avoids it easily.
Nucleus appeared to try and counter that last move with a leg kick.
The fans in attendance giving it up for the two fighters, who have really let it all hang out in the last minute or so!
Minor throws a body shot but no joy.
Nucleus misses the shot to the body.
Nucleus throws a right and a left that both miss.
Minor takes a solid shot to the body. That one hurt him but he's trying not to show it.
No luck for Minor with that takedown attempt.
That's three minutes gone in the round.
Minor swings and misses with a hook to the body.
Nucleus lands a nice looking body shot.
Minor takes a nasty kick to the mid section... That should keep him thinking. Does he try and block and risk a head kick landing?
Minor misses with a wild body shot.
Nucleus looks like he wants to counter punch here.
Minor showing good head movement there, avoiding the strikes from Nucleus.
Nucleus moves out of range of the leg kick from Minor.
Nucleus scores with a leg kick.
Nucleus avoids a punch combination nicely.
Nucleus tries a head kick but it misses.
Nucleus misses with a body kick.
Minor tries to counter by moving into the clinch but Nucleus manages to circle out of the way.
Nucleus has used his reach advantage pretty well so far tonight.
That's four minutes gone in the round.
Minor digs a good body shot into Nucleus's ribs.
Minor throws a body shot but no joy.
Minor takes a swing at Nucleus's ribcage but misses.
Nucleus displays some good footwork, moving neatly out of range as Minor throws out the jab.
Minor jabs at Nucleus's body.
Nucleus lands an overhand right.
Fantastic stuff here - a very entertaining period of action, which has drawn cheers from the crowd.
Minor throws a hard body shot but it just misses.
Nucleus misses with a body kick.
Minor takes a punch right to his stomach. That took the wind out of him momentarily.
Minor tries to land with a swinging hook to the body but Nucleus was well out of range. Poor timing from Minor.
Minor darts in and out, connecting with a jab.
And thats the end of the round the fighters go back to their corners.
Superior Nucleus showed his class in that round. I'd imagine he'll take it on all the scorecards.
Well, the break between rounds is over. Let's get back to the scrappin! This is the final round!
Nucleus lands a slapping body shot.
A slapping leg kick lands for Nucleus.
Nucleus misses with a half-hearted attempt at a head kick.
Minor throws a body punch but Nucleus moves out of range.
Minor throws a right and a left that both miss.
Nucleus scores with a jab to the body.
Minor takes a nasty kick to the mid section... That should keep him thinking. Does he try and block and risk a head kick landing?
Minor attempts a leg kick but it's missed by a good margin.
Minor seems to be moving with more speed, compared to his last bout. He must have been working on that in the gym.
We've had a slow start to the round here - hopefully the action picks up.
Minor takes a head kick and shrugs it off.
Minor throws a poor cross that misses
and Nucleus counters with a shot to the ribs. That looked like it hurt.
Minor connects with a body shot that sends Nucleus's belly button to the back.
Nucleus misses the shot to the body.
That's one minute gone in the round.
Nucleus misses with a half-hearted attempt at a head kick.
Nucleus looks to throw a body kick

so Minor counters with a double leg into guard. Good agility.

Nucleus escapes his hips to the side and looks to be working for an armbar. Minor gives him a little smile and shakes his head. No chance.
Nucleus managing to control the position.
Minor drops back looking for a leg! Nucleus is in trouble here! The fighters roll with the hold and Nucleus manages to kick Minor off! Minor jumps back into Nucleus's guard.
Minor working some ground and pound from guard but it's not doing any damage.
That's two minutes gone in the round.
Nucleus preventing the ground and pound from doing any damage.
Nucleus controlling the position.
Nucleus has an active guard here but Minor has managed to pass into half guard.
Nucleus wants to get back to full guard.
Nucleus is working for an escape here. He's hooked one of Minor's legs and he's managed to sneak out and take Minor's back!
Good control from Nucleus.
Nucleus has his hand under the chin of his opponent looking for the choke. He's nearly got it! This one could be all over! But no, Minor has freed his hand and lives to survive another
well, another couple of seconds at least!
The ref warns both fighters not to hold the cage as they work up against the meshing.
That's three minutes gone in the round.
Nucleus avoiding Minor 's attempts to control his hands.
Minor is in bad spot here.
Nucleus trying to secure his dominant position for a moment - making sure Minor doesn't escape.
Minor is defending well here and trying to improve his position.
That's four minutes gone in the round.
There's not a lot going on here and the crowd are letting the fighters know they're not willing to tolerate a lack of action.
You know, I was talking to some of our celebrities at ringside tonight and they were split right down the middle on who was going to win this fight.
Nucleus gets his hands free as Minor looks to control.
Nucleus just keeping the dominant position. He can't wait too long though, otherwise the referee will stand them back up.
Gerald Minor has stepped it up - he knows he needs a finish here!
Let's hope that Nucleus has the urge to step up the pace any second now because for the last 15 or 20 seconds he's just been holding on tight.
The crowd thankful this round is nearly over.
Nucleus trying desperately to keep hold of the dominant position.
And that's the end of the fight!
Superior Nucleus comfortably won the final round on my scorecard.
Well Nucleus has outworked and out performed his opponent in all aspects of the game today. He was simply too good and the decision should be no more than a formality. Over to the ring announcer for the scorecards.
Ladies and gentlemen, after 3 rounds of action, we go to the scorecards for a decision.
Judge Eddie Farnsworth scores the fight 27:30
Judge Russell Pearce scores the fight 27:30
Judge Chad Campbell scores the fight 27:30
In favor of your winner, by unanimous decision... Superior Nucleus!
A very excited looking Superior Nucleus made sure he remembered to thank all the fans both in the arena and on the internet. He said all the coolest people spend all day on MMA websites, which got a big reaction.
|
|
|
|
|
|
|
|
|
|
|
|
|
|
|
|
|
|
|
|
|
|
|
| S |
C
A |
G |
S |
C
B |
G |
|
S |
C |
G |
|
energy
A | B |
|
hype
A | B |
|
pop
A | B |
|
mgr
A | B |
|
FIGHT
RATING
47% |
|
|
|
|
|
|
|
Undercard bout
|
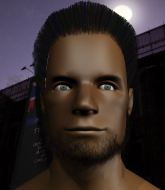
Coming up we have a light heavyweight MMA rules bout between Eric Cartmen (ranked 0 p4p, 0 weight class) and Ron Jeremy (ranked 0 p4p, 0 weight class). Cartmen's ring entrance music is that housewives' favourite, Eric Cartman - Come Sail Away . Both fighters look pumped up here. Let's hope this is a good fight!
 |
|
 |
| 181 cm
23
210 lbs
8 - 5 - 0 |
|
180 cm
23
212 lbs
6 - 5 - 0 |
BJJ Purple Belt
Solid boxing
Insanely flexible |
|
Powerful takedowns
Excellent boxer
Granite chin |
|
| |
|
Ladies and gentlemen. This fight is 3 rounds, in the light heavyweight division.
Introducing the fighter to my left, fighting out of the red corner.
With a record of
8 - 5 - 0, fighting out of New York, Eric Cartmen!
And introducing the fighter to my right, fighting out of the blue corner.
With a record of
6 - 5 - 0, fighting out of New York, Ron Jeremy!
The judges for this bout are Anthony Taglia, John Kavanagh and Columbo Gatti.
The bell rings for round one and we are underway!
Cartmen defends well against a solid takedown attempt from Jeremy.
Cartmen swung with a counter punch to the body but it didn't connect.
Cartmen drives through and clinches with Jeremy against the cage.
Cartmen can't find room to land a body shot as Jeremy controls the action.
Cartmen misses with a knee to the head.
Cartmen putting his Muay Thai to good use. He has Jeremy in a tight clinch and is doing some damage with knees to the body.
Jeremy has dropped down and is looking to force the takedown but it's defended by Cartmen after a bit of a struggle.
Jeremy looks winded!
Jeremy is working for a takedown up against the cage. He can't get it on this occasion though.
Eric Cartmen has stuffed three takedown attempts in the round now. That's going to take a lot out of Ron Jeremy.
Cartmen escapes the clinch and we're back to striking.
Cartmen misses with a head kick.
We can't be sure of the tactics at this early stage but we have heard that Jeremy has been working on his takedowns a lot in the buildup to the fight and we can only assume he's going to look to take this to the mat.
We've had a slow start to the round here - hopefully the action picks up.
Cartmen dips down and scores with a jab to the body.
No luck for Jeremy with that takedown attempt.
Cartmen lands with a hook. Jeremy tried to avoid it but it clipped the top of his head.
It looks like Ron Jeremy has been cut.
Jeremy walks forward, straight into a front kick from Cartmen.
We've been told by Cartmen's head coaches at BigMouth Cabrons that he's been working on his takedown defense in preparation for this fight.
That's one minute gone in the round.
Jeremy shoots in but doesn't get the takedown
and Cartmen counters with an outside leg kick.
Cartmen scores with a punch to the head.
Eric Cartmen is looking to keep the fight on the feet at all costs.
Cartmen moves into range and lands a nice leg kick.
Good exchange - Cartmen coming out on top.
Jeremy darts in looking for a takedown but Cartmen gets double underhooks and turns Jeremy into the cage.
Cartmen lands with a shot to the body.
Cartmen scores with a nice body kick.
Jeremy needs to keep his hands up - Cartmen had a free shot at his head there.
Cartmen clinches with his opponent.
Cartmen manages to break the clinch.
A decent looking cross lands there for Jeremy.
The crowd cheering loudly, showing their appreciation for the quality fight we're seeing here.
Jeremy takes a big uppercut there. He seems a bit wobbly but no, he's OK.
That has opened up Ron Jeremy's cut even more.
Cartmen tries a switch kick but it misses it's target.
Cartmen scores with a sloppy punch to the body. Not much technique there but it did the business.
That's two minutes gone in the round.
Cartmen throws a quick inside leg kick.
A slapping body kick lands there for Cartmen.
Cartmen lands a slapping body shot.
Cartmen lands with a thumping leg kick.
Cartmen slaps away a takedown attempt from Jeremy, before circling back to the center of the mat.
Cartmen darts in and out, connecting with a jab.
Cartmen stuns Jeremy with a nice body shot, before stepping back out of range.
Cartmen lands with a kick to the ribs.
Cartmen darts in and clinches Jeremy up against the cage.
Cartmen lands a right hand that snaps the head of Jeremy backwards.
Cartmen lands a shoulder strike.
Cartmen escapes the clinch and we're back to striking.
That's three minutes gone in the round.
Jeremy uses some good footwork to avoid the body shot by Cartmen.
Jeremy throws a fast counter high kick but Cartmen manages to duck under it in time.
Jeremy pulls out of a head kick attempt.
The fighters circle momentarily. Cartmen darts into range and connects with a nice straight punch.
Ron Jeremy seems to be the more aggressive standup fighter in this bout.
Jeremy looks for a takedown but Cartmen sprawls well.
Jeremy with a lazy takedown attempt
and Cartmen counters with a straight punch to the midsection.
Crunch! Cartmen slams his shin into Jeremy's torso.
Cartmen throws a right high kick that is partially blocked by Jeremy.
Jeremy on the receiving end of a decent leg kick there by Cartmen. Cartmen obviously looking to wear him down.
Cartmen lands a head kick. Jeremy smiles back at him and beckons him forward.
The cut above Ron Jeremy's eye is starting to cause him problems now.
A punch lands to the side of Jeremy 's head but he takes it in his stride.
Jeremy is rocked!
Cartmen misses with a few strikes there.
Jeremy is still on wobbly legs! Can Cartmen finish him?
The fans in attendance giving it up for the two fighters, who have really let it all hang out in the last minute or so!
Boom, another hit is landed. "You're gunna get knocked out" taunts Cartmen, as that shot connected.
Jeremy looks for a takedown here. Will he get it? Cartmen is fending him off so far but Jeremy persists. Nope, Cartmen circles away and we're back to standing.
A solid body kick from Cartmen.
Jeremy seems to have recovered his senses.
The fighters circle, before Cartmen throws a beautiful high kick that crashes into Jeremy's neck, sending him stumbling to the floor! Cartmen lands more strikes and forces a referee stoppage! That one ended in an instant!
Ladies and gentlemen, after 4:55 of round 1, we have a winner by way of TKO (Kick & Punches). Eric Cartmen!
Our winner, Eric Cartmen, made sure he spent some time buttering up the crowd during his post fight interview, which will no doubt bring him a few more fans.
|
|
|
|
|
|
|
|
|
|
|
|
|
|
|
|
|
|
|
|
|
|
|
| S |
C
A |
G |
S |
C
B |
G |
|
S |
C |
G |
|
energy
A | B |
|
hype
A | B |
|
pop
A | B |
|
mgr
A | B |
|
FIGHT
RATING
63% |
|
|
|
|
|
|
|
Undercard bout
|
Coming up we have a heavyweight MMA rules bout between Dante Boudain (ranked 0 p4p, 0 weight class) and Brutus Fulgore (ranked 0 p4p, 0 weight class). I can't wait for this one - let's get the fighter introductions out of the way and get this one started!
 |
|
 |
| 185 cm
23
282 lbs
4 - 3 - 0 |
|
209 cm
28
280 lbs
6 - 3 - 0 |
Good wrestling
World class MT
Insanely flexible |
|
Decent wrestler
Decent boxing
Powerful |
|
| |
|
Ladies and gentlemen. This fight is 3 rounds, in the heavyweight division.
Introducing the fighter to my left, fighting out of the red corner.
With a record of
4 - 3 - 0, fighting out of New York, Dante Boudain!
And introducing the fighter to my right, fighting out of the blue corner.
With a record of
6 - 3 - 0, fighting out of New York, Brutus Fulgore!
The judges for this bout are Jonathan Paton, Columbo Gatti and Russell Pearce.
The bell rings for round one and we are underway!
Boudain has closed the distance and engaged Fulgore in a clinch.
Boudain has been talking about how he's improved his wrestling in the run up to the fight so let's see if that's enough to sway the balance.
Fulgore is trying to slow down the pace of the fight but Boudain is keeping busy.
A head punch blocked on the inside by Boudain.
Good anti-grappling being displayed by Fulgore as Boudain tries to tie him up.
Boudain escapes the clinch and we're back to striking.
Boudain feints with a shoulder and throws a nice leg kick to Fulgore's calf.
Fulgore ducks down and throws a hook to the body but Boudain moves away.
Fulgore looks to throw the jab but Boudain is out of range.
Fulgore misses with a double jab.
Boudain throws a right high kick that is partially blocked by Fulgore.
It looks like Brutus Fulgore has been cut.
Fulgore misses with a series of wild punches.
Boudain wants to take advantage of his opponent's missed offense by moving into the clinch.
Fulgore misses with a body shot.
Boudain blocks a jab.
Fulgore scores with a jab to the body.
Boudain misses with a straight right.
Boudain lands a big head kick that sends Fulgore tumbling to the mat! Boudain takes a step backwards and waves Fulgore back to his feet - he wants the finish!
We've seen a great period of action over the last minute or so - credit to both fighters for going all out!
Boudain throws a leg kick which misses Fulgore's front leg but catches the back leg as Fulgore tries to avoid it.
Fulgore misses with a leg kick.
Boudain moves out of range of the strikes.
That's one minute gone in the round.
Boudain has closed the distance and engaged Fulgore in a clinch.
Boudain can't find room to land a body shot as Fulgore controls the action.
Boudain lands a nice uppercut.
Fulgore tried to land a shot to the body but connects with Boudain's elbow.
Boudain breaks from the clinch.
Boudain drops Fulgore with a big left hand! Fulgore is injured, injured bad! Boudain jumps in and finished him with strikes! The fight is over!
Ladies and gentlemen, after 1:20 of round 1, we have a winner by way of TKO (Strikes). Dante Boudain!
|
|
|
|
|
|
|
|
|
|
|
|
|
|
|
|
|
|
|
|
|
|
|
| S |
C
A |
G |
S |
C
B |
G |
|
S |
C |
G |
|
energy
A | B |
|
hype
A | B |
|
pop
A | B |
|
mgr
A | B |
|
FIGHT
RATING
85% |
|
|
|
|
|
|
|
Undercard bout
|
Coming up we have a featherweight MMA rules bout between Zin Foe (ranked 0 p4p, 0 weight class) and Micah Holland (ranked 0 p4p, 0 weight class). Holland has chosen Zombie as his entrance music. The key to victory for Zin Foe has got to be keeping the fight on the feet.
 |
|
 |
| 172 cm
27
150 lbs
5 - 6 - 0 |
|
178 cm
24
155 lbs
1 - 0 - 0 |
BJJ Purple Belt
Solid Muay Thai
KO power |
|
Good takedowns
Counter fighter
Solid chin |
|
| |
|
Ladies and gentlemen. This fight is 5 rounds, for the featherweight championship of the world!
Introducing the champion to my left, fighting out of the red corner.
With a record of
5 - 6 - 0, fighting out of New York, Zin Foe!
And introducing the challenger to my right, fighting out of the blue corner.
With a record of
1 - 0 - 0, fighting out of New York, Micah Holland!
The judges for this bout are Joseph Jones, David Schapiro and Lou da Vinci.
The bell rings for round one and we are underway!
Foe doesn't manage to clinch there - Holland circles away.

Foe tries to sprawl but Holland drives through with a takedown into half guard.
Holland throwing punches and elbows but they're not doing any damage.
Holland takes advantage of the dominant position to land a couple of big hammer fists.
The two fighters exchange a few words. I couldn't hear what they were saying but maybe it's more fun if you make it up yourself. Holland connects with a nice short shot to Foe's temple.
Holland lands with an elbow from half guard - that looked like it hurt.
Holland is scoring with some nice ground and pound from the dominant position.
The ref warns both fighters not to hold the cage as they work up against the meshing.
Holland winds up and cracks Foe with a swinging punch to the side of the head.
We've had a slow start to the round here - hopefully the action picks up.
Holland is looking for a kimura here.
Holland is thinking about going for an arm triangle but he can't free his leg.
That's one minute gone in the round.
Foe is trying to defend against the ground and pound but Holland scores with a couple of nice shots.
Foe tries to kick Holland off but Holland keeps his base steady and stays in half guard.
We've been hearing good reports from Foe's training camp. Apparently he has been rolling around with some good quality BJJ practitioners and has been sharpening his skills. Let's see if that has an impact on the fight today.
Holland working the head and body with strikes.
Holland is nestled in close to Foe, controlling him well. He's worked in a nice elbow to the side of the head as well, for good measure.
Foe looking for submissions off his back.
Holland scores with a couple of good hammerfists.
The fighters are pressed up against the cage, both looking to find a bit of space to work.
Holland working over Foe with some ground and pound. Foe looks like he wants out of this position, which is understandable.
Holland winds up and cracks Foe with a swinging punch to the side of the head.
Foe is looking to regain full guard. Not this time though.
Ground and pound from Holland.
That's two minutes gone in the round.
Holland seems to be working for a kimura but Foe defends the submission attempt.
Foe looking to work for a kimura from the bottom.
The two fighters exchange a few words. I couldn't hear what they were saying but maybe it's more fun if you make it up yourself. Holland connects with a nice short shot to Foe's temple.
Foe wants to control but Holland is keeping busy.
Holland working the head and body with strikes.
Still in half guard, Holland seems content to control.
Holland wants to control but Foe is keeping him busy.
Holland lands with a punch from half guard.
Holland takes advantage of the dominant position to land a couple of big hammer fists.
Foe is looking to regain full guard. Not this time though.
That's three minutes gone in the round.
Holland is working for a kimura but Foe is defending it quite comfortably.
Holland scores with a couple of good hammerfists.
Holland lands with an elbow from half guard - that looked like it hurt.
Holland is keen to just control but Foe is a slippery customer.
Holland uses his free foot to push down on Foe's thigh. Eventually he works his other foot free and he's advanced to mount - this is trouble for Foe.
Holland looking to ground and pound his opponent to a finish here.
Holland lands a big elbow.
Holland punishing his opponent with strikes.
That's four minutes gone in the round.
Holland lands an elbow that was bordering on illegal but the referee lets it go with a warning.
Holland raining down shots from the mount!
Holland with shots to the head and body - Foe looks very uncomfortable down there.

Foe is rocked!
Foe is trying to escape the mount.
Holland is still in mount, landing shots to his trapped opponent. Foe can't stay in a position like this for much longer.
Oh Foe is still in real trouble! Will he be able to recover?!!
Holland punishing his opponent with strikes.
Holland landing punches.
The crowd are loving this. Great action here.
Foe tries to lock up and control but Holland gives him a forearm to the face and pushes him away.
Holland cracks Foe with a big head shot that has him covering up instantly! He's rolled onto his side and the referee has seen enough - this one is aaaaaaaaaaall over!
Ladies and gentlemen, after 4:59 of round 1, we have a winner by way of TKO (Strikes). Micah Holland!
Micah Holland is the new featherweight champion!
During a confident post fight interview, Micah Holland thanked all his fans. He seemed very genuine when describing how motivated his fans keep him.
|
|
|
|
|
|
|
|
|
|
|
|
|
|
|
|
|
|
|
|
|
|
|
| S |
C
A |
G |
S |
C
B |
G |
|
S |
C |
G |
|
energy
A | B |
|
hype
A | B |
|
pop
A | B |
|
mgr
A | B |
|
FIGHT
RATING
30% |
|
|
|
|
|
|
|
Co-main event
|
Coming up we have a bantamweight MMA rules bout between Macho Alpha (ranked 0 p4p, 0 weight class) and Anderson Rodriguez (ranked 0 p4p, 0 weight class). The key to victory for Macho Alpha has got to be keeping the fight on the feet.
 |
|
 |
| 150 cm
27
130 lbs
6 - 7 - 0 |
|
165 cm
25
144 lbs
5 - 1 - 0 |
Good takedowns
Decent elbows
Experienced |
|
Good takedowns
Counter fighter
Granite chin |
|
| |
|
Ladies and gentlemen. This fight is 5 rounds, for the bantamweight championship of the world!
Introducing the champion to my left, fighting out of the red corner.
With a record of
6 - 7 - 0, fighting out of New York, Macho Alpha!
And introducing the challenger to my right, fighting out of the blue corner.
With a record of
5 - 1 - 0, fighting out of New York, Anderson Rodriguez!
The judges for this bout are John Kavanagh, Alyssa Summers and Dean Styles.
The bell rings for round one and we are underway!
Alpha throws the overhand right but ducks down into a quick takedown attempt. Rodriguez was covering up waiting for the punch and Alpha finishes the takedown easily into guard.
We could do with one of the fighters taking the initiative a bit more on the ground - they're both waiting to capitalize on a mistake.
Alpha stopping the sweep attempt from Rodriguez.
Alpha has to be careful here, sitting in the guard of a superior BJJ player.
Rodriguez is working actively off his back, looking to secure an arm or perhaps work for a triangle.
Rodriguez working for a triangle but Alpha defends it easily.
Alpha cracks Rodriguez with a solid left hand.
Rodriguez is looking for a guillotine. You can't force these things though and Alpha defends well.
There's a bit of a scramble here and now Rodriguez is on top in guard.

Rodriguez trying to control the position from guard on top but Alpha is wriggling around, looking for whatever he can.
That's one minute gone in the round.
Rodriguez won't allow Alpha to get back to his feet.
Rodriguez stands up and looks to throw the legs aside to pass to side control. Alpha swivels though and keeps the full guard.
Rodriguez wants to control from the top but Alpha keeps moving.

Alpha pushes Rodriguez off for just long enough to get back to his feet. Very athletic spring there.
Rodriguez looks frustrated there after his takedown attempt is stuffed easily.
Rodriguez looks for a takedown but Alpha sprawls well.
Alpha tries to counter with a takedown but Rodriguez is quick to defend against it.
Alpha looks to have improved his striking defense since last time we saw him fight.
Alpha fails with a rather predictable takedown attempt.
That's two minutes gone in the round.
Alpha lunges in with swinging rights and lefts but Rodriguez circles away quickly and effectively.
Rodriguez changes levels for a counter takedown but doesn't follow through with his attempt.
Alpha gets caught napping as Rodriguez dives in and scores a takedown. Alpha manages to retain guard.
Alpha keeping moving, preventing Rodriguez from controlling successfully.
Rodriguez postures up as if he's going to throw some strikes but drops back for an ankle! Alpha is in big trouble! He looks ready to tap! But no, he's escaped and dives on top of Rodriguez, into his guard.

The fighters are starting to get a bit slippery now, which will make submissions a bit more difficult.
Rodriguez working a defensive guard here.
Rodriguez looking for a guillotine here but Alpha defends easily.
We've seen a great period of action over the last minute or so - credit to both fighters for going all out!
Alpha throwing elbows and punches but not connecting, as Rodriguez works some decent striking defense from the bottom.
That's three minutes gone in the round.
Rodriguez looking for a sweep. Not yet Rodriguez, not yet.
Rodriguez is working the butterfly guard. He manages to land a nice scissor sweep and is now in half guard on the top. Nice move.
Rodriguez is trying to work for a kimura but Alpha is defending well.
Rodriguez seems to be looking for submissions.
The ref warns both fighters not to hold the cage as they work up against the meshing.
Alpha is trying to maintain the position but Rodriguez is very close to passing his half guard.
Rodriguez is looking for a kimura but Alpha is holding onto that half guard position, so it's hard for Rodriguez to get the leverage.
That's four minutes gone in the round.
Rodriguez is looking to take a break and control but Alpha is keeping him honest, looking to work from the bottom.
Alpha looks like he's trying to stand up.
In the pre-fight buildup videos we saw Rodriguez working his ground and pound in the gym. He isn't landing a great percentage of his ground strikes so far though.
Alpha is defending against the submission attempts here by Rodriguez.
Rodriguez is looking for an arm triangle, whilst trying to pass to side control. Alpha doesn't seem that keen to cooperate though. No luck this time Rodriguez.
Rodriguez wants to control but Alpha is keeping him busy.
And thats the end of the round the fighters go back to their corners.
Anderson Rodriguez dominated that round.
That's time! Alpha's corner gives him a slap on the ass as he gets ready to fight.
Alpha shoots in for a double leg but Rodriguez sprawls well. That's going to sap some energy.
Macho Alpha seems to be the more aggressive standup fighter in this bout.
A really sloppy takedown attempt there from Alpha.
Rodriguez stuffs the takedown attempt from Alpha. Alpha gets slowly back to his feet.
That's three failed takedown attempts in the round for Macho Alpha. That's going to take a lot out of him.
Horrible takedown attempt by Alpha or perhaps it was just good defense by Rodriguez, which made it look bad.
Rodriguez shoots in with a lovely double leg takedown. Alpha manages to land in full guard to minimise the damage.
We've had a slow start to the round here - hopefully the action picks up.
Rodriguez looking to pass the guard.
That's one minute gone in the round.
Alpha keeping moving, preventing Rodriguez from controlling successfully.
Rodriguez might have to switch it up a bit here because his efforts to control Alpha haven't been going to plan, at least at the current moment in time.
Rodriguez throws a big right hand that misses.
Alpha keeping full guard, as Rodriguez tries to pass.
Rodriguez is trying to work a guillotine from the top, or something like that? Don't know how he thinks he's going to get a finish from there.
Rodriguez trying to control the position from guard on top but Alpha is wriggling around, looking for whatever he can.

The referee has motioned to the fighters to stand back up. He just wasn't happy with the level of activity.
That's two minutes gone in the round.
A lull in the action here being met with boos from the crowd.
Alpha leaves Rodriguez with his face pressed against the mat as he sprawls beautifully, defending against a solid takedown attempt.
Macho Alpha is looking to throw some combinations by the looks of things.
Alpha goes for a double leg but Rodriguez avoids the attempt and the two fighters end up clinched against the cage as Rodriguez continues to drive forward.
Rodriguez changes levels for a counter takedown but doesn't follow through with his attempt.
Alpha scores with a nice takedown into half guard. Let's see what he's got on the ground.
Rodriguez works his way to full guard. Good work.
Rodriguez working the defensive guard well to avoid strikes from Alpha.
Rodriguez looking for submissions off his back, moving his hips, looking for an opening.
Alpha might be looking to lock onto one of his opponent's long limbs for a submission, whilst we're on the ground.
Rodriguez throws a couple of shots from the bottom but they don't land.
Rodriguez is active off his back here, looking for submissions.
The fighters are pressed up against the cage, both looking to find a bit of space to work.
Alpha loading up with the ground and pound but he's missing more than he's landing in this flurry.
That's three minutes gone in the round.
Rodriguez is actively looking for submissions from his back. He's worked himself a little space on the bottom and seems to be going for a triangle. No, he's switched into an armbar! That was slick! Alpha rolls with it to try and escape but Rodriguez cranks on the arm and Alpha is forced to tap out! This one is aaaaaaaaall over!
Ladies and gentlemen, after 3:25 of round 2, we have a winner by way of Submission (Armbar). Anderson Rodriguez!
Anderson Rodriguez is the new bantamweight champion!
Anderson Rodriguez managed to slip a mention for his sponsors, Spartan Nutrition , into his post fight interview.
|
|
|
|
|
|
|
|
|
|
|
|
|
|
|
|
|
|
|
|
|
|
|
| S |
C
A |
G |
S |
C
B |
G |
|
S |
C |
G |
|
energy
A | B |
|
hype
A | B |
|
pop
A | B |
|
mgr
A | B |
|
FIGHT
RATING
32% |
|
|
|
|
|
|
|
Main event
|
Coming up we have a heavyweight MMA rules bout between Yoshimitzu Sakuraba (ranked 0 p4p, 0 weight class) and Jonathan Uso (ranked 0 p4p, 0 weight class). Sakuraba comes into the arena with Pride theme song blares through the speaker as fireworks erupt blaring out of the sound system. Uso is bouncing up and down as he enters the arena, backed by So Close Now. Fingers crossed for an exciting fight - I'm sure both fighters are looking for a nice under the table bonus!
 |
|
 |
| 191 cm
27
272 lbs
9 - 3 - 0 |
|
188 cm
28
240 lbs
11 - 3 - 0 |
Good wrestling
Counter fighter
Very quick |
|
Good wrestler
Decent boxing
Granite chin |
|
| |
|
Ladies and gentlemen. This fight is 5 rounds, for the heavyweight championship of the world!
Introducing the champion to my left, fighting out of the red corner.
With a record of
9 - 3 - 0, fighting out of New York, Yoshimitzu Sakuraba!
And introducing the challenger to my right, fighting out of the blue corner.
With a record of
11 - 3 - 0, fighting out of Hilo, Jonathan Uso!
The judges for this bout are Russell Pearce, Alyssa Summers and John Kavanagh.
The bell rings for round one and we are underway!
Uso fails miserably with a takedown attempt.
Uso moves out of range of the strikes.
A telegraphed takedown attempt from Uso is defended easily by Sakuraba.
Sakuraba feinted with a counter takedown.
Sakuraba closes the distance and looks for a trip takedown... aaaand he's got it - Sakuraba lands in his opponent's guard.
Sakuraba is looking to work some ground and pound but Uso has wrist control.
We've had a slow start to the round here - hopefully the action picks up.
Uso wants to stand but Sakuraba is controlling the position.
The fighters are pressed up against the cage, both looking to find a bit of space to work.
Sakuraba throws a strike but Uso rolls with it and manages to sweep. Now he's in guard on top.
Sakuraba keeping moving, preventing Uso from controlling successfully.
That's one minute gone in the round.
Sakuraba not looking particularly offensive just at the moment.
Sakuraba keeping moving, preventing Uso from controlling successfully.
Uso working some ground and pound from guard but it's not doing any damage.
Uso passes Sakuraba's right leg, so he's now in half guard.
Sakuraba blocking the ground and pound attempt from Uso.
Sakuraba desperately trying to maintain half guard.
Uso content to sit in half guard and control for a moment.
Sakuraba has no desire to be mounted, so is trying to control. Uso is working away from the top position though.
In the pre-fight buildup videos we saw Uso working his ground and pound in the gym. He isn't landing a great percentage of his ground strikes so far though.
That's two minutes gone in the round.
Well. There's a bit of a lull in the action here and the crowd are starting to get restless.
Uso thumps the canvas. Not on purpose obviously - he just missed Sakuraba's head.
Uso is working for a submission of some sort.
Uso has the superior BJJ but he's also working some ground strikes into his gameplan.
Uso is figuring out what he wants to do next.
Uso is trying to work for a kimura but Sakuraba is defending well.
Sakuraba is not content to let Uso control the position.
That's three minutes gone in the round.
Sakuraba is looking for a sweep. Uso is wise to his cunning plan and keeps the top position.
Sakuraba is doing well to avoid being mounted. He's controlling the position at the moment.
The referee has stepped in and called for a break in the action. We'll restart on the feet.
Uso tries to drive through with a takedown attempt but Sakuraba defends well and Uso ends up having to push Sakuraba into the cage where they will battle it out in the clinch.
Yoshimitzu Sakuraba has stuffed three takedown attempts in the round now. That's going to take a lot out of Jonathan Uso.
Uso fails with a takedown attempt.
Uso misses with the combination.
Uso fakes an overhand right and shoots for a takedown. Sakuraba sprawls well initially but Uso persists and gets the takedown into half guard.
Uso landing with strikes to the body and head, softening up his opponent.

It looks like Yoshimitzu Sakuraba has been cut.
That's four minutes gone in the round.
Uso thumps the canvas. Not on purpose obviously - he just missed Sakuraba's head.
Uso trying to control from half guard but Sakuraba is working away.
Sakuraba blocking the ground and pound attempt from Uso.
Uso throwing shots but Sakuraba is blocking nicely.
Nice strikes from Uso there.
Sakuraba is looking to regain full guard. Not this time though.
Uso seems to be working for a kimura but Sakuraba defends the submission attempt.
Uso trying to work for an americana but Sakuraba has managed to regain full guard.
The crowd thankful this round is nearly over.
Uso wants to control from the top but Sakuraba keeps moving.
And thats the end of the round the fighters go back to their corners.
Jonathan Uso dominated that round.
The cut man is working on Yoshimitzu Sakuraba's cut.
The corners get their ten second warning. Both fighters stand from their stools and stare eachother down, ready to get back to the action.
Uso scores a trip takedown into side control. Nice.
The step up in weight doesn't seem to be a problem for Uso. He's performing admirably here against the bigger man.
Uso is looking for a kimura. He might have it! No, Sakuraba has escaped the position, nice work there.
Uso cracks Sakuraba with a big right hand but Sakuraba just smiles back at him and invites him to have another go.
Yoshimitzu Sakuraba's cut is getting worse.
Sakuraba tries to improve position but can't.
Uso working away.
Uso throwing strikes but missing, from side control.
We've had a slow start to the round here - hopefully the action picks up.
Uso is trying to land an Americana. He has the arm isolated but Sakuraba is keeping cool and he's avoided the danger for now.
Uso looking for an arm triangle but it's way too loose to do anything.
The ref warns both fighters not to hold the cage as they work up against the meshing.
Uso tries for an arm triangle. That looks pretty tight to me. Is this one over!?! Possibly, maybe, no Uso has let go of the choke. Obviously it wasn't as tight as we thought!
That's one minute gone in the round.
Sakuraba tries to get back to half guard but can't.
Uso is looking to take a break and control but Sakuraba is keeping him honest, looking to work from the bottom.
Uso is trying to get an arm triangle but Sakuraba is defending well.
Uso trying to control the position but Sakuraba is working away.
That's two minutes gone in the round.
The crowd are hurling abuse towards the fighters... You can hardly blame them though because there isn't a lot going on in the fight.
Uso scores with a couple of short elbows.
Uso is trying to get an arm triangle but Sakuraba is defending well.
Uso has been the more effective fighter overall so far.
Sakuraba sneaks back into half guard.
Uso wants to work for an arm triangle but Sakuraba is really keeping half guard well and defending the submission attempt.
Uso takes advantage of the dominant position to land a couple of big hammer fists.
Yoshimitzu Sakuraba's cut is bleeding quite badly. He's got to try and protect it.
Uso is trying to work for a kimura but Sakuraba is defending well.
Uso seems to be taking a bit of a break to think of his next move. He lands a short punch in the meantime.
That's three minutes gone in the round.
Sakuraba is looking to control Uso's leg but it's slowly edging free. Can Sakuraba avoid being mounted?
Sakuraba is going to have to think about doing something other than just controlling because Uso is managing to avoid having the position dictated to him.
Jonathan Uso has got the better of the ground game so far.
Sakuraba is looking to improve his position.
Uso seems very keen to just sit and control from half guard but Sakuraba does not like that idea so much and is remaining active off his back.
Uso winds up and cracks Sakuraba with a swinging punch to the side of the head.
Jeez, Yoshimitzu Sakuraba's cut is really nasty now. The referee must be thinking about getting that checked.
The referee calls the doctor in to look at Yoshimitzu Sakuraba's cut. Oh no, the doctor has called an end to the bout!
Ladies and gentlemen, after 4:59 of round 2, we have a winner by way of TKO (Cut). Jonathan Uso! Jonathan Uso retains his heavyweight title!
Jonathan Uso decided to thank the fans in attendance for making a great atmosphere. It seemed to go down pretty well.
|
|
|
|
|
|
|
|
|
|
|
|
|
|
|
|
|
|
|
|
|
|
|
| S |
C
A |
G |
S |
C
B |
G |
|
S |
C |
G |
|
energy
A | B |
|
hype
A | B |
|
pop
A | B |
|
mgr
A | B |
|
FIGHT
RATING
16% |
|
|
|
|
|
|
|
|
|
|
