 |
LFC | 93° PBP Commentary |
Undercard bout
|
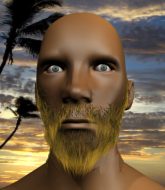
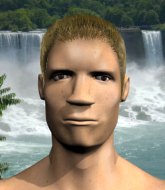
Coming up we have a featherweight MMA rules bout between Antonio Gatmaitan (ranked 0 p4p, 0 weight class) and Sami Orgun (ranked 0 p4p, 0 weight class). Both fighters look fresh as a daisy as they make their way towards the cage.
 |
|
 |
| 168 cm
27
158 lbs
5 - 3 - 0 |
|
158 cm
22
142 lbs
4 - 3 - 1 |
Good wrestling
Basic striking
KO power |
|
BJJ Purple Belt
Decent boxing
Powerful |
|
| |
|
Ladies and gentlemen. This fight is 3 rounds, in the featherweight division.
Introducing the fighter to my left, fighting out of the red corner.
With a record of
5 - 3 - 0, fighting out of Hilo, Antonio Gatmaitan!
And introducing the fighter to my right, fighting out of the blue corner.
With a record of
4 - 3 - 1, fighting out of Hilo, Sami Orgun!
The judges for this bout are Josh West, Roger Salmon and Chris Saunders.

The bell rings for round one and we are underway!
Orgun lands with a slapping head kick.
Orgun connects with a solid leg kick.
Gatmaitan throws a body kick but he was well out of range there.
Orgun throws a hook but Gatmaitan blocks it.
Orgun throws a quick inside leg kick.
Gatmaitan looking to land some kicks to the body here.
Orgun flicks out a counter leg kick but Gatmaitan steps away.
Gatmaitan shoots in for a double leg but Orgun sprawls well. That's going to sap some energy.
Gatmaitan connects nicely with a jab. Noted by the judges no doubt.
Orgun thows a left - swing and a miss!
Orgun keeps his opponent at a distance with a nice jab.

It looks like Antonio Gatmaitan has been cut.
Nice takedown defense from Orgun. No joy for Gatmaitan on that attempt.
Orgun misses with a low kick.
Orgun fakes with a right hand and throws a good leg kick, right into the thigh. That had to hurt Gatmaitan.
Orgun slips a jab from Gatmaitan.
Gatmaitan misses with a body shot.
This has been an exciting period of action!
Orgun lands a body shot.
Gatmaitan blocks the body kick.
Gatmaitan throws a body punch but Orgun moves out of range.
Gatmaitan keeping a good distance there, avoiding the body shot.
Gatmaitan feinted with a counter takedown.
Orgun connects with a solid leg kick.
The fight stays on the outside here - Gatmaitan looks like he's thinking about clinching though.

That's one minute gone in the round.

Gatmaitan closes the distance and clinches.

Orgun has managed to pull guard. Let's see whether he can work an aggressive guard. It will also be interesting to see what tactics Gatmaitan uses from the top position.
Gatmaitan lands a nice shot whilst sitting in his opponent's guard.

Orgun is looking for a guillotine. You can't force these things though and Gatmaitan defends well.
Orgun is working an open guard here, looking to improve his position. No doubt that will leave him open to counters but at least he's being more offensive.
Gatmaitan working some strikes from top position.
The fighters are pressed up against the cage, both looking to find a bit of space to work.
Orgun looking to sweep here. No luck so far.
Orgun bucks up whilst keeping hold of a body lock, managing to reverse the position. Now he's in top in Gatmaitan's guard.

Orgun preventing the sweep.
Gatmaitan manages to sweep nicely, so he's now on top. Orgun manages to get himself to full guard.

Orgun escapes his hips to the side and looks to be working for an armbar. Gatmaitan gives him a little smile and shakes his head. No chance.
Gatmaitan scores with a decent looking elbow strike.

That's two minutes gone in the round.
Orgun working the defensive guard well to avoid strikes from Gatmaitan.
Gatmaitan stopping the sweep attempt from Orgun.
Gatmaitan works over Orgun with some ground and pound from guard.
This is a great period of action - very entertaining stuff!
Gatmaitan stopping the sweep attempt from Orgun.
Gatmaitan lands a couple of digs.
There's a bit of a scramble here and now Orgun is on top in guard.
The ref warns both fighters not to hold the cage as they work up against the meshing.
Orgun works a leg free and moves into half guard.
Gatmaitan tries to roll over but Orgun keeps him under control.
Orgun is nestled in close to Gatmaitan, controlling him well. He's worked in a nice elbow to the side of the head as well, for good measure.
Orgun scores with a couple of good hammerfists.
Orgun working some ground and pound from close in. He's looking to maintain this position and strike for a while by the looks of things... although he'll probably advance to full mount in a minute now I've said that.
Neither fighter is being very active at the moment, with Orgun in particular looking to stall.
Orgun works his way into full mount!
Gatmaitan is in all sorts of trouble here.

That's three minutes gone in the round.
Gatmaitan is working hard here to advance position.
Orgun with good strikes from the mount here!

Gatmaitan is rocked!
Gatmaitan on his back here. We all know that wrestlers don't like being on their back so let's see if Gatmaitan tries to get out of the position.
Oooooh, big shot lands for Orgun! Gatmaitan is hurt baaadly! Orgun is firing away with more strikes - Gatmaitan is covering up... the ref is warning him to do something. He's just covering up though still and the ref has to step in to end the fight! This one is all over!
Ladies and gentlemen, after 3:36 of round 1, we have a winner by way of TKO (Strikes). Sami Orgun!
Sami Orgun seemed lost for words in his post fight interview but he remembered to thank his fans and directed everyone to his website.
|
|
|
|
|
|
|
|
|
|
|
|
|
|
|
|
|
|
|
|
|
|
|
| S |
C
A |
G |
S |
C
B |
G |
|
S |
C |
G |
|
energy
A | B |
|
hype
A | B |
|
pop
A | B |
|
mgr
A | B |
|
FIGHT
RATING
55% |
|
|
|
|
|
|
|
Undercard bout
|
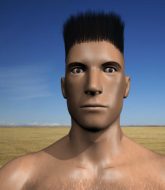
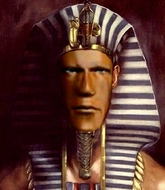
Coming up we have a heavyweight MMA rules bout between Wayne Wade (ranked 0 p4p, 0 weight class) and Ramses Xll (ranked 0 p4p, 0 weight class). Wade comes to the cage accompanied by Dance Gavin Dance - Strawberry Swisher pt. III . Both these guys are coming into the fight with injuries so let's see if that has a bearing on the fight. These two fighters really are very evenly matched on the feet - it will be fascinating to see who can assert themselves in that aspect of the fight.
 |
|
 |
| 205 cm
32
282 lbs
21 - 17 - 0 |
|
191 cm
18
200 lbs
1 - 1 - 0 |
Good wrestling
Solid boxing
Cardio machine |
|
Good wrestler
Excellent boxer
Good gas tank |
|
| |
|
Ladies and gentlemen. This fight is 3 rounds, in the heavyweight division.
Introducing the fighter to my left, fighting out of the red corner.
With a record of
21 - 17 - 0, fighting out of Hilo, Wayne Wade!
And introducing the fighter to my right, fighting out of the blue corner.
With a record of
1 - 1 - 0, fighting out of Hilo, Ramses Xll!
The judges for this bout are Micheangelo Fripello, Roger Salmon and Chris Saunders.
The bell rings for round one and we are underway!
Xll misses with a double jab.
Wade slips a jab and a cross from Xll.
Xll fakes high and swings low for a body shot but Wade manages to avoid it.
Xll looks more muscular than last time we saw him. He must have been on the weights.
Wade fails with a rather predictable takedown attempt.
Xll is looking to land body kicks.
Xll throws a jab but it's blocked by Wade.
Xll is looking to chop away at Wade's legs.
Wade changes levels and looks for a double leg takedown. Xll tries to avoid it but Wade manages to keep hold of a leg and drag Xll to the ground. Xll escapes though and pops straight back up to his feet.
Xll throws out a counter right but Wade avoids it with no problem.
Wade shoots in looking for a double leg takedown. Xll defends it nicely.
Xll tries a counter takedown but it's more of a dummy move, and he uses it to push himself away.
That's three failed takedown attempts in the round for Wayne Wade. That's going to take a lot out of him.
A swing and a miss from Xll.

Wade closes the distance and after a bit of a stuggle, scores a takedown into Xll's guard.
Wade trying to control the position from guard on top but Xll is wriggling around, looking for whatever he can.
Xll wants to get back to his feet but Wade is in a dominant position and won't allow it.
That's one minute gone in the round.
A real slowdown in the pace of the fight for a moment, as Xll holds on and takes a little breather.
Wade trying to control but Xll is working from the bottom.
Xll pulls Wade in to control the position.
Wade trying to control the position from guard on top but Xll is wriggling around, looking for whatever he can.
The referee is pacing around the two fighters - he looks like he's thinking about a standup.
Xll is looking to stand up but Wade isn't so interested in that idea.

The referee has decided to stand the fighters back up, so we'll restart on the feet.
The crowd cheers as Xll lands an impressive looking overhand right. Wade doesn't seem phased though.
Wade looks for a takedown but Xll sprawls well.
That's two minutes gone in the round.
Well. There's a bit of a lull in the action here and the crowd are starting to get restless.
Xll shuffles to his left behind two crisp jabs. Wade eats them both and turns towards Xll to reposition himself and eats a stinging right hand-left hook combo.
Xll misses with the combination.
Decent striking displayed by Xll there.
Xll fakes high and swings low for a body shot but Wade manages to avoid it.
Xll keeps the fight standing with a nice sprawl.
Xll scores with a slapping inside leg kick.
Wade fails with a takedown attempt.
Xll throws a hook to the body but it doesn't connect.
No luck for Wade with that takedown attempt.
Xll appears to be waiting to throw a counter punch to the body.

Xll has Wade up against the cage in a clinch.
That's three minutes gone in the round.

Xll breaks from the clinch.
Xll keeps the fight standing with a nice sprawl.
Xll throws a counter combo.
Wade shoots in looking for a takedown. Xll tries to sprawl out of it but Wade keeps driving through. The fighters are pinned against the cage. Xll manages to get underhooks and after a bit of a struggle, circles away and we're back to standing.
Wade decides to change it up a bit and drives through with a nice takedown into half guard.
Wade will need to keep those long limbs tucked in whilst he's on the ground, to prevent any submissions.
Xll is looking to regain full guard. Not this time though.
Xll is trying to stand.
Xll keeping hold of Wade's head, controlling as best he can.
Xll pushes Wade off looking to stand but Wade dives back in and keeps control.

That's four minutes gone in the round.

Xll manages to create a bit of space in order to work his way back to his feet. Wade keeps hold of his opponent and drives him back against the cage.
Xll just leaning against Wade, taking a breather.
Wade misses with a shot to the kidneys.
Still in the clinch, Xll scores with a nice short uppercut.
A nice left hand lands by Xll.
The crowd cheering loudly, showing their appreciation for the quality fight we're seeing here.
Wade slowing the pace effectively.
Xll letting Wade take a breather here.
Wade lands a nice uppercut.
Xll is trying to maintain a safe position but Wade gets an underhook and turns Xll into the cage.
Xll lands an uppercut.
Xll breaks from the clinch.
Wade shoots in for a takedown but Xll shows good takedown defense.
Wade fakes high and shoots in for a takedown but Xll avoids it really well and circles away.
And thats the end of the round the fighters go back to their corners.
Ramses Xll dominated that round.
That's the end of the round. The referee orders the cornermen out of the cage so we can get back down to business.

Xll scores with a three punch combo!
Xll scores with a reasonable looking shot to the body. Wade doesn't seem bothered though.
Xll looks to score with a jab to the body but Wade is just out of range.
Xll lands a leg kick and bounces back out of range.
Xll has been the more effective fighter overall so far.
Wade shoots in looking for a double leg takedown. Xll defends it nicely.
Wayne Wade is looking to throw some combinations by the looks of things.
Wade takes a kick to the side of the head.
Wade misses with a takedown attempt - Xll sprawls well and throws a nice strike on the way out which just misses.
Xll throws a counter combo.
We've had a slow start to the round here - hopefully the action picks up.
Xll connects with a good right hand that stumbles Wade. Wade circles away out of range and recomposes himself.
Wade dives in and grabs Xll's left leg, looking for a takedown. Xll pushes down on Wade's head and hops out.
That's three failed takedown attempts in the round for Wayne Wade. That's going to take a lot out of him.
Xll ducks low and lands a nice hook to the body of his opponent.
Xll scores with a sloppy punch to the body. Not much technique there but it did the business.
That's one minute gone in the round.
Xll defends well against a solid takedown attempt from Wade.
Both fighters are absolutely exhausted here.
Xll thuds his shin into the meat of Wade's side.
Xll is moving around nicely and scores here with a single head shot.
Xll connects with a single shot there.
Wade slips a jab and a cross from Xll.
Wade fires out a quick counter leg kick but Xll just manages to avoid it.
Xll lands with a two punch combination before moving back out of range.
Xll throws a hard body shot but it just misses.
It looked like Wade was looking amped, ready to throw a big counter but didn't commit.
Wow, both these guys are really going for it!
Xll defends well against a solid takedown attempt from Wade.
Xll lunges in with swinging rights and lefts but Wade circles away quickly and effectively.
Wade fails with a takedown attempt.
Wade doesn't react quick enough there as he takes a shot to the body.
Xll closes the distance and clinches.
The crowd are loving this. Great action here.
Xll keeps control of Wade as he tries to wriggle out of the double underhooks.
Some stalling of biblical proportions here from Xll.
That's two minutes gone in the round.
Xll's corner calls for him to break the clinch, which he does.
Wade uses good head movement to avoid the hook from Xll.
Xll stuffs the takedown attempt from Wade. Wade gets slowly back to his feet.
Xll throws a wild combination but nothing lands.
Wade takes a body punch that cleary hurt but he's trying not to show any weakness.
Xll throws a series of punches but Wade moves out of range.
Wade shoots and misses
and Xll counters with a leg kick.
The step up in weight doesn't seem to be a problem for Xll. He's performing admirably here against the bigger man.
Wade fails with a rather predictable takedown attempt.
Xll shuffles to his left behind two crisp jabs. Wade eats them both and turns towards Xll to reposition himself and eats a stinging right hand-left hook combo.
Xll scores with a big left there. The judges will like that one.
Xll looks to land a left hand but Wade moved out of range nicely.
Wade fails to land the takedown.
Xll connects with the punch.
That's three minutes gone in the round.
Wade fails to land the takedown.
Xll throws a shot to the body.
A slow jab from Xll misses its intended target.
Ramses Xll is looking to keep the fight on the feet at all costs.
Xll connects with a leg kick. He turned his hip over nicely there.
The fight stays on the outside here - Xll looks like he's thinking about clinching though.
Wade dives in and grabs Xll's left leg, looking for a takedown. Xll pushes down on Wade's head and hops out.
Wade looks for a takedown here. Will he get it? Xll is fending him off so far but Wade persists. Nope, Xll circles away and we're back to standing.
A punch combination from Xll misses.
Xll fakes a couple of low kicks, before throwing one on the third attempt. It connects and Wade has to reset his feet before getting ready to engage.
Xll cracks Wade with an open hand slap.
Xll lands a kick to the ribs of his opponent. Nice work there - in and out in a flash.
Xll lands an overhand left. A wild punch that just about connected.
No joy there for Xll, who threw a few shots but didn't land.
Wade takes a hook to the side of the head. I wonder if that's got his ears ringing.
That's four minutes gone in the round.
Fantastic stuff here - a very entertaining period of action, which has drawn cheers from the crowd.
Xll throws a series of punches but Wade avoids them all with ease.
Xll moves into the clinch successfully.
Stalling in the clinch from Xll.
A short uppercut from Xll.
Xll breaks the clinch and we return to the middle of the mat.
A shot to the liver by Xll. Beautiful body shot.
Xll fakes a head punch and goes low to the body. Nicely done.
Wade slips a jab and a cross from Xll.
Xll throws a right hand that Wade ducks under and follows up with a left that Wade also avoids with ease.
Xll throws a leg kick which misses Wade's front leg but catches the back leg as Wade tries to avoid it.
Wade darts in looking for a takedown but Xll gets double underhooks and turns Wade into the cage.
Xll lands a pitter patter jab to the forehead of his opponent.
Xll throws a body kick but he wasn't in range.
The crowd applaud the fighters' efforts here as the round comes to an end.
No luck with that takedown attempt from Wade.
Wade fails with a takedown attempt.
And thats the end of the round the fighters go back to their corners.
Ramses Xll showed his class in that round. I'd imagine he'll take it on all the scorecards.
The minute break is over - no more time for sponges and pep talks - back to the action! This is the final round!

Wade shoots for a takedown but Xll saw that one coming a mile off and avoided it easily.
Wade uses good head movement to avoid the hook from Xll.
Xll digs a good hook to Wade's body.
Wade fails with a rather predictable takedown attempt.
Xll paws at his opponent with the jab and then lunges in with a straight, right on the button.
Xll will need to tighten up his combinations if he doesn't want to gas himself out, swinging at thin air.
Xll misses with the combination.
Wade shoots in for a takedown but Xll shows good takedown defense there and keeps this one on the feet.
That's three failed takedown attempts in the round for Wayne Wade. That's going to take a lot out of him.
We've had a slow start to the round here - hopefully the action picks up.
Xll lands with a thumping leg kick.
A punch combination from Xll misses.
Xll lands a leg kick and bounces back out of range.
Both fighters are breathing heavily.
Wade shoots in for a takedown. "I don't think so" says Xll as he avoids it easily.
Xll is clearly trying to counter these attacks from Wade with a body shot.
Wade fails miserably with a takedown attempt.
That's one minute gone in the round.
Wade takes a shot to the body in his stride.
Xll throws a body punch but Wade moves out of range.
Wade fails with a takedown attempt.
Xll lunges in with swinging rights and lefts but Wade circles away quickly and effectively.
A nice combination there by Xll.
Xll jabs Wade right on the nose. Wade blinks but takes it well.
Xll takes a swing at Wade's ribcage but misses.
Wade moves out of range as Xll strikes.
Wade keeping his hands up high there, blocking the jab from Xll.
Xll misses with the combination.
Wade tries for a takedown but Xll sees it coming a mile off and avoids it easily.
Xll looks to land a combination but Wade avoids it well.
Xll connects with a solid leg kick.
That's two minutes gone in the round.
Wade shoots in for a takedown - he's clinched up with Xll but Xll pushes him off and we're back to square one.
Xll fakes with an overhand right and moves in to clinch with Wade, pushing him back against the cage.
We've seen a great period of action over the last minute or so - credit to both fighters for going all out!
Xll stalling in the clinch but Wade improves position.
The pace really dropping off here, momentarily.
Xll stalling in the clinch but Wade improves position.
A shot in the inside from Xll.
Xll breaks the clinch and we're back to striking at distance.
Xll swings and misses with a hook to the body.
Xll looks to land a combination. Wade sees it coming but can only parry a couple of the shots.
Wade fails with a rather predictable takedown attempt.
Xll tries to land with a swinging hook to the body but Wade was well out of range. Poor timing from Xll.
Xll throws a shot from downtown. Wade moves away and avoids it.
That's three minutes gone in the round.
Xll gets to the clinch - let's see what his plan is here.
A real battle for position is taking place between these two warriors.
Wayne Wade has stepped it up - he knows he needs a finish here!
Wade being controlled against the cage.
Xll leaning against his opponent.
Xll is stalling here.
Xll continues to stall. The referee tells him to work or he's going to break them up.
Xll taking a breather.
Xll receives a warning from the referee for stalling.
Xll has Wade pushed against the cage.
The ref breaks the fighters up, due to lack of action by Ramses Xll.
No luck for Wade with that takedown attempt.
Xll steps in looking to clinch after the strikes miss from Wade.
Xll is looking to slow Wade down with leg kicks.
That's four minutes gone in the round.
Xll lunges in with swinging rights and lefts but Wade circles away quickly and effectively.
Xll stuffs the takedown.
Xll rushes forward with a series of wild hooks but Wade moves out of range and avoids them all easily.
A looping hook to the body misses from Xll. Wade does a little dance to reset his feet.
Xll scores with a jab to the body.
Xll changes levels and scores with a jab to the body.
The fighters circle momentarily. Xll darts into range and connects with a nice straight punch.
Wade bobs and weaves well there to avoid the strikes.
Wade tries to keep at a distance but Xll has taken the fight into the clinch.
We've seen a great period of action over the last minute or so - credit to both fighters for going all out!
Xll avoiding damage.
Wade looking to stall.
Xll is looking to score with knees to the body. Maybe he'll change it up and go body then head. Wade is defending well for now.
Xll scores with a shoulder strike.
Both guys are working to get underhooks.
And that's the end of the fight!
Ramses Xll comfortably won the final round on my scorecard.
I've got Xll winning every round here. Surely the decision will go his way and he'll pick up a well deserved decision victory. Over to the ring announcer for the scorecards.
Ladies and gentlemen, after 3 rounds of action, we go to the scorecards for a decision.
Judge Micheangelo Fripello scores the fight 25:30
Judge Roger Salmon scores the fight 25:30
Judge Chris Saunders scores the fight 25:30
In favor of your winner, by unanimous decision... Ramses Xll!
A very excited looking Ramses Xll made sure he remembered to thank all the fans both in the arena and on the internet. He said all the coolest people spend all day on MMA websites, which got a big reaction.
|
|
|
|
|
|
|
|
|
|
|
|
|
|
|
|
|
|
|
|
|
|
|
| S |
C
A |
G |
S |
C
B |
G |
|
S |
C |
G |
|
energy
A | B |
|
hype
A | B |
|
pop
A | B |
|
mgr
A | B |
|
FIGHT
RATING
60% |
|
|
|
|
|
|
|
Undercard bout
|
Coming up we have a lightweight MMA rules bout between Claudemir Bonanza (ranked 0 p4p, 0 weight class) and Joe Dever (ranked 0 p4p, 0 weight class). Joe Dever is staring across the cage at his opponent, tweaking his nipples.
 |
|
 |
| 181 cm
27
166 lbs
9 - 1 - 0 |
|
175 cm
19
163 lbs
3 - 1 - 0 |
Good wrestling
Counter fighter
Granite chin |
|
BJJ White Belt
Good kicks
Good gas tank |
|
| |
|
Ladies and gentlemen. This fight is 3 rounds, in the lightweight division.
Introducing the fighter to my left, fighting out of the red corner.
With a record of
9 - 1 - 0, fighting out of Los Angeles, Claudemir Bonanza!
And introducing the fighter to my right, fighting out of the blue corner.
With a record of
3 - 1 - 0, fighting out of Sydney, Joe Dever!
The judges for this bout are Roger Salmon, Paul Gruel and Chris Saunders.
The bell rings for round one and we are underway!
Bonanza fails with a takedown attempt.
Dever tries to clinch
and Bonanza counters with a nice double leg into half guard.
Bonanza controlling the action here.
Dever has no desire to be mounted, so is trying to control. Bonanza is working away from the top position though.
Dever makes his way to full guard. A much better position for Dever.
We've had a slow start to the round here - hopefully the action picks up.
Bonanza advances position into side control!
Dever tries to get back to his feet but has found himself mounted instead. Damn, that's gotta suck.
Dever felt the need to train up his defensive grappling in the buildup to the fight. Presumably he was expecting to be in a difficult position like this, so let's see if he can get out of it.
Dever really doesn't want to stay on the ground with Bonanza. If he can't get it back to his feet, it's only a matter of time before he'll be tapping out.
Bonanza controlling from mount.
That's one minute gone in the round.
Dever tries to get back to half guard but can't.
Bonanza content just to control the position here.
Dever really trying hard to get back to half guard here.
Dever wants to hold on but Bonanza pushes him away.
Bonanza sitting in mount, just looking to control for the moment.
We get told so often about how wrestlers don't like to be on their backs. Let's see if Dever can do anything to dispel that myth.

Bonanza with some aggressive grappling here. He's looking for submissions here, rather than waiting for the opportunity to counter.
Bonanza has hold of Dever's left arm, perhaps looking for a submission. The two fighters tussle over control of the isolated limb and Dever manages to get his arm back to his side and away from danger.
That's two minutes gone in the round.
Dever has given up his back.
Dever prevents Bonanza from getting a body triangle.
Dever is defending well here and trying to improve his position.
Bonanza is working hard for the rear naked choke here.
Dever is displaying good submission defense - not really looking in danger of submitting to the rear naked choke at the moment. That could change in an instant of course if Bonanza gets his way!
Bonanza gets his hands free as Dever looks to control.
Bonanza is working on the RNC. He looks like he's got it but Dever won't tap... Oh, he's out! The ref rips Bonanza off his unconscious opponent!
Ladies and gentlemen, after 3:58 of round 1, we have a winner by way of Submission (RNC). Claudemir Bonanza!
|
|
|
|
|
|
|
|
|
|
|
|
|
|
|
|
|
|
|
|
|
|
|
| S |
C
A |
G |
S |
C
B |
G |
|
S |
C |
G |
|
energy
A | B |
|
hype
A | B |
|
pop
A | B |
|
mgr
A | B |
|
FIGHT
RATING
38% |
|
|
|
|
|
|
|
Undercard bout
|
Coming up we have a light heavyweight MMA rules bout between Tyke Mitchell (ranked 0 p4p, 0 weight class) and Pablo Escobar (ranked 0 p4p, 0 weight class). Mitchell comes to the cage accompanied by Ride The Lightning. Over to our ring announcer for the fighter introductions!
 |
|
 |
| 188 cm
25
222 lbs
5 - 3 - 0 |
|
188 cm
24
220 lbs
12 - 3 - 0 |
BJJ Purple Belt
Excellent boxer
Insanely flexible |
|
Good wrestler
Excellent MT
Good gas tank |
|
| |
|
Ladies and gentlemen. This fight is 3 rounds, in the light heavyweight division.
Introducing the fighter to my left, fighting out of the red corner.
With a record of
5 - 3 - 0, fighting out of Amsterdam, Tyke Mitchell!
And introducing the fighter to my right, fighting out of the blue corner.
With a record of
12 - 3 - 0, fighting out of Helsinki, Pablo Escobar!
The judges for this bout are Colin Fray, Micheangelo Fripello and Ryoma Takatsuka.
The bell rings for round one and we are underway!
Escobar buckles his opponent's knee momentarily with a nice leg kick.
Escobar has closed the distance and engaged Mitchell in a clinch.
Mitchell is looking to score with knees to the body. Maybe he'll change it up and go body then head. Escobar is defending well for now.
Mitchell has a couple of punches blocked by Escobar.
Escobar lands a shoulder strike.
Mitchell trying to control the position but instead, Escobar has worked for underhooks and has pushed Mitchell into the cage.
A head punch blocked on the inside by Escobar.
Escobar keeps control of Mitchell as he tries to wriggle out of the double underhooks.
Escobar scores with a nice hook to the head.
Nice body punch from Escobar - that landed with a thud.
Mitchell taking a breather.
Escobar lands a shot to the body.
A nice left hand lands by Escobar.
Escobar digs a right hand underneath Mitchell's ribcage. Mitchell let out a lung full of air as it connected.
Mitchell misses with a hook from the clinch.
Mitchell letting Escobar take a breather here.
Escobar lands a right uppercut that snaps the head of Mitchell backwards.
Mitchell is trying to maintain a safe position but Escobar gets an underhook and turns Mitchell into the cage.
Escobar blocks a knee to the body. He'll have a nicely bruised forearm in the morning.
This is a great period of action - very entertaining stuff!
Mitchell blocks a body shot from Escobar.
Escobar lands a short shot on the inside that snaps the head of Mitchell backwards.
That's one minute gone in the round.
Escobar content to slow the pace in the clinch.
A head punch blocked on the inside by Escobar.
Mitchell tries to land knees in the clinch but Escobar avoids the damage to the body.
Mitchell lands with a short punch from the clinch.
Mitchell lands with a short shot to the head.
Mitchell takes a shot to the head.
Escobar lands with a good tight uppercut to the head.
Escobar has Mitchell pressed against the cage, preventing Mitchell from circling away and getting back to striking at range.
Mitchell has had enough of the clinch and is looking to separate.
Escobar on the defensive, avoiding the knees to the body.
Mitchell letting Escobar take a breather here.
Escobar lands with a left to the head.
Both fighters working to control the clinch.
Escobar lands a right hand.
Escobar struggles to land a body shot inside as Mitchell controls his hands.
Escobar holding his opponent close, against the cage.
Still in the clinch, Escobar scores with a nice short uppercut.
Escobar tries to throw a body punch but Mitchell avoids it by throwing Escobar back against the cage.
Escobar fails to land with a short punch on the inside.
A head punch on the inside from Mitchell fails to land.
That's two minutes gone in the round.
We've seen a great period of action over the last minute or so - credit to both fighters for going all out!
Escobar lands a left hand.
Escobar lands a right hand that snaps the head of Mitchell backwards.
Mitchell tries to land a knee to the body but he is off balance and Escobar avoids it.
Some stalling of biblical proportions here from Escobar.
Still in the clinch, Escobar scores with a nice short uppercut.
Mitchell missing with knees to the body.
Mitchell is working hard here but doesn't seem to be able to control effectively, up against the cage.
Mitchell tries to land a knee to the body but he is off balance and Escobar avoids it.
Both fighters working to control the clinch.

Mitchell breaks from the clinch.
Mitchell loads up on a big right hand but Escobar slips the punch.
Mitchell misses with a straight left.
Mitchell walks straight into an uppercut. Luckily it didn't land flush.
Mitchell misses with a jab to the body
and Escobar counters with a nice uppercut.
Escobar connects with a right hand. Mitchell shakes it off.
Mitchell scores with a jab to the jaw.
Mitchell thows a left - swing and a miss!
Escobar moves out of range as Mitchell strikes.
Escobar feints a counter leg kick.
That's three minutes gone in the round.
Escobar throws a wild combination but nothing lands.
Nice shot lands for Escobar.
Mitchell misses with a jab to the body
and Escobar counters with a stiff right hand.
Mitchell throws a body punch but Escobar moves out of range.
Escobar is trying to avoid his opponent's strikes and get into the clinch.
Escobar with a hook.
Escobar bobs and weaves and throws out a fast jab that snaps Mitchell's head backwards.
Mitchell connects with a body shot that sends Escobar's belly button to the back.
Mitchell throws a hook to the body but it doesn't connect.
Escobar lands the left hand.
Mitchell misses with a low kick as Escobar jumps back.
A nice inside leg kick there by Escobar. That's going to slow Mitchell down.
Mitchell takes a step towards his opponent and connects with a left hand, before circling away.
The crowd cheering loudly, showing their appreciation for the quality fight we're seeing here.
Escobar takes a big uppercut there. He seems a bit wobbly but no, he's OK.
Mitchell throws a leg kick
and Escobar finishes the little exchange by landing a big kick to the body.
Escobar is landing a lot of head punches in this opening round! Mitchell had better start moving his head a bit unless he wants his face to turn into pâté.
A telegraphed right hand from Mitchell misses the target.
Mitchell throws a lazy uppercut
and Escobar connects with a straight left hand counter down the middle.
That's four minutes gone in the round.
Escobar swings for the body but Mitchell moves out of range.
Mitchell throws out a token jab with nothing on it.
Escobar with a nice looking leg kick. You could hear that one land in a back row.
Mitchell misses with a right hand
and Escobar counters with a quick right hand to the jaw.
Mitchell misses with a low kick as Escobar jumps back.
Escobar moves into range and lands a nice leg kick.
Mitchell misses with a body shot.
Escobar scores with a big left there. The judges will like that one.
Escobar scores with a sloppy right hand. Mitchell should have avoided that one.
Mitchell moves into the clinch successfully.
Mitchell has had enough of the clinch but Escobar keeps him there for the moment.
Mitchell scores with a shot to the side of Escobar's head.
The crowd applaud the fighters' efforts here as the round comes to an end.
Escobar lands on the inside with an uppercut.
Escobar is leaning against Mitchell and scores with a nice uppercut to the body.
Escobar on the defensive, avoiding the knees to the body.
A head punch on the inside from Mitchell fails to land.
Escobar misses with a body punch.
And thats the end of the round the fighters go back to their corners.
Pablo Escobar dominated that round.
That's time! Back to the action!
Escobar closes the distance and clinches.
Escobar lands with a short head shot on the inside.
A short right from Mitchell on the inside.
A short left from Escobar.
Escobar misses with a hook from the clinch.
A frustrated look appears on Mitchell's face as he tries to break the clinch.
Escobar leaning against his opponent.
Escobar keeps control of Mitchell as he tries to wriggle out of the double underhooks.
Escobar is trying to stall.
Mitchell is looking to score with knees to the body. Maybe he'll change it up and go body then head. Escobar is defending well for now.
Escobar lands on the inside with an uppercut.
A right hook to the body lands for Escobar.
Escobar lands with a short shot to the head.
We've had a slow start to the round here - hopefully the action picks up.
Escobar digs a right hand into Mitchell's ribs. Those have got to be taking their toll on Mitchell's gas tank.
Escobar lands with a short shot to the head.
Mitchell's corner calls for him to break the clinch, which he does.
Both fighters are absolutely exhausted here.
Jab, jab by Escobar - just one landing.
Fantastic stuff here - a very entertaining period of action, which has drawn cheers from the crowd.
Mitchell scores with a sloppy right hand. Escobar should have avoided that one.
Escobar works the jab nicely.
That's one minute gone in the round.
Mitchell shakes his hands off, looking to compose himself, but takes a jab to the jaw whilst he does it.
Mitchell is rocked!
Escobar takes a step towards his opponent and connects with a left hand, before circling away.
Oh Mitchell is still all over the place! His legs are completely gone! Will he be able to recover?!!
Nice body kick there by Escobar.
Mitchell seems to have got his legs back now.
Escobar jabs Mitchell right on the nose. Mitchell blinks but takes it well.
Mitchell drives through and clinches with Escobar against the cage.
Mitchell wants to stall.
Escobar lands punches inside but they're not really causing much damage.
Escobar is working hard here but doesn't seem to be able to control effectively, up against the cage.
Mitchell gets through Escobar's defenses to land a nice punch to the side of the head.
An uppercut on the inside fails to land for Escobar.
Mitchell missing with knees to the body.
Mitchell working aggressively here.
Escobar pushes Mitchell back against the cage and lands a hook to the side of the head.
Pablo Escobar seems to be working more effectively in the clinch in the fight so far.
Nice body punch from Escobar - that landed with a thud.
The crowd are loving this. Great action here.
Escobar blocks a punch to the side of the head.
Escobar lands with a right to the head.
Escobar scores with a shoulder strike.
That's two minutes gone in the round.
Escobar stalling here - the referee won't stand for too much of that.
Nice body punch from Escobar - that landed with a thud.
Escobar lands with a quick shot inside that doesn't really do much damage.
Mitchell tries to circle away but Escobar has him pinned against the cage.
Mitchell wants to stall.
Escobar pushes Mitchell back against the cage and lands a hook to the side of the head.
Escobar lands a nice shot to the body.
Escobar scores with a shoulder strike.
Mitchell tries to land knees in the clinch but Escobar avoids the damage to the body.
Escobar dictating the pace here, as the fighters clinch against the cage.
Mitchell is trying to stall.
Escobar lands a short shot on the inside that snaps the head of Mitchell backwards.
A short right from Escobar.
Mitchell tries to land knees in the clinch but Escobar avoids the damage to the body.
Mitchell is trying to work out of this bad position, with his back against the cage.
Escobar lands a hook that snaps the head of Mitchell backwards.
That's three minutes gone in the round.
A head punch blocked on the inside by Mitchell.
Escobar managing to block the knees to the body from Mitchell.
Escobar lands with a short head shot on the inside.
Escobar blocks a knee to the body. He'll have a nicely bruised forearm in the morning.
Escobar has been the more effective fighter overall so far.
A right hook to the body lands for Escobar.
Escobar misses with a punch to the body.
Escobar lands a shoulder strike that jolts his opponent's head backwards.
Escobar managing to block the knees to the body from Mitchell.
Escobar stalling in the clinch.
Escobar displaying some good clinch control by pressing Mitchell up against the cage.
Escobar lands with a short shot to the head.
Mitchell misses with a punch on the inside.
Escobar tries to throw a body punch but Mitchell avoids it by throwing Escobar back against the cage.
Mitchell is looking to score with knees to the body. Maybe he'll change it up and go body then head. Escobar is defending well for now.
A short right from Escobar.
Escobar on the defensive, avoiding the knees to the body.
Mitchell is trying to break the clinch but Escobar is controlling him.
Mitchell looks like he'd prefer to be striking at range right now.
A short uppercut from Escobar.
That's four minutes gone in the round.
Escobar stalling the fight.
A quick uppercut on the inside from Escobar.
This has been an exciting period of action!
Escobar throws a blind hook that connects with the side of Mitchells head.
Escobar can't find room to land a body shot as Mitchell controls the action.
Mitchell using the Thai plumb to throw knees but Escobar has his back arched nicely, preventing the strike.
Escobar lands a right uppercut that snaps the head of Mitchell backwards.
Escobar throws a hook to the body. More of an arm punch but it's all scoring with the judges.
Escobar lands with a good tight uppercut to the head.
Escobar scores with a nice hook to the head.
Good body shot from Escobar.
Escobar controlling the action here for a moment.
Escobar lands with a left to the head.
Escobar works for underhooks and lands a body shot in the process.
Escobar working some nice short punches in the clinch.
The crowd applaud the fighters' efforts here as the round comes to an end.
Escobar managing to block the knees to the body from Mitchell.
Mitchell takes a shot to the head.
Escobar is working Mitchell over against the cage.
Escobar is clearly stalling here... Pick up the pace son.
Escobar lands a body punch.
And thats the end of the round the fighters go back to their corners.
Pablo Escobar showed his class in that round. I'd imagine he'll take it on all the scorecards.
That's time! Mitchell's corner gives him a slap on the ass as he gets ready to fight. This is the final round!
Escobar misses the shot to the body.
Escobar has his hands up protecting his head but a hook from Mitchell finds it's way round the side to connect with Escobar's head.
Mitchell gets tackled into the cage by Escobar. Escobar maintains the clinch.
Mitchell manages to break the clinch.
We've been told by Mitchell's head coaches at [LOD]Berlin Giants that he's been working on his takedown defense in preparation for this fight.
Escobar swings wildly with a hook that is half blocked by Mitchell.
Mitchell shakes his hands off, looking to compose himself, but takes a jab to the jaw whilst he does it.
Escobar dips to his left and cracks Mitchell with an uppercut!
Escobar closes the distance and pushes Mitchell back into the cage.
Escobar lands a body shot.
Escobar avoiding damage as Mitchell throws knees to the body.
Mitchell's head jolts backwards as he takes an uppercut right on the button!
Escobar blocks a punch to the side of the head.
Escobar tried to land a shot to the body but connects with Mitchell's elbow.
Escobar pushes Mitchell back against the cage and unloads with a body punch.
This has been an exciting period of action!
Escobar softening up his opponent with strikes, against the cage.
Both fighters are breathing heavily.
Escobar blocks a knee to the body. He'll have a nicely bruised forearm in the morning.
Mitchell working aggressively here.
Escobar scores with a hook to the body.
Escobar pushes Mitchell back against the cage and lands a hook to the side of the head.
That's one minute gone in the round.
Escobar blocking some punches.
A short uppercut from Escobar.
Escobar lands a shoulder strike.
A short right hand to the side of the head by Escobar.
Escobar makes some space for himself and lands an uppercut.
Mitchell being controlled against the cage.
Escobar lands a body shot in the clinch.
Escobar lands with a short punch from the clinch.
Mitchell throws a vicious knee straight up the middle but Escobar blocks it with crossed arms.
Escobar blocks a knee to the body. He'll have a nicely bruised forearm in the morning.
A right handed body shot lands from Escobar.
Escobar scores with an uppercut up the middle.
Escobar lands a hook to the side of the head.
Escobar stalling here - the referee won't stand for too much of that.
A short right hand to the side of the head by Escobar.
This has been an exciting period of action!
Mitchell is trying to stall.
Mitchell looking to slow down the pace here.
Tyke Mitchell has stepped it up - he knows he needs a finish here!
That's two minutes gone in the round.
Escobar stays in close to his opponent and throws a right hand to the body.
A short right from Escobar on the inside.
A nice right hand lands inside from Escobar.
Escobar holding his opponent close, against the cage.
Escobar throws a hook to the body. More of an arm punch but it's all scoring with the judges.
Escobar lands a right hand.
Escobar lands a body punch in the clinch.
Escobar lands a body shot in the clinch.
Escobar lands with a quick shot inside that doesn't really do much damage.
Escobar lands a hook to the side of the head.
The referee is keeping an eye on Escobar - much more stalling and he will separate the fighters.
Stalling in the clinch from Escobar.
Mitchell throws a head punch that misses.
Escobar lands a nice looking hook to the body, against the cage.
Escobar lands a hook to the body. It's hard to tell if that hurt Mitchell or not.
Escobar makes some space for himself and lands an uppercut.
That's three minutes gone in the round.
Escobar makes some space for himself and lands an uppercut.
Escobar lands punches inside but they're not really causing much damage.
Escobar lands a body punch.
A right hook to the body lands for Escobar.
A shot in the inside from Escobar.
A quick uppercut on the inside from Escobar.
Escobar lands with a short punch from the clinch.
Escobar unloads with a big right hand that wobbles Mitchell! He's leaning against the cage trying to keep his feet but Escobar is unloading with more strikes now! Mitchell drops to his knees and the referee stops the fight for a TKO!
Ladies and gentlemen, after 3:31 of round 3, we have a winner by way of TKO (Strikes). Pablo Escobar!
Our winner, Pablo Escobar, made sure he spent some time buttering up the crowd during his post fight interview, which will no doubt bring him a few more fans.
|
|
|
|
|
|
|
|
|
|
|
|
|
|
|
|
|
|
|
|
|
|
|
| S |
C
A |
G |
S |
C
B |
G |
|
S |
C |
G |
|
energy
A | B |
|
hype
A | B |
|
pop
A | B |
|
mgr
A | B |
|
FIGHT
RATING
100% |
|
|
|
|
|
|
|
Undercard bout
|
Coming up we have a heavyweight MMA rules bout between Yuba Boulwiha (ranked 0 p4p, 0 weight class) and Marco Buhler (ranked 0 p4p, 0 weight class). Yuba Boulwiha looks tired to me. Hopefully he has got enough gas left in the tank to put in a good performance.
 |
|
 |
| 185 cm
32
275 lbs
25 - 14 - 0 |
|
198 cm
31
265 lbs
20 - 13 - 0 |
Abu Dhabi Champ
Solid boxing
Insanely flexible |
|
BJJ White Belt
Excellent MT
Powerful |
|
| |
|
Ladies and gentlemen. This fight is 3 rounds, in the heavyweight division.
Introducing the fighter to my left, fighting out of the red corner.
With a record of
25 - 14 - 0, fighting out of Hilo, Yuba Boulwiha!
And introducing the fighter to my right, fighting out of the blue corner.
With a record of
20 - 13 - 0, fighting out of Hilo, Marco Buhler!
The judges for this bout are Paul Gruel, Colin Fray and Jeff Smith.
The bell rings for round one and we are underway!
Buhler throws the overhand right but ducks down into a quick takedown attempt. Boulwiha was covering up waiting for the punch and Buhler finishes the takedown easily into guard.
Boulwiha has his feet on Buhler's thighs here. He's pushed Buhler off and worked for a very quick armbar from the bottom! He's flipped onto his stomach and he's cranking hard on the arm! Buhler screams in pain and taps out! This one is all over!
Ladies and gentlemen, after 0:18 of round 1, we have a winner by way of Submission (Armbar). Yuba Boulwiha!
In his post fight interview, Yuba Boulwiha started talking himself up. Luckily his charisma kept the crowd on side and gave him a good reception.
|
|
|
|
|
|
|
|
|
|
|
|
|
|
|
|
|
|
|
|
|
|
|
| S |
C
A |
G |
S |
C
B |
G |
|
S |
C |
G |
|
energy
A | B |
|
hype
A | B |
|
pop
A | B |
|
mgr
A | B |
|
FIGHT
RATING
100% |
|
|
|
|
|
|
|
Undercard bout
|
Coming up we have a middleweight MMA rules bout between Bon Aqua (ranked 0 p4p, 0 weight class) and Ed Gennero (ranked 0 p4p, 0 weight class). Gennero comes into a darkened arena with his song building. Wally's Pep Talk kicks in, the lights come on and the crowd goes wild! What a showman! Over to our ring announcer for the fighter introductions!
 |
|
 |
| 187 cm
24
200 lbs
10 - 1 - 0 |
|
182 cm
24
200 lbs
14 - 6 - 0 |
Good wrestling
Excellent boxer
Insanely flexible |
|
Good wrestler
World class boxer
Good gas tank |
|
| |
|
Ladies and gentlemen. This fight is 5 rounds, for the middleweight championship of the world!
Introducing the champion to my left, fighting out of the red corner.
With a record of
10 - 1 - 0, fighting out of St Petersburg, Bon Aqua!
And introducing the challenger to my right, fighting out of the blue corner.
With a record of
14 - 6 - 0, fighting out of Los Angeles, Ed Gennero !
The judges for this bout are Roger Salmon, Paul Gruel and Colin Fray.
The bell rings for round one and we are underway!
Nice body kick there by Gennero .
Gennero looks to land a combination but Aqua avoids it well.
Aqua lands a jab to Gennero 's midsection.
Aqua takes one on the button.
Gennero has been working on his striking defense in training and it's paying off as Aqua is landing a low percentage of strikes.
Aqua tries to bum rush Gennero with a series of wild strikes but Gennero uses good footwork to avoid the assault.
Aqua backing away here, and Gennero unleashes a leg kick that just misses.
Aqua moves out of range as Gennero strikes.
Nice cross by Gennero .
Aqua wants to clinch.
A head kick by Gennero misses
and Aqua counters with a straight right hand.
Aqua has been working on his boxing with his coaches at gym closing in the buildup to the fight.
Gennero scoring well with a low kick there.
Gennero swings away with a leg kick that misses.
Gennero fails to land with a series of punches.
The fans in attendance giving it up for the two fighters, who have really let it all hang out in the last minute or so!
Gennero takes an uppercut right on the button but keeps his composure.
Aqua throws an uppercut from half a mile away. Gennero sees it coming and avoids it easily.
Gennero drops his hands and takes a jab to the jaw for his troubles.
Aqua gets cracked there but stands up to it.
Aqua lands a right hook to the body.
That's one minute gone in the round.
Gennero tries a switch kick but it misses it's target.
Sloppy strikes from Gennero . Those never looked like landing.
Aqua scores with a jab.
Aqua ducks under an overhand right and circles away with a smile on his face.
Gennero tries to grapple but his opponent circles
and Aqua counters with a quick right hand to the jaw.
Aqua darts in and out, connecting with a jab.
Gennero connects with a nice looking jab.
Good work by Aqua as he checks the leg kick.
Aqua swung with a counter right hand that didn't connect.
Aqua avoids a punch combination nicely.
Aqua showing good head movement there, avoiding the strikes from Gennero .
Gennero keeping his hands up high there, blocking the jab from Aqua.
Aqua lands a head shot.
That's two minutes gone in the round.
Gennero scores with a one two! Aqua had his feet all tangled up there and couldn't avoid the strikes.
This is a great period of action - very entertaining stuff!
Gennero misses with a straight right.
Gennero misses with a straight left.
Gennero throws an off balance right hand
and Aqua counters with a lovely shot to the body.
Gennero doesn't react quick enough there as he takes a shot to the body.
Aqua scores with a nice head shot.
Aqua takes the fight into the clinch.
Aqua lands a right uppercut that snaps the head of Gennero backwards.
Gennero manages to break the clinch.
Gennero keeps the fight on the outside.
Gennero thumps Aqua with a low kick.
Gennero loads up on a big right hand but Aqua slips the punch.
Aqua works his jab well there, keeping his opponent at a distance.
Gennero throws a series of punches but Aqua moves out of range.
Aqua scores with a nice right hand.
That's three minutes gone in the round.
Aqua is looking to take this fight into the clinch.
Aqua bobs and weaves and throws out a fast jab that snaps Gennero 's head backwards.
Gennero throws the left hand but Aqua avoids the punch easily.
Gennero thuds his right hand into Aqua's forehead from close range. That could be painful for both fighters.
Gennero misses with a combination
and Aqua connects with a straight left hand counter down the middle.
Sloppy strikes from Gennero . Those never looked like landing.
Gennero keeping his hands up high there, blocking the jab from Aqua.
Gennero throws a leg kick
and Aqua counters with a quick right hand to the jaw.
Aqua ducks under a wild hook from Gennero .
Gennero takes one on the chin but seems OK.
Aqua wings a very wild body shot but it does the job and lands to the midsection.
Gennero avoids the clinch attempt nicely.
A clash of legs there as Aqua blocks the low kick.
That's four minutes gone in the round.
A clash of legs there as Aqua blocks the low kick.
Gennero throws a lazy right hand but Aqua sees it coming a mile off and sidesteps it easily.
Fantastic stuff here - a very entertaining period of action, which has drawn cheers from the crowd.
Aqua uses decent footwork to sidestep a right hand from Gennero .
Aqua appears to be looking for a counter punch to the body.
Gennero just misses with a punch to the body.
Gennero thows a leg kick but Aqua checks it
enabling Aqua to counter with a crisp jab.
Gennero moves his head to the side to avoid a jab but walks straight into a cross.
A swing and a miss from Aqua.
Gennero bobbing and weaving, closes the distance and lands a hook to the side of Aqua's head.
Aqua takes a step towards his opponent and connects with a left hand, before circling away.
Aqua staying out of range there.
Aqua was looking to counter that last move with a shot to the body but he didn't commit.
Gennero looking to throw a kick but he's pulled out of it.
Aqua is looking to counter the offense by Gennero and move into the clinch.
Aqua throws out a loose jab but Gennero uses good head movement to avoid it.
The crowd applaud the fighters' efforts here as the round comes to an end.
Gennero tries to land with a swinging hook to the body but Aqua was well out of range. Poor timing from Gennero .
Gennero connects with the punch.
Gennero swings wildly with a right hand that was never going to find it's target.
Gennero misses with a right hand
and Aqua counters with a lovely straight right hand!
And thats the end of the round the fighters go back to their corners.
That was a close round but I would say that Bon Aqua will probably get the nod.
That's the end of the round. The referee orders the cornermen out of the cage so we can get back down to business.
Gennero misses with a right hand
and Aqua counters with a quick right hand to the jaw.
Gennero rushes in with a sloppy looking punch
and Aqua counters with a stiff right hand.
Aqua tries to clinch but Gennero is having none of it.
Good standup being displayed there by Gennero as he connects with a hook.
Aqua is rocked!
Gennero misses with a head kick.
Oh Aqua is still all over the place! His legs are completely gone! Will he be able to recover?!!
The fight stays on the outside here - Aqua looks like he's thinking about clinching though.
Aqua bobs and weaves well there to avoid the strikes.
Aqua seems to have got his legs back now.
Gennero looks to land a left hand but Aqua moved out of range nicely.
Aqua is really head hunting here, hardly looking to strike to the body at all.
Aqua darts in and clinches Gennero up against the cage.
Aqua content to slow the pace in the clinch.
Aqua lands with a good tight uppercut to the head.
We've had a slow start to the round here - hopefully the action picks up.
Gennero throws a nice elbow but it doesn't land.
Gennero breaks the clinch.
Gennero misses with an uppercut.
Gennero lands a glancing blow to the side of Aqua's head.
This has been an exciting period of action!
Gennero throws a hook to the side of Aqua's head but Aqua sees it coming and ducks under it beautifully.
Aqua throwing a counter right hand but Gennero manages to avoid it.
Aqua scores with a punch to the head.
That's one minute gone in the round.
Gennero just misses with a punch to the body.
Gennero misses with a lunging right hand
letting Aqua counter with a right hand.
A slow jab from Aqua misses its intended target.
Aqua throws out a token jab with nothing on it.
Gennero slips a jab from Aqua.
Nice defenses there by Aqua.
Aqua misses with a left hand
and Gennero counters with a nice uppercut.
Gennero throws an overhand right that lands on Aqua's shoulder, as Aqua tries to avoid the shot.
Gennero throws a leg kick
and Aqua counters with a lovely straight right hand!

Gennero is rocked!
Aqua drops Gennero with a big left hand! Gennero is injured, injured bad! Aqua jumps in and finished him with strikes! The fight is over!
Ladies and gentlemen, after 1:43 of round 2, we have a winner by way of TKO (Strikes). Bon Aqua!
Bon Aqua is the new middleweight champion!
Bon Aqua spent the whole post fight interview bigging himself up. It didn't go down that well with the fans after a while as they thought it was a bit arrogant.
|
|
|
|
|
|
|
|
|
|
|
|
|
|
|
|
|
|
|
|
|
|
|
| S |
C
A |
G |
S |
C
B |
G |
|
S |
C |
G |
|
energy
A | B |
|
hype
A | B |
|
pop
A | B |
|
mgr
A | B |
|
FIGHT
RATING
60% |
|
|
|
|
|
|
|
Co-main event
|
Coming up we have a bantamweight MMA rules bout between Kilafwa Tatlumahi (ranked 0 p4p, 0 weight class) and Bee Jay (ranked 0 p4p, 0 weight class). Bee Jay told me before the fight that he's been watching a lot of DVDs so let's see if that helps him in this one! I can't wait to find out!
 |
|
 |
| 170 cm
24
150 lbs
13 - 4 - 0 |
|
163 cm
23
135 lbs
9 - 3 - 0 |
BJJ Purple Belt
World class MT
Granite chin |
|
Good wrestler
Decent boxing
Granite chin |
|
| |
|
Ladies and gentlemen. This fight is 3 rounds, in the bantamweight division.
Introducing the fighter to my left, fighting out of the red corner.
With a record of
13 - 4 - 0, fighting out of Hilo, Kilafwa Tatlumahi!
And introducing the fighter to my right, fighting out of the blue corner.
With a record of
9 - 3 - 0, fighting out of Tokyo, Bee Jay!
The judges for this bout are Micheangelo Fripello, Chris Saunders and Roger Salmon.
The bell rings for round one and we are underway!
Tatlumahi throws a leg kick but Jay sees it coming and checks it nicely.
Jay steps to his left, right into the path of a big body kick from Tatlumahi. That one must have hurt.
Tatlumahi has been working on his boxing with his coaches at Kombat MMA in the buildup to the fight.
No luck with that takedown attempt from Jay.
A really sloppy takedown attempt there from Jay.
Jay shoots in for a takedown but doesn't get it.
Kilafwa Tatlumahi has stuffed three takedown attempts in the round now. That's going to take a lot out of Bee Jay.
Jay shoots in looking for a double leg takedown. Tatlumahi defends it nicely.
Tatlumahi pulls out of a head kick attempt.
We've had a slow start to the round here - hopefully the action picks up.
Jay throws a leg kick but Tatlumahi sees it coming and checks it nicely.
Some bone on bone action there as Tatlumahi checks a low kick. Luckily it wasn't a particularly hard one.
Tatlumahi looked to counter that last move with a leg kick but didn't pull the trigger.
Tatlumahi lands with a head kick! That's gotta hurt.
Tatlumahi lands a leg kick and bounces back out of range.
That's one minute gone in the round.
A kick lands to the mid section there for Tatlumahi.
A nice leg kick lands there from Tatlumahi.
Jay shoots in with a takedown attempt and he has Tatlumahi pinned against the cage. Tatlumahi gets the underhooks and manages to circle away.
Tatlumahi seem to be loading up, looking for a big counter.
Jay feints and then dives in with a takedown. That was a long way out but the feint bought him enough time to close the distance and complete the takedown. Now we'll play guard for a bit and see who can get the better of that position.
Jay pushing down on Tatlumahi's thigh, trying to pass to half guard. He's managed it... Nice work.
Jay is looking to advance position but Tatlumahi won't allow it.
Tatlumahi wants to get back to full guard.
Jay tries to pass the half guard into mount. Tatlumahi knows what he's doing though and prevents the attempt.
That's two minutes gone in the round.
The fighters are pressed up against the cage, both looking to find a bit of space to work.
Tatlumahi controlling the position well.
Jay looks over to his corner - he wants some instructions but his corner are not responding.
Tatlumahi trying to control from the bottom.
Tatlumahi wants to improve his position but Jay is controlling well.
Jay is looking for a kimura but he's never going to get it from there.
That's three minutes gone in the round.
Jay controlling the pace.
Jay looking to pass the half guard. Not this time.
Tatlumahi wants to get back to full guard.
The referee decides to stand the fighters back up.
Jay shoots in and gets a takedown into Tatlumahi's guard.
Tatlumahi trying to control the position.
Tatlumahi looking for a sweep. Not yet Tatlumahi, not yet.
That's four minutes gone in the round.
Jay wants to control from the top but Tatlumahi keeps moving.
Tatlumahi keeping full guard, as Jay tries to pass.
Jay trying to control the position from guard on top but Tatlumahi is wriggling around, looking for whatever he can.
Jay trying to pass the guard but can't manage it just yet.
The crowd thankful this round is nearly over.
Jay advances to half guard.
Tatlumahi is looking to control Jay's leg but it's slowly edging free. Can Tatlumahi avoid being mounted?
Tatlumahi is trying to get back to full guard.
And thats the end of the round the fighters go back to their corners.
A close round but Bee Jay will probably get the nod.
The minute break is over - no more time for sponges and pep talks - back to the action!
Jay misses with a low kick.
Jay takes a kick to the side of the head.
Jay takes a kick to the body and keeps moving.
Jay shoots in looking for a takedown. Tatlumahi tries to sprawl out of it but Jay keeps driving through. The fighters are pinned against the cage. Tatlumahi manages to get underhooks and after a bit of a struggle, circles away and we're back to standing.
Jay throws a leg kick but Tatlumahi moved away.
Jay scores with a leg kick.
Bee Jay seems to be the more aggressive standup fighter in this bout.
Jay with a nice looking leg kick. You could hear that one land in a back row.
Jay has his takedown stuffed
and Tatlumahi counters with a good right hand that lands right on the jaw.
Kilafwa Tatlumahi is winning the standup battle so far.
We've had a slow start to the round here - hopefully the action picks up.
Jay closes the distance and clinches up, looking for a takedown. He shifts his weight and gets a nice trip into half guard.
This has been an exciting period of action!
Tatlumahi is refusing to be controlled, as Jay sits in half guard.
Tatlumahi slips a foot under and gets full guard. Nice work.
That's one minute gone in the round.
Tatlumahi trying to keep a closed guard but Jay is proving a slippery customer.
Tatlumahi is adopting a defensive guard.
Jay looking to sit in guard and control but Tatlumahi gets the butterfly guard and sweeps. He's now in the guard on the top.
Tatlumahi has to be careful here, sitting in the guard of a superior BJJ player.
Jay throwing his legs up looking for a triangle.
That's two minutes gone in the round.
Neither fighter has done anything of merit for a good minute or two here and the crowd are not happy about it.
Jay trying to control the position.
Bee Jay has got the better of the ground game so far.
Jay bucks up whilst keeping hold of a body lock, managing to reverse the position. Now he's in top in Tatlumahi's guard.
Jay tries to free his leg and advance position but Tatlumahi is retaining full guard.
Jay slows down the pace of the fight, as he sits in guard.
Tatlumahi can't keep his opponent in guard - Jay advances to half guard, no doubt looking to mount.
Tatlumahi is in trouble now - Jay has advanced to mount!
That's three minutes gone in the round.
Jay swings around for an armbar but it's a sloppy attempt and Tatlumahi is now in Jay's guard. A big mistake from Jay there, giving up the dominant position!
Jay has control of Tatlumahi's left arm, preventing Tatlumahi from doing any damage.
Tatlumahi wants to stand but Jay is controlling his posture from full guard.
Jay is trying to keep Tatlumahi in close.
Jay wants to control but Tatlumahi passes easily into half guard.
That's four minutes gone in the round.
Tatlumahi wants to get back to his feet.
Jay trying to control from the bottom.
Jay keeps control of the position for the meantime.
The crowd thankful this round is nearly over.
Tatlumahi wants to stand but Jay has hold of a leg and an arm, so he's trapped for now.
And thats the end of the round the fighters go back to their corners.
That was a close second round but I would say that Kilafwa Tatlumahi will probably get the nod.
The fighters' corners scream their final instructions, as the referee calls time. Here we go, back to the action! This is the final round!
Jay looking for a takedown here - he's got it.
Jay sitting in guard, not really doing much.
Jay's corner are shouting for him to control the position and he seems happy to oblige.
Tatlumahi keeping moving, preventing Jay from controlling successfully.
We've had a slow start to the round here - hopefully the action picks up.
Jay pressing down on his opponent's thigh, looking to pass guard. Tatlumahi is keeping the position for now.
That's one minute gone in the round.
Jay keeps trying to improve his position.
Jay trying to control the position from guard on top but Tatlumahi is wriggling around, looking for whatever he can.
Jay pressing down on his opponent's thigh, looking to pass guard. Tatlumahi is keeping the position for now.
The referee has stepped in and called for a break in the action. We'll restart on the feet.
Tatlumahi moves out of range of the leg kick from Jay.
Tatlumahi feinted there with a counter leg kick.
Tatlumahi is looking to slow Jay down with leg kicks.
Jay on the wrong end of a nice low kick. He's acting like it's no big deal but he doesn't want to take many more of those.
Tatlumahi goes for a high kick. It partially lands.
That's two minutes gone in the round.
Jay shoots in for a takedown from distance. He catches Tatlumahi napping and manages to drive through into side control!
Tatlumahi knows he needs to get back to his feet asap. He's simply no match for Jay on the ground.
Tatlumahi is looking to reverse the position.
Jay is pausing for a moment. What's he doing? It looks like he's clearing his nose. Oh dude! He's shot a load of snot all down Tatlumahi's shoulder. That is not cool.
Tatlumahi is positioning himself to get back to half guard.
Jay trying to control the action but Tatlumahi is working from the bottom.
Jay is looking to finish here, going for an Americana. Tatlumahi knows the correct defense though, so he's OK.
That's three minutes gone in the round.
Jay working away.
Tatlumahi manages to land a sweep and he's now on top! Lovely Jiu Jitsu!
The ref warns both fighters not to hold the cage as they work up against the meshing.
Jay moves into full guard.
Tatlumahi won't allow Jay to sweep him here.
Jay is working from a closed guard but he's struggling to control his opponent.
That's four minutes gone in the round.
Jay wants to control the position but Tatlumahi says "no thanks buddy" and passes to half guard.
Jay is pressing down on Tatlumahi's left leg trying to get back to full guard. He's managed it.
Tatlumahi would like to get this fight back to the feet but can't get free from the closed guard.
Jay trying to keep a closed guard but Tatlumahi is proving a slippery customer.
Jay tries to land a sweep but no joy.
Boooooooooooooooooooo!!! God, this has been a terrible round. Come on you two, sort yourselves out!
Tatlumahi wants to get up but he can't break Jay's closed guard. He needs to be careful trying to break the legs open, as he's open to submissions here.
Jay is trying to control the position from the bottom.
And that's the end of the fight!
Bee Jay comfortably won the final round on my scorecard.
I think Jay has won this one but let's see whether the judges agree with me. Over to the ring announcer for the scorecards.
Ladies and gentlemen, after 3 rounds of action, we go to the scorecards for a decision.
Judge Micheangelo Fripello scores the fight 27:30
Judge Chris Saunders scores the fight 29:28
Judge Roger Salmon scores the fight 28:30
In favor of your winner, by split decision... Bee Jay!
After the fight, Bee Jay was humble in paying tribute to his opponent but made it clear he wants to go on to bigger and better things. It seemed to go down well with the crowd who cheered him loudly.
|
|
|
|
|
|
|
|
|
|
|
|
|
|
|
|
|
|
|
|
|
|
|
| S |
C
A |
G |
S |
C
B |
G |
|
S |
C |
G |
|
energy
A | B |
|
hype
A | B |
|
pop
A | B |
|
mgr
A | B |
|
FIGHT
RATING
28% |
|
|
|
|
|
|
|
Main event
|
Coming up we have a heavyweight MMA rules bout between Ken Halo (ranked 0 p4p, 0 weight class) and Conway Pulford (ranked 0 p4p, 0 weight class). Conway Pulford has the power to score a knockout today if he connects clean with Ken Halo's chin.
 |
|
 |
| 192 cm
24
254 lbs
14 - 4 - 0 |
|
198 cm
23
257 lbs
13 - 3 - 0 |
Good wrestling
World class boxer
Insanely flexible |
|
Good wrestler
World class MT
Good gas tank |
|
| |
|
Ladies and gentlemen. This fight is 5 rounds, for the heavyweight championship of the world!
Introducing the champion to my left, fighting out of the red corner.
With a record of
14 - 4 - 0, fighting out of Los Angeles, Ken Halo!
And introducing the challenger to my right, fighting out of the blue corner.
With a record of
13 - 3 - 0, fighting out of Hilo, Conway Pulford!
The judges for this bout are Colin Fray, Roger Salmon and Josh West.
The bell rings for round one and we are underway!
A looping hook to the body misses from Halo. Pulford does a little dance to reset his feet.
Pulford is pinned up against the cage taking some big shots here. The referee is looking closely deciding whether he should stop the fight.
Halo throws a series of punches but Pulford moves out of range.
Pulford with the counter takedown but Halo avoids it easily.
Jab, cross, leg kick. Nice combination by Halo!

It looks like Conway Pulford has been cut.
Halo sizes up Pulford with a pawing jab and scores with a straight right down the middle.
Pulford takes a body punch but keeps moving.
Halo seems to be moving with more speed, compared to his last bout. He must have been working on that in the gym.
Pulford blocks a head kick by Halo.
Pulford moves out of range of the body kick from Halo.
Halo throws a body kick that digs right into the meat.
Halo lands a jab to the head.
That's one minute gone in the round.
Halo misses with a two punch combination.
Pulford has his head snapped back a nice jab. A little nod from Pulford there as he acknowledges the shot.
Well, he's not going to score with shots like that. A lazy body kick attempt from Halo.
Ken Halo seems to be the more aggressive standup fighter in this bout.
Pulford keeping a good distance there, avoiding the body shot.
Pulford moves out of range of the leg kick from Halo.
Halo fakes high and swings low for a body shot but Pulford manages to avoid it.
Halo throws a head kick that half lands.
Halo misses with a looping left.
Pulford with the counter takedown but Halo avoids it easily.
Halo looks to score with a jab to the body but Pulford is just out of range.
Halo pulls out of a head kick attempt.
That's two minutes gone in the round.
Halo will need to tighten up his combinations if he doesn't want to gas himself out, swinging at thin air.
Halo throws a head kick but Pulford moves out of range.
Pulford tries a counter takedown but it's more of a dummy move, and he uses it to push himself away.
Halo misses with the combination.
Halo misses with a hook. Pulford ducked under it nicely.
Halo wants to clinch.
That's three minutes gone in the round.
Halo misses with an uppercut.
Pulford checks a leg kick.
A jab from Halo finds it's way through Pulford's defenses.
Halo misses with a wild body shot.
Pulford blocks a leg kick.
Halo throws a body shot but no joy.
Pulford is definitely looking for the counter takedowns here.
Pulford avoids the clinch attempt nicely.
Pulford tries a counter takedown but it's more of a dummy move, and he uses it to push himself away.
Halo fakes a head shot and lands one to the body.
Pulford avoids the body shot from Halo.
And Pulford tries to counter it with a takedown but Halo pushes his down on his head and steps out.
That's four minutes gone in the round.
Halo lands a nice hook to Pulford's body. Pulford takes it in his stride and looks to land his own strikes.
Halo swings and misses with a hook to the body.
Pulford is definitely looking for the counter takedowns here.
Pulford swats away the attempt to clinch by Halo.
Halo misses with a hook.
Pulford's coach down at was telling us pre-fight that they have been working on Pulford's balance. Obviously they view that as a key factor in the outcome of this fight.
Pulford moves out of range of the strikes.
Pulford changes levels for a counter takedown but doesn't follow through with his attempt.
Halo throws a series of punches but Pulford moves out of range.
Pulford drops down looking to force a counter takedown but Halo defends it well.
Halo misses with a body kick.
Pulford is definitely looking for the counter takedowns here.
Pulford ducks under an overhand right and circles away with a smile on his face.
Ken Halo is looking to keep the fight on the feet at all costs.
Halo throws a body kick but he was well out of range there.
And thats the end of the round the fighters go back to their corners.
Ken Halo dominated that round.
The cut man is working on Conway Pulford's cut.
The fighters' corners scream their final instructions, as the referee calls time. Here we go, back to the action!
Halo throws an uppercut from half a mile away. Pulford sees it coming and avoids it easily.
Halo scores with a kick to the midsection.
Halo throws an overhand right that lands on Pulford's shoulder, as Pulford tries to avoid the shot.
Pulford is definitely looking for the counter takedowns here.
Halo throws a series of punches but Pulford avoids them all with ease.
Halo fails to land with a series of punches.
Pulford feints the counter takedown.
Halo throws the kick towards the body but Pulford avoids it.
Halo misses with a kick to the body
and Pulford counters with a shoot takedown into half guard.

Halo kicks Pulford off and gets back to his feet.
Wooooo! Give it up for these two warriors! They are putting on a show!
Halo misses with a body shot. Nice footwork from Pulford.
Pulford feints the counter takedown.
Ken Halo is winning the standup battle so far.
Some wild striking there from Halo.
That's one minute gone in the round.
Halo throws a hard body shot but it just misses.
Halo connects with a body shot that sends Pulford's belly button to the back.
Halo pulls out of a head kick attempt.
Pulford is definitely looking for the counter takedowns here.
Halo connects with a nice looking jab.
Halo tries a switch kick but it misses it's target.
Halo throws a body kick but he wasn't in range.
Pulford tries a counter takedown but it's more of a dummy move, and he uses it to push himself away.
Halo throws a body shot but no joy.
Pulford feints the counter takedown.
Pulford blocks a head kick by Halo.
And Pulford tries to counter it with a takedown but Halo pushes his down on his head and steps out.
That's two minutes gone in the round.
Halo just misses with a punch to the body.
Pulford showing good head movement there, avoiding the strikes from Halo.
And Pulford tries to counter it with a takedown but Halo pushes his down on his head and steps out.
Halo connects with a leg kick. He turned his hip over nicely there.
Halo throws out a powerful jab.
Ken Halo is looking to throw some combinations by the looks of things.
Halo misses with a body shot. Nice footwork from Pulford.
Pulford bobs and weaves well there to avoid the strikes.
Pulford slips under a jab.
Pulford feints the counter takedown.
That's three minutes gone in the round.
Halo throws a body punch but Pulford moves out of range.
Pulford slips under a jab from Halo.
A slow jab from Halo misses its intended target.
Halo lands a head shot.
That has opened up Conway Pulford's cut even more.
Halo misses with a leg kick.
Pulford takes one to the chin there.
Halo tries to bum rush Pulford with a series of wild strikes but Pulford uses good footwork to avoid the assault.
Halo tries to land with a swinging hook to the body but Pulford was well out of range. Poor timing from Halo.
Pulford slips under a jab from Halo.
And Pulford tries to counter it with a takedown but Halo pushes his down on his head and steps out.
A clash of legs there as Pulford blocks the low kick.
Pulford is definitely looking for the counter takedowns here.
That's four minutes gone in the round.
Nice shot lands for Halo.
Halo throws a shot to the body.
A big left from Halo misses.
Halo swings and misses with a hook to the body.
And Pulford tries to counter it with a takedown but Halo pushes his down on his head and steps out.
Halo wings a very wild body shot but it does the job and lands to the midsection.
Halo looking to land some kicks to the body here.
Halo is really dominating this fight. Is there anything that Pulford can do to turn this around?
Halo jabs at Pulford's body.
The crowd are loving this. Great action here.
Pulford on the wrong end of a nice low kick. He's acting like it's no big deal but he doesn't want to take many more of those.
And thats the end of the round the fighters go back to their corners.
Ken Halo dominated that second round.
The cut man is working on Conway Pulford's cut.
That's time! Halo's corner gives him a slap on the ass as he gets ready to fight.
Halo throws a big shot that misses.
Halo throws a leg kick but Pulford sees it coming and checks it nicely.
Halo fakes with an overhand right and moves in to clinch with Pulford, pushing him back against the cage.
Halo misses with the head strike.
Halo tries to throw a body punch but Pulford avoids it by throwing Halo back against the cage.
Halo working aggressively here.
Halo can't find room to land a body shot as Pulford controls the action.
Halo working aggressively here.
We've had a slow start to the round here - hopefully the action picks up.
Halo wants to break free but Pulford has control.
Halo misses with a body punch.
Halo's corner calls for him to break the clinch, which he does.
Halo clinches up against the cage.
That's one minute gone in the round.
Halo misses with some punches.
Halo has a couple of punches blocked by Pulford.
Halo misses with a hook to the ribs.
Halo misses with a hook from the clinch.
Halo misses with a short punch on the inside.
Halo working aggressively here.
Still in the clinch, Halo scores with a nice short uppercut.
Halo misses with a punch to the body.
Halo misses with a body punch.
Halo pushes off and circles away, back to the middle of the mat.
Halo throws a head kick but Pulford moves out of range.
Halo lands a jab followed by a nice looking cross.
That's two minutes gone in the round.
Pulford staying out of range there.
Halo tests Pulford's chin there with a solid looking shot.
Halo connects with a body shot that sends Pulford's belly button to the back.
Halo does a little shimmy and throws a leg kick. The leg kick missed by a considerable margin though, making him look a little bit silly for doing the shimmy.
Halo swings and misses with a hook to the body.
Pulford changes levels for a counter takedown but doesn't follow through with his attempt.
Pulford ducks under a wild hook from Halo.
Pulford feints the counter takedown.
Wooooo! Give it up for these two warriors! They are putting on a show!
Halo swings away with a leg kick that misses.
Pulford blocks the body kick.
Pulford changes levels for a counter takedown but doesn't follow through with his attempt.
That's three minutes gone in the round.
A telegraphed right hand from Halo misses the target.
Halo tries to land with a swinging hook to the body but Pulford was well out of range. Poor timing from Halo.
Pulford blocks the body kick.
Halo throws a leg kick but Pulford sees it coming and moves out of range.
Pulford uses decent footwork to sidestep a right hand from Halo.
Halo motions for Pulford to come forward. Halo throws a leg kick but it misses it's target.
Halo tries to land a leg kick but Pulford saw it coming and moves away.
Halo chopping away at his opponent's legs.
Halo thows a left - swing and a miss!
That's four minutes gone in the round.
Halo just misses with a punch to the body.
And Pulford tries to counter it with a takedown but Halo pushes his down on his head and steps out.
Halo misses with a body shot.
Halo fakes high and swings low for a body shot but Pulford manages to avoid it.
Halo ducks down and throws a hook to the body but Pulford moves away.
Pulford feints the counter takedown.
Halo throws a body kick that misses.
Pulford changes levels for a counter takedown but doesn't follow through with his attempt.
Halo throws a hook to the body but it doesn't connect.
The crowd thankful this round is nearly over.
Pulford ducks under a wild hook from Halo.
Pulford feints the counter takedown.
Halo ducks down and throws a hook to the body but Pulford moves away.
Halo throws a two punch combo that lands nicely.
And thats the end of the round the fighters go back to their corners.
Ken Halo clearly takes that round.
The cut man is working on Conway Pulford's cut.
The minute break is over - no more time for sponges and pep talks - back to the action!

Pulford moves out of range as Halo strikes.
Pulford uses some good footwork to avoid the body shot by Halo.
Halo looking to land some kicks to the body here.
Halo fakes high and swings low for a body shot but Pulford manages to avoid it.
A combination from Halo does no damage.
Halo jabs at Pulford's body.
We've had a slow start to the round here - hopefully the action picks up.
Pulford moves out of range of the body kick.
A chopping leg kick lands by Halo.
Halo throws out a token jab with nothing on it.
Pulford tries a counter takedown but it's more of a dummy move, and he uses it to push himself away.
That's one minute gone in the round.
Pulford's hands are dropping dangerously low here and Halo connects clean with a right hook that sends him down to one knee! Pulford scrambles back to his feet.
Halo fakes high and swings low for a body shot but Pulford manages to avoid it.
Nice straight punches there by Halo. You know Roy Jones Jr respects the hands of Halo.
Halo misses with a wild body shot.
Halo fakes a head punch and goes low to the body. Nicely done.
Pulford avoids the body shot from Halo.
Halo lets loose with a powerful body kick. Pulford will feel that in the morning.
Halo fails to land with the punch combination there - jab, cross, hook, miss, miss, miss.
Pulford is definitely looking for the counter takedowns here.
Halo misses with an uppercut. Pulford saw that one coming.
That's two minutes gone in the round.
Halo fakes high and swings low for a body shot but Pulford manages to avoid it.
Pulford displays some good footwork, moving neatly out of range as Halo throws out the jab.
Pulford with the counter takedown but Halo avoids it easily.
Halo misses with a low kick.
Pulford changes levels for a counter takedown but doesn't follow through with his attempt.
Halo tries a switch kick but it misses it's target.
Pulford drops down looking to force a counter takedown but Halo defends it well.
Pulford staying out of range there.
Pulford dodges the punch combination from Halo.
Pulford changes levels for a counter takedown but doesn't follow through with his attempt.
Halo misses with a hook. Pulford ducked under it nicely.
Pulford tries a counter takedown but it's more of a dummy move, and he uses it to push himself away.
Halo throws out a token jab with nothing on it.
That's three minutes gone in the round.
A jab from Halo misses.
This fight brought to you by 5M nutrition - it's mmmmm tasty. Nice jab by Halo.
Halo misses with a low kick as Pulford jumps back.
Pulford feints the counter takedown.
Pulford showing good head movement there, avoiding the strikes from Halo.
Halo throws a leg kick but Pulford sees it coming and moves out of range.
Halo swings away but doesn't land with a series of punches.
A looping hook to the body misses from Halo. Pulford does a little dance to reset his feet.
Pulford tries a counter takedown but it's more of a dummy move, and he uses it to push himself away.
Jab, cross, leg kick. Nice combination by Halo!
That's four minutes gone in the round.
Halo throws a jab to the body, straight down the pipe. Boom. That sent Pulford stumbling backwards but he manages to regain his composure quickly.
Pulford uses some good footwork to avoid the body shot by Halo.
Pulford feints the counter takedown.
Halo lands a beauty of a right hand that gets the crowd cheering.
Halo looks for the body kick but Pulford saw that one coming.
Pulford is definitely looking for the counter takedowns here.
Halo tries to bum rush Pulford with a series of wild strikes but Pulford uses good footwork to avoid the assault.
And Pulford tries to counter it with a takedown but Halo pushes his down on his head and steps out.
Halo looks to throw the jab but Pulford is out of range.
Pulford tries a counter takedown but it's more of a dummy move, and he uses it to push himself away.
The crowd thankful this round is nearly over.
Halo throws a series of punches but Pulford avoids them all with ease.
Pulford feints the counter takedown.
This is a great period of action - very entertaining stuff!
Halo misses with an uppercut. Pulford saw that one coming.
Pulford drops down looking to force a counter takedown but Halo defends it well.
And thats the end of the round the fighters go back to their corners.
Ken Halo had his way with Conway Pulford in that round.
The cut man is working on Conway Pulford's cut.
The referee calls time. The cornermen exit stage left and we're back to business. This is the final round!

Halo will need to tighten up his combinations if he doesn't want to gas himself out, swinging at thin air.
A clash of legs there as Pulford blocks the low kick.
Halo lands a nice shot to the body.
Pulford avoids the body shot from Halo.
Halo scores with a punch to the gut of his opponent.
We've had a slow start to the round here - hopefully the action picks up.
Halo connects with a leg kick. Pulford looked like he was expecting something else and didn't defend it.
Halo rushes forward with a series of wild hooks but Pulford moves out of range and avoids them all easily.
Pulford avoids the clinch attempt nicely.
And Pulford tries to counter it with a takedown but Halo pushes his down on his head and steps out.
That's one minute gone in the round.
Halo throws a front kick aimed at Pulford's knee but Pulford avoids it well.
Pulford tries a counter takedown but it's more of a dummy move, and he uses it to push himself away.
Halo connects with a crisp jab.
Halo goes to the watering hole and comes back with a big thumbs up from the judges as he scores a three punch combo.
Halo fakes a head punch and goes low to the body. Nicely done.
Pulford has a pretty nasty looking mouse under his right eye.
Pulford avoids the body shot from Halo.
Pulford feints the counter takedown.
Pulford avoids a kick to the body.
Pulford has a nice red mark on his side after a thudding body kick by Halo.
Pulford avoids a kick to the body.
Halo throws a body punch but Pulford moves out of range.
Pulford feints the counter takedown.
That's two minutes gone in the round.
Halo throws a hard body shot but it just misses.
Pulford feints the counter takedown.
Halo fails to land with the punch combination there - jab, cross, hook, miss, miss, miss.
Pulford takes a step back and watches a body kick go sailing past his mid section.
Pulford avoids a kick to the body.
Halo misses with a straight right.
Pulford feints the counter takedown.
That's a knee to de groin and it's over and out! Pulford crumples to the ground after an illegal strike from Halo - the referee stops the clock and Pulford gets 5 minutes to recover from that one. "I'm sorry" says Halo. Pulford manages to get back to his feet and the fight resumes.
Pulford staying out of range there.
And Pulford tries to counter it with a takedown but Halo pushes his down on his head and steps out.
Fantastic stuff here - a very entertaining period of action, which has drawn cheers from the crowd.
Halo scores with a punch to the head.
That's three minutes gone in the round.
Pulford on the wrong end of a kick to the body.
Halo misses with a wild combination.
Halo thows a left - swing and a miss!
Halo with a body punch. A glancing blow.
Halo throws out a leg kick but Pulford moves out of range and Halo only half commits.
Halo tries to land with a swinging hook to the body but Pulford was well out of range. Poor timing from Halo.
Pulford drops down looking to force a counter takedown but Halo defends it well.
Pulford slips under a jab from Halo.
That's four minutes gone in the round.
A jab from Halo misses.
Halo tries a head kick but it misses.
Halo swings and misses with a hook to the body.
Pulford is definitely looking for the counter takedowns here.
Halo lands with an overhand left.
Halo just misses with a punch to the body.
Pulford feints the counter takedown.
Halo lands with a nice low kick. That'll leave a bruise.
Halo misses with a double jab.
Pulford is definitely looking for the counter takedowns here.
The crowd thankful this round is nearly over.
Halo moves in looking to clinch but Pulford pushes him off.
Pulford feints the counter takedown.
Conway Pulford has stepped it up - he knows he needs a finish here!
Halo slips in close and lands a nice hook before moving back out of range.
And that's the end of the fight!
Ken Halo showed his dominance in that final round.
Well Halo has outscored his opponent in every aspect of the fight today. Only a scarily incompetent judge or two will keep him from a well deserved win... Over to the ring announcer for the scorecards.
Ladies and gentlemen, after 5 rounds of action, we go to the scorecards for a decision.
Judge Colin Fray scores the fight 50:40
Judge Roger Salmon scores the fight 50:40
Judge Josh West scores the fight 50:41
In favor of your winner, by unanimous decision... Ken Halo!
Ken Halo retains his heavyweight title!
A very excited looking Ken Halo made sure he remembered to thank all the fans both in the arena and on the internet. He said all the coolest people spend all day on MMA websites, which got a big reaction.
Conway Pulford spoke after the fight, saying 'They drugged me! The opponent is juicing and he had steel plates in his gloves! The ref and all the judges were paid off!!!'.
|
|
|
|
|
|
|
|
|
|
|
|
|
|
|
|
|
|
|
|
|
|
|
| S |
C
A |
G |
S |
C
B |
G |
|
S |
C |
G |
|
energy
A | B |
|
hype
A | B |
|
pop
A | B |
|
mgr
A | B |
|
FIGHT
RATING
43% |
|
|
|
|
|
|
|
|
|
|

