 |
Rehab 4: Heating Up PBP Commentary |
Undercard bout
|
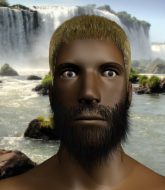
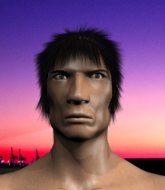
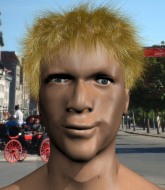
Coming up we have a middleweight MMA rules bout between Diesel Armstrong (ranked 0 p4p, 0 weight class) and Simon Simonsen (ranked 0 p4p, 0 weight class). These two fighters really are very evenly matched on the feet - it will be fascinating to see who can assert themselves in that aspect of the fight.
 |
|
 |
| 185 cm
18
188 lbs
1 - 1 - 0 |
|
188 cm
18
185 lbs
0 - 2 - 0 |
BJJ Blue Belt
Excellent boxer
Very strong |
|
BJJ White Belt
Excellent boxer
Very confident |
|
| |
|
Ladies and gentlemen. This fight is 3 rounds, in the middleweight division.
Introducing the fighter to my left, fighting out of the red corner.
With a record of
1 - 1 - 0, fighting out of New York, Diesel Armstrong!
And introducing the fighter to my right, fighting out of the blue corner.
With a record of
0 - 2 - 0, fighting out of Amsterdam, Simon Simonsen!
The judges for this bout are Nard Betker, Saam Ante and Aafke Stam.

The bell rings for round one and we are underway!
Armstrong jabbing away but nothing is landing.
Armstrong fails to land with a series of punches.
Simonsen just misses with a punch to the body.
Armstrong is looking to counter punch.
Simonsen throws out a powerful jab.
Armstrong pushing out the jab but it's not landing.
Armstrong moves out of range of the body kick.
Armstrong throws a combination but comes up with nothing but fresh air.
Simonsen pivots as if he's going to throw a leg kick but stops half way.
Simonsen motions for Armstrong to come forward. Simonsen throws a leg kick but it misses it's target.
Simonsen slips a straight right by Armstrong.
Armstrong misses with a looping right.
A combination from Armstrong does no damage.
Simonsen looked like he wanted to counter with a punch but didn't throw it.
Simonsen connects with a jab.
Armstrong jabbing away but nothing is landing.
Armstrong avoids a punch combination nicely.
Simonsen throws a low kick but Armstrong avoids it.
A shot to the body from Armstrong misses
letting Simonsen counter with a right hand.
We've seen a great period of action over the last minute or so - credit to both fighters for going all out!
Armstrong lands a right hook to the body.
Armstrong missing with a left hand there. Simonsen was out of range so wasted energy throwing that one.

That's one minute gone in the round.

Armstrong drops Simonsen with a beautiful combination! Simonsen stares up at his opponent, who ushers him back to his feet - Armstrong is looking for the KO!

Simonsen is rocked!

It looks like Simon Simonsen has been cut.
Simonsen bobbing and weaving nicely... He's ducked under a jab and ducks again but ooooooh! Armstrong comes at him with an uppercut from hell! Simonsen falls to the canvas, unconscious! This one is all over! Oh man, looking at the replay that was right on the button! Simonsen was out before he hit the floor!
Ladies and gentlemen, after 1:10 of round 1, we have a winner by way of KO (Punch). Diesel Armstrong!
|
|
|
|
|
|
|
|
|
|
|
|
|
|
|
|
|
|
|
|
|
|
|
| S |
C
A |
G |
S |
C
B |
G |
|
S |
C |
G |
|
energy
A | B |
|
hype
A | B |
|
pop
A | B |
|
mgr
A | B |
|
FIGHT
RATING
87% |
|
|
|
|
|
|
|
Undercard bout
|
|
|
|
Undercard bout
|
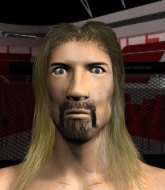
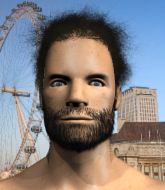
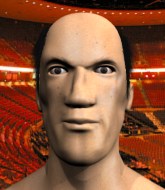
Coming up we have a middleweight MMA rules bout between Raymond Grey (ranked 0 p4p, 0 weight class) and Tuco Salamanca (ranked 0 p4p, 0 weight class). Rumors backstage are that the fighters have been paid to keep it standing but we know that would never happen in MMA!
 |
|
 |
| 182 cm
18
183 lbs
0 - 0 - 0 |
|
190 cm
18
190 lbs
1 - 0 - 0 |
BJJ White Belt
Solid boxing
Cuts easily |
|
BJJ White Belt
Excellent boxer
Powerful |
|
| |
|
Ladies and gentlemen. This fight is 3 rounds, in the middleweight division.
Introducing the fighter to my left, fighting out of the red corner.
With a record of
0 - 0 - 0, fighting out of Helsinki, Raymond Grey!
And introducing the fighter to my right, fighting out of the blue corner.
With a record of
1 - 0 - 0, fighting out of Las Vegas, Tuco Salamanca!
The judges for this bout are Saam Ante, Nard Betker and Aafke Stam.
The bell rings for round one and we are underway!
A big right from Salamanca misses.

Grey gets the takedown into side control.

Grey is looking for a kimura. He might have it! No, Salamanca has escaped the position, nice work there.
Grey tries for an arm triangle. That looks pretty tight to me. Is this one over!?! Possibly, maybe, no Grey has let go of the choke. Obviously it wasn't as tight as we thought!
Grey wants to work for a kimura but he's foiled early by Salamanca, who protects the arm well.
Grey tries for a kimura but Salamanca is defending well.
Grey is trying to land an Americana. He has the arm isolated but Salamanca is keeping cool and he's avoided the danger for now.
That's one minute gone in the round.
Salamanca wants to get back to his feet but Grey drags him back down.
Grey working hard here to secure a kimura but he's not really in the right position for it.
Grey thinks about going for a far side armbar but bails out and retains the dominant position instead.
Salamanca is trying to buck Grey off.
Grey tries to advance to mount but can't.

That's two minutes gone in the round.
Well. There's a bit of a lull in the action here and the crowd are starting to get restless.
Grey is looking to finish here, going for an Americana. Salamanca knows the correct defense though, so he's OK.
The fighters are pressed up against the cage, both looking to find a bit of space to work.
Grey controlling the position.
Salamanca really doesn't want to stay on the ground with Grey. If he can't get it back to his feet, it's only a matter of time before he'll be tapping out.
Grey advances to mount.
Salamanca is flailing around, obviously not happy about being mounted. Grey locks hold of one of his arms and spins for an armbar. He's got it! Salamanca is forced to tap!
Ladies and gentlemen, after 3:56 of round 1, we have a winner by way of Submission (Armbar). Raymond Grey!
|
|
|
|
|
|
|
|
|
|
|
|
|
|
|
|
|
|
|
|
|
|
|
| S |
C
A |
G |
S |
C
B |
G |
|
S |
C |
G |
|
energy
A | B |
|
hype
A | B |
|
pop
A | B |
|
mgr
A | B |
|
FIGHT
RATING
31% |
|
|
|
|
|
|
|
Undercard bout
|
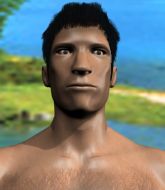
Coming up we have a welterweight MMA rules bout between Semmy Schmuckatelli (ranked 0 p4p, 0 weight class) and Ahmad Howard (ranked 0 p4p, 0 weight class). Both these guys have really solid chins. Will we see a standup war or will they both decide that a knockout is unlikely and try to win the fight elsewhere?
 |
|
 |
| 181 cm
19
175 lbs
2 - 0 - 0 |
|
187 cm
25
165 lbs
2 - 1 - 0 |
BJJ Blue Belt
Good knees
Good chin |
|
BJJ Blue Belt
Decent boxing
Solid chin |
|
| |
|
Ladies and gentlemen. This fight is 3 rounds, in the welterweight division.
Introducing the fighter to my left, fighting out of the red corner.
With a record of
2 - 0 - 0, fighting out of Amsterdam, Semmy Schmuckatelli!
And introducing the fighter to my right, fighting out of the blue corner.
With a record of
2 - 1 - 0, fighting out of Amsterdam, Ahmad Howard!
The judges for this bout are Paulsen Ambrosius, Saam Ante and Wagner Zegers.
The bell rings for round one and we are underway!
Schmuckatelli tries to close the distance and clinch up but Howard swats him away and circles back towards the center.
Howard feints a jab promting Schmuckatelli to slip. Howard then demonstrates his capabilities by jabbing again. Schmuckatelli slips again and ducks right into an uppercut.
Schmuckatelli showing good head movement there, avoiding the strikes from Howard.
Howard looks to throw a body kick
letting Schmuckatelli counter with a right hand.
Howard looks more muscular than last time we saw him. He must have been on the weights.
Schmuckatelli tries to clinch but is not successful on this occasion.

Schmuckatelli closes the distance and presses his opponent up against the cage.
Howard is looking to take this one to the mat.

Schmuckatelli pushes off and circles away, back to the middle of the mat.
Schmuckatelli closes the distance looking to clinch
and Howard counters with a crisp hook to the side of the head.
Schmuckatelli clinches.
Knees to the body from Schmuckatelli.
This is a great period of action - very entertaining stuff!
Schmuckatelli landing some nice looking knees to the body.
Howard wants to break the clinch but can't.
Schmuckatelli landing some nice looking knees to the body.
Schmuckatelli lands a knee to the head.
Schmuckatelli pushes off and circles away, back to the middle of the mat.
Schmuckatelli tries to close the distance and clinch up against the cage but Howard paws at him with a jab and circles away.
That's one minute gone in the round.
Howard fails to land the takedown.
Howard looks winded!
Schmuckatelli shoots in for a double leg but Howard sprawls well. That's going to sap some energy.
Schmuckatelli has a takedown stuffed.

Howard has Schmuckatelli up against the cage in a clinch.
Schmuckatelli unloads a knee to the mid-section. Howard lets out a prehistoric sounding urrrrgh.
Howard takes a knee to the side of the body.
Schmuckatelli escapes the clinch and we're back to striking.
Howard darts in and clinches Schmuckatelli up against the cage.
Our sources have told us that Schmuckatelli has been working on his knees in the buildup to the fight.
Howard takes a knee to the side of the body.
Schmuckatelli landing some nice looking knees to the body.
Kneeeeees! The crowd are calling for knees to the body. Schmuckatelli obliges.
The pace slowing considerably in the clinch, as Schmuckatelli takes a break from that fighting nonsense to think about the finer things in life.
Schmuckatelli scores a nice knee to the body.
That's two minutes gone in the round.
The crowd cheering loudly, showing their appreciation for the quality fight we're seeing here.
Howard takes an elbow to the temple.
It looks like Ahmad Howard has been cut.
Schmuckatelli is trying to pull guard but Howard turns him against the cage and we stay in the clinch.
That's three failed takedown attempts in the round for Semmy Schmuckatelli. That's going to take a lot out of him.
Schmuckatelli lands a knee to the head.
Schmuckatelli landing knees to the head.
Schmuckatelli lands a right hand that snaps the head of Howard backwards.
Schmuckatelli lands a knee to the head.
Schmuckatelli connects with a nasty looking knee right to Howard's face.
Schmuckatelli lands an elbow that stopped Howard in his tracks for a moment.
Schmuckatelli landing some nice looking knees to the body.
Schmuckatelli unloads a knee to the mid-section. Howard lets out a prehistoric sounding urrrrgh.
The fighters are pressed against the cage, as the pace of the fight slows.
Schmuckatelli using the Thai clinch to land knees to the body.
Schmuckatelli working Howard over with knees to the body.
Schmuckatelli's corner are urging him to control the action in the clinch for a moment, rather than mount any serious offense. I'm sure the crowd appreciate those instructions... not.

That's three minutes gone in the round.
Schmuckatelli lands a nice knee to the body.
Howard wants to get back to striking at distance but Schmuckatelli won't allow it.
Schmuckatelli manages to pull guard.
Schmuckatelli is pulling down on Howard's head to control his posture.
Howard won't allow Schmuckatelli to get back to his feet.
Howard pushes down on Schmuckatelli's leg and manages to get into half guard.
Schmuckatelli is looking to escape.
Schmuckatelli has a hand on Howard's thigh, trying to get back to full guard. Howard takes advantage of the position though and mounts him!

That's four minutes gone in the round.
Schmuckatelli wants to control but Howard is having none of it.
Poor strikes thrown by Howard there. More accuracy and less frantic strikes would help!
Schmuckatelli is trying to reverse the position but instead Howard has taken his back - oops!
Howard controlling from the back.
Schmuckatelli trying to get back to his feet but Howard is in full control for now.
The fighters are pressed up against the cage, both looking to find a bit of space to work.
And thats the end of the round the fighters go back to their corners.
Semmy Schmuckatelli dominated that round.
The cut man is working on Ahmad Howard's cut.
That's the end of the round. The referee orders the cornermen out of the cage so we can get back down to business.

Howard avoids a lazy jab quite easily.
Schmuckatelli closes the distance and clinches.
Howard wants a takedown.
Some stalling of biblical proportions here from Schmuckatelli.
Schmuckatelli doesn't land with the attempted body shot.
Schmuckatelli is looking to score with knees to the body. Maybe he'll change it up and go body then head. Howard is defending well for now.
Schmuckatelli's corner calls for him to break the clinch, which he does.
Schmuckatelli throws a sloppy head kick
and Howard counters with a straight right hand.
Schmuckatelli tries to close the distance and clinch but Howard swats him to one side with an open hand palm strike and circles away.
Schmuckatelli instigates a clinch.
Schmuckatelli lands a nice knee to the body.
Schmuckatelli blocks a couple of punches on the inside.
We've had a slow start to the round here - hopefully the action picks up.
Schmuckatelli manages to break the clinch.
Howard shoots in for a takedown. He's persisting with it as Schmuckatelli sprawls well. Schmuckatelli wins this battle and keeps the fight standing. Howard gets slowly back to his feet.
Schmuckatelli is looking to clinch.
Howard throws a right hand that Schmuckatelli ducks under and follows up with a left that Schmuckatelli also avoids with ease.
That's one minute gone in the round.
Schmuckatelli rushes Howard and pushes him back against the cage in a clinch.
Schmuckatelli unloads a knee to the mid-section.
Howard is breathing heavily.
Howard blocks a punch to the side of the head.
Schmuckatelli tried to land a shot to the body but connects with Howard's elbow.
Schmuckatelli has Howard pushed against the cage.
Howard wants to take the fight to the mat but Schmuckatelli manages to get underhooks and keep the fight in the clinch.
Semmy Schmuckatelli has stuffed three takedown attempts in the round now. That's going to take a lot out of Ahmad Howard.
Schmuckatelli lands a nice knee to the body.
Schmuckatelli connects with a nasty looking knee right to Howard's face.
Semmy Schmuckatelli has scored more points in the clinch so far.
Schmuckatelli using the Thai clinch to land knees to the body.
Schmuckatelli putting his Muay Thai to good use. He has Howard in a tight clinch and is doing some damage with knees to the body.
Schmuckatelli stalling the fight.
Schmuckatelli breaks from the clinch.
Schmuckatelli closes the distance and clinches.
Schmuckatelli putting his Muay Thai to good use. He has Howard in a tight clinch and is doing some damage with knees to the body.
The crowd are loving this. Great action here.
Schmuckatelli tries to pull guard but can't drag his opponent to the mat. Howard just stands there and leans against the cage.
Schmuckatelli misses with a punch on the inside.
That's two minutes gone in the round.
Schmuckatelli scores a nice knee to the body.
Schmuckatelli dictating the pace here, as the fighters clinch against the cage.
Howard takes a knee to the side of the body.
Knees in the clinch landing for Schmuckatelli.
Schmuckatelli goes for a takedown attempt but Howard pushes him away and we're back to fighting at a distance.
Schmuckatelli gets in close and instigates a clinch.
Schmuckatelli breaks the clinch.
Schmuckatelli is really dominating this fight. Is there anything that Howard can do to turn this around?
Howard avoids the body shot from Schmuckatelli.
A telegraphed takedown attempt from Howard is defended easily by Schmuckatelli.
Howard circles away from the clinch attempt.
Schmuckatelli tries to clinch up
and Howard connects with a straight left hand counter down the middle.
That's three minutes gone in the round.
Schmuckatelli will need to tighten up his combinations if he doesn't want to gas himself out, swinging at thin air.
Howard rushes forward with a series of wild hooks but Schmuckatelli moves out of range and avoids them all easily.
Howard displays some good footwork, moving neatly out of range as Schmuckatelli throws out the jab.
Schmuckatelli tries to clinch but is not successful on this occasion.
The fight stays on the outside here - Schmuckatelli looks like he's thinking about clinching though.
Howard is looking for the big counter here.
Semmy Schmuckatelli seems to be the more aggressive standup fighter in this bout.
Howard gets tackled into the cage by Schmuckatelli. Schmuckatelli maintains the clinch.
Howard is trying to work out of this bad position, with his back against the cage.
Howard on the defensive, avoiding the knees to the body.
Schmuckatelli crunches a lovely knee into Howard's ribcage.
Schmuckatelli creates a bit of space for himself and sneaks an elbow through Howard's defenses.
Schmuckatelli is clearly stalling here... Pick up the pace son.
That's four minutes gone in the round.
Schmuckatelli manages to pull guard. Let's see whether he can land a sub off his back.
Howard in full guard, throwing the ground and pound. No damage this time.
Schmuckatelli is looking to stand up but Howard isn't so interested in that idea.

Howard stands and steps away. Schmuckatelli gets to his feet too and we're back to the striking game.
Schmuckatelli tries to clinch up against the cage, rushing in to close the distance. Howard manages to break the clinch and circles back to the middle of the mat.
Schmuckatelli fakes with the hands and throws a leg kick but Howard is out of range.
Howard feints the counter takedown.
Ahmad Howard is looking to throw some combinations by the looks of things.
The fight stays on the outside here - Schmuckatelli looks like he's thinking about clinching though.
Howard will have to do better than that with his takedown attempts.
Schmuckatelli throws a quick counter kick to the body but Howard avoids it.
Schmuckatelli is looking to clinch.
And thats the end of the round the fighters go back to their corners.
Semmy Schmuckatelli dominated that second round.
The cut man is working on Ahmad Howard's cut.
That's the end of the round. The referee orders the cornermen out of the cage so we can get back down to business. So, we enter the final round. Let's see if either fighter can bring us a finish, or whether we're going to the judges scorecards.

Schmuckatelli tries to clinch there but Howard circles away.
Schmuckatelli closes the distance and presses his opponent up against the cage.
Kneeeeees! The crowd are calling for knees to the body. Schmuckatelli obliges.
Schmuckatelli goes for a body shot but it's blocked.
Schmuckatelli breaks the clinch and we return to the middle of the mat.
Howard forces Schmuckatelli back against the cage and clinches.
Howard jumps guard but Schmuckatelli stands there with Howard around his waist. Howard gives up and drops back to his feet. We remain in the clinch.
Schmuckatelli has hold of a leg and is looking for a trip takedown. Howard avoids it nicely though and we remain in the clinch.
Schmuckatelli landing knees to the body. They look like they could hurt.
Schmuckatelli tries to take the fight to the ground by pulling guard but can't manage it.
Schmuckatelli breaks from the clinch.
Howard takes a big intake of breath there - he's definitely tired.
We've had a slow start to the round here - hopefully the action picks up.
Schmuckatelli tries to keep at a distance but Howard has taken the fight into the clinch.
Schmuckatelli landing knees to the head.
Schmuckatelli escapes the clinch and we're back to striking.
Schmuckatelli wants to clinch up but Howard keeps it at a distance.
That's one minute gone in the round.
Howard has taken the fight to the clinch.
Schmuckatelli breaks the clinch and we return to the middle of the mat.
Schmuckatelli drives through and clinches with Howard against the cage.
Howard tries to pull guard but Schmuckatelli forces him back to his feet, against the cage.
Schmuckatelli landing knees to the body. They look like they could hurt.
The pace really dropping off here, momentarily.
Schmuckatelli is stalling here.
The crowd are getting pretty annoyed with Schmuckatelli for his constant stalling in the clinch and are voicing their displeasure.
Schmuckatelli effectively controlling the action here.
Schmuckatelli landing some nice looking knees to the body.
Howard takes an elbow to the forehead.
Schmuckatelli lands a glancing elbow in the clinch.
Schmuckatelli unloads a knee to the mid-section. Howard lets out a prehistoric sounding urrrrgh.
Schmuckatelli crunches a lovely knee into Howard's ribcage.
That's two minutes gone in the round.
Schmuckatelli misses with a shot to the kidneys.
Schmuckatelli lands a knee to the head there! That was nasty!
Wooooo! Give it up for these two warriors! They are putting on a show!
Schmuckatelli working Howard over with knees to the body.
Howard takes a knee right on the jaw!
Schmuckatelli breaks from the clinch.
Schmuckatelli darts in looking for a takedown but Howard gets double underhooks and turns Schmuckatelli into the cage.
That's three failed takedown attempts in the round for Semmy Schmuckatelli. That's going to take a lot out of him.
Schmuckatelli wants to clinch.
Schmuckatelli is looking to clinch but Howard is avoiding it.
Schmuckatelli fails with a takedown attempt.
No luck for Schmuckatelli with that takedown attempt.
Schmuckatelli closes the distance but Howard moves to the side
and Howard counters with a crisp hook to the side of the head.
That's three minutes gone in the round.
Schmuckatelli wants to clinch.
Schmuckatelli fails with an attempt to clinch.
Howard tries to keep at a distance but Schmuckatelli has taken the fight into the clinch.
Howard wants to push off and get back to the center of the mat but Schmuckatelli has him pressed against the cage.
Schmuckatelli looking to slow down the pace here.
Howard managing to block the knees to the body from Schmuckatelli.
Schmuckatelli keeps control of Howard as he tries to wriggle out of the double underhooks.
A knee to the head by Schmuckatelli.
Howard can't break the clinch.
Schmuckatelli gets double underhooks to prevent a takedown attempt from Howard.
That's four minutes gone in the round.
Schmuckatelli breaks from the clinch.
Schmuckatelli pushes Howard up against the cage in a clinch.
Schmuckatelli prevents Howard from breaking the clinch.
Schmuckatelli is pushing Howard up against the cage, for a bit of lean and pray action. Action being used the in the loosest possible sense of the word.
Schmuckatelli misses the knee to the body. Nice hip positioning from Howard.
Schmuckatelli lands a glancing elbow in the clinch.
Schmuckatelli tries to pull guard but Howard won't allow it.
Howard has a body lock and is looking for a takedown. Schmuckatelli is bouncing around trying to prevent the takedown and somehow he has indeed managed to stay on his feet.
Schmuckatelli escapes the clinch and we're back to striking.
Schmuckatelli tries to close the distance and clinch up against the cage but Howard paws at him with a jab and circles away.
Ahmad Howard has stepped it up - he knows he needs a finish here!
Semmy Schmuckatelli is fighting for a decision here - he's started to take the cautious approach.
Schmuckatelli throws a hook to the body but it doesn't connect.
Schmuckatelli tries to clinch but is not successful on this occasion.
And that's the end of the fight!
Semmy Schmuckatelli showed his dominance in that final round.
Well I reckon that's a shut out for Schmuckatelli, winning every round. Will the judges agree? They are the ones who matter, even if they are often depressingly incompetent. Over to the ring announcer for the scorecards.
Ladies and gentlemen, after 3 rounds of action, we go to the scorecards for a decision.
Judge Paulsen Ambrosius scores the fight 30:27
Judge Saam Ante scores the fight 30:27
Judge Wagner Zegers scores the fight 30:27
In favor of your winner, by unanimous decision... Semmy Schmuckatelli!
Ahmad Howard was interviewed post fight and said 'Rematch'.
|
|
|
|
|
|
|
|
|
|
|
|
|
|
|
|
|
|
|
|
|
|
|
| S |
C
A |
G |
S |
C
B |
G |
|
S |
C |
G |
|
energy
A | B |
|
hype
A | B |
|
pop
A | B |
|
mgr
A | B |
|
FIGHT
RATING
56% |
|
|
|
|
|
|
|
Undercard bout
|
Coming up we have a heavyweight MMA rules bout between Hello Kitty (ranked 0 p4p, 0 weight class) and Yaya Uwawa (ranked 0 p4p, 0 weight class). Uwawa has chosen Skeleton as his entrance music, which hasn't gone down very well with the crowd. Yaya Uwawa looks lathargic as he enters the arena. Wake up son, you're about to have a fight!
 |
|
 |
| 178 cm
24
273 lbs
2 - 2 - 0 |
|
210 cm
25
270 lbs
1 - 0 - 0 |
BJJ Blue Belt
Excellent boxer
KO power |
|
BJJ Brown Belt
Counter fighter
Powerful |
|
| |
|
Ladies and gentlemen. This fight is 3 rounds, in the heavyweight division.
Introducing the fighter to my left, fighting out of the red corner.
With a record of
2 - 2 - 0, fighting out of St Petersburg, Hello Kitty!
And introducing the fighter to my right, fighting out of the blue corner.
With a record of
1 - 0 - 0, fighting out of Helsinki, Yaya Uwawa!
The judges for this bout are Nard Betker, Radbod Blank and Daniel Blasius.
The bell rings for round one and we are underway!
Kitty throws a body shot but no joy.
Kitty lands with a straight right. Uwawa didn't see that one coming.
It looks like Yaya Uwawa has been cut.
Are you kidding me?! Kitty ducked down and unloaded an uppercut from hell that sent Uwawa clean off his feet! Someone make me a GIF - that's knockout of the night for sure!
Ladies and gentlemen, after 0:14 of round 1, we have a winner by way of KO (Punch). Hello Kitty!
Hello Kitty gave a mention to Max Octane Fight Wear in his post fight interview. That will please them (and hopefully generate some sales).
|
|
|
|
|
|
|
|
|
|
|
|
|
|
|
|
|
|
|
|
|
|
|
| S |
C
A |
G |
S |
C
B |
G |
|
S |
C |
G |
|
energy
A | B |
|
hype
A | B |
|
pop
A | B |
|
mgr
A | B |
|
FIGHT
RATING
100% |
|
|
|
|
|
|
|
Undercard bout
|
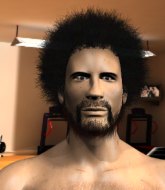
Coming up we have a middleweight MMA rules bout between Son Goku (ranked 0 p4p, 0 weight class) and Brendan Behan (ranked 0 p4p, 0 weight class). Son Goku has the better chin. Will he look to stand and bang today?
 |
|
 |
| 197 cm
25
190 lbs
2 - 1 - 0 |
|
184 cm
24
180 lbs
1 - 0 - 0 |
Good takedowns
Excellent boxer
Big right hand |
|
BJJ Blue Belt
Brawler
Very confident |
|
| |
|
Ladies and gentlemen. This fight is 3 rounds, in the middleweight division.
Introducing the fighter to my left, fighting out of the red corner.
With a record of
2 - 1 - 0, fighting out of St Petersburg, Son Goku!
And introducing the fighter to my right, fighting out of the blue corner.
With a record of
1 - 0 - 0, fighting out of Helsinki, Brendan Behan!
The judges for this bout are Albert Achterberg, Aafke Stam and Radbod Blank.
The bell rings for round one and we are underway!
Behan misses with a few strikes there.
The fight stays on the outside here - Goku looks like he's thinking about clinching though.
Oooooh!!! Goku has knocked Behan down with a huge combo! Goku steps away and waves a wobbly Behan back to his feet! This one might not go much longer!
Behan is rocked!

Behan shoots in for a takedown from distance. He catches Goku napping and manages to drive through into side control!
The fans in attendance giving it up for the two fighters, who have really let it all hang out in the last minute or so!
Behan tries to score with some ground and pound. Goku controls his posture well this time though and the shots don't do any damage.
Behan content to control the pace. The referee will try and keep them active though.
That's one minute gone in the round.
Goku is pushing Behan's head away, looking to escape. Behan manages to hold on to the position though.
Goku stops Behan from passing to mount.
The ref warns both fighters not to hold the cage as they work up against the meshing.
The ground and pound from Behan seems to be hitting the mat more than his opponent.

Behan is trying to get an arm triangle but Goku is defending well.
Behan happy to just control the position for now.
That's two minutes gone in the round.
The crowd are starting to boo a lack of action.
Goku is not content to let Behan control the position.
The referee must be thinking about standing these guys back up.
Behan tries to cartwheel into mount but he doesn't manage it.
Behan wants to control but Goku is keeping him busy.

The referee has stepped in and called for a break in the action. We'll restart on the feet.
Goku misses with a takedown attempt. He shot from a bit too far out.
That's three minutes gone in the round.
Goku connects with a nice looking jab.
Behan fails with the takedown.
Goku leaves Behan with his face pressed against the mat as he sprawls beautifully, defending against a solid takedown attempt.
Goku looks for a takedown here. Will he get it? Behan is fending him off so far but Goku persists. Nope, Behan circles away and we're back to standing.
Goku tries to clinch but fails miserably
and Behan counters with a lovely straight right hand!
Goku looks to have improved his striking defense since last time we saw him fight.
Behan gets taken down but at least he's managed to land in guard.

The fighters are working up against the cage. Behan manages to wriggle his way back to his feet, so the fighters are now clinched against the cage.
We've seen a great period of action over the last minute or so - credit to both fighters for going all out!
Goku is looking to break free of the clinch but Behan has double underhooks.
Behan is pushing Goku up against the cage, for a bit of lean and pray action. Action being used the in the loosest possible sense of the word.
Behan tries to jump guard but he falls flat on his backside. Goku smiles and moves away.
Son Goku has stuffed three takedown attempts in the round now. That's going to take a lot out of Brendan Behan.
That's four minutes gone in the round.
Goku shoots in looking for a takedown. Behan tries to sprawl out of it but Goku keeps driving through. The fighters are pinned against the cage. Behan manages to get underhooks and after a bit of a struggle, circles away and we're back to standing.
Goku throws a looping left and ducks down for a takedown. He's got his arms around Behan's waist but Behan gets an underhook and avoids the takedown by throwing Goku off to one side.
Behan will have to do better than that with his takedown attempts.
It looked like Goku was looking amped, ready to throw a big counter but didn't commit.
Goku tries to drive through with a takedown attempt but Behan defends well and Goku ends up having to push Behan into the cage where they will battle it out in the clinch.
The fight stays on the outside here - Goku looks like he's thinking about clinching though.
Son Goku seems to be the more aggressive standup fighter in this bout.
No luck with that takedown attempt from Goku.
Goku shoots in for a takedown but doesn't get it.
Behan shoots in and bounces Goku off the cage to secure the takedown into guard.
And thats the end of the round the fighters go back to their corners.
A close round but Brendan Behan will probably get the nod.
The minute break is over - no more time for sponges and pep talks - back to the action!
Behan shoots in and gets a takedown into half guard. Behan showed some decent athleticism there.
Behan wants to lay and pray for a moment but Goku keeps working.
Behan missing with the ground and pound from half guard.
We've had a slow start to the round here - hopefully the action picks up.
Goku is not content to let Behan control the position.
Behan takes a deep breath and rests his weight momentarily on top of his opponent, to control the position.
That's one minute gone in the round.
Goku pushes Behan off looking to stand but Behan dives back in and keeps control.
Goku really does look like a pencil wearing a pair of gloves. Let's hope he has a gameplan to suit that ridiculous body shape.
Behan decides to stand and escape the position.
Behan keeps the fight standing with a nice sprawl.
Behan closes the distance and pushes Goku back into the cage.
Behan is trying to pull guard but Goku turns him against the cage and we stay in the clinch.
Goku wants to get back to striking at distance but Behan won't allow it.
Behan missing with knees to the body.
Goku changes levels and goes for a takedown here. Behan fights it off and pushes away nicely.
Goku misses with a takedown attempt. He shot from a bit too far out.
That's three failed takedown attempts in the round for Son Goku. That's going to take a lot out of him.
Goku fails with a rather predictable takedown attempt.
That's two minutes gone in the round.
Behan shoots in with a lovely double leg takedown. Goku manages to land in full guard to minimise the damage.

Goku has butterfly guard. He's looking to stand up here. He pushes Behan off him and springs to his feet nicely. The crowd applauds.
Goku shoots in for a takedown but doesn't get it.
Wooooo! Give it up for these two warriors! They are putting on a show!
Behan closes the distance and pushes Goku back into the cage.
Goku wants to break free. God knows he wants to breaaaak freeee.
Goku is looking to take this one to the mat.
Goku wants to get back to striking at distance but Behan won't allow it.
Behan prevents a takedown attempt there.
Behan pulls Goku into guard.
That's three minutes gone in the round.
Behan is working the butterfly guard. He manages to land a nice scissor sweep and is now in half guard on the top. Nice move.

Behan throws a big elbow that misses, also allowing Goku to regain full guard.
Brendan Behan has got the better of the ground game so far.
Behan pressing down on his opponent's thigh, looking to pass guard. Goku is keeping the position for now.
Behan throws a strike but Goku rolls with it and manages to sweep. Now he's in guard on top.

Goku wants to stand but Behan has a closed guard, so he can't escape.
That's four minutes gone in the round.
Behan looking to hit a scissor sweep but Goku is one step ahead there.

Goku gets to his feet. Behan looking to butt scoot but the ref puts an end to that. On your feet son!
Goku shoots in for a takedown. "Ole!" shouts Behan as he jumps to the side.
Goku doesn't succeed with the takedown
and Behan counters by clinching up.
The crowd thankful this round is nearly over.
Behan tries to work over Goku's body with a swooping hook but it only glances the target.
Behan throws a vicious knee straight up the middle but Goku blocks it with crossed arms.
And thats the end of the round the fighters go back to their corners.
Brendan Behan showed his class in that round. I'd imagine he'll take it on all the scorecards.
The fighters' corners scream their final instructions, as the referee calls time. Here we go, back to the action! This is the final round!
Behan lands a high kick!
Behan shoots in for a takedown from distance. He catches Goku napping and manages to drive through into side control!
Goku regains half guard there - taking advantage of Behan's attempt to lay and pray for a moment.
Goku pushes Behan off looking to stand but Behan dives back in and keeps control.
Behan performing his best blanket impression for a moment.
We've had a slow start to the round here - hopefully the action picks up.
Goku is refusing to be controlled, as Behan sits in half guard.
That's one minute gone in the round.
Behan working Goku over with strikes.
Behan has been the more effective fighter overall so far.
Behan is working for a submission of some sort.
Behan thumps the canvas. Not on purpose obviously - he just missed Goku's head.
Behan working the head and body with strikes.
That's two minutes gone in the round.
The crowd are getting on the fighters' backs, as the pace has dropped off in the last minute or so.
Behan throwing shots but Goku is blocking nicely.
Behan is trying to control. Goku wants to improve his position but can't escape this time.
The referee has stepped in and called for a break in the action. We'll restart on the feet.
Behan circles away from the clinch attempt.
Behan unleashes a big counter combination but Goku bobs and weaves and avoids any damage.
Goku shoots in for a takedown but Behan shows good takedown defense.
Goku gets a double leg takedown into Behan's guard.
Behan pushes Goku off and scrambles back to his feet.
Both fighters are breathing heavily.
Goku tries to clinch but Behan is having none of it.
Behan changes levels for a counter takedown but doesn't follow through with his attempt.
Behan pushes Goku up against the cage in a clinch.
Behan using the Thai plumb to throw knees but Goku has his back arched nicely, preventing the strike.
Behan jumps guard but his hands slip and he falls flat on his back. Well, he's made himself look a right mug there, as Goku walks away with a smile on his face. Behan gets slowly back to his feet and shakes his head.
Goku is looking to clinch but Behan is avoiding it.
That's three minutes gone in the round.
Goku fails with a takedown attempt from distance.
Behan chopping away at his opponent's legs.
Goku closes this distance looking for a takedown but Behan circles away.
That's three failed takedown attempts in the round for Son Goku. That's going to take a lot out of him.
Behan closes the distance and presses his opponent up against the cage.
Behan looking for a takedown.

Behan breaks the clinch.
Goku shoots in for a takedown. "Ole!" shouts Behan as he jumps to the side.
Behan gets a takedown into half guard.
Goku scrambles, trying to get to his feet, but Behan manages to mount him!
That's four minutes gone in the round.
Behan is standing up out of mount! Strange tactic there - he must really want this one on the feet!
Son Goku has stepped it up - he knows he needs a finish here!
Thud! ouch! good body kick from Behan - that will leave a mark!
Wooooo! Give it up for these two warriors! They are putting on a show!
Behan bobs and weaves into range and then changes levels and scores with a nice takedown into side control.
Behan lands an elbow.
Goku is trying to escape and get back to his feet.
Behan is pausing for a moment. What's he doing? It looks like he's clearing his nose. Oh dude! He's shot a load of snot all down Goku's shoulder. That is not cool.
And that's the end of the fight!
Brendan Behan comfortably won the final round on my scorecard.
Well Behan has outworked and out performed his opponent in all aspects of the game today. He was simply too good and the decision should be no more than a formality. Over to the ring announcer for the scorecards.
Ladies and gentlemen, after 3 rounds of action, we go to the scorecards for a decision.
Judge Albert Achterberg scores the fight 28:29
Judge Aafke Stam scores the fight 27:30
Judge Radbod Blank scores the fight 28:30
In favor of your winner, by unanimous decision... Brendan Behan!
During a confident post fight interview, Brendan Behan thanked all his fans. He seemed very genuine when describing how motivated his fans keep him.
The defeated Son Goku had this to say: 'My KI was very loly'.
|
|
|
|
|
|
|
|
|
|
|
|
|
|
|
|
|
|
|
|
|
|
|
| S |
C
A |
G |
S |
C
B |
G |
|
S |
C |
G |
|
energy
A | B |
|
hype
A | B |
|
pop
A | B |
|
mgr
A | B |
|
FIGHT
RATING
44% |
|
|
|
|
|
|
|
Undercard bout
|
|
|
|
Undercard bout
|
Coming up we have a super heavyweight MMA rules bout between Jon Bates (ranked 0 p4p, 0 weight class) and Katar Hilal (ranked 0 p4p, 0 weight class). Hilal has chosen JawBreaker as his entrance music. Jon Bates has the edge in experience - let's see if he can make that count tonight.
 |
|
 |
| 218 cm
25
296 lbs
5 - 1 - 0 |
|
200 cm
23
275 lbs
2 - 1 - 0 |
BJJ Blue Belt
Solid boxing
Experienced |
|
BJJ Blue Belt
Basic striking
Determined |
|
| |
|
Ladies and gentlemen. This fight is 3 rounds, in the super heavyweight division.
Introducing the fighter to my left, fighting out of the red corner.
With a record of
5 - 1 - 0, fighting out of Amsterdam, Jon Bates!
And introducing the fighter to my right, fighting out of the blue corner.
With a record of
2 - 1 - 0, fighting out of Helsinki, Katar Hilal!
The judges for this bout are Saam Ante, Paulsen Ambrosius and Wagner Zegers.
The bell rings for round one and we are underway!
Bates forces Hilal back against the cage and clinches.
Hilal breaks the clinch and we're back to striking at distance.
Hilal clinches up against the cage.
Bates looking to slow down the pace here.
Bates tries to land a shot to the body but it's blocked.
Hilal manages to break the clinch.
Bates swats away the attempt to clinch by Hilal.
Hilal is looking to clinch.
Bates moves into range and clinches up with Hilal.
Hilal breaks from the clinch.
Hilal tries to clinch but is not successful on this occasion.
Bates throws a series of strikes that have Hilal backpedaling.
It looks like Katar Hilal has been cut.
Hilal keeps the fight on the outside.
Bates moves into the clinch.
Hilal pushes off and circles away, back to the middle of the mat.
Bates has managed to clinch.
This is a great period of action - very entertaining stuff!
Hilal breaks the clinch and we're back to striking at distance.
Hilal tries to close the distance and clinch up against the cage but Bates paws at him with a jab and circles away.
Hilal tries to shoot in for a takedown. He's got hold of a leg but Bates swivels and escapes.
That's one minute gone in the round.
Bates swats away the attempt to clinch by Hilal.
Hilal clinches.
Hilal stalling against the cage.
Bates tries to stall but Hilal uses the opportunity to gain a better position.
Bates manages to break the clinch.
Hilal tries to clinch there but Bates circles away.
Bates swung with a counter punch to the body but it didn't connect.
Bates drives through and clinches with Hilal against the cage.
Hilal escapes the clinch and we're back to striking.
Wow, both these guys are really going for it!
Bates throws a nice hook to the body that draws an oooh from the crowd.
Bates definitely looks more muscular than last time we saw him fight.
Bates lands a nice shot to the body.
Bates works Hilal's body with a nice hook.
Bates fakes a head punch and goes low to the body. Nicely done.
Bates changes levels and scores with a jab to the body.
Bates gets a clinch.
Hilal breaks the clinch and we're back to striking at distance.
Jon Bates is looking to keep the fight on the feet at all costs.
We've seen a great period of action over the last minute or so - credit to both fighters for going all out!
The fight stays on the outside here - Bates looks like he's thinking about clinching though.
That's two minutes gone in the round.
Bates digs a good hook to Hilal's body.
Hilal gets tackled into the cage by Bates. Bates maintains the clinch.
Bates throws an elbow that misses.
Bates manages to break the clinch.
Bates misses with a jab, cross combination.
Hilal lets it all go there with a big combo counter but none of the punches connected.
Bates takes the fight into the clinch.
Hilal breaks from the clinch.
Bates connects with a looping left hand that seems like it dazed Hilal momentarily.
Hilal wants to clinch up but Bates keeps it at a distance.
Hilal is looking to clinch but Bates is avoiding it.
Hilal fails miserably with a takedown attempt.
Hilal throws a head kick that misses and slips in the process. He scrambles back to his feet and the fighters circle.
Bates pushes Hilal up against the cage in a clinch.
That's three minutes gone in the round.
Bates leaning against his opponent.
Hilal breaks the clinch and we're back to striking at distance.
A head kick misses from Hilal.
Hilal tries to score a power double leg takedown but Bates sees that one coming and sprawls well. That will dishearten Hilal somewhat.
Jon Bates has stuffed three takedown attempts in the round now. That's going to take a lot out of Katar Hilal.
Hilal looks winded!
Bates fakes a head punch and goes low to the body. Nicely done.
Hilal instigates a clinch.
Hilal breaks the clinch.
Bates lands a slapping body shot.
Hilal moves into the clinch.
Bates drops down for a takedown but doesn't get it.
Bates pushes Hilal back against the cage and unloads with a body punch.
That's four minutes gone in the round.
Hilal escapes the clinch and we're back to striking.
Bates lets the fists fly and connects with a left straight followed by a right hook.
Bates clinches with his opponent.
This has been an exciting period of action!
Hilal stops a takedown attempt from Bates.
Hilal breaks the clinch.
Hilal throws a head kick that misses
and Bates counters by moving into the clinch.
Bates escapes the clinch and we're back to striking.
Hilal is on the wrong end of a nice combination from Bates.
A combination from Bates does no damage.
Hilal fails with an attempt to clinch.
Bates drops down looking for a counter takedown but Hilal sprawls and moves away.
Bates swats away the attempt to clinch by Hilal.
Hilal is looking to take this fight into the clinch.
Hilal tries a head kick but it misses.
Bates is looking to counter the offense by Hilal and move into the clinch.
Bates throws a nice looking combination but Hilal bobs and weaves to avoid any damage.
And thats the end of the round the fighters go back to their corners.
Jon Bates dominated that round.
The cut man is working on Katar Hilal's cut.
That's time! Back to the action!
Hilal gets to the clinch - let's see what his plan is here.
Bates breaks the clinch and we return to the middle of the mat.
Bates tries to clinch but is not successful on this occasion.
Bates has managed to clinch.
Hilal manages to break the clinch.
Hilal closes the distance but Bates moves to the side
and Bates counters with a stiff right hand.
Bates keeps the fight on the outside.
Hilal has his takedown stuffed
and Bates moves into the clinch.
Hilal pushes off and circles away, back to the middle of the mat.
Bates doesn't manage to clinch there - Hilal circles away.
We've had a slow start to the round here - hopefully the action picks up.
Hilal doesn't manage to clinch there - Bates circles away.
Hilal moves into the clinch successfully.
Jon Bates has scored more points in the clinch so far.
Bates breaks the clinch and we're back to striking at distance.
Bates is looking to clinch.
Jon Bates is winning the standup battle so far.
Bates gets tackled into the cage by Hilal. Hilal maintains the clinch.
Hilal with an attempt at a knee that misses.
That's one minute gone in the round.
Stalling in the clinch from Bates.
Bates is trying to pull guard but Hilal turns him against the cage and we stay in the clinch.
Hilal tries to break the clinch but Bates is controlling the position.
Hilal pushes off and circles away, back to the middle of the mat.
Bates is looking to clinch but Hilal is avoiding it.
Hilal circles away from the clinch attempt.
Hilal moves in looking to clinch but Bates pushes him off.
Jon Bates is looking to throw some combinations by the looks of things.
Hilal circles away from the clinch attempt.
Bates scores with a hook to the body. Hilal takes a step back and tries to catch his breath.
Hilal throws a head kick that Bates semi-blocks.
Hilal tries to clinch there but Bates circles away.
Bates lands with a two punch combination before moving back out of range.
Hilal rushes Bates and pushes him back against the cage in a clinch.
Bates escapes the clinch and we're back to striking.
Bates stuffs the takedown attempt from Hilal. Hilal gets slowly back to his feet.
Hilal is breathing heavily.
That's two minutes gone in the round.
Bates swats away the attempt to clinch by Hilal.
A jab lands there for Bates.
This has been an exciting period of action!
Hilal clinches with his opponent.
Bates pushes off and circles away, back to the middle of the mat.
Bates lands a pitter patter jab to the forehead of his opponent.
Hilal throws a combination but comes up with nothing but fresh air.
Bates fakes with an overhand right and moves in to clinch with Hilal, pushing him back against the cage.
Bates pushes off and circles away, back to the middle of the mat.
Bates is really dominating this fight. Is there anything that Hilal can do to turn this around?
Hilal moves into the clinch successfully.
Hilal breaks from the clinch.
Katar Hilal seems to be the more aggressive standup fighter in this bout.
Bates fails in his attempt to clinch.
A telegraphed takedown attempt from Hilal is defended easily by Bates.
Jon Bates has stuffed three takedown attempts in the round now. That's going to take a lot out of Katar Hilal.
Hilal closes the distance looking to clinch
letting Bates counter with a right hand.
That's three minutes gone in the round.
Hilal darts in trying to clinch
letting Bates counter with a right hand.
Hilal takes a punch to the jaw and another one to the bread basket.
Bates lands a body shot.
Hilal tries to clinch but is not successful on this occasion.
Hilal tries to close the distance and clinch up against the cage but Bates paws at him with a jab and circles away.
Bates is using his reach advantage well here, landing the more effective single shots from range.
Bates forces Hilal back against the cage and clinches.
Hilal breaks from the clinch.
Bates scores with a three punch combo!
Bates connects with a body shot.
A punch combination from Bates misses.
The fans in attendance giving it up for the two fighters, who have really let it all hang out in the last minute or so!
Bates fakes with an overhand right and moves in to clinch with Hilal, pushing him back against the cage.
Hilal tries for a takedown but Bates manages to get underhooks.
That's four minutes gone in the round.
Hilal avoids the elbow strike from Bates, against the cage.
Hilal working aggressively here.
Bates is looking to score with knees to the body. Maybe he'll change it up and go body then head. Hilal is defending well for now.
Hilal jumps guard and drags Bates to the mat. He's obviously going to be looking for submissions off his back.
The fighters are pressed up against the cage, both looking to find a bit of space to work.
Bates decides to stand up and beckons his opponent to follow.
Hilal keeps the fight on the outside.
Hilal is trying hard to land a takedown here. Bates sprawls well and keeps this one on the feet.
Bates takes the fight into the clinch.
Hilal jumps guard but his hands slip and he falls flat on his back. Well, he's made himself look a right mug there, as Bates walks away with a smile on his face. Hilal gets slowly back to his feet and shakes his head.
Bates lands a nice hook to Hilal's body. Hilal takes it in his stride and looks to land his own strikes.
Bates fakes a head punch and goes low to the body. Nicely done.
Bates closes the distance and clinches.
Both fighters working to control the clinch.
A nice left hand lands by Bates.
And thats the end of the round the fighters go back to their corners.
Jon Bates dominated that second round.
The cut man is working on Katar Hilal's cut.
OK. That's time! The bell goes and we're back to the action. Let's hear some noise people - this is the final round!
Bates lands three nice shots there - that looked like it hurt!
Bates tries to clinch up against the cage, rushing in to close the distance. Hilal manages to break the clinch and circles back to the middle of the mat.
Hilal shoots in for a takedown. "I don't think so" says Bates as he avoids it easily.
Bates moves into the clinch successfully.
Bates manages to break the clinch.
Bates circles away from the clinch attempt.
Bates clinches.
Bates breaks the clinch and we're back to striking at distance.
Bates misses with a wild body shot.
Bates wants to clinch.
We've had a slow start to the round here - hopefully the action picks up.
Bates lands with a right hand.
Hilal has taken the fight to the clinch.
Hilal breaks the clinch and we're back to striking at distance.
That's one minute gone in the round.
Bates tries to clinch but Hilal is having none of it.
Bates tries to clinch but is not successful on this occasion.
Hilal darts in and clinches Bates up against the cage.
Hilal working hard to break the clinch.
Hilal jumps into guard, dragging Bates to the mat.
Hilal wriggles free and stands up.
Hilal takes a big intake of breath there - he's definitely tired.
Bates tries to close the distance and clinch up but Hilal swats him away and circles back towards the center.
Bates pushes Hilal up against the cage in a clinch.
Bates misses with a knee strike.
Hilal manages to break the clinch.
Hilal closes the distance and clinches.
Bates ties up his opponent against the cage and manages to drag the fight down to the ground. Bates no doubt will be looking to work submissions from his guard.
Hilal gets to his feet and steps away from his opponent.
The fans in attendance giving it up for the two fighters, who have really let it all hang out in the last minute or so!
Hilal with a poor takedown
and Bates counters with a straight right hand.
Hilal is looking to clinch.
That's two minutes gone in the round.
Bates fakes a head shot and lands one to the body.
Hilal throws a head kick that misses and slips in the process. He scrambles back to his feet and the fighters circle.
Bates is using his height advantage well here, landing a good percentage of his punches.
Bates moves into range and throws a lovely three punch combination.
Bates is looking to wear down Hilal with body shots, infact he's throwing more body shots than head shots at the moment.
Bates scores with the left hand. Hilal knows he should have avoided that one.
Hilal moves into the clinch.
Bates escapes the clinch and we're back to striking.
Bates takes the fight into the clinch.
Hilal tries to pull guard but Bates won't allow it.
Jon Bates has stuffed three takedown attempts in the round now. That's going to take a lot out of Katar Hilal.
Hilal breaks from the clinch.
Bates gets in close and instigates a clinch.
Hilal breaks the clinch.
Bates clinches up with Hilal and pushes him back against the cage.
Bates fails to pull guard.
That's three minutes gone in the round.
Hilal using the Thai plumb to throw knees but Bates has his back arched nicely, preventing the strike.
Bates stalling in the clinch but Hilal improves position.
Hilal breaks the clinch and we return to the middle of the mat.
Bates avoids the clinch attempt nicely.
Hilal avoids the clinch attempt nicely.
Bates scores with a punch to the head.
Bates lands three nice shots there - that looked like it hurt!
That has opened up Katar Hilal's cut even more.
Hilal takes a shot to the body in his stride.
Hilal tries to clinch up but Bates circles away and keeps his distance.
Bates moves into the clinch.
Hilal ties up his opponent against the cage and manages to drag the fight down to the ground. Hilal no doubt will be looking to work submissions from his guard.
Hilal is trying to control the position from the bottom.
Bates stands up from Hilal's guard - Bates perhaps looking for a knockout.
That's four minutes gone in the round.
Hilal shoots in with a takedown attempt and he has Bates pinned against the cage. Bates gets the underhooks and manages to circle away.
Bates lands a nice shot to the body.
This has been an exciting period of action!
Bates closes the distance and clinches.
Bates manages to break the clinch.
Bates moves into range and clinches up with Hilal.
Bates is looking to take this one to the mat.
Hilal looking to stall.
Hilal breaks the clinch and we return to the middle of the mat.
Hilal closes this distance looking for a takedown but Bates circles away.
Katar Hilal has stepped it up - he knows he needs a finish here!
Jon Bates is fighting for a decision here - he's started to take the cautious approach.
Bates shuffles to his left behind two crisp jabs. Hilal eats them both and turns towards Bates to reposition himself and eats a stinging right hand-left hook combo.
And that's the end of the fight!
Jon Bates showed his dominance in that final round.
Well I reckon that's a shut out for Bates, winning every round. Will the judges agree? They are the ones who matter, even if they are often depressingly incompetent. Over to the ring announcer for the scorecards.
Ladies and gentlemen, after 3 rounds of action, we go to the scorecards for a decision.
Judge Saam Ante scores the fight 30:27
Judge Paulsen Ambrosius scores the fight 30:27
Judge Wagner Zegers scores the fight 30:27
In favor of your winner, by unanimous decision... Jon Bates!
Jon Bates bigged himself up after the win. The crowd seemed to love it.
|
|
|
|
|
|
|
|
|
|
|
|
|
|
|
|
|
|
|
|
|
|
|
| S |
C
A |
G |
S |
C
B |
G |
|
S |
C |
G |
|
energy
A | B |
|
hype
A | B |
|
pop
A | B |
|
mgr
A | B |
|
FIGHT
RATING
71% |
|
|
|
|
|
|
|
Co-main event
|
Coming up we have a welterweight MMA rules bout between Ramon Gracie (ranked 0 p4p, 0 weight class) and Veke Purha (ranked 0 p4p, 0 weight class). Gracie comes to the cage accompanied by Jiu Jitsu: Vai Finaliza!. The crowd giving both fighters a great reception on their way into the arena. That's good to see.
 |
|
 |
| 180 cm
20
180 lbs
1 - 0 - 0 |
|
180 cm
25
174 lbs
2 - 0 - 0 |
BJJ Brown Belt
Counter fighter
Good chin |
|
BJJ Blue Belt
Counter fighter
Solid chin |
|
| |
|
Ladies and gentlemen. This fight is 3 rounds, in the welterweight division.
Introducing the fighter to my left, fighting out of the red corner.
With a record of
1 - 0 - 0, fighting out of London, Ramon Gracie!
And introducing the fighter to my right, fighting out of the blue corner.
With a record of
2 - 0 - 0, fighting out of Helsinki, Veke Purha!
The judges for this bout are Nard Betker, Patrick Alders and Paul Aken.
The bell rings for round one and we are underway!
Gracie fails with a takedown attempt from distance.
Purha has been working on his striking defense in training and it's paying off as Gracie is landing a low percentage of strikes.
Purha avoids the clinch attempt nicely.
Gracie wants to clinch.
Gracie takes a swing at Purha's ribcage but misses.
Gracie avoids the body shot from Purha.
Gracie tries to counter with a takedown but Purha is quick to defend against it.
We've had a slow start to the round here - hopefully the action picks up.
Purha swats away the attempt to clinch by Gracie.
Gracie tries to clinch up against the cage, rushing in to close the distance. Purha manages to break the clinch and circles back to the middle of the mat.
Purha throws a body shot but no joy.
That's one minute gone in the round.
Gracie misses with a leg kick.
A countering left hand to the body from Purha misses.
Gracie walks into a straight right hand from Purha.
Gracie misses with a low kick.
Purha checks a low kick. Bone on bone - not my idea of a good time.
Purha misses with a low kick as Gracie jumps back.
Gracie drops down looking for a counter takedown but Purha sprawls and moves away.
Purha misses with an uppercut.
Purha throws a looping overhand right but Gracie ducks down to avoid it.
Gracie changes levels looking for a counter takedown but doesn't commit.
Gracie has been working on his balance at Canadian Top Team, so perhaps that has help him stuff some of the takedown attempts by Purha.
Gracie tries to clinch there but Purha circles away.
Sloppy strikes from Purha. Those never looked like landing.
Gracie feinted with a counter takedown.
Gracie keeping a good distance there, avoiding the body shot.
That's two minutes gone in the round.
Nice uppercut there from Purha.
Purha throws a body shot but no joy.
Gracie attempts a counter takedown but Purha avoids it well and moves away.
Purha is looking to score with low kicks.
Purha avoids the clinch attempt nicely.
Gracie throws an overhand right that lands on Purha's shoulder, as Purha tries to avoid the shot.
Purha now looks to counter with a shot at the body.
Gracie misses with a low kick.
Gracie throws a leg kick but Purha checks it.
Purha throws a low kick but Gracie moves out of range easily.
Gracie fails miserably with a takedown attempt.
That's three minutes gone in the round.
Purha misses with a body shot. Nice footwork from Gracie.
Gracie attempts a counter takedown but Purha avoids it well and moves away.
Gracie fails in his attempt to clinch.
Purha misses with a jab and misses with a cross straight after too.
Gracie tries to grapple but his opponent circles
and Purha counters with a left and a right that stings Gracie.
Purha throws a one two combo.

It looks like Ramon Gracie has been cut.
Gracie fails in his attempt to clinch.
Gracie checks a leg kick.
That's four minutes gone in the round.
Purha misses with a body shot.
Gracie half commits to a counter takedown before pushing away, out of range.
Gracie is looking to clinch.
Purha is clearly trying to counter these attacks from Gracie with a body shot.
Gracie doesn't manage to clinch there - Purha circles away.
Purha is throwing a lot of body shots here, looking to wear down Gracie rather than just go for the knockout.
Purha throws an uppercut from half a mile away. Gracie sees it coming and avoids it easily.
Gracie is looking for a takedown here. He's shot in and has managed to get it, finishing up in Purha's half guard.
This has been an exciting period of action!
Gracie tries to pass to full mount but Purha defends it.
The crowd thankful this round is nearly over.
Gracie controlling the action here.
And thats the end of the round the fighters go back to their corners.
Veke Purha dominated that round.
The cut man is working on Ramon Gracie's cut.
That's time! Gracie's corner gives him a slap on the ass as he gets ready to fight.
Purha clinches up with Gracie and pushes him back against the cage.
Purha breaks the clinch.
Gracie throws a looping left and ducks down for a takedown. He's got his arms around Purha's waist but Purha gets an underhook and avoids the takedown by throwing Gracie off to one side.
Purha has been the more effective fighter overall so far.
Gracie fails with the takedown.
We've had a slow start to the round here - hopefully the action picks up.
Purha tries to land with a swinging hook to the body but Gracie was well out of range. Poor timing from Purha.
Gracie is trying to close the distance and clinch up, after that failed offence from Purha.
Gracie wants to clinch.
That's one minute gone in the round.
Purha misses with a low kick.
Purha comes forward and lands a shot to the body, then darts back out of range.
Gracie tries to clinch up.
Gracie tries to grapple but his opponent circles
and Purha counters with a leg kick.
Purha misses the shot to the body.
Gracie changes levels looking for a counter takedown but doesn't commit.
Gracie shoots for a takedown but Purha saw that one coming a mile off and avoided it easily.
That's three failed takedown attempts in the round for Ramon Gracie. That's going to take a lot out of him.
Purha misses with a leg kick.
That's two minutes gone in the round.
Purha gets in close and instigates a clinch.
Gracie is trying to work for a single leg takedown but Purha pulls him back up using the underhooks.
Purha comes over the top with an elbow. That landed flush.
Purha is trying to wear down his opponent with knees to the body.
Purha breaks the clinch.
Gracie tries to clinch up.
A low kick from Purha misses
and Gracie counters with a shoot takedown into half guard.
The crowd are loving this. Great action here.
The fighters are battling for position here. Purha manages to regain full guard. Nice work.
Gracie preventing the sweep.
Gracie throwing strikes but missing.
Gracie drops back for a leg but he's not going to get it - he lets go and Purha dives on top into guard.
Gracie working the defensive guard well to avoid strikes from Purha.
That's three minutes gone in the round.
Gracie working for a triangle but Purha defends it easily.
Gracie looking to sweep here. No luck so far.
Purha postures up and scores with a shot to the body and a follow up elbow to the head.
Purha working some strikes from top position.
Gracie working from the bottom, still in full guard. He's managed to get a loose triangle. Purha doesn't seem to be doing much to defend here, obviously he feels comfortable in the position. Purha manages to throw the legs off his shoulder and he's back into guard - no problem.
Gracie working for a triangle but Purha defends it easily.
Gracie controls Purha momentarily but Purha frees himself.
That's four minutes gone in the round.
Gracie throwing his legs up looking for a triangle.
There's a bit of a scramble here and now Gracie is on top in guard.
Gracie slips nicely into half guard.
Gracie is sneakily working for an arm triangle but Purha sees it coming and defends easily.
Purha really doesn't want to stay on the ground with Gracie. If he can't get it back to his feet, it's only a matter of time before he'll be tapping out.
The crowd thankful this round is nearly over.
Gracie with a momentary lay and pray from half guard.
And thats the end of the round the fighters go back to their corners.
Veke Purha showed his class in that round. I'd imagine he'll take it on all the scorecards.
The cut man is working on Ramon Gracie's cut.
That's the end of the round. The referee orders the cornermen out of the cage so we can get back down to business. This is the final round!
Gracie tries to clinch up against the cage, rushing in to close the distance. Purha manages to break the clinch and circles back to the middle of the mat.
Purha misses with a body shot. Nice footwork from Gracie.
Some wild striking there from Purha.
Veke Purha seems to be getting the better of the standup.
Gracie keeping a good distance there, avoiding the body shot.
Purha misses with a jab to the body
and Gracie counters with a single leg into guard. Purha didn't expect that.
Gracie won't allow Purha to get back to his feet.
We've had a slow start to the round here - hopefully the action picks up.
Gracie drops back for a leg but he's not going to get it - he lets go and Purha dives on top into guard.
Purha postures up and lands some nice ground and pound.
Gracie is working an open guard here, looking to improve his position. No doubt that will leave him open to counters but at least he's being more offensive.
That's one minute gone in the round.
Purha throws a sloppy strike and Gracie has hooked up an armbar on the loose arm! He's turned and extended fully! Purha is forced to tap! Great BJJ from Gracie!
Ladies and gentlemen, after 1:20 of round 3, we have a winner by way of Submission (Armbar). Ramon Gracie!
An out of breath Ramon Gracie thanked his loyal fans in his post fight interview, giving them credit for his success over the course of his career.
|
|
|
|
|
|
|
|
|
|
|
|
|
|
|
|
|
|
|
|
|
|
|
| S |
C
A |
G |
S |
C
B |
G |
|
S |
C |
G |
|
energy
A | B |
|
hype
A | B |
|
pop
A | B |
|
mgr
A | B |
|
FIGHT
RATING
43% |
|
|
|
|
|
|
|
Main event
|
Coming up we have a light heavyweight MMA rules bout between Marc Charbonnier (ranked 0 p4p, 0 weight class) and Curtis Crane (ranked 0 p4p, 0 weight class). Charbonnier kept the crowd waiting but all that was forgotten when his ring entrance music started. The incomparable musical genius that is MC Hammer - U Can't Touch This. Curtis Crane has the better chin. Will he look to stand and bang today?
 |
|
 |
| 185 cm
23
218 lbs
1 - 0 - 0 |
|
190 cm
25
215 lbs
2 - 0 - 0 |
Good wrestling
Basic striking
Self confident |
|
BJJ Blue Belt
Excellent MT
Heavy handed |
|
| |
|
Ladies and gentlemen. This fight is 3 rounds, in the light heavyweight division.
Introducing the fighter to my left, fighting out of the red corner.
With a record of
1 - 0 - 0, fighting out of Amsterdam, Marc Charbonnier!
And introducing the fighter to my right, fighting out of the blue corner.
With a record of
2 - 0 - 0, fighting out of Las Vegas, Curtis Crane!
The judges for this bout are Aafke Stam, Paulsen Ambrosius and Radbod Blank.
The bell rings for round one and we are underway!
Charbonnier closes the distance and after a bit of a stuggle, scores a takedown into Crane's guard.
Charbonnier connects with a couple of short punches.
Charbonnier lands a couple of decent looking shots.
Charbonnier postures up to throw the ground and pound strikes but they don't connect.
The fighters are pressed up against the cage, both looking to find a bit of space to work.
Charbonnier not doing a lot at the moment. He'll have to show some more aggression or the fight will get stood up.
The ref warns both fighters not to hold the cage as they work up against the meshing.
Charbonnier throwing shots from guard but he's hitting more mat than opponent.
Charbonnier content to stall in guard here.
Charbonnier postures up.
We've had a slow start to the round here - hopefully the action picks up.
Charbonnier working some strikes from top position.
Charbonnier in full guard, throwing the ground and pound. No damage this time.
Charbonnier is taking a break and basically stalling. The referee will not allow him to do that for long.
Charbonnier chips away with some ground and pound.
That's one minute gone in the round.
Charbonnier makes a bit of distance and scores with some ground and pound, still in guard.
Crane working the defensive guard well to avoid strikes from Charbonnier.
Charbonnier lands a couple of elbows.
Charbonnier throwing elbows and punches but not connecting, as Crane works some decent striking defense from the bottom.
Charbonnier controlling from the guard. I say controlling but really, he's stalling.
Charbonnier scores with a decent looking elbow strike.
Charbonnier lands a couple of elbows.
Crane will have to put a bit more behind his punches if he's going to do any damage from this position.
Charbonnier lands a couple of decent looking shots.
Charbonnier loading up with the ground and pound but he's missing more than he's landing in this flurry.
That's two minutes gone in the round.
Charbonnier scoring with some ground and pound.
Charbonnier throws a big elbow that misses.
Crane controls Charbonnier momentarily but Charbonnier frees himself.
Charbonnier working some strikes from top position.
Charbonnier scoring with some ground and pound.
Charbonnier looks to be in better condition than last time we saw him fight. Obviously he's been working hard on his cardio.
Crane can't do much from the bottom at the moment, as Charbonnier controls the pace.
Charbonnier content to strike from guard, landing some decent shots.
Crane looks winded!
Charbonnier content to strike from guard, landing some decent shots.
Charbonnier landing with the ground and pound.
Charbonnier cracks Crane with a solid left hand.
That's three minutes gone in the round.
Charbonnier gets to his feet and stands over Crane, holding his ankles. He dives in with a big left hand that connects! Crane felt that one! Charbonnier unloads more punches and elbows and this one is over! The ref has dived in to save Crane from any more punishment!
Ladies and gentlemen, after 3:22 of round 1, we have a winner by way of TKO (Strikes). Marc Charbonnier!
After the big win, Marc Charbonnier made sure to do all the important stuff like thanking his sponsors Machine Fight Gear and telling the interviewer how much he loves him.
|
|
|
|
|
|
|
|
|
|
|
|
|
|
|
|
|
|
|
|
|
|
|
| S |
C
A |
G |
S |
C
B |
G |
|
S |
C |
G |
|
energy
A | B |
|
hype
A | B |
|
pop
A | B |
|
mgr
A | B |
|
FIGHT
RATING
35% |
|
|
|
|
|
|
|
|
|
|

