 |
The Island Season 3, 145 lbs, Round 3 PBP Commentary |
Undercard bout
|
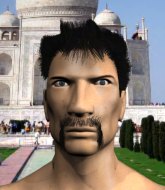
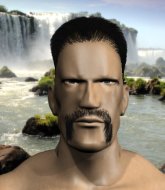
Coming up we have a featherweight MMA rules bout between Hans Yamato (ranked 0 p4p, 0 weight class) and Patrick Seery (ranked 0 p4p, 0 weight class). Seery has chosen An Irish Pub Song as his entrance music. Well, the cameraman is lingering on a pretty young lady for a bit too long there. Keep your eyes on the prize buddy or you'll miss the fighter intros!
 |
|
 |
| 170 cm
27
155 lbs
11 - 4 - 0 |
|
175 cm
24
150 lbs
11 - 1 - 0 |
Powerful takedowns
Counter fighter
Very strong |
|
BJJ Blue Belt
Excellent boxer
Good gas tank |
|
| |
|
Ladies and gentlemen. This fight is 3 rounds, in the featherweight division.
Introducing the fighter to my left, fighting out of the red corner.
With a record of
11 - 4 - 0, fighting out of The Island, Hans Yamato!
And introducing the fighter to my right, fighting out of the blue corner.
With a record of
11 - 1 - 0, fighting out of The Island, Patrick Seery!
The judges for this bout are Winston Alpacca, Peter Branson and Dirk Anderson.

The bell rings for round one and we are underway!
Seery fakes a jab and then connects with a hook.
Yamato shoots in for a takedown - he's clinched up with Seery but Seery pushes him off and we're back to square one.
Yamato dives in for a single leg takedown but Seery sprawls and the fighters end up clinched against the cage.
Seery wants to counter with a clinch but Yamato pushes him away.
Seery dips down and scores with a jab to the body.
Seery lands a slapping body shot.
Seery swings for the body but Yamato moves out of range.
Seery lands a vicious shot with the stealth of a sniper and the strength of a viper. Are vipers that strong? I can think of lots of things that are stronger than a viper - not many rhyme with sniper though.
Seery throws a hook to the body but it doesn't connect.
Patrick Seery seems to be the more aggressive standup fighter in this bout.

Seery gets in close and instigates a clinch.
Yamato is working for takedown but Seery is calmly controlling the position for now.
That's three failed takedown attempts in the round for Hans Yamato. That's going to take a lot out of him.
Seery lands a left hand.
A bit of stalling here from Seery.
Seery taking a breather.
Yamato has Seery pressed up against the cage and is working for takedown. Seery manages to improve position though and keeps the fight standing.
The crowd cheering loudly, showing their appreciation for the quality fight we're seeing here.

Seery pushes off and circles away, back to the middle of the mat.

That's one minute gone in the round.
Seery cracks a nice hook into Yamato's ribs.
Seery digs a good body shot into Yamato's ribs.
A right-left combo lands from Seery.
Yamato misses with a takedown attempt

and Seery counters with a crisp right hand that drops Yamato! Seery lets Yamato back up to his feet, looking for a finish!

Yamato is rocked!
Wooooo! Give it up for these two warriors! They are putting on a show!
Seery connects with a left and a right that sees a clearly hurt Yamato covering up! Seery comes in with a big uppercut and Yamato goes doooown! He's slumped up against the cage, eyes staring blankly into space.
Ladies and gentlemen, after 1:26 of round 1, we have a winner by way of KO (Strikes). Patrick Seery!
Patrick Seery seemed lost for words in his post fight interview but he remembered to thank his fans and directed everyone to his website.
|
|
|
|
|
|
|
|
|
|
|
|
|
|
|
|
|
|
|
|
|
|
|
| S |
C
A |
G |
S |
C
B |
G |
|
S |
C |
G |
|
energy
A | B |
|
hype
A | B |
|
pop
A | B |
|
mgr
A | B |
|
FIGHT
RATING
80% |
|
|
|
|
|
|
|
Undercard bout
|
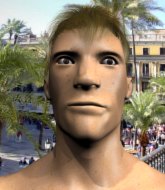
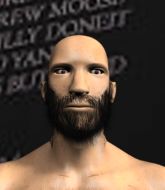
Coming up we have a featherweight MMA rules bout between Moka Moka (ranked 0 p4p, 0 weight class) and Jim Dixon (ranked 0 p4p, 0 weight class). Moka Moka could well score a knockout today. He has the power to get to Jim Dixon's chin.
 |
|
 |
| 165 cm
27
145 lbs
10 - 3 - 0 |
|
170 cm
27
140 lbs
10 - 7 - 0 |
Good wrestling
Counter fighter
Granite chin |
|
Good wrestler
Decent boxing
Good gas tank |
|
| |
|
Ladies and gentlemen. This fight is 3 rounds, in the featherweight division.
Introducing the fighter to my left, fighting out of the red corner.
With a record of
10 - 3 - 0, fighting out of The Island, Moka Moka!
And introducing the fighter to my right, fighting out of the blue corner.
With a record of
10 - 7 - 0, fighting out of The Island, Jim Dixon!
The judges for this bout are Bart Greer, Santiago Holmes and Winston Alpacca.
The bell rings for round one and we are underway!
A big right from Dixon misses.
Dixon loads up on a big right hand but Moka slips the punch.
Moka moves away from the strike by Dixon.
Moka uses good footwork to avoid the strikes from Dixon.
Moka slips a jab from Dixon.
Moka throws a leg kick
letting Dixon counter with a right hand.
Moka misses with a low kick.
A big left from Dixon misses.
We've had a slow start to the round here - hopefully the action picks up.
A good leg kick by Moka.
Moka seems to be moving with more speed, compared to his last bout. He must have been working on that in the gym.

Moka changes levels and drives through with a really nice takedown into side control. Dixon looks really pissed at himself for not defending that better.
Moka throws a knee to the body but it doesn't do much damage.
Moka scores with punches from side control.
That's one minute gone in the round.
Moka wants to take a breather but Dixon manages to regain guard - a lesson learnt for Moka.
Moka trying to control the position from guard on top but Dixon is wriggling around, looking for whatever he can.
Dixon working the defensive guard well to avoid strikes from Moka.
Moka sitting in guard, not really doing much.
Moka pressing down on his opponent's thigh, looking to pass guard. Dixon is keeping the position for now.
Moka postures up in Dixon's guard and throws a big left but Dixon blocks it.

That's two minutes gone in the round.
There's not a lot going on here and the crowd are letting the fighters know they're not willing to tolerate a lack of action.
Dixon keeping moving, preventing Moka from controlling successfully.
Moka wants to pass the guard but Dixon is keeping the position.
Moka scoring with some ground and pound.
Moka preventing the sweep.
Moka looking to sit in guard and control but Dixon gets the butterfly guard and sweeps. He's now in the guard on the top.

Dixon looks more muscular than last time we saw him. He must have been on the weights.
Moka controls Dixon momentarily but Dixon frees himself.
Dixon is fighting to break Moka's control of his arms but Moka is doing a good job of controlling the position at the moment.

That's three minutes gone in the round.
Dixon throws a big right hand that misses.
Dixon wants to stand but Moka has a closed guard, so he can't escape.
Moka looking to sweep here. No luck so far.
Dixon working some ground and pound from guard but it's not doing any damage.
Moka looking to hit a scissor sweep but Dixon is one step ahead there.
Dixon trying to pass the guard. He's being very persistent here but Moka manages to land a sweep and now he's on top!

Dixon keeping full guard, as Moka tries to pass.
Moka postures up to throw the ground and pound strikes but they don't connect.
Dixon utilising some decent striking defenses from the guard, preventing the ground and pound.

That's four minutes gone in the round.
Moka postures up to throw the ground and pound strikes but they don't connect.
Moka wants to control from the top but Dixon keeps moving.
Moka is looking to work some ground and pound but Dixon has wrist control.
Moka has been looking to land a fair amount of strikes on the ground. He might be looking to soften his opponent up in order to work for a submission.
Moka trying to control but Dixon is working from the bottom.
Moka throwing strikes but missing.
The crowd thankful this round is nearly over.
Moka working some ground and pound from guard but it's not doing any damage.
If this pace continues, the referee will definitely step in and force a standup.
And thats the end of the round the fighters go back to their corners.
That was a close round but I would say that Moka Moka will probably get the nod.
That's time! Moka's corner gives him a slap on the ass as he gets ready to fight.

Moka connects with a solid leg kick.
Dixon is the aggressor but that punch slipped nicely by Moka.
Moka misses with an attempted mid kick.
Moka turns his hip over beautifully as he lands a nice leg kick.
Dixon uses good head movement to avoid the hook from Moka.
It seemed like Dixon was going to counter with the hook but didn't fully commit to it.
A thudding body kick lands there by Moka!
Dixon checks a leg kick.
Moka moves out of range of the strikes.
We've had a slow start to the round here - hopefully the action picks up.
Dixon loads up on a big right hand but Moka slips the punch.
Dixon throws an off balance right hand
and Moka counters with an outside leg kick.
An inside leg kick lands from Moka.
That's one minute gone in the round.
Dixon throws an uppercut from half a mile away. Moka sees it coming and avoids it easily.
Dixon feints a straight left to the body, then turns around with a flashy move and hits Mokas jaw with a dramatic spinning back fist!
A low kick from Moka misses
and Dixon connects with a straight left hand counter down the middle.

It looks like Moka Moka has been cut.
Dixon chopped to the floor by a nice leg kick but he springs right back up before Moka can pounce on him.
Moka will have to do better than that with his takedown attempts.
Dixon throws out a counter right but Moka avoids it with no problem.
Moka uses good footwork to avoid the strikes from Dixon.
Moka misses with an attempted mid kick.
Dixon waving his hands out in front of him, looking to distract Moka.
Moka throws a front kick aimed at Dixon's knee but Dixon avoids it well.
Dixon wants to counter with a clinch but Moka pushes him away.
Moka slips under a jab from Dixon.
Jim Dixon is looking to keep the fight on the feet at all costs.
Moka scores with a takedown into Dixon's guard.
That's two minutes gone in the round.
Moka is working Dixon over from the guard. He should look to pass the guard and do a little more damage with these strikes.
We've seen a great period of action over the last minute or so - credit to both fighters for going all out!
Moka wants to control from the top but Dixon keeps moving.
Moka connects with a couple of short punches.
Moka trying to control but Dixon is working from the bottom.
Moka is going to have to think about doing something other than just controlling because Dixon is managing to avoid having the position dictated to him.
Dixon really doesn't want to stay on the ground with Moka. If he can't get it back to his feet, it's only a matter of time before he'll be tapping out.
Dixon is working from a closed guard but he's struggling to control his opponent.
That's three minutes gone in the round.
Moka slows down the pace of the fight, as he sits in guard.
Moka trying to control the position from guard on top but Dixon is wriggling around, looking for whatever he can.
Moka scores with a decent looking elbow strike.
Moka trying to land body shots but he keeps hitting the mat.
Moka pressing down on his opponent's thigh, looking to pass guard. Dixon is keeping the position for now.
The fighters are pressed up against the cage, both looking to find a bit of space to work.
Moka postures up in Dixon's guard and throws a big left but Dixon blocks it.
That's four minutes gone in the round.
The crowd are getting on the fighters' backs, as the pace has dropped off in the last minute or so.
Dixon working the defensive guard well to avoid strikes from Moka.
Dixon managing to control the position.

The referee decides to stand the fighters back up.
Dixon throws a hook but Moka avoids it easily.
A chopping leg kick lands by Moka.
Nice defenses there by Moka.
Jim Dixon seems to be getting the better of the standup.
An inside leg kick from Moka misses.
Moka displays some good footwork, moving neatly out of range as Dixon throws out the jab.
The crowd thankful this round is nearly over.
Moka moves into range and lands a nice leg kick.
Moka misses with a body kick.
Dixon looked like he wanted to counter with a punch but didn't throw it.
A bone on bone clash there as Dixon blocks the leg kick.
And thats the end of the round the fighters go back to their corners.
Moka Moka dominated that second round.
The cut man is working on Moka Moka's cut.
The fighters' corners scream their final instructions, as the referee calls time. Here we go, back to the action! This is the final round!

Dixon moves out of range as Moka throws a body kick.
Dixon thuds his right hand into Moka's forehead from close range. That could be painful for both fighters.
Moka throws a leg kick but he was too far away and it doesn't land.
Dixon jabbing away but nothing is landing.
Moka throws a leg kick
and Dixon counters with a stiff right hand.
Dixon throws a jab when Moka was well out of range.
A nice inside leg kick there by Moka. That's going to slow Dixon down.
We've had a slow start to the round here - hopefully the action picks up.
Moka misses with a low kick.
Dixon misses with a hook. Moka ducked under it nicely.
Dixon might want to mix his strikes up a bit more. He's just going for head shots at the moment and that can become a bit predictable.
Moka tries to land a leg kick but Dixon saw it coming and moves away.
Dixon dips to his left and cracks Moka with an uppercut!
That's one minute gone in the round.
Moka scores with a kick to the body.
Dixon gets caught napping as Moka dives in and scores a takedown. Dixon manages to retain guard.
Moka lands a couple of decent looking shots.
Moka's corner is telling him to maintain position.
Moka trying to control but Dixon is working from the bottom.
Moka showing good wrestling skills to control the position.
Moka trying to control but Dixon is working from the bottom.
Jim Dixon has stepped it up - he knows he needs a finish here!
That's two minutes gone in the round.
Moka stands up and looks to throw the legs aside to pass to side control. Dixon swivels though and keeps the full guard.
Dixon looking for a sweep. Not yet Dixon, not yet.
Moka Moka overall seems to be getting the better of the ground position in the fight so far.
Moka works a leg free and moves into half guard.
Moka wants to take a breather but Dixon is having none of it.
The ref warns both fighters not to hold the cage as they work up against the meshing.
Dixon won't allow Moka to pass to mount.
Moka wants to lay and pray for a moment but Dixon keeps working.
The referee has motioned to the fighters to stand back up. He just wasn't happy with the level of activity.
That's three minutes gone in the round.
A big right from Dixon misses.
A swing and a miss from Dixon.
Moka chopping away at his opponent's legs.
Moka connects with a leg kick. Dixon looked like he was expecting something else and didn't defend it.
Dixon works the jab nicely.
Moka thows a leg kick but Dixon checks it
and Dixon counters with a nice uppercut.
Dixon throws an overhand right that lands on Moka's shoulder, as Moka tries to avoid the shot.
Moka connects with a leg kick. Dixon looked like he was expecting something else and didn't defend it.
Moka throws a body kick, spinning off balance
and Moka takes a counter punch right on the button for his troubles.
Dixon misses with a lunging right hand
and Moka counters with a nice low kick that buckles Dixon's knee momentarily.
That's four minutes gone in the round.
A low kick from Moka misses
and Dixon counters with a lovely straight right hand!
Dixon tries to clinch there but Moka circles away.
This has been an exciting period of action!
Dixon misses with an uppercut.
Moka attempts a counter takedown but Dixon avoids it well and moves away.
Dixon blocks a leg kick.
Dixon is trying to avoid his opponent's strikes and get into the clinch.
Moka lands a leg kick. The shin dug right into the meat of the thigh.
A leg kick checked by Dixon.
Moka fakes a couple of low kicks, before throwing one on the third attempt. It connects and Dixon has to reset his feet before getting ready to engage.
Moka throws a body kick that misses.
Moka is looking to land body kicks.
Moka scoring well with a low kick there.
And that's the end of the fight!
That was a close round. You could make an argument for either fighter but I would give it to Moka Moka.
Well I reckon that's a shut out for Moka, winning every round. Will the judges agree? They are the ones who matter, even if they are often depressingly incompetent. Over to the ring announcer for the scorecards.
Ladies and gentlemen, after 3 rounds of action, we go to the scorecards for a decision.
Judge Bart Greer scores the fight for Moka Moka!
Judge Santiago Holmes scores the fight for Moka Moka!
Judge Winston Alpacca scores the fight for Moka Moka!
Moka Moka wins by unanimous decision!
A less than humble Moka Moka misjudged his post fight interview somewhat and came across a little too arrogant whilst trying to hype up his own abilities.
|
|
|
|
|
|
|
|
|
|
|
|
|
|
|
|
|
|
|
|
|
|
|
| S |
C
A |
G |
S |
C
B |
G |
|
S |
C |
G |
|
energy
A | B |
|
hype
A | B |
|
pop
A | B |
|
mgr
A | B |
|
FIGHT
RATING
38% |
|
|
|
|
|
|
|
Co-main event
|
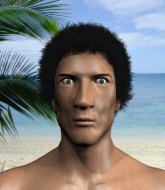
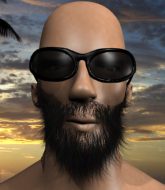
Coming up we have a featherweight MMA rules bout between Hannu Haapana (ranked 0 p4p, 0 weight class) and Prince The (ranked 0 p4p, 0 weight class). I can't wait for this one - let's get the fighter introductions out of the way and get this one started!
 |
|
 |
| 169 cm
27
145 lbs
12 - 2 - 0 |
|
159 cm
27
139 lbs
7 - 4 - 1 |
Decent wrestler
Excellent MT
Granite chin |
|
BJJ White Belt
Lethal high kicks
Heavy handed |
|
| |
|
Ladies and gentlemen. This fight is 3 rounds, in the featherweight division.
Introducing the fighter to my left, fighting out of the red corner.
With a record of
12 - 2 - 0, fighting out of The Island, Hannu Haapana!
And introducing the fighter to my right, fighting out of the blue corner.
With a record of
7 - 4 - 1, fighting out of The Island, Prince The!
The judges for this bout are Daniel Franklin, Santiago Holmes and Michael Johnstone.
The bell rings for round one and we are underway!
The checks a low kick from Haapana.
The lands with a thumping leg kick.
Haapana throws a leg kick but The sees it coming and checks it nicely.
Haapana lands a jab to the head.
Haapana throws a head kick that misses.

Haapana rushes The and pushes him back against the cage in a clinch.
Haapana scores with a hook to the body.
The is trying to break free.
The's corner calls for him to break the clinch, which he does.
The looks more muscular than last time we saw him. He must have been on the weights.
Haapana does a little shimmy and throws a leg kick. The leg kick missed by a considerable margin though, making him look a little bit silly for doing the shimmy.
Haapana tries to close the distance and clinch but The swats him to one side with an open hand palm strike and circles away.
The flicks out a counter leg kick but Haapana steps away.
The misses with a low kick.
Haapana gets to the clinch - let's see what his plan is here.
The breaks the clinch and we return to the middle of the mat.
We've been told by Haapana's head coaches at Highland Brawl Academy that he's been working on his takedown defense in preparation for this fight.
Haapana fails in his attempt to clinch.
The pivots, looking for a leg kick but Haapana is out of range and The settles back down.
Haapana rushes The and presses him up against the cage.
Haapana lands an elbow that stopped The in his tracks for a moment.

It looks like Prince The has been cut.
This is a great period of action - very entertaining stuff!
The pushes off and circles away, back to the middle of the mat.
The thumps Haapana with a low kick.
The throws the left hand but Haapana avoids the punch easily.
Haapana is looking to slow The down with leg kicks.
Haapana has The up against the cage in a clinch.
That's one minute gone in the round.
The wants to break free. God knows he wants to breaaaak freeee.
Haapana lands an elbow inside that The shrugs off.
The is trying to break free.
Haapana lands a shot to the body.
A frustrated look appears on The's face as he tries to break the clinch.
Haapana can't find room to land a body shot as The controls the action.
Haapana stalling in the clinch.
Haapana keeps the fight in the clinch, despite The's efforts to push away.
The tries to break free but Haapana pushes him back against the cage.
Haapana pushes off and fires off an elbow that misses, before clinching up again, against the cage.
Haapana lands a damaging elbow.
Haapana is trying to stall.
The is trying to break the clinch but Haapana is controlling him.
The avoids a wild elbow strike from Haapana.
The tries to circle away but Haapana has him pinned against the cage.
Haapana lands an elbow that stopped The in his tracks for a moment.
Haapana lands a nice elbow.
That has opened up Prince The's cut even more.
Haapana pushes off and fires off an elbow that misses, before clinching up again, against the cage.
Haapana throws an elbow but it misses.
That's two minutes gone in the round.
The tries to break free but Haapana pushes him back against the cage.
The is trying to break the clinch but Haapana has him pressed against the cage.
Haapana lands an elbow just above The 's eye.
Haapana lands a glancing elbow in the clinch.
A battle for position here, against the cage.
The is trying to work out of this bad position, with his back against the cage.
The's corner calls for him to break the clinch, which he does.
The fakes a jab and throws a low kick but Haapana checks it well.
Prince The seems to be the more aggressive standup fighter in this bout.
Haapana checks a leg kick.
We've seen a great period of action over the last minute or so - credit to both fighters for going all out!
The tries a head kick but it misses.
The avoids the clinch attempt nicely.
The chopped to the floor by a nice leg kick but he springs right back up before Haapana can pounce on him.
Nice shot by Haapana.
Haapana tries to score with a leg kick but it misses it's target.
Wow, both these guys are really going for it!

Haapana feints and then winds up with a huge right hand that connects perfectly and sends The sprawling to the canvas! The rolls over backwards and springs off the cage and manages to regain his footing - how acrobatic! Oh, he's still wobbly - can Haapana finish him?!

The is rocked!
Haapana checks a leg kick.
The is still on wobbly legs! Can Haapana finish him?
The does a little shimmy and throws a leg kick. The leg kick missed by a considerable margin though, making him look a little bit silly for doing the shimmy.
Haapana throws a quick inside leg kick.
Haapana takes an uppercut right on the jaw but it doesn't phase him.
Haapana gets to the clinch - let's see what his plan is here.
Haapana keeps control of The as he tries to wriggle out of the double underhooks.
That's three minutes gone in the round.
The wants to break the clinch but can't.
Haapana keeps the fight in the clinch, despite The's efforts to push away.
Haapana misses with a shot to the kidneys.
The seems to have recovered his senses.
The avoids the elbow strike from Haapana, against the cage.
The tries to break free but Haapana pushes him back against the cage.
The wants to get back to striking at distance but Haapana won't allow it.
The wants to push off and get back to the center of the mat but Haapana has him pressed against the cage.
The wants to break free. God knows he wants to breaaaak freeee.
Haapana lands a hook that snaps the head of The backwards.
Haapana comes over the top with an elbow. That landed flush.
The cut above Prince The's eye is starting to cause him problems now.
Haapana just leaning against The, taking a breather.
Haapana throws an elbow but it's blocked.
The is trying to break the clinch but Haapana is controlling him.
The blocks an elbow strike from Haapana.
Both fighters working to control the clinch.
Haapana trying to control the position but instead, The has worked for underhooks and has pushed Haapana into the cage.
The breaks the clinch and we're back to striking at distance.
The throws a right high kick that is partially blocked by Haapana.
A slapping leg kick lands for The.
That's four minutes gone in the round.
A left lands for Haapana.
The throws a low kick but it's checked well by Haapana.
The scoring well with a low kick there.
The tries a low kick but Haapana avoids it.
Haapana swings and misses with a hook to the body.
Haapana backing away here, and The unleashes a leg kick that just misses.
Haapana missing with a left hand there. The was out of range so wasted energy throwing that one.
Haapana clinches with his opponent.
This is a great period of action - very entertaining stuff!
Haapana pushes off an throws an elbow but The leans to the side and avoids it. We're back to clinching against the cage.
Haapana is pushing The up against the cage, for a bit of lean and pray action. Action being used the in the loosest possible sense of the word.
The is trying to break the clinch but Haapana has him pressed against the cage.
Haapana lands an elbow that stopped The in his tracks for a moment.
Haapana keeps control of The as he tries to wriggle out of the double underhooks.
Haapana has The pressed against the cage, preventing The from circling away and getting back to striking at range.
The manages to break the clinch.
The crowd applaud the fighters' efforts here as the round comes to an end.
Haapana wants to clinch up but The keeps it at a distance.
Haapana tries to close the distance and clinch but The swats him to one side with an open hand palm strike and circles away.
The gets tackled into the cage by Haapana. Haapana maintains the clinch.
Haapana working aggressively here.
Haapana lands a body punch - he's looking to wear down The.
And thats the end of the round the fighters go back to their corners.
Hannu Haapana dominated that round.
The cut man is working on Prince The's cut.
Well, the break between rounds is over. Let's get back to the scrappin!
Haapana feints with a shoulder and throws a nice leg kick to The's calf.
The tries a low kick but Haapana avoids it.
Haapana dances in quickly and lands a nice inside leg kick on The. That did some damage!
Haapana slips under a jab from The.
The lands with a straight right. Haapana didn't see that one coming.
The tries to score with a leg kick but it misses it's target.
Haapana throws a combination but comes up with nothing but fresh air.
The tries a switch kick but it misses it's target.
Haapana clinches with his opponent.
The referee calls for Haapana to work.
The is trying to break the clinch but Haapana is controlling him.
The wants to break free. God knows he wants to breaaaak freeee.
The is trying to work out of this bad position, with his back against the cage.
The is trying to break free.
We've had a slow start to the round here - hopefully the action picks up.
A nice glancing elbow lands by Haapana.
The pace slowing considerably in the clinch, as Haapana takes a break from that fighting nonsense to think about the finer things in life.
The is trying to work out of this bad position, with his back against the cage.
Haapana lands a nice elbow.
The breaks the clinch and we're back to striking at distance.
Haapana wants to clinch up but The keeps it at a distance.
That's one minute gone in the round.
Haapana throws a leg kick but The sees it coming and checks it nicely.
The throws a leg kick that misses.
Nice shot lands for Haapana.
The throws a leg kick that misses.
Haapana tries to score with a low kick but The moves his leg out of the way.
A combination from Haapana does no damage.
The lands a leg kick. The shin dug right into the meat of the thigh.
Haapana has taken the fight to the clinch.
The is trying to break the clinch but Haapana is controlling him.
With the fighters up against the cage, Haapana throws an elbow but misses.
A bit of stalling here from Haapana.
The blocks the elbow strike.
Haapana lands an elbow inside that The shrugs off.
The breaks the clinch and we return to the middle of the mat.
Haapana takes one to the chin there.
The throws a leg kick but Haapana moved away.
Haapana looks to land a right hand but The moved out of range.
Haapana clinches.
Wooooo! Give it up for these two warriors! They are putting on a show!
Haapana softening up his opponent with strikes, against the cage.
Hannu Haapana has scored more points in the clinch so far.
Haapana has The pressed against the cage, preventing The from circling away and getting back to striking at range.
That's two minutes gone in the round.
Haapana keeps the fight in the clinch, despite The's efforts to push away.
The wants to strike at distance but he can't break free of the clinch.
The breaks the clinch and we're back to striking at distance.
The has his head snapped back a nice jab. A little nod from The there as he acknowledges the shot.
The pivots, looking for a leg kick but Haapana is out of range and The settles back down.
The keeps the fight on the outside.
A head kick misses from The.
The throws a leg kick but Haapana checks it.
Haapana closes the distance and clinches.
The wants to push off and get back to the center of the mat but Haapana has him pressed against the cage.
Haapana throws an elbow that misses.
Haapana struggles to land a body shot inside as The controls his hands.
Haapana is using his height advantage well here, landing a good percentage of his punches.
A right hand to the body from Haapana.
Haapana lands an elbow inside that The shrugs off.
Prince The's cut is absolute horrible now. This looks like something out of a horror film with blood covering both fighters.
The breaks from the clinch.
Haapana throws an uppercut from half a mile away. The sees it coming and avoids it easily.
Haapana is really dominating this fight. Is there anything that The can do to turn this around?
Haapana throws a body shot but no joy.
The throws a low kick but Haapana avoids it.
The wings a very wild body shot but it does the job and lands to the midsection.
The turns his hip over beautifully as he lands a nice leg kick.
That's three minutes gone in the round.
The misses with a half-hearted attempt at a head kick.
Haapana moves into the clinch.
The pushes off and circles away, back to the middle of the mat.
Haapana checks a low kick from The.
The scoring well with a low kick there.
Haapana misses with a low kick.
Haapana moves out of range of the leg kick from The.
Haapana listening to his corner there, landing a nice uppercut.
The throws a jab to the body, straight down the pipe. Boom. That sent Haapana stumbling backwards but he manages to regain his composure quickly.
The attempts a low kick but it misses it's target.
Haapana swings and misses with a hook to the body.
Haapana fails in his attempt to clinch.
Haapana pushes The up against the cage in a clinch.
Haapana lands an elbow inside.
The referee calls the doctor in to look at Prince The's cut. Oh no, the doctor has called an end to the bout!
Ladies and gentlemen, after 3:51 of round 2, we have a winner by way of TKO (Cut). Hannu Haapana!
After the fight, Hannu Haapana was humble in paying tribute to his opponent but made it clear he wants to go on to bigger and better things. It seemed to go down well with the crowd who cheered him loudly.
|
|
|
|
|
|
|
|
|
|
|
|
|
|
|
|
|
|
|
|
|
|
|
| S |
C
A |
G |
S |
C
B |
G |
|
S |
C |
G |
|
energy
A | B |
|
hype
A | B |
|
pop
A | B |
|
mgr
A | B |
|
FIGHT
RATING
55% |
|
|
|
|
|
|
|
Main event
|
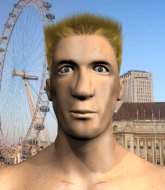
Coming up we have a featherweight MMA rules bout between Darth Mauler (ranked 0 p4p, 0 weight class) and Count Chocula (ranked 0 p4p, 0 weight class). Count Chocula has the better chin. Will he look to stand and bang today?
 |
|
 |
| 175 cm
27
144 lbs
13 - 1 - 0 |
|
180 cm
27
155 lbs
11 - 4 - 0 |
BJJ Blue Belt
Solid boxing
KO power |
|
BJJ White Belt
Excellent boxer
Good gas tank |
|
| |
|
Ladies and gentlemen. This fight is 3 rounds, in the featherweight division.
Introducing the fighter to my left, fighting out of the red corner.
With a record of
13 - 1 - 0, fighting out of The Island, Darth Mauler!
And introducing the fighter to my right, fighting out of the blue corner.
With a record of
11 - 4 - 0, fighting out of The Island, Count Chocula!
The judges for this bout are David Hoff, Sandra Marshall and Michael Johnstone.
The bell rings for round one and we are underway!
Mauler takes a swing at Chocula's ribcage but misses.
Mauler fakes a jab and scores with a low kick.
Chocula keeping a good distance there, avoiding the body shot.
Chocula misses with an uppercut.
Mauler misses with a head kick.
Chocula looks like he wants to counter punch here.
Mauler misses with a hook to the body
and Chocula counters with a quick right hand to the jaw.
Chocula looks to land a left hand but Mauler moved out of range nicely.
Mauler looking to throw a kick but he's pulled out of it.
Mauler slips under a jab from Chocula.
We've had a slow start to the round here - hopefully the action picks up.
Mauler swings away with a body shot that misses
and Chocula counters with a quick right hand to the jaw.
Chocula with poor footwork there. He got himself in a bit of a tangle, enabling Mauler to score with a decent uppercut.
Chocula throws a hook to the body but it doesn't connect.
Chocula misses with a right hand
and Mauler counters with a nice jab to the body that keeps Chocula thinking.
Chocula uses good footwork to get in and out and land a nice right hand before Mauler has time to react.
Count Chocula seems to be the more aggressive standup fighter in this bout.
That's one minute gone in the round.
The fight stays on the outside here - Chocula looks like he's thinking about clinching though.
Mauler scores with the left hand. Chocula knows he should have avoided that one.
Chocula fails to land with a series of punches.
Chocula tries to land with a swinging hook to the body but Mauler was well out of range. Poor timing from Chocula.
Mauler lands with a straight right. Chocula didn't see that one coming.
Chocula ducks under a wild hook from Mauler.
Chocula avoids the head kick by Mauler.
Mauler is looking to wear down Chocula with body shots, infact he's throwing more body shots than head shots at the moment.
Mauler scores with a head kick. Chocula tried to block it but didn't get his arm up in time.
Chocula moves in looking to clinch but Mauler pushes him off.
Mauler swung with a counter punch to the body but it didn't connect.
Chocula avoids a lazy jab quite easily.
Chocula uses some good footwork to avoid the body shot by Mauler.
That's two minutes gone in the round.
Mauler throws a leg kick that is checked
and Chocula counters with a shot to the ribs. That looked like it hurt.
Mauler swings and misses with a shot to the body
and Chocula cracks him with a counter punch right on the button.
It looks like Darth Mauler has been cut.
This is a great period of action - very entertaining stuff!
Chocula misses with a jab and misses with a cross straight after too.
Mauler swung with a counter punch to the body but it didn't connect.
A big right from Chocula misses.
A quick step to the side and Mauler tries to counter with a shot to the body but it doesn't connect.
Mauler pushes Chocula away with a front kick.
Chocula swings and misses with a shot to the body
and Chocula takes a counter punch right on the button for his troubles.
Mauler scores with a kick to the midsection.
Chocula looks more muscular than last time we saw him. He must have been on the weights.
Chocula misses with a jab and misses with a cross straight after too.
Mauler throws a jab but it's blocked by Chocula.
Mauler has his hands up protecting his head but a hook from Chocula finds it's way round the side to connect with Mauler's head.
Chocula has Mauler up against the cage in a clinch.
Mauler swings wildly with an uppercut but Chocula uses good head movement to avoid it.
That's three minutes gone in the round.
Mauler gets through Chocula's defenses to land a nice punch to the side of the head.

Mauler breaks the clinch.
Chocula misses with a looping right.
Chocula gets in close and instigates a clinch.
Mauler manages to break the clinch.
Chocula throws an uppercut from half a mile away. Mauler sees it coming and avoids it easily.
Chocula ducks under a wild hook from Mauler.
Chocula wants to clinch up but Mauler keeps it at a distance.
Mauler is looking light on his feet compared to last time was saw him fight.
A nice inside leg kick there by Mauler. That's going to slow Chocula down.
Mauler throws a couple of head shots and lands with the final one - a decent hook, which struck Chocula on the side of the head.
Chocula tries to clinch but fails miserably
and Mauler counters with a straight punch to the midsection.
Chocula tries to clinch but Mauler is having none of it.
Mauler was looking to counter that move with a punch but didn't quite pull the trigger.
Mauler scores with the left hand. Chocula knows he should have avoided that one.
That's four minutes gone in the round.
Mauler circles away from the clinch attempt
enabling Mauler to counter with a crisp jab.
The fans in attendance giving it up for the two fighters, who have really let it all hang out in the last minute or so!
Mauler swings away with a body shot that misses
and Mauler takes a counter punch right on the button for his troubles.
Mauler slips a jab from Chocula.
Chocula fakes a head shot and lands one to the body.
Mauler avoids a punch combination nicely.
Mauler throws a leg kick which misses Chocula's front leg but catches the back leg as Chocula tries to avoid it.
Mauler fakes high and swings low for a body shot but Chocula manages to avoid it.
Mauler misses the shot to the body.
And thats the end of the round the fighters go back to their corners.
Darth Mauler dominated that round.
The cut man is working on Darth Mauler's cut.
The corners get their ten second warning. Both fighters stand from their stools and stare eachother down, ready to get back to the action.
Mauler looks to score with a jab to the body but Chocula is just out of range.
Good standup being displayed there by Chocula as he connects with a hook.
Decent striking displayed by Chocula there.
Mauler throws a head kick that misses.
Chocula looks like he wants to counter punch here.
Mauler avoids a punch combination nicely.
Chocula cracks Mauler with a good jab.
Chocula digs a good body shot into Mauler's ribs.
We've had a slow start to the round here - hopefully the action picks up.
Chocula keeping his hands up high there, blocking the jab from Mauler.
Mauler lands a slapping body shot.
Mauler takes a step towards his opponent and connects with a left hand, before circling away.
Chocula throws a body punch but Mauler moves out of range.
That's one minute gone in the round.
Mauler slips a jab from Chocula.
Mauler chopping away at his opponent's legs.
Mauler takes a body punch but keeps moving.
Mauler on the wrong end of a nice hook.
Darth Mauler is winning the standup battle so far.
Mauler slips under a jab from Chocula.
Mauler is looking to counter with head kicks.
Mauler needs to keep his hands up - Chocula had a free shot at his head there.
Mauler doesn't react quick enough there as he takes a shot to the body.
Chocula tries to close the distance and clinch up but Mauler swats him away and circles back towards the center.
Chocula just misses with a punch to the body.
Chocula has his head snapped back a nice jab. A little nod from Chocula there as he acknowledges the shot.
The fighters circling - Chocula throws out the jab but it was never going to land.
Mauler looks to score with a jab to the body but Chocula is just out of range.
That's two minutes gone in the round.
Mauler misses with a body kick.
Chocula misses with a body shot. Nice footwork from Mauler.
Mauler throws a hook to the body but it doesn't connect.
Chocula lands a nice looking body shot.
The crowd are loving this. Great action here.
Chocula tries to clinch but Mauler moves out of range.
Mauler quickly followed up with a counter body kick but doesn't connect.
Chocula wings a very wild body shot but it does the job and lands to the midsection.
Mauler throws a leg kick that is checked
letting Chocula counter with a right hand.
Mauler throws a jab but it's blocked by Chocula.
Chocula misses with a looping left.
Mauler lands a jab, followed by a cross and another cross, as Chocula backs up against the cage.
It looks like Count Chocula has been cut.
Mauler walks straight into an uppercut. Luckily it didn't land flush.
Mauler misses the shot to the body.
Chocula steps in looking to clinch after the strikes miss from Mauler.
Mauler has not gone for a single takedown so far in this fight, which seems like a very strange tactic when you consider that he has the superior wrestling and BJJ.
That's three minutes gone in the round.
Mauler swings for the body but Chocula moves out of range.
Mauler just misses with a punch to the body.
Mauler misses with a body shot.
Chocula throws a poor cross that misses
and Mauler counters with a nice low kick that buckles Chocula's knee momentarily.
Mauler lands a big head kick that sends Chocula tumbling to the mat! Mauler takes a step backwards and waves Chocula back to his feet - he wants the finish!
Chocula is rocked!
Chocula takes a swing at Mauler's ribcage but misses.
Mauler was looking to counter that last move with a shot to the body but he didn't commit.
Chocula is still on wobbly legs! Can Mauler finish him?
Mauler takes a jab on the nose. He smiles like he loves it and keeps coming.
Chocula seems to have recovered his senses.
Chocula tries to close the distance and clinch but Mauler swats him to one side with an open hand palm strike and circles away.
Mauler dips to his left and cracks Chocula with an uppercut!
This has been an exciting period of action!
Mauler dips to his left and cracks Chocula with an uppercut!
Chocula avoids a kick to the body.
Chocula tries to clinch there but Mauler circles away.
It looked like Mauler wanted to counter with a hook but didn't fully commit.
That's four minutes gone in the round.
Mauler takes a swing at Chocula's ribcage but misses.
Mauler throws a sloppy head kick
and Chocula counters with a crisp hook to the side of the head.
Chocula looks to land a left hand but Mauler moved out of range nicely.
Mauler is looking to counter with a shot to the body.
Chocula jabbing away but nothing is landing.
Mauler looked to counter that last move with a leg kick but didn't pull the trigger.
Mauler throws the left hand but Chocula avoids the punch easily.
Mauler uses some good footwork to avoid the body shot by Chocula.
A quick step to the side and Mauler tries to counter with a shot to the body but it doesn't connect.
Chocula keeping at a good range here, avoiding a leg kick.
Chocula looks to score with a jab to the body but Mauler is just out of range.
Mauler just misses with a punch to the body.
A slow jab from Mauler misses its intended target.
Chocula is trying to avoid his opponent's strikes and get into the clinch.
Mauler throws a lazy uppercut
and Mauler takes a counter punch right on the button for his troubles.
Chocula throws a poor cross that misses
letting Mauler counter with a right hand.
And thats the end of the round the fighters go back to their corners.
That was a close second round but I would say that Darth Mauler will probably get the nod.
Both fighters have cut men working on them during the interval.
The referee calls time. The cornermen exit stage left and we're back to business. This is the final round!
Mauler fakes with a right hand and throws a good leg kick, right into the thigh. That had to hurt Chocula.
Chocula digs a good hook to Mauler's body.
Mauler ducks under a wild hook from Chocula.
The sound of bone on bone echoes around the arena as Chocula checks a leg kick.
Chocula misses with a hook
and Mauler counters with a nice leg kick.
Mauler throws a sloppy head kick
and Chocula counters with a shot to the ribs. That looked like it hurt.
Chocula takes a swing at Mauler's ribcage but misses.
Chocula avoids the body shot from Mauler.
We've had a slow start to the round here - hopefully the action picks up.
Chocula scores with a decent looking hook.
Chocula ducks down and throws a hook to the body.
A lazy body kick from Mauler
and Chocula counters with a lovely shot to the body.
Chocula with a body punch. A glancing blow.
That's one minute gone in the round.
Chocula waving his hands out in front of him, looking to distract Mauler.
A counter left hand to the body from Mauler misses its target.
Nice defenses there by Mauler.
Mauler throws a counter high kick but Chocula was just alert enough to avoid it.
Mauler avoids the body shot from Chocula.
Chocula throws an off balance right hand
and Mauler makes the exchange count by landing a cracking kick to the body. Chocula really felt that one!
Mauler throws a body kick that misses
and Chocula counters with a shot to the ribs. That looked like it hurt.
Chocula ducks down and throws a hook to the body but Mauler moves away.
Mauler swings for the body but Chocula moves out of range.
A countering left hand to the body from Chocula misses.
Mauler missing with a left hand there. Chocula was out of range so wasted energy throwing that one.
Chocula swings away with a counter right hand but no contact made.
Mauler misses with a body shot. Nice footwork from Chocula.
Chocula steps in looking to clinch after the strikes miss from Mauler.
Chocula connects with a single shot there.
Mauler misses with a shot to the body
and Chocula counters with a lovely straight right hand!
Chocula keeping his hands up high there, blocking the jab from Mauler.
That's two minutes gone in the round.
Chocula scores with a jab.
Mauler is rocked!
Chocula bobs and weaves and throws out a fast jab that snaps Mauler's head backwards.
Oh Mauler is still all over the place! His legs are completely gone! Will he be able to recover?!!
Chocula cracks Mauler with a good shot that sees him stumbling back into the cage.
This is a great period of action - very entertaining stuff!
Chocula tries to bum rush Mauler with a series of wild strikes but Mauler uses good footwork to avoid the assault.
Chocula slips a straight right by Mauler.
Mauler seems to have got his legs back now.
Chocula tries to clinch there but Mauler circles away.
A little feinted left hand from Mauler on the counter but he doesn't commit to it.
Mauler buckles his opponent's knee momentarily with a nice leg kick.
Mauler swings wildly with a right hand that was never going to find it's target.
Chocula connects with a body shot.
Chocula tries to clinch but Mauler moves out of range.
That's three minutes gone in the round.
Mauler misses with a body shot.
A left lands for Chocula.
Chocula tries to land with a swinging hook to the body but Mauler was well out of range. Poor timing from Chocula.
Chocula tries to close the distance and clinch but Mauler swats him to one side with an open hand palm strike and circles away.
Mauler fakes a jab and scores with a low kick.
A shot to the body from Mauler misses
and Chocula counters with a good right hand that lands right on the jaw.
Chocula waving his hands out in front of him, looking to distract Mauler.
Chocula's leg has a nasty welt from taking a succession of leg kicks. That must be slowing him down.
Mauler throws a half hearted mid kick.
A little jabbing left from Chocula on the counter but it doesn't find it's target.
Mauler misses with a telegraphed body shot
and Chocula counters with a one-two to the body.
Chocula scores with a one two! Mauler had his feet all tangled up there and couldn't avoid the strikes.
Mauler wings a very wild body shot but it does the job and lands to the midsection.
This is a great period of action - very entertaining stuff!
Chocula wants to clinch.
Mauler is looking to counter punch.
That's four minutes gone in the round.
Mauler lets loose with a powerful body kick. Chocula will feel that in the morning.
Chocula connects with a nice looking jab.
Chocula jabbing away but nothing is landing.
Mauler staying out of range there.
Chocula gets in close and instigates a clinch.
Chocula lands a right hand that snaps the head of Mauler backwards.
Chocula working aggressively here.
Mauler tries to land a shot to the body but it's blocked.
And that's the end of the fight!
Count Chocula comfortably won the final round on my scorecard.
I think Mauler has won this one but let's see what the judges have to say. Over to the ring announcer for the scorecards.
Ladies and gentlemen, after 3 rounds of action, we go to the scorecards for a decision.
Judge David Hoff scores the fight for Count Chocula!
Judge Sandra Marshall scores the fight for Count Chocula!
Judge Michael Johnstone scores the fight for Count Chocula!
Count Chocula wins by unanimous decision!
Count Chocula spent the whole post fight interview bigging himself up. It didn't go down that well with the fans after a while as they thought it was a bit arrogant.
|
|
|
|
|
|
|
|
|
|
|
|
|
|
|
|
|
|
|
|
|
|
|
| S |
C
A |
G |
S |
C
B |
G |
|
S |
C |
G |
|
energy
A | B |
|
hype
A | B |
|
pop
A | B |
|
mgr
A | B |
|
FIGHT
RATING
68% |
|
|
|
|
|
|
|
|
|
|
