 |
Stomp-a-thon 41 PBP Commentary |
Undercard bout
|
|
|
|
Undercard bout
|
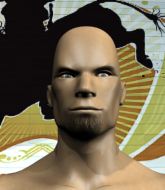
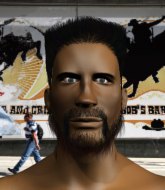
Coming up we have a heavyweight MMA rules bout between Lamont Walker (ranked 0 p4p, 0 weight class) and Tyler McClain (ranked 0 p4p, 0 weight class). The crowd seem to be enjoying McClain's choice of entrance music: New Found Glory - Ready and Willing. I'm sure you'll be fascinated to know that I was talking to some pointless Z list celebrity before the fight and he thought that Tyler McClain was going to win. Let's see if he was right.
 |
|
 |
| 200 cm
18
275 lbs
1 - 0 - 0 |
|
186 cm
20
240 lbs
2 - 2 - 0 |
BJJ White Belt
Excellent boxer
Good chin |
|
Good takedowns
Basic striking
Solid chin |
|
| |
|
Ladies and gentlemen. This fight is 3 rounds, in the heavyweight division.
Introducing the fighter to my left, fighting out of the red corner.
With a record of
1 - 0 - 0, fighting out of Las Vegas, Lamont Walker!
And introducing the fighter to my right, fighting out of the blue corner.
With a record of
2 - 2 - 0, fighting out of Montreal, Tyler McClain!
The judges for this bout are Daniel Franklin, Alan Glass and George Francis.

The bell rings for round one and we are underway!
McClain misses with a body shot.
McClain misses with a straight right.
McClain misses with a wild combination.
McClain scores with a straight right hand, right through his opponent's guard.

It looks like Lamont Walker has been cut.
McClain bobs and weaves well there to avoid the strikes.
McClain lands a vicious shot with the stealth of a sniper and the strength of a viper. Are vipers that strong? I can think of lots of things that are stronger than a viper - not many rhyme with sniper though.
Walker throws a body punch but McClain moves out of range.
A swing and a miss from Walker.
Walker stuns McClain with a nice body shot, before stepping back out of range.

McClain shoots in and bounces Walker off the cage to secure the takedown into guard.
McClain seems content to control from guard here. He's going to have to remain active though if he doesn't want to get stood back up.
Walker avoiding any damage from the ground and pound.

That's one minute gone in the round.
McClain stays in close to Walker's body and controls the position.
Walker wants to stand but McClain is controlling the position.
McClain seems content to control from guard here. He's going to have to remain active though if he doesn't want to get stood back up.
Let's hope that McClain has the urge to step up the pace any second now because for the last 15 or 20 seconds he's just been holding on tight.
It looks like the ref is thinking about a standup.

That's two minutes gone in the round.
Neither fighter has done anything of merit for a good minute or two here and the crowd are not happy about it.
McClain stands and throws Walker's legs to the side, diving into side control.
McClain lands a few punches from side control.
The fighters are pressed up against the cage, both looking to find a bit of space to work.
Walker is looking to get back to his feet here but McClain is keeping cool and he's managed to take Walker's back.

McClain has the hooks in and he's looking for a rear naked choke here. Walker is defending well but eventually McClain manages to get an arm under the chin and he's locked on the RNC! Walker has no choice but to tap now! He does! This one is all over!
Ladies and gentlemen, after 2:56 of round 1, we have a winner by way of Submission (RNC). Tyler McClain!
|
|
|
|
|
|
|
|
|
|
|
|
|
|
|
|
|
|
|
|
|
|
|
| S |
C
A |
G |
S |
C
B |
G |
|
S |
C |
G |
|
energy
A | B |
|
hype
A | B |
|
pop
A | B |
|
mgr
A | B |
|
FIGHT
RATING
36% |
|
|
|
|
|
|
|
Undercard bout
|
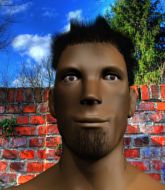
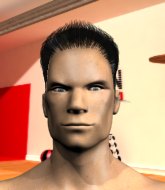
Coming up we have a welterweight MMA rules bout between Rascal Donkashane (ranked 0 p4p, 0 weight class) and Bob Sinclur (ranked 0 p4p, 0 weight class). Sinclur has chosen Ganjaman as his entrance music. Over to our ring announcer for the fighter introductions!
 |
|
 |
| 183 cm
21
180 lbs
3 - 0 - 0 |
|
185 cm
20
175 lbs
1 - 0 - 0 |
BJJ Purple Belt
Counter fighter
Granite chin |
|
BJJ Blue Belt
Counter fighter
Tends to cut |
|
| |
|
Ladies and gentlemen. This fight is 3 rounds, in the welterweight division.
Introducing the fighter to my left, fighting out of the red corner.
With a record of
3 - 0 - 0, fighting out of New York, Rascal Donkashane!
And introducing the fighter to my right, fighting out of the blue corner.
With a record of
1 - 0 - 0, fighting out of Hilo, Bob Sinclur!
The judges for this bout are Chris Downing, George Francis and Stewart Dunkirk.
The bell rings for round one and we are underway!
Sinclur doesn't manage to clinch there - Donkashane circles away.
Donkashane fails to land with a series of punches.
Sinclur looked like he wanted to counter with a punch but didn't throw it.
Sinclur misses with a few strikes there.
Donkashane is looking for a counter combo.
Donkashane tries to clinch
and Sinclur counters with a good right hand that lands right on the jaw.
Donkashane chopped to the floor by a nice leg kick but he springs right back up before Sinclur can pounce on him.

Donkashane closes the distance and scores a nice trip takedown into half guard. Sinclur did well to prevent Donkashane getting side control.
Donkashane has been talking about how he's improved his wrestling in the run up to the fight so let's see if that's enough to sway the balance.

Donkashane in half guard on the top. He's looking for a kimura... He's got it locked and he's managed to free his trapped foot. Sinclur tries to escape but it's on too tight and he has to tap! Great BJJ skills there from Donkashane!
Ladies and gentlemen, after 0:53 of round 1, we have a winner by way of Submission (Kimura). Rascal Donkashane!
The defeated Bob Sinclur had this to say: 'Too much weed :('.
|
|
|
|
|
|
|
|
|
|
|
|
|
|
|
|
|
|
|
|
|
|
|
| S |
C
A |
G |
S |
C
B |
G |
|
S |
C |
G |
|
energy
A | B |
|
hype
A | B |
|
pop
A | B |
|
mgr
A | B |
|
FIGHT
RATING
98% |
|
|
|
|
|
|
|
Undercard bout
|
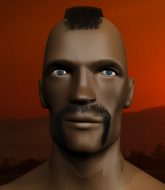
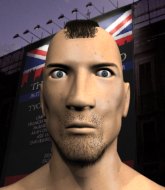
Coming up we have a super heavyweight MMA rules bout between Ham Sammich (ranked 0 p4p, 0 weight class) and Manni Megakelle (ranked 0 p4p, 0 weight class). Sammich comes to the cage accompanied by Dadude Sandstorm. Manni Megakelle will no doubt be trying to keep this one on the feet, where he has a distinct advantage.
 |
|
 |
| 150 cm
18
300 lbs
3 - 1 - 0 |
|
225 cm
19
300 lbs
3 - 0 - 0 |
BJJ Blue Belt
Brawler
Good chin |
|
BJJ White Belt
Decent boxing
Determined |
|
| |
|
Ladies and gentlemen. This fight is 3 rounds, in the super heavyweight division.
Introducing the fighter to my left, fighting out of the red corner.
With a record of
3 - 1 - 0, fighting out of Las Vegas, Ham Sammich!
And introducing the fighter to my right, fighting out of the blue corner.
With a record of
3 - 0 - 0, fighting out of Amsterdam, Manni Megakelle!
The judges for this bout are Robert Twigg, Frank Dennis and Chris Downing.
The bell rings for round one and we are underway!
Sammich throws a lazy uppercut
and Megakelle counters with a two punch combo.
Megakelle looks to score with a combo but nothing lands.
Megakelle displays some good footwork, moving neatly out of range as Sammich throws out the jab.
Sammich throws a hook but Megakelle blocks it.
As Sammich backs off Megakelle throws a huge counter combo but Sammich manages to avoid it all.
Sammich misses with a series of wild punches.
Megakelle steps in looking to clinch after the strikes miss from Sammich.
Sammich fails to land with the punch combination there - jab, cross, hook, miss, miss, miss.
Sammich throws a combination but it was largely blocked by Megakelle.
Megakelle has been spending a lot of time sparring his boxing in the run up to the fight, trying to sharpen up those hands and look for a knockout.
Sammich swings wildly with a couple of big hooks
and Megakelle counters with a quick right hand to the jaw.

Sammich clinches.

Sammich escapes the clinch and we're back to striking.
Sammich misses with a right hand
letting Megakelle counter with a right hand.
The fans in attendance giving it up for the two fighters, who have really let it all hang out in the last minute or so!
A combination from Sammich does no damage.
Sammich misses with a straight left.
Sammich throws a right and a left that Megakelle avoids nicely.
Megakelle ducks under a wild hook from Sammich.
That's one minute gone in the round.
Sammich looks to score with a combo but nothing lands.
Sammich throws a jab, cross combination which is slipped
and Megakelle counters with a two punch combo.
Sammich is breathing heavily.
Sammich throws a left and a right that both miss
and Megakelle counters with a crisp hook to the side of the head.
Megakelle closes the distance and lands a one-two.
Sammich swings wildly with a couple of big hooks
and Megakelle counters with a two punch combo.
Sammich throws a poor cross that misses
and Megakelle counters with a three punch combination, finished off with a leg kick. Nice work.
It looks like Ham Sammich has been cut.
We've seen a great period of action over the last minute or so - credit to both fighters for going all out!
Sammich throws a right and a left that both miss.
Megakelle lets the fists fly and connects with a left straight followed by a right hook.
Megakelle lands a head kick. Sammich smiles back at him and beckons him forward.
Sammich throws a combination that misses
and Sammich takes a counter punch right on the button for his troubles.
Sammich takes one on the button.
Sammich looks to be in better condition than last time we saw him fight. Obviously he's been working hard on his cardio.
Megakelle keeping a good distance there, avoiding the body shot.
Sammich walks into a stiff left hand from Megakelle.
That's two minutes gone in the round.
A head kick misses from Megakelle.
Megakelle misses with a few strikes there.
Sammich misses with a wild body shot.
As Sammich backs off Megakelle throws a huge counter combo but Sammich manages to avoid it all.
Sammich pushes Megakelle up against the cage in a clinch.
Sammich breaks the clinch and we return to the middle of the mat.
Megakelle is working the combinations to good effect here.
Sammich avoids a punch combination nicely.
Sammich will need to tighten up his combinations if he doesn't want to gas himself out, swinging at thin air.
Megakelle is using his reach advantage to land shots from outside his opponent's range.
Megakelle lands three nice shots there - that looked like it hurt!
Megakelle misses with a two punch combination.
Sammich swung with a counter right hand that didn't connect.
Sammich is really struggling to find his range with his punches. Megakelle's reach advantage is clearly causing him problems.
Megakelle avoids the body shot from Sammich.
Megakelle steps in looking to clinch after the strikes miss from Sammich.

That's three minutes gone in the round.
Sammich lands a lovely overhand right.
Ham Sammich seems to be the more aggressive standup fighter in this bout.
Sammich misses with a telegraphed body shot
and Megakelle counters with a series of strikes. Sammich will be more careful next time no doubt.
Sammich closes the distance and clinches.
Sammich manages to break the clinch.
Sammich misses with a body shot. Nice footwork from Megakelle.
No joy there for Sammich, who threw a few shots but didn't land.
Sammich fails to land with a series of punches.
A punch combination from Sammich misses.
Megakelle's corner calls for a 1, 2 combination and Megakelle duly obliges.
Megakelle looks to land a combination but Sammich avoids it well.
Sammich throws a combination that misses
and Megakelle counters with a straight right hand.
This has been an exciting period of action!
Megakelle lands an overhand right.

That's four minutes gone in the round.
Sammich throws a jab, cross combination which is slipped
and Megakelle counters with a three punch combination, finished off with a leg kick. Nice work.
A nice combination there by Megakelle.
Megakelle dodges the punch combination from Sammich.
Megakelle lands a jab followed by a nice looking cross.
Sammich rushes Megakelle and presses him up against the cage.
Sammich breaks from the clinch.
Sammich misses with a two punch combination.
Sammich misses with a combination
and Megakelle counters with a three punch combo that has Sammich backing up. Sammich nods at Megakelle to acknowledge the strikes.
The crowd applaud the fighters' efforts here as the round comes to an end.
Megakelle jabs Sammich right on the nose. Sammich blinks but takes it well.
Sammich misses with a series of wild punches.
Megakelle unleashes a big counter combination but Sammich bobs and weaves and avoids any damage.
And thats the end of the round the fighters go back to their corners.
Manni Megakelle dominated that round.
The cut man is working on Ham Sammich's cut.
Well, the break between rounds is over. Let's get back to the scrappin!

Sammich misses the body punch
and Megakelle counters with a quick right hand to the jaw.
Megakelle takes one to the chin there.
Sammich throws a series of punches but Megakelle avoids them all with ease.
Ham Sammich is looking to throw some combinations by the looks of things.
Sammich misses with a two punch combination.
Sammich throws a hook to the body but it doesn't connect.
Megakelle throws out a counter right but Sammich avoids it with no problem.
Sammich looks to score with a jab to the body but Megakelle is just out of range.
Megakelle is looking for the big counter here.
Sammich throws a jab, cross combination which is slipped
and Megakelle counters with a three punch combo that has Sammich backing up. Sammich nods at Megakelle to acknowledge the strikes.
Sammich throws a combination that misses
and Megakelle counters with a nice uppercut.
A combination from Megakelle does no damage.
Sammich takes a body punch but keeps moving.
Both fighters are absolutely exhausted here.
Megakelle lands a jab. Then a cross. Then finally a nice hook to the body. Good work there by Megakelle.
This has been an exciting period of action!
Megakelle uses good head movement to avoid the hook from Sammich.
Sammich avoids a punch combination nicely.
That's one minute gone in the round.
Sammich throws a combination but comes up with nothing but fresh air.
Sammich will need to tighten up his combinations if he doesn't want to gas himself out, swinging at thin air.
A punch combination from Sammich misses.
Sammich looks like he's developed a pretty tasty lump over his left eye. He'll need to avoid taking much more damage to that.
Megakelle throws a combination but it was largely blocked by Sammich.
Manni Megakelle seems to be getting the better of the standup.
Sammich has his head slapped from side to side by a 3 punch combination. That must have hurt him.
Sammich has not gone for a single takedown so far in this fight, which seems like a very strange tactic when you consider that he has the superior wrestling and BJJ.
Sammich throws an ugly left hook that misses
and Megakelle counters with a series of strikes. Sammich will be more careful next time no doubt.
Sammich misses with a jab and misses with a cross straight after too.
Sammich looks shocked there as he takes a right hand to the temple.
Sammich swings away but doesn't land with a series of punches.
Megakelle defending well as Sammich loads up on a big left hand.
A combination from Megakelle does no damage.
That's two minutes gone in the round.
This is a great period of action - very entertaining stuff!
Megakelle ducks down and throws a hook to the body but Sammich moves away.
Sammich will need to tighten up his combinations if he doesn't want to gas himself out, swinging at thin air.
Megakelle has been the more effective fighter overall so far.
Sammich misses with a double jab
and Megakelle counters with a lovely straight right hand!
Megakelle stalks Sammich and leaps in with a furious combination of punches. Uppercuts and crosses smash into Sammich's face. Sammich staggers backwards, shaken.
Sammich closes the distance and pushes Megakelle back into the cage.
Megakelle has used his reach advantage pretty well so far tonight.
Sammich escapes the clinch and we're back to striking.
Sammich misses with an uppercut. Megakelle saw that one coming.
Sammich rushes in with a sloppy looking punch
and Megakelle counters with a nice jab to the body that keeps Sammich thinking.
Sammich misses with a hook.
Sammich throws a right hand that Megakelle ducks under and follows up with a left that Megakelle also avoids with ease.
That's three minutes gone in the round.

Megakelle forces Sammich back against the cage and clinches.

Megakelle's corner calls for him to break the clinch, which he does.
Sammich takes a punch to the jaw and another one to the bread basket.
Sammich looks to score with a combo but nothing lands.
A combination from Sammich does no damage.
Sammich throws a right hand that Megakelle ducks under and follows up with a left that Megakelle also avoids with ease.
Megakelle jabs. That one connects to the head of his opponent.
Sammich on the wrong end of a nice hook.
A punch combination from Sammich misses.
Sammich needs to keep his hands up - Megakelle had a free shot at his head there.
Megakelle closes the distance and lands a one-two.
The crowd are loving this. Great action here.
Megakelle misses with a jab, cross combination.
That's four minutes gone in the round.
Megakelle dodges the punch combination from Sammich.
It seemed like Megakelle was going to counter with the hook but didn't fully commit to it.
Sammich avoids a punch combination nicely.
Sammich tries to bum rush Megakelle with a series of wild strikes but Megakelle uses good footwork to avoid the assault.
Some wild striking there from Sammich.
Megakelle is loading up here, looking for a big counter of his own.
Megakelle darts in and out, connecting with a jab.
Sammich misses with a jab, cross combination.
Megakelle is looking for the big counter here.
Megakelle slips a straight right by Sammich.
Megakelle with a jab.
Megakelle might want to mix his strikes up a bit more. He's just going for head shots at the moment and that can become a bit predictable.
Megakelle displaying good standup as he scores with a three punch combination.
And thats the end of the round the fighters go back to their corners.
Manni Megakelle showed his class in that round. I'd imagine he'll take it on all the scorecards.
The cut man is working on Ham Sammich's cut.
The fighters' corners scream their final instructions, as the referee calls time. Here we go, back to the action! The crowd applaud as we get ready to start the final round!

Megakelle misses with a jab and misses with a cross straight after too.
Sammich forces Megakelle back against the cage and clinches.
Sammich breaks the clinch.
Megakelle misses with a double jab.
Megakelle rushes forward with a series of wild hooks but Sammich moves out of range and avoids them all easily.
Megakelle misses with a jab, cross combination.
Sammich throws a right hand that Megakelle ducks under and follows up with a left that Megakelle also avoids with ease.
Sloppy strikes from Sammich. Those never looked like landing.
Megakelle is loading up here, looking for a big counter of his own.
Sammich throws a right and a left that Megakelle avoids nicely.
We've had a slow start to the round here - hopefully the action picks up.
Megakelle avoids a punch combination nicely.
Sammich swings widly with a right hand
and Megakelle counters with a nice uppercut.
Both fighters are breathing heavily.
Sammich swings and misses with a shot to the body
and Megakelle counters with a three punch combo that has Sammich backing up. Sammich nods at Megakelle to acknowledge the strikes.
That's one minute gone in the round.
Sammich throws a monster uppercut resembling something out of street fighter but it doesn't land.
A nice side step and Megakelle releases a counter shot to the body, but it doesn't find it's home.
Megakelle lands with a straight right. Sammich didn't see that one coming.
Sammich misses with a series of wild punches.
Megakelle misses with a few strikes there.
Sammich throws a right hand that Megakelle ducks under and follows up with a left that Megakelle also avoids with ease.
Megakelle lets it all go there with a big combo counter but none of the punches connected.
Sammich fails to land with the punch combination there - jab, cross, hook, miss, miss, miss.
Megakelle unleashes a big counter combination but Sammich bobs and weaves and avoids any damage.
Sammich avoids a punch combination nicely.
Megakelle uses some good footwork to avoid the body shot by Sammich.
Sammich throws a lazy uppercut
and Megakelle counters with a three punch combo that has Sammich backing up. Sammich nods at Megakelle to acknowledge the strikes.
Sammich throws an overhand right that lands on Megakelle's shoulder, as Megakelle tries to avoid the shot.
Sammich misses with a wild body shot.
Megakelle is looking for the big counter here.
That's two minutes gone in the round.
Sammich fakes high and swings low for a body shot but Megakelle manages to avoid it.
Despite the aggression on Megakelle's face he doesn't fully commit to the counter.
Sammich has Megakelle up against the cage in a clinch.
Megakelle breaks the clinch and we're back to striking at distance.
Megakelle avoids a punch combination nicely.
The crowd are loving this. Great action here.
Sammich misses with a left hand
and Megakelle connects with a straight left hand counter down the middle.
Sammich throws a series of punches but Megakelle avoids them all with ease.
Megakelle throws a combination. Sammich tries to block but a couple of punches get through.
Sammich rushes forward with a series of wild hooks but Megakelle moves out of range and avoids them all easily.
Sammich misses with a few strikes there.
Megakelle scores with a nice one two combo and darts back out of range to avoid anything coming in the opposite direction.
Ham Sammich has stepped it up - he knows he needs a finish here!
That's three minutes gone in the round.
Sammich dodges the punch combination from Megakelle.
Sammich takes the fight into the clinch.
Sammich's corner calls for him to break the clinch, which he does.
Sammich gets a clinch.
Sammich manages to break the clinch.
Sammich misses with a few strikes there.
Sammich moves into range and clinches up with Megakelle.
Sammich breaks from the clinch.
Sammich dodges the punch combination from Megakelle.
That's four minutes gone in the round.
Sammich will need to tighten up his combinations if he doesn't want to gas himself out, swinging at thin air.
Megakelle misses with a double jab.
Sammich misses with a double jab
and Megakelle counters nicely by changing levels and landing a hook to the body.
Megakelle fails to land with a series of punches.
Sammich misses with a two punch combination.
This is a great period of action - very entertaining stuff!
Megakelle connects with a jab.
Megakelle rushes forward with a series of wild hooks but Sammich moves out of range and avoids them all easily.
Sammich swings wildly with a couple of big hooks
and Megakelle counters with a straight punch to the midsection.
Sammich takes a punch to the jaw and another one to the bread basket.
Manni Megakelle is fighting for a decision - hopefully he's judged it right and he's actually winning the fight.
Sammich misses with a two punch combination.
And that's the end of the fight!
I would just about give that final round to Manni Megakelle.
I've got Megakelle winning every round here. Surely the decision will go his way and he'll pick up a well deserved decision victory. Over to the ring announcer for the scorecards.
Ladies and gentlemen, after 3 rounds of action, we go to the scorecards for a decision.
Judge Robert Twigg scores the fight 27:30
Judge Frank Dennis scores the fight 27:30
Judge Chris Downing scores the fight 27:30
In favor of your winner, by unanimous decision... Manni Megakelle!
Ham Sammich spoke after the fight, saying 'He was on steroids!'.
|
|
|
|
|
|
|
|
|
|
|
|
|
|
|
|
|
|
|
|
|
|
|
| S |
C
A |
G |
S |
C
B |
G |
|
S |
C |
G |
|
energy
A | B |
|
hype
A | B |
|
pop
A | B |
|
mgr
A | B |
|
FIGHT
RATING
76% |
|
|
|
|
|
|
|
Undercard bout
|
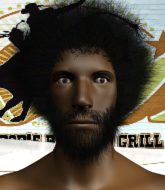
Coming up we have a lightweight MMA rules bout between Paullly Pullman (ranked 0 p4p, 0 weight class) and Scott Wood (ranked 0 p4p, 0 weight class). Paullly Pullman has a significant reach advantage - let's see if he can make it count.
 |
|
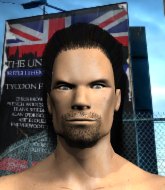 |
| 188 cm
18
165 lbs
0 - 1 - 0 |
|
175 cm
21
158 lbs
3 - 0 - 0 |
Good wrestling
Counter fighter
Granite chin |
|
Decent wrestler
Decent boxing
Good gas tank |
|
| |
|
Ladies and gentlemen. This fight is 3 rounds, in the lightweight division.
Introducing the fighter to my left, fighting out of the red corner.
With a record of
0 - 1 - 0, fighting out of Amsterdam, Paullly Pullman!
And introducing the fighter to my right, fighting out of the blue corner.
With a record of
3 - 0 - 0, fighting out of Helsinki, Scott Wood!
The judges for this bout are Cecil Peabody, Alan Glass and Frank Dennis.
The bell rings for round one and we are underway!
Pullman blocks a jab.
Wood connects with a body shot that sends Pullman's belly button to the back.
No joy there for Wood, who threw a few shots but didn't land.
Wood throws a lazy right hand but Pullman sees it coming a mile off and sidesteps it easily.
Pullman closes the distance and takes a jab right on the nose as he does so.
Some wild striking there from Wood.
Wood rushes forward with a series of wild hooks but Pullman moves out of range and avoids them all easily.
We've had a slow start to the round here - hopefully the action picks up.
Wood misses with a two punch combination.
Pullman is pinned up against the cage taking some big shots here. The referee is looking closely deciding whether he should stop the fight.
Wood jabs at Pullman's body.
Wood lands with a two punch combination before moving back out of range.
That's one minute gone in the round.
Wood throws a monster uppercut resembling something out of street fighter but it doesn't land.
No joy there for Wood, who threw a few shots but didn't land.
Wood lands a jab followed by a nice looking cross.
Pullman shoots in for a takedown. He's persisting with it as Wood sprawls well. Wood wins this battle and keeps the fight standing. Pullman gets slowly back to his feet.
Wood tries to bum rush Pullman with a series of wild strikes but Pullman uses good footwork to avoid the assault.
Pullman showing good head movement there, avoiding the strikes from Wood.
A right-left combo lands from Wood.
That's two minutes gone in the round.
Wood cracks Pullman with a hook to the jaw. Both fighters smile at eachother and high-five before getting back down to business.
Wood lands an overhand right.
The crowd cheering loudly, showing their appreciation for the quality fight we're seeing here.
Pullman goes for a double leg but Wood avoids the attempt and the two fighters end up clinched against the cage as Wood continues to drive forward.
Pullman gets his takedown attempt stuffed easily
and Wood connects with a straight left hand counter down the middle.
That's three failed takedown attempts in the round for Paullly Pullman. That's going to take a lot out of him.
Wood throws a left jab followed by a right to the body, Oh Pullman colapses and takes a barrage of punches from Wood as he moves to mount! the ref stops the fight and Pullman is left battered and dazed whilst Wood and his camp cheer!
Ladies and gentlemen, after 2:36 of round 1, we have a winner by way of TKO (Strikes). Scott Wood!
Scott Wood really struggled to get his t-shirt on before his hand was raised. Making sure that Bushido Fightwear logo gets some air time is pretty tricky when you're all sweaty.
|
|
|
|
|
|
|
|
|
|
|
|
|
|
|
|
|
|
|
|
|
|
|
| S |
C
A |
G |
S |
C
B |
G |
|
S |
C |
G |
|
energy
A | B |
|
hype
A | B |
|
pop
A | B |
|
mgr
A | B |
|
FIGHT
RATING
51% |
|
|
|
|
|
|
|
Undercard bout
|
Coming up we have a featherweight MMA rules bout between Rocky Bullwinkle (ranked 0 p4p, 0 weight class) and Mat Kenny (ranked 0 p4p, 0 weight class). Over to our ring announcer for the fighter introductions!
 |
|
 |
| 190 cm
18
150 lbs
2 - 0 - 0 |
|
181 cm
19
145 lbs
1 - 2 - 0 |
BJJ White Belt
Good knees
Cuts easily |
|
BJJ Purple Belt
Counter fighter
Tends to cut |
|
| |
|
Ladies and gentlemen. This fight is 3 rounds, in the featherweight division.
Introducing the fighter to my left, fighting out of the red corner.
With a record of
2 - 0 - 0, fighting out of Hilo, Rocky Bullwinkle!
And introducing the fighter to my right, fighting out of the blue corner.
With a record of
1 - 2 - 0, fighting out of London, Mat Kenny!
The judges for this bout are Daniel Franklin, Robert Twigg and Wesley Smith.
The bell rings for round one and we are underway!
Bullwinkle pushes Kenny up against the cage in a clinch.
Bullwinkle lands a knee to the body.
Bullwinkle throws a vicious knee straight up the middle but Kenny blocks it with crossed arms.
Bullwinkle lands a nice knee to the body.
Our sources have told us that Bullwinkle has been working on his knees in the buildup to the fight.
Bullwinkle lands a knee to the head.

It looks like Mat Kenny has been cut.
Bullwinkle tries to land a knee to the head but misses.
Kenny works for the underhooks and manages to get a trip takedown into guard.
Bullwinkle keeping moving, preventing Kenny from controlling successfully.
Kenny lands a couple of digs.
Bullwinkle wants to stand and escape but Kenny is having none of it.
Kenny distracts Bullwinkle with his right hand and drops a big elbow with his other arm.
Kenny looking to pass the guard.
Fantastic stuff here - a very entertaining period of action, which has drawn cheers from the crowd.
Kenny is trying to work a guillotine from the top, or something like that? Don't know how he thinks he's going to get a finish from there.
Kenny won't allow Bullwinkle to get back to his feet.
That's one minute gone in the round.
Bullwinkle utilising some decent striking defenses from the guard, preventing the ground and pound.
Bullwinkle knows he needs to get back to his feet asap. He's simply no match for Kenny on the ground.
Kenny landing some decent shots from guard.
Kenny stands and throws Bullwinkle's legs to the side, diving into side control.
Kenny tries for an arm triangle. That looks pretty tight to me. Is this one over!?! Possibly, maybe, no Kenny has let go of the choke. Obviously it wasn't as tight as we thought!
Kenny scores with a couple of short elbows.

Kenny decides to take the fight back to the feet.
Bullwinkle has Kenny up against the cage in a clinch.
That's two minutes gone in the round.
Kenny is looking for a takedown.
Bullwinkle using the Thai plumb to throw knees but Kenny has his back arched nicely, preventing the strike.
Bullwinkle working Kenny over with knees to the body.
Bullwinkle connects with a nasty looking knee right to Kenny's face.
Knees in the clinch landing for Bullwinkle.
The fans in attendance giving it up for the two fighters, who have really let it all hang out in the last minute or so!
Bullwinkle gets double underhooks to prevent a takedown attempt from Kenny.
Kenny looks winded!
Bullwinkle landing knees to the head.
Bullwinkle lands a knee to the head.
Kenny has Bullwinkle pressed up against the cage. He's trying to work for a single leg takedown. Kenny pulls back from the cage and twists to the side, sending Bullwinkle tumbling to the mat - Kenny dives into Bullwinkle's guard.
Bullwinkle is trying to stand up but he's not managed so far.
That's three minutes gone in the round.
Kenny with a nice head shot there.
Kenny has the superior BJJ but he's also working some ground strikes into his gameplan.
Kenny prevents Bullwinkle from getting back to his feet.
Bullwinkle trying desperately to get back to his feet here but he's not having any joy at all. He's going to tire himself out if he's not careful.
Kenny trying to control the position from guard on top but Bullwinkle is wriggling around, looking for whatever he can.
The fighters are pressed up against the cage, both looking to find a bit of space to work.
Kenny content to strike from guard, landing some decent shots.
Kenny controlling from the guard. I say controlling but really, he's stalling.
Bullwinkle trying to keep a closed guard but Kenny is proving a slippery customer.
That's four minutes gone in the round.
The crowd are starting to boo a lack of action.
Kenny stops Bullwinkle from standing up.

The referee has decided to stand the fighters back up, so we'll restart on the feet.
Bullwinkle gets in close and instigates a clinch.
Kenny can't get the takedown.
Rocky Bullwinkle has stuffed three takedown attempts in the round now. That's going to take a lot out of Mat Kenny.
Bullwinkle scores a nice knee to the body.
Bullwinkle tries to land a knee to the head but Kenny blocks with his arms.
Bullwinkle landing knees to the head.
Bullwinkle really does look like a pencil wearing a pair of gloves. Let's hope he has a gameplan to suit that ridiculous body shape.
Kenny is trying to break the clinch but Bullwinkle has him pressed against the cage.
Kenny letting Bullwinkle take a breather here.
Bullwinkle with an attempt at a knee that misses.
Bullwinkle with the Thai clinch, lands a knee to the head.
Bullwinkle landing knees to the head.
And thats the end of the round the fighters go back to their corners.
Rocky Bullwinkle dominated that round.
The cut man is working on Mat Kenny's cut.
That's the end of the round. The referee orders the cornermen out of the cage so we can get back down to business.
Bullwinkle has Kenny up against the cage in a clinch.
Bullwinkle is really dominating this fight. Is there anything that Kenny can do to turn this around?
Bullwinkle lands a knee to the head.
Bullwinkle connects with a knee to the head.
Bullwinkle connects with a knee to the head.
Bullwinkle misses with a knee strike.
Bullwinkle stalling against the cage.
Bullwinkle lands a knee to the head there! That was nasty!

Kenny is rocked!
A knee to the head by Bullwinkle.
Kenny is still on wobbly legs! Can Bullwinkle finish him?
A knee to the head by Bullwinkle.
Bullwinkle has Kenny pressed up against the cage in a tight Thai clinch. Kenny is arching his back, trying to avoid the knees but a big one sneaks through from Bullwinkle - that's hurt Kenny badly! Oh, another knee lands and Kenny is covering up! The referee steps in to save him - possibly a bit early but Kenny doesn't seem to be complaining.
Ladies and gentlemen, after 0:49 of round 2, we have a winner by way of TKO (Knees). Rocky Bullwinkle!
|
|
|
|
|
|
|
|
|
|
|
|
|
|
|
|
|
|
|
|
|
|
|
| S |
C
A |
G |
S |
C
B |
G |
|
S |
C |
G |
|
energy
A | B |
|
hype
A | B |
|
pop
A | B |
|
mgr
A | B |
|
FIGHT
RATING
47% |
|
|
|
|
|
|
|
Undercard bout
|
Coming up we have a featherweight MMA rules bout between Terrence Funk (ranked 0 p4p, 0 weight class) and Kotetsu Yamamoto (ranked 0 p4p, 0 weight class). Terrence Funk has the better chin. Will he look to stand and bang today?
 |
|
 |
| 167 cm
19
145 lbs
4 - 1 - 0 |
|
168 cm
19
149 lbs
1 - 1 - 0 |
Good wrestling
Basic striking
Very quick |
|
BJJ Purple Belt
Brawler
Determined |
|
| |
|
Ladies and gentlemen. This fight is 3 rounds, in the featherweight division.
Introducing the fighter to my left, fighting out of the red corner.
With a record of
4 - 1 - 0, fighting out of Montreal, Terrence Funk!
And introducing the fighter to my right, fighting out of the blue corner.
With a record of
1 - 1 - 0, fighting out of St Petersburg, Kotetsu Yamamoto!
The judges for this bout are Robert Twigg, Gwen Towbar and Alan Glass.
The bell rings for round one and we are underway!
Funk scores with a jab to the body.
Yamamoto throws a series of punches but Funk avoids them all with ease.
Funk throws a hard body shot but it just misses.
Funk looks for a takedown but Yamamoto sprawls well.
Yamamoto gets caught napping as Funk dives in and scores a takedown. Yamamoto manages to retain guard.
Yamamoto wants to stand but Funk is controlling the position.
Yamamoto trying to keep a closed guard but Funk is proving a slippery customer.
Funk is taking a break and basically stalling. The referee will not allow him to do that for long.
We've had a slow start to the round here - hopefully the action picks up.
Funk stands up over Yamamoto, holding his feet. He dives back in and lands a decent shot to the head.
Funk postures up and scores with a shot to the body and a follow up elbow to the head.
Funk trying to control but Yamamoto is working from the bottom.
Funk is taking a break and basically stalling. The referee will not allow him to do that for long.
That's one minute gone in the round.
Funk wants to control from the top but Yamamoto keeps moving.
Yamamoto is trying to control the position from the bottom.
Funk trying to land body shots but he keeps hitting the mat.
Yamamoto is trying to control the position but Funk postures up.

Yamamoto wriggles free and stands up.
Yamamoto lands with a cross to side of his opponent's head.
Kotetsu Yamamoto is looking to keep the fight on the feet at all costs.
Funk throws the left hand but Yamamoto avoids the punch easily.
Yamamoto throws out a counter right but Funk avoids it with no problem.
Yamamoto gets his head snapped back by a nice shot there.
Yamamoto throws a hook to the body but it doesn't connect.
Funk appears to be looking for a counter takedown.
Yamamoto is the aggressor but that punch slipped nicely by Funk.
Funk throws an overhand right that lands on Yamamoto's shoulder, as Yamamoto tries to avoid the shot.
Yamamoto slips under a jab.
That's two minutes gone in the round.
A jab from Yamamoto does it's job there.
Yamamoto scores with a big left there. The judges will like that one.
Funk doesn't succeed with the takedown
and Yamamoto counters with a stiff right hand.
Wooooo! Give it up for these two warriors! They are putting on a show!
A big left from Yamamoto misses.
Yamamoto sizes up Funk with a pawing jab and scores with a straight right down the middle.
Funk feints and then dives in with a takedown. That was a long way out but the feint bought him enough time to close the distance and complete the takedown. Now we'll play guard for a bit and see who can get the better of that position.
Both fighters have adopted an aggressive gameplan on the ground!
A big thud reverberates around the arena there as Funk accidentally thumps the mat. Hopefully he's not broken his hand.
The ref warns both fighters not to hold the cage as they work up against the meshing.
A big thud reverberates around the arena there as Funk accidentally thumps the mat. Hopefully he's not broken his hand.
Funk is fighting to break Yamamoto's control of his arms but Yamamoto is doing a good job of controlling the position at the moment.
We've been hearing that Funk has been drilling a lot of ground and pound in training, so let's see if he get the finish.
Funk is working the ground and pound from guard. He might want to try advancing position though to get more of an impact.
Funk missing there with some ground and pound from the guard.
Yamamoto controls Funk momentarily but Funk frees himself.
Yamamoto wants to stand up but Funk is controlling him.
The fighters are pressed up against the cage, both looking to find a bit of space to work.
That's three minutes gone in the round.
Hammerfist, elbow! yells Funk's corner. There ya go! There ya go!
Funk postures up to throw the ground and pound strikes but they don't connect.
Funk content to stall in guard here.
Funk is fighting to break Yamamoto's control of his arms but Yamamoto is doing a good job of controlling the position at the moment.
Yamamoto not looking particularly offensive just at the moment.
Funk landing with the ground and pound.
Funk throwing shots from guard but he's hitting more mat than opponent.
Yamamoto is pulling down on Funk's head to control his posture.
Yamamoto trying to control the position.
Hammerfist, elbow! yells Funk's corner. There ya go! There ya go!
That's four minutes gone in the round.
Yamamoto preventing the ground and pound from doing any damage.
Funk lands a nice shot whilst sitting in his opponent's guard.
Funk scoring with punches to the head and body.
Yamamoto wants to stand and escape but Funk is having none of it.
Funk controls from within his opponent's guard.
Funk throwing strikes but missing.
Funk throwing elbows and punches but not connecting, as Yamamoto works some decent striking defense from the bottom.
Funk postures up to throw the ground and pound strikes but they don't connect.
Yamamoto is adopting a defensive guard.
Funk missing there with some ground and pound from the guard.
And thats the end of the round the fighters go back to their corners.
Terrence Funk dominated that round.
That's time! Back to the action!
Funk fails to land the takedown.
Yamamoto looked like he wanted to counter with a punch but didn't throw it.
Terrence Funk seems to be the more aggressive standup fighter in this bout.
Funk throws out a powerful jab.
Yamamoto punishes Funk's body with a nice straight punch.
Funk throws a jab when Yamamoto was well out of range.
Funk gets his takedown attempt stuffed easily
and Yamamoto counters with a good right hand that lands right on the jaw.
Funk takes one to the side of the head.
Yamamoto has been working his punching technique in the buildup to the fight and it appears to be paying off.
Funk shoots in for a double leg but Yamamoto sprawls well. That's going to sap some energy.
That's three failed takedown attempts in the round for Terrence Funk. That's going to take a lot out of him.
Funk takes a swing at Yamamoto's ribcage but misses.
Funk shoots in looking for a double leg takedown. Yamamoto defends it nicely.
We've had a slow start to the round here - hopefully the action picks up.
Funk shoots in for a takedown. "Ole!" shouts Yamamoto as he jumps to the side.
Yamamoto keeps his opponent at a distance with a nice jab.
That's one minute gone in the round.
Yamamoto throws a nice hook to the body that draws an oooh from the crowd.
Yamamoto scores with a body shot.
Yamamoto scores with a jab.
Funk closes this distance looking for a takedown but Yamamoto circles away.
Yamamoto lands a really nice looking cross but Funk seems unphased.
Funk swings wildly with a right hand that was never going to find it's target.
Funk looking to score a takedown here. Yamamoto is defending well but Funk drives through and ends up in Yamamoto's guard.
Yamamoto pulls Funk in close to prevent any damage.
Funk in full guard, throwing the ground and pound. No damage this time.
Yamamoto pulls Funk in to control the position.
Yamamoto trying to keep a closed guard but Funk is proving a slippery customer.
Funk throwing shots from guard but he's hitting more mat than opponent.
That's two minutes gone in the round.
Hammerfist, elbow! yells Funk's corner. There ya go! There ya go!
The crowd are loving this. Great action here.
Yamamoto wants to control here, rather than go for any submissions from the bottom. At least for now.
Funk landing with the ground and pound.
Funk throws a big right hand that misses.
Terrence Funk overall seems to be getting the better of the ground position in the fight so far.
Yamamoto is controlling Funk's posture.
Funk trying to control the position from guard on top but Yamamoto is wriggling around, looking for whatever he can.
Funk postures up.
Yamamoto looking to control the pace of the fight rather than finish it.
Hammerfist, elbow! yells Funk's corner. There ya go! There ya go!
That's three minutes gone in the round.
Yamamoto keeping moving, preventing Funk from controlling successfully.
Yamamoto trying to keep a closed guard but Funk is proving a slippery customer.
Funk is in close to Yamamoto's body, working some short punches and elbows.
A big thud reverberates around the arena there as Funk accidentally thumps the mat. Hopefully he's not broken his hand.
Funk throwing shots from guard but he's hitting more mat than opponent.
Funk wants to control from the top but Yamamoto keeps moving.
Funk postures up to throw the ground and pound strikes but they don't connect.
Yamamoto is controlling Funk's posture.
The referee is asking the fighters to pick up the pace.
Yamamoto looking to control.
The ref stands the fighters back up due to a lack of activity.
Funk throws a looping left and ducks down for a takedown. He's got his arms around Yamamoto's waist but Yamamoto gets an underhook and avoids the takedown by throwing Funk off to one side.
That's four minutes gone in the round.
Well. There's a bit of a lull in the action here and the crowd are starting to get restless.
Nice shot lands for Yamamoto.
Funk throws an uppercut from half a mile away. Yamamoto sees it coming and avoids it easily.
Funk bobs and weaves into range and then changes levels and scores with a nice takedown into side control.
Yamamoto manages to land a sweep and he's now on top! Lovely Jiu Jitsu!
Funk wants to improve his position but Yamamoto is controlling well.
Yamamoto not doing much here.
Yamamoto trying to control from half guard but Funk is working away.
Funk tries to roll over but Yamamoto keeps him under control.
And thats the end of the round the fighters go back to their corners.
Kotetsu Yamamoto showed his class in that round. I'd imagine he'll take it on all the scorecards.
The fighters get back to their feet, the hooter sounds and we're back to the action! This is the final round!
Yamamoto throws a jab to the body, straight down the pipe. Boom. That sent Funk stumbling backwards but he manages to regain his composure quickly.
Funk misses with a hook to the body
and Yamamoto counters with a stiff right hand.
Funk throws out a token jab with nothing on it.
Funk drives through with a really nice takedown into side control.
Yamamoto regains half guard.
Yamamoto has no desire to be mounted, so is trying to control. Funk is working away from the top position though.
Funk wants to free his trapped foot but Yamamoto is holding on for dear life with his legs.
Funk is trying to control the action in half guard but Yamamoto is working away on the bottom, looking perhaps to get back to full guard.
We've had a slow start to the round here - hopefully the action picks up.
Yamamoto keeping his head moving to avoid the ground and pound.
Funk sitting and controlling from the half guard.
Yamamoto keeping his head moving to avoid the ground and pound.
That's one minute gone in the round.
Funk thows a wild elbow that connects with the canvas.
Funk lands with an elbow from half guard - that looked like it hurt.
Funk throwing shots but they're hitting the canvas more than the man.
Funk prevents Yamamoto from improving his position.
Funk throwing shots but they're hitting the canvas more than the man.
Funk looks towards his corner to check for any instructions. The corner give him nothing to work with, so he cracks Yamamoto with a short hammerfist. I guess that's as good as any advice he could get in this position.
Funk throws a strike but Yamamoto avoids it easily and moves to full guard.
Funk throwing shots from guard but he's hitting more mat than opponent.
Funk postures up to throw the ground and pound strikes but they don't connect.
Funk working from the guard for now, landing some ground and pound.
Funk is looking to work some ground and pound but Yamamoto has wrist control.
Funk lands a couple of elbows.
That's two minutes gone in the round.
Funk is fighting to break Yamamoto's control of his arms but Yamamoto is doing a good job of controlling the position at the moment.
Funk lands a couple of decent looking shots.
Funk working in close now, lands a nice elbow to the side of Yamamoto's head.
Funk works over Yamamoto with some ground and pound from guard.
Yamamoto not looking particularly offensive just at the moment.
Yamamoto controlling Funk's posture.
Funk stands up over Yamamoto, holding his feet. He dives back in and lands a decent shot to the head.
Funk postures up in Yamamoto's guard and throws a big left but Yamamoto blocks it.
Funk has to be careful here, sitting in the guard of a superior BJJ player.
Yamamoto is trying to keep Funk in close.
Funk working some ground and pound from guard but it's not doing any damage.
Funk landing some decent shots from guard.
That's three minutes gone in the round.
Funk is looking to work some ground and pound but Yamamoto has wrist control.
Yamamoto not looking particularly offensive just at the moment.
Funk is frustrating his opponent with some stalling tactics from top position.
A real slowdown in the pace of the fight for a moment, as Yamamoto holds on and takes a little breather.
Yamamoto is working from a closed guard but he's struggling to control his opponent.
Funk postures up in Yamamoto's guard and throws a big left but Yamamoto blocks it.
Funk landing some decent shots from guard.
Funk throwing shots from guard but he's hitting more mat than opponent.
Yamamoto not looking particularly offensive just at the moment.
That's four minutes gone in the round.
The crowd are getting on the fighters' backs, as the pace has dropped off in the last minute or so.
Yamamoto is pulling down on Funk's head to control his posture.
Yamamoto has momentary wrist control but Funk slips an elbow through the middle.
Funk controlling from the guard. I say controlling but really, he's stalling.
Funk wants to control from the top but Yamamoto keeps moving.
Funk throwing shots from guard but he's hitting more mat than opponent.
Funk trying to land body shots but he keeps hitting the mat.
Yamamoto has his hands on Funk's head, controlling the position.
The referee has motioned to the fighters to stand back up. He just wasn't happy with the level of activity.
The crowd thankful this round is nearly over.
Funk missing with a left hand there. Yamamoto was out of range so wasted energy throwing that one.
Kotetsu Yamamoto seems to be getting the better of the standup.
Yamamoto moving in and out of range nicely, whilst landing the scoring shot.
A slow jab from Yamamoto misses its intended target.
Funk shoots in and bounces Yamamoto off the cage to secure the takedown into guard.
And that's the end of the fight!
Terrence Funk showed his dominance in that final round.
I think Funk has won this one but let's see what the judges have to say. Over to the ring announcer for the scorecards.
Ladies and gentlemen, after 3 rounds of action, we go to the scorecards for a decision.
Judge Robert Twigg scores the fight 29:28
Judge Gwen Towbar scores the fight 29:28
Judge Alan Glass scores the fight 29:28
In favor of your winner, by unanimous decision... Terrence Funk!
|
|
|
|
|
|
|
|
|
|
|
|
|
|
|
|
|
|
|
|
|
|
|
| S |
C
A |
G |
S |
C
B |
G |
|
S |
C |
G |
|
energy
A | B |
|
hype
A | B |
|
pop
A | B |
|
mgr
A | B |
|
FIGHT
RATING
43% |
|
|
|
|
|
|
|
Undercard bout
|
Coming up we have a lightweight MMA rules bout between Marcus Beck (ranked 0 p4p, 0 weight class) and Dedrick Sledge (ranked 0 p4p, 0 weight class). Beck comes to the cage accompanied by Adventure Club - Do I See Color. Dedrick Sledge is the more experienced fighter, so let's see if that makes a difference tonight.
 |
|
 |
| 175 cm
24
160 lbs
4 - 0 - 0 |
|
168 cm
26
155 lbs
5 - 1 - 0 |
BJJ Blue Belt
Brawler
Cardio machine |
|
Good takedowns
Counter fighter
Enjoys gardening |
|
| |
|
Ladies and gentlemen. This fight is 3 rounds, in the lightweight division.
Introducing the fighter to my left, fighting out of the red corner.
With a record of
4 - 0 - 0, fighting out of Los Angeles, Marcus Beck!
And introducing the fighter to my right, fighting out of the blue corner.
With a record of
5 - 1 - 0, fighting out of Las Vegas, Dedrick Sledge!
The judges for this bout are Tiny Johnson, Stewart Dunkirk and Chris Downing.
The bell rings for round one and we are underway!
Beck throws a loose over hand right and dives in with a double leg takedown. Sledge tries to sprawl but it's too late and the fighters hit the mat. Beck is in Sledge's guard.
The fighters are pressed up against the cage, both looking to find a bit of space to work.
Sledge keeping moving, preventing Beck from controlling successfully.
Beck scoring with some ground and pound.
Sledge throws a couple of weedy looking strikes off his back.
Beck knows he needs to get back to his feet asap. He's simply no match for Sledge on the ground.
Sledge throwing his legs up looking for a triangle.
Beck throws a big right hand that misses.
Sledge controls Beck momentarily but Beck frees himself.
Sledge looking for a sweep. Not yet Sledge, not yet.
Beck controls from within his opponent's guard.
We've had a slow start to the round here - hopefully the action picks up.
Sledge has his foot on Beck's thigh. He's trying to push off and get in position for a triangle, I think. Beck works his way back into a safe position though.
Beck postures up and lands some nice ground and pound.
Beck wants to get up but he can't break Sledge's closed guard. He needs to be careful trying to break the legs open, as he's open to submissions here.
That's one minute gone in the round.
Sledge trying to keep a closed guard but Beck is proving a slippery customer.
Beck working some strikes from top position.
Beck scoring with some ground and pound.
Beck with a couple of shots to the head there. Not particularly brutal.
Sledge had isolated an arm as going for a kimura. Beck defends it easily.
Sledge is working actively off his back, looking to secure an arm or perhaps work for a triangle.
Beck postures up and scores with a shot to the body and a follow up elbow to the head.
Beck lands a couple of elbows.
Beck makes a bit of distance and scores with some ground and pound, still in guard.
Beck connects with a couple of short punches.
Sledge is throwing his legs up, looking for submissions. Beck is aware though and is defending well.
That's two minutes gone in the round.
Beck lands a couple of digs.
Sledge is rocked!
Sledge is looking for a guillotine. You can't force these things though and Beck defends well.
Sledge is still in real trouble! Can Beck finish him?
Sledge looks winded!
Beck working in close now, lands a nice elbow to the side of Sledge's head.
Beck gets to his feet and stands over Sledge, holding his ankles. He dives in with a big left hand that connects! Sledge felt that one! Beck unloads more punches and elbows and this one is over! The ref has dived in to save Sledge from any more punishment!
Ladies and gentlemen, after 2:28 of round 1, we have a winner by way of TKO (Strikes). Marcus Beck!
Marcus Beck very nearly forgot to thank V-Mask Clothing (10%) amongst all the excitement of his win but just as the interview came to a close, he screamed their name. Hopefully he'll get a few nice freebies in the mail as a thank you.
|
|
|
|
|
|
|
|
|
|
|
|
|
|
|
|
|
|
|
|
|
|
|
| S |
C
A |
G |
S |
C
B |
G |
|
S |
C |
G |
|
energy
A | B |
|
hype
A | B |
|
pop
A | B |
|
mgr
A | B |
|
FIGHT
RATING
46% |
|
|
|
|
|
|
|
Co-main event
|
Coming up we have a welterweight MMA rules bout between Third Foot (ranked 0 p4p, 0 weight class) and Justin Tyme (ranked 0 p4p, 0 weight class). Foot's ring entrance music is that housewives' favourite, dumber than a box of rocks. Both these guys have solid standup skills and neither is particularly fantastic on the ground, so let's hope for a nice standup war!
 |
|
 |
| 180 cm
19
182 lbs
7 - 1 - 0 |
|
183 cm
21
183 lbs
3 - 2 - 0 |
BJJ Blue Belt
Excellent boxer
Cardio machine |
|
BJJ Blue Belt
Excellent boxer
Powerful |
|
| |
|
Ladies and gentlemen. This fight is 3 rounds, in the welterweight division.
Introducing the fighter to my left, fighting out of the red corner.
With a record of
7 - 1 - 0, fighting out of Las Vegas, Third Foot!
And introducing the fighter to my right, fighting out of the blue corner.
With a record of
3 - 2 - 0, fighting out of Los Angeles, Justin Tyme!
The judges for this bout are Stewart Dunkirk, Tiny Johnson and Alan Glass.
The bell rings for round one and we are underway!
Tyme is looking to clinch.
Tyme walks into a straight right hand from Foot.
Tyme wants to clinch.
Foot is trying to close the distance and clinch up, after that failed offence from Tyme.
We've been informed that Tyme has been sparring a lot of Muay Thai in the buildup to this fight so let's see if that has an impact on the result.
Tyme tries to clinch up.
Foot ducks down and throws a hook to the body.
Foot has been working on his boxing with his coaches at Aliens Only Spa in the buildup to the fight.
Tyme dodges the punch combination from Foot.
Foot misses with a wild combination.
We've had a slow start to the round here - hopefully the action picks up.
Foot stooping low to avoid any incoming strikes and then lunges in with an uppercut come cross that lands flush.
Foot scores with a sloppy right hand. Tyme should have avoided that one.
Tyme fails in his attempt to clinch.
Tyme tries to clinch but is not successful on this occasion.
That's one minute gone in the round.
Tyme takes a punch right to his stomach. That took the wind out of him momentarily.
Foot fails to land with a series of punches.
Tyme has taken the fight to the clinch.
An uppercut on the inside fails to land for Tyme.
Tyme doesn't land with the attempted body shot.
Tyme lands a right hand.
Foot working hard to break the clinch.
Tyme has a couple of punches blocked by Foot.
Tyme softening up his opponent with strikes, against the cage.
Tyme gets through Foot's defenses to land a nice punch to the side of the head.
Foot can't break the clinch.
Foot is trying to work out of this bad position, with his back against the cage.
Tyme misses with a punch on the inside.
Tyme fails to land with a short punch on the inside.
Foot wants to break free. God knows he wants to breaaaak freeee.
That's two minutes gone in the round.
Foot is trying to push Tyme away but Tyme has him pressed against the cage, so he's going nowhere.
Foot doesn't land with the attempted body shot.
Tyme tries to land a shot to the body but it's blocked.
Foot lands with a left to the head.
Foot breaks the clinch and we're back to striking at distance.
Tyme fails in his attempt to clinch.
This is a great period of action - very entertaining stuff!
A shot to the body from Foot misses
and Tyme cracks him with a counter punch right on the button.
Foot throws an off balance right hand
and Tyme counters nicely by changing levels and landing a hook to the body.
Foot takes a swing at Tyme's ribcage but misses.
Tyme lets it all go there with a big combo counter but none of the punches connected.
Foot throws a jab but it's blocked by Tyme.
Foot throws a combination but comes up with nothing but fresh air.
And an attempted straight right on the counter from Tyme! But no joy.
Tyme throws a nice looking combination but Foot bobs and weaves to avoid any damage.
Some wild striking there from Tyme.
Foot throws a hook but Tyme avoids it easily.
That's three minutes gone in the round.
Tyme misses with a looping left.
Foot scores with the left hand. Tyme knows he should have avoided that one.
A jab from Foot misses.
Tyme looked like he wanted to counter with a punch but didn't throw it.
Foot misses with a few strikes there.
Tyme tries to clinch up.
Foot works Tyme's body with a nice hook.
Foot throws a combination but comes up with nothing but fresh air.
Tyme is looking to take this fight into the clinch.
Tyme tries to clinch but Foot is having none of it.
Tyme misses with a wild combination.
Tyme showing good head movement there, avoiding the strikes from Foot.
Foot misses with a straight right.
It seemed like Tyme was going to counter with the hook but didn't fully commit to it.
That's four minutes gone in the round.
Tyme tries to clinch but is not successful on this occasion.
Foot seemed to be looking to counter by closing the distance.
Foot lands a nice hook to Tyme's body. Tyme takes it in his stride and looks to land his own strikes.
Foot misses with a hook to the body
and Tyme connects with a straight left hand counter down the middle.
This is a great period of action - very entertaining stuff!
Some wild striking there from Foot.
A nice combination there by Foot.
Third Foot seems to be the more aggressive standup fighter in this bout.
Foot's corner calls for a 1-2. Foot obliges with the 1 part as he scores the single shot and moves back out of range.
Tyme avoids the body shot from Foot.
Foot takes a swing at Tyme's ribcage but misses.
Tyme slips a straight right by Foot.
Tyme tries to clinch up against the cage, rushing in to close the distance. Foot manages to break the clinch and circles back to the middle of the mat.
Tyme avoids the body shot from Foot.
Tyme takes a jab right on the kisser.
And thats the end of the round the fighters go back to their corners.
Third Foot dominated that round.
That's the end of the interval. I'm sure that seemed a lot quicker than a minute for our two fighters! Back to the action.
Nice jab there from Foot.
Foot looks to throw the jab but Tyme is out of range.
Foot tries to land with a swinging hook to the body but Tyme was well out of range. Poor timing from Foot.
Tyme throws a counter combo.
Foot misses with a body shot
and Tyme counters with a crisp hook to the side of the head.
Jab by Foot.
Foot misses with a shot to the body
and Tyme makes him pay by landing a nice hook to the body before moving out of range.
Foot walks forward and throws a big overhand right! Tyme drops to the floor like a sack of potatoes! Foot swarms on him with more punches until the referee wrestles him away from Tyme's unconscious body! Wow, that was brutal!
Ladies and gentlemen, after 0:30 of round 2, we have a winner by way of TKO (Strikes). Third Foot!
A relieved looking Third Foot thanked the fans for their support and gave the usual line about them being amazing. They seemed to believe that he actually meant it.
|
|
|
|
|
|
|
|
|
|
|
|
|
|
|
|
|
|
|
|
|
|
|
| S |
C
A |
G |
S |
C
B |
G |
|
S |
C |
G |
|
energy
A | B |
|
hype
A | B |
|
pop
A | B |
|
mgr
A | B |
|
FIGHT
RATING
52% |
|
|
|
|
|
|
|
Main event
|
|
|
|
|
|
|

