 |
Wurundjeri Christmas Dinner PBP Commentary |
Undercard bout
|
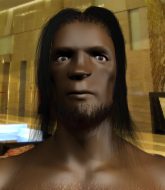
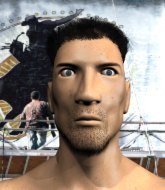
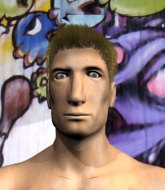
Coming up we have a light heavyweight MMA rules bout between Kyle Yotoka (ranked 0 p4p, 0 weight class) and Jigga Jones (ranked 0 p4p, 0 weight class). Jigga Jones has the better chin. Will he look to stand and bang today?
 |
|
 |
| 186 cm
24
205 lbs
1 - 0 - 0 |
|
225 cm
30
220 lbs
7 - 4 - 0 |
BJJ Blue Belt
Solid boxing
Cuts easily |
|
BJJ Purple Belt
Excellent MT
Good gas tank |
|
| |
|
Ladies and gentlemen. This fight is 3 rounds, in the light heavyweight division.
Introducing the fighter to my left, fighting out of the red corner.
With a record of
1 - 0 - 0, fighting out of Tokyo, Kyle Yotoka!
And introducing the fighter to my right, fighting out of the blue corner.
With a record of
7 - 4 - 0, fighting out of Sydney, Jigga Jones!
The judges for this bout are Ron Honeybunn, Chris Dean and Winston Howard.

The bell rings for round one and we are underway!
Yotoka looks for the body kick but Jones saw that one coming.
Despite the aggression on Jones's face he doesn't fully commit to the counter.
Wow, both these guys are really going for it!
Yotoka on the wrong end of a nice low kick. He's acting like it's no big deal but he doesn't want to take many more of those.
Jones is a painfully thin specimen of a man. You do wonder whether a good body kick would snap him clean in two.
Yotoka throws a right and a left that Jones avoids nicely.
Yotoka throws a right hand that Jones ducks under and follows up with a left that Jones also avoids with ease.
Jones lunges at Yotoka with a hook that half lands and is half blocked by Yotoka's hand.
Jones scores with a slapping inside leg kick.
A left and a right from Yotoka both land. Nice combination.

It looks like Jigga Jones has been cut.
Both fighters circling a little - Jones finishes the exchange with a kick to the body.
A nice leg kick lands there from Jones.
This is a great period of action - very entertaining stuff!
Yotoka on the receiving end of a decent leg kick there by Jones. Jones obviously looking to wear him down.
Jones stalks Yotoka and leaps in with a furious combination of punches. Uppercuts and crosses smash into Yotoka's face. Yotoka staggers backwards, shaken.

It looks like Kyle Yotoka has been cut.
Yotoka tries to check a leg kick but that clearly hurt him.
Yotoka shoots for a takedown but Jones saw that one coming a mile off and avoided it easily.
Jones with a nice looking leg kick. You could hear that one land in a back row.
Jones fakes a head punch and goes low to the body. Nicely done.
Yotoka throws a head kick that misses and slips in the process. He scrambles back to his feet and the fighters circle.
Yotoka takes a shot right to the bread basket.
Yotoka misses with a kick to the body.
Yotoka is breathing heavily.
Yotoka looking to land some kicks to the body here.
Boom, another hit is landed. "You're gunna get knocked out" taunts Jones, as that shot connected.

That's one minute gone in the round.
Yotoka gets his takedown attempt stuffed easily
and Jones counters with a crisp hook to the side of the head.

Yotoka is rocked!
Yotoka misses with a body shot
and Jones counters with an outside leg kick.
Oh Yotoka is still all over the place! His legs are completely gone! Will he be able to recover?!!
Jones scores with a slapping inside leg kick.
We've been informed that Jones has been sparring a lot of Muay Thai in the buildup to this fight so let's see if that has an impact on the result.
Jones lands a big uppercut and this one is all over! His foe lies motionless on the canvas - a massive one punch knockout!
Ladies and gentlemen, after 1:15 of round 1, we have a winner by way of KO (Punch). Jigga Jones!
|
|
|
|
|
|
|
|
|
|
|
|
|
|
|
|
|
|
|
|
|
|
|
| S |
C
A |
G |
S |
C
B |
G |
|
S |
C |
G |
|
energy
A | B |
|
hype
A | B |
|
pop
A | B |
|
mgr
A | B |
|
FIGHT
RATING
96% |
|
|
|
|
|
|
|
Undercard bout
|
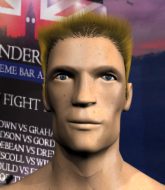
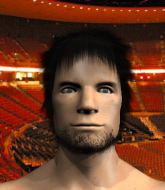
Coming up we have a bantamweight MMA rules bout between Eddy Neuhardt (ranked 0 p4p, 0 weight class) and Chauchai Dechaudarra (ranked 0 p4p, 0 weight class). Neuhardt comes to the cage accompanied by Street Fighter II Ryu Theme Original . Both fighters look fresh as a daisy as they make their way towards the cage.
 |
|
 |
| 164 cm
19
132 lbs
0 - 4 - 0 |
|
165 cm
18
144 lbs
0 - 1 - 0 |
BJJ Blue Belt
Basic striking
Cuts easily |
|
BJJ White Belt
Counter fighter
Granite chin |
|
| |
|
Ladies and gentlemen. This fight is 3 rounds, in the bantamweight division.
Introducing the fighter to my left, fighting out of the red corner.
With a record of
0 - 4 - 0, fighting out of Sydney, Eddy Neuhardt!
And introducing the fighter to my right, fighting out of the blue corner.
With a record of
0 - 1 - 0, fighting out of New York, Chauchai Dechaudarra!
The judges for this bout are Darius Henderson, Ben Watson and Francis DeMontford.
The bell rings for round one and we are underway!
Neuhardt avoids a lazy jab quite easily.
Neuhardt with a poor takedown
and Dechaudarra counters with a stiff right hand.
Neuhardt throws a head kick that Dechaudarra semi-blocks.
Dechaudarra dips to his left and cracks Neuhardt with an uppercut!

Neuhardt drives through with a really nice takedown into side control.

Neuhardt has an Americana. Dechaudarra didn't react quickly enough there and he's in big trouble now! He tries to squirm out but is forced to tap! Neuhardt is delighted and gyrates in front of the ring girls. They seem to like the attention - it'll be interesting to see if Neuhardt hooks up with any of them at the after show party.
Ladies and gentlemen, after 0:35 of round 1, we have a winner by way of Submission (Americana). Eddy Neuhardt!
Eddy Neuhardt tried to hype himself up post fight but didn't word it too well and it ended up with him sounding like a bit of a tool.
|
|
|
|
|
|
|
|
|
|
|
|
|
|
|
|
|
|
|
|
|
|
|
| S |
C
A |
G |
S |
C
B |
G |
|
S |
C |
G |
|
energy
A | B |
|
hype
A | B |
|
pop
A | B |
|
mgr
A | B |
|
FIGHT
RATING
100% |
|
|
|
|
|
|
|
Undercard bout
|
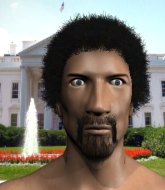
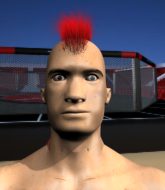
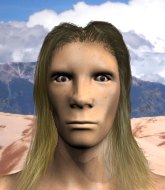
Coming up we have a super heavyweight MMA rules bout between Charles Kamen (ranked 0 p4p, 0 weight class) and Archie Trew (ranked 0 p4p, 0 weight class). Over to our ring announcer for the fighter introductions!
 |
|
 |
| 190 cm
26
270 lbs
4 - 2 - 0 |
|
195 cm
20
300 lbs
5 - 1 - 0 |
BJJ Blue Belt
World class boxer
Cardio machine |
|
Good wrestler
Decent boxing
Good gas tank |
|
| |
|
Ladies and gentlemen. This fight is 5 rounds, for the super heavyweight championship of the world!
Introducing the champion to my left, fighting out of the red corner.
With a record of
4 - 2 - 0, fighting out of Sydney, Charles Kamen!
And introducing the challenger to my right, fighting out of the blue corner.
With a record of
5 - 1 - 0, fighting out of St Petersburg, Archie Trew!
The judges for this bout are Summer Carpenter, Winston Howard and Donatello Bradman.
The bell rings for round one and we are underway!
Kamen tries to close the distance and clinch up but Trew swats him away and circles back towards the center.
A big left from Trew misses.
Trew circles away from the clinch attempt.
A nice combination there by Kamen.
It looks like Archie Trew has been cut.
Kamen tries to close the distance and clinch up against the cage but Trew paws at him with a jab and circles away.
Trew avoids the clinch attempt nicely.

Kamen darts in and clinches Trew up against the cage.
Trew blocking some punches.
Kamen lands a hook to the side of the head.
Kamen throws a blind hook that connects with the side of Trews head.
Trew lands with a light punch inside.
Trew avoiding damage.
Trew is looking to take this one to the mat.
Kamen misses with some punches.
Kamen lands with a left to the head.
This has been an exciting period of action!
Trew struggles to land a body shot inside as Kamen controls his hands.
That's one minute gone in the round.
A hook to the body from Trew.
Trew's head jolts backwards as he takes an uppercut right on the button!
Kamen misses with a short punch on the inside.
With the two fighters working up against the cage, Kamen just misses with a elbow thrown towards Trew's brow.
Trew has dropped down and is looking to force the takedown but it's defended by Kamen after a bit of a struggle.
A head punch blocked on the inside by Trew.
Kamen misses with a punch on the inside.
Kamen prevents a body shot from Trew.
Trew scores a nice knee to the body.
Trew tries to score a body lock takedown but Kamen shows good agility there to stay on his feet.
Charles Kamen has stuffed three takedown attempts in the round now. That's going to take a lot out of Archie Trew.
Kamen lands punches inside but they're not really causing much damage.
A bit of stalling here from Trew.
Kamen prevents a takedown attempt there.
Kamen lands a left hand that snaps the head of Trew backwards.
Trew goes for a body shot but it's blocked.
Trew is trying to slow down the pace of the fight but Kamen is keeping busy.
Trew tries a body shot but Kamen blocks it.

That's two minutes gone in the round.
Trew wants to stall.
Kamen prevents the takedown attempt.
Kamen lands a nice uppercut.
That has opened up Archie Trew's cut even more.
Kamen lands with a short punch from the clinch.
The crowd cheering loudly, showing their appreciation for the quality fight we're seeing here.
Trew tries a body shot but Kamen blocks it.
Trew stalling the fight.
Trew tries a body shot but Kamen blocks it.
Kamen pushes off an throws an elbow but Trew leans to the side and avoids it. We're back to clinching against the cage.
Trew fails to land with a short punch on the inside.
Trew wants a takedown.
Trew has hold of a leg and is looking for a trip takedown. Kamen avoids it nicely though and we remain in the clinch.
Kamen tries a shoulder strike but it doesn't do any damage.
A head punch on the inside from Kamen fails to land.
Kamen lands a right hand.
Kamen lands a shoulder strike.
Trew blocks a punch to the side of the head.
Kamen lands a knee to the head.
Trew looks winded!
Trew can't find room to land a body shot as Kamen controls the action.

That's three minutes gone in the round.
Kamen scores with a shot to the side of Trew's head.
The cut above Archie Trew's eye is starting to cause him problems now.
Kamen scores with a shot to the side of Trew's head.
Archie Trew's cut is absolute horrible now. This looks like something out of a horror film with blood covering both fighters.
Trew blocks a punch to the side of the head.
Kamen misses with a short punch on the inside.
Kamen lands a shoulder strike that jolts his opponent's head backwards.
A nice left hand lands by Kamen.
Kamen blocks a punch to the side of the head.
Kamen misses with the head strike.
Kamen throws a head punch that misses.
Kamen tries a shoulder strike but it doesn't do any damage.
Kamen swings away with an uppercut that misses.
Trew dodges an elbow strike from Kamen.
Trew is working hard here but doesn't seem to be able to control effectively, up against the cage.
Trew wants a takedown but no success here.
Kamen scores with a shot to the side of Trew's head.
The referee calls the doctor in to look at Archie Trew's cut. Oh no, the doctor has called an end to the bout!
Ladies and gentlemen, after 4:58 of round 1, we have a winner by way of TKO (Cut). Charles Kamen!
Charles Kamen is the new super heavyweight champion!
Charles Kamen really struggled to get his t-shirt on before his hand was raised. Making sure that On Tap (160Q & Laundry) logo gets some air time is pretty tricky when you're all sweaty.
|
|
|
|
|
|
|
|
|
|
|
|
|
|
|
|
|
|
|
|
|
|
|
| S |
C
A |
G |
S |
C
B |
G |
|
S |
C |
G |
|
energy
A | B |
|
hype
A | B |
|
pop
A | B |
|
mgr
A | B |
|
FIGHT
RATING
31% |
|
|
|
|
|
|
|
Undercard bout
|
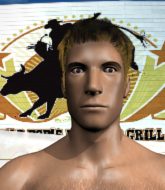
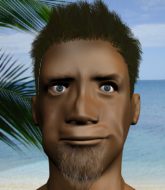
Coming up we have a heavyweight MMA rules bout between Dicky Fatton (ranked 0 p4p, 0 weight class) and Mike Galloway (ranked 0 p4p, 0 weight class). Dicky Fatton could well score a knockout today. He has the power to get to Mike Galloway's chin.
 |
|
 |
| 188 cm
26
280 lbs
7 - 5 - 0 |
|
193 cm
24
265 lbs
1 - 0 - 0 |
Powerful takedowns
Solid boxing
Granite chin |
|
BJJ Blue Belt
Decent boxing
Very confident |
|
| |
|
Ladies and gentlemen. This fight is 3 rounds, in the heavyweight division.
Introducing the fighter to my left, fighting out of the red corner.
With a record of
7 - 5 - 0, fighting out of Sydney, Dicky Fatton!
And introducing the fighter to my right, fighting out of the blue corner.
With a record of
1 - 0 - 0, fighting out of Sydney, Mike Galloway!
The judges for this bout are Eliza Hachem, Darius Henderson and Donatello Bradman.
The bell rings for round one and we are underway!

Fatton lands a left and a right that send Galloway crashing to the mat, dazed. Fatton thinks about following him to the mat but decides to wave him back up to his feet!

Galloway is rocked!
It looks like Mike Galloway has been cut.
Galloway looks to score with a jab to the body but Fatton is just out of range.
Galloway is still on wobbly legs! Can Fatton finish him?
Fatton lands a nice looking body shot.
Galloway looks winded!
Fatton dances in with a quick combination. Galloway is being worked over with jabs and crosses. Oooh, a right straight from Fatton snaps Galloway's head back. Galloway stumbles backwards against the cage. Fatton steps forward and delivers a right cross that connects with Galloway's jaw, simultaneously knocking him out and sending his mouthpiece into the crowd! There's a worthy souvenir for the fans. This one is over folks. Galloway just didn't come prepared.
Ladies and gentlemen, after 0:09 of round 1, we have a winner by way of KO (Punches). Dicky Fatton!
Jumping up and down and very excited, Dicky Fatton waved his t-shirt featuring On Tap (160Q & Laundry)'s logo in front of the cameras.
|
|
|
|
|
|
|
|
|
|
|
|
|
|
|
|
|
|
|
|
|
|
|
| S |
C
A |
G |
S |
C
B |
G |
|
S |
C |
G |
|
energy
A | B |
|
hype
A | B |
|
pop
A | B |
|
mgr
A | B |
|
FIGHT
RATING
100% |
|
|
|
|
|
|
|
Undercard bout
|
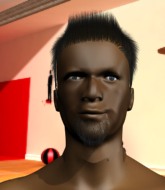
Coming up we have a middleweight MMA rules bout between Tony Twister (ranked 0 p4p, 0 weight class) and Allkindsa Bustinchapsup (ranked 0 p4p, 0 weight class). Bustinchapsup has chosen Mouth for war as his entrance music. Tony Twister could well score a knockout today. He has the power to get to Allkindsa Bustinchapsup's chin.
 |
|
 |
| 188 cm
40
195 lbs
23 - 23 - 0 |
|
185 cm
28
185 lbs
10 - 11 - 0 |
Abu Dhabi Champ
Excellent boxer
Cardio machine |
|
Good wrestler
Good kicks
Powerful |
|
| |
|
Ladies and gentlemen. This fight is 3 rounds, in the middleweight division.
Introducing the fighter to my left, fighting out of the red corner.
With a record of
23 - 23 - 0, fighting out of Sydney, Tony Twister!
And introducing the fighter to my right, fighting out of the blue corner.
With a record of
10 - 11 - 0, fighting out of Sydney, Allkindsa Bustinchapsup!
The judges for this bout are Skip Squint, Darius Henderson and Topper Green.
The bell rings for round one and we are underway!
Bustinchapsup throws a poor cross that misses
and Twister counters with a left to the body.
Bustinchapsup throws a poor cross that misses
letting Twister counter with a right hand.
Bustinchapsup looks to land a left hand but Twister moved out of range nicely.
Bustinchapsup takes a jab on the nose there. A little bit of blood seems to be coming out. Hopefully that won't affect his breathing.
Bustinchapsup throws an ugly left hook that misses
and Twister cracks him with a counter punch right on the button.
Bustinchapsup misses with a right hand
and Twister counters with a shoot takedown. Bustinchapsup fights it but they end up in guard.

Bustinchapsup pushes Twister off for just long enough to get back to his feet. Very athletic spring there.
The crowd are loving this. Great action here.
Bustinchapsup throws a right hand that misses
and Twister counters with a straight right hand.
Some bone on bone action there as Twister checks a low kick. Luckily it wasn't a particularly hard one.
Bustinchapsup throws a right and a left that Twister avoids nicely.
Twister feinted with a counter takedown.
Twister lands a jab to the nose.
Twister uses good head movement to avoid the hook from Bustinchapsup.
Twister lands the left hand.
Bustinchapsup throws a combination but it was largely blocked by Twister.
That's one minute gone in the round.
Twister bobs and weaves well there to avoid the strikes.
Bustinchapsup ducks low and lands a nice hook to the body of his opponent.
Allkindsa Bustinchapsup is looking to keep the fight on the feet at all costs.
Twister bobbing and weaving, closes the distance and lands a hook to the side of Bustinchapsup's head.
Bustinchapsup throws an uppercut from half a mile away. Twister sees it coming and avoids it easily.
Twister seemed to be looking to counter by closing the distance.
Twister tries to score a power double leg takedown but Bustinchapsup sees that one coming and sprawls well. That will dishearten Twister somewhat.
Bustinchapsup fakes high and swings low for a body shot but Twister manages to avoid it.
Twister misses with a double jab
and Bustinchapsup counters with a nice uppercut.
Twister works the jab nicely.
Twister connects with a looping right hand.
Allkindsa Bustinchapsup seems to be the more aggressive standup fighter in this bout.
Twister scores with a reasonable looking shot to the body. Bustinchapsup doesn't seem bothered though.
That's two minutes gone in the round.
No joy there for Bustinchapsup, who threw a few shots but didn't land.
Bustinchapsup is pinned up against the cage taking some big shots here. The referee is looking closely deciding whether he should stop the fight.
Fantastic stuff here - a very entertaining period of action, which has drawn cheers from the crowd.
Bustinchapsup misses with a low kick.
Bustinchapsup misses with a right hand
and Twister counters with a stiff right hand.
Bustinchapsup looks to score with a combo but nothing lands.
Twister changes levels and drives through with a really nice takedown into side control. Bustinchapsup looks really pissed at himself for not defending that better.
Bustinchapsup tries to escape but Twister is in control.
Bustinchapsup tries to wriggle free to get back to his feet but he's given up his back! Oops.
Bustinchapsup defending nicely against the rear naked choke attempt.
Bustinchapsup trying to get back to his feet but Twister is in full control for now.
That's three minutes gone in the round.
Bustinchapsup fending off the submission attempt from Twister.
Bustinchapsup is trying to stand back up.
Twister is staying calm and holding on to the back position, whilst working on a rear naked choke. Bustinchapsup is defending well though. Twister let's go of the attempt for now.
Bustinchapsup defends a rear naked choke attempt by controlling one of Twister's arms.
Bustinchapsup trying to get back to his feet but Twister is in full control for now.

That's four minutes gone in the round.
Bustinchapsup fending off the submission attempt from Twister.
Bustinchapsup fending off the submission attempt from Twister.
The fighters are pressed up against the cage, both looking to find a bit of space to work.
Bustinchapsup is trying to get back to his feet but Twister has full control of the position and if anything, Bustinchapsup has just worked his way into a worse spot.
Twister is remaining active here, looking for the choke. The more discerning members of the crowd will appreciate his efforts.
Twister is working for the rear naked choke. He has one arm under the chin but Bustinchapsup has hold of the other arm. A bit of a stalemate here.
Bustinchapsup is trying to get back to his feet but Twister has full control of the position and if anything, Bustinchapsup has just worked his way into a worse spot.
And thats the end of the round the fighters go back to their corners.
Tony Twister dominated that round.
The referee calls time. The cornermen exit stage left and we're back to business.

Bustinchapsup fakes and then throws a beautiful body shot. Twister looks a bit winded and takes a step backwards to take a breath.
Bustinchapsup lunges in with an uppercut that skims his opponent's chin.
Twister keeping a good distance there, avoiding the body shot.
Bustinchapsup just misses with a punch to the body.
Bustinchapsup has tried to improve his agility in the runup to this fight.
Bustinchapsup drops his hands and takes a jab to the jaw for his troubles.
Some wild striking there from Bustinchapsup.
Bustinchapsup moves away from the strike by Twister.
Twister defending well as Bustinchapsup loads up on a big left hand.
We've had a slow start to the round here - hopefully the action picks up.
Twister drives through with a takedown into Bustinchapsup's guard. Let's see what he can do from the top position.
Bustinchapsup pushes Twister off and scrambles back to his feet.
We've seen a great period of action over the last minute or so - credit to both fighters for going all out!
Bustinchapsup misses with a looping right.
Twister connects with a lovely jab that went straight through the gap between Bustinchapsup's hands.
That's one minute gone in the round.
Twister lands a straight punch to the body, keeping Bustinchapsup at a distance.
Bustinchapsup chopping away at his opponent's legs.
Tony Twister is winning the standup battle so far.
Twister avoids a lazy jab quite easily.
Bustinchapsup throws a monster uppercut resembling something out of street fighter but it doesn't land.
Bustinchapsup wants to land a leg kick but Twister is out of range.
Twister slips a jab from Bustinchapsup.
Bustinchapsup misses with a telegraphed body shot
and Twister counters with a good right hand that lands right on the jaw.
Twister avoids the body shot from Bustinchapsup.
Twister tests Bustinchapsup's chin there with a solid looking shot.
Allkindsa Bustinchapsup is looking to throw some combinations by the looks of things.
Bustinchapsup rushes forward with a series of wild hooks but Twister moves out of range and avoids them all easily.
Twister lunges in with an uppercut that skims his opponent's chin.
A big left from Twister misses.
That's two minutes gone in the round.
Bustinchapsup connects with a lovely right hand, straight down the pipe.
Twister throws a lazy right hand but Bustinchapsup sees it coming a mile off and sidesteps it easily.
A looping hook to the body misses from Twister. Bustinchapsup does a little dance to reset his feet.
Bustinchapsup defends well against a solid takedown attempt from Twister.
Bustinchapsup swings away with a counter right hand but no contact made.
The crowd are loving this. Great action here.
Sloppy strikes from Bustinchapsup. Those never looked like landing.
Twister slips a straight right by Bustinchapsup.
Twister dives in for a single leg takedown but Bustinchapsup sprawls and the fighters end up clinched against the cage.
Some wild striking there from Bustinchapsup.
Twister misses the shot to the body.
A countering left hand to the body from Bustinchapsup misses.
Twister takes a head kick and keeps coming.
Twister moves out of range of the strikes.
That's three minutes gone in the round.
Bustinchapsup lands a nice leg kick that just misses Twister's sensitive parts.
Bustinchapsup lands a jab to the nose.
Bustinchapsup tries to move into range but Twister moves to the side and lands with a nice right hand.
Bustinchapsup looks to land a left hand but Twister moved out of range nicely.
Twister appears to be looking for a counter punch to the body.
Bustinchapsup misses with a double jab.
Nice cross by Bustinchapsup.
Twister blocks a jab.
Bustinchapsup scores with a decent looking hook.
Bustinchapsup misses with a jab, cross combination.
Twister lands with a straight right. Bustinchapsup didn't see that one coming.
Bustinchapsup fakes high and swings low for a body shot but Twister manages to avoid it.
Twister is looking to counter with a shot to the body.
Twister shoots in for a takedown but Bustinchapsup shows good takedown defense.
Bustinchapsup doesn't fully commit to the body shot counter.
That's three failed takedown attempts in the round for Tony Twister. That's going to take a lot out of him.
That's four minutes gone in the round.
Bustinchapsup rushes forward with a series of wild hooks but Twister moves out of range and avoids them all easily.
The fans in attendance giving it up for the two fighters, who have really let it all hang out in the last minute or so!
Bustinchapsup throws a poor cross that misses
and Twister counters with a two punch combo.
Twister throws out a token jab with nothing on it.
A big right from Bustinchapsup misses.
Twister went nuts there looking for a big combo counter but none of the flurry connected.
Bustinchapsup misses with a looping left.
Twister throws a nice looking combination but Bustinchapsup bobs and weaves to avoid any damage.
A little jabbing left from Bustinchapsup on the counter but it doesn't find it's target.
Bustinchapsup on the wrong end of a vicious looking body shot.
Bustinchapsup loads up on a big right hand but Twister slips the punch.
Bustinchapsup misses with a straight right.
Twister scores with a jab to the head.
Twister closes the distance and clinches up, looking for a takedown. He shifts his weight and gets a nice trip into half guard.
Bustinchapsup manages to escape and get back to his feet!
And thats the end of the round the fighters go back to their corners.
Allkindsa Bustinchapsup showed his class in that round. I'd imagine he'll take it on all the scorecards.
The corners get their ten second warning. Both fighters stand from their stools and stare eachother down, ready to get back to the action. This is the final round!

Bustinchapsup misses with a jab, cross combination.
Bustinchapsup keeping his hands up high there, blocking the jab from Twister.
The fighters circling - Twister throws out the jab but it was never going to land.
Bustinchapsup misses with a straight right.
Bustinchapsup comes forward and lands a shot to the body, then darts back out of range.
Twister looks frustrated there after his takedown attempt is stuffed easily.
Bustinchapsup looks to score with a jab to the body but Twister is just out of range.
We've had a slow start to the round here - hopefully the action picks up.
Twister tries to score a power double leg takedown but Bustinchapsup sees that one coming and sprawls well. That will dishearten Twister somewhat.
Bustinchapsup walks into a jab.
That's one minute gone in the round.
Bustinchapsup misses with a leg kick
and Twister counters with a three punch combo that has Bustinchapsup backing up. Bustinchapsup nods at Twister to acknowledge the strikes.
Bustinchapsup misses with a wild combination.
Twister throws a series of punches but Bustinchapsup avoids them all with ease.
Bustinchapsup connects with a good right hand that stumbles Twister. Twister circles away out of range and recomposes himself.
Twister throws a looping left and ducks down for a takedown. He's got his arms around Bustinchapsup's waist but Bustinchapsup gets an underhook and avoids the takedown by throwing Twister off to one side.
That's three failed takedown attempts in the round for Tony Twister. That's going to take a lot out of him.
Bustinchapsup connects with a nice looking jab.
Bustinchapsup thows a left - swing and a miss!
Bustinchapsup displays good takedown defense there as he swats away a double leg from Twister.
That's two minutes gone in the round.
Bustinchapsup throws a combination but it was largely blocked by Twister.
Twister bobs and weaves well there to avoid the strikes.
Bustinchapsup cracks a nice hook into Twister's ribs.
Bustinchapsup lands a head kick!
The crowd are loving this. Great action here.
Twister scores with a three punch combo!
Twister shoots in for a takedown but Bustinchapsup shows good takedown defense there and keeps this one on the feet.
Bustinchapsup is looking for the big counter here.
Twister stooping low to avoid any incoming strikes and then lunges in with an uppercut come cross that lands flush.
Bustinchapsup swings wildly with a couple of big hooks
and Twister counters with a good right hand that lands right on the jaw.
Twister misses the jab.
Twister takes a swing at Bustinchapsup's ribcage but misses.
That's three minutes gone in the round.
Twister throws a nice looking combination but Bustinchapsup bobs and weaves to avoid any damage.
Bustinchapsup swings wildly with a hook that is half blocked by Twister.
Bustinchapsup jabbing away but nothing is landing.
Bustinchapsup misses with a body shot. Nice footwork from Twister.
A punch combination from Twister misses.
Twister misses with a looping right.
Twister rushes forward with a series of wild hooks but Bustinchapsup moves out of range and avoids them all easily.
Twister ducks down and throws a hook to the body but Bustinchapsup moves away.
Bustinchapsup connects with a lovely jab that went straight through the gap between Twister's hands.
Bustinchapsup throws a right and a left that both miss.
Bustinchapsup throws a leg kick that misses.
Twister swung with a counter punch to the body but it didn't connect.
Twister fakes high and shoots in for a takedown but Bustinchapsup avoids it really well and circles away.
That's four minutes gone in the round.
Bustinchapsup tries to land with a swinging hook to the body but Twister was well out of range. Poor timing from Bustinchapsup.
Bustinchapsup misses with a double jab.
Twister uses some good footwork to avoid the body shot by Bustinchapsup.
Bustinchapsup throws a low kick but Twister moves out of range easily.
Twister tries to land with a swinging hook to the body but Bustinchapsup was well out of range. Poor timing from Twister.
Bustinchapsup throws a low kick but Twister avoids it.
A little feinted left hand from Twister on the counter but he doesn't commit to it.
A left lands for Twister.
We've seen a great period of action over the last minute or so - credit to both fighters for going all out!
Bustinchapsup misses the shot to the body.
Bustinchapsup misses with a body shot
and Twister counters with a three punch combination, finished off with a leg kick. Nice work.
And that's the end of the fight!
I would just about give that final round to Allkindsa Bustinchapsup.
I think Bustinchapsup has won this one but let's see whether the judges agree with me. Over to the ring announcer for the scorecards.
Ladies and gentlemen, after 3 rounds of action, we go to the scorecards for a decision.
Judge Skip Squint scores the fight 28:29
Judge Darius Henderson scores the fight 28:29
Judge Topper Green scores the fight 28:29
In favor of your winner, by unanimous decision... Allkindsa Bustinchapsup!
An intense looking Allkindsa Bustinchapsup took to the microphone post fight and gave a little speech: 'You do not deserve to watch me'.
|
|
|
|
|
|
|
|
|
|
|
|
|
|
|
|
|
|
|
|
|
|
|
| S |
C
A |
G |
S |
C
B |
G |
|
S |
C |
G |
|
energy
A | B |
|
hype
A | B |
|
pop
A | B |
|
mgr
A | B |
|
FIGHT
RATING
63% |
|
|
|
|
|
|
|
Co-main event
|
|
|
|
Main event
|
Coming up we have a bantamweight MMA rules bout between Koulouraki Souvlaki (ranked 0 p4p, 0 weight class) and Mia St John (ranked 0 p4p, 0 weight class). Souvlaki kept the crowd waiting but all that was forgotten when his ring entrance music started. The incomparable musical genius that is Greek Anthem. St John has chosen The Bitch is back as his entrance music. Over to our ring announcer for the fighter introductions!
 |
|
 |
| 174 cm
26
135 lbs
4 - 2 - 0 |
|
168 cm
37
140 lbs
11 - 13 - 0 |
Abu Dhabi Champ
Counter fighter
Cardio machine |
|
BJJ Purple Belt
Decent boxing
Knockout power |
|
| |
|
Ladies and gentlemen. This fight is 3 rounds, in the bantamweight division.
Introducing the fighter to my left, fighting out of the red corner.
With a record of
4 - 2 - 0, fighting out of Sydney, Koulouraki Souvlaki!
And introducing the fighter to my right, fighting out of the blue corner.
With a record of
11 - 13 - 0, fighting out of Los Angeles, Mia St John!
The judges for this bout are Eliza Hachem, Ben Watson and Ron Honeybunn.
The bell rings for round one and we are underway!
St John tries to clinch
and Souvlaki counters with a takedown into side control! That could mean trouble for St John!
Souvlaki wants to work for a kimura but he's foiled early by St John, who protects the arm well.
St John is putting a lot of effort into getting back to his feet here.
Souvlaki trying to control the action but St John is working from the bottom.
Souvlaki working the head and body with strikes.
Souvlaki just content to control the position.
St John throws his opponent off and manages to get back to his feet! Nicely done!

St John instigates a clinch.
St John misses with a body punch.
Wooooo! Give it up for these two warriors! They are putting on a show!
St John lands a shoulder strike.
St John tries a shoulder strike but it doesn't do any damage.
St John missing with knees to the body.

St John breaks from the clinch.
That's one minute gone in the round.
St John throws a jab, cross combination which is slipped
and Souvlaki counters with a nice shoot takedown that brings the fighters to the ground.
We've been hearing good reports from Souvlaki's training camp. Apparently he has been rolling around with some good quality BJJ practitioners and has been sharpening his skills. Let's see if that has an impact on the fight today.
St John is looking to stand up but Souvlaki isn't so interested in that idea.
Souvlaki stays in close to St John's body and controls the position.
Souvlaki stops St John from standing up.
The fighters are pressed up against the cage, both looking to find a bit of space to work.
St John kicks Souvlaki off and gets to his feet.
St John tries to close the distance and clinch up against the cage but Souvlaki paws at him with a jab and circles away.
St John drives through and clinches with Souvlaki against the cage.
St John breaks the clinch and we return to the middle of the mat.
St John throws a combination that misses
and Souvlaki decides to take the opportunity to score a takedown. He's landed in St John's guard.
The crowd cheering loudly, showing their appreciation for the quality fight we're seeing here.
St John is looking to get back to his feet but can't, whilst Souvlaki is controlling him.
Souvlaki is stalling in the full guard.
That's two minutes gone in the round.
St John wants to get back to his feet but Souvlaki is in a dominant position and won't allow it.
The ref warns both fighters not to hold the cage as they work up against the meshing.
Souvlaki engaging in some classic timewasting tactics.
St John wants to stand but Souvlaki is controlling the position.
The referee must be thinking about standing these guys back up.

The referee has stepped in and called for a break in the action. We'll restart on the feet.
Souvlaki shoots in for a takedown but St John shows good takedown defense.
St John is looking to clinch but Souvlaki is avoiding it.
St John has taken the fight to the clinch.
St John struggles to land a body shot inside as Souvlaki controls his hands.
That's three minutes gone in the round.
St John lands punches inside but they're not really causing much damage.
St John creates a bit of space for himself and sneaks an elbow through Souvlaki's defenses.
St John breaks the clinch and we return to the middle of the mat.
St John tries to clinch but Souvlaki moves out of range.
A swing and a miss from Souvlaki.
St John tries to close the distance and clinch up but Souvlaki swats him away and circles back towards the center.
St John fakes with an overhand right and moves in to clinch with Souvlaki, pushing him back against the cage.
St John breaks the clinch and we return to the middle of the mat.
St John displaying good standup as he scores with a three punch combination.
Souvlaki shoots in but no luck this time.
St John is looking to clinch but Souvlaki is avoiding it.
Souvlaki dives in for a single leg takedown but St John sprawls and the fighters end up clinched against the cage.
That's three failed takedown attempts in the round for Koulouraki Souvlaki. That's going to take a lot out of him.
St John misses with a double jab.
Horrible takedown attempt by Souvlaki or perhaps it was just good defense by St John, which made it look bad.
St John has closed the distance and engaged Souvlaki in a clinch.
This has been an exciting period of action!
St John misses with the head strike.
St John breaks the clinch and we return to the middle of the mat.
That's four minutes gone in the round.
St John is looking to clinch but Souvlaki is avoiding it.
A telegraphed takedown attempt from Souvlaki is defended easily by St John.
Souvlaki misses with a takedown attempt - St John sprawls well and throws a nice strike on the way out which just misses.
St John tries to close the distance and clinch up against the cage but Souvlaki paws at him with a jab and circles away.
St John will need to tighten up his combinations if he doesn't want to gas himself out, swinging at thin air.
St John tries to bum rush Souvlaki with a series of wild strikes but Souvlaki uses good footwork to avoid the assault.
St John tries to close the distance and clinch up against the cage but Souvlaki paws at him with a jab and circles away.
St John pushes forward with a 1-2 combination that forces Souvlaki back to the cage. St John follows up with a solid lead hook to the liver.
St John takes the fight into the clinch.
St John breaks the clinch and we're back to striking at distance.
St John tries to close the distance and clinch up against the cage but Souvlaki paws at him with a jab and circles away.
St John is looking to take this fight into the clinch.
Souvlaki attempts a counter takedown but St John avoids it well and moves away.
And thats the end of the round the fighters go back to their corners.
Mia St John dominated that round.
That's time! Back to the action!
St John misses with a series of wild punches.
Mia St John seems to be getting the better of the standup.
St John tries to clinch but Souvlaki is having none of it.
Souvlaki is looking to clinch.
St John tries a counter takedown but it's more of a dummy move, and he uses it to push himself away.
St John takes the fight into the clinch.
St John breaks the clinch and we're back to striking at distance.
St John darts in and clinches Souvlaki up against the cage.
St John's corner calls for him to break the clinch, which he does.
St John darts in and clinches Souvlaki up against the cage.
St John can't find room to land a body shot as Souvlaki controls the action.
Souvlaki gets the body lock takedown. After a quick scramble, St John regains guard.
Souvlaki controls from within his opponent's guard.
Souvlaki won't allow St John to get back to his feet.
That's one minute gone in the round.
St John scrambles and gets back to his feet.
St John tries to clinch but Souvlaki is having none of it.
St John tries to bum rush Souvlaki with a series of wild strikes but Souvlaki uses good footwork to avoid the assault.
Souvlaki misses with a takedown attempt - St John sprawls well and throws a nice strike on the way out which just misses.
St John tries to close the distance and clinch up but Souvlaki swats him away and circles back towards the center.
Souvlaki attempts a counter takedown but St John avoids it well and moves away.
St John tries to clinch but Souvlaki moves out of range.
Souvlaki slips a jab and a cross from St John.
Souvlaki throws a looping left and ducks down for a takedown. He's got his arms around St John's waist but St John gets an underhook and avoids the takedown by throwing Souvlaki off to one side.
St John darts in and clinches Souvlaki up against the cage.
An uppercut on the inside fails to land for St John.
St John has been the more effective fighter overall so far.
St John wants to strike at distance but he can't break free of the clinch.
Souvlaki tries to land a shot to the body but it's blocked.
A short left from Souvlaki.
St John stops a takedown attempt from Souvlaki.
That's three failed takedown attempts in the round for Koulouraki Souvlaki. That's going to take a lot out of him.
Souvlaki has dropped down and is looking to force the takedown but it's defended by St John after a bit of a struggle.
St John tries to work over Souvlaki's body with a swooping hook but it only glances the target.
St John throws a head punch that misses.
Mia St John seems to be working more effectively in the clinch in the fight so far.
That's two minutes gone in the round.
St John tries a knee to the head but he's missed.
Souvlaki prevents St John from breaking the clinch.
St John struggles to land a body shot inside as Souvlaki controls his hands.
St John pushes off and circles away, back to the middle of the mat.
The fans in attendance giving it up for the two fighters, who have really let it all hang out in the last minute or so!
St John gets in close and instigates a clinch.
St John gets double underhooks to prevent a takedown attempt from Souvlaki.
Souvlaki pushes St John back against the cage and unloads with a body punch.
St John stops a takedown attempt from Souvlaki.
St John prevents a body shot from Souvlaki.
A head punch on the inside from St John fails to land.
St John wants to break the clinch but can't.
St John breaks the clinch and we return to the middle of the mat.
St John moves out of range as Souvlaki strikes.
St John throws a right and a left that both miss.
Souvlaki tries to counter with a takedown but St John is quick to defend against it.
Souvlaki closes the distance and clinches up with St John, looking for a takedown. Souvlaki pushes St John against the cage but St John circles to the side and manages to break the clinch.
St John tries to clinch but is not successful on this occasion.
That's three minutes gone in the round.
Some wild striking there from St John.
St John is looking to clinch but Souvlaki is avoiding it.
Souvlaki shoots in for a double leg but St John sprawls well. That's going to sap some energy.
St John throws a right and a left that both miss.
Souvlaki tries to keep at a distance but St John has taken the fight into the clinch.
St John dictating the pace here, as the fighters clinch against the cage.
St John pushes off and circles away, back to the middle of the mat.
Mia St John is looking to throw some combinations by the looks of things.
St John moves into the clinch successfully.
St John is trying to break the clinch but Souvlaki has him pressed against the cage.
St John wants to break the clinch but can't.
St John can't find room to land a body shot as Souvlaki controls the action.
St John gets underhooks to prevent Souvlaki's takedown attempt.
St John misses with a short punch on the inside.
St John tries a shoulder strike but it doesn't do any damage.
St John trying to stall but Souvlaki improves his position.
That's four minutes gone in the round.
St John stops a takedown attempt from Souvlaki.
St John's corner calls for him to break the clinch, which he does.
St John throws a combination but comes up with nothing but fresh air.
St John moves in looking to clinch but Souvlaki pushes him off.
St John throws a right hand that Souvlaki ducks under and follows up with a left that Souvlaki also avoids with ease.
No joy there for St John, who threw a few shots but didn't land.
Souvlaki avoids a punch combination nicely.
Souvlaki tries to counter with a takedown but St John is quick to defend against it.
Souvlaki gets a clinch.
The fans in attendance giving it up for the two fighters, who have really let it all hang out in the last minute or so!
St John doesn't land with the attempted body shot.
Souvlaki has St John pressed against the cage, preventing St John from circling away and getting back to striking at range.
St John working hard to break the clinch.
St John lands with a quick shot inside that doesn't really do much damage.
St John tries to throw a body punch but Souvlaki avoids it by throwing St John back against the cage.
St John has a couple of punches blocked by Souvlaki.
St John is defending well against a takedown attempt.
St John is pressed up against the cage. Souvlaki has hold of a leg and is looking to drag St John down to the mat. St John avoids the attempt though and has circled away. We're back to striking at a distance.
And thats the end of the round the fighters go back to their corners.
Mia St John showed his class in that round. I'd imagine he'll take it on all the scorecards.
That's time! Back to the action! So, we enter the final round. Let's see if either fighter can bring us a finish, or whether we're going to the judges scorecards.
Souvlaki fails miserably with a takedown attempt.
St John tries a counter takedown but it's more of a dummy move, and he uses it to push himself away.
St John misses with a jab and misses with a cross straight after too.
Souvlaki appears to be looking for a counter punch to the body.
St John misses with a series of wild punches.
St John tries to close the distance and clinch up against the cage but Souvlaki paws at him with a jab and circles away.
No joy there for St John, who threw a few shots but didn't land.
St John has Souvlaki up against the cage in a clinch.
St John manages to break the clinch.
St John tries to clinch there but Souvlaki circles away.
Souvlaki is looking to take this fight into the clinch.
We've had a slow start to the round here - hopefully the action picks up.
St John will need to tighten up his combinations if he doesn't want to gas himself out, swinging at thin air.
St John moves in looking to clinch but Souvlaki pushes him off.
St John tries to clinch there but Souvlaki circles away.
St John goes to the watering hole and comes back with a big thumbs up from the judges as he scores a three punch combo.
That's one minute gone in the round.
The fight stays on the outside here - St John looks like he's thinking about clinching though.
St John instigates a clinch.
St John escapes the clinch and we're back to striking.
St John gets in close and instigates a clinch.
St John taking a breather.
Souvlaki misses with a punch to the body.
Souvlaki misses with a shot to the kidneys.
St John lands a shoulder strike.
St John gets double underhooks to prevent a takedown attempt from Souvlaki.
St John breaks the clinch.
Souvlaki swats away the attempt to clinch by St John.
The fight stays on the outside here - St John looks like he's thinking about clinching though.
That's two minutes gone in the round.
Souvlaki throws the left hand but St John avoids the punch easily.
St John wants to counter the offense by Souvlaki and move into the clinch position.
Souvlaki tries to clinch up against the cage, rushing in to close the distance. St John manages to break the clinch and circles back to the middle of the mat.
St John steps in looking to clinch after the strikes miss from Souvlaki.
Souvlaki shoots for a takedown but St John saw that one coming a mile off and avoided it easily.
That's three failed takedown attempts in the round for Koulouraki Souvlaki. That's going to take a lot out of him.
St John tries to close the distance and clinch but Souvlaki swats him to one side with an open hand palm strike and circles away.
Souvlaki darts in looking for a takedown but St John gets double underhooks and turns Souvlaki into the cage.
Souvlaki closes the distance and after a bit of a stuggle, scores a takedown into St John's guard.
The crowd are loving this. Great action here.
Souvlaki stops St John from standing up.
Souvlaki sitting in guard, not really doing much.
St John is looking to stand back up but Souvlaki counters by passing into half guard. Oops... bit sloppy there by St John.
St John pushes Souvlaki off looking to stand but Souvlaki dives back in and keeps control.
The referee calls for the fighters to work.
That's three minutes gone in the round.
St John pushes Souvlaki off looking to stand but Souvlaki dives back in and keeps control.
St John manages to escape and get back to his feet!
St John takes a big intake of breath there - he's definitely tired.
St John tries to clinch there but Souvlaki circles away.
St John fakes with an overhand right and moves in to clinch with Souvlaki, pushing him back against the cage.
St John is defending well against a takedown attempt.
Souvlaki's head jolts backwards as he takes an uppercut right on the button!
With the fighters clinched against the cage, St John creates a bit of distance for himself and scores with a nice uppercut.
St John cracks Souvlaki with a nice body shot.
St John misses with a shot to the kidneys.
St John pushes off and circles away, back to the middle of the mat.
St John stuffs the takedown.
St John moves into range and clinches up with Souvlaki.
St John's corner calls for him to break the clinch, which he does.
St John's corner calls for a 1, 2 combination and St John duly obliges.
Wooooo! Give it up for these two warriors! They are putting on a show!
Souvlaki is trying hard to land a takedown here. St John sprawls well and keeps this one on the feet.
That's four minutes gone in the round.
St John throws a right and a left that Souvlaki avoids nicely.
Souvlaki changes levels looking for a counter takedown but doesn't commit.
St John tries to close the distance and clinch up but Souvlaki swats him away and circles back towards the center.
St John tries to clinch up.
St John lunges in with swinging rights and lefts but Souvlaki circles away quickly and effectively.
Mia St John is looking to keep the fight on the feet at all costs.
St John tries to close the distance and clinch but Souvlaki swats him to one side with an open hand palm strike and circles away.
Souvlaki circles away from the clinch attempt.
Souvlaki tries to shoot in for a takedown. He's got hold of a leg but St John swivels and escapes.
St John lands a jab-cross combination.
Koulouraki Souvlaki has stepped it up - he knows he needs a finish here!
Souvlaki misses the jab.
A telegraphed takedown attempt from Souvlaki is defended easily by St John.
Mia St John is fighting for a decision - hopefully he's judged it right and he's actually winning the fight.
The fight moves into the clinch position.
Souvlaki throws a punch but it's blocked by St John.
And that's the end of the fight!
Mia St John comfortably won the final round on my scorecard.
I've got St John winning every round here. Surely the decision will go his way and he'll pick up a well deserved decision victory. Over to the ring announcer for the scorecards.
Ladies and gentlemen, after 3 rounds of action, we go to the scorecards for a decision.
Judge Eliza Hachem scores the fight 27:30
Judge Ben Watson scores the fight 27:30
Judge Ron Honeybunn scores the fight 27:30
In favor of your winner, by unanimous decision... Mia St John!
Mia St John opened up his post fight interview with a scream to camera that he wants a title shot! Whether he deserves the shot will be up to the management of the organization, so I guess he'll have to wait and see.
|
|
|
|
|
|
|
|
|
|
|
|
|
|
|
|
|
|
|
|
|
|
|
| S |
C
A |
G |
S |
C
B |
G |
|
S |
C |
G |
|
energy
A | B |
|
hype
A | B |
|
pop
A | B |
|
mgr
A | B |
|
FIGHT
RATING
59% |
|
|
|
|
|
|
|
|
|
|

