 |
WFC - 47 PBP Commentary |
Undercard bout
|
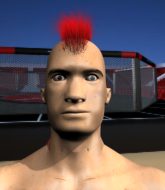
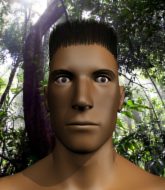
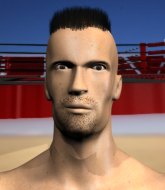
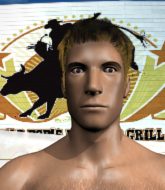
Coming up we have a heavyweight MMA rules bout between Mike Galloway (ranked 0 p4p, 0 weight class) and Jack Reach (ranked 0 p4p, 0 weight class). Jack Reach has the power to score a knockout today if he connects clean with Mike Galloway's chin.
 |
|
 |
| 193 cm
24
265 lbs
1 - 1 - 0 |
|
195 cm
26
265 lbs
5 - 1 - 0 |
BJJ Blue Belt
Solid boxing
Self confident |
|
BJJ Blue Belt
Decent boxing
Very confident |
|
| |
|
Ladies and gentlemen. This fight is 3 rounds, in the heavyweight division.
Introducing the fighter to my left, fighting out of the red corner.
With a record of
1 - 1 - 0, fighting out of Sydney, Mike Galloway!
And introducing the fighter to my right, fighting out of the blue corner.
With a record of
5 - 1 - 0, fighting out of Sydney, Jack Reach!
The judges for this bout are Winston Howard, Ron Honeybunn and Summer Carpenter.

The bell rings for round one and we are underway!
Galloway blocks a jab.
Galloway appears to be looking for a big counter.
Reach dips down and scores with a jab to the body.
Reach swings for the body but Galloway moves out of range.
A counter left hand to the body from Galloway misses its target.
Galloway with a poor takedown
and Reach counters with a crisp hook to the side of the head.
A lazy body kick from Galloway
and Reach counters with a good right hand that lands right on the jaw.

Galloway closes the distance and clinches.
Reach keeps the fight in the clinch, despite Galloway's efforts to push away.
Galloway tries to pull guard but Reach forces him back to his feet, against the cage.
We've had a slow start to the round here - hopefully the action picks up.
Galloway has had enough of the clinch but Reach keeps him there for the moment.
With the two fighters working up against the cage, Reach just misses with a elbow thrown towards Galloway's brow.
Galloway is working on a leg, looking for a takedown but Reach is defending well.
That's three failed takedown attempts in the round for Mike Galloway. That's going to take a lot out of him.

That's one minute gone in the round.

Galloway jumps guard and drags Reach to the mat. He's obviously going to be looking for submissions off his back.
Reach has decided he wants to stand but the closed guard of Galloway is proving hard to escape from.

Reach stands up from guard. Let's bang!
Galloway tries for a takedown but Reach circles away easily
and Reach counters with a good right hand that lands right on the jaw.
Galloway shoots in looking for a double leg takedown. Reach defends it nicely.
Reach lets it all go there with a big combo counter but none of the punches connected.
Reach scores with the left hand. Galloway knows he should have avoided that one.

That's two minutes gone in the round.
Galloway looks shocked there as he takes a right hand to the temple.
Galloway tries for a takedown but Reach circles away easily
and Reach counters with a stiff right hand.
Galloway dives in for a single leg takedown but Reach sprawls and the fighters end up clinched against the cage.
Nice sprawl there from Reach as Galloway shoots in.
A little jabbing left from Reach on the counter but it doesn't find it's target.
Reach stuffs the takedown attempt from Galloway. Galloway gets slowly back to his feet.
Reach throws out a counter right but Galloway avoids it with no problem.
Galloway is breathing heavily.
Galloway misses with a takedown
and Reach counters with a lovely straight right hand!
Galloway gets clipped by a big right hand and goes down spinning to the canvas! Reach gets the back mount and begins to drop bombs on his rocked foe! Galloway is too out of it to defend against the strikes and the referee jumps in to save him from the beatdown!
Ladies and gentlemen, after 3:56 of round 1, we have a winner by way of TKO (Strikes). Jack Reach!
|
|
|
|
|
|
|
|
|
|
|
|
|
|
|
|
|
|
|
|
|
|
|
| S |
C
A |
G |
S |
C
B |
G |
|
S |
C |
G |
|
energy
A | B |
|
hype
A | B |
|
pop
A | B |
|
mgr
A | B |
|
FIGHT
RATING
34% |
|
|
|
|
|
|
|
Undercard bout
|
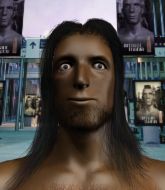
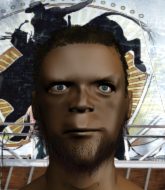
Coming up we have a bantamweight MMA rules bout between Joseph Taylor (ranked 0 p4p, 0 weight class) and Mia St John (ranked 0 p4p, 0 weight class). St John has chosen The Bitch is back as his entrance music. Joseph Taylor could well score a knockout today. He has the power to get to Mia St John's chin.
 |
|
 |
| 156 cm
29
138 lbs
7 - 6 - 0 |
|
168 cm
38
140 lbs
12 - 13 - 0 |
Good takedowns
Counter fighter
KO power |
|
BJJ Purple Belt
Decent boxing
Knockout power |
|
| |
|
Ladies and gentlemen. This fight is 3 rounds, in the bantamweight division.
Introducing the fighter to my left, fighting out of the red corner.
With a record of
7 - 6 - 0, fighting out of Sydney, Joseph Taylor!
And introducing the fighter to my right, fighting out of the blue corner.
With a record of
12 - 13 - 0, fighting out of Los Angeles, Mia St John!
The judges for this bout are Francis DeMontford, Damien Edna and Bruno Hogan.
The bell rings for round one and we are underway!
A kick lands to the mid section there for St John.

St John instigates a clinch.

St John pushes off and circles away, back to the middle of the mat.
St John throws a head kick that half lands.
Taylor showing good head movement there, avoiding the strikes from St John.
St John throws a combination. Taylor tries to block but a couple of punches get through.
St John has taken the fight to the clinch.
St John escapes the clinch and we're back to striking.
St John closes the distance and pushes Taylor back into the cage.
St John manages to break the clinch.
This has been an exciting period of action!
St John fails to land with the punch combination there - jab, cross, hook, miss, miss, miss.
St John fails to land with a series of punches.
Taylor feinted with a counter takedown.
Taylor could do with losing a few pounds - he looks very soft around the mid section, to put it politely.
St John shuffles to his left behind two crisp jabs. Taylor eats them both and turns towards St John to reposition himself and eats a stinging right hand-left hook combo.
St John works over Taylor's head and body with a nice combination.
That's one minute gone in the round.
St John scores to the head and body with a nice combination!
Taylor wants to clinch up but St John keeps it at a distance.
Taylor has his head slapped from side to side by a 3 punch combination. That must have hurt him.
St John throws a combination. Taylor tries to block but a couple of punches get through.
Taylor shoots in looking for a takedown but St John manages to keep the fight standing, pushing Taylor's face into the canvas for good measure before circling away.
St John fails to land with the punch combination there - jab, cross, hook, miss, miss, miss.
Taylor feinted with a counter takedown.
Taylor takes a head kick and shrugs it off.
St John throws a one two combo.
Mia St John seems to be the more aggressive standup fighter in this bout.
This is a great period of action - very entertaining stuff!
St John rushes Taylor and pushes him back against the cage in a clinch.
St John manages to break the clinch.
St John is working the combinations to good effect here.
Taylor shoots in for a takedown. He's persisting with it as St John sprawls well. St John wins this battle and keeps the fight standing. Taylor gets slowly back to his feet.
Mia St John is looking to keep the fight on the feet at all costs.
That's two minutes gone in the round.
St John misses with the combination.
Taylor tries to counter with a takedown but St John is quick to defend against it.
St John throws a nice looking combination but Taylor bobs and weaves to avoid any damage.
St John misses with a double jab.
St John rushes Taylor and pushes him back against the cage in a clinch.
St John breaks the clinch.
St John throws a two punch combo that lands nicely.
St John has closed the distance and engaged Taylor in a clinch.
St John manages to break the clinch.
St John misses with a jab and misses with a cross straight after too.
St John throws a combination but it was largely blocked by Taylor.
Taylor fails with a rather predictable takedown attempt.
That's three failed takedown attempts in the round for Joseph Taylor. That's going to take a lot out of him.

That's three minutes gone in the round.
St John throws a series of strikes that have Taylor backpedaling.
St John moves into the clinch.
St John pushes off and circles away, back to the middle of the mat.
A head kick from St John lands but Taylor takes it in his stride.
St John misses with a few strikes there.
Taylor drops down looking for a counter takedown but St John sprawls and moves away.
St John clinches.
Taylor trying to land knees to the body.
St John pushes off and circles away, back to the middle of the mat.
Taylor has his front leg slapped to the side - a nice low kick landing there from St John.
St John instigates a clinch.
St John manages to break the clinch.
St John clinches with his opponent.
Fantastic stuff here - a very entertaining period of action, which has drawn cheers from the crowd.
St John breaks the clinch and we're back to striking at distance.

That's four minutes gone in the round.
A left and a right from St John both land. Nice combination.
St John clinches with his opponent.
St John breaks the clinch and we return to the middle of the mat.
St John looks to score with a combo but nothing lands.
St John lands a jab-cross combination.
Taylor avoids a punch combination nicely.
St John throws a head kick that misses.
Taylor seem to be loading up, looking for a big counter.
Taylor closes the distance, clinches up and gets a nice trip takedown into side control. Very smooth.
The ref warns both fighters not to hold the cage as they work up against the meshing.
St John bucks up and tries to throw Taylor off but instead Taylor has got his back!
The crowd applaud the fighters' efforts here as the round comes to an end.
Taylor wants to control but St John is keeping busy.

St John preventing the rear naked choke attempt from Taylor.
And thats the end of the round the fighters go back to their corners.
Mia St John dominated that round.
That's time! Taylor's corner gives him a slap on the ass as he gets ready to fight.

St John takes the fight into the clinch.
St John escapes the clinch and we're back to striking.
Nice sprawl there from St John as Taylor shoots in.
St John instigates a clinch.
St John breaks from the clinch.
A solid body kick from St John.
St John displays good takedown defense there as he swats away a double leg from Taylor.
We've had a slow start to the round here - hopefully the action picks up.
St John fakes with an overhand right and moves in to clinch with Taylor, pushing him back against the cage.
St John breaks the clinch.
St John has taken the fight to the clinch.
That's one minute gone in the round.
St John manages to break the clinch.
St John moves into range and throws a combination. A nice jab followed by a hook to the body.
St John tries to bum rush Taylor with a series of wild strikes but Taylor uses good footwork to avoid the assault.
St John forces Taylor back against the cage and clinches.
St John breaks from the clinch.
St John has been the more effective fighter overall so far.
St John misses with a jab, cross combination.
Taylor wants to clinch up but St John keeps it at a distance.
Jab, cross, leg kick. Nice combination by St John!
A punch combination from St John misses.
St John tries to bum rush Taylor with a series of wild strikes but Taylor uses good footwork to avoid the assault.
St John throws a body kick that sends a sickening thudding noise reverberating around the arena.
The crowd cheering loudly, showing their appreciation for the quality fight we're seeing here.
St John has managed to clinch.
St John breaks the clinch.
That's two minutes gone in the round.
St John lands with a head kick! That's gotta hurt.
St John has taken the fight to the clinch.
St John escapes the clinch and we're back to striking.
Thud! ouch! good body kick from St John - that will leave a mark!
Joseph Taylor is looking to throw some combinations by the looks of things.
St John has Taylor up against the cage in a clinch.
St John escapes the clinch and we're back to striking.
St John lands a two punch combo.
Taylor dodges the punch combination from St John.
Taylor is looking for a counter combo.
St John misses with a two punch combination.
St John will need to tighten up his combinations if he doesn't want to gas himself out, swinging at thin air.
That's three minutes gone in the round.
No luck for Taylor with that takedown attempt.
That's three failed takedown attempts in the round for Joseph Taylor. That's going to take a lot out of him.
St John plants his feet and lands a nice head kick!
St John scores with a head kick.
St John throws a nice looking combination but Taylor bobs and weaves to avoid any damage.
Taylor looked to counter that last move with a leg kick but didn't pull the trigger.
Mia St John seems to be getting the better of the standup.
St John scores with a nice looking left hook and follows it up with an uppercut!
St John plants his feet and lands a nice head kick!
Taylor takes a step back and watches a body kick go sailing past his mid section.
Taylor appears to be looking for a big counter.
Taylor fails with a takedown attempt from distance.
St John tries to bum rush Taylor with a series of wild strikes but Taylor uses good footwork to avoid the assault.
Taylor tries to counter with a takedown but St John is quick to defend against it.
St John lands a jab, followed by a cross and another cross, as Taylor backs up against the cage.
That's four minutes gone in the round.
Wooooo! Give it up for these two warriors! They are putting on a show!
St John misses with a double jab.
St John lands a jab. Then a cross. Then finally a nice hook to the body. Good work there by St John.
Taylor shoots in for a takedown. "Ole!" shouts St John as he jumps to the side.
St John throws a series of punches but Taylor avoids them all with ease.
St John pushes Taylor up against the cage in a clinch.
The fighters are starting to perspire pretty heavily.
St John's corner calls for him to break the clinch, which he does.
St John fails to land with the punch combination there - jab, cross, hook, miss, miss, miss.
It looked like Taylor was looking amped, ready to throw a big counter but didn't commit.
St John misses with a two punch combination.
St John misses with a double jab
and Taylor counters with a nice shoot takedown that brings the fighters to the ground.

St John wriggles free and stands up.
The crowd applaud the fighters' efforts here as the round comes to an end.
St John forces Taylor back against the cage and clinches.
And thats the end of the round the fighters go back to their corners.
Mia St John showed his class in that round. I'd imagine he'll take it on all the scorecards.
The minute break is over - no more time for sponges and pep talks - back to the action! And we move into the final round!

Sloppy strikes from St John. Those never looked like landing.
Taylor attempts a counter takedown but St John avoids it well and moves away.
St John looks to land a combination but Taylor avoids it well.
St John stalks Taylor and leaps in with a furious combination of punches. Uppercuts and crosses smash into Taylor's face. Taylor staggers backwards, shaken.
St John fails to land with a series of punches.
Taylor appears to be looking for a counter takedown.
Taylor avoids a punch combination nicely.
St John thuds a mid kick into his opponent's body. That will wear on Taylor if he has to take too many more of those.
St John misses with a wild combination.
We've had a slow start to the round here - hopefully the action picks up.
St John tries to bum rush Taylor with a series of wild strikes but Taylor uses good footwork to avoid the assault.
Taylor attempts a counter takedown but St John avoids it well and moves away.
St John moves into range and clinches up with Taylor.
St John breaks from the clinch.
That's one minute gone in the round.
St John throws a jab, cross combination which is slipped
and Taylor counters with a shot to the ribs. That looked like it hurt.
A punch combination from St John misses.
St John looks to land a combination. Taylor sees it coming but can only parry a couple of the shots.
St John takes a big intake of breath there - he's definitely tired.
St John forces Taylor back against the cage and clinches.
St John breaks from the clinch.
St John closes the distance and clinches.
St John is defending well against a takedown attempt.
St John breaks from the clinch.
Taylor misses with a takedown attempt - St John sprawls well and throws a nice strike on the way out which just misses.
St John has taken the fight to the clinch.
St John breaks the clinch.
That's two minutes gone in the round.
St John's corner calls for a 1, 2 combination and St John duly obliges.
The fans in attendance giving it up for the two fighters, who have really let it all hang out in the last minute or so!
St John misses with a few strikes there.
St John closes the distance and clinches.
St John breaks from the clinch.
St John throws a quick head kick that skims the top of Taylor's head.
Some wild striking there from St John.
Taylor changes levels looking for a counter takedown but doesn't commit.
St John lands with a kick to the temple. Taylor shrugs as if to say "is that all you've got?"
Taylor showing good head movement there, avoiding the strikes from St John.
Taylor half commits to a counter takedown before pushing away, out of range.
St John fakes with an overhand right and moves in to clinch with Taylor, pushing him back against the cage.
That's three minutes gone in the round.
St John breaks the clinch.
St John gets to the clinch - let's see what his plan is here.
St John breaks from the clinch.
Taylor shoots in for a takedown. "Ole!" shouts St John as he jumps to the side.
Despite the aggression on St John's face he doesn't fully commit to the counter.
That's three failed takedown attempts in the round for Joseph Taylor. That's going to take a lot out of him.
St John moves into range and throws a combination. A nice jab followed by a hook to the body.
St John lands a head kick. Taylor smiles back at him and beckons him forward.
Joseph Taylor has stepped it up - he knows he needs a finish here!
St John lunges in with swinging rights and lefts but Taylor circles away quickly and effectively.
St John looks to land a combination but Taylor avoids it well.
Taylor half commits to a counter takedown before pushing away, out of range.
St John throws a nice looking combination but Taylor bobs and weaves to avoid any damage.
Taylor tries to counter with a takedown but St John is quick to defend against it.
St John lands with a two punch combination before moving back out of range.
That's four minutes gone in the round.
St John throws a nice looking combination but Taylor bobs and weaves to avoid any damage.
We've seen a great period of action over the last minute or so - credit to both fighters for going all out!
Taylor shoots in from a long way out. He's driving through with the takedown attempt and he eventually gets it, landing in St John's guard.
St John pushes Taylor off for just long enough to get back to his feet. Very athletic spring there.
Taylor slips a jab and a cross from St John.
St John throws a head kick that misses and slips in the process. He scrambles back to his feet and the fighters circle.
Taylor goes for a double leg but St John avoids the attempt and the two fighters end up clinched against the cage as St John continues to drive forward.
Taylor looks frustrated there after his takedown attempt is stuffed easily.
A punch combination from St John misses.
Taylor fails with a takedown attempt.
Mia St John is fighting for a decision - hopefully he's judged it right and he's actually winning the fight.
St John throws a wild combination but nothing lands.
And that's the end of the fight!
Mia St John comfortably won the final round on my scorecard.
Well St John has outworked and out performed his opponent in all aspects of the game today. He was simply too good and the decision should be no more than a formality. Over to the ring announcer for the scorecards.
Ladies and gentlemen, after 3 rounds of action, we go to the scorecards for a decision.
Judge Francis DeMontford scores the fight 24:30
Judge Damien Edna scores the fight 24:30
Judge Bruno Hogan scores the fight 24:30
In favor of your winner, by unanimous decision... Mia St John!
Mia St John opened up his post fight interview with a scream to camera that he wants a title shot! Whether he deserves the shot will be up to the management of the organization, so I guess he'll have to wait and see.
|
|
|
|
|
|
|
|
|
|
|
|
|
|
|
|
|
|
|
|
|
|
|
| S |
C
A |
G |
S |
C
B |
G |
|
S |
C |
G |
|
energy
A | B |
|
hype
A | B |
|
pop
A | B |
|
mgr
A | B |
|
FIGHT
RATING
82% |
|
|
|
|
|
|
|
Undercard bout
|
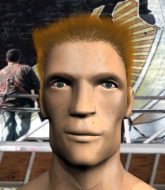
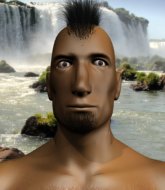
Coming up we have a lightweight MMA rules bout between Iko Ruhian (ranked 0 p4p, 0 weight class) and Tanner Wylder (ranked 0 p4p, 0 weight class). Ruhian kept the crowd waiting but all that was forgotten when his ring entrance music started. The incomparable musical genius that is Kendang Pencak. These two fighters really are very evenly matched on the feet - it will be fascinating to see who can assert themselves in that aspect of the fight.
 |
|
 |
| 180 cm
19
169 lbs
3 - 0 - 0 |
|
178 cm
22
153 lbs
1 - 0 - 0 |
BJJ White Belt
Counter fighter
Very quick |
|
Good wrestler
Brawler
Experienced |
|
| |
|
Ladies and gentlemen. This fight is 3 rounds, in the lightweight division.
Introducing the fighter to my left, fighting out of the red corner.
With a record of
3 - 0 - 0, fighting out of Sydney, Iko Ruhian!
And introducing the fighter to my right, fighting out of the blue corner.
With a record of
1 - 0 - 0, fighting out of Sydney, Tanner Wylder!
The judges for this bout are Ron Honeybunn, Winston Howard and Francis DeMontford.
The bell rings for round one and we are underway!
Wylder shoots in looking for a takedown but Ruhian manages to keep the fight standing, pushing Wylder's face into the canvas for good measure before circling away.
We've been told by Ruhian's head coaches at Fokai Academy that he's been working on his takedown defense in preparation for this fight.
Wylder has his takedown stuffed
and Ruhian connects with a straight left hand counter down the middle.

It looks like Tanner Wylder has been cut.
Wylder shoots in looking for a double leg takedown. Ruhian defends it nicely.
Iko Ruhian has stuffed three takedown attempts in the round now. That's going to take a lot out of Tanner Wylder.
Wylder with a lazy takedown attempt
and Ruhian counters with a quick right hand to the jaw.
Wylder looks winded!
Wylder with a poor takedown
and Ruhian counters with a left and a right... and another left... and another!! That last one turned off the lights! Wylder has no idea who he is and is as he gazes up at the spotlights. Brutal knockout!
Ladies and gentlemen, after 0:34 of round 1, we have a winner by way of KO (Strikes). Iko Ruhian!
During a confident post fight interview, Iko Ruhian thanked all his fans. He seemed very genuine when describing how motivated his fans keep him.
|
|
|
|
|
|
|
|
|
|
|
|
|
|
|
|
|
|
|
|
|
|
|
| S |
C
A |
G |
S |
C
B |
G |
|
S |
C |
G |
|
energy
A | B |
|
hype
A | B |
|
pop
A | B |
|
mgr
A | B |
|
FIGHT
RATING
60% |
|
|
|
|
|
|
|
Undercard bout
|
Coming up we have a middleweight MMA rules bout between The Australian (ranked 0 p4p, 0 weight class) and Shawn Jones (ranked 0 p4p, 0 weight class). Shawn Jones told me before the fight that he's been watching a lot of DVDs so let's see if that helps him in this one! I can't wait to find out!
 |
|
 |
| 180 cm
22
200 lbs
0 - 3 - 0 |
|
185 cm
20
185 lbs
2 - 2 - 0 |
BJJ Brown Belt
Counter fighter
Very quick |
|
BJJ Purple Belt
Basic striking
Solid chin |
|
| |
|
Ladies and gentlemen. This fight is 3 rounds, in the middleweight division.
Introducing the fighter to my left, fighting out of the red corner.
With a record of
0 - 3 - 0, fighting out of Tokyo, The Australian!
And introducing the fighter to my right, fighting out of the blue corner.
With a record of
2 - 2 - 0, fighting out of Sydney, Shawn Jones!
The judges for this bout are Summer Carpenter, Topper Green and Skip Squint.
The bell rings for round one and we are underway!
Jones gets his takedown attempt stuffed easily
and Australian counters with a shoot takedown into half guard.
Australian throwing shots but Jones is blocking nicely.
Australian controlling the action here.
Jones wants to control but Australian is keeping busy.
Australian sitting and controlling from the half guard.
We've had a slow start to the round here - hopefully the action picks up.
Jones tries to get to full guard but Australian has control of the leg.
That's one minute gone in the round.
Australian controlling the action here.
Jones scrambles, trying to get to his feet, but Australian manages to mount him!
Australian content just to control the position here.
That's two minutes gone in the round.
A few boos can be heard. I'm sure they will multiply if the fighters don't pick up the pace.
Australian thowing shots but they're missing.
Jones is looking to get to half guard.
Australian throws some wild stikes that Jones manages to avoid easily.
The ref warns both fighters not to hold the cage as they work up against the meshing.
Australian trying to control but Jones is having none of it.
Australian controlling the position easily from mount.
That's three minutes gone in the round.
Jones is writhing around trying to get back to his feet.
Australian content just to control the position here.
That's four minutes gone in the round.
The crowd are starting to boo a lack of action.
Jones is looking to get to half guard.
Jones really doesn't want to stay on the ground with Australian. If he can't get it back to his feet, it's only a matter of time before he'll be tapping out.
Australian throwing sloppy strikes here. Perhaps if he tightened up his striking from such a dominant position, he'd be able to finish easier.
Australian tucks in and makes sure he doesn't lose the dominant position.
Australian prevents Jones from getting the reversal.
Boooooooooooooooooooo!!! God, this has been a terrible round. Come on you two, sort yourselves out!
Australian throws some wild stikes that Jones manages to avoid easily.
Australian with a couple of short strikes.
And thats the end of the round the fighters go back to their corners.
The Australian dominated that round.
That's time! Back to the action!
A really sloppy takedown attempt there from Jones.
Jones is trying hard to land a takedown here. Australian sprawls well and keeps this one on the feet.
Jones has tried to improve his agility in the runup to this fight.

Jones looking to score a takedown here. Australian is defending well but Jones drives through and ends up in Australian's guard.
Australian preventing the ground and pound from doing any damage.
The fighters are pressed up against the cage, both looking to find a bit of space to work.
Australian controlling Jones's posture.
Jones looking to sit in guard and control but Australian gets the butterfly guard and sweeps. He's now in the guard on the top.

We've had a slow start to the round here - hopefully the action picks up.
Australian sitting in guard here, content to control.
That's one minute gone in the round.
Australian postures up.
Australian stands up and looks to throw the legs aside to pass to side control. Jones swivels though and keeps the full guard.
Australian trying to control but Jones is working from the bottom.
Australian pressing down on his opponent's thigh, looking to pass guard. Jones is keeping the position for now.
Australian is looking to work some ground and pound but Jones has wrist control.
That's two minutes gone in the round.
A lull in the action here being met with boos from the crowd.
Australian is intent on slowing down the pace of the fight, simply looking to control.
Australian is looking to pass into half guard but Jones pushes him away with his feet and jumps on top - now Jones is in guard.

Australian utilising some decent striking defenses from the guard, preventing the ground and pound.
Jones stands up and looks to throw the legs aside to pass to side control. Australian swivels though and keeps the full guard.
Australian controlling the position.
Jones stopping the sweep attempt from Australian.
Jones is fighting to break Australian's control of his arms but Australian is doing a good job of controlling the position at the moment.
Jones tries to free his leg and advance position but Australian is retaining full guard.

The referee has stepped in and called for a break in the action. We'll restart on the feet.
That's three minutes gone in the round.
Jones fails with a rather predictable takedown attempt.
The Australian has stuffed three takedown attempts in the round now. That's going to take a lot out of Shawn Jones.
Australian dives in for a single leg takedown but Jones sprawls and the fighters end up clinched against the cage.
Australian has been working on his balance at Africa Training , so perhaps that has help him stuff some of the takedown attempts by Jones.
Jones shoots in for a takedown - he's clinched up with Australian but Australian pushes him off and we're back to square one.
Shawn Jones is looking to throw some combinations by the looks of things.
Jones fails with the takedown.
Horrible takedown attempt by Australian or perhaps it was just good defense by Jones, which made it look bad.
Jones tries to counter by closing the distance.
A momentary lapse in concentration from Jones enables Australian to shoot in and score with a neat double leg. Jones manages to secure a closed guard as the fighters hit the mat.
That's four minutes gone in the round.
Australian controls the pace of the fight for a moment.
Australian throws a big right hand that misses.

Jones is throwing his legs up, looking for submissions. Australian is aware though and is defending well.
Jones is breathing heavily.
Australian slows down the pace of the fight for a moment. He'll need to remain active if he doesn't want to see the fight stood back up.
Boooooooooooooooooooo!!! God, this has been a terrible round. Come on you two, sort yourselves out!
Jones wants to get back to his feet but Australian is in a dominant position and won't allow it.
And thats the end of the round the fighters go back to their corners.
The Australian dominated that second round.
The referee calls time. The cornermen exit stage left and we're back to business. This is the final round!
Australian rushes Jones and presses him up against the cage.
Jones is pressed up against the cage. Australian has hold of a leg and is looking to drag Jones down to the mat. Jones avoids the attempt though and has circled away. We're back to striking at a distance.
Jones dives in for a single leg takedown but Australian sprawls and the fighters end up clinched against the cage.
Australian defends well against a solid takedown attempt from Jones.
No luck with that takedown attempt from Jones.
Australian feinted with a counter takedown.
The Australian has stuffed three takedown attempts in the round now. That's going to take a lot out of Shawn Jones.
Jones closes the distance and clinches up, looking for a takedown. He shifts his weight and gets a nice trip into half guard.
We've had a slow start to the round here - hopefully the action picks up.
Australian is looking to improve his position.
Australian keeping control of the leg, stopping his opponent passing to mount.
That's one minute gone in the round.
Jones wants to work for an arm triangle but Australian is really keeping half guard well and defending the submission attempt.
Jones takes a big intake of breath there - he's definitely tired.
Australian is looking to control Jones's leg but it's slowly edging free. Can Australian avoid being mounted?
Australian is pressing down on Jones's left leg trying to get back to full guard. He's managed it.
Jones is looking to work some ground and pound but Australian has wrist control.
Jones with a flurry of punches that miss.
Australian has his hands on Jones's head, controlling the position.
That's two minutes gone in the round.
My god... these two guys really need to pick up the pace or everyone will leave to go get a beer.
The referee has decided to stand the fighters back up, so we'll restart on the feet.
Jones tries for a takedown but Australian sees it coming a mile off and avoids it easily.
Jones shoots in for a double leg but Australian sprawls well. That's going to sap some energy.
Australian throws a monster uppercut resembling something out of street fighter but it doesn't land.
Jones wants to clinch up but Australian keeps it at a distance.
Jones displays good takedown defense there as he swats away a double leg from Australian.
That's three minutes gone in the round.
Australian closes the distance and gets a trip takedown into side control. Jones quickly recovers to half guard.
Australian is looking for a kimura here.
Australian slows the pace down in half guard.
That's four minutes gone in the round.
Shawn Jones has stepped it up - he knows he needs a finish here!
Australian is working for a submission of some sort.
Boooooooooooooooooooo!!! God, this has been a terrible round. Come on you two, sort yourselves out!
Jones actively working from the bottom here.
And that's the end of the fight!
The Australian showed his dominance in that final round.
Well Australian has outscored his opponent in every aspect of the fight today. Only a scarily incompetent judge or two will keep him from a well deserved win... Over to the ring announcer for the scorecards.
Ladies and gentlemen, after 3 rounds of action, we go to the scorecards for a decision.
Judge Summer Carpenter scores the fight 30:27
Judge Topper Green scores the fight 30:27
Judge Skip Squint scores the fight 30:27
In favor of your winner, by unanimous decision... The Australian!
|
|
|
|
|
|
|
|
|
|
|
|
|
|
|
|
|
|
|
|
|
|
|
| S |
C
A |
G |
S |
C
B |
G |
|
S |
C |
G |
|
energy
A | B |
|
hype
A | B |
|
pop
A | B |
|
mgr
A | B |
|
FIGHT
RATING
22% |
|
|
|
|
|
|
|
Undercard bout
|
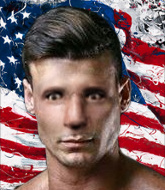
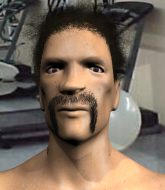
Coming up we have a welterweight MMA rules bout between Alf Stewart (ranked 0 p4p, 0 weight class) and Leon Elasor (ranked 0 p4p, 0 weight class). Elasor comes into a darkened arena with his song building. Kemuri - Time Bomb kicks in, the lights come on and the crowd goes wild! What a showman! Alf Stewart has a significant reach advantage - let's see if he can make it count.
 |
|
 |
| 205 cm
29
180 lbs
9 - 10 - 0 |
|
182 cm
28
179 lbs
10 - 3 - 0 |
BJJ Blue Belt
Solid boxing
Good chin |
|
BJJ White Belt
Counter fighter
Powerful |
|
| |
|
Ladies and gentlemen. This fight is 3 rounds, in the welterweight division.
Introducing the fighter to my left, fighting out of the red corner.
With a record of
9 - 10 - 0, fighting out of Sydney, Alf Stewart!
And introducing the fighter to my right, fighting out of the blue corner.
With a record of
10 - 3 - 0, fighting out of Sydney, Leon Elasor!
The judges for this bout are Eliza Hachem, Summer Carpenter and Ben Watson.
The bell rings for round one and we are underway!
Stewart fakes a jab and then connects with a hook.
Elasor throws a sloppy head kick and Stewart moves out of range easily.
Elasor throws a head kick that looked like it stung.

It looks like Alf Stewart has been cut.
Elasor gets cracked with a nice right hand there by Stewart.
Elasor drives through and clinches with Stewart against the cage.
A short right hand to the side of the head by Elasor.
Stewart wants to break free but Elasor has control.
Stewart is trying to push Elasor away but Elasor has him pressed against the cage, so he's going nowhere.
The fighters are pressed against the cage, as the pace of the fight slows.
Stewart avoiding damage as Elasor throws knees to the body.
Stewart has had enough of the clinch but Elasor keeps him there for the moment.
Elasor keeps the fight in the clinch, despite Stewart's efforts to push away.
Stewart looks like he'd prefer to be striking at range right now.
Stewart takes a knee right on the jaw!
Stewart is trying to work out of this bad position, with his back against the cage.
Elasor lands a right hand that snaps the head of Stewart backwards.
That's one minute gone in the round.
Elasor can't find room to land a body shot as Stewart controls the action.
Stewart can't break the clinch.

Stewart breaks the clinch and we're back to striking at distance.
Stewart throws a jab but it's blocked by Elasor.
Elasor thinks about the counter body kick.
Stewart rushes Elasor and pushes him back against the cage in a clinch.
Elasor lands with a left to the head.
Elasor lands a glancing elbow in the clinch.
Stewart can't break the clinch.
Elasor is trying to wear down his opponent with knees to the body.
Elasor tries to land a knee to the body but he is off balance and Stewart avoids it.
Elasor unloads a knee to the mid-section. Stewart lets out a prehistoric sounding urrrrgh.
Elasor goes for a body shot but it's blocked.
Elasor putting his Muay Thai to good use. He has Stewart in a tight clinch and is doing some damage with knees to the body.
Stewart looks to be in better condition than last time we saw him fight. Obviously he's been working hard on his cardio.
Elasor lands an elbow just above Stewart 's eye.
Elasor lands a nice elbow from the clinch.
The crowd are loving this. Great action here.
Elasor missing with knees to the body.
Elasor misses with a shot to the kidneys.
That's two minutes gone in the round.
Stewart has had enough of the clinch and is looking to separate.
Elasor breaks the clinch and we're back to striking at distance.
Stewart takes a shot to the body in his stride.

Elasor lands a big head kick that sends Stewart tumbling to the mat! Elasor takes a step backwards and waves Stewart back to his feet - he wants the finish!

Stewart is rocked!
Elasor swats away the attempt to clinch by Stewart.
Stewart throws a jab, cross combination which is slipped
and Elasor counters by clinching up.
Still in the clinch, Elasor scores with a nice short uppercut.
Oh Stewart is still all over the place! His legs are completely gone! Will he be able to recover?!!
Stewart taking a breather.
Stewart seems to have got his legs back now.
A frustrated look appears on Stewart's face as he tries to break the clinch.
Elasor avoiding damage as Stewart throws knees to the body.
Elasor misses the knee to the body. Nice hip positioning from Stewart.
Elasor with the Thai clinch. He's looking to land a big knee but he's not managed it this time.
Stewart really does look like a pencil wearing a pair of gloves. Let's hope he has a gameplan to suit that ridiculous body shape.
Stewart wants to push off and get back to the center of the mat but Elasor has him pressed against the cage.
Elasor breaks from the clinch.
Stewart lands a really nice looking cross but Elasor seems unphased.
Stewart takes a kick to the body and keeps moving.
That's three minutes gone in the round.
Elasor lands a big head kick that sends Stewart tumbling to the mat! Elasor takes a step backwards and waves Stewart back to his feet - he wants the finish!
A swing and a miss from Stewart.
Elasor throws a body shot but no joy.
Elasor uses some good footwork to avoid the body shot by Stewart.
Leon Elasor is looking to keep the fight on the feet at all costs.
Elasor closes the distance and clinches.
Stewart working aggressively here.
Elasor trying to land knees to the body.
Stewart tries to jump guard but he falls flat on his backside. Elasor smiles and moves away.
A left lands for Elasor.
The fans in attendance giving it up for the two fighters, who have really let it all hang out in the last minute or so!
Elasor moves into range and lands a nice body kick.
Stewart thows a left - swing and a miss!
Elasor is looking for the big counter here.
Stewart misses with a leg kick
and Elasor counters with a body kick that brings a smile to the face of both fighters.
Stewart is breathing heavily.
Stewart connects with a body shot that sends Elasor's belly button to the back.
Elasor lands a nice looking kick to the body. Stewart takes a step back to recover.
That's four minutes gone in the round.
Elasor throws a nice head kick!
Elasor scores with a sloppy right hand. Stewart should have avoided that one.
A head kick misses from Elasor.
Elasor throws a head kick that misses and slips in the process. He scrambles back to his feet and the fighters circle.
Elasor misses with a looping right.
Elasor has done a lot of speed work in the buildup to this fight.
Elasor drives through and clinches with Stewart against the cage.
Elasor escapes the clinch and we're back to striking.
Stewart throws a lazy right hand but Elasor sees it coming a mile off and sidesteps it easily.
Stewart takes a body punch but keeps moving.
Elasor throws a head kick that misses and slips in the process. He scrambles back to his feet and the fighters circle.
Stewart swung with a counter right hand that didn't connect.
The crowd applaud the fighters' efforts here as the round comes to an end.
Stewart misses with a left hand
enabling Elasor to counter with a crisp jab.
Elasor takes a swing at Stewart's ribcage but misses.
A decent looking cross lands there for Elasor.
Elasor will need to tighten up his combinations if he doesn't want to gas himself out, swinging at thin air.
And thats the end of the round the fighters go back to their corners.
Leon Elasor dominated that round.
The cut man is working on Alf Stewart's cut.
OK. That's time! The bell goes and we're back to the action.
Elasor keeping his hands up high there, blocking the jab from Stewart.
Leon Elasor seems to be getting the better of the standup.
Elasor lands a left and a right that send Stewart crashing to the mat, dazed. Elasor thinks about following him to the mat but decides to wave him back up to his feet!
Elasor uses decent footwork to sidestep a right hand from Stewart.
Elasor tries a head kick but it misses.
Stewart is really head hunting here, hardly looking to strike to the body at all.
Stewart tries to clinch up.
Elasor closes the distance and presses his opponent up against the cage.
Elasor is trying to wear down his opponent with knees to the body.
Elasor lands a knee to the body.
The crowd are loving this. Great action here.
Elasor creates a bit of space for himself and sneaks an elbow through Stewart's defenses.
Elasor misses the knee to the body. Nice hip positioning from Stewart.
Elasor lands an elbow that stopped Stewart in his tracks for a moment.
Both fighters are absolutely exhausted here.
Stewart is trying to break the clinch but Elasor is controlling him.
Elasor holding his opponent close, against the cage.
Stewart is trying to break the clinch but Elasor is controlling him.
Elasor misses with a hook to the ribs.
That's one minute gone in the round.
Elasor keeps the fight in the clinch, despite Stewart's efforts to push away.
Elasor has been the more effective fighter overall so far.
Elasor breaks the clinch and we're back to striking at distance.
Elasor throws a series of punches but Stewart avoids them all with ease.
Stewart throws a right and a left that Elasor avoids nicely.
Elasor tries a switch kick but it misses it's target.
Stewart misses with a hook
and Elasor counters with a body kick.
Stewart steps to his left, right into the path of a big body kick from Elasor. That one must have hurt.
Stewart will be looking to protect his midsection after taking some solid kicks to the body.
Elasor forces Stewart back against the cage and clinches.
Elasor utilising his Muay Thai to score with a knee to the body.
Elasor breaks the clinch and we're back to striking at distance.
Elasor fakes high and swings low for a body shot but Stewart manages to avoid it.
Elasor scores with a nice body kick.
Elasor fakes with an overhand right and moves in to clinch with Stewart, pushing him back against the cage.
That's two minutes gone in the round.
A short left from Elasor.
We've seen a great period of action over the last minute or so - credit to both fighters for going all out!
Elasor lands an elbow inside.
Elasor putting his Muay Thai to good use. He has Stewart in a tight clinch and is doing some damage with knees to the body.
Elasor's corner calls for him to break the clinch, which he does.
Elasor lands a head shot.
Stewart blocks a head kick by Elasor.
Elasor connects with a high kick.
Stewart swings for the body but Elasor moves out of range.
Elasor circles to his right before unloading a perfect head kick! Stewart drops to the canvas, hurt badly! Elasor follows Stewart to the ground and unloads with a series of strikes that force the referee to step in and end the fight! This one is all over!
Ladies and gentlemen, after 2:38 of round 2, we have a winner by way of TKO (Strikes). Leon Elasor!
After winning the bout, Leon Elasor thanked all his fans and promised he'd do even better in his next fight. The crowd seemed to love his humility.
|
|
|
|
|
|
|
|
|
|
|
|
|
|
|
|
|
|
|
|
|
|
|
| S |
C
A |
G |
S |
C
B |
G |
|
S |
C |
G |
|
energy
A | B |
|
hype
A | B |
|
pop
A | B |
|
mgr
A | B |
|
FIGHT
RATING
78% |
|
|
|
|
|
|
|
Undercard bout
|
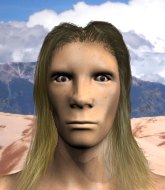
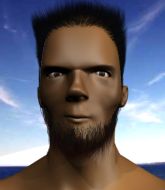
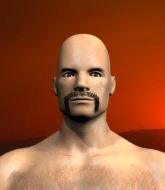
Coming up we have a super heavyweight MMA rules bout between Charles Kamen (ranked 0 p4p, 0 weight class) and Sole Uce (ranked 0 p4p, 0 weight class). These two fighters really are very evenly matched on the feet - it will be fascinating to see who can assert themselves in that aspect of the fight.
 |
|
 |
| 190 cm
27
270 lbs
5 - 2 - 0 |
|
192 cm
27
300 lbs
3 - 2 - 0 |
BJJ Blue Belt
World class boxer
Cardio machine |
|
BJJ Blue Belt
Excellent MT
Granite chin |
|
| |
|
Ladies and gentlemen. This fight is 5 rounds, for the super heavyweight championship of the world!
Introducing the champion to my left, fighting out of the red corner.
With a record of
5 - 2 - 0, fighting out of Sydney, Charles Kamen!
And introducing the challenger to my right, fighting out of the blue corner.
With a record of
3 - 2 - 0, fighting out of Sydney, Sole Uce!
The judges for this bout are Darius Henderson, Topper Green and Damien Edna.
The bell rings for round one and we are underway!
Kamen has Uce up against the cage in a clinch.
Uce tries to work over Kamen's body with a swooping hook but it only glances the target.
Kamen throws a nice elbow but it doesn't land.
We've been informed that Uce has been sparring a lot of Muay Thai in the buildup to this fight so let's see if that has an impact on the result.
Kamen lands an elbow inside that Uce shrugs off.
It looks like Sole Uce has been cut.
Kamen fails to land with a short punch on the inside.
Uce tried to land a shot to the body but connects with Kamen's elbow.
Kamen misses with a hook from the clinch.
Kamen lands a right uppercut that snaps the head of Uce backwards.
Uce avoids a wild elbow strike from Kamen.
Uce working hard to break the clinch.
Uce tries to throw a body punch but Kamen avoids it by throwing Uce back against the cage.
Uce stalling the fight.
Uce stalling in the clinch but Kamen improves position.
Uce lands a shoulder strike.
We've had a slow start to the round here - hopefully the action picks up.
Kamen throws a blind hook that connects with the side of Uces head.
Uce avoids a wild elbow strike from Kamen.
Uce stalling in the clinch.
Both fighters working to control the clinch.
Kamen has a couple of punches blocked by Uce.
Uce blocking some punches.
That's one minute gone in the round.
A quick uppercut on the inside from Kamen.
Kamen throws a nice elbow but it doesn't land.
Kamen scores with a nice hook to the head.
Kamen gets through Uce's defenses to land a nice punch to the side of the head.
A shot in the inside from Kamen.
Kamen lands with a quick shot inside that doesn't really do much damage.
Kamen lands a glancing elbow in the clinch.
Kamen lands a left hand.
Kamen blocks a body shot from Uce.
Kamen with an attempt at a knee that misses.
Uce misses with a hook from the clinch.
Still in the clinch, Kamen scores with a nice short uppercut.
We've seen a great period of action over the last minute or so - credit to both fighters for going all out!
Uce tried to land a shot to the body but connects with Kamen's elbow.
Kamen misses with a knee strike.
Uce scores with an uppercut up the middle.
Uce blocks an uppercut.
Kamen lands an uppercut.
Kamen working aggressively here.
Kamen fails to land with a short punch on the inside.
That's two minutes gone in the round.
Kamen throws a punch but it's blocked by Uce.
Kamen creates a bit of distance and throws an elbow that only just misses.
Uce throws a blind hook that connects with the side of Kamens head.
A real battle for position is taking place between these two warriors.
Uce blocks a couple of punches on the inside.
Uce doesn't land with the attempted body shot.
Kamen has a couple of punches blocked by Uce.
Kamen makes some space for himself and lands an uppercut.
Kamen using the Thai plumb to throw knees but Uce has his back arched nicely, preventing the strike.
Kamen working on landing some head shots here - that one got through nicely.
Uce blocks the elbow strike.
Uce misses with a hook to the ribs.
Uce is trying to slow down the pace in the clinch, to catch his breath.
An uppercut on the inside fails to land for Uce.
Kamen with the Thai clinch. He's looking to land a big knee but he's not managed it this time.
An uppercut on the inside fails to land for Kamen.
Kamen lands a left hand.
Kamen misses with some punches.
That's three minutes gone in the round.
Kamen creates a bit of distance and throws an elbow that only just misses.
Kamen lands a right hand that snaps the head of Uce backwards.
Kamen lands with a quick shot inside that doesn't really do much damage.
Kamen scores with a nice hook to the head.
Kamen working aggressively here.
Kamen lands an elbow that stopped Uce in his tracks for a moment.
Uce tries to work over Kamen's body with a swooping hook but it only glances the target.
Kamen creates a bit of space for himself and rocks Uce with a big uppercut! Uce tries to clinch up but Kamen pushes him back against the cage and lands another monster strike that crumples Uce to the mat! Uce covers up and Kamen unloads with more strikes until the referee steps in to end the bout!
Ladies and gentlemen, after 3:34 of round 1, we have a winner by way of TKO (Punches). Charles Kamen!
Charles Kamen retains his super heavyweight title!
Charles Kamen gave a mention to On Tap (160Q) in his post fight interview. That will please them (and hopefully generate some sales).
|
|
|
|
|
|
|
|
|
|
|
|
|
|
|
|
|
|
|
|
|
|
|
| S |
C
A |
G |
S |
C
B |
G |
|
S |
C |
G |
|
energy
A | B |
|
hype
A | B |
|
pop
A | B |
|
mgr
A | B |
|
FIGHT
RATING
49% |
|
|
|
|
|
|
|
Co-main event
|
Coming up we have a middleweight MMA rules bout between Allkindsa Bustinchapsup (ranked 0 p4p, 0 weight class) and Saul Goodman (ranked 0 p4p, 0 weight class). Bustinchapsup comes to the cage accompanied by Mouth for war. Over to our ring announcer for the fighter introductions!
 |
|
 |
| 185 cm
28
185 lbs
11 - 11 - 0 |
|
190 cm
28
178 lbs
15 - 14 - 0 |
Good wrestling
Solid boxing
Very quick |
|
Good wrestler
Excellent boxer
Powerful |
|
| |
|
Ladies and gentlemen. This fight is 3 rounds, in the middleweight division.
Introducing the fighter to my left, fighting out of the red corner.
With a record of
11 - 11 - 0, fighting out of Sydney, Allkindsa Bustinchapsup!
And introducing the fighter to my right, fighting out of the blue corner.
With a record of
15 - 14 - 0, fighting out of Sydney, Saul Goodman!
The judges for this bout are Ron Honeybunn, Skip Squint and Darius Henderson.
The bell rings for round one and we are underway!
Nice sprawl there from Bustinchapsup as Goodman shoots in.
Bustinchapsup connects with a jab.
Donk. Bustinchapsup catches Goodman right on the button with a cross.
Goodman swings wildly with a couple of big hooks
and Bustinchapsup counters with a good right hand that lands right on the jaw.
Bustinchapsup misses with a straight right.
Bustinchapsup misses with a hook.
Bustinchapsup moves out of range of the strikes.
Bustinchapsup misses with a jab to the body
and Goodman counters with a shoot takedown. Bustinchapsup fights it but they end up in guard.

Bustinchapsup is edging up against the cage. He's using the cage to get back to his feet. Nice work there - the fighters are clinched.
We've seen a great period of action over the last minute or so - credit to both fighters for going all out!
Bustinchapsup lands with a left to the head.
Bustinchapsup misses with a hook to the ribs.
A head punch on the inside from Bustinchapsup fails to land.
Bustinchapsup scores with a shoulder strike.
Bustinchapsup misses with a short punch on the inside.
Bustinchapsup struggles to land a body shot inside as Goodman controls his hands.
That's one minute gone in the round.
Goodman blocking some punches.
Bustinchapsup works for underhooks and lands a body shot in the process.
Bustinchapsup misses with a hook from the clinch.
Bustinchapsup lands punches inside but they're not really causing much damage.
Bustinchapsup can't find room to land a body shot as Goodman controls the action.
Bustinchapsup misses with a punch on the inside.
Goodman wants a takedown but no success here.
Bustinchapsup misses with a body punch.
Bustinchapsup tries to work over Goodman's body with a swooping hook but it only glances the target.
Goodman blocks a body shot from Bustinchapsup.
Bustinchapsup tried to land a shot to the body but connects with Goodman's elbow.
Bustinchapsup pushes Goodman back against the cage and lands a hook to the side of the head.
Bustinchapsup makes some space for himself and lands an uppercut.
Bustinchapsup lands a body shot in the clinch.
Bustinchapsup lands a left hand that snaps the head of Goodman backwards.
Bustinchapsup unloads with a big right hand that wobbles Goodman! He's leaning against the cage trying to keep his feet but Bustinchapsup is unloading with more strikes now! Goodman drops to his knees and the referee stops the fight for a TKO!
Ladies and gentlemen, after 2:58 of round 1, we have a winner by way of TKO (Strikes). Allkindsa Bustinchapsup!
As Allkindsa Bustinchapsup got his breath back, he grabbed the microphone and managed to blurt out the following: You do not deserve to watch me'.
The defeated Saul Goodman had this to say: 'Thank You to all the fans and my training partners. I came up short tonight but I'll be back.'.
|
|
|
|
|
|
|
|
|
|
|
|
|
|
|
|
|
|
|
|
|
|
|
| S |
C
A |
G |
S |
C
B |
G |
|
S |
C |
G |
|
energy
A | B |
|
hype
A | B |
|
pop
A | B |
|
mgr
A | B |
|
FIGHT
RATING
59% |
|
|
|
|
|
|
|
Main event
|
Coming up we have a light heavyweight MMA rules bout between Jigga Jones (ranked 0 p4p, 0 weight class) and Omar Sumner (ranked 0 p4p, 0 weight class). Well, the cameraman is lingering on a pretty young lady for a bit too long there. Keep your eyes on the prize buddy or you'll miss the fighter intros!
 |
|
 |
| 225 cm
30
220 lbs
8 - 4 - 0 |
|
187 cm
28
215 lbs
7 - 0 - 0 |
BJJ Purple Belt
Excellent MT
Cardio machine |
|
Decent wrestler
Excellent MT
Powerful |
|
| |
|
Ladies and gentlemen. This fight is 5 rounds, for the light heavyweight championship of the world!
Introducing the champion to my left, fighting out of the red corner.
With a record of
8 - 4 - 0, fighting out of Sydney, Jigga Jones!
And introducing the challenger to my right, fighting out of the blue corner.
With a record of
7 - 0 - 0, fighting out of Sydney, Omar Sumner!
The judges for this bout are Ben Watson, Summer Carpenter and Skip Squint.
The bell rings for round one and we are underway!
Sumner doesn't manage to clinch there - Jones circles away.
Jones throws a head kick that misses.
Jones really does look like a pencil wearing a pair of gloves. Let's hope he has a gameplan to suit that ridiculous body shape.
Sumner has Jones up against the cage in a clinch.
An uppercut on the inside fails to land for Sumner.
Sumner tries a body shot but Jones blocks it.
Jones blocks an uppercut.
Sumner blocks an elbow strike from Jones.
Sumner lands a right hand that snaps the head of Jones backwards.
Jones can't break the clinch.
A nice right hand lands inside from Sumner.
A short uppercut from Sumner.
A quick uppercut on the inside from Sumner.
Jones can't break the clinch.
Jones takes a shot to the head.
Jones has had enough of the clinch and is looking to separate.
Sumner tries a shoulder strike but it doesn't do any damage.
Sumner lands a shoulder strike that jolts his opponent's head backwards.
The crowd cheering loudly, showing their appreciation for the quality fight we're seeing here.
A body shot lands from Jones.
Jones tries to circle away but Sumner has him pinned against the cage.
That's one minute gone in the round.
Sumner misses with a hook from the clinch.
Sumner misses with a short punch on the inside.
Jones tries to circle away but Sumner has him pinned against the cage.
Sumner swings away with an uppercut that misses.
Jones has had enough of the clinch and is looking to separate.
Sumner keeps the fight in the clinch, despite Jones's efforts to push away.
A head punch blocked on the inside by Jones.
A head punch blocked on the inside by Jones.
Jones is trying to push Sumner away but Sumner has him pressed against the cage, so he's going nowhere.
Sumner struggles to land a body shot inside as Jones controls his hands.
Sumner misses with the head strike.
A right hand to the body from Sumner.
Jones tries to circle away but Sumner has him pinned against the cage.
Sumner lands a right hand.
Sumner lands with a short shot to the head.
Jones is rocked!
Jones tries to circle away but Sumner has him pinned against the cage.
Oh Jones is still all over the place! His legs are completely gone! Will he be able to recover?!!
Jones wants to break the clinch but can't.
Sumner lands a right hand.
Sumner is clearly stalling here... Pick up the pace son.
Sumner lands a big right hand that drops Jones! The killer instinct kicks in and Sumner finishes his opponent with a series of strikes from mount. A dominating finish by Sumner!
Ladies and gentlemen, after 2:59 of round 1, we have a winner by way of TKO (Strikes). Omar Sumner! Omar Sumner retains his light heavyweight title!
During a confident post fight interview, Omar Sumner thanked all his fans. He seemed very genuine when describing how motivated his fans keep him.
|
|
|
|
|
|
|
|
|
|
|
|
|
|
|
|
|
|
|
|
|
|
|
| S |
C
A |
G |
S |
C
B |
G |
|
S |
C |
G |
|
energy
A | B |
|
hype
A | B |
|
pop
A | B |
|
mgr
A | B |
|
FIGHT
RATING
44% |
|
|
|
|
|
|
|
|
|
|
