 |
Combat Pro 2 - Title Road PBP Commentary |
Undercard bout
|
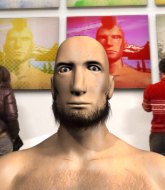
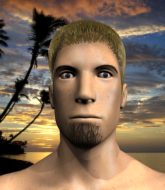
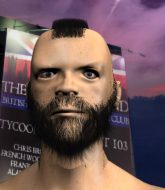
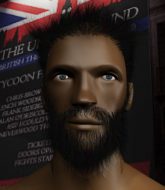
Coming up we have a welterweight MMA rules bout between Asharak Black (ranked 0 p4p, 0 weight class) and Lance St Pierre (ranked 0 p4p, 0 weight class). Asharak Black had a look across the cage there at his opponent. He definitely means business
 |
|
 |
| 175 cm
19
175 lbs
1 - 0 - 0 |
|
181 cm
18
179 lbs
2 - 0 - 0 |
BJJ Purple Belt
Brawler
Self confident |
|
BJJ Blue Belt
Basic striking
Determined |
|
| |
|
Ladies and gentlemen. This fight is 3 rounds, in the welterweight division.
Introducing the fighter to my left, fighting out of the red corner.
With a record of
1 - 0 - 0, fighting out of Montreal, Asharak Black!
And introducing the fighter to my right, fighting out of the blue corner.
With a record of
2 - 0 - 0, fighting out of Montreal, Lance St Pierre!
The judges for this bout are Alec Ball, Robert Douchet and Gregory Folan.

The bell rings for round one and we are underway!
St Pierre throws a hook to the body but it doesn't connect.
St Pierre needs to keep his hands up - Black had a free shot at his head there.
Black shoots in but no luck this time.
A nice combination there by St Pierre.
St Pierre closes the distance and lands a one-two.

Black is rocked!
Nice takedown defense from St Pierre. No joy for Black on that attempt.
St Pierre keeps the fight on the outside.
St Pierre displaying good standup as he scores with a three punch combination.
Oh Black is still all over the place! His legs are completely gone! Will he be able to recover?!!

Black closes the distance, clinches up and gets a nice trip takedown into side control. Very smooth.
St Pierre is sneaking out the side here. He's bucked Black off and has taken his back!
The ref warns both fighters not to hold the cage as they work up against the meshing.

St Pierre has his hand under the chin of his opponent looking for the choke. He's nearly got it! This one could be all over! But no, Black has freed his hand and lives to survive another
well, another couple of seconds at least!
St Pierre tightening his grip on Black, looking for the choke.
St Pierre working for the choke.
Black seems to have got his legs back now.
St Pierre avoiding Black 's attempts to control his hands.

That's one minute gone in the round.
St Pierre tries to get the hooks in deep but Black pushed the leg off.
St Pierre is controlling his opponent, waiting for an opportunity to finish.
Black looks to control his opponent's hands but he's not mananging it at the moment.
Black is really stuck here.
Black staying busy and making it hard for St Pierre to control.
The fighters are pressed up against the cage, both looking to find a bit of space to work.
Black rolls and manages to get back to half guard. Nicely done.
St Pierre really doesn't want to stay on the ground with Black. If he can't get it back to his feet, it's only a matter of time before he'll be tapping out.
St Pierre seems content to maintain position for now, rather than mounting any offense.

That's two minutes gone in the round.
A lull in the action here being met with boos from the crowd.
Black wants to control but St Pierre is keeping busy and won't allow it.
Black is in a bad position, trying to hold on for dear life but he is really struggling to maintain any sort of control.
Black is trying to stand back up but St Pierre is controlling him
Black is breathing heavily.

Neither fighter is doing enough for the referee's liking and he's decided to stand them back up.
St Pierre scores with a jab. Black acknowledges it with a nod of the head.
St Pierre looks to land a combination but Black avoids it well.
Black walks straight into an uppercut. Luckily it didn't land flush.
Black avoids a punch combination nicely.
Danga de danga de dang - St Pierre scores with a four punch combination!
St Pierre rushes forward with a series of wild hooks but Black moves out of range and avoids them all easily.
St Pierre misses with a jab and misses with a cross straight after too.
Black tries to clinch up.
St Pierre closes the distance and lands a one-two.
Black moves out of range of the strikes.

That's three minutes gone in the round.
St Pierre's corner calls for a 1,2 combination and St Pierre duly obliges.
Black looks frusrated there after his takedown attempt is stuffed easily.
That's three failed takedown attempts in the round for Asharak Black. That's going to take a lot out of him.
St Pierre lands a pitter patter jab to the forehead of his opponent.
St Pierre misses with a jab, cross combination.
Jab, cross, leg kick. Nice combination by St Pierre!
St Pierre lands with an uppercut that bounces Black off the cage and back into rage.
Black dodges the punch combination from St Pierre.
Black wants to clinch.
Black throws a head kick that misses and slips in the process. He scrambles back to his feet and the fighters circle.
St Pierre throws a couple of head shots and lands with the final one - a decent hook, which struck Black on the side of the head.
Black takes a hook to the side of the head. I wonder if that's got his ears ringing.
St Pierre connects with a crisp jab.
St Pierre is working the combinations to good effect here.
The fighters circle momentarily. St Pierre darts into range and connects with a nice straight punch.
Black on the wrong end of a nice jab.
St Pierre will need to tighten up his combinations if he doesn't want to gas himself out, swinging at thin air.

That's four minutes gone in the round.
Black looks for a takedown but St Pierre sprawls well.
St Pierre throws a head kick but Black moves out of range.
St Pierre throws a series of punches but Black avoids them all with ease.
St Pierre tries to bum rush Black with a series of wild strikes but Black uses good footwork to avoid the assault.
St Pierre misses with a two punch combination.
Black throws a looping left and ducks down for a takedown. He's got his arms around St Pierre's waist but St Pierre gets an underhook and avoids the takedown by throwing Black off to one side.
St Pierre lands with an uppercut that bounces Black off the cage and back into rage.
St Pierre lands with a shot to the body.
St Pierre digs a good body shot into Black's ribs.
Lance St Pierre seems to be the more aggressive standup fighter in this bout.
A right-left combo lands from St Pierre.
The fighters circle momentarily. St Pierre darts into range and connects with a nice straight punch.
Black looks shocked there as he takes a right hand to the temple.
St Pierre throws a left jab followed by a right to the body, Oh Black colapses and takes a barrage of punches from St Pierre as he moves to mount! the ref stops the fight and Black is left battered and dazed whilst St Pierre and his camp cheer!
Ladies and gentlemen, after 4:49 of round 1, we have a winner by way of TKO (Strikes). Lance St Pierre!
|
|
|
|
|
|
|
|
|
|
|
|
|
|
|
|
|
|
|
|
|
|
|
| S |
C
A |
G |
S |
C
B |
G |
|
S |
C |
G |
|
energy
A | B |
|
hype
A | B |
|
pop
A | B |
|
mgr
A | B |
|
FIGHT
RATING
55% |
|
|
|
|
|
|
|
Undercard bout
|
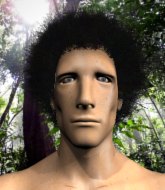
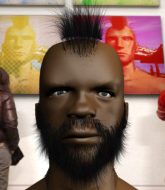
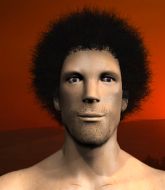
Coming up we have a middleweight MMA rules bout between Rejuan Decloire (ranked 0 p4p, 0 weight class) and Alex Andrews (ranked 0 p4p, 0 weight class). Alex Andrews told me before the fight that he's been watching a lot of DVDs so let's see if that helps him in this one! I can't wait to find out!
 |
|
 |
| 185 cm
22
188 lbs
1 - 1 - 0 |
|
189 cm
19
185 lbs
2 - 0 - 0 |
BJJ Blue Belt
Counter striker
Cuts easily |
|
BJJ Blue Belt
Brawler
Determined |
|
| |
|
Ladies and gentlemen. This fight is 3 rounds, in the middleweight division.
Introducing the fighter to my left, fighting out of the red corner.
With a record of
1 - 1 - 0, fighting out of Montreal, Rejuan Decloire!
And introducing the fighter to my right, fighting out of the blue corner.
With a record of
2 - 0 - 0, fighting out of Montreal, Alex Andrews!
The judges for this bout are William Peck, Yves DeLean and Gregory Folan.
The bell rings for round one and we are underway!
Decloire will have to do better than that with his takedown attempts.
Decloire looks for a takedown. He's got it. We're now in half guard.
Andrews is trying to maintain the position but Decloire is very close to passing his half guard.
Andrews wants to improve his position but Decloire is controlling well.
Decloire works his foot free and advances to mount.
Andrews is looking to get to half guard.
Decloire jumps to side control looking for an arm triangle but Andrews manages to avoid the submission attempt.
Decloire cracks Andrews with a big right hand but Andrews just smiles back at him and invites him to have another go.
Both fighters really going for it on the ground here!

Decloire decides to stand back up. Decloire steps back and let's Andrews get back to his feet.

Andrews gets in close and instigates a clinch.
Decloire drops down looking for an ankle pick but Andrews pulls his leg out and moves away.
Decloire closes this distance looking for a takedown but Andrews circles away.
That's three failed takedown attempts in the round for Rejuan Decloire. That's going to take a lot out of him.
That's one minute gone in the round.
Decloire closes the distance and clinches up, looking for a takedown. He shifts his weight and gets a nice trip into half guard.
Decloire is keen to just control but Andrews is a slippery customer.
Decloire is breathing heavily.
The fighters are battling for position here. Andrews manages to regain full guard. Nice work.
Andrews looking for submissions from the bottom here. Moving his hips around, possibly looking for an armbar.
Andrews is active off his back here, looking for submissions.
Andrews can't keep his opponent in guard - Decloire advances to half guard, no doubt looking to mount.
Andrews on the receiving end of some nice ground and pound.
Andrews looking for submissions off his back.
Andrews trying to control here.
Decloire scoring with strikes to the body and head.
Decloire thows a huge punch but Andrews dodges it nicely.
Andrews looking to work for a kimura from the bottom.
The two fighters exchange a few words. I couldn't hear what they were saying but maybe it's more fun if you make it up yourself. Decloire connects with a nice short shot to Andrews's temple.
That's two minutes gone in the round.
Andrews actively working from the bottom here.
Neither fighter is doing enough for the referee's liking and he's decided to stand them back up.
Decloire closes the distance and clinches up, looking for a takedown. He shifts his weight and gets a nice trip into half guard.
Andrews moves his hips nicely and gets into full guard.
Andrews trying to punch from his back but it's not doing any damage.
Andrews throwing his legs up looking for a triangle.
The fans in attendance giving it up for the two fighters, who have really let it all hang out in the last minute or so!
Decloire avoids a guillotine attempt easily.
Decloire won't allow Andrews to sweep him here.
Decloire avoids a guillotine attempt easily.
Andrews tries to land a sweep but no joy.
Decloire working from the guard for now, landing some ground and pound.
Decloire makes a bit of distance and scores with some ground and pound, still in guard.
Decloire is posturing up here but Andrews has hold of an arm and he's gone for an armbar! Decloire tries to roll out but it's too tight and Decloire has to tap! Slick submission there by Andrews!
Ladies and gentlemen, after 3:04 of round 1, we have a winner by way of Submission (Armbar). Alex Andrews!
|
|
|
|
|
|
|
|
|
|
|
|
|
|
|
|
|
|
|
|
|
|
|
| S |
C
A |
G |
S |
C
B |
G |
|
S |
C |
G |
|
energy
A | B |
|
hype
A | B |
|
pop
A | B |
|
mgr
A | B |
|
FIGHT
RATING
79% |
|
|
|
|
|
|
|
Undercard bout
|
Coming up we have a middleweight MMA rules bout between Grant Fuhr (ranked 0 p4p, 0 weight class) and Jack Charack (ranked 0 p4p, 0 weight class). The atmosphere really building for this one as we go over to our ring announcer for the fighter introductions!
 |
|
 |
| 180 cm
18
185 lbs
1 - 0 - 0 |
|
185 cm
22
185 lbs
1 - 2 - 0 |
Good takedowns
Counter striker
Good chin |
|
BJJ Blue Belt
Good kicks
Solid chin |
|
| |
|
Ladies and gentlemen. This fight is 3 rounds, in the middleweight division.
Introducing the fighter to my left, fighting out of the red corner.
With a record of
1 - 0 - 0, fighting out of Montreal, Grant Fuhr!
And introducing the fighter to my right, fighting out of the blue corner.
With a record of
1 - 2 - 0, fighting out of Montreal, Jack Charack!
The judges for this bout are William Peck, Robert Douchet and Steve Smith.
The bell rings for round one and we are underway!
Fuhr shoots in for a takedown - he's clinched up with Charack but Charack pushes him off and we're back to square one.
Fuhr has a takedown stuffed.
Charack shoots in for a takedown and gets it. Let's see what he's got on the mat.
Charack wants to get up but he can't break Fuhr's closed guard. He needs to be careful trying to break the legs open, as he's open to submissions here.
Fuhr has his feet on Charack's hips. He pushes off and gets to his feet. Nice work.
Fuhr tries for a takedown but Charack circles away easily
and Charack counters by moving into the clinch.
That's three failed takedown attempts in the round for Grant Fuhr. That's going to take a lot out of him.
Fuhr jumps guard but Charack stands there with Fuhr around his waist. Fuhr gives up and drops back to his feet. We remain in the clinch.
Fuhr goes for a takedown attempt but Charack pushes him away and we're back to fighting at a distance.
Fuhr tries for a takedown but Charack circles away easily
and Charack counters by clinching up.

Charack escapes the clinch and we're back to striking.
Nice body kick from Charack.
Charack looks gassed!
Fuhr misses with a lunging right hand
and Charack counters with a nice body kick.
That's one minute gone in the round.
Charack shoots in for a takedown and gets it. Let's see what he's got on the mat.
Fuhr looking for a sweep. Not yet Fuhr, not yet.
Fuhr wants to stand but Charack is controlling the position.
Charack trying to control the position from guard on top but Fuhr is wriggling around, looking for whatever he can.
Fuhr is actively looking for submissions from his back. He's worked himself a little space on the bottom and seems to be going for a triangle. No, he's switched into an armbar! That was slick! Charack rolls with it to try and escape but Fuhr cranks on the arm and Charack is forced to tap out! This one is aaaaaaaaall over!
Ladies and gentlemen, after 1:42 of round 1, we have a winner by way of Submission (Armbar). Grant Fuhr!
|
|
|
|
|
|
|
|
|
|
|
|
|
|
|
|
|
|
|
|
|
|
|
| S |
C
A |
G |
S |
C
B |
G |
|
S |
C |
G |
|
energy
A | B |
|
hype
A | B |
|
pop
A | B |
|
mgr
A | B |
|
FIGHT
RATING
56% |
|
|
|
|
|
|
|
Undercard bout
|
Coming up we have a middleweight MMA rules bout between Cyriel Clancy (ranked 0 p4p, 0 weight class) and Goran Sankte Per (ranked 0 p4p, 0 weight class). Clancy comes to the cage accompanied by My Sacrifice. Cyriel Clancy looks tired to me. Hopefully he has got enough gas left in the tank to put in a good performance.
 |
|
 |
| 180 cm
22
192 lbs
0 - 1 - 0 |
|
180 cm
19
185 lbs
1 - 1 - 0 |
BJJ White Belt
Solid Muay Thai
Cuts easily |
|
BJJ Blue Belt
Counter striker
Intelligent |
|
| |
|
Ladies and gentlemen. This fight is 3 rounds, in the middleweight division.
Introducing the fighter to my left, fighting out of the red corner.
With a record of
0 - 1 - 0, fighting out of Montreal, Cyriel Clancy!
And introducing the fighter to my right, fighting out of the blue corner.
With a record of
1 - 1 - 0, fighting out of Montreal, Goran Sankte Per!
The judges for this bout are Ian Loll, Dillan Fox and Alec Ball.
The bell rings for round one and we are underway!
Clancy throws a wild combination but nothing lands.
Sankte Per drives through with a really nice takedown into side control.
Sankte Per stands up and we're back to a striking position.
Sankte Per shoots in with a takedown attempt and he has Clancy pinned against the cage. Clancy gets the underhooks and manages to circle away.
Sankte Per fails with a rather predictable takedown attempt.
Clancy dances in quickly and lands a nice inside leg kick on Sankte Per. That did some damage!
A head kick misses from Clancy.
Clancy pulls out of a head kick attempt.
Clancy looking to land some kicks to the body here.
Clancy throws a right and a left that Sankte Per avoids nicely.
Clancy is breathing heavily.
Sankte Per changes levels and looks for a double leg takedown. Clancy tries to avoid it but Sankte Per manages to keep hold of a leg and drag Clancy to the ground. Clancy escapes though and pops straight back up to his feet.
Cyriel Clancy has stuffed three takedown attempts in the round now. That's going to take a lot out of Goran Sankte Per.
Clancy tries to clinch but Sankte Per moves out of range.
That's one minute gone in the round.
Sankte Per avoids a punch combination nicely.
Clancy gets his takedown attempt stuffed easily
and Sankte Per counters with a nice double leg into half guard.
Sankte Per tries to pass the half guard into mount. Clancy knows what he's doing though and prevents the attempt.
Clancy punching from the bottom.
Clancy wants to get back to his feet.
Clancy has no desire to be mounted, so is trying to control. Sankte Per is working away from the top position though.
The fighters are pressed up against the cage, both looking to find a bit of space to work.
Sankte Per trying to control from half guard but Clancy is working away.
Sankte Per is working hard to pass the guard. He's done it - he's now in full mount! Trouble for Clancy!
Sankte Per avoids the attempt from Clancy to control.
Sankte Per swings around for an armbar but it's a sloppy attempt and Clancy is now in Sankte Per's guard. A big mistake from Sankte Per there, giving up the dominant position!
Sankte Per trying to keep a closed guard but Clancy is proving a slippery customer.
That's two minutes gone in the round.
Clancy wants to stand but Sankte Per has a closed guard, so he can't escape.
Clancy has to be careful here, sitting in the guard of a superior BJJ player.
Sankte Per tries to land a sweep but no joy.
Clancy trying to control the position from guard on top but Sankte Per is wriggling around, looking for whatever he can.
Clancy throwing elbows and punches but not connecting, as Sankte Per works some decent striking defense from the bottom.
Sankte Per looking to sweep here. No luck so far.
Clancy wanted to stand there but Sankte Per had control of the position.
The referee decides to stand the fighters back up.
Clancy tries to clinch up
and Sankte Per counters with a nice double leg into guard.
This has been an exciting period of action!
Clancy looking to sweep here. No luck so far.
Sankte Per passes into half guard.
That's three minutes gone in the round.
Sankte Per works his way into full mount!
Sankte Per takes his opponent's back. Perhaps a chance to lock up a rear naked choke here.
Sankte Per is staying calm and holding on to the back position, whilst working on a rear naked choke. Clancy is defending well though. Sankte Per let's go of the attempt for now.
Clancy is really stuck here.
Sankte Per has his arm under Clancy's chin here. Game over son! Sankte Per squeezes tightly and Clancy is forced to tap out!
Ladies and gentlemen, after 3:57 of round 1, we have a winner by way of Submission (RNC). Goran Sankte Per!
|
|
|
|
|
|
|
|
|
|
|
|
|
|
|
|
|
|
|
|
|
|
|
| S |
C
A |
G |
S |
C
B |
G |
|
S |
C |
G |
|
energy
A | B |
|
hype
A | B |
|
pop
A | B |
|
mgr
A | B |
|
FIGHT
RATING
58% |
|
|
|
|
|
|
|
Undercard bout
|
Coming up we have a middleweight MMA rules bout between Dwayne Keller (ranked 0 p4p, 0 weight class) and Laurel Aitken (ranked 0 p4p, 0 weight class). Dwayne Keller has the better chin. Will he look to stand and bang today?
 |
|
 |
| 175 cm
18
185 lbs
1 - 1 - 0 |
|
187 cm
22
195 lbs
2 - 0 - 0 |
BJJ Blue Belt
Brawler
KO power |
|
BJJ Purple Belt
Decent boxing
Heavy handed |
|
| |
|
Ladies and gentlemen. This fight is 3 rounds, in the middleweight division.
Introducing the fighter to my left, fighting out of the red corner.
With a record of
1 - 1 - 0, fighting out of Montreal, Dwayne Keller!
And introducing the fighter to my right, fighting out of the blue corner.
With a record of
2 - 0 - 0, fighting out of Montreal, Laurel Aitken!
The judges for this bout are Gregory Folan, Ian Loll and Yves DeLean.
The bell rings for round one and we are underway!
Keller has closed the distance and engaged Aitken in a clinch.
Keller has clasped his hands together around Aitken's back... aaand, he's got a takedown into side control. Nicely done.
Aitken manages to get back to half guard.
Aitken is pressing down on Keller's left leg trying to get back to full guard. He's managed it.
Aitken working for a triangle but Keller defends it easily.
Keller knows he needs to get back to his feet asap. He's simply no match for Aitken on the ground.
Keller is intent on slowing down the pace of the fight, simply looking to control.
Keller pressing down on his opponent's thigh, looking to pass guard. Aitken is keeping the position for now.
Keller stopping the sweep attempt from Aitken.
Aitken is looking for a triangle but Keller pushes his legs off easily.
Aitken looking to sweep using the butterfly guard but Keller puts pay to that idea as he passes nicely into half guard.
Aitken manages to get to full guard.
Keller cracks Aitken with a solid left hand.
That's one minute gone in the round.
Aitken working for a triangle but Keller defends it easily.
Keller avoids a guillotine attempt easily.
Keller loading up with the ground and pound but he's missing more than he's landing in this flurry.
Keller is taking a break and basically stalling. The referee will not allow him to do that for long.
Keller wants to control from the top but Aitken keeps moving.
Keller pressing down on his opponent's thigh, looking to pass guard. Aitken is keeping the position for now.
The fighters are pressed up against the cage, both looking to find a bit of space to work.
Keller showing good wrestling skills to control the position.
Aitken working from the bottom, still in full guard. He's managed to get a loose triangle. Keller doesn't seem to be doing much to defend here, obviously he feels comfortable in the position. Keller manages to throw the legs off his shoulder and he's back into guard - no problem.
That's two minutes gone in the round.
Aitken has managed to work for a loose triangle. I think Keller should be able to defend this one pretty easily though. Oh, Aitken has tightened it up now! Keller should have reacted faster there - he's in big trouble and yes, he's tapped out! This one is all over!
Ladies and gentlemen, after 2:25 of round 1, we have a winner by way of Submission (Triangle). Laurel Aitken!
|
|
|
|
|
|
|
|
|
|
|
|
|
|
|
|
|
|
|
|
|
|
|
| S |
C
A |
G |
S |
C
B |
G |
|
S |
C |
G |
|
energy
A | B |
|
hype
A | B |
|
pop
A | B |
|
mgr
A | B |
|
FIGHT
RATING
57% |
|
|
|
|
|
|
|
Undercard bout
|
Coming up we have a light heavyweight MMA rules bout between Ryan Duder (ranked 0 p4p, 0 weight class) and Rickson Silva (ranked 0 p4p, 0 weight class). Rickson Silva has the better chin. Will he look to stand and bang today?
 |
|
 |
| 190 cm
20
215 lbs
2 - 2 - 0 |
|
200 cm
18
205 lbs
2 - 0 - 0 |
BJJ White Belt
Counter striker
KO power |
|
BJJ Purple Belt
Counter striker
Intelligent |
|
| |
|
Ladies and gentlemen. This fight is 3 rounds, in the light heavyweight division.
Introducing the fighter to my left, fighting out of the red corner.
With a record of
2 - 2 - 0, fighting out of Montreal, Ryan Duder!
And introducing the fighter to my right, fighting out of the blue corner.
With a record of
2 - 0 - 0, fighting out of Montreal, Rickson Silva!
The judges for this bout are Yves DeLean, Ian Loll and Alec Ball.
The bell rings for round one and we are underway!
Duder lands a leg kick. The shin dug right into the meat of the thigh.
Silva shoots in for a takedown - he's clinched up with Duder but Duder pushes him off and we're back to square one.
Silva fails with a rather predictable takedown attempt.
Duder clinches up with Silva and pushes him back against the cage.
Duder breaks from the clinch.
Nice takedown defense from Duder. No joy for Silva on that attempt.
Ryan Duder has stuffed three takedown attempts in the round now. That's going to take a lot out of Rickson Silva.
That's one minute gone in the round.
Silva blocks a head kick by Duder.
A head kick lands from Duder that sends Silva to the canvas. Silva tries to scramble back to his feet but Duder brings him back down into side control.
Silva is rocked!

It looks like Rickson Silva has been cut.
Duder stands up.
Silva is still on wobbly legs! Can Duder finish him?
Duder cracks Silva with a left hook right on the temple and Silva goes down! He's out! Referee! Stop the fight! Duder lands a few more punches before the dopey ref steps in - hopefully Silva is OK!
Ladies and gentlemen, after 1:32 of round 1, we have a winner by way of KO (Punch). Ryan Duder!
|
|
|
|
|
|
|
|
|
|
|
|
|
|
|
|
|
|
|
|
|
|
|
| S |
C
A |
G |
S |
C
B |
G |
|
S |
C |
G |
|
energy
A | B |
|
hype
A | B |
|
pop
A | B |
|
mgr
A | B |
|
FIGHT
RATING
48% |
|
|
|
|
|
|
|
Undercard bout
|
Coming up we have a light heavyweight MMA rules bout between Jay Faber (ranked 0 p4p, 0 weight class) and Hotaka Yoshifumi (ranked 0 p4p, 0 weight class). Faber's ring entrance music is that housewives' favourite, Cypress Hill - Rock Superstar. Hotaka Yoshifumi has the better chin. Will he look to stand and bang today?
 |
|
|
| 188 cm
20
205 lbs
1 - 1 - 0 |
|
186 cm
18
210 lbs
3 - 2 - 0 |
BJJ White Belt
Brawler
Self confident |
|
BJJ Purple Belt
Brawler
Very confident |
|
| |
|
Ladies and gentlemen. This fight is 3 rounds, in the light heavyweight division.
Introducing the fighter to my left, fighting out of the red corner.
With a record of
1 - 1 - 0, fighting out of Montreal, Jay Faber!
And introducing the fighter to my right, fighting out of the blue corner.
With a record of
3 - 2 - 0, fighting out of Montreal, Hotaka Yoshifumi!
The judges for this bout are Alec Ball, Gregory Folan and Trevor Gratis.
The bell rings for round one and we are underway!
Faber throws a head kick that misses and slips in the process. He scrambles back to his feet and the fighters circle.
Faber looks exhausted already! Oh dear, he should have come in in better shape than this!
Faber darts in and lands a nice takedown into half guard.
Yoshifumi is doing well to avoid being mounted. He's controlling the position at the moment.
Yoshifumi is pressing down on Faber's left leg trying to get back to full guard. He's managed it.
Yoshifumi lands a beautiful switch and he's in full mount! That could spell trouble for Faber!
Yoshifumi swings around for an armbar and he's got it! Wow, that came out of nowhere! What a finish!
Ladies and gentlemen, after 0:50 of round 1, we have a winner by way of Submission (Armbar). Hotaka Yoshifumi!
|
|
|
|
|
|
|
|
|
|
|
|
|
|
|
|
|
|
|
|
|
|
|
| S |
C
A |
G |
S |
C
B |
G |
|
S |
C |
G |
|
energy
A | B |
|
hype
A | B |
|
pop
A | B |
|
mgr
A | B |
|
FIGHT
RATING
58% |
|
|
|
|
|
|
|
Undercard bout
|
Coming up we have a light heavyweight MMA rules bout between Damen Slash (ranked 0 p4p, 0 weight class) and Rudy Benson (ranked 0 p4p, 0 weight class). The crowd giving both fighters a great reception on their way into the arena. That's good to see.
 |
|
 |
| 188 cm
22
216 lbs
2 - 1 - 0 |
|
186 cm
18
214 lbs
0 - 1 - 0 |
BJJ Blue Belt
Brawler
Prefers ground |
|
Good wrestler
Counter striker
Solid chin |
|
| |
|
Ladies and gentlemen. This fight is 3 rounds, in the light heavyweight division.
Introducing the fighter to my left, fighting out of the red corner.
With a record of
2 - 1 - 0, fighting out of Montreal, Damen Slash!
And introducing the fighter to my right, fighting out of the blue corner.
With a record of
0 - 1 - 0, fighting out of Montreal, Rudy Benson!
The judges for this bout are Gregory Folan, Robert Douchet and Steve Smith.
The bell rings for round one and we are underway!
Slash shoots in looking for a takedown. Benson tries to sprawl out of it but Slash keeps driving through. The fighters are pinned against the cage. Benson manages to get underhooks and after a bit of a struggle, circles away and we're back to standing.
Slash connects with a high kick.
Slash wants to clinch.
Slash fails with the takedown.
Benson clinches but Slash breaks the clinch
and Slash counters with a nice jab to the body that keeps Benson thinking.
Slash shoots in for a takedown - he's clinched up with Benson but Benson pushes him off and we're back to square one.
That's three failed takedown attempts in the round for Damen Slash. That's going to take a lot out of him.
Slash jabs at Benson's body.
Benson keeps the fight on the outside.
Slash shoots in for a takedown - he's clinched up with Benson but Benson pushes him off and we're back to square one.
That's one minute gone in the round.
Benson tries to clinch up but Slash circles away and keeps his distance.
Slash shoots in but no luck this time.
Benson is looking to take this fight into the clinch.
Slash wants to clinch up but Benson keeps it at a distance.
Slash throws a sloppy head kick and Benson moves out of range easily.
Benson drops down and drives through with a powerful takedown into guard.
Benson slows down the pace of the fight, as he sits in guard.
Benson stands up and looks to throw the legs aside to pass to side control. Slash swivels though and keeps the full guard.
Slash throwing some rather feeble looking strikes off his back.
That's two minutes gone in the round.
Benson stays in close to Slash's body and controls the position.
Benson's corner are shouting for him to control the position and he seems happy to oblige.
Benson passes Slash's left leg - he's now in half guard.
Slash manages to get to full guard.
The ref warns both fighters not to hold the cage as they work up against the meshing.
Benson looking to control the position here, rather than advance.
That's three minutes gone in the round.
Slash looking to sweep here. No luck so far.
Slash wants to stand but Benson is controlling the position.
Slash looking for submissions from the bottom here. Moving his hips around, possibly looking for an armbar.
Benson stays in close to Slash's body and controls the position.
Slash controls Benson momentarily but Benson frees himself.
Benson missing there with some ground and pound from the guard.
That's four minutes gone in the round.
The crowd are hurling abuse towards the fighters... You can hardly blame them though because there isn't a lot going on in the fight.
Benson is just sitting in guard, looking to avoid any submissions.
Slash not looking particularly offensive just at the moment.
Neither fighter is doing enough for the referee's liking and he's decided to stand them back up.
Benson is looking to clinch.
Slash gets his takedown attempt stuffed easily
and Benson counters with a nice shoot takedown that brings the fighters to the ground.
Benson stops Slash from standing up.
Slash is breathing heavily.
Slash is active off his back here, looking for submissions.
Benson would like to get this fight back to the feet but can't get free from the closed guard.
Benson is on the wrong end of a couple of strikes there.
Benson really doesn't want to stay on the ground with Slash. If he can't get it back to his feet, it's only a matter of time before he'll be tapping out.
Benson is looking to stand up but Slash won't let him.
And thats the end of the round the fighters go back to their corners.
Rudy Benson dominated that round.
The referee calls time. The cornermen exit stage left and we're back to business.

Benson throws a body kick despite being completely out of range
and Slash counters with an outside leg kick.
Benson throws a lazy head kick
and Slash counters into the clinch. Nicely done.
Slash wants to get back to striking at distance but Benson won't allow it.
Slash goes for a takedown in the clinch but Benson prevents it.
Benson drops down looking for an ankle pick but Slash pulls his leg out and moves away.
Damen Slash is looking to throw some combinations by the looks of things.
Slash misses with a takedown
and Benson counters with a nice double leg into half guard.
Benson throwing shots but Slash is blocking nicely.
Benson is looking for a kimura. It's going to be difficult to finish that from half guard though and Slash defends it well.
Benson perhaps working for something from half guard, or maybe not. It looks like he's just sitting there.
Both fighters are absolutely exhausted here.
Benson is working for a kimura but Slash is defending it quite comfortably.
Benson missing with some ground and pound from the half guard.
That's one minute gone in the round.
Slash tries to roll over but Benson keeps him under control.
Benson stops Slash from getting back to his feet.
Slash slips a foot under and gets full guard. Nice work.
Slash is trying to control the position from the bottom.
Benson throws a strike but Slash rolls with it and manages to sweep. Now he's in guard on top.
Slash is looking to stand up but Benson won't let him.
That's two minutes gone in the round.
Well. There's a bit of a lull in the action here and the crowd are starting to get restless.
Benson is looking to stand up but Slash isn't so interested in that idea.
Benson utilising some decent striking defenses from the guard, preventing the ground and pound.
Benson pulls Slash in close to his closed guard and prevents Slash from doing any damage or advancing position.
The fighters are pressed up against the cage, both looking to find a bit of space to work.
A big thud reverberates around the arena there as Slash accidentally thumps the mat. Hopefully he's not broken his hand.
Slash throwing shots from guard but he's hitting more mat than opponent.
It looks like we're going to have a standup here. Neither fight is doing enough on the ground.
Slash tries to clinch up.
Slash fails with the takedown
and Benson counters with a shoot takedown into half guard.
That's three failed takedown attempts in the round for Damen Slash. That's going to take a lot out of him.
That's three minutes gone in the round.
Benson decides he's had enough of the ground and stands up.
Slash tries for a takedown but Benson circles away easily
and Benson counters with a nice double leg into half guard.
Benson seems content to maintain position for now, rather than mounting any offense.
Benson tries to pass to full mount but Slash defends it.
Slash throws a strike from the bottom that misses.
Benson controlling the action here.
Slash slips a foot under and gets full guard. Nice work.
That's four minutes gone in the round.
Benson trying to stand up but can't free himself from Slash's guard.
Benson wants to control from the top but Slash keeps moving.
Slash manages to land a sweep and now he's in mount on top!
Benson taking shots to the head.
Slash looking to control but Benson is working nicely, looking to advance position himself.
Benson is writhing around trying to get back to his feet.
Slash looking to control but Benson is working nicely, looking to advance position himself.
And thats the end of the round the fighters go back to their corners.
Rudy Benson showed his class in that round. I'd imagine he'll take it on all the scorecards.
That's the end of the interval. I'm sure that seemed a lot quicker than a minute for our two fighters! Back to the action. Let's get this one finished - here comes the final round!

Slash scores with a punch to the gut of his opponent.
Benson tries to clinch up
and Slash counters with a stiff right hand.
Slash with a poor takedown
and Benson counters with a shoot takedown. Slash fights it but they end up in guard.
Benson showing good wrestling skills to control the position.
Slash looking for a sweep. Not yet Slash, not yet.
Slash is working hard here to advance position.
Both fighters are breathing heavily.
Slash thows some rabbit punches from the bottom but they don't do any damage.
Benson postures up and lands a big shot to Slash's brow.
That's one minute gone in the round.
Benson tries to stand but Slash is controlling from the bottom.
Slash wants to sweep here but Benson controlling him for the moment.
Slash manages to land a sweep and now he's in mount on top!
Slash is working on an americana here. Ooh, that looks pretty nasty! Nope, Benson has managed to escape the submission attempt.
Benson wants to hold on but Slash pushes him away.
Benson wants to use the cage to get back to his feet here.
Benson wants to hold on but Slash pushes him away.
That's two minutes gone in the round.
Neither fighter has done anything of merit for a good minute or two here and the crowd are not happy about it.
Slash with the ground and pound from mount.
Slash avoids the attempt from Benson to control.
Slash throwing sloppy strikes, which aren't doing any damage.
Poor strikes thrown by Slash there. More accuracy and less frantic strikes would help!
Slash can't quite control the action as he would like just now, as Benson is looking to escape.
Slash avoids the attempt from Benson to control.
The referee warns Benson that he has to improve his position here as he takes two more clean shots to the head.
That's three minutes gone in the round.
Slash punishing his opponent with strikes.
Benson is in all sorts of trouble here.
Slash has been looking to land a fair amount of strikes on the ground. He might be looking to soften his opponent up in order to work for a submission.
Slash looking to control but Benson is working nicely, looking to advance position himself.
Rudy Benson has got the better of the ground game so far.
Slash punching from mount but Benson doing a good job of avoiding damage.
Benson is in all sorts of trouble here.
Slash is still in mount, landing shots to his trapped opponent. Benson can't stay in a position like this for much longer.
Benson is desperately trying to get back to half guard.
A nice elbow there by Slash.
That's four minutes gone in the round.
My god... these two guys really need to pick up the pace or everyone will leave to go get a beer.
Benson gets back to half guard.
Benson tries to roll over but Slash keeps him under control.
Benson preventing any damage for now, controlling his opponent's head.
Slash tries to pass to full mount but Benson defends it.
Benson is not content to let Slash control the position.
Slash throwing punches and elbows but they're not doing any damage.
Damen Slash has stepped it up - he knows he needs a finish here!
Benson tries to roll over but Slash keeps him under control.
And that's the end of the fight!
I would just about give that final round to Rudy Benson.
I've got Benson winning every round here. Surely the decision will go his way and he'll pick up a well deserved decision victory. Over to the ring announcer for the scorecards.
Ladies and gentlemen, after 3 rounds of action, we go to the scorecards for a decision.
Judge Gregory Folan scores the fight 27:30
Judge Robert Douchet scores the fight 27:30
Judge Steve Smith scores the fight 27:30
In favor of your winner, by unanimous decision... Rudy Benson!
|
|
|
|
|
|
|
|
|
|
|
|
|
|
|
|
|
|
|
|
|
|
|
| S |
C
A |
G |
S |
C
B |
G |
|
S |
C |
G |
|
energy
A | B |
|
hype
A | B |
|
pop
A | B |
|
mgr
A | B |
|
FIGHT
RATING
43% |
|
|
|
|
|
|
|
Co-main event
|
Coming up we have a light heavyweight MMA rules bout between Jury Lokomotivo (ranked 0 p4p, 0 weight class) and Chris Power (ranked 0 p4p, 0 weight class). Lokomotivo comes to the cage accompanied by Slipknot - Wait and bleed. Chris Power is staring across the cage at his opponent, tweaking his nipples.
 |
|
 |
| 183 cm
20
217 lbs
2 - 0 - 0 |
|
192 cm
19
212 lbs
1 - 1 - 0 |
BJJ Blue Belt
Brawler
Good chin |
|
BJJ Blue Belt
Counter striker
Tends to cut |
|
| |
|
Ladies and gentlemen. This fight is 3 rounds, in the light heavyweight division.
Introducing the fighter to my left, fighting out of the red corner.
With a record of
2 - 0 - 0, fighting out of Montreal, Jury Lokomotivo!
And introducing the fighter to my right, fighting out of the blue corner.
With a record of
1 - 1 - 0, fighting out of Montreal, Chris Power!
The judges for this bout are Trevor Gratis, Alec Ball and William Peck.
The bell rings for round one and we are underway!
Power is looking to clinch but Lokomotivo is avoiding it.
Lokomotivo tries to clinch but Power moves out of range.
Lokomotivo misses with a half-hearted attempt at a head kick.
Power wants to clinch
and Lokomotivo counters with a straight right hand.
Lokomotivo misses with a takedown attempt - Power sprawls well and throws a nice strike on the way out which just misses.
Lokomotivo scores with a nice takedown into half guard. Let's see what he's got on the ground.
Lokomotivo is nestled in close to Power, controlling him well. He's worked in a nice elbow to the side of the head as well, for good measure.
Power gets back to full guard.
Lokomotivo trying to pass the guard but can't manage it just yet.
Lokomotivo is looking to stand up but Power won't let him.
Lokomotivo avoids a guillotine attempt easily.
Lokomotivo throwing elbows and punches but not connecting, as Power works some decent striking defense from the bottom.
Power is trying to keep Lokomotivo in close.
Power looks gassed!
That's one minute gone in the round.
Lokomotivo works over Power with some ground and pound from guard.
Power has his feet on Lokomotivo's hips. He pushes off and gets to his feet. Nice work.
Jury Lokomotivo seems to be the more aggressive standup fighter in this bout.
Lokomotivo clinches with his opponent.
Lokomotivo tries for a takedown. No joy.
Power stops a takedown attempt from Lokomotivo.
That's three failed takedown attempts in the round for Jury Lokomotivo. That's going to take a lot out of him.
Power blocks the elbow strike.
Lokomotivo tries a knee to the head but he's missed.
Power scores with a knee to the head.
Power manages to break the clinch.
Power tries to keep at a distance but Lokomotivo has taken the fight into the clinch.
Power manages to break the clinch.
An inside leg kick lands from Power.
Lokomotivo shoots in for a takedown! He's got it and he's managed to land in full mount! That's better than Lokomotivo was expecting from the takedown attempt, I'm sure!
Power in a bad spot here, taking shots to the head.
Power is wriggling around trying to escape.
That's two minutes gone in the round.
Power is persisting with the attempt to improve his position.
Lokomotivo throwing strikes but Power uses the opportunity to regain half guard.
Power moves into full guard.
Lokomotivo trying to control but Power is working from the bottom.
Lokomotivo is intent on slowing down the pace of the fight, simply looking to control.
Lokomotivo postures up as if he's going to throw some strikes but drops back for an ankle! Power is in big trouble! He looks ready to tap! But no, he's escaped and dives on top of Lokomotivo, into his guard.
Lokomotivo looking for submissions from the bottom but instead Power passes into side control.
Lokomotivo struggling a bit here.
That's three minutes gone in the round.
Power has had enough of the ground for now and decides to stand.
Power throws a chopping leg kick but Lokomotivo manages to avoid taking any serious damage.
A punch combination from Lokomotivo misses.
Lokomotivo wants to clinch up but Power keeps it at a distance.
Lokomotivo fails with a takedown attempt from distance.
Power shoots in but no luck this time.
Lokomotivo shoots in for a takedown and gets it.
Lokomotivo is looking for a kimura but he's never going to get it from there.
The ref warns both fighters not to hold the cage as they work up against the meshing.
Power looking for submissions from an awkward position here.
That's four minutes gone in the round.
Lokomotivo perhaps working for something from half guard, or maybe not. It looks like he's just sitting there.
Power tries to kick Lokomotivo off but Lokomotivo keeps his base steady and stays in half guard.
Lokomotivo is thwarting Power's attempts to control the position.
Power pushes Lokomotivo off and gets back to his feet.
Power fails to land with a series of punches.
Lokomotivo lands a big right hand and follows it up with an uppercut. Oh and another big punch and a knee - Power can't take much more of this! Another big shot to the jaw from Lokomotivo and Power drops to the floor. Beaten and bloodied - he had enough there. A vicious beatdown by Lokomotivo.
Ladies and gentlemen, after 4:36 of round 1, we have a winner by way of TKO (Strikes). Jury Lokomotivo!
|
|
|
|
|
|
|
|
|
|
|
|
|
|
|
|
|
|
|
|
|
|
|
| S |
C
A |
G |
S |
C
B |
G |
|
S |
C |
G |
|
energy
A | B |
|
hype
A | B |
|
pop
A | B |
|
mgr
A | B |
|
FIGHT
RATING
53% |
|
|
|
|
|
|
|
Main event
|
Coming up we have a heavyweight MMA rules bout between Fabien Fabarossi JR (ranked 0 p4p, 0 weight class) and Josh Hamlet (ranked 0 p4p, 0 weight class). The atmosphere really building for this one as we go over to our ring announcer for the fighter introductions!
 |
|
 |
| 216 cm
22
230 lbs
1 - 0 - 0 |
|
196 cm
22
240 lbs
1 - 0 - 0 |
BJJ White Belt
Counter striker
KO power |
|
BJJ Blue Belt
Decent boxing
Granite chin |
|
| |
|
Ladies and gentlemen. This fight is 3 rounds, in the heavyweight division.
Introducing the fighter to my left, fighting out of the red corner.
With a record of
1 - 0 - 0, fighting out of Montreal, Fabien Fabarossi JR!
And introducing the fighter to my right, fighting out of the blue corner.
With a record of
1 - 0 - 0, fighting out of Montreal, Josh Hamlet!
The judges for this bout are Steve Smith, Trevor Gratis and Alec Ball.
The bell rings for round one and we are underway!
Fabarossi JR forces Hamlet back against the cage and clinches.
Fabarossi JR landing knees to the body.
Hamlet breaks the clinch.
Fabarossi JR looks frusrated there after his takedown attempt is stuffed easily.
Hamlet loads up on a big right hand but Fabarossi JR slips the punch.
Fabarossi JR shoots in for a takedown - he's clinched up with Hamlet but Hamlet pushes him off and we're back to square one.
Hamlet sizes up Fabarossi JR with a pawing jab and scores with a straight right down the middle.
It looks like Fabien Fabarossi JR has been cut.
Hamlet throws a low kick but his opponent is out of range.
Hamlet stuffs the takedown attempt from Fabarossi JR. Fabarossi JR gets slowly back to his feet.
That's three failed takedown attempts in the round for Fabien Fabarossi JR. That's going to take a lot out of him.
Fabarossi JR throws a right and a left that both miss.
Fabarossi JR tries for a takedown but Hamlet sees it coming a mile off and avoids it easily.
Hamlet misses with a double jab
and Fabarossi JR counters by moving into the clinch. Good anticipation by Fabarossi JR.
Fabarossi JR fails to pull the fight into his guard.
Fabarossi JR escapes the clinch and we're back to striking.
Fabarossi JR looks for a takedown here. Will he get it? Hamlet is fending him off so far but Fabarossi JR persists. Nope, Hamlet circles away and we're back to standing.
That's one minute gone in the round.
Excellent takedown into side control there by Fabarossi JR.
Fabarossi JR wants to lay and pray for a moment but Hamlet keeps working.
Hamlet is looking for a sweep.
Fabarossi JR wants to stand but Hamlet has his arm trapped.
You can see the frustration on Hamlet's face, being in this tough position on the bottom.
Fabarossi JR taking a break here but Hamlet is having none of it and regains half guard.
Hamlet is trying to control but can't.
That's two minutes gone in the round.
Hamlet controlling the position well.
Fabarossi JR tries to pass the half guard into mount. Hamlet knows what he's doing though and prevents the attempt.
Well, the referee has seen enough. Neither fighter is active enough on the ground so he's stood them back up.
Fabarossi JR fails with an attempt to clinch.
Fabarossi JR throws a right high kick that is partially blocked by Hamlet.
Nice takedown defense from Hamlet. No joy for Fabarossi JR on that attempt.
Fabarossi JR is breathing heavily.
A nice leg kick lands there from Hamlet.
Fabarossi JR showing good head movement there, avoiding the strikes from Hamlet.
Hamlet throws a low kick, looking for Fabarossi JR's leg but Fabarossi JR calmly moves out of range.
Fabarossi JR scores with a nice takedown into half guard. Let's see what he's got on the ground.
That's three minutes gone in the round.
Hamlet manages to get to full guard.
Fabarossi JR tries to free his leg and advance position but Hamlet is retaining full guard.
Hamlet pulls Fabarossi JR in close to prevent any damage.
Hamlet wants to stand but Fabarossi JR is controlling the position.
Hamlet bucks up whilst keeping hold of a body lock, managing to reverse the position. Now he's in top in Fabarossi JR's guard.
Fabarossi JR is looking to stand up but Hamlet isn't so interested in that idea.
Hamlet stopping the sweep attempt from Fabarossi JR.
That's four minutes gone in the round.
The crowd are getting on the fighters' backs, as the pace has dropped off in the last minute or so.
Hamlet postures up.
Fabarossi JR trying to strike from the bottom but really, it's not the best position to be doing that from!
Fabarossi JR looking to control.
Hamlet stopping the sweep attempt from Fabarossi JR.
There's a bit of a scramble here and now Fabarossi JR is on top in guard.
Fabarossi JR wanted to stand there but Hamlet had control of the position.
And thats the end of the round the fighters go back to their corners.
That was a close round but I would say that Fabien Fabarossi JR will probably get the nod.
The cut man is working on Fabien Fabarossi JR's cut.
The referee calls time. The cornermen exit stage left and we're back to business.
The crowd cheers as Hamlet lands an impressive looking overhand right. Fabarossi JR doesn't seem phased though.
Fabarossi JR clinches up against the cage.
Fabarossi JR breaks from the clinch.
Fabarossi JR fails with the takedown.
Hamlet scores with a nice looking left hook and follows it up with an uppercut!
A punch combination from Fabarossi JR misses.
Fabarossi JR will have to do better than that with his takedown attempts.
Hamlet circles away from the clinch attempt.
A thudding body kick lands there by Fabarossi JR!
Hamlet throws a combination that misses
and Fabarossi JR counters by moving into the clinch.
Hamlet is fighting off a takedown attempt but Fabarossi JR is just too persistent for him and manages to trip Hamlet to the mat. Hamlet regains guard as soon as the fighters hit the mat.
Hamlet is trying to stand up but he's not managed so far.
Hamlet working the defensive guard well to avoid strikes from Fabarossi JR.
The ref warns both fighters not to hold the cage as they work up against the meshing.
That's one minute gone in the round.
Fabarossi JR looking to sit in guard and control but Hamlet gets the butterfly guard and sweeps. He's now in the guard on the top.
Fabarossi JR wants to sweep here but Hamlet controlling him for the moment.
Fabarossi JR has Hamlet pulled in close to control his posture.
Fabarossi JR looking for a sweep. Not yet Fabarossi JR, not yet.
Fabarossi JR is working from a closed guard but he's struggling to control his opponent.
Both fighters are absolutely exhausted here.
Fabarossi JR is going to have to think about doing something other than just controlling because Hamlet is managing to avoid having the position dictated to him.
The referee decides to stand the fighters back up.
Fabarossi JR clinches up against the cage.
That's two minutes gone in the round.
A few boos can be heard. I'm sure they will multiply if the fighters don't pick up the pace.
Hamlet taking a break, stalling in the clinch.
Fabarossi JR prevents Hamlet from breaking the clinch.
Fabarossi JR stalling the fight.
Fabarossi JR prevents Hamlet from breaking the clinch.
Good body shot from Fabarossi JR.
Hamlet breaks from the clinch.
Fabarossi JR misses with a takedown attempt - Hamlet sprawls well and throws a nice strike on the way out which just misses.
That's three failed takedown attempts in the round for Fabien Fabarossi JR. That's going to take a lot out of him.
A head kick by Hamlet misses
and Fabarossi JR counters with a flying knee. Nice.
Hamlet avoids the head kick by Fabarossi JR.
Josh Hamlet seems to be the more aggressive standup fighter in this bout.
Fabarossi JR is looking to clinch.
Fabarossi JR scores with a takedown into Hamlet's guard.
Fabarossi JR trying to land body shots but he keeps hitting the mat.
Hamlet seems keen to control rather than go for a submission, at least for now.
Fabarossi JR trying to move into half guard but instead Hamlet has managed to sweep!
That's three minutes gone in the round.
Hamlet gets to his feet and steps away from his opponent.
Fabarossi JR has managed to clinch.
Fabarossi JR is trying to work for a single leg takedown but Hamlet pulls him back up using the underhooks.
Fabarossi JR lands a nice elbow.
It looks like Josh Hamlet has been cut.
Fabarossi JR manages to break the clinch.
Fabarossi JR looks for a takedown. He's got it. We're now in half guard.
Hamlet gets full guard.
Fabarossi JR trying to control the position from guard on top but Hamlet is wriggling around, looking for whatever he can.
Hamlet has his feet on Fabarossi JR's hips. He pushes off and gets to his feet. Nice work.
That's four minutes gone in the round.
Hamlet misses with a double jab
and Fabarossi JR counters with a head kick.
Hamlet throws a sloppy head kick
and Fabarossi JR counters with a nice kick to the body.
Fantastic stuff here - a very entertaining period of action, which has drawn cheers from the crowd.
Hamlet shoots in and drives through. Fabarossi JR sprawls well.
Fabarossi JR lands with a nice combination. Hamlet backs away looking to recover.
Fabien Fabarossi JR is looking to throw some combinations by the looks of things.
Fabarossi JR misses with a kick to the body.
Hamlet swings wildly with a couple of big hooks
and Fabarossi JR counters with a left and a right that stings Hamlet.
Hamlet misses with a double jab
and Fabarossi JR counters with a shoot takedown into half guard.
Fabarossi JR trying to control the pace.
The fighters are pressed up against the cage, both looking to find a bit of space to work.
As the round comes to an end the crowd are showing their appreciation for a great round of action.
Fabarossi JR is looking to pass Hamlet's guard but actually Hamlet recovers to full guard.
And thats the end of the round the fighters go back to their corners.
Fabien Fabarossi JR dominated that second round.
Both fighters have cut men working on them during the interval.
The referee calls time. The cornermen exit stage left and we're back to business. This is the final round!
Hamlet tries to keep at a distance but Fabarossi JR has taken the fight into the clinch.
Hamlet escapes the clinch and we're back to striking.
Fabarossi JR really does look like a pencil wearing a pair of gloves. Let's hope he has a gameplan to suit that ridiculous body shape.
Fabarossi JR shoots in for a takedown - he's clinched up with Hamlet but Hamlet pushes him off and we're back to square one.
Fabarossi JR tries to shoot in for a takedown. He's got hold of a leg but Hamlet swivels and escapes.
Hamlet tries a head kick but it misses.
Fabarossi JR changes levels and looks for a double leg takedown. Hamlet tries to avoid it but Fabarossi JR manages to keep hold of a leg and drag Hamlet to the ground. Hamlet escapes though and pops straight back up to his feet.
That's three failed takedown attempts in the round for Fabien Fabarossi JR. That's going to take a lot out of him.
Hamlet misses with a double jab
so Fabarossi JR counters with a double leg into guard. Good agility.
Fabarossi JR wants to stand and escape but instead Hamlet has hit a sweep and he's now on top in guard.
Hamlet tries to free his leg and advance position but Fabarossi JR is retaining full guard.
Fabarossi JR on his back here. We all know that wrestlers don't like being on their back so let's see if Fabarossi JR tries to get out of the position.
Both fighters are breathing heavily.
Hamlet content to stall in guard here.
That's one minute gone in the round.
Fabarossi JR looking for a sweep. Not yet Fabarossi JR, not yet.
Hamlet postures up and scores with a shot to the body and a follow up elbow to the head.
Hamlet slows down the pace of the fight, as he sits in guard.
Fabarossi JR is working from a closed guard but he's struggling to control his opponent.
That's two minutes gone in the round.
There's not a lot going on here and the crowd are letting the fighters know they're not willing to tolerate a lack of action.
The referee has ruled that neither fighter is active enough on the ground and has stood them back up.
Fabarossi JR walks straight into an uppercut. Luckily it didn't land flush.
Fabarossi JR knocks Hamlet to the floor with a head kick! Can he finish him!?
Hamlet is rocked!
Fabarossi JR works a knee to the body and follows up with a nice elbow to the head.
Hamlet is still in real trouble! Can Fabarossi JR finish him?
Fabarossi JR lands a knee to the body and a forearm to the face.
Fabarossi JR in side control, just content to control the action for now.
Fabarossi JR stands up.
Fabarossi JR shoots in for a takedown. He's got it... He's hoisted his opponent over his head and is carrying him over to the other end of the mat. The crowd roars in approval and Fabarossi JR slams his opponent to the mat. OH, that is naaaaaasty! He's out! Fabarossi JR lands a punch to his unconscious victim for good measure before the ref has time to call the fight.
Ladies and gentlemen, after 2:50 of round 3, we have a winner by way of KO (Slam). Fabien Fabarossi JR!
|
|
|
|
|
|
|
|
|
|
|
|
|
|
|
|
|
|
|
|
|
|
|
| S |
C
A |
G |
S |
C
B |
G |
|
S |
C |
G |
|
energy
A | B |
|
hype
A | B |
|
pop
A | B |
|
mgr
A | B |
|
FIGHT
RATING
96% |
|
|
|
|
|
|
|
|
|
|

