 |
Infliction Warning PBP Commentary |
Undercard bout
|
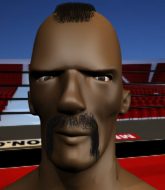
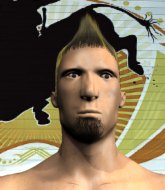
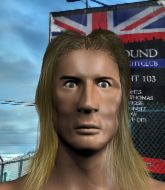
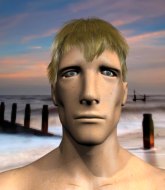
Coming up we have a super heavyweight MMA rules bout between Monster Mann (ranked 0 p4p, 0 weight class) and DC United (ranked 0 p4p, 0 weight class). The fight MMA fans around the world have waited their entire lives for!
 |
|
 |
| 225 cm
22
300 lbs
1 - 1 - 0 |
|
215 cm
22
300 lbs
1 - 0 - 0 |
BJJ Blue Belt
Excellent boxer
Granite chin |
|
BJJ Blue Belt
Solid Muay Thai
Solid chin |
|
| |
|
Ladies and gentlemen. This fight is 3 rounds, in the super heavyweight division.
Introducing the fighter to my left, fighting out of the red corner.
With a record of
1 - 1 - 0, fighting out of Sydney, Monster Mann!
And introducing the fighter to my right, fighting out of the blue corner.
With a record of
1 - 0 - 0, fighting out of Sydney, DC United!
The judges for this bout are Damien Edna, Eliza Hachem and Skip Squint.

The bell rings for round one and we are underway!
United fails with an attempt to clinch.
United is looking to clinch but Mann is avoiding it.
Mann lands with an uppercut that bounces United off the cage and back into rage.

It looks like DC United has been cut.
United lands an overhand left. A wild punch that just about connected.
It looks like Monster Mann has been cut.
Mann will have to do better than that with his takedown attempts.
United takes a big uppercut there. He seems a bit wobbly but no, he's OK.
Mann lands a right hook to the body.
Fantastic stuff here - a very entertaining period of action, which has drawn cheers from the crowd.
Mann bobbing and weaving, closes the distance and lands a hook to the side of United's head.
A punch lands to the side of United 's head but he takes it in his stride.

United is rocked!
Mann cracks United with a left hook right on the temple and United goes down! He's out! Referee! Stop the fight! Mann lands a few more punches before the dopey ref steps in - hopefully United is OK!
Ladies and gentlemen, after 0:23 of round 1, we have a winner by way of KO (Punch). Monster Mann!
|
|
|
|
|
|
|
|
|
|
|
|
|
|
|
|
|
|
|
|
|
|
|
| S |
C
A |
G |
S |
C
B |
G |
|
S |
C |
G |
|
energy
A | B |
|
hype
A | B |
|
pop
A | B |
|
mgr
A | B |
|
FIGHT
RATING
100% |
|
|
|
|
|
|
|
Undercard bout
|
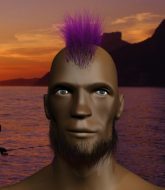
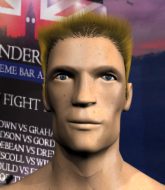
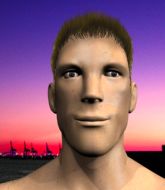
Coming up we have a middleweight MMA rules bout between Luke Skywalker (ranked 0 p4p, 0 weight class) and Leo Johnson (ranked 0 p4p, 0 weight class). Johnson has chosen tribal entrance as his entrance music. Luke Skywalker has the edge in experience - let's see if he can make that count tonight.
 |
|
 |
| 187 cm
20
195 lbs
0 - 2 - 0 |
|
183 cm
18
189 lbs
0 - 0 - 0 |
BJJ Blue Belt
Brawler
Granite chin |
|
Good wrestler
Basic striking
Likes ground |
|
| |
|
Ladies and gentlemen. This fight is 3 rounds, in the middleweight division.
Introducing the fighter to my left, fighting out of the red corner.
With a record of
0 - 2 - 0, fighting out of Sydney, Luke Skywalker!
And introducing the fighter to my right, fighting out of the blue corner.
With a record of
0 - 0 - 0, fighting out of Sydney, Leo Johnson!
The judges for this bout are Damien Edna, Bruno Hogan and Winston Howard.
The bell rings for round one and we are underway!
Skywalker shoots in for a takedown but doesn't get it.

Johnson darts in and clinches Skywalker up against the cage.

Johnson jumps guard and drags Skywalker to the mat. He's obviously going to be looking for submissions off his back.
Johnson is trying to keep Skywalker in close.
Johnson wants to control here, rather than go for any submissions from the bottom. At least for now.
Skywalker wants to stand but Johnson is controlling his posture from full guard.
Johnson is trying to hold Skywalker in close to prevent damage but Skywalker has managed to pass into half guard.
Skywalker is keen to just control but Johnson is a slippery customer.
Johnson keeping his head moving to avoid the ground and pound.
Johnson tries to get to full guard but Skywalker has control of the leg.

The referee has ruled that neither fighter is active enough on the ground and has stood them back up.
Skywalker moves in looking to clinch but Johnson pushes him off.
Johnson drops down and drives through with a powerful takedown into guard.
Skywalker looking to sweep here. No luck so far.
Johnson trying to pass the guard but can't manage it just yet.
Skywalker manages to land a sweep and now he's in mount on top!
Johnson is working to get back to half guard.

That's one minute gone in the round.
Skywalker looking to control but Johnson is working nicely, looking to advance position himself.
We get told so often about how wrestlers don't like to be on their backs. Let's see if Johnson can do anything to dispel that myth.
Johnson is looking to improve his position but Skywalker isn't that keen on the idea.
Skywalker lands with some vicious ground and pound - can Johnson hang on?

Skywalker is in full mount, looking to secure a guillotine but Johnson is surviving well by controlling Skywalker's body position as best he can.
Johnson is desperately trying to improve his position but Skywalker has a good base and remains in mount.
Skywalker avoids the attempt from Johnson to control.
Skywalker has been looking to land a fair amount of strikes on the ground. He might be looking to soften his opponent up in order to work for a submission.
Johnson is desperately trying to get back to half guard.
Skywalker punishing his opponent with strikes.
Johnson is rocked!
Skywalker is still in mount, landing shots to his trapped opponent. Johnson can't stay in a position like this for much longer.
Johnson is still in real trouble! Can Skywalker finish him?
BOOM! Skywalker connects with a massive shot to the dome!

That's two minutes gone in the round.
Skywalker looking to ground and pound his opponent to a finish here.
Skywalker lands a couple of nice shots there from mount.
Skywalker scoring with some good ground and pound from mount here. Will he manage to finish Johnson?
Skywalker scoring with strikes but Johnson is staying in there.
The crowd are loving this. Great action here.
Skywalker with good strikes from the mount here!
Skywalker lands a nice shot to the head.
Skywalker unloading with bombs!
Skywalker is breathing heavily.
Skywalker with good strikes from the mount here!
Skywalker scores with a couple of good head shots there.
The fighters are pressed up against the cage, both looking to find a bit of space to work.
Skywalker lands with some vicious ground and pound - can Johnson hang on?
Skywalker landing punches.
The referee warns Johnson that he has to improve his position here as he takes two more clean shots to the head.
Skywalker has hold of Johnson's left arm, perhaps looking for a submission. The two fighters tussle over control of the isolated limb and Johnson manages to get his arm back to his side and away from danger.
The crowd growing excited in anticipation of a finish here! Right on cue, Skywalker cracks his opponent with a massive right hand that draws loud cheers!
Johnson throwing punches from his back but nothing is landing.
Skywalker working Johnson over with strikes here.
Johnson tries to lock up and control but Skywalker gives him a forearm to the face and pushes him away.
Skywalker pausing momentarily but resumes with a couple of decent strikes that do a bit of damage.
Johnson can't escape the position.
Skywalker breaks from Johnson's wrist control and lands an elbow.

That's three minutes gone in the round.
Johnson is trying to escape the mount.
Skywalker looking to finish Johnson with some ground and pound. This is bad for Johnson!
Skywalker landing shots from mount.
Both fighters really going for it on the ground here!
Skywalker looking to ground and pound his opponent to a finish here.
BOOM! Skywalker connects with a massive shot to the dome!
It looks like Leo Johnson has been cut.
This is a great period of action - very entertaining stuff!
Johnson taking shots to the head.
Skywalker connects with a couple of good shots from mount.
The crowd growing excited in anticipation of a finish here! Right on cue, Skywalker cracks his opponent with a massive right hand that draws loud cheers!
That has opened up Leo Johnson's cut even more.
Skywalker working for a submission here. He's tucked his head under his opponent's arm, looking for an arm triangle. He's hopped off into side control, looking to tighten the submission... is it going to work? He's given up a good position looking for it. Johnson looks OK. Oh, I spoke too soon, he's out! That must have been tighter than I thought! Excellent work there by Skywalker! Submission of the night perhaps?
Ladies and gentlemen, after 3:45 of round 1, we have a winner by way of Submission (Arm Triangle). Luke Skywalker!
|
|
|
|
|
|
|
|
|
|
|
|
|
|
|
|
|
|
|
|
|
|
|
| S |
C
A |
G |
S |
C
B |
G |
|
S |
C |
G |
|
energy
A | B |
|
hype
A | B |
|
pop
A | B |
|
mgr
A | B |
|
FIGHT
RATING
100% |
|
|
|
|
|
|
|
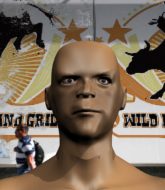
Undercard bout
|
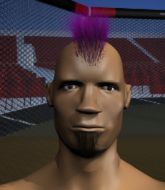
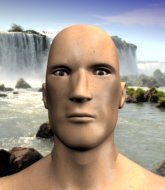
Coming up we have a heavyweight MMA rules bout between bloody albo (ranked 0 p4p, 0 weight class) and London Paul (ranked 0 p4p, 0 weight class). albo's entrance music is coldplay-fix you. A fine choice. These two fighters really are very evenly matched on the feet - it will be fascinating to see who can assert themselves in that aspect of the fight.
 |
|
 |
| 188 cm
22
232 lbs
1 - 2 - 0 |
|
200 cm
20
260 lbs
1 - 1 - 0 |
BJJ Blue Belt
Brawler
Good chin |
|
BJJ Blue Belt
Brawler
Very confident |
|
| |
|
Ladies and gentlemen. This fight is 3 rounds, in the heavyweight division.
Introducing the fighter to my left, fighting out of the red corner.
With a record of
1 - 2 - 0, fighting out of Sydney, bloody albo!
And introducing the fighter to my right, fighting out of the blue corner.
With a record of
1 - 1 - 0, fighting out of Sydney, London Paul!
The judges for this bout are Donatello Bradman, Summer Carpenter and Bruno Hogan.
The bell rings for round one and we are underway!
albo tries to close the distance and clinch but Paul swats him to one side with an open hand palm strike and circles away.
albo shoots in for a takedown but doesn't get it.
Paul throws a solid leg kick but albo takes the impact on his shin and smiles at Paul.
Paul misses with a two punch combination.
Paul scores with a shot to the body.
albo misses with a takedown attempt - Paul sprawls well and throws a nice strike on the way out which just misses.
Paul scores with a punch to the head.
bloody albo seems to be the more aggressive standup fighter in this bout.
albo tries to clinch but Paul is having none of it.
albo throws a sloppy head kick and Paul moves out of range easily.
Paul darts in and clinches albo up against the cage.
albo stalling in the clinch but Paul improves position.
Paul stalling here - the referee won't stand for too much of that.
Paul throws a blind hook that connects with the side of albos head.
albo wants to push off and get back to the center of the mat but Paul has him pressed against the cage.
Come on Paul - let's have some action - none of this stalling nonsense.
Paul lands with a right to the head.
albo tries for a takedown but Paul manages to get underhooks.
That's three failed takedown attempts in the round for bloody albo. That's going to take a lot out of him.
Good body shot from Paul.
albo is breathing heavily.

Paul escapes the clinch and we're back to striking.
Paul drops down and drives through with a powerful takedown into guard.
Paul must be cautious of submissions here, given that his opponent has the superior Jiu Jitsu.
Paul with a flurry of punches that miss.

Paul decides to stand up and beckons his opponent to follow.
The crowd are loving this. Great action here.
Paul feints and then dives in with a takedown. That was a long way out but the feint bought him enough time to close the distance and complete the takedown. Now we'll play guard for a bit and see who can get the better of that position.
That's one minute gone in the round.
Paul has decided he wants to stand but the closed guard of albo is proving hard to escape from.
albo keeping moving, preventing Paul from controlling successfully.
Both fighters really going for it on the ground here!
albo looking to control.
albo can't do much from the bottom at the moment, as Paul controls the pace.
albo throws his legs up looking for a submission but Paul uses it to pass to side control.
Paul stands up.
Ooooh, nice body kick lands from albo. Paul shrugs it off though.
Paul gets caught flat footed, as albo shoots in with a quick takedown into guard.
albo won't allow Paul to sweep him here.
albo might be looking to lock onto one of his opponent's long limbs for a submission, whilst we're on the ground.
Paul kicks albo off and gets to his feet.
Paul fails to land with the punch combination there - jab, cross, hook, miss, miss, miss.
albo misses with a takedown
and Paul cracks him with a counter punch right on the button.
That's two minutes gone in the round.
Wooooo! Give it up for these two warriors! They are putting on a show!
albo misses with a head kick.
Excellent takedown into side control there by Paul.
albo is rocked!
albo takes a big shot right to the temple there but he's taken it well.
Oh albo is still in real trouble! Will he be able to recover?!!
Paul lands some shots froms side control.
Paul working the body and head with strikes.
albo on the wrong end of some ground and pound.
Paul scoring with punches and elbows.
Paul lands a few punches from side control.
Paul creates a bit of distance and throws down some hard shots.
Paul is working albo over with some ground and pound from side control.
Paul stands up and we're back to a striking position.
Paul rushes forward with a series of wild hooks but albo moves out of range and avoids them all easily.
albo tries for a takedown but Paul circles away easily
and Paul counters with a massive hook, right on the button! He's out cold! Damn, that was naaaaaasty! Hopefully he'll be OK.
Ladies and gentlemen, after 2:54 of round 1, we have a winner by way of KO (Punch). London Paul!
|
|
|
|
|
|
|
|
|
|
|
|
|
|
|
|
|
|
|
|
|
|
|
| S |
C
A |
G |
S |
C
B |
G |
|
S |
C |
G |
|
energy
A | B |
|
hype
A | B |
|
pop
A | B |
|
mgr
A | B |
|
FIGHT
RATING
0% |
|
|
|
|
|
|
|
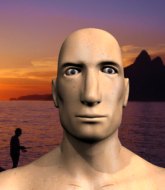
Undercard bout
|
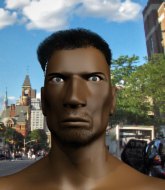
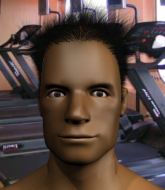
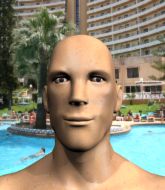
Coming up we have a heavyweight MMA rules bout between David Mauchismo (ranked 0 p4p, 0 weight class) and Rufus Firefly (ranked 0 p4p, 0 weight class). Mauchismo kept the crowd waiting but all that was forgotten when his ring entrance music started. The incomparable musical genuis that is Before I Forget by Slipknot. Both fighters look fresh as a daisy as they make their way towards the cage.
 |
|
 |
| 191 cm
22
220 lbs
0 - 1 - 0 |
|
192 cm
22
258 lbs
1 - 0 - 0 |
BJJ White Belt
Excellent MT
Intelligent |
|
BJJ Blue Belt
Decent boxing
Very confident |
|
| |
|
Ladies and gentlemen. This fight is 3 rounds, in the heavyweight division.
Introducing the fighter to my left, fighting out of the red corner.
With a record of
0 - 1 - 0, fighting out of Sydney, David Mauchismo!
And introducing the fighter to my right, fighting out of the blue corner.
With a record of
1 - 0 - 0, fighting out of Sydney, Rufus Firefly !
The judges for this bout are Eliza Hachem, Donatello Bradman and John Mangel.
The bell rings for round one and we are underway!
Firefly tries to clinch but Mauchismo moves out of range.
Mauchismo tries to clinch there but Firefly circles away.
Firefly is looking to clinch.
Mauchismo fails with a takedown attempt from distance.
Firefly with a lazy takedown attempt
and Mauchismo counters with a takedown into full mount! That could mean trouble for Firefly !
Firefly manages to regain half guard. Good work.
Mauchismo prevents Firefly from standing back up.
Firefly is trying to get back to full guard.
Firefly trying to control but Mauchismo postures up.
Firefly is trying to get back to full guard.
The fighters are pressed up against the cage, both looking to find a bit of space to work.
Firefly is trying to stand up here but Mauchismo is controlling him well.
That's one minute gone in the round.
Firefly moves into full guard.
Firefly looking to control.
Firefly had isolated an arm as going for an omaplata. Mauchismo is defending the submission well but is in a very vulnerable position. Firefly Is leaning forward trying to finish the omaplata but decides to abandon it, and take Mauchismo's back instead.
Firefly has his hand under the chin of his opponent looking for the choke. He's nearly got it! This one could be all over! But no, Mauchismo has freed his hand and lives to survive another
well, another couple of seconds at least!
Firefly looks gassed!
Mauchismo avoids the strikes from Firefly .
Mauchismo tries to roll but Firefly sticks to his back.
Firefly thows a huge left but connects with the canvas and not his opponent.
That's two minutes gone in the round.
Firefly looking for the choke from the back.
Mauchismo fending off the submission attempt from Firefly .
Firefly is working hard for the rear naked choke here.
What can Mauchismo do to escape this position? He's going to have to figure it out pretty quick if he wants to stay in the fight!
Firefly working for the rear naked choke here. He's got one arm under but Mauchismo is defending well. A couple of punches soften him up though and Firefly has tightened the hold! This one could be all over! It is! Mauchismo taps out!
Ladies and gentlemen, after 2:56 of round 1, we have a winner by way of Submission (RNC). Rufus Firefly !
|
|
|
|
|
|
|
|
|
|
|
|
|
|
|
|
|
|
|
|
|
|
|
| S |
C
A |
G |
S |
C
B |
G |
|
S |
C |
G |
|
energy
A | B |
|
hype
A | B |
|
pop
A | B |
|
mgr
A | B |
|
FIGHT
RATING
44% |
|
|
|
|
|
|
|
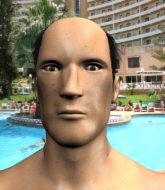
Undercard bout
|
|
|
|
Undercard bout
|
Coming up we have a heavyweight MMA rules bout between Tray Roberts (ranked 0 p4p, 0 weight class) and Scott Hazwan (ranked 0 p4p, 0 weight class). Hazwan has chosen Wolfpack Attack as his entrance music, which hasn't gone down very well with the crowd. Tray Roberts has the edge in experience - let's see if he can make that count tonight.
 |
|
 |
| 192 cm
22
265 lbs
2 - 0 - 0 |
|
183 cm
18
231 lbs
0 - 1 - 0 |
BJJ Blue Belt
Improved boxing
Big right hand |
|
BJJ Blue Belt
Counter striker
Very confident |
|
| |
|
Ladies and gentlemen. This fight is 3 rounds, in the heavyweight division.
Introducing the fighter to my left, fighting out of the red corner.
With a record of
2 - 0 - 0, fighting out of Sydney, Tray Roberts!
And introducing the fighter to my right, fighting out of the blue corner.
With a record of
0 - 1 - 0, fighting out of Sydney, Scott Hazwan!
The judges for this bout are Winston Howard, Damien Edna and Donatello Bradman.
The bell rings for round one and we are underway!
Roberts slips in close and lands a nice hook before moving back out of range.
A head kick misses from Roberts.
Roberts drives through with a takedown into guard.
Hazwan should think about turning a few of those tyres round his middle into muscle if he wants people to take him seriously as an athlete.
Roberts throwing elbows and punches but not connecting, as Hazwan works some decent striking defense from the bottom.
Roberts looking to sit in guard and control but Hazwan gets the butterfly guard and sweeps. He's now in the guard on the top.
Roberts tries to strike from the bottom.
Hazwan stands up from Roberts's guard - Hazwan perhaps looking for a knockout.
Hazwan fails with a takedown attempt from distance.
Roberts moves into the clinch successfully.
Roberts throws a knee to the head but misses.
Hazwan looking for a takedown.
Roberts is working Hazwan over against the cage.
Hazwan is looking for a takedown up against the cage. Roberts gets underhooks though and prevents the takedown attempt.
Tray Roberts has stuffed three takedown attempts in the round now. That's going to take a lot out of Scott Hazwan.
Roberts breaks from the clinch.
That's one minute gone in the round.
Roberts scores with a sloppy punch to the body. Not much technique there but it did the business.
Hazwan looks gassed!
Roberts tries for a takedown but Hazwan circles away easily
and Hazwan counters with a nice double leg into side control. Roberts won't be happy with that.
Roberts can't do much from the bottom here.
Hazwan wants to work for a kimura but he's foiled early by Roberts, who protects the arm well.
Roberts managing to avoid any damage from the strikes thrown by Hazwan.
Roberts is trying to buck Hazwan off.
Roberts prevents Hazwan from improving position.
Hazwan wants to control but Roberts is keeping him busy.
That's two minutes gone in the round.
Roberts taking punishment in the form of punches.
We've seen a great period of action over the last minute or so - credit to both fighters for leaving it all in the cage!
Roberts is looking for a sweep.
Roberts is trying to get back to his feet.
The fighters are pressed up against the cage, both looking to find a bit of space to work.
Roberts is trying to improve his position.
You can see the frustration on Roberts's face as Hazwan controls the position.
Hazwan wants to lay and pray for a moment but Roberts keeps working.
Roberts tries to wriggle free to get back to his feet but he's given up his back! Oops.
Roberts is trying to break free.
That's three minutes gone in the round.
Roberts controlling the position well but he knows he's in a bad position.
The fighters are starting to perspire pretty heavily.
Roberts tries to escape the position.
Hazwan softening up his opponent with strikes here.
Hazwan connects with a series of strikes and the referee is calling for Roberts to escape the position.
Hazwan patiently working for the choke. Which fighter will keep their nerve here?
Hazwan is persistently looking for the submission but Roberts is defending it well.
Hazwan is hanging on to Roberts's back as he tries to escape.

That's four minutes gone in the round.
Roberts breaks Hazwan's hooks off and manages to turn into his guard.
Roberts throws a strike but Hazwan rolls with it and manages to sweep. Now he's in guard on top.
Hazwan stops Roberts from standing up.
The ref warns both fighters not to hold the cage as they work up against the meshing.
Roberts has an omoplata and is looking to use it perhaps as a submission or perhaps to transition. Hazwan is in a bit of discomfort here, but he's managed to free himself and has dived into side control! That didn't work out too well for Roberts.
Hazwan passes to full mount! That's big trouble for Roberts!
As the round comes to an end the crowd are showing their appreciation for a great round of action.
Roberts is desperately trying to get back to half guard.
Roberts bucks up and manages to get a nice reversal! He's in guard on the top - nicely done!
And thats the end of the round the fighters go back to their corners.
A close round but Scott Hazwan will probably get the nod.
The referee calls time. The cornermen exit stage left and we're back to business.

Roberts dances in with a quick combination. Hazwan is being worked over with jabs and crosses. Oooh, a right straight from Roberts snaps Hazwan's head back. Hazwan stumbles backwards against the cage. Roberts steps forward and delivers a right cross that connects with Hazwan's jaw, simultaneously knocking him out and sending his mouthpiece into the crowd! There's a worthy souvenir for the fans. This one is over folks. Hazwan just didn't come prepared.
Ladies and gentlemen, after 0:05 of round 2, we have a winner by way of KO (Punches). Tray Roberts!
|
|
|
|
|
|
|
|
|
|
|
|
|
|
|
|
|
|
|
|
|
|
|
| S |
C
A |
G |
S |
C
B |
G |
|
S |
C |
G |
|
energy
A | B |
|
hype
A | B |
|
pop
A | B |
|
mgr
A | B |
|
FIGHT
RATING
100% |
|
|
|
|
|
|
|
Undercard bout
|
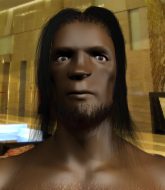
Coming up we have a super heavyweight MMA rules bout between Brann Samael (ranked 0 p4p, 0 weight class) and Andre THE GIANT (ranked 0 p4p, 0 weight class). This should be a great matchup!
 |
|
 |
| 197 cm
22
290 lbs
2 - 0 - 0 |
|
225 cm
18
300 lbs
1 - 0 - 0 |
BJJ Blue Belt
Good kicks
Cuts easily |
|
BJJ Blue Belt
Brawler
Determined |
|
| |
|
Ladies and gentlemen. This fight is 3 rounds, in the super heavyweight division.
Introducing the fighter to my left, fighting out of the red corner.
With a record of
2 - 0 - 0, fighting out of Sydney, Brann Samael!
And introducing the fighter to my right, fighting out of the blue corner.
With a record of
1 - 0 - 0, fighting out of Sydney, Andre THE GIANT!
The judges for this bout are Skip Squint, Bruno Hogan and Damien Edna.
The bell rings for round one and we are underway!
Samael throws a body kick that misses.
Samael throws a leg kick but he was too far away and it doesn't land.
THE GIANT rushes Samael and presses him up against the cage.
THE GIANT is looking to break free of the clinch but Samael has double underhooks.
THE GIANT stops a takedown attempt from Samael.
THE GIANT is trying to work out of this bad position, with his back against the cage.
THE GIANT wants to strike at distance but he can't break free of the clinch.
Samael can't get the takedown.
THE GIANT goes for a takedown in the clinch but Samael prevents it.
THE GIANT tries to score a body lock takedown but Samael shows good agility there to stay on his feet.
Come on THE GIANT - let's have some action - none of this stalling nonsense.
THE GIANT breaks from the clinch.
Nice sprawl there from THE GIANT as Samael shoots in.
That's three failed takedown attempts in the round for Brann Samael. That's going to take a lot out of him.
THE GIANT misses with a jab and misses with a cross straight after too.
Samael connects with a leg kick. He turned his hip over nicely there.
Samael moves into range and lands a nice leg kick.
THE GIANT is throwing a storm of strikes! Right hook, left hook and follows it up with a spinning back fist! Samael hits the canvas like a rag doll! And just like that, this one is over!
Ladies and gentlemen, after 0:46 of round 1, we have a winner by way of KO (Strikes). Andre THE GIANT!
|
|
|
|
|
|
|
|
|
|
|
|
|
|
|
|
|
|
|
|
|
|
|
| S |
C
A |
G |
S |
C
B |
G |
|
S |
C |
G |
|
energy
A | B |
|
hype
A | B |
|
pop
A | B |
|
mgr
A | B |
|
FIGHT
RATING
66% |
|
|
|
|
|
|
|
Undercard bout
|
Coming up we have a super heavyweight MMA rules bout between Jason Orton (ranked 0 p4p, 0 weight class) and Dipsy Kaine (ranked 0 p4p, 0 weight class). Both fighters look fresh as a daisy as they make their way towards the cage.
 |
|
 |
| 225 cm
18
295 lbs
1 - 1 - 0 |
|
180 cm
22
290 lbs
0 - 1 - 0 |
BJJ White Belt
Improved boxing
KO power |
|
BJJ Blue Belt
Decent boxing
Solid chin |
|
| |
|
Ladies and gentlemen. This fight is 3 rounds, in the super heavyweight division.
Introducing the fighter to my left, fighting out of the red corner.
With a record of
1 - 1 - 0, fighting out of Sydney, Jason Orton!
And introducing the fighter to my right, fighting out of the blue corner.
With a record of
0 - 1 - 0, fighting out of Sydney, Dipsy Kaine!
The judges for this bout are Steve Erwin, Hugh Johnson and Summer Carpenter.
The bell rings for round one and we are underway!
Orton bobbing and weaving well here. And he's unloaded with a massive right hand that drops Kaine! He dives into his guard looking to finish!
Kaine is rocked!
It looks like Dipsy Kaine has been cut.
The fighters are pressed up against the cage, both looking to find a bit of space to work.
There's a bit of a scramble here and now Kaine is on top in guard.
Kaine is still in real trouble! Can Orton finish him?
Orton keeping full guard, as Kaine tries to pass.
Kaine seems to have recovered his senses.
Kaine stands up and waves to Orton to follow him.
We're hearing some news coming in from back stage. It's official - Kaine has eaten all the pies!
Orton shoots in with a takedown attempt and he has Kaine pinned against the cage. Kaine gets the underhooks and manages to circle away.
We've seen a great period of action over the last minute or so - credit to both fighters for leaving it all in the cage!
Orton misses the shot to the body.
Orton stuffs the takedown.
Kaine changes levels and drives through with a really nice takedown into side control. Orton looks really pissed at himself for not defending that better.
Orton is not content to let Kaine control the position.
Kaine wants to control for a moment but Orton uses the opportunity to move back to half guard.
Orton knows he needs to get back to his feet asap. He's simply no match for Kaine on the ground.
That's one minute gone in the round.
Orton wants to pass the guard but Kaine is defending well.
Orton lands a big shot. The thud that echoes around the arena is like music to the fans' ears.
Kaine is looking to regain full guard. Not this time though.
The ref warns both fighters not to hold the cage as they work up against the meshing.
Kaine looking for submissions from an awkward position here.
Kaine trying to control but Orton postures up.
Kaine looks gassed!
Orton wants to take a breather but Kaine is having none of it.
Orton tries to stand but his arm is trapped.
That's two minutes gone in the round.
There's not a lot going on here and the crowd are letting the fighters know they're not willing to tolerate a lack of action.
Kaine wants to improve his position but Orton is controlling well.
Kaine actively working from the bottom here.
Orton tries to stand but his hand is stuck under Kaine.
It looks like we're going to have a standup here. Neither fight is doing enough on the ground.
Orton shoots in but doesn't get the takedown
and Kaine counters with a nice double leg into side control. Orton won't be happy with that.
Kaine wants to control but Orton is keeping him busy.
Orton misses with an elbow from the bottom.
Kaine wants to control for a moment but Orton uses the opportunity to move back to half guard.
Kaine tries to get to full guard but Orton has control of the leg.
That's three minutes gone in the round.
Kaine misses with some strikes from the bottom.
Kaine actively working from the bottom here.
Kaine is trying to get back to full guard.
Kaine keeping control of the position.
The referee has ruled that neither fighter is active enough on the ground and has stood them back up.
Excellent takedown into side control there by Kaine.
The strikes coming from Kaine are missing the target in this wave of attacks.
Kaine wants to control but Orton is keeping him busy.
Kaine decides to stand back up. Kaine steps back and let's Orton get back to his feet.
That's four minutes gone in the round.
Kaine closes the distance and clinches up, looking for a takedown. He shifts his weight and gets a nice trip into half guard.
Orton is defending against the submission attempts here by Kaine.
Orton manages to get to full guard.
Orton keeping moving, preventing Kaine from controlling successfully.
The crowd applaud the fighters efforts here as the round comes to an end.
Orton throwing some rather feeble looking strikes off his back.
Orton looking to control.
Orton wants to get back to his feet but Kaine is in a dominant position and won't allow it.
And thats the end of the round the fighters go back to their corners.
Dipsy Kaine dominated that round.
The cut man is working on Dipsy Kaine's cut.
The minute break is over - no more time for sponges and pep talks - back to the action!
A big right followed by a crushing left from Orton knocks Kaine out cold! Ouch - that one's going to be featured in highlight reels for years to come!
Ladies and gentlemen, after 0:05 of round 2, we have a winner by way of KO (Punches). Jason Orton!
|
|
|
|
|
|
|
|
|
|
|
|
|
|
|
|
|
|
|
|
|
|
|
| S |
C
A |
G |
S |
C
B |
G |
|
S |
C |
G |
|
energy
A | B |
|
hype
A | B |
|
pop
A | B |
|
mgr
A | B |
|
FIGHT
RATING
100% |
|
|
|
|
|
|
|
Co-main event
|
Coming up we have a super heavyweight MMA rules bout between Voin Upyachki (ranked 0 p4p, 0 weight class) and Eddie G (ranked 0 p4p, 0 weight class). G comes into a darkened arena with his song building. Lethal Industry kicks in, the lights come on and the crowd goes wild! What a showman! Voin Upyachki has the better chin. Will he look to stand and bang today?
 |
|
 |
| 195 cm
22
285 lbs
0 - 1 - 0 |
|
225 cm
18
300 lbs
1 - 1 - 0 |
BJJ White Belt
Good knees
Very quick |
|
BJJ White Belt
Great elbows
Very confident |
|
| |
|
Ladies and gentlemen. This fight is 3 rounds, in the super heavyweight division.
Introducing the fighter to my left, fighting out of the red corner.
With a record of
0 - 1 - 0, fighting out of Sydney, Voin Upyachki!
And introducing the fighter to my right, fighting out of the blue corner.
With a record of
1 - 1 - 0, fighting out of Sydney, Eddie G!
The judges for this bout are Steve Erwin, Bruno Hogan and Damien Edna.
The bell rings for round one and we are underway!
Upyachki gets a clinch.
Upyachki crunches a lovely knee into G's ribcage.
G has had enough of the clinch but Upyachki keeps him there for the moment.
Upyachki looking to throw knees to the head but G is blocking nicely.
Upyachki lands a nice knee to the body.
G has had enough of the clinch but Upyachki keeps him there for the moment.
Upyachki connects with a knee to the head.
Upyachki scores with a knee to the head.
G is looking to break free of the clinch but Upyachki has double underhooks.
G is trying to break free.
Upyachki misses with a knee to the head.
Upyachki unloads a knee to the mid-section. G lets out a prehistoric sounding urrrrgh.
G wants to strike at distance but he can't break free of the clinch.
G wants to strike at distance but he can't break free of the clinch.

Upyachki has the Thai clinch. He lands a big knee to the head and G goes down! Upyachki dives on top of him - G manages to get guard.
G is rocked!
Both fighters really going for it on the ground here!
Upyachki gets to his feet and steps away from his opponent.
G is still on wobbly legs! Can Upyachki finish him?
Voin Upyachki seems to be the more aggressive standup fighter in this bout.
Upyachki rushes G and pushes him back against the cage in a clinch.
Upyachki lands a big knee! That's hurt G! Oh, he's all over the place! Upyachki lands another knee that sends G to the floor and the referee steps in to end the fight!
Ladies and gentlemen, after 0:38 of round 1, we have a winner by way of TKO (Strikes). Voin Upyachki!
|
|
|
|
|
|
|
|
|
|
|
|
|
|
|
|
|
|
|
|
|
|
|
| S |
C
A |
G |
S |
C
B |
G |
|
S |
C |
G |
|
energy
A | B |
|
hype
A | B |
|
pop
A | B |
|
mgr
A | B |
|
FIGHT
RATING
100% |
|
|
|
|
|
|
|
Main event
|
Coming up we have a super heavyweight MMA rules bout between Jean Claude Johnson (ranked 0 p4p, 0 weight class) and Tyrone Buckell (ranked 0 p4p, 0 weight class). Both fighters look fresh as a daisy as they make their way towards the cage.
 |
|
 |
| 201 cm
22
280 lbs
1 - 0 - 0 |
|
201 cm
21
295 lbs
0 - 0 - 0 |
BJJ Blue Belt
Improved boxing
Good chin |
|
BJJ Blue Belt
Decent boxing
Plays chess |
|
| |
|
Ladies and gentlemen. This fight is 3 rounds, in the super heavyweight division.
Introducing the fighter to my left, fighting out of the red corner.
With a record of
1 - 0 - 0, fighting out of Sydney, Jean Claude Johnson!
And introducing the fighter to my right, fighting out of the blue corner.
With a record of
0 - 0 - 0, fighting out of Sydney, Tyrone Buckell!
The judges for this bout are Summer Carpenter, Hugh Johnson and John Mangel.
The bell rings for round one and we are underway!
Buckell gets in close and instigates a clinch.
Buckell manages to break the clinch.
Jean Claude Johnson seems to be the more aggressive standup fighter in this bout.
Johnson shoots in for a takedown - he's clinched up with Buckell but Buckell pushes him off and we're back to square one.
Johnson tries to close the distance and clinch but Buckell swats him to one side with an open hand palm strike and circles away.
Nice takedown defense from Buckell. No joy for Johnson on that attempt.
Johnson tries to clinch but is not successful on this occasion.
Buckell waving his hands out infront of him, looking to distract Johnson.
Johnson misses with a double jab.
Johnson swats away the attempt to clinch by Buckell.
The fight moves into the clinch position.
Johnson goes for a takedown in the clinch but Buckell prevents it.
That's three failed takedown attempts in the round for Jean Claude Johnson. That's going to take a lot out of him.
Buckell breaks from the clinch.
Johnson rushes forward with a series of wild hooks but Buckell moves out of range and avoids them all easily.
Johnson shoots in with a takedown attempt and he has Buckell pinned against the cage. Buckell gets the underhooks and manages to circle away.
Johnson tries to clinch but Buckell moves out of range.
Johnson clinches with his opponent.
Buckell has had enough of the clinch but Johnson keeps him there for the moment.
Buckell breaks from the clinch.
Buckell dodges the punch combination from Johnson.
Buckell swats away the attempt to clinch by Johnson.
Johnson throws a right hand that Buckell ducks under and follows up with a left that Buckell also avoids with ease.
Johnson is breathing heavily.
Johnson fails in his attempt to clinch.
Buckell wants to clinch.
That's one minute gone in the round.
Johnson swings away but doesn't land with a series of punches.
Johnson avoids the clinch attempt nicely.
Buckell tries to clinch but is not successful on this occasion.
Buckell wants to clinch.
Buckell is looking to clinch.
Buckell keeps the fight standing with a nice sprawl.
Buckell has Johnson up against the cage in a clinch.
Buckell wants to get back to striking at distance but Johnson won't allow it.
Buckell is trying to work out of this bad position, with his back against the cage.
An uppercut on the inside fails to land for Johnson.
Johnson lands a nice elbow from the clinch.
Buckell wants to break free but Johnson has control.
Buckell breaks the clinch and we return to the middle of the mat.
Johnson changes levels and looks for a double leg takedown. Buckell tries to avoid it but Johnson manages to keep hold of a leg and drag Buckell to the ground. Buckell escapes though and pops straight back up to his feet.
Buckell gets a clinch.
Johnson has Buckell pressed up against the cage and is working for takedown. Buckell manages to improve position though and keeps the fight standing.
Johnson lands a right hand that snaps the head of Buckell backwards.
Buckell breaks from the clinch.
Johnson wants to clinch
and Buckell counters by moving into the clinch. Good anticipation by Buckell.
Buckell wants to break free. God knows he wants to breaaaak freeee.
Buckell is trying to break the clinch but Johnson has him pressed against the cage.
Johnson swings away with an uppercut that misses.
Johnson drops down for a takedown but doesn't get it.
Johnson is working for a takedown up against the cage. He can't get it on this occasion though.
That's two minutes gone in the round.
Johnson breaks the clinch.
Buckell is looking to clinch but Johnson is avoiding it.
Some wild striking there from Johnson.
Buckell fails in his attempt to clinch.
Johnson pushes Buckell up against the cage in a clinch.
Johnson swings wildly with an uppercut but Buckell uses good head movement to avoid it.
Johnson misses with a short punch on the inside.
Johnson tries to score a body lock takedown but Buckell shows good agility there to stay on his feet.
Johnson has a couple of punches blocked by Buckell.
A short right hand to the side of the head by Johnson.
Johnson goes for a takedown attempt but Buckell pushes him away and we're back to fighting at a distance.
Johnson is looking to clinch but Buckell is avoiding it.
Johnson throws a right and a left that both miss.
Buckell tries to close the distance and clinch but Johnson swats him to one side with an open hand palm strike and circles away.
Johnson swats away the attempt to clinch by Buckell.
Buckell tries to clinch up.
Buckell pushes Johnson up against the cage in a clinch.
Johnson throws a head punch that misses.
Buckell breaks from the clinch.
Johnson wants to clinch.
No luck for Johnson with that takedown attempt.
No luck for Johnson with that takedown attempt.
That's three minutes gone in the round.
Buckell circles away from the clinch attempt.
No joy there for Johnson, who threw a few shots but didn't land.
Buckell tries to close the distance and clinch up but Johnson swats him away and circles back towards the center.
Buckell closes the distance and presses his opponent up against the cage.
Johnson wants to strike at distance but he can't break free of the clinch.
Buckell wants to strike at distance but he can't break free of the clinch.
Buckell breaks the clinch and we return to the middle of the mat.
Buckell clinches.
Buckell blocking some punches.
Buckell breaks the clinch and we're back to striking at distance.
Buckell fails with a takedown attempt.
The fight stays on the outside here - Buckell looks like he's thinking about clinching though.
Buckell tries to clinch up but Johnson circles away and keeps his distance.
Buckell darts in and clinches Johnson up against the cage.
Buckell breaks from the clinch.
Buckell moves in looking to clinch but Johnson pushes him off.
Buckell doesn't manage to clinch there - Johnson circles away.
Buckell tries to clinch there but Johnson circles away.
Johnson shoots in but no luck this time.
Buckell tries to close the distance and clinch but Johnson swats him to one side with an open hand palm strike and circles away.
Johnson gets in close and instigates a clinch.
Johnson lands a takedown into guard.
Johnson forces his way into half guard.
Johnson is thinking about going for an arm triangle but he can't free his leg.
That's four minutes gone in the round.
Johnson looking for a kimura but he'll have to free his other leg if he wants to finish that. Perhaps he's just using it as a distraction technique.
Buckell is defending against the submission attempts here by Johnson.
Buckell flails away from the bottom but he's not doing any damage.
Johnson is trying to work for a kimura. He's got his hands clasped together - this could be trouble! No, Buckell has managed to free his arm - good work.
Johnson landing with strikes to the body and head, softening up his opponent.
Johnson working Buckell over with strikes.
And thats the end of the round the fighters go back to their corners.
A close round but Tyrone Buckell will probably get the nod.
The minute break is over - no more time for sponges and pep talks - back to the action!
Buckell doesn't manage to clinch there - Johnson circles away.
Buckell doesn't manage to clinch there - Johnson circles away.
Johnson gets to the clinch - let's see what his plan is here.
Johnson lands with a quick shot inside that doesn't really do much damage.
Johnson working some nice short punches in the clinch.
Buckell prevents a takedown attempt there.
Johnson lands an uppercut.
Johnson is leaning against Buckell and scores with a nice uppercut to the body.
Johnson tries a shoulder strike but it doesn't do any damage.
Johnson is trying to trip Buckell. He has hold of a leg but Buckell is hopping around, keeping his balance for the moment. Johnson persists though and gets the takedown into guard.
Johnson trying to move into half guard but instead Buckell has managed to sweep!
Buckell throwing elbows and punches but not connecting, as Johnson works some decent striking defense from the bottom.
Buckell stopping the sweep attempt from Johnson.
Buckell thinks about going for a leg but decides against it, in order to maintain the position.
Johnson looking to hit a scissor sweep but Buckell is one step ahead there.
Johnson is working actively off his back, looking to secure an arm or perhaps work for a triangle.
Both fighters are absolutely exhausted here.
Johnson wants to sweep but no luck.
That's one minute gone in the round.
Buckell stands and throws Johnson's legs to the side, diving into side control.
Buckell looking for an arm triangle but it's way too loose to do anything.
Buckell is looking to finish here, going for an Americana. Johnson knows the correct defense though, so he's OK.
Johnson is trying to get back to half guard. He's pushing on Buckell's leg. He's managed it. Nice work.
Johnson is looking to sinch up a gullotine here but Buckell pulls his head out easily.
Johnson manages to get to full guard.
Johnson wants to sweep but no luck.
Johnson bucks up whilst keeping hold of a body lock, managing to reverse the position. Now he's in top in Buckell's guard.
Buckell keeping full guard, as Johnson tries to pass.
That's two minutes gone in the round.
Buckell keeping moving, preventing Johnson from controlling successfully.
Johnson stands and throws Buckell's legs to the side, diving into side control.
Johnson has an Americana. Buckell didn't react quickly enough there and he's in big trouble now! He tries to squirm out but is forced to tap! Johnson is delighted and gyrates infront of the ring girls. They seem to like the attention - it'll be interesting to see if Johnson hooks up with any of them at the after show party.
Ladies and gentlemen, after 2:31 of round 2, we have a winner by way of Submission (Americana). Jean Claude Johnson!
|
|
|
|
|
|
|
|
|
|
|
|
|
|
|
|
|
|
|
|
|
|
|
| S |
C
A |
G |
S |
C
B |
G |
|
S |
C |
G |
|
energy
A | B |
|
hype
A | B |
|
pop
A | B |
|
mgr
A | B |
|
FIGHT
RATING
70% |
|
|
|
|
|
|
|
|
|
|
