 |
QFC Tournament 599 Round 2 PBP Commentary |
Undercard bout
|
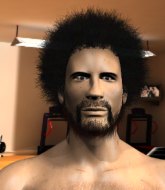
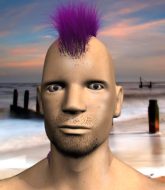
Coming up we have a welterweight MMA rules bout between Harold Freeze (ranked 0 p4p, 0 weight class) and Pedro Diaz (ranked 0 p4p, 0 weight class). On his way into the cage it seems that Harold Freeze has been attacked by a crazed fan! It looks like it might have been the just bleed guy! Luckily Harold Freeze seems to be OK! I thought that lunatic was in prison!?
 |
|
 |
| 225 cm
23
130 lbs
1 - 0 - 0 |
|
180 cm
18
173 lbs
1 - 0 - 0 |
BJJ Blue Belt
Brawler
Good chin |
|
BJJ White Belt
Brawler
Determined |
|
| |
|
Ladies and gentlemen. This fight is 3 rounds, in the welterweight division.
Introducing the fighter to my left, fighting out of the red corner.
With a record of
1 - 0 - 0, fighting out of Tokyo, Harold Freeze!
And introducing the fighter to my right, fighting out of the blue corner.
With a record of
1 - 0 - 0, fighting out of Tokyo, Pedro Diaz!
The judges for this bout are Shigeki Fujiwara, Shirou Masuda and Yukihiro Yamamoto.

The bell rings for round one and we are underway!
Freeze shoots in for a takedown but Diaz shows good takedown defense.

Diaz closes the distance and presses his opponent up against the cage.
Diaz tries to pull guard but Freeze won't allow it.
Diaz has Freeze pressed against the cage.
Freeze jumps guard but his hands slip and he falls flat on his back. Well, he's made himself look a right mug there, as Diaz walks away with a smile on his face. Freeze gets slowly back to his feet and shakes his head.
Diaz fails with the takedown

and Freeze counters into the clinch. Nicely done.
Diaz tries to jump guard but he falls flat on his backside. Freeze smiles and moves away.
Harold Freeze has stuffed three takedown attempts in the round now. That's going to take a lot out of Pedro Diaz.
Diaz gets in close and instigates a clinch.
We've had a slow start to the round here - hopefully the action picks up.
Freeze wants to push off and get back to the center of the mat but Diaz has him pressed against the cage.

Freeze escapes the clinch and we're back to striking.
Diaz tries to clinch up but Freeze circles away and keeps his distance.
Diaz tries to clinch up against the cage, rushing in to close the distance. Freeze manages to break the clinch and circles back to the middle of the mat.

That's one minute gone in the round.
Freeze gets tackled into the cage by Diaz. Diaz maintains the clinch.

Diaz turns his hips and lands a very nice judo throw into side control!
Diaz really doesn't want to stay on the ground with Freeze. If he can't get it back to his feet, it's only a matter of time before he'll be tapping out.
Freeze is putting a lot of effort into getting back to his feet here.
You can see the frustration on Freeze's face, being in this tough position on the bottom.
Freeze manages to land a sweep and he's now on top! Lovely Jiu Jitsu!
Diaz is positioning himself well to prevent Freeze advancing to mount.
Freeze throwing shots but Diaz is blocking nicely.
Freeze is keen to just control but Diaz is a slippery customer.

Diaz looking for submissions off his back.
Freeze is looking to pass the guard... He's managed it - he's now in full mount!

That's two minutes gone in the round.
Freeze content just to control the position here.
Freeze postures up and cracks his opponent a couple of times before moving back into close ground control. Diaz looks a forlorn figure.
The fans in attendance giving it up for the two fighters, who have really let it all hang out in the last minute or so!
Freeze dominating with strikes here.
Diaz is trying to reverse the position but instead Freeze has taken his back - oops!

Diaz is looking to escape here. Oh dear - Freeze has locked on a rear naked choke here! Diaz is tapping out! The fight is over!
Ladies and gentlemen, after 3:58 of round 1, we have a winner by way of Submission (RNC). Harold Freeze!
|
|
|
|
|
|
|
|
|
|
|
|
|
|
|
|
|
|
|
|
|
|
|
| S |
C
A |
G |
S |
C
B |
G |
|
S |
C |
G |
|
energy
A | B |
|
hype
A | B |
|
pop
A | B |
|
mgr
A | B |
|
FIGHT
RATING
42% |
|
|
|
|
|
|
|
Undercard bout
|
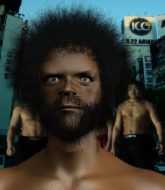
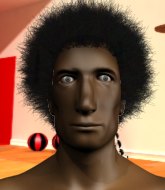
Coming up we have a welterweight MMA rules bout between Shin Murakami (ranked 0 p4p, 0 weight class) and Power Ortiz (ranked 0 p4p, 0 weight class). Power Ortiz is the more experienced fighter, so let's see if that makes a difference tonight.
 |
|
 |
| 170 cm
24
170 lbs
1 - 0 - 0 |
|
200 cm
23
130 lbs
1 - 0 - 0 |
BJJ Blue Belt
Solid Muay Thai
KO power |
|
BJJ Blue Belt
Brawler
Determined |
|
| |
|
Ladies and gentlemen. This fight is 3 rounds, in the welterweight division.
Introducing the fighter to my left, fighting out of the red corner.
With a record of
1 - 0 - 0, fighting out of Tokyo, Shin Murakami!
And introducing the fighter to my right, fighting out of the blue corner.
With a record of
1 - 0 - 0, fighting out of Tokyo, Power Ortiz!
The judges for this bout are Ren Mimura, Sosuke Kotani and Yukihiro Shimada.
The bell rings for round one and we are underway!
Ortiz blocks a head kick by Murakami.
Ortiz blocks a head kick by Murakami.
Ortiz wants to counter the offense by Murakami and move into the clinch position.
Ortiz closes the distance, clinches up and gets a nice trip takedown into side control. Very smooth.

Murakami explodes and escapes back to his feet! Nice escape there!
The fight moves into the clinch position.

Murakami pulls Ortiz into guard.
The fighters are pressed up against the cage, both looking to find a bit of space to work.
We've seen a great period of action over the last minute or so - credit to both fighters for going all out!
Ortiz with a couple of shots to the head there. Not particularly brutal.
Ortiz is trying to work a guillotine from the top, or something like that? Don't know how he thinks he's going to get a finish from there.
Ortiz engaging in some classic timewasting tactics.
Ortiz has decided he wants to stand but the closed guard of Murakami is proving hard to escape from.
That's one minute gone in the round.
Ortiz is holding a leg here, probably looking for an ankle lock - he drops back and goes for it! Murakami is in trouble! Is it all over??? No! Murakami has escaped and now he's on top!


Murakami stands up from guard. Let's bang!
Murakami shoots in but doesn't get the takedown
and Ortiz counters by clinching up.
Murakami tries to jump guard but he falls flat on his backside. Ortiz smiles and moves away.
That's two minutes gone in the round.
Murakami shoots in looking for a double leg takedown. Ortiz defends it nicely.
That's three failed takedown attempts in the round for Shin Murakami. That's going to take a lot out of him.
Ortiz smiles there as he lands a nice right hand right on the button.
Murakami tries to sprawl but Ortiz drives through with a takedown into half guard.
Murakami pushes Ortiz off and gets back to his feet.
This is a great period of action - very entertaining stuff!
Murakami misses with a hook. Ortiz ducked under it nicely.
Ortiz is a painfully thin specimen of a man. You do wonder whether a good body kick would snap him clean in two.
Excellent takedown into side control there by Ortiz.
Murakami might be looking to lock onto one of his opponent's long limbs for a submission, whilst we're on the ground.
Ortiz taking a breather here.
Murakami tries to buck Ortiz off but Ortiz is having none of it.

That's three minutes gone in the round.
Ortiz is looking to take a break and control but Murakami is keeping him honest, looking to work from the bottom.
Murakami tries to improve position but can't.
Ortiz controlling the position from side mount.
Murakami can't do much from the bottom here.

That's four minutes gone in the round.
The crowd are showing their displeasure at the lack of action as loud boos ring out around the arena.
Murakami tries to wriggle free to get back to his feet but he's given up his back! Oops.
Ortiz is hanging on to Murakami's back as he tries to escape.
Despite being in a bad position, Murakami is controlling the hands, preventing any submission attempts.
Ortiz is working for the rear naked choke. He has one arm under the chin but Murakami has hold of the other arm. A bit of a stalemate here.
Ortiz punishes Murakami with strikes from the back mount.
And thats the end of the round the fighters go back to their corners.
That was a close round but I would say that Shin Murakami will probably get the nod.
Well, the break between rounds is over. Let's get back to the scrappin!

Murakami throws a jab but it's blocked by Ortiz.
Murakami sets himself, and Ortiz steps forward looking for the clinch! Murakami avoids it this time.
Murakami misses with a jab to the body
and Ortiz counters with a straight punch to the midsection.
Ortiz keeps the fight on the outside.
Nice sprawl there from Murakami as Ortiz shoots in.
Murakami half commits to a counter takedown before pushing away, out of range.
Ortiz shoots in for a double leg but Murakami sprawls well. That's going to sap some energy.
Ortiz instigates a clinch.
Murakami is working on a leg, looking for a takedown but Ortiz is defending well.
Murakami wants to break free but Ortiz has control.

Ortiz breaks the clinch and we return to the middle of the mat.
We've had a slow start to the round here - hopefully the action picks up.
Murakami rushes Ortiz and pushes him back against the cage in a clinch.
Ortiz tries to pull guard but can't drag his opponent to the mat. Murakami just stands there and leans against the cage.
Shin Murakami has stuffed three takedown attempts in the round now. That's going to take a lot out of Power Ortiz.
Ortiz tries to pull guard but Murakami won't allow it.
Murakami successfully pulls guard.
Murakami is trying to keep Ortiz in close.
That's one minute gone in the round.
Murakami throws a couple of weedy looking strikes off his back.
Murakami is working from a closed guard but he's struggling to control his opponent.
Ortiz is intent on slowing down the pace of the fight, simply looking to control.
Murakami is trying to control the position but Ortiz postures up.

Ortiz stands up and waves to Murakami to follow him.
Murakami tries to close the distance and clinch but Ortiz swats him to one side with an open hand palm strike and circles away.
Ortiz changes levels for a counter takedown but doesn't follow through with his attempt.
Murakami is trying hard to land a takedown here. Ortiz sprawls well and keeps this one on the feet.
That's two minutes gone in the round.
The crowd are getting on the fighters' backs, as the pace has dropped off in the last minute or so.
Ortiz keeping at a good range here, avoiding a leg kick.
Murakami shoots in and drives through. Ortiz sprawls well.
A telegraphed takedown attempt from Ortiz is defended easily by Murakami.
Murakami closes the distance looking to clinch
and Ortiz counters with a two punch combo.
Ortiz decides to change it up a bit and drives through with a nice takedown into half guard.
Ortiz with the ground and pound but Murakami uses the opportunity to regain guard.
Murakami pulls Ortiz in close to prevent any damage.
Ortiz pressing down on his opponent's thigh, looking to pass guard. Murakami is keeping the position for now.
That's three minutes gone in the round.
Ortiz wants to control from the top but Murakami keeps moving.
Murakami looking for submissions from the bottom here. Moving his hips around, possibly looking for an armbar.
Murakami wants to get back to his feet but Ortiz is in a dominant position and won't allow it.
Ortiz trying to control the position from guard on top but Murakami is wriggling around, looking for whatever he can.
Ortiz preventing the sweep.

The ref stands the fighters back up due to a lack of activity.
That's four minutes gone in the round.
Well. There's a bit of a lull in the action here and the crowd are starting to get restless.
Ortiz pushes Murakami up against the cage in a clinch.
Ortiz manages to break the clinch.
Ortiz looking to score a takedown here. Murakami is defending well but Ortiz drives through and ends up in Murakami's guard.
Murakami can't do much from the bottom at the moment, as Ortiz controls the pace.
Murakami wants to control but Ortiz passes easily into half guard.
The crowd thankful this round is nearly over.
Murakami trying to control but Ortiz postures up.
And thats the end of the round the fighters go back to their corners.
Power Ortiz showed his class in that round. I'd imagine he'll take it on all the scorecards.
Well, the break between rounds is over. Let's get back to the scrappin! The crowd applaud as we get ready to start the final round!

Murakami tries to clinch but is not successful on this occasion.
Murakami shoots in but no luck this time.
Ortiz throws out a leg kick but Murakami moves out of range and Ortiz only half commits.
Murakami shoots in for a takedown but Ortiz shows good takedown defense.
Ortiz looks for a takedown here. Will he get it? Murakami is fending him off so far but Ortiz persists. Nope, Murakami circles away and we're back to standing.
Murakami showing good head movement there, avoiding the strikes from Ortiz.
Ortiz scores with a takedown into Murakami's guard.
Murakami manages to wriggle out and sneak his way back up to his feet, so the fighters are now clinched up against the cage.
We've had a slow start to the round here - hopefully the action picks up.
Ortiz is trying to drag Murakami to the mat but Murakami just about manages to keep his footing. He used the cage to his advantage there.
Murakami pulls guard successfully.
That's one minute gone in the round.
Ortiz stopping the sweep attempt from Murakami.
Ortiz gets to his feet - Murakami follows without any prompting.
Good shot there by Ortiz.
Murakami closes the distance and clinches up with Ortiz, looking for a takedown. Murakami pushes Ortiz against the cage but Ortiz circles to the side and manages to break the clinch.
That's three failed takedown attempts in the round for Shin Murakami. That's going to take a lot out of him.
Ortiz shoots in and drives through. Murakami sprawls well.
Ortiz shoots in from a long way out. He's driving through with the takedown attempt and he eventually gets it, landing in Murakami's guard.
Both fighters are breathing heavily.
Murakami is looking to get back to his feet but can't, whilst Ortiz is controlling him.
Murakami is working an open guard so Ortiz takes the opportunity to get back to his feet.
That's two minutes gone in the round.
Murakami closes this distance looking for a takedown but Ortiz circles away.
Ortiz is looking for a takedown here. He's shot in and has managed to get it, finishing up in Murakami's half guard.
Murakami is not content to let Ortiz control the position.
Well, if Ortiz is going to just lie there, perhaps we should talk about what we're having for dinner tonight
I'm having a ham and pineapple pizza
Yum. Can't wait.
Ortiz tries to pass to full mount but Murakami defends it.
That's three minutes gone in the round.
Ortiz wants to lay and pray for a moment but Murakami keeps working.
Murakami tries to get to full guard but Ortiz has control of the leg.
The ref warns both fighters not to hold the cage as they work up against the meshing.
Ortiz is keen to just control but Murakami is a slippery customer.
Murakami taking some punishment here, with Ortiz in his half guard.
Ortiz takes a deep breath and rests his weight momentarily on top of his opponent, to control the position.
Ortiz winds up and cracks Murakami with a swinging punch to the side of the head.
Ortiz working the head and body with strikes.
That's four minutes gone in the round.
Well. There's a bit of a lull in the action here and the crowd are starting to get restless.
Murakami is looking to escape.
Ortiz thows a huge punch but Murakami dodges it nicely.
Ortiz tries to pass the half guard into mount. Murakami knows what he's doing though and prevents the attempt.
The ref stands the fighters back up due to a lack of activity.
Ortiz shoots in with a lovely double leg takedown. Murakami manages to land in full guard to minimise the damage.
Murakami manages to sweep nicely, so he's now on top. Ortiz manages to get himself to full guard.
Ortiz trying to control the position here.
Shin Murakami has stepped it up - he knows he needs a finish here!
Power Ortiz is fighting for a decision here - he's started to take the cautious approach.
Ortiz not looking particularly offensive just at the moment.
And that's the end of the fight!
Power Ortiz comfortably won the final round on my scorecard.
Well Ortiz has outworked and out performed his opponent in all aspects of the game today. He was simply too good and the decision should be no more than a formality. Over to the ring announcer for the scorecards.
Ladies and gentlemen, after 3 rounds of action, we go to the scorecards for a decision.
Judge Ren Mimura scores the fight for Power Ortiz!
Judge Sosuke Kotani scores the fight for Power Ortiz!
Judge Yukihiro Shimada scores the fight for Power Ortiz!
Power Ortiz wins by unanimous decision!
|
|
|
|
|
|
|
|
|
|
|
|
|
|
|
|
|
|
|
|
|
|
|
| S |
C
A |
G |
S |
C
B |
G |
|
S |
C |
G |
|
energy
A | B |
|
hype
A | B |
|
pop
A | B |
|
mgr
A | B |
|
FIGHT
RATING
42% |
|
|
|
|
|
|
|
Co-main event
|
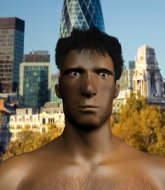
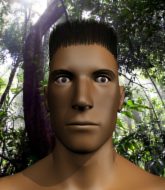
Coming up we have a welterweight MMA rules bout between Myke Toifer (ranked 0 p4p, 0 weight class) and Satoshi Yamamoto (ranked 0 p4p, 0 weight class). Myke Toifer could well score a knockout today. He has the power to get to Satoshi Yamamoto's chin.
 |
|
 |
| 171 cm
18
132 lbs
1 - 0 - 0 |
|
183 cm
24
170 lbs
1 - 0 - 0 |
BJJ Brown Belt
Counter fighter
Granite chin |
|
BJJ Blue Belt
Excellent boxer
Very confident |
|
| |
|
Ladies and gentlemen. This fight is 3 rounds, in the welterweight division.
Introducing the fighter to my left, fighting out of the red corner.
With a record of
1 - 0 - 0, fighting out of Tokyo, Myke Toifer!
And introducing the fighter to my right, fighting out of the blue corner.
With a record of
1 - 0 - 0, fighting out of Tokyo, Satoshi Yamamoto!
The judges for this bout are Yuuki Gou, Yukihiro Shimada and Shirou Masuda.
The bell rings for round one and we are underway!
Yamamoto shoots in looking for a takedown but Toifer manages to keep the fight standing, pushing Yamamoto's face into the canvas for good measure before circling away.
Yamamoto fakes and then throws a beautiful body shot. Toifer looks a bit winded and takes a step backwards to take a breath.
Toifer gets tackled into the cage by Yamamoto. Yamamoto maintains the clinch.
Toifer tries to score a body lock takedown but Yamamoto shows good agility there to stay on his feet.
Yamamoto prevents the takedown attempt.
Yamamoto gets a trip takedown into half guard.
Yamamoto sitting and controlling from the half guard.
Yamamoto wants to advance to full mount but Toifer doesn't think that's going to happen and regains full guard instead.
Toifer throwing his legs up looking for a triangle.
Yamamoto drops back for a leg! It's a sloppy attempt though and Yamamoto jumps back into guard quickly, to retain the dominant position.
Toifer has an active guard here but Yamamoto has managed to pass into half guard.
That's one minute gone in the round.
Toifer manages to get to full guard.
Yamamoto tries to stand but Toifer is controlling from the bottom.
Toifer might be looking to lock onto one of his opponent's long limbs for a submission, whilst we're on the ground.
Toifer has his foot on Yamamoto's thigh. He's trying to push off and get in position for a triangle, I think. Yamamoto works his way back into a safe position though.
Yamamoto is sitting in close to Toifer's body. Toifer has gone for a guillotine from the bottom. Oh damn, that looks pretty tight! Yamamoto is panicking - it looks like this one could be all over! Yes, Yamamoto is tapping! That was a very nice submission by Toifer.
Ladies and gentlemen, after 1:54 of round 1, we have a winner by way of Submission (Guillotine). Myke Toifer!
|
|
|
|
|
|
|
|
|
|
|
|
|
|
|
|
|
|
|
|
|
|
|
| S |
C
A |
G |
S |
C
B |
G |
|
S |
C |
G |
|
energy
A | B |
|
hype
A | B |
|
pop
A | B |
|
mgr
A | B |
|
FIGHT
RATING
48% |
|
|
|
|
|
|
|
Main event
|
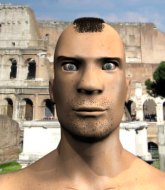
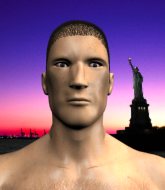
Coming up we have a welterweight MMA rules bout between Thomas Lawson (ranked 0 p4p, 0 weight class) and John Wall (ranked 0 p4p, 0 weight class). Both fighters look fresh as a daisy as they make their way towards the cage.
 |
|
 |
| 175 cm
18
130 lbs
1 - 0 - 0 |
|
180 cm
20
150 lbs
1 - 0 - 0 |
BJJ Blue Belt
Brawler
Good chin |
|
BJJ Blue Belt
Brawler
Tends to cut |
|
| |
|
Ladies and gentlemen. This fight is 3 rounds, in the welterweight division.
Introducing the fighter to my left, fighting out of the red corner.
With a record of
1 - 0 - 0, fighting out of Tokyo, Thomas Lawson!
And introducing the fighter to my right, fighting out of the blue corner.
With a record of
1 - 0 - 0, fighting out of Tokyo, John Wall!
The judges for this bout are Hirohito Nitta, Shirou Masuda and Yukihiro Yamamoto.
The bell rings for round one and we are underway!
Wall slaps away a takedown attempt from Lawson, before circling back to the center of the mat.
Crunch! Wall slams his shin into Lawson's torso.
Wall leaves Lawson with his face pressed against the mat as he sprawls beautifully, defending against a solid takedown attempt.
Lawson misses with a hook
and Wall counters by moving into the clinch.
Lawson drops to a knee looking for a takedown but Wall gets the underhooks and prevents it.
That's three failed takedown attempts in the round for Thomas Lawson. That's going to take a lot out of him.
Wall controlling the action here for a moment.
We've had a slow start to the round here - hopefully the action picks up.
Lawson manages to break the clinch.
Lawson circles away from the clinch attempt.
That's one minute gone in the round.
Wall dives in and scores a takedown into Lawson's guard.
Lawson seems keen to control Wall's posture.
Wall content to stall in guard here.
Lawson has Wall pulled in close to control his posture.
Lawson continues to stall.
Wall decides he's had enough of playing guard and decides to stand. Come on Lawson, up you get!
Lawson avoids a punch combination nicely.
That's two minutes gone in the round.
Lawson avoids the head kick by Wall.
Lawson half commits to a counter takedown before pushing away, out of range.
Lawson fakes with an overhand right and moves in to clinch with Wall, pushing him back against the cage.
Wall gets control of Lawson's arms and successfully pulls guard. Wall will no doubt be looking for submissions off his back.
Lawson missing there with some ground and pound from the guard.
Wall is looking for a triangle but Lawson pushes his legs off easily.
Lawson slips nicely into half guard.
Wall wants to get back to full guard but Lawson has mounted him!
Wooooo! Give it up for these two warriors! They are putting on a show!
Lawson tucks in and makes sure he doesn't lose the dominant position.
Lawson lands a nice shot to the head.
That's three minutes gone in the round.
Lawson controlling from the full mount.
Wall keeping his composure momentarily, calmly looking to get back to half guard.
Wall is still trying to improve position.
That's four minutes gone in the round.
A few boos can be heard. I'm sure they will multiply if the fighters don't pick up the pace.
Wall wants to control but Lawson is having none of it.
Lawson controlling the pace for now.
Wall wants to control but Lawson is having none of it.
Lawson landing punches.
Lawson really does look like a pencil wearing a pair of gloves. Let's hope he has a gameplan to suit that ridiculous body shape.
The crowd thankful this round is nearly over.
Lawson trying to control but he's not successful this time.
Wall looking to escape from mount but he's given up his back!
And thats the end of the round the fighters go back to their corners.
That was a close round but I would say that Thomas Lawson will probably get the nod.
Well, the break between rounds is over. Let's get back to the scrappin!
Wall dives in for a single leg takedown but Lawson sprawls and the fighters end up clinched against the cage.
Lawson wants to take advantage of his opponent's missed offense by moving into the clinch.
Wall tries to clinch but Lawson moves away
and Lawson counters with a nice double leg into half guard.
Wall is trying to stand up here but Lawson is controlling him well.
Wall is trying to maintain the position but Lawson is very close to passing his half guard.
Wall regains full guard. Nicely done.
Lawson is frustrating his opponent with some stalling tactics from top position.
Lawson postures up.
We've had a slow start to the round here - hopefully the action picks up.
Wall looking for submissions from the bottom here. Moving his hips around, possibly looking for an armbar.
That's one minute gone in the round.
Wall controlling the position.
We must be close to a standup if these guys don't pick up the pace.
Lawson looking to pass the guard.
Lawson postures up and lands a big shot to Wall's brow.
Lawson is stalling in the full guard.
Lawson missing there with some ground and pound from the guard.
The referee has motioned to the fighters to stand back up. He just wasn't happy with the level of activity.
Wall shoots in for a double leg but Lawson sprawls well. That's going to sap some energy.
Lawson seem to be loading up, looking for a big counter.
Good work by Wall as he checks the leg kick.
That's two minutes gone in the round.
My god... these two guys really need to pick up the pace or everyone will leave to go get a beer.
Lawson shoots in for a takedown but doesn't get it.
Lawson misses with a head kick.
Wall wants to clinch.
Lawson closes the distance and after a bit of a stuggle, scores a takedown into Wall's guard.
Lawson sitting in guard, not really doing much.
Lawson's ground tactics aren't going to win him many fans. Let's hope he's got fireworks for us if he gets back to his feet because he's not doing much on the ground.
That's three minutes gone in the round.
Wall has a closed guard, preventing Lawson from standing up.
Wall looking to hit a scissor sweep but Lawson is one step ahead there.
Wall is working the butterfly guard. He manages to land a nice scissor sweep and is now in half guard on the top. Nice move.

Lawson on his back here. We all know that wrestlers don't like being on their back so let's see if Lawson tries to get out of the position.
Wall is looking to stall here but Lawson recovers full guard.
That's four minutes gone in the round.
Lawson looking for submissions off his back, moving his hips, looking for an opening.
Lawson keeping full guard, as Wall tries to pass.
Wall wants to control from the top but Lawson keeps moving.
Boooooooooooooooooooo!!! God, this has been a terrible round. Come on you two, sort yourselves out!
Wall is pushing down on Lawson's leg trying to pass to half guard. Lawson is fighting to maintain full guard but Wall has managed to sneak the leg through.
And thats the end of the round the fighters go back to their corners.
Thomas Lawson dominated that second round.
The fighters get back to their feet, the hooter sounds and we're back to the action! This is the final round!
Wall wants to clinch up but Lawson keeps it at a distance.
Wall throws the kick towards the body but Lawson avoids it.
Lawson is the aggressor but that punch slipped nicely by Wall.
Lawson throws out a leg kick but Wall moves out of range and Lawson only half commits.
Wall counters with a body kick.
Wall rushes Lawson and pushes him back against the cage in a clinch.
Lawson is pressed up against the cage. Wall has hold of a leg and is looking to drag Lawson down to the mat. Lawson avoids the attempt though and has circled away. We're back to striking at a distance.
Lawson shoots in for a takedown. "Ole!" shouts Wall as he jumps to the side.
Lawson misses with a half-hearted attempt at a head kick.
We've had a slow start to the round here - hopefully the action picks up.
Lawson tries to close the distance and clinch but Wall swats him to one side with an open hand palm strike and circles away.
Lawson misses with a head kick.
Wall blocks a head kick by Lawson.
Wall is clearly trying to counter these attacks from Lawson with a body shot.
Wall scores with a jab to the body.
That's one minute gone in the round.
Wall shoots in and drives through. Lawson sprawls well.
Lawson seemed to be looking to counter by closing the distance.
Wall drives through and clinches with Lawson against the cage.
Lawson wants to break the clinch but can't.
Lawson blocks a knee to the body. He'll have a nicely bruised forearm in the morning.
Lawson is looking for a takedown.
Both fighters are breathing heavily.
Wall tried to land a shot to the body but connects with Lawson's elbow.
Lawson stops a takedown attempt from Wall.
Thomas Lawson has stuffed three takedown attempts in the round now. That's going to take a lot out of John Wall.
Wall gets double underhooks to prevent a takedown attempt from Lawson.
Lawson being controlled against the cage.
A head punch blocked on the inside by Wall.
That's two minutes gone in the round.
Wall gets double underhooks to prevent a takedown attempt from Lawson.
Lawson manages to pull guard.
Wall looking to pass the guard.
Wall trying to control but Lawson is working from the bottom.
Lawson can't do much from the bottom at the moment, as Wall controls the pace.
That's three minutes gone in the round.
Wall gets to his feet. Lawson looking to butt scoot but the ref puts an end to that. On your feet son!
Wall shoots in looking for a takedown. Lawson tries to sprawl out of it but Wall keeps driving through. The fighters are pinned against the cage. Lawson manages to get underhooks and after a bit of a struggle, circles away and we're back to standing.
Wall throws a looping left and ducks down for a takedown. He's got his arms around Lawson's waist but Lawson gets an underhook and avoids the takedown by throwing Wall off to one side.
Wall checks a low kick from Lawson.
Wall lunges in with an uppercut that skims his opponent's chin.
Lawson throws a quick inside leg kick.
Wall will have to do better than that with his takedown attempts.
Wall gets a clinch.
That's four minutes gone in the round.
Lawson pulls Wall into guard.
Wall is working the ground and pound from guard. He might want to try advancing position though to get more of an impact.
Wall content to stall in guard here.
The fighters are pressed up against the cage, both looking to find a bit of space to work.
Wall postures up in Lawson's guard and throws a big left but Lawson blocks it.
Wall stands up from Lawson's guard - Wall perhaps looking for a knockout.
Boooooooooooooooooooo!!! God, this has been a terrible round. Come on you two, sort yourselves out!
Lawson tries to clinch up but Wall circles away and keeps his distance.
Oooooooooooh, not good. A low kick from Wall lands where it shouldn't have, right in the... well, you know what he did? He kicked him in the penis. He's injured, injured bad. The referee sends both fighters to their corners and Lawson has 5 minutes to recover. He's OK now though... a thumbs up from Lawson and we're back underway with a touch of gloves.
Wall keeps the fight on the outside.
And that's the end of the fight!
I would just about give that final round to John Wall.
I think Lawson has won this one but let's see what the judges have to say. Over to the ring announcer for the scorecards.
Ladies and gentlemen, after 3 rounds of action, we go to the scorecards for a decision.
Judge Hirohito Nitta scores the fight for Thomas Lawson!
Judge Shirou Masuda scores the fight for Thomas Lawson!
Judge Yukihiro Yamamoto scores the fight for John Wall!
Thomas Lawson wins by split decision!
|
|
|
|
|
|
|
|
|
|
|
|
|
|
|
|
|
|
|
|
|
|
|
| S |
C
A |
G |
S |
C
B |
G |
|
S |
C |
G |
|
energy
A | B |
|
hype
A | B |
|
pop
A | B |
|
mgr
A | B |
|
FIGHT
RATING
30% |
|
|
|
|
|
|
|
|
|
|
