|
TWGC 10 (265lbs, D3): Amsterdam Qualifier - Round 1 PBP Commentary |
Undercard bout
|
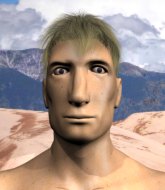
Coming up we have a heavyweight Tycoon World Grappling Championship rules bout between Dayton McAdams and Numero Deux. McAdams comes to the cage accompanied by OVERWERK - Alive. Numero Deux acknowledges the crowd's support as he enters the cage.
This TWGC bout is 1 fifteen minute round in the heavyweight division. Introducing today's competitors. In the red corner, competing out of Los Angeles, with a TWGC record of 1 wins and 1 losses; Dayton McAdams! And in the blue corner, fighting out of Rio de Janeiro, with a TWGC record of 0 wins and 1 losses; Numero Deux!
The judges for this bout are Paul Aken, Albert Achterberg and Daniel Blasius.
The official calls the fighters to the middle and the contest is under way.

Deux closes the distance and presses his opponent up against the cage.
Deux stops a takedown attempt from McAdams.

Deux pulls McAdams into guard.

McAdams is holding a leg here, probably looking for an ankle lock - he drops back and goes for it! Deux is in trouble! Is it all over??? No! Deux has escaped and now he's on top! Score +2 for sweep to guard / half guard: McAdams (0) vs (2) Deux
Deux looking to pass the guard.
Deux content to stall in guard here.
We've had a slow start to the round here - hopefully the action picks up.
Deux forces his way into half guard.

That's one minute gone in the round.
The referee calls for the fighters to work.
The fighters are pressed up against the cage, both looking to find a bit of space to work.
McAdams looking for submissions from an awkward position here.
Deux controlling the pace.
The ref warns both fighters not to hold the cage as they work up against the meshing.
McAdams with the active half guard here but Deux passes nicely into side control. Score +3 for passing guard: McAdams (0) vs (5) Deux

That's two minutes gone in the round.
Deux taking a breather here.
My spies in Soul Supremacy Rio inform me that Deux has been getting involved in the gym's BJJ sparring sessions. Let's see whether that pays dividends!

That's three minutes gone in the round.

That's four minutes gone in the round.
Let's hope that Deux has the urge to step up the pace any second now because for the last 15 or 20 seconds he's just been holding on tight.
We're seeing a lot of stalling here from Deux.

Deux is working to tighten his grip on McAdams's neck. He's isolated an arm and is working for an arm triangle. McAdams has recognised the danger and is trying to turn with the submission but Deux is really squeezing tight and eventually McAdams passes out! Deux breaks the hold and jumps onto the cage to celebrate! Submission of the night, I'd say!
Ladies and gentlemen, after 4:51 of round 1, we have a winner by way of Submission (Arm Triangle). Numero Deux!
After winning the bout, Numero Deux thanked all his fans and promised he'd do even better in his next fight. The crowd seemed to love his humility.
Dayton McAdams was interviewed post fight and said 'Gotta go back to work, simply.'. |
|
|
|
Undercard bout
|
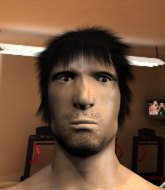
Coming up we have a heavyweight Tycoon World Grappling Championship rules bout between Darrell Abbott and Ryo Theyer. Over to our ring announcer for the fighter introductions!
This TWGC bout is 1 fifteen minute round in the heavyweight division. Introducing today's competitors. In the red corner, competing out of Amsterdam, with a TWGC record of 0 wins and 0 losses; Darrell Abbott! And in the blue corner, fighting out of Amsterdam, with a TWGC record of 0 wins and 0 losses; Ryo Theyer!
The judges for this bout are Wagner Zegers, Radbod Blank and Saam Ante.
Let's get this grappling contest under way! Who will be victorious?

Abbott rushes Theyer and pushes him back against the cage in a clinch.
Abbott gets underhooks to prevent Theyer's takedown attempt.

Abbott wants the takedown. Theyer is fighting it off but Abbott persists and manages to bring the fight to the ground, ending up in Theyer's guard against the cage. Score +2 for takedown into guard / half guard: Abbott (2) vs (0) Theyer
Abbott slows down the pace of the fight for a moment. He'll need to remain active if he doesn't want to see the fight stood back up.
We're hearing some news coming in from back stage. It's official - Theyer has eaten all the pies!
Abbott passes Theyer's right leg, so he's now in half guard.
The fighters are pressed up against the cage, both looking to find a bit of space to work.
Theyer wants to improve his position but Abbott is controlling well.
Abbott trying to mount his opponent but Theyer defends it.
Theyer is looking for a sweep. Abbott is wise to his cunning plan and keeps the top position.
Abbott with a momentary lay and pray from half guard.
Abbott will need to keep those long limbs tucked in whilst he's on the ground, to prevent any submissions.
Theyer tries to roll over but Abbott keeps him under control.
We've had a slow start to the round here - hopefully the action picks up.
Abbott takes a deep breath and rests his weight momentarily on top of his opponent, to control the position.
That's one minute gone in the round.
Theyer trying to control but Abbott postures up.
Abbott is pressing down on Theyer's thigh, looking to free his foot. Theyer is holding on for now.
Abbott seems to be working for a kimura but Theyer defends the submission attempt.
The referee calls for the fighters to work.
Theyer won't allow Abbott to pass to mount.
Theyer has no desire to be mounted, so is trying to control. Abbott is working away from the top position though.
Abbott wants to pass to mount but Theyer is defending the position.
That's two minutes gone in the round.
Abbott is working hard here to advance position.
Abbott performing his best blanket impression for a moment.
Abbott seems to be looking for submissions.
Theyer looking for submissions off his back.
Neither fighter is being very active at the moment, with Abbott in particular looking to stall.
That's three minutes gone in the round.
Theyer works his way to full guard. Good work.
Theyer working for a triangle but Abbott defends it easily.
Theyer escapes his hips to the side and looks to be working for an armbar. Abbott gives him a little smile and shakes his head. No chance.
Abbott forces his way into half guard.
Theyer is looking to improve his position.
Abbott is controlling the pace.
That's four minutes gone in the round.
Theyer tries to roll over but Abbott keeps him under control.
Abbott is thinking about going for an arm triangle but he can't free his leg.
Theyer is trying to get back to full guard.
Abbott looks over to his corner - he wants some instructions but his corner are not responding.
Abbott wants to pass the guard but Theyer is defending well.

That's five minutes gone in the round.
Abbott is taking a breather. Theyer says something to him but it's hard to make out. Perhaps he's telling him to get on with it and actually do something.
Theyer looking to work for a kimura from the bottom.
Abbott with a momentary lay and pray from half guard.

That's six minutes gone in the round.
Theyer looking for submissions from an awkward position here.
Abbott is controlling the pace.
Abbott continues to stall.

That's seven minutes gone in the round.
Theyer won't allow Abbott to pass to mount.
Theyer is looking to sinch up a guillotine here but Abbott pulls his head out easily.
Abbott perhaps working for something from half guard, or maybe not. It looks like he's just sitting there.
Theyer tries to regain full guard. Instead though, Abbott has advanced to mount. Uh oh. Score +3 for passing guard: Abbott (5) vs (0) Theyer
Abbott controlling the position easily from mount.
More hug and hope from Abbott.

That's eight minutes gone in the round.
Theyer tries to lock up and control but Abbott gives him a forearm to the face and pushes him away.
Abbott has hold of Theyer's left arm, perhaps looking for a submission. The two fighters tussle over control of the isolated limb and Theyer manages to get his arm back to his side and away from danger.
Theyer is trying desperately to improve position.
Abbott controlling from mount.
Theyer working to try and regain half guard.
Abbott controlling from the full mount.

That's nine minutes gone in the round.
Theyer has given up his back.
Score +3 for taking back: Abbott (8) vs (0) Theyer
What can Theyer do to escape this position? He's going to have to figure it out pretty quick if he wants to stay in the fight!
Abbott looking for the RNC.
Abbott is trying to stick to Theyer's back but Theyer is turning into Abbott. He's managed to reverse the position - now he's in Abbott's guard. Polite applause from the crowd in appreciation of some nice Jiu Jitsu by Theyer. Score +2 for sweep to guard / half guard: Abbott (8) vs (2) Theyer
Theyer wants to pass the guard but Abbott is keeping the position.
Abbott keeping moving, preventing Theyer from controlling successfully.
Abbott is active off his back here, looking for submissions.

That's ten minutes gone in the round.
Theyer trying to control but Abbott is working from the bottom.
Abbott is active off his back here, looking for submissions.
Abbott seems to have improved his submission grappling technique since last time we saw him. Let's see if he can pull off a submission.
Abbott is looking for a guillotine. You can't force these things though and Theyer defends well.
Abbott looking for submissions off his back, moving his hips, looking for an opening.
Theyer trying to control the position from guard on top but Abbott is wriggling around, looking for whatever he can.
Theyer pressing down on his opponent's thigh, looking to pass guard. Abbott is keeping the position for now.

That's eleven minutes gone in the round.
Theyer wants to control from the top but Abbott keeps moving.
Abbott is active off his back here, looking for submissions.
Theyer stands up and looks to throw the legs aside to pass to side control. Abbott swivels though and keeps the full guard.
Theyer passes Abbott's left leg - he's now in half guard.
Theyer works his foot free and advances to mount. Score +3 for passing guard: Abbott (8) vs (5) Theyer
Theyer takes Abbott's back. Score +3 for taking back: Abbott (8) vs (8) Theyer

That's twelve minutes gone in the round.
Abbott tries to escape the position - he's now mounted. Is that better or worse? Hard to tell!
Abbott is looking to get to half guard.
Theyer is stalling here but it's allowed Abbott to get half guard.
Theyer is trying to control. Abbott wants to improve his position but can't escape this time.
Abbott is looking to regain full guard. Not this time though.
Abbott is not content to let Theyer control the position.
Theyer is looking to advance position but Abbott won't allow it.
Theyer is keen to just control but Abbott is a slippery customer.
Theyer trying to pass the guard but Abbott defending well.

That's thirteen minutes gone in the round.
Theyer trying to control from Abbott's half guard. Abbott has other ideas though and has regained full guard.
Theyer wants to control from the top but Abbott keeps moving.
Abbott escapes his hips to the side and looks to be working for an armbar. Theyer gives him a little smile and shakes his head. No chance.
Abbott keeping moving, preventing Theyer from controlling successfully.
Theyer looking to pass the guard.
Abbott keeping moving, preventing Theyer from controlling successfully.

That's fourteen minutes gone in the round.
Abbott looking for a guillotine here but Theyer defends easily.
Theyer wants to control from the top but Abbott keeps moving.
Abbott looking for a guillotine here but Theyer defends easily.
Boooooooooooooooooooo!!! God, this has been a terrible round. Come on you two, sort yourselves out!
Theyer content to sit in guard, stalling... Great. Oh but he could get punished here because Abbott has locked up a guillotine! Abbott's face is contorted as he sqeezes tight on the submission attempt - will he finish? Theyer is holding on here and Abbott must be using up a lot of energy. Theyer has gone limp! He's out! He's out cold! Abbott gets to his feet, tossing aside his stricken foe. Arms raised, he milks the applause from the crowd. Great submission!
Ladies and gentlemen, after 14:57 of round 1, we have a winner by way of Submission (Guillotine). Darrell Abbott!
An out of breath Darrell Abbott thanked his loyal fans in his post fight interview, giving them credit for his success over the course of his career. |
|
|
|
Co-main event
|
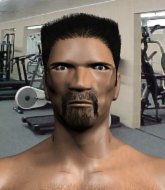
Coming up we have a heavyweight Tycoon World Grappling Championship rules bout between Boris Kharitonov and Randall Flagg. Both fighters look fresh as a daisy as they make their way towards the cage.
This TWGC bout is 1 fifteen minute round in the heavyweight division. Introducing today's competitors. In the red corner, competing out of Rio de Janeiro, with a TWGC record of 3 wins and 1 losses; Boris Kharitonov! And in the blue corner, fighting out of Rio de Janeiro, with a TWGC record of 0 wins and 0 losses; Randall Flagg!
The judges for this bout are Radbod Blank, Daniel Blasius and Paul Aken.
Let's get this grappling contest under way! Who will be victorious?
Flagg pushes Kharitonov up against the cage in a clinch.
Kharitonov tries to score a body lock takedown but Flagg shows good agility there to stay on his feet.
Kharitonov is trying to drag Flagg to the mat but Flagg just about manages to keep his footing. He used the cage to his advantage there.
Flagg tries for a takedown. No joy.
Flagg is trying to pull guard but Kharitonov has him pressed against the cage.
Kharitonov is trying to drag Flagg to the mat but Flagg just about manages to keep his footing. He used the cage to his advantage there.
That's three failed takedown attempts in the round for Boris Kharitonov. That's going to take a lot out of him.
Flagg is pressed up against the cage. Kharitonov has hold of a leg and is looking to drag Flagg down to the mat. Flagg avoids the attempt though and has circled away. We're back to striking at a distance.
Kharitonov fails with an attempt to clinch.
Flagg is trying to avoid his opponent's strikes and get into the clinch.
Flagg circles away from the clinch attempt.
We've had a slow start to the round here - hopefully the action picks up.
Flagg closes the distance and clinches.
Flagg wants a takedown.
Kharitonov drops to a knee looking for a takedown but Flagg gets the underhooks and prevents it.
Kharitonov drops to a knee looking for a takedown but Flagg gets the underhooks and prevents it.
That's one minute gone in the round.
Kharitonov goes for a takedown in the clinch but Flagg prevents it.
Kharitonov goes for a takedown attempt but Flagg pushes him away and we're back to fighting at a distance.
Flagg avoids the clinch attempt nicely.
Flagg feints the counter takedown.
Kharitonov moves in looking to clinch but Flagg pushes him off.
Flagg pushes Kharitonov up against the cage in a clinch.
Kharitonov tries to score a body lock takedown but Flagg shows good agility there to stay on his feet.
Kharitonov has a body lock and is looking for a takedown. Flagg is bouncing around trying to prevent the takedown and somehow he has indeed managed to stay on his feet.
Flagg goes for a takedown attempt but Kharitonov pushes him away and we're back to fighting at a distance.
Kharitonov tries to clinch up against the cage, rushing in to close the distance. Flagg manages to break the clinch and circles back to the middle of the mat.
Flagg tries to counter with a clinch but Kharitonov shakes him off and moves away.
Flagg moves into the clinch successfully.
That's two minutes gone in the round.
Flagg fails to pull the fight into his guard.
Flagg gets underhooks to prevent Kharitonov's takedown attempt.
Kharitonov is pressed up against the cage. Flagg has hold of a leg and is looking to drag Kharitonov down to the mat. Kharitonov avoids the attempt though and has circled away. We're back to striking at a distance.
Kharitonov moves into the clinch.
Kharitonov is defending well against a takedown attempt.
Kharitonov ties up his opponent against the cage and manages to drag the fight down to the ground. Kharitonov no doubt will be looking to work submissions from his guard.
Flagg passes Kharitonov's right leg, so he's now in half guard.
Flagg works his way into side control. Score +3 for passing guard: Kharitonov (0) vs (3) Flagg
Kharitonov is trying to get back to half guard. He's pushing on Flagg's leg. He's managed it. Nice work.
Kharitonov wants to get back to full guard.
The ref warns both fighters not to hold the cage as they work up against the meshing.
That's three minutes gone in the round.
Flagg is trying to advance to mount but he's lost his balance and Kharitonov reverses the position - he's now on top in Flagg's guard. Score +2 for sweep to guard / half guard: Kharitonov (2) vs (3) Flagg
Kharitonov engaging in some classic timewasting tactics.
Flagg keeping moving, preventing Kharitonov from controlling successfully.
Kharitonov pressing down on his opponent's thigh, looking to pass guard. Flagg is keeping the position for now.
Kharitonov wants to control from the top but Flagg keeps moving.
That's four minutes gone in the round.
Kharitonov wants to pass the guard but Flagg is keeping the position.
Kharitonov is working hard here to advance position.
Kharitonov drops back looking for a heel hook - he quickly realises he's not going to get it but Flagg manages to dive on top of him before he can escape and now Kharitonov has Flagg in his guard. Score +2 for sweep to guard / half guard: Kharitonov (2) vs (5) Flagg
Flagg pressing down on his opponent's thigh, looking to pass guard. Kharitonov is keeping the position for now.
That's five minutes gone in the round.
Flagg advances to half guard.
Flagg is trying for a guillotine from the top but the pressure isn't in the right place so Kharitonov is just riding it out for now. Flagg eventually gives up the hold.
Flagg passes to side control. Score +3 for passing guard: Kharitonov (2) vs (8) Flagg
That's six minutes gone in the round.
Kharitonov sneaks a leg under to get back to half guard.
Kharitonov is looking to improve his position.
Kharitonov wants to control but Flagg is keeping busy and won't allow it.
That's seven minutes gone in the round.
Kharitonov is looking for a sweep. Flagg is wise to his cunning plan and keeps the top position.
Flagg passes the half guard and he's now in mount! Big trouble for Kharitonov! Score +3 for passing guard: Kharitonov (2) vs (11) Flagg
Flagg goes for an armbar but Kharitonov turns quickly into his guard - lovely anticipation from Kharitonov. Score +2 for sweep to guard / half guard: Kharitonov (4) vs (11) Flagg
Kharitonov trying to pass the guard but can't manage it just yet.
The fighters are pressed up against the cage, both looking to find a bit of space to work.
That's eight minutes gone in the round.
Kharitonov trying to control but Flagg is working from the bottom.
Kharitonov stands up and looks to throw the legs aside to pass to side control. Flagg swivels though and keeps the full guard.
Flagg looking to control.
Kharitonov pressing down on his opponent's thigh, looking to pass guard. Flagg is keeping the position for now.
Flagg working a defensive guard here.
That's nine minutes gone in the round.
Flagg keeping full guard, as Kharitonov tries to pass.
Flagg is working from a closed guard but he's struggling to control his opponent.
Kharitonov trying to pass the guard but can't manage it just yet.
Kharitonov trying to control the position from guard on top but Flagg is wriggling around, looking for whatever he can.
Kharitonov stands up and looks to throw the legs aside to pass to side control. Flagg swivels though and keeps the full guard.
Kharitonov being controlled here momentarily.
That's ten minutes gone in the round.
Kharitonov trying to pass the guard but can't manage it just yet.
Kharitonov advances to half guard.
Kharitonov moves nicely into side control. Score +3 for passing guard: Kharitonov (7) vs (11) Flagg
That's eleven minutes gone in the round.
Flagg is looking for a sweep.
Kharitonov tries to move to full mount but Flagg actually manages to regain half guard.
Flagg moves into full guard.
Kharitonov pressing down on his opponent's thigh, looking to pass guard. Flagg is keeping the position for now.
Kharitonov trying to control but Flagg is working from the bottom.
Kharitonov wants to pass the guard but Flagg is keeping the position.
That's twelve minutes gone in the round.
Flagg looking to control the pace of the fight rather than finish it.
We've been hearing good reports from Kharitonov's training camp. Apparently he has been rolling around with some good quality BJJ practitioners and has been sharpening his skills. Let's see if that has an impact on the fight today.
Kharitonov pressing down on his opponent's thigh, looking to pass guard. Flagg is keeping the position for now.
Flagg is trying to control the position from the bottom.
Kharitonov wants to control from the top but Flagg keeps moving.
Kharitonov tries to free his leg and advance position but Flagg is retaining full guard.
That's thirteen minutes gone in the round.
Flagg looking for a sweep. Not yet Flagg, not yet.
Kharitonov passes Flagg's right leg, so he's now in half guard.
Kharitonov is working for a kimura from half guard. He's really concentrating on the hold and it's allowed Flagg to slip a leg under and get back to full guard.
Kharitonov is looking to advance position but Flagg has hit a scissor sweep - now he's on top in mount! Score +4 for clean sweep to past guard: Kharitonov (7) vs (15) Flagg
Flagg sitting in mount, just looking to control for the moment.
Kharitonov is looking to improve his position but Flagg isn't that keen on the idea.
My spies in The Warehouse inform me that Flagg has been getting involved in the gym's BJJ sparring sessions. Let's see whether that pays dividends!
That's fourteen minutes gone in the round.
Kharitonov tries to lock up and control but Flagg gives him a forearm to the face and pushes him away.
Flagg trying to control but he's not successful this time.
Kharitonov is trying to escape the mount.
Boooooooooooooooooooo!!! God, this has been a terrible round. Come on you two, sort yourselves out!
Kharitonov is squirming around, avoiding Flagg's attempts to control the action.
And that's the end of the fight!
Flagg wins on points by 15 to 7. |
|
|
|
Main event
|
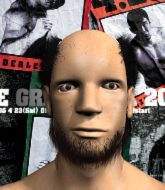
Coming up we have a heavyweight Tycoon World Grappling Championship rules bout between Lou Thornton and Timothy Bourque. Timothy Bourque acknowledges the crowd's support as he enters the cage.
This TWGC bout is 1 fifteen minute round in the heavyweight division. Introducing today's competitors. In the red corner, competing out of Rio de Janeiro, with a TWGC record of 0 wins and 0 losses; Lou Thornton! And in the blue corner, fighting out of Rio de Janeiro, with a TWGC record of 0 wins and 0 losses; Timothy Bourque!
The judges for this bout are Albert Achterberg, Paul Aken and Paulsen Ambrosius.
The fighters bow as they face eachother in the middle of the mat and we are under way.
Bourque forces Thornton back against the cage and clinches.
Thornton stops a takedown attempt from Bourque.
Bourque is working for a takedown up against the cage. He can't get it on this occasion though.
Thornton gets a trip takedown into half guard. Score +2 for takedown into guard / half guard: Thornton (2) vs (0) Bourque
Thornton is trying to work for a kimura but Bourque is defending well.
Bourque is positioning himself well to prevent Thornton advancing to mount.
Thornton wants to pass the guard but Bourque is defending well.
Thornton is working for a kimura but Bourque is defending it quite comfortably.
Bourque has his hands clasped together around Thornton's back. He's all about the action.
We've had a slow start to the round here - hopefully the action picks up.
Thornton looking for a submission but Bourque manages to get full guard, putting an end to that submission attempt.
That's one minute gone in the round.
Bourque keeping full guard, as Thornton tries to pass.
Thornton is looking to advance position but Bourque has hit a scissor sweep - now he's on top in mount! Score +4 for clean sweep to past guard: Thornton (2) vs (4) Bourque
Bourque trying to control but he's not successful this time.
Thornton is in all sorts of trouble here.
Bourque looking to control but Thornton is working nicely, looking to advance position himself.
Bourque manages to capitalize on a mistake by Thornton to take his back! Score +3 for taking back: Thornton (2) vs (7) Bourque
The fighters are pressed up against the cage, both looking to find a bit of space to work.
You can see the frustration on Thornton's face
He knows he is in trouble unless he improves his position sooner rather than later.
Bourque trying desperately to keep hold of the dominant position.
Thornton tries to break free.
That's two minutes gone in the round.
Bourque working for the choke.
Thornton tries to escape but Bourque has the hooks in and won't let him break free.
Thornton is working hard here to advance position.
Bourque is remaining active here, looking for the choke. The more discerning members of the crowd will appreciate his efforts.
Bourque looking for the choke from the back.
Thornton trying to control but he's just got himself in more trouble.
Thornton is trying to break free.
Bourque is working really hard to secure the rear naked choke. Thornton defends successfully for a significant amount of time. Both fighters are looking very determined.
Thornton breaks Bourque's hooks off and manages to turn into his guard.
Score +2 for sweep to guard / half guard: Thornton (4) vs (7) Bourque
Thornton drops back looking for a heel hook - he quickly realises he's not going to get it but Bourque manages to dive on top of him before he can escape and now Thornton has Bourque in his guard. Score +2 for sweep to guard / half guard: Thornton (4) vs (9) Bourque
Bourque pressing down on his opponent's thigh, looking to pass guard. Thornton is keeping the position for now.
That's three minutes gone in the round.
Thornton is throwing his legs up, looking for submissions. Bourque is aware though and is defending well.
Bourque slips nicely into half guard.
Thornton looking for submissions off his back.
Bourque looking to pass the half guard. Not this time.
Bourque looks more muscular than last time we saw him. He must have been on the weights.
Thornton actively working from the bottom here.
Bourque works his way into side control. Score +3 for passing guard: Thornton (4) vs (12) Bourque
Bourque is a painfully thin specimen of a man. You do wonder whether a good body kick would snap him clean in two.
Bourque moves into full mount! Score +2 for reaching mount: Thornton (4) vs (14) Bourque
Bourque wants to finish this one by submission but Thornton is holding onto his waist, trying to prevent any attacks from Bourque.
Bourque can't quite control the action as he would like just now, as Thornton is looking to escape.
That's four minutes gone in the round.
Thornton working to try and regain half guard.
Thornton might be looking to lock onto one of his opponent's long limbs for a submission, whilst we're on the ground.
Bourque moves to the back. Score +3 for taking back: Thornton (4) vs (17) Bourque
Bourque is persistently looking for the submission but Thornton is defending it well.
Thornton manages to reverse the position and now he's in Bourque's guard. Nice work there by Thornton.
Score +2 for sweep to guard / half guard: Thornton (6) vs (17) Bourque
Thornton drops back looking for a heel hook - he quickly realises he's not going to get it but Bourque manages to dive on top of him before he can escape and now Thornton has Bourque in his guard. Score +2 for sweep to guard / half guard: Thornton (6) vs (19) Bourque
Bourque avoids a guillotine attempt easily.
Thornton has his foot on Bourque's thigh. He's trying to push off and get in position for a triangle, I think. Bourque works his way back into a safe position though.
That's five minutes gone in the round.
Thornton is throwing his legs up, looking for submissions. Bourque is aware though and is defending well.
Bourque showing good wrestling skills to control the position.
Bourque trying to control but Thornton is working from the bottom.
Bourque looking to pass the guard.
Bourque wants to control from the top but Thornton keeps moving.
Thornton looks to be working for a triangle here. Oh, it looks like he might have it! Bourque has picked Thornton up and slammed him! Thornton can't keep hold of the triangle and Bourque manages to pass to side control! Score +3 for passing guard: Thornton (6) vs (22) Bourque
Thornton is positioning himself to get back to half guard.
Bourque looking for an arm triangle but it's way too loose to do anything.
Thornton is positioning himself to get back to half guard.
That's six minutes gone in the round.
Bourque is looking to finish here, going for an Americana. Thornton knows the correct defense though, so he's OK.
Thornton is trying to control Bourque's posture but Bourque avoids it.
Thornton tries to bench press Bourque off him but Bourque keeps the position.
Bourque advances to full mount. Score +2 for reaching mount: Thornton (6) vs (24) Bourque
Bourque sitting in mount, just looking to control for the moment.
Thornton is trying desperately to improve position.
Bourque working for a guillotine from mount but Thornton is in no mood to give up.
Bourque wants to control the pace but Thornton is squirming around nicely.
That's seven minutes gone in the round.
Bourque with some aggressive grappling here. He's looking for submissions here, rather than waiting for the opportunity to counter.
Thornton manages to regain half guard. Good work.
Thornton gets full guard.
Thornton working for a triangle but Bourque defends it easily.
Thornton keeping full guard, as Bourque tries to pass.
Thornton looking for submissions off his back, moving his hips, looking for an opening.
Thornton is looking for a triangle but Bourque pushes his legs off easily.
Bourque trying to control but Thornton is working from the bottom.
That's eight minutes gone in the round.
Thornton looking for submissions off his back, moving his hips, looking for an opening.
Thornton has his foot on Bourque's thigh. He's trying to push off and get in position for a triangle, I think. Bourque works his way back into a safe position though.
Thornton is breathing heavily.
Thornton looking for submissions from the bottom here. Moving his hips around, possibly looking for an armbar.
The ref warns both fighters not to hold the cage as they work up against the meshing.
Thornton can't do much from the bottom at the moment, as Bourque controls the pace.
Thornton is looking for a guillotine. You can't force these things though and Bourque defends well.
Bourque got a little sloppy there for a moment and Thornton has worked his way into a loose triangle - can he finish it?! No, Bourque has managed to get both his arms back between Thornton's legs - danger averted.
Bourque passes easily into side control. Nice work. Score +3 for passing guard: Thornton (6) vs (27) Bourque
Bourque controls the position from side control.
Bourque is trying to get an arm triangle but Thornton is defending well.
That's nine minutes gone in the round.
Bourque is looking to finish here, going for an Americana. Thornton knows the correct defense though, so he's OK.
Thornton tries to improve position but can't.
Thornton can't do much from the bottom here.
Bourque staying calm.
Bourque tries to advance to mount but Thornton denies him.
Thornton is looking for a sweep.
That's ten minutes gone in the round.
Thornton stops Bourque from passing to mount.
Bourque staying calm.
Thornton is looking for a sweep.
Thornton sneaks back into half guard.
Thornton is looking to regain full guard. Not this time though.
Thornton looking for submissions from an awkward position here.
Thornton looking for submissions off his back.
Bourque moves into full mount! Thornton won't be happy about that! Score +3 for passing guard: Thornton (6) vs (30) Bourque
Bourque works his way to his opponent's back.
Score +3 for taking back: Thornton (6) vs (33) Bourque
That's eleven minutes gone in the round.
Bourque working for a RNC but it's not happening just yet.
Thornton is trying to break free.
Bourque has his opponent's back and is working for the choke.
Bourque is looking to finish the fight by rear naked choke. Thornton knows exactly what he's got planned though, so he's defending well. Maybe a few strikes would soften Thornton for a finish.
Thornton can't escape the position.
Bourque is persistently looking for the submission but Thornton is defending it well.
Bourque is trying to stick to Thornton's back but Thornton is turning into Bourque. He's managed to reverse the position - now he's in Bourque's guard. Polite applause from the crowd in appreciation of some nice Jiu Jitsu by Thornton. Score +2 for sweep to guard / half guard: Thornton (8) vs (33) Bourque
Thornton pressing down on his opponent's thigh, looking to pass guard. Bourque is keeping the position for now.
Thornton has gone for a leg lock! Bourque slips out almost immediately though and dives into Thornton's guard. Score +2 for sweep to guard / half guard: Thornton (8) vs (35) Bourque
Thornton is working actively off his back, looking to secure an arm or perhaps work for a triangle.
That's twelve minutes gone in the round.
Bourque advances position into side control! Score +3 for passing guard: Thornton (8) vs (38) Bourque
Bourque works to advance to full mount. Thornton defends for a few seconds but eventually he succumbs. Score +2 for reaching mount: Thornton (8) vs (40) Bourque
Bourque is working on an americana here. Ooh, that looks pretty nasty! Nope, Thornton has managed to escape the submission attempt.
Thornton is trying desperately to improve position.
Bourque is in full mount, looking to secure a guillotine but Thornton is surviving well by controlling Bourque's body position as best he can.
Thornton is desperately trying to get back to half guard.
That's thirteen minutes gone in the round.
Bourque forces the positional change into back control. Score +3 for taking back: Thornton (8) vs (43) Bourque
Bourque has the hooks sunk in and you can see the will to fight slowly draining out of Thornton's body.
Bourque looking for the RNC.
Thornton showing good submission defense here.
You know, I was talking to some of our celebrities at ringside tonight and they were split right down the middle on who was going to win this fight.
Thornton is defending well here and trying to improve his position.
Bourque is working hard for the rear naked choke here.
Bourque working for a RNC but it's not happening just yet.
That's fourteen minutes gone in the round.
The crowd hopeful of a finish here - Bourque's supporters are on their feet, screaming for him to go for the rear naked choke.
Bourque looking to break Thornton's wrist control so he can sink in the choke. Thornton remaining controlled and patient though - he really has to keep calm otherwise Bourque will wrap this one up with the rear naked choke!
Thornton is really stuck here.
Thornton defends a rear naked choke attempt by controlling one of Bourque's arms.
Bourque is working hard for the rear naked choke here.
Bourque has his opponent's back and is working for the choke.
Thornton tries to escape but Bourque has the hooks in and won't let him break free.
Boooooooooooooooooooo!!! God, this has been a terrible round. Come on you two, sort yourselves out!
Bourque struggling to keep hold of the position.
Thornton is trying to break free.
Bourque not allowing Thornton to control his hands.
And that's the end of the fight!
Bourque wins on points by 43 to 8.
Timothy Bourque decided to thank the fans in attendance for making a great atmosphere. It seemed to go down pretty well. |
|
|
|
|
|
|