 |
BHFC 21 - Penagos vs Wright PBP Commentary |
Undercard bout
|
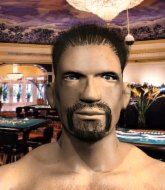
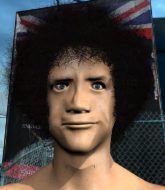
Coming up we have a heavyweight MMA rules bout between Jaun Marco (ranked 0 p4p, 0 weight class) and Eddie Green (ranked 0 p4p, 0 weight class). Over to our ring announcer for the fighter introductions!
 |
|
 |
| 187 cm
23
250 lbs
1 - 3 - 0 |
|
189 cm
19
225 lbs
2 - 4 - 0 |
BJJ Purple Belt
Counter striker
Good in bed |
|
BJJ White Belt
Brawler
Knockout power |
|
| |
|
Ladies and gentlemen. This fight is 3 rounds, in the heavyweight division.
Introducing the fighter to my left, fighting out of the red corner.
With a record of
1 - 3 - 0, fighting out of Sydney, Jaun Marco!
And introducing the fighter to my right, fighting out of the blue corner.
With a record of
2 - 4 - 0, fighting out of Sydney, Eddie Green!
The judges for this bout are Bruno Hogan, Eliza Hachem and Steve Erwin.

The bell rings for round one and we are underway!
Green throws a shot to the body.
Marco is breathing heavily.
Fantastic stuff here - a very entertaining period of action, which has drawn cheers from the crowd.
Green misses with a head kick.

Green rushes Marco and presses him up against the cage.

Green breaks the clinch and we return to the middle of the mat.
Green misses with a wild body shot.
Green fails with a takedown attempt.
Green shoots in for a takedown. "Ole!" shouts Marco as he jumps to the side.
Marco keeps the fight standing with a nice sprawl.
Jaun Marco has stuffed three takedown attempts in the round now. That's going to take a lot out of Eddie Green.
Green instigates a clinch.

That's one minute gone in the round.

Green manages to pull guard. Let's see whether he can land a sub off his back.
Green tries to land a sweep but no joy.
Marco prevents Green from getting back to his feet.
Green trying to control the position.
Green really doesn't want to stay on the ground with Marco. If he can't get it back to his feet, it's only a matter of time before he'll be tapping out.

That's two minutes gone in the round.
Well. There's a bit of a lull in the action here and the crowd are starting to get restless.
Green is trying to stand up but he's not managed so far.
Marco trying to control but Green is working from the bottom.

That's three minutes gone in the round.
Green is pulling down on Marco's head. It's preventing any offense from Marco, at least for the moment.
Marco stops Green from standing up.

That's four minutes gone in the round.
There's not a lot going on here and the crowd are letting the fighters know they're not willing to tolerate a lack of action.

Well, the referee has seen enough. Neither fighter is active enough on the ground so he's stood them back up.
Marco throws the overhand right but ducks down into a quick takedown attempt. Green was covering up waiting for the punch and Marco finishes the takedown easily into guard.

Marco is trying to work a guillotine from the top, or something like that? Don't know how he thinks he's going to get a finish from there.
And thats the end of the round the fighters go back to their corners.
Eddie Green dominated that round.
The fighters get back to their feet, the hooter sounds and we're back to the action!

Marco doesn't succeed with the takedown
and Green counters by moving into the clinch. Good anticipation by Green.
Green manages to break the clinch.
Green wants to clinch.
Marco could do with loosing a few pounds - he looks very soft around the mid section, to put it politely.
Green is looking for a takedown here. He's shot in and has managed to get it, finishing up in Marco's half guard.
Green tries to stand and escape but Marco is controlling the position.
Green is breathing heavily.
That's one minute gone in the round.
Marco moves his hips nicely and gets into full guard.
Green looking to sit in guard and control but Marco gets the butterfly guard and sweeps. He's now in the guard on the top.
Green is looking to stand up but Marco isn't so interested in that idea.
We could do with one of the fighters taking the initiative a bit more on the ground - they're both waiting to capitalize on a mistake.
That's two minutes gone in the round.
A lull in the action here being met with boos from the crowd.
Marco drops back for a leg here. A bit of a high risk move... He's looking for a kneebar by the looks of things. Now both of them are looking for submissions. Marco seems to have locked his on tight now - Green screams in pain and taps out furiously! It certainly was a high risk move but it's paid off for Marco, as he picks up the win!
Ladies and gentlemen, after 2:28 of round 2, we have a winner by way of Submission (Kneebar). Jaun Marco!
|
|
|
|
|
|
|
|
|
|
|
|
|
|
|
|
|
|
|
|
|
|
|
| S |
C
A |
G |
S |
C
B |
G |
|
S |
C |
G |
|
energy
A | B |
|
hype
A | B |
|
pop
A | B |
|
mgr
A | B |
|
FIGHT
RATING
38% |
|
|
|
|
|
|
|
Undercard bout
|
|
|
|
Undercard bout
|
|
|
|
Undercard bout
|
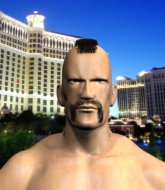
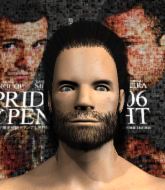
Coming up we have a heavyweight MMA rules bout between Yuri Rook (ranked 0 p4p, 0 weight class) and Nick Vass (ranked 0 p4p, 0 weight class). Rook comes to the cage accompanied by Mr Krinkle. Nick Vass has the better chin. Will he look to stand and bang today?
 |
|
 |
| 195 cm
20
285 lbs
1 - 2 - 0 |
|
185 cm
19
215 lbs
2 - 3 - 0 |
BJJ Brown Belt
Solid boxing
Very strong |
|
BJJ Purple Belt
Brawler
Powerful |
|
| |
|
Ladies and gentlemen. This fight is 3 rounds, in the heavyweight division.
Introducing the fighter to my left, fighting out of the red corner.
With a record of
1 - 2 - 0, fighting out of Rio de Janeiro, Yuri Rook!
And introducing the fighter to my right, fighting out of the blue corner.
With a record of
2 - 3 - 0, fighting out of Sydney, Nick Vass!
The judges for this bout are Bruno Hogan, Damien Edna and Eliza Hachem.
The bell rings for round one and we are underway!
Vass ducks under a wild hook from Rook.
Vass shoots in for a takedown! He's got it and he's managed to land in full mount! That's better than Vass was expecting from the takedown attempt, I'm sure!
Vass controlling the position easily from mount.
Vass looks like he's working for a submission but he's not found anything just yet.
Vass is working for a guillotine from mount but Rook frees his head quite easily.
Rook tries to hold on but Vass postures up.
Rook is trying to escape the mount.
That's one minute gone in the round.
Rook tries to hold on but Vass postures up.
Vass goes for an armbar but Rook turns quickly into his guard - lovely anticipation from Rook.
Vass wants to sweep here but Rook controlling him for the moment.
Vass tries to strike from the bottom.
Rook trying to control the position from guard on top but Vass is wriggling around, looking for whatever he can.
Vass is trying to keep Rook in close.
Vass is looking for a triangle but Rook pushes his legs off easily.
Rook is frustrating his opponent with some stalling tactics from top position.
That's two minutes gone in the round.
My god... these two guys really need to pick up the pace or everyone will leave to go get a beer.

Vass uses the cage to get back to his feet.
Rook throws a big shot that misses.
A head kick misses from Vass.
Rook throws a hook but Vass avoids it easily.
Rook throws an uppercut from half a mile away. Vass sees it coming and avoids it easily.
A shot to de liver by Rook. Beautiful body shot.
Vass shoots in for a takedown but Rook shows good takedown defense.
Rook scores with a nice strike.
Rook throws a monster uppercut resembling something out of street fighter but it doesn't land.
Vass slips a straight right by Rook.
Rook connects with a lovely right hand, straight down the pipe.
Yuri Rook seems to be the more aggressive standup fighter in this bout.
Vass throws a head kick that misses and slips in the process. He scrambles back to his feet and the fighters circle.
Vass avoids a lazy jab quite easily.
Rook scores with a takedown into Vass's guard.
Vass looks gassed!
That's three minutes gone in the round.
Vass keeping moving, preventing Rook from controlling successfully.
Rook pressing down on his opponent's thigh, looking to pass guard. Vass is keeping the position for now.
Vass working a defensive guard but Rook manages to pass into side control anyway.
Rook scoring with punches from side control.
Vass struggling a bit here.
Rook blocks the strikes from Vass.
Rook is looking to take a break and control but Vass is keeping him honest, looking to work from the bottom.
That's four minutes gone in the round.
A few boos can be heard. I'm sure they will multiply if the fighters don't pick up the pace.
Vass struggling a bit here.
Vass might have to switch it up a bit here because his efforts to control Rook kaven't been going to plan, at least at the current moment in time.
Rook thinks about going for a far side armbar but bails out and retains the dominant position instead.
The referee decides to stand the fighters back up.
Rook moves into range and throws a lovely three punch combination.
The crowd applaud the fighters efforts here as the round comes to an end.
Vass shoots in from a long way out. He's driving through with the takedown attempt and he eventually gets it, landing in Rook's guard.
Vass trying to control but Rook is working from the bottom.
And thats the end of the round the fighters go back to their corners.
Yuri Rook dominated that round.
OK. That's time! The bell goes and we're back to the action.
Rook displays good takedown defense there as he swats away a double leg from Vass.
Vass takes one to the chin there.
Rook swings wildly with a hook that is half blocked by Vass.
Rook gets his takedown attempt stuffed easily
and Vass moves into the clinch.
Vass misses with the head strike.
Vass goes for a takedown attempt but Rook pushes him away and we're back to fighting at a distance.
Rook paws at his opponent with the jab and then lunges in with a straight, right on the button.

It looks like Nick Vass has been cut.
Fantastic stuff here - a very entertaining period of action, which has drawn cheers from the crowd.
Vass pulls out of a head kick attempt.
Rook scores with a nice strike.
Rook ducks down and throws a hook to the body but Vass moves away.
Rook fakes and then throws a beautiful body shot. Vass looks a bit winded and takes a step backwards to take a breath.
Rook swings for the body but Vass moves out of range.
Nick Vass is looking to throw some combinations by the looks of things.
Vass is breathing heavily.
That's one minute gone in the round.
Rook fakes low and throws an overhand right that catches Vass on the side of the head.
Vass has taken the fight to the clinch.
Vass is working for a takedown up against the cage. He can't get it on this occasion though.
Yuri Rook has stuffed three takedown attempts in the round now. That's going to take a lot out of Nick Vass.
Vass tries to take the fight to the ground by pulling guard but can't manage it.
Vass tries to pull guard but can't drag his opponent to the mat. Rook just stands there and leans against the cage.
Vass drops down for a takedown but doesn't get it.
Rook has had enough of the clinch but Vass keeps him there for the moment.
Vass looks like he'd prefer to be striking at range right now.
Vass missing with knees to the body.
Rook prevents Vass from breaking the clinch.
Vass throws an elbow that misses.
That's two minutes gone in the round.
Rook wants to break the clinch but can't.
Rook is looking to break free of the clinch but Vass has double underhooks.
Rook tries to break the clinch but Vass is controlling the position.
Vass goes for a takedown in the clinch but Rook prevents it.
Rook's corner calls for him to break the clinch, which he does.
Vass takes a shot right to the bread basket.
Vass takes a big uppercut there. He seems a bit wobbly but no, he's OK.
Fantastic stuff here - a very entertaining period of action, which has drawn cheers from the crowd.
Rook thuds a left hand into Vass's body.
A cross from Rook lands.
Rook lands a jab to the head.
Rook lands a powerful looking uppercut that connected with his opponent's jaw.

Vass is rocked!
Rook changes levels and drives through with a really nice takedown into side control. Vass looks really pissed at himself for not defending that better.
Vass is still in real trouble! Can Rook finish him?
Rook passes to full mount! That's big trouble for Vass!
Vass seems to have recovered his senses.
Rook takes a little breather and maintains the position. The referee will be looking for him to stay active from such a dominant position though.
That's three minutes gone in the round.
Vass wants to hold on but Rook pushes him away.
Rook landing strikes, looking to finish!
Rook tries to control but Vass wriggling away.
Rook takes a little breather and maintains the position. The referee will be looking for him to stay active from such a dominant position though.
Vass tries to lock up and control but Rook gives him a forearm to the face and pushes him away.
Rook with good strikes from the mount here!
Rook working for a submission but Vass is keeping him at bay.
Vass really trying hard to get back to half guard here.
That's four minutes gone in the round.
Vass flailing away with punches but nothing is landing.
Vass is squirming around, avoiding Rook's attempts to control the action.
Vass bucks up and manages to get a nice reversal! He's in guard on the top - nicely done!
Vass wants to stand but Rook is controlling his posture from full guard.
Rook has Vass pulled in close to control his posture.
The crowd are going absolutely nuts as the round comes to an end - what a fantastic round of action!
Rook is trying to control the position but Vass postures up.
And thats the end of the round the fighters go back to their corners.
Yuri Rook dominated that second round.
The cut man is working on Nick Vass's cut.
The fighters get back to their feet, the hooter sounds and we're back to the action! Ladies and gentlemen, this is the final round!

Vass shoots in for a takedown. "Ole!" shouts Rook as he jumps to the side.
Rook fakes a head punch and goes low to the body. Nicely done.
Rook catches Vass with a nice straight right. He seems pissed - ooooh, it's on now! On like donkey kong!
Rook throws a jab when Vass was well out of range.
Rook is using his height advantage well here, landing a good percentage of his punches.
Vass bobs and weaves well there to avoid the strikes.
A jab lands there for Rook.
Rook misses with a wild body shot.
Rook swings and misses with a shot to the body
and Vass counters with a shoot takedown. Rook fights it but they end up in guard.
Vass trying to control but Rook is working from the bottom.
Vass must be cautious of submissions here, given that his opponent has the superior Jiu Jitsu.
Vass won't allow Rook to sweep him here.
Vass trying to control but Rook is working from the bottom.
Rook controls Vass momentarily but Vass frees himself.
Both fighters are breathing heavily.
That's one minute gone in the round.
Rook looking to hit a scissor sweep but Vass is one step ahead there.
Rook is working from a closed guard but he's struggling to control his opponent.
Vass trying to control the position from guard on top but Rook is wriggling around, looking for whatever he can.
Rook bucks up whilst keeping hold of a body lock, managing to reverse the position. Now he's in top in Vass's guard.
Rook wants to control from the top but Vass keeps moving.
Vass manages to sweep nicely, so he's now on top. Rook manages to get himself to full guard.
That's two minutes gone in the round.
My god... these two guys really need to pick up the pace or everyone will leave to go get a beer.
Rook working a defensive guard here.
Rook has a closed guard, preventing Vass from standing up.
Rook keeping moving, preventing Vass from controlling successfully.
Rook is trying to control the position but Vass postures up.
Rook keeping moving, preventing Vass from controlling successfully.
Yuri Rook overall seems to be getting the better of the ground position in the fight so far.
Rook managing to control the position.
That's three minutes gone in the round.
Rook looking for a sweep. Not yet Rook, not yet.
Well, the referee has seen enough. Neither fighter is active enough on the ground so he's stood them back up.
Rook is the aggressor but that punch slipped nicely by Vass.
Rook lands a really nice looking cross but Vass seems unphased.
Rook keeps the fight standing with a nice sprawl.
Vass shoots in for a takedown from distance. He catches Rook napping and manages to drive through into side control!
Vass trying to control the action but Rook is working from the bottom.
Rook is trying to get back to half guard. He's pushing on Vass's leg. He's managed it. Nice work.
The ref warns both fighters not to hold the cage as they work up against the meshing.
Vass is thinking about going for an arm triangle but he can't free his leg.
That's four minutes gone in the round.
The referee calls for the fighters to work.
Vass tries to stand but can't do so whilst Rook controls his leg.
Rook is working for an escape here. He's hooked one of Vass's legs and he's managed to sneak out and take Vass's back!
Rook loading up with punches from the back mount - how long can Vass hold on?
Rook is persistently looking for the submission but Vass is defending it well.
So, who will make the next big move? In this position it could be crucial.
Nick Vass has stepped it up - he knows he needs a finish here!
Vass prevents Rook from getting a body triangle.
And that's the end of the fight!
That was a close round. You could make an argument for either fighter but I would give it to Yuri Rook.
Well Rook has outscored his opponent in every aspect of the fight today. Only a scarily incompetent judge or two will keep him from a well deserved win... Over to the ring announcer for the scorecards.
Ladies and gentlemen, after 3 rounds of action, we go to the scorecards for a decision.
Judge Bruno Hogan scores the fight 30:26
Judge Damien Edna scores the fight 30:26
Judge Eliza Hachem scores the fight 30:26
In favor of your winner, by unanimous decision... Yuri Rook!
|
|
|
|
|
|
|
|
|
|
|
|
|
|
|
|
|
|
|
|
|
|
|
| S |
C
A |
G |
S |
C
B |
G |
|
S |
C |
G |
|
energy
A | B |
|
hype
A | B |
|
pop
A | B |
|
mgr
A | B |
|
FIGHT
RATING
100% |
|
|
|
|
|
|
|
Undercard bout
|
|
|
|
Undercard bout
|
Coming up we have a featherweight MMA rules bout between Shin Yamaguchi (ranked 0 p4p, 0 weight class) and Nycky Downtime (ranked 0 p4p, 0 weight class). Shin Yamaguchi has the better chin. Will he look to stand and bang today?
 |
|
 |
| 180 cm
23
154 lbs
2 - 1 - 0 |
|
176 cm
19
152 lbs
3 - 1 - 0 |
BJJ Blue Belt
Excellent boxer
Granite chin |
|
BJJ Purple Belt
Basic striking
Determined |
|
| |
|
Ladies and gentlemen. This fight is 3 rounds, in the featherweight division.
Introducing the fighter to my left, fighting out of the red corner.
With a record of
2 - 1 - 0, fighting out of Sydney, Shin Yamaguchi!
And introducing the fighter to my right, fighting out of the blue corner.
With a record of
3 - 1 - 0, fighting out of Sydney, Nycky Downtime!
The judges for this bout are John Mangel, Hugh Johnson and Damien Edna.
The bell rings for round one and we are underway!
Downtime shoots in for a takedown. "Ole!" shouts Yamaguchi as he jumps to the side.
Downtime shoots in for a takedown. "Ole!" shouts Yamaguchi as he jumps to the side.
Downtime on the wrong end of a vicious looking body shot.
Yamaguchi misses with the combination.
Yamaguchi lunges in with an uppercut that skims his opponent's chin.
Downtime tries to clinch up.
Downtime shoots for a takedown but Yamaguchi saw that one coming a mile off and avoided it easily.
Shin Yamaguchi has stuffed three takedown attempts in the round now. That's going to take a lot out of Nycky Downtime.
Yamaguchi scores with a three punch combo!
Nice body punch from Yamaguchi.
Yamaguchi works his jab well there, keeping his opponent at a distance.
Downtime shoots in for a takedown. "Ole!" shouts Yamaguchi as he jumps to the side.
Yamaguchi scores with a jab to the jaw.
Downtime has a takedown stuffed.
Downtime tries to score a power double leg takedown but Yamaguchi sees that one coming and sprawls well. That will dishearten Downtime somewhat.
Nycky Downtime seems to be the more aggressive standup fighter in this bout.
That's one minute gone in the round.
Yamaguchi bobbing and weaving, closes the distance and lands a hook to the side of Downtime's head.
Downtime misses with a takedown attempt. He shot from a bit too far out.
Yamaguchi cracks Downtime with a hook to the jaw. Both fighters smile at eachother and high-five before getting back down to business.
Shin Yamaguchi is looking to keep the fight on the feet at all costs.
Yamaguchi scores with a jab to the jaw.
Yamaguchi scores with a punch to the head.
Yamaguchi lands a two punch combo.
Yamaguchi stuffs a takedown. It's all about dictating where the fight takes place and Yamaguchi wants it to stay on the feet.
Downtime takes a solid shot to the body. That one hurt him but he's trying not to show it.
Yamaguchi lets the fists fly and connects with a left straight followed by a right hook.
Downtime fails with a rather predictable takedown attempt.
Downtime has a takedown stuffed.
Downtime looks gassed!
That's two minutes gone in the round.
Left hook, right uppercut from Yamaguchi.
Downtime is rocked!
This has been an exciting period of action!
Downtime looks frustrated there after his takedown attempt is stuffed easily.
Downtime needs to keep his hands up - Yamaguchi had a free shot at his head there.
Yamaguchi is really peppering his opponent's head with punches.
Downtime fails to land the takedown.
Yamaguchi goes to the watering hole and comes back with a big thumbs up from the judges as he scores a three punch combo.
Downtime fails with a takedown attempt.
Nice shot by Yamaguchi.
Yamaguchi connects with a good right hand that stumbles Downtime. Downtime circles away out of range and recomposes himself.
Yamaguchi scores with a decent looking hook.
Yamaguchi defends well against a solid takedown attempt from Downtime.
Downtime fails with a rather predictable takedown attempt.
Yamaguchi stooping low to avoid any incoming strikes and then lunges in with an uppercut come cross that lands flush.
Downtime is trying desperately to land a takedown but Yamaguchi is having absolutely none of it. This is turning into a bit of a nightmare for Downtime.
That's three minutes gone in the round.
Yamaguchi wings a very wild body shot but it does the job and lands to the midsection.
Yamaguchi scores with a body shot.
Downtime fails with a takedown attempt.
Yamaguchi thuds a left hand into Downtime's body.
Downtime takes a punch to the jaw and another one to the bread basket.
Yamaguchi scores with a nice looking left hook and follows it up with an uppercut!
Downtime is still on wobbly legs! Can Yamaguchi finish him?
Yamaguchi scores with a nice right hand.
Yamaguchi scores with a jab to the jaw.
Yamaguchi cracks a nice hook into Downtime's ribs.
The crowd are loving this. Great action here.
Yamaguchi rushes Downtime with punches - Downtime moves straight backwards instead of circling and gets clipped by the second strike... and the third... and the fourth! Oh, Downtime goes down! Yamaguchi follows up with more strikes and the ref steps in to end the bout!
Ladies and gentlemen, after 3:53 of round 1, we have a winner by way of TKO (Strikes). Shin Yamaguchi!
|
|
|
|
|
|
|
|
|
|
|
|
|
|
|
|
|
|
|
|
|
|
|
| S |
C
A |
G |
S |
C
B |
G |
|
S |
C |
G |
|
energy
A | B |
|
hype
A | B |
|
pop
A | B |
|
mgr
A | B |
|
FIGHT
RATING
73% |
|
|
|
|
|
|
|
Undercard bout
|
Coming up we have a heavyweight MMA rules bout between Maximum Mainiac (ranked 0 p4p, 0 weight class) and Fubar Snafu (ranked 0 p4p, 0 weight class). Maximum Mainiac could well score a knockout today. He has the power to get to Fubar Snafu's chin.
 |
|
 |
| 202 cm
21
255 lbs
3 - 1 - 0 |
|
195 cm
19
215 lbs
3 - 1 - 0 |
BJJ White Belt
Solid boxing
Granite chin |
|
BJJ Blue Belt
Basic striking
Determined |
|
| |
|
Ladies and gentlemen. This fight is 3 rounds, in the heavyweight division.
Introducing the fighter to my left, fighting out of the red corner.
With a record of
3 - 1 - 0, fighting out of Sydney, Maximum Mainiac!
And introducing the fighter to my right, fighting out of the blue corner.
With a record of
3 - 1 - 0, fighting out of Sydney, Fubar Snafu!
The judges for this bout are Winston Howard, John Mangel and Skip Squint.
The bell rings for round one and we are underway!
Snafu fails in his attempt to clinch.
Mainiac cracks a nice hook into Snafu's ribs.
Mainiac looks to land a combination but Snafu avoids it well.
Some wild striking there from Mainiac.
Mainiac scores with a slapping inside leg kick.
Mainiac looks to score with a jab to the body but Snafu is just out of range.
Mainiac feints a jab and as Snafu dips his head, Mainiac unleashes a brutal head kick that catches Snafu right on the jaw! Timbeeer! Snafu falls backwards in slow motion, only propped up by the cage! Mainiac smiles a psychotic smile as he stares down his unconscious opponent. That is a scary man.
Ladies and gentlemen, after 0:21 of round 1, we have a winner by way of KO (Head Kick). Maximum Mainiac!
|
|
|
|
|
|
|
|
|
|
|
|
|
|
|
|
|
|
|
|
|
|
|
| S |
C
A |
G |
S |
C
B |
G |
|
S |
C |
G |
|
energy
A | B |
|
hype
A | B |
|
pop
A | B |
|
mgr
A | B |
|
FIGHT
RATING
100% |
|
|
|
|
|
|
|
Undercard bout
|
Coming up we have a light heavyweight MMA rules bout between Tom Green (ranked 0 p4p, 0 weight class) and Lincoln Hawk (ranked 0 p4p, 0 weight class). Over to our ring announcer for the fighter introductions!
 |
|
 |
| 188 cm
19
215 lbs
3 - 2 - 0 |
|
180 cm
23
200 lbs
3 - 1 - 0 |
BJJ Blue Belt
Solid boxing
Very strong |
|
BJJ Purple Belt
Decent boxing
Solid chin |
|
| |
|
Ladies and gentlemen. This fight is 3 rounds, in the light heavyweight division.
Introducing the fighter to my left, fighting out of the red corner.
With a record of
3 - 2 - 0, fighting out of Sydney, Tom Green!
And introducing the fighter to my right, fighting out of the blue corner.
With a record of
3 - 1 - 0, fighting out of Sydney, Lincoln Hawk!
The judges for this bout are Hugh Johnson, Damien Edna and Summer Carpenter.
The bell rings for round one and we are underway!
Green throws a head kick but Hawk moves out of range.
A big left from Hawk misses.
Hawk clinches up with Green and pushes him back against the cage.
Hawk is working on a single leg takedown against the cage. Green can't fight it off and eventually Hawk manages to take the fight to the floor. Green looks annoyed but at least he's managed to land in guard.
Hawk advances to half guard.
Hawk content to sit in half guard and control for a moment.
Green controlling the leg, holding on to half guard.
Green wants to control but Hawk is keeping busy.
Hawk is just sitting in half guard, waiting for something to happen.
That's one minute gone in the round.
Green actively working from the bottom here.
Green looking for submissions from an awkward position here.
Green has no desire to be mounted, so is trying to control. Hawk is working away from the top position though.
Hawk moves into full mount! Green won't be happy about that!
Green really trying hard to get back to half guard here.
Hawk lands a couple of nice shots there from mount.
That's two minutes gone in the round.
Hawk controlling his opponent.
Hawk lands a couple of nice shots there from mount.
Hawk looking to control but Green is working nicely, looking to advance position himself.
Green is looking to improve his position but Hawk isn't that keen on the idea.
The fighters are going at a pretty good pace and they're both starting to sweat now.
Hawk can't quite control the action as he would like just now, as Green is looking to escape.
Green tries to lock up and control but Hawk gives him a forearm to the face and pushes him away.
That's three minutes gone in the round.
Green is working to get back to half guard.
The fighters are pressed up against the cage, both looking to find a bit of space to work.
Hawk controlling from the full mount.
The ref warns both fighters not to hold the cage as they work up against the meshing.
Hawk prevents Green from getting the reversal.
A nice elbow there by Hawk.
Hawk with the ground and pound from mount.
That's four minutes gone in the round.
Hawk punishing his opponent with strikes.
Green is in a horrible position here. Hawk smacks him with another shot as he tries to escape the position.
Hawk working the ground and pound effectively.
Green tries to lock up and control but Hawk gives him a forearm to the face and pushes him away.
Hawk landing strikes from the mount.
Hawk scores with a couple of good head shots there.
Wooooo! Give it up for these two warriors! They are putting on a show!
Hawk with a couple of short strikes.
The crowd applaud the fighters efforts here as the round comes to an end.
Hawk can't quite control the action as he would like just now, as Green is looking to escape.
Hawk with some aggressive grappling here. He's looking for submissions here, rather than waiting for the opportunity to counter.
And thats the end of the round the fighters go back to their corners.
Lincoln Hawk dominated that round.
OK. That's time! The bell goes and we're back to the action.
A really sloppy takedown attempt there from Hawk.
Hawk throws a body punch but Green moves out of range.
Green fails with the takedown.
Hawk swings for the body but Green moves out of range.
A jab from Hawk misses.
Green slips a jab from Hawk.
Hawk has taken the fight to the clinch.
Green keeps the fight in the clinch, despite Hawk's efforts to push away.
Hawk has double underhooks and is working for a body lock takedown. He's got it. The fighters land in half guard but Green regains guard immediately.
Hawk stands and steps away. Green gets to his feet too and we're back to the striking game.
A punch combination from Hawk misses.
Hawk stuffs the takedown.
Hawk bobs and weaves and throws out a fast jab that snaps Green's head backwards.
Green tries for a takedown but Hawk sees it coming a mile off and avoids it easily.
That's three failed takedown attempts in the round for Tom Green. That's going to take a lot out of him.
That's one minute gone in the round.
Hawk just misses with a punch to the body.
No luck for Green with that takedown attempt.
Green tries to close the distance and clinch up against the cage but Hawk paws at him with a jab and circles away.
Green fails with the takedown.
Hawk comes forward and lands a shot to the body, then darts back out of range.
Both fighters are absolutely exhausted here.
Hawk scores a trip takedown into side control. Nice.
Hawk is trying to get an arm triangle but Green is defending well.
Hawk passes to full mount! That's big trouble for Green!
Hawk controlling from mount.
Lincoln Hawk has got the better of the ground game so far.
Hawk avoids the attempt from Green to control.
That's two minutes gone in the round.
Green tries to get back to half guard but can't.
Hawk trying to control but Green is having none of it.
Hawk is in a good position here but he's just trying to control... And he's not even managing to do that successfully.
Hawk avoids the attempt from Green to control.
Green is trying desperately to improve position.
That's three minutes gone in the round.
Hawk in mount throwing good strikes here, bouncing his opponent's head off the canvas.
Hawk can't quite control the action as he would like just now, as Green is looking to escape.
Hawk controlling from mount.
Green is writhing around trying to get back to his feet.
Hawk raining down shots from the mount!
Hawk looking to control and managing it successfully.
That's four minutes gone in the round.
Hawk avoids the attempt from Green to control.
Green is really trying hard to get back to his feet.
Hawk has the superior BJJ but he's also working some ground strikes into his gameplan.
Hawk can't quite control the action as he would like just now, as Green is looking to escape.
BOOM! Hawk connects with a massive shot to the dome!
Hawk takes a little breather and maintains the position. The referee will be looking for him to stay active from such a dominant position though.
And thats the end of the round the fighters go back to their corners.
Lincoln Hawk showed his class in that round. I'd imagine he'll take it on all the scorecards.
The corners get their ten second warning. Both fighters stand from their stools and stare eachother down, ready to get back to the action. Let's get this one finished - here comes the final round!
Hawk instigates a clinch.
Hawk manages to break the clinch.
Green lands a slapping body shot.
The fight moves into the clinch position.
Green can't break the clinch.
Hawk breaks the clinch.
Green is trying hard to land a takedown here. Hawk sprawls well and keeps this one on the feet.
Hawk connects with a lovely right hand, straight down the pipe.
Hawk throws a hook to the side of Green's head but Green sees it coming and ducks under it beautifully.
Green is looking to clinch.
Tom Green is looking to throw some combinations by the looks of things.
Green scores with a hook to the body. Hawk takes a step back and tries to catch his breath.
Green avoids the body shot from Hawk.
Hawk loads up on a big right hand but Green slips the punch.
Green tries to clinch up.
Hawk takes a step back and watches a body kick go sailing past his mid section.
Green feints and as Hawk raises his hands in defense, Green changes levels and drives through with a takedown into guard.
Hawk takes a big intake of breath there - he's definitely tired.
The crowd cheering loudly, showing their appreciation for the quality fight we're seeing here.
Hawk manages to sweep nicely, so he's now on top. Green manages to get himself to full guard.
That's one minute gone in the round.
Green looking for a guillotine here but Hawk defends easily.
Hawk with a nice head shot there.
Green utilising some decent striking defenses from the guard, preventing the ground and pound.
Hawk tries to free his leg and advance position but Green is retaining full guard.
Green is throwing his legs up, looking for submissions. Hawk is aware though and is defending well.
Hawk chips away with some ground and pound.
Green isolates an arm and boxes in a triangle. Hawk stacks Green on his neck as he steps over and passes to the side. He's now in a much more dominant position where he can look to do some serious damage. Nice move by Hawk!
That's two minutes gone in the round.
The crowd are starting to boo a lack of action.
Hawk working hard here to secure a kimura but he's not really in the right position for it.
Green can't do much from the bottom here.
Hawk wants to control but Green is keeping him busy.
Hawk just content to control the position.
That's three minutes gone in the round.
Hawk looking for an arm triangle but it's way too loose to do anything.
Hawk wants to control but Green is keeping him busy.
Green knows he needs to get back to his feet asap. He's simply no match for Hawk on the ground.
Hawk slows the pace down.
Green is not content to let Hawk control the position.
That's four minutes gone in the round.
The crowd are starting to boo a lack of action.
Hawk tries to advance to mount but Green denies him.
Hawk wants to lay and pray for a moment but Green keeps working.
Hawk working away.
Hawk remains in side control and seems content to stay there. It's a versatile position from which he can work both strikes and submissions, whilst maintaining that control, so maybe he'll sit here for a while.
It looks like we're going to have a standup here. Neither fighter is doing enough on the ground.
Green uses decent footwork to sidestep a right hand from Hawk.
Tom Green has stepped it up - he knows he needs a finish here!
Hawk lands a nice shot to the body.
And that's the end of the fight!
I would just about give that final round to Lincoln Hawk.
Well Hawk has outworked and out performed his opponent in all aspects of the game today. He was simply too good and the decision should be no more than a formality. Over to the ring announcer for the scorecards.
Ladies and gentlemen, after 3 rounds of action, we go to the scorecards for a decision.
Judge Hugh Johnson scores the fight 25:30
Judge Damien Edna scores the fight 27:29
Judge Summer Carpenter scores the fight 25:30
In favor of your winner, by unanimous decision... Lincoln Hawk!
|
|
|
|
|
|
|
|
|
|
|
|
|
|
|
|
|
|
|
|
|
|
|
| S |
C
A |
G |
S |
C
B |
G |
|
S |
C |
G |
|
energy
A | B |
|
hype
A | B |
|
pop
A | B |
|
mgr
A | B |
|
FIGHT
RATING
62% |
|
|
|
|
|
|
|
Co-main event
|
Coming up we have a lightweight MMA rules bout between Mattew Justice (ranked 0 p4p, 0 weight class) and Tiger Lee (ranked 0 p4p, 0 weight class). Lee has chosen Monkeys of War as his entrance music. Mattew Justice has the edge in experience - let's see if he can make that count tonight.
 |
|
 |
| 170 cm
23
159 lbs
4 - 1 - 0 |
|
180 cm
19
164 lbs
3 - 0 - 0 |
Good wrestling
Brawler
Experienced |
|
Good wrestler
Counter striker
Powerful |
|
| |
|
Ladies and gentlemen. This fight is 3 rounds, in the lightweight division.
Introducing the fighter to my left, fighting out of the red corner.
With a record of
4 - 1 - 0, fighting out of Sydney, Mattew Justice!
And introducing the fighter to my right, fighting out of the blue corner.
With a record of
3 - 0 - 0, fighting out of Sydney, Tiger Lee!
The judges for this bout are Steve Erwin, Bruno Hogan and Skip Squint.
The bell rings for round one and we are underway!
Justice tries to shoot in for a takedown. He's got hold of a leg but Lee swivels and escapes.
Justice misses with a takedown attempt - Lee sprawls well and throws a nice strike on the way out which just misses.
Horrible takedown by Justice or perhaps it was just good defense by Lee which made him look bad.
That's three failed takedown attempts in the round for Mattew Justice. That's going to take a lot out of him.
Lee leaves Justice with his face pressed against the mat as he sprawls beautifully, defending against a solid takedown attempt.
Justice dives in and grabs Lee's left leg, looking for a takedown. Lee pushes down on Justice's head and hops out.
Lee is looking for a takedown here. He's shot in and has managed to get it, finishing up in Justice's half guard.
Lee thows a big elbow that misses, also allowing Justice to regain full guard.
Lee loading up with the ground and pound but he's missing more than he's landing in this flurry.
The fighters are pressed up against the cage, both looking to find a bit of space to work.
Lee connects with a couple of short punches.
Lee working some ground and pound from guard but it's not doing any damage.
Lee scores with a decent looking elbow strike.
Lee thows a big elbow that misses.
Lee stands up over his opponent, looking to dive in with a big punch. Here he comes, superman style! Oh, the punch misses and Justice has got him in a triangle choke for good measure! Oh no! Lee manages to get his head free but now Justice has transitioned to an armbar! Lee grimaces and is forced to tap! Beautiful Jiu Jitsu from Justice! I'd be surprised if that didn't end up as submission of the night!
Ladies and gentlemen, after 1:18 of round 1, we have a winner by way of Submission (Armbar). Mattew Justice!
|
|
|
|
|
|
|
|
|
|
|
|
|
|
|
|
|
|
|
|
|
|
|
| S |
C
A |
G |
S |
C
B |
G |
|
S |
C |
G |
|
energy
A | B |
|
hype
A | B |
|
pop
A | B |
|
mgr
A | B |
|
FIGHT
RATING
56% |
|
|
|
|
|
|
|
Main event
|
Coming up we have a middleweight MMA rules bout between Carlos Penagos (ranked 0 p4p, 0 weight class) and Kyle Wright (ranked 0 p4p, 0 weight class). Penagos's entrance music is Somebody Gonna Get Their Ass Whooped!. A fine choice. Both these guys have solid standup skills and neither is particularly fantastic on the ground, so let's hope for a nice standup war!
 |
|
 |
| 183 cm
21
191 lbs
4 - 0 - 0 |
|
185 cm
19
195 lbs
2 - 0 - 0 |
Decent wrestler
Excellent boxer
Good chin |
|
BJJ Blue Belt
Decent boxing
Powerful |
|
| |
|
Ladies and gentlemen. This fight is 3 rounds, in the middleweight division.
Introducing the fighter to my left, fighting out of the red corner.
With a record of
4 - 0 - 0, fighting out of Sydney, Carlos Penagos!
And introducing the fighter to my right, fighting out of the blue corner.
With a record of
2 - 0 - 0, fighting out of Sydney, Kyle Wright!
The judges for this bout are Summer Carpenter, Skip Squint and Bruno Hogan.
The bell rings for round one and we are underway!
Penagos waving his hands out in front of him, looking to distract Wright.
Penagos throws a combination but it was largely blocked by Wright.
Penagos looks to land a right hand but Wright moved out of range.
Wright slips a jab from Penagos.
Wright cracks Penagos with an open hand slap.
Penagos misses with a two punch combination.
Wright connects nicely with a jab. Noted by the judges no doubt.
Penagos lands a two punch combo.
It looks like Kyle Wright has been cut.
Wright misses with a hook. Penagos ducked under it nicely.
Penagos throws a combination but it was largely blocked by Wright.
Penagos looks to score with a combo but nothing lands.
Penagos misses with a series of wild punches.
Penagos misses with a body shot.
Wright throws a series of punches but Penagos moves out of range.
Penagos throws the left hand but Wright avoids the punch easily.
Wright lands an overhand right.
The crowd are loving this. Great action here.
Wright lands three nice shots there - that looked like it hurt!
Wright throws a jab but it's blocked by Penagos.
Nice body punch from Penagos.
Penagos rushes forward with a series of wild hooks but Wright moves out of range and avoids them all easily.
Wright rushes Penagos and presses him up against the cage.
Penagos lands a left hand.
That's one minute gone in the round.
Wright breaks the clinch and we return to the middle of the mat.
Penagos fails to land with the punch combination there - jab, cross, hook, miss, miss, miss.
Wright fails to land with a series of punches.
Wright falls off balance throwing a combination
and Penagos counters with a three punch combination, finished off with a leg kick. Nice work.
Left hook, right uppercut from Wright.
Wright throws a predictable looking body shot
letting Penagos counter with a right hand.
Penagos misses with a wild body shot.
Wright takes one on the button.
Penagos scores with a body shot.
The crowd are loving this. Great action here.
Wright throws a right hand that Penagos ducks under and follows up with a left that Penagos also avoids with ease.
Wright throws a left and a right that both miss
letting Penagos counter with a right hand.
Wright looks gassed!
Wright fails to land with the punch combination there - jab, cross, hook, miss, miss, miss.
Wright looks to land a combination but Penagos avoids it well.
Penagos connects with a looping left hand that seems like it dazed Wright momentarily.
Penagos staying out of range there.
Penagos lands a pitter patter jab to the forehead of his opponent.
That has opened up Kyle Wright's cut even more.
Penagos fakes a jab and then connects with a hook.
Wright is pinned up against the cage taking some big shots here. The referee is looking closely deciding whether he should stop the fight.
Wright is rocked!
Wright tries to get into range but Penagos steps to the side and lands a beautiful hook that drops Wright! He's faceplanted into the mat, ass in the air... he's out cold! That's an image he won't want to show his grandkids when he gets older! Penagos scores the big KO victory!
Ladies and gentlemen, after 2:05 of round 1, we have a winner by way of KO (Punch). Carlos Penagos!
|
|
|
|
|
|
|
|
|
|
|
|
|
|
|
|
|
|
|
|
|
|
|
| S |
C
A |
G |
S |
C
B |
G |
|
S |
C |
G |
|
energy
A | B |
|
hype
A | B |
|
pop
A | B |
|
mgr
A | B |
|
FIGHT
RATING
100% |
|
|
|
|
|
|
|
|
|
|
