 |
UFL 2: PBP Commentary |
Undercard bout
|
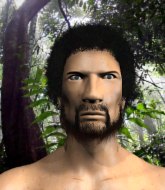
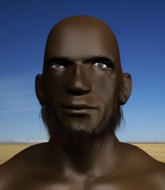
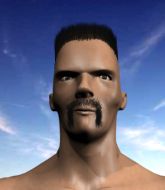
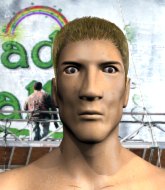
Coming up we have a welterweight MMA rules bout between Finn Balor (ranked 0 p4p, 0 weight class) and Cosma Svendsen (ranked 0 p4p, 0 weight class). Svendsen has chosen Rocky as his entrance music. Cosma Svendsen has the better chin. Will he look to stand and bang today?
 |
|
 |
| 187 cm
21
178 lbs
2 - 1 - 0 |
|
190 cm
20
180 lbs
3 - 7 - 0 |
BJJ Blue Belt
Brawler
Cuts easily |
|
BJJ Blue Belt
Brawler
Determined |
|
| |
|
Ladies and gentlemen. This fight is 3 rounds, in the welterweight division.
Introducing the fighter to my left, fighting out of the red corner.
With a record of
2 - 1 - 0, fighting out of Amsterdam, Finn Balor!
And introducing the fighter to my right, fighting out of the blue corner.
With a record of
3 - 7 - 0, fighting out of Amsterdam, Cosma Svendsen!
The judges for this bout are Saam Ante, Albert Achterberg and Aafke Stam.

The bell rings for round one and we are underway!
Svendsen is looking to clinch.
We've been told by Balor's head coaches at Fighter Haven that he's been working on his takedown defense in preparation for this fight.
Svendsen misses with a double jab.
Svendsen shoots for a takedown but Balor saw that one coming a mile off and avoided it easily.
Balor fails with a takedown attempt.
Svendsen scores with a nice one two combo and darts back out of range to avoid anything coming in the opposite direction.
Balor shoots for a double leg takedown but Svendsen sprawls well. He's pushed Balor's face into the mat and manages to get back to his feet relatively easily.
Svendsen pulls out of a head kick attempt.
Balor is trying hard to land a takedown here. Svendsen sprawls well and keeps this one on the feet.
Svendsen with the counter takedown but Balor avoids it easily.
That's three failed takedown attempts in the round for Finn Balor. That's going to take a lot out of him.
We've had a slow start to the round here - hopefully the action picks up.
Svendsen looking to throw a kick but he's pulled out of it.
Finn Balor seems to be the more aggressive standup fighter in this bout.
Some wild striking there from Balor.

Svendsen clinches.

That's one minute gone in the round.
Balor fails to pull guard.
Svendsen wants to take the fight to the mat but Balor manages to get underhooks and keep the fight in the clinch.
Svendsen taking a breather.
Some stalling of biblical proportions here from Svendsen.
Svendsen gets underhooks to prevent Balor's takedown attempt.
Svendsen being controlled against the cage.
Balor is breathing heavily.
Balor is working on a leg, looking for a takedown but Svendsen is defending well.
Svendsen blocks a couple of punches on the inside.
Svendsen can't get the takedown.

That's two minutes gone in the round.
A few boos can be heard. I'm sure they will multiply if the fighters don't pick up the pace.
Svendsen is trying to pull guard but being pressed up against the cage enables Balor to keep the fight standing.
Balor keeps control of Svendsen as he tries to wriggle out of the double underhooks.
Balor creates a bit of space for himself and sneaks an elbow through Svendsen's defenses.
Balor is trying to pull guard but being pressed up against the cage enables Svendsen to keep the fight standing.
The referee calls for Svendsen to work.
Svendsen missing with knees to the body.
Balor can't get the takedown.

Svendsen pulls Balor into guard.

Svendsen is looking for a triangle but Balor pushes his legs off easily.
Svendsen wants to sweep but no luck.

That's three minutes gone in the round.
Svendsen wants to control here, rather than go for any submissions from the bottom. At least for now.
Svendsen keeping moving, preventing Balor from controlling successfully.
Balor is looking to stand up but Svendsen won't let him.
Svendsen keeping moving, preventing Balor from controlling successfully.
The referee must be thinking about standing these guys back up.
Balor won't allow Svendsen to sweep him here.

The referee decides to stand the fighters back up.
Svendsen is trying hard to land a takedown here. Balor sprawls well and keeps this one on the feet.
Svendsen tries to score a power double leg takedown but Balor sees that one coming and sprawls well. That will dishearten Svendsen somewhat.

That's four minutes gone in the round.
The crowd are starting to boo a lack of action.
Balor swings wildly with a couple of big hooks
and Svendsen counters with a three punch combo that has Balor backing up. Balor nods at Svendsen to acknowledge the strikes.
Svendsen goes for a double leg but Balor avoids the attempt and the two fighters end up clinched against the cage as Balor continues to drive forward.
Svendsen moves out of range as Balor throws a body kick.
Svendsen scores with a shot to the body.
Svendsen feints a jab promting Balor to slip. Svendsen then demonstrates his capabilities by jabbing again. Balor slips again and ducks right into an uppercut.
Balor slaps away a takedown attempt from Svendsen, before circling back to the center of the mat.
Svendsen throws a head kick that misses.
The crowd thankful this round is nearly over.
Svendsen gets a clinch.
Svendsen pulls guard successfully.
And thats the end of the round the fighters go back to their corners.
Cosma Svendsen dominated that round.
The fighters' corners scream their final instructions, as the referee calls time. Here we go, back to the action!

Svendsen fails with the takedown.

Balor moves into range and clinches up with Svendsen.
Balor stalling in the clinch.
Balor controlling the action here for a moment.
Svendsen drags the fight down to the ground.
We've had a slow start to the round here - hopefully the action picks up.
Balor wanted to stand there but Svendsen had control of the position.
Balor throwing strikes from guard but Svendsen blocks nicely.
That's one minute gone in the round.

Svendsen has managed to wall walk up one of the corner posts to get back to his feet. Balor is pushing him up against the cage, looking to control the position.
Both fighters are absolutely exhausted here.
Balor has a body lock and is looking for a takedown. Svendsen is bouncing around trying to prevent the takedown and somehow he has indeed managed to stay on his feet.
Svendsen lands a hook that snaps the head of Balor backwards.
Svendsen manages to pull guard.
Balor is looking to pass into half guard but Svendsen pushes him away with his feet and jumps on top - now Svendsen is in guard.

Svendsen postures up to throw the ground and pound strikes but they don't connect.
Svendsen passes easily into side control. Nice work.

Svendsen decides to stand back up.
That's two minutes gone in the round.
Balor tries to clinch but Svendsen is having none of it.
Balor keeps the fight standing with a nice sprawl.
Balor gets tackled into the cage by Svendsen. Svendsen maintains the clinch.
Wooooo! Give it up for these two warriors! They are putting on a show!
A battle for position here, against the cage.
Svendsen displaying some good clinch control by pressing Balor up against the cage.
Svendsen throws a knee to the head but misses.
Svendsen pulls guard effortlessly.
That's three minutes gone in the round.
Balor trying to pass the guard but can't manage it just yet.
Svendsen managing to control the position.
Svendsen is looking to stand up but Balor isn't so interested in that idea.
That's four minutes gone in the round.
The crowd are getting on the fighters' backs, as the pace has dropped off in the last minute or so.
Balor passes Svendsen's left leg - he's now in half guard.
Balor thows a wild elbow that connects with the canvas.

Balor decides to return to a standing position.
Svendsen moves into the clinch successfully.
Boooooooooooooooooooo!!! God, this has been a terrible round. Come on you two, sort yourselves out!
Svendsen tries for a takedown but Balor manages to get underhooks.
Finn Balor has stuffed three takedown attempts in the round now. That's going to take a lot out of Cosma Svendsen.
Balor misses with a punch on the inside.
Svendsen wants to get back to striking at distance but Balor won't allow it.
And thats the end of the round the fighters go back to their corners.
Cosma Svendsen showed his class in that round. I'd imagine he'll take it on all the scorecards.
The minute break is over - no more time for sponges and pep talks - back to the action! Let's get this one finished - here comes the final round!

Svendsen gets to the clinch - let's see what his plan is here.
Balor is trying to pull guard but Svendsen turns him against the cage and we stay in the clinch.
Balor cracks Svendsen with a nice body shot.
Svendsen has been the more effective fighter overall so far.
Svendsen slowing the pace effectively.
With the fighters up against the cage, Balor throws an elbow but misses.
Balor goes for a takedown in the clinch but Svendsen prevents it.
Balor prevents Svendsen from breaking the clinch.
Svendsen has had enough of the clinch and is looking to separate.
Both fighters are breathing heavily.
We've had a slow start to the round here - hopefully the action picks up.
Svendsen letting Balor take a breather here.
Balor wants to get back to striking at distance but Svendsen won't allow it.
Balor blocks a knee to the body. He'll have a nicely bruised forearm in the morning.
Cosma Svendsen seems to be working more effectively in the clinch in the fight so far.
That's one minute gone in the round.
Svendsen drags the fight down to the ground.
Balor stands and steps away. Svendsen gets to his feet too and we're back to the striking game.
Balor falls off balance throwing a combination
and Svendsen counters with a one-two to the body.
Svendsen wants to land a leg kick but Balor is out of range.
Svendsen steps to the side to avoid the strikes from Balor.
Svendsen rushes Balor and presses him up against the cage.
A battle for position here, against the cage.
Svendsen drags the fight down to the ground.
Svendsen is looking to get back to his feet but can't, whilst Balor is controlling him.
That's two minutes gone in the round.
Svendsen is looking for a triangle but Balor pushes his legs off easily.
Balor trying to control but Svendsen is working from the bottom.
Balor won't allow Svendsen to sweep him here.
Svendsen pulls Balor in close to prevent any damage.
The fighters are pressed up against the cage, both looking to find a bit of space to work.
Svendsen is looking to get back to his feet but can't, whilst Balor is controlling him.
Svendsen pulls Balor in to control the position.
That's three minutes gone in the round.
The referee has motioned to the fighters to stand back up. He just wasn't happy with the level of activity.
Svendsen shoots in looking for a double leg takedown. Balor defends it nicely.
Svendsen shoots in but no luck this time.
Balor fakes a head shot and lands one to the body.
Balor shoots for a double leg takedown but Svendsen sprawls well. He's pushed Balor's face into the mat and manages to get back to his feet relatively easily.
That's three failed takedown attempts in the round for Finn Balor. That's going to take a lot out of him.
Svendsen is looking to slow Balor down with leg kicks.
Svendsen fails with a takedown attempt.
Balor tries to counter by clinching up but Svendsen breaks away and moves out of range.
That's four minutes gone in the round.
Svendsen clinches up with Balor and pushes him back against the cage.
Balor lands an elbow that stopped Svendsen in his tracks for a moment.
Svendsen manages to get underhooks and slows down the pace for a moment.
Balor is trying to maintain a safe position but Svendsen gets an underhook and turns Balor into the cage.
Svendsen has a body lock and is looking for a takedown. Balor is bouncing around trying to prevent the takedown and somehow he has indeed managed to stay on his feet.
Boooooooooooooooooooo!!! God, this has been a terrible round. Come on you two, sort yourselves out!
Balor avoids the elbow strike from Svendsen, against the cage.
Svendsen tries to score a body lock takedown but Balor shows good agility there to stay on his feet.
Finn Balor has stepped it up - he knows he needs a finish here!
Cosma Svendsen is fighting for a decision - hopefully he's judged it right and he's actually winning the fight.
Balor is looking to score with knees to the body. Maybe he'll change it up and go body then head. Svendsen is defending well for now.
And that's the end of the fight!
Cosma Svendsen comfortably won the final round on my scorecard.
Well Svendsen has outworked and out performed his opponent in all aspects of the game today. He was simply too good and the decision should be no more than a formality. Over to the ring announcer for the scorecards.
Ladies and gentlemen, after 3 rounds of action, we go to the scorecards for a decision.
Judge Saam Ante scores the fight 27:30
Judge Albert Achterberg scores the fight 27:30
Judge Aafke Stam scores the fight 27:30
In favor of your winner, by unanimous decision... Cosma Svendsen!
A very excited looking Cosma Svendsen made sure he remembered to thank all the fans both in the arena and on the internet. He said all the coolest people spend all day on MMA websites, which got a big reaction.
|
|
|
|
|
|
|
|
|
|
|
|
|
|
|
|
|
|
|
|
|
|
|
| S |
C
A |
G |
S |
C
B |
G |
|
S |
C |
G |
|
energy
A | B |
|
hype
A | B |
|
pop
A | B |
|
mgr
A | B |
|
FIGHT
RATING
31% |
|
|
|
|
|
|
|
Undercard bout
|
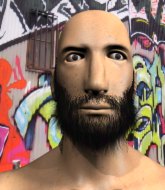
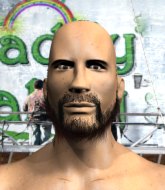
Coming up we have a bantamweight MMA rules bout between Chris Bertram (ranked 0 p4p, 0 weight class) and Andre Hendrix (ranked 0 p4p, 0 weight class). The crowd seem to be enjoying Hendrix's choice of entrance music: Rage Against the Machine - Renegades of Funk. On his way into the cage it seems that Chris Bertram has been attacked by a crazed fan! It looks like it might have been the just bleed guy! Luckily Chris Bertram seems to be OK! I thought that lunatic was in prison!?
 |
|
 |
| 155 cm
25
140 lbs
1 - 0 - 0 |
|
150 cm
18
147 lbs
1 - 0 - 0 |
BJJ White Belt
Great elbows
Good chin |
|
Good takedowns
Brawler
Very confident |
|
| |
|
Ladies and gentlemen. This fight is 5 rounds, in the bantamweight division.
Introducing the fighter to my left, fighting out of the red corner.
With a record of
1 - 0 - 0, fighting out of Amsterdam, Chris Bertram!
And introducing the fighter to my right, fighting out of the blue corner.
With a record of
1 - 0 - 0, fighting out of Amsterdam, Andre Hendrix!
The judges for this bout are Paul Aken, Aafke Stam and Radbod Blank.
The bell rings for round one and we are underway!
No luck for Hendrix with that takedown attempt.
Bertram rushes Hendrix and presses him up against the cage.
Bertram tries a shoulder strike but it doesn't do any damage.
Nice elbow from Bertram.
A head punch on the inside from Bertram fails to land.
Bertram could do with losing a few pounds - he looks very soft around the mid section, to put it politely.
Bertram's corner are urging him to control the action in the clinch for a moment, rather than mount any serious offense. I'm sure the crowd appreciate those instructions... not.
Bertram working aggressively here.
Bertram comes over the top with an elbow. That landed flush.
We've had a slow start to the round here - hopefully the action picks up.
Hendrix takes an elbow to the temple.
Bertram just leaning against Hendrix, taking a breather.
Hendrix jumps guard but Bertram stands there with Hendrix around his waist. Hendrix gives up and drops back to his feet. We remain in the clinch.
Hendrix takes an elbow to the forehead.
That's one minute gone in the round.
Hendrix fails to pull the fight into his guard.
Chris Bertram has stuffed three takedown attempts in the round now. That's going to take a lot out of Andre Hendrix.
Bertram lands a glancing elbow in the clinch.
Bertram gets an overhook and lands an elbow to the side of the head.
Hendrix blocks a body shot from Bertram.
Nice elbow from Bertram.
Bertram throws a head punch that misses.
A nice glancing elbow lands by Bertram.
Hendrix takes an elbow to the temple.
Bertram lands an elbow inside that Hendrix shrugs off.
Bertram gets an overhook and lands an elbow to the side of the head.

Hendrix is rocked!
Bertram scores with an uppercut up the middle.
Hendrix is still on wobbly legs! Can Bertram finish him?
Bertram lands with a short shot to the head.
Wooooo! Give it up for these two warriors! They are putting on a show!
Bertram with the Thai clinch. He's looking to land a big knee but he's not managed it this time.
Bertram is looking to score with knees to the body. Maybe he'll change it up and go body then head. Hendrix is defending well for now.
Nice elbow from Bertram.
Bertram lands an elbow that stopped Hendrix in his tracks for a moment.
Bertram pulls back and lands a big elbow that stuns Hendrix! Bertram unloads with more strikes and Hendrix sinks to his knees! This one is all over!
Ladies and gentlemen, after 1:57 of round 1, we have a winner by way of TKO (Strikes). Chris Bertram!
|
|
|
|
|
|
|
|
|
|
|
|
|
|
|
|
|
|
|
|
|
|
|
| S |
C
A |
G |
S |
C
B |
G |
|
S |
C |
G |
|
energy
A | B |
|
hype
A | B |
|
pop
A | B |
|
mgr
A | B |
|
FIGHT
RATING
55% |
|
|
|
|
|
|
|
Undercard bout
|
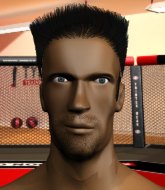
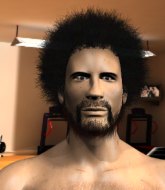
Coming up we have a light heavyweight MMA rules bout between Lebron James (ranked 0 p4p, 0 weight class) and Sean Tooma (ranked 0 p4p, 0 weight class). Tooma is bouncing up and down as he enters the arena, backed by Blood simple- Straight Hate. Sean Tooma will no doubt be trying to keep this one on the feet, where he has a distinct advantage.
 |
|
 |
| 200 cm
25
212 lbs
0 - 0 - 0 |
|
190 cm
22
195 lbs
2 - 0 - 0 |
Decent wrestler
Brawler
Granite chin |
|
BJJ White Belt
Basic striking
Enjoys gardening |
|
| |
|
Ladies and gentlemen. This fight is 5 rounds, for the light heavyweight championship of the world!
Introducing the champion to my left, fighting out of the red corner.
With a record of
0 - 0 - 0, fighting out of Amsterdam, Lebron James!
And introducing the challenger to my right, fighting out of the blue corner.
With a record of
2 - 0 - 0, fighting out of Amsterdam, Sean Tooma!
The judges for this bout are Radbod Blank, Paulsen Ambrosius and Wagner Zegers.
The bell rings for round one and we are underway!
Tooma will need to tighten up his combinations if he doesn't want to gas himself out, swinging at thin air.
Tooma looks to land a combination but James avoids it well.
James drives through and clinches with Tooma against the cage.
Tooma wants the takedown. James is fighting it off but Tooma persists and manages to bring the fight to the ground, ending up in James's guard against the cage.
James throwing strikes off his back to little effect.
Tooma scores with a decent looking elbow strike.
James has a closed guard, preventing anything of note from happening. Perhaps he's looking to stall.
We've had a slow start to the round here - hopefully the action picks up.
James wants to stand and escape but Tooma is having none of it.
James is avoiding any damage by keeping wrist control.
That's one minute gone in the round.
Tooma has decided he wants to stand but the closed guard of James is proving hard to escape from.
The ref stands the fighters back up due to a lack of activity.
James rushes Tooma and pushes him back against the cage in a clinch.
Tooma drops down for a takedown but doesn't get it.
Tooma has James pressed up against the cage and is working for takedown. James manages to improve position though and keeps the fight standing.
James taking a break, stalling in the clinch.
James has Tooma pushed against the cage.
Tooma changes levels and goes for a takedown here. James fights it off and pushes away nicely.
Lebron James has stuffed three takedown attempts in the round now. That's going to take a lot out of Sean Tooma.
That's two minutes gone in the round.
Neither fighter has done anything of merit for a good minute or two here and the crowd are not happy about it.
Tooma fakes a head shot and lands one to the body.

James closes the distance, clinches up and gets a nice trip takedown into side control. Very smooth.
Tooma is positioning himself to get back to half guard.
A lull in the action here as James stalls from top position.
James working away.
That's three minutes gone in the round.
James tries to advance to mount but Tooma denies him.
James landing strikes.
James scoring with punches from side control.
James decides to stand back up. James steps back and let's Tooma get back to his feet.
Tooma moves into range and throws a lovely three punch combination.

It looks like Lebron James has been cut.
Tooma throws a combination but it was largely blocked by James.
No joy there for Tooma, who threw a few shots but didn't land.
That's four minutes gone in the round.
Tooma misses with the combination.
James on the wrong end of a nice jab.
Tooma lands a jab followed by a nice looking cross.
Wooooo! Give it up for these two warriors! They are putting on a show!
James closes the distance and gets a double leg, slamming Tooma to the mat! Tooma manages to get full guard.
Tooma working a defensive guard but James passes into half guard.
Neither fighter is being very active at the moment, with James in particular looking to stall.
Tooma is pressing down on James's left leg trying to get back to full guard. He's managed it.
James is breathing heavily.
James slows down the pace of the fight, as he sits in guard.
And thats the end of the round the fighters go back to their corners.
Sean Tooma dominated that round.
The cut man is working on Lebron James's cut.
That's time! Back to the action!
Tooma misses with a few strikes there.
James dodges the punch combination from Tooma.
James shoots in looking for a single leg takedown. Tooma is trying to defend but James finishes it well and ends up in half guard. Let's see if he can advance position further.
Tooma looks like he's trying to stand up.
James performing his best blanket impression for a moment.
We've had a slow start to the round here - hopefully the action picks up.
Tooma wants to get back to his feet.
That's one minute gone in the round.
Lebron James overall seems to be getting the better of the ground position in the fight so far.
Still in half guard, James seems content to control.
The referee must be thinking about standing these guys back up.
The referee has decided to stand the fighters back up, so we'll restart on the feet.
Sean Tooma seems to be the more aggressive standup fighter in this bout.
Tooma moves into range and throws a lovely three punch combination.
That's two minutes gone in the round.
James fails to land the takedown.
Both fighters are absolutely exhausted here.
Tooma throws a right hand that James ducks under and follows up with a left that James also avoids with ease.
Tooma gets caught on his heels momentarily as he allows James to score an easy takedown into full guard.
James stops Tooma from standing up.
The ref warns both fighters not to hold the cage as they work up against the meshing.
James wants to stand but Tooma is controlling his posture from full guard.
James stops Tooma from standing up.
That's three minutes gone in the round.
Tooma looking to control.
The step up in weight doesn't seem to be a problem for Tooma. He's performing admirably here against the bigger man.
James looking to pass the guard.
James controlling from the top position.
James postures up and lands a big shot to Tooma's brow.
Tooma trying to control the position.
The referee has decided to stand the fighters back up, so we'll restart on the feet.
James shoots in looking for a double leg takedown. Tooma defends it nicely.
That's four minutes gone in the round.
The crowd are showing their displeasure at the lack of action as loud boos ring out around the arena.
Left hook, right uppercut from Tooma.
James fails with an attempt to clinch.
James changes levels and drives through with a really nice takedown into side control. Tooma looks really pissed at himself for not defending that better.
Tooma is trying to stand back up. He's worked his way up against the cage but James has just dragged him back down to the mat.
James controlling the position from side mount.
The strikes coming from James are missing the target in this wave of attacks.
And thats the end of the round the fighters go back to their corners.
Sean Tooma showed his class in that round. I'd imagine he'll take it on all the scorecards.
The cut man is working on Lebron James's cut.
OK. That's time! The bell goes and we're back to the action.
Tooma closes the distance and lands a one-two.
Tooma slips a jab from James.
Tooma throws a right and a left that both miss.
Tooma jabs at James's body.
James shoots in for a takedown but Tooma shows good takedown defense.
Tooma lands with a nice combination. James backs away looking to recover.
Tooma feints a jab promting James to slip. Tooma then demonstrates his capabilities by jabbing again. James slips again and ducks right into an uppercut.
Tooma tests James's chin there with a solid looking shot.
The crowd cheering loudly, showing their appreciation for the quality fight we're seeing here.
Tooma punishes James's body with a nice straight punch.
Both fighters are breathing heavily.
Tooma scores with a nice looking left hook and follows it up with an uppercut!
James throws a loose over hand right and dives in with a double leg takedown. Tooma tries to sprawl but it's too late and the fighters hit the mat. James is in Tooma's guard.
James slows down the pace of the fight for a moment. He'll need to remain active if he doesn't want to see the fight stood back up.
That's one minute gone in the round.
Tooma wants to get back to his feet but James is in a dominant position and won't allow it.
We get told so often about how wrestlers don't like to be on their backs. Let's see if Tooma can do anything to dispel that myth.
James sneaks a leg through and gets to half guard. That was like a knife through butter how easily he passed Tooma's guard.
Tooma wants to control but James is keeping busy.
That's two minutes gone in the round.
Well. There's a bit of a lull in the action here and the crowd are starting to get restless.
James is trying to get back to his feet now but his leg is trapped.
The ref stands the fighters back up due to a lack of activity.
James tries to clinch but Tooma moves out of range.
A punch combination from Tooma misses.
James wants to clinch up but Tooma keeps it at a distance.
James dives in and grabs Tooma's left leg, looking for a takedown. Tooma pushes down on James's head and hops out.
Tooma pushes forward with a 1-2 combination that forces James back to the cage. Tooma follows up with a solid lead hook to the liver.
Nice shot lands for Tooma.
Tooma lands a jab. Then a cross. Then finally a nice hook to the body. Good work there by Tooma.
Tooma throws a combination but comes up with nothing but fresh air.
Sloppy strikes from James. Those never looked like landing.
That's three minutes gone in the round.
Some wild striking there from Tooma.
A right-left combo lands from Tooma.
James takes a really solid shot there but just smiles back and shrugs his shoulders.
Lebron James is looking to throw some combinations by the looks of things.
Tooma shuffles to his left behind two crisp jabs. James eats them both and turns towards Tooma to reposition himself and eats a stinging right hand-left hook combo.
Tooma keeps the fight standing with a nice sprawl.
That's three failed takedown attempts in the round for Lebron James. That's going to take a lot out of him.
James slips a jab and a cross from Tooma.
Sloppy strikes from Tooma. Those never looked like landing.
Some wild striking there from Tooma.
Jab, cross, leg kick. Nice combination by Tooma!
That's four minutes gone in the round.
This has been an exciting period of action!
James has closed the distance and engaged Tooma in a clinch.
James slowing the pace effectively.
James tries for a takedown. No joy.
Tooma tries to circle away but James has him pinned against the cage.
Tooma wants a takedown.
James gets the body lock takedown. After a quick scramble, Tooma regains guard.
James trying to control the position from guard on top but Tooma is wriggling around, looking for whatever he can.
And thats the end of the round the fighters go back to their corners.
Sean Tooma really dominated that round.
The cut man is working on Lebron James's cut.
That's the end of the interval. I'm sure that seemed a lot quicker than a minute for our two fighters! Back to the action.

Tooma scores with a shot to the body.
James scores with a nice takedown into half guard. Let's see what he's got on the ground.
James takes a deep breath and rests his weight momentarily on top of his opponent, to control the position.
Tooma wants to control but James is keeping busy.
We've had a slow start to the round here - hopefully the action picks up.
Tooma scrambles, trying to get to his feet, but James manages to mount him!
James sitting in mount, just looking to control for the moment.
It's got to the stage where if one of these guys blows hard enough, the other might fall over.
That's one minute gone in the round.
James seems to have a rather negative gameplan on the ground. He seems keen to just score the takedown and hold down Tooma for as long as he can get away with.
Tooma is wriggling around trying to escape.
James controlling the pace for now.
James lands a nice shot to the head.
James connects with a couple of good shots from mount.
That's two minutes gone in the round.

James has control of Tooma's right arm, working for a kimura. It's a bit of a token attempt though and Tooma regains control of the situation pretty easily.
Tooma is trying to stand.
Tooma has been the more effective fighter overall so far.
James looking to control and managing it successfully.
Tooma tries to reverse the position but James maintains control.
James looking to control and managing it successfully.
That's three minutes gone in the round.
Tooma is in a horrible position here. James smacks him with another shot as he tries to escape the position.
Tooma tries to lock up and control but James gives him a forearm to the face and pushes him away.
Tooma tries to reverse the position but James maintains control.
James with a couple of short strikes.
Tooma in a bad spot here, taking shots to the head.
Tooma takes a big shot to the head but keeps on trying to improve his position.
That's four minutes gone in the round.
James content just to control the position here.
A nice elbow there by James.
Tooma is rocked!
James looking to control and managing it successfully.
Tooma is still in real trouble! Can James finish him?
James has hold of Tooma's left arm, perhaps looking for a submission. The two fighters tussle over control of the isolated limb and Tooma manages to get his arm back to his side and away from danger.
James is dominating on the ground here - he's now on his opponent's back, looking to sink in the hooks. Tooma is in real trouble.
Tooma tries to escape the position.
And thats the end of the round the fighters go back to their corners.
Lebron James had his way with Sean Tooma in that round.
The cut man is working on Lebron James's cut.
The referee calls time. The cornermen exit stage left and we're back to business. This is the final round!

James tries a head kick but it misses.
Tooma seems to have recovered his senses.
Tooma throws a right and a left that James avoids nicely.
James shoots in for a takedown but doesn't get it.
Tooma ducks down and throws a hook to the body.
Sloppy strikes from James. Those never looked like landing.
Tooma throws out a powerful jab.
Tooma feints a straight left to the body, then turns around with a flashy move and hits Jamess jaw with a dramatic spinning back fist!
James has his head slapped from side to side by a 3 punch combination. That must have hurt him.
Tooma lets the fists fly and connects with a left straight followed by a right hook.
James takes a punch to the jaw and another one to the bread basket.
This has been an exciting period of action!
Tooma lands a right hook to the body.
Tooma jabs at James's body.
Tooma throws a loose over hand right and dives in with a double leg takedown. James tries to sprawl but it's too late and the fighters hit the mat. Tooma is in James's guard.
Both of our modern day gladiators look out of it here - a gruelling 5 rounds of action taking it's toll on them, no doubt.
Tooma preventing the sweep.
That's one minute gone in the round.
Tooma trying to control but James is working from the bottom.
James lands with a heel strike from the guard.
Tooma trying to control the position from guard on top but James is wriggling around, looking for whatever he can.
Tooma slows down the pace of the fight for a moment. He'll need to remain active if he doesn't want to see the fight stood back up.
Tooma is trying to tuck his arms in to keep them safe but James has managed to isolate one of them and has got a loose triangle. Tooma is looking to defend but James has done well to lock his legs together - this could be big trouble for Tooma! James pulls down on the head and a little smile comes across his face - he knows he's got it. Yep, Tooma taps out and this one is all over!
Ladies and gentlemen, after 1:59 of round 5, we have a winner by way of Submission (Triangle). Lebron James!
Lebron James is the new light heavyweight champion!
Sean Tooma spoke after the fight, saying 'Well guys....what can I say?. I left an opening exposed and he exploited it. It won't happen in the rematch, which you should expect very soon'.
|
|
|
|
|
|
|
|
|
|
|
|
|
|
|
|
|
|
|
|
|
|
|
| S |
C
A |
G |
S |
C
B |
G |
|
S |
C |
G |
|
energy
A | B |
|
hype
A | B |
|
pop
A | B |
|
mgr
A | B |
|
FIGHT
RATING
54% |
|
|
|
|
|
|
|
Undercard bout
|
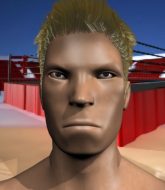
Coming up we have a middleweight MMA rules bout between Jackson Rodriguez (ranked 0 p4p, 0 weight class) and Jacare Souza (ranked 0 p4p, 0 weight class). Both these guys have solid standup skills and neither is particularly fantastic on the ground, so let's hope for a nice standup war!
 |
|
 |
| 194 cm
18
195 lbs
4 - 0 - 0 |
|
194 cm
25
195 lbs
2 - 0 - 0 |
BJJ White Belt
Solid boxing
Cardio machine |
|
BJJ White Belt
Excellent boxer
Solid chin |
|
| |
|
Ladies and gentlemen. This fight is 5 rounds, for the middleweight championship of the world!
Introducing the champion to my left, fighting out of the red corner.
With a record of
4 - 0 - 0, fighting out of Amsterdam, Jackson Rodriguez!
And introducing the challenger to my right, fighting out of the blue corner.
With a record of
2 - 0 - 0, fighting out of Amsterdam, Jacare Souza!
The judges for this bout are Radbod Blank, Paulsen Ambrosius and Saam Ante.
The bell rings for round one and we are underway!
Souza connects with a jab.
Rodriguez darts in and clinches Souza up against the cage.
Souza blocks a body shot from Rodriguez.
Rodriguez misses with the head strike.
Souza is trying to break the clinch but Rodriguez is controlling him.
Souza tries to break the clinch but Rodriguez is controlling the position.
Souza tries to break the clinch but Rodriguez is controlling the position.

Souza escapes the clinch and we're back to striking.
Souza misses with a series of wild punches.
Rodriguez half committed to a counter leg kick.
Rodriguez takes a shot right to the liver - Bas would have been proud of that punch.
Souza dips down and scores with a jab to the body.
We've had a slow start to the round here - hopefully the action picks up.
Souza catches Rodriguez with a nice straight right. He seems pissed - ooooh, it's on now! On like donkey kong!
Rodriguez misses with a body shot.
Rodriguez throws a shot from downtown. Souza moves away and avoids it.
Souza fakes a head shot and lands one to the body.
Rodriguez looks to score with a combo but nothing lands.
Wooooo! Give it up for these two warriors! They are putting on a show!
Rodriguez throws a nice looking combination but Souza bobs and weaves to avoid any damage.
That's one minute gone in the round.
Rodriguez looks to score with a jab to the body but Souza is just out of range.
Rodriguez has been working on his boxing with his coaches at McDojo in the buildup to the fight.
Rodriguez misses with a right hand
and Souza counters with a lovely straight right hand!
Souza slips under a jab from Rodriguez.
Rodriguez moves into range and clinches up with Souza.
Souza breaks the clinch and we're back to striking at distance.
Rodriguez drops his hands and takes a jab to the jaw for his troubles.
A slow jab from Rodriguez misses its intended target.
Rodriguez misses with a low kick.
Souza misses with a jab, cross combination.
Souza scores with a jab to the jaw.
This fight brought to you by 5M nutrition - it's mmmmm tasty. Nice jab by Rodriguez.
Rodriguez throws a hook to the body but it doesn't connect.
Souza doesn't fully commit to the body shot counter.
Rodriguez forces Souza back against the cage and clinches.
Rodriguez lands a body punch in the clinch.
The crowd are loving this. Great action here.
Rodriguez lands a shoulder strike.
Souza tries to circle away but Rodriguez has him pinned against the cage.
That's two minutes gone in the round.
Rodriguez goes for a body shot but it's blocked.
Souza tries to break the clinch but Rodriguez is controlling the position.
Souza takes a shot to the head.
Souza looks like he'd prefer to be striking at range right now.
Souza has had enough of the clinch but Rodriguez keeps him there for the moment.
Souza is trying to break the clinch but Rodriguez is controlling him.
Souza is trying to break the clinch but Rodriguez has him pressed against the cage.
Rodriguez tries a body shot but Souza blocks it.
Rodriguez prevents Souza from breaking the clinch.
Souza tries to break free but Rodriguez pushes him back against the cage.
Rodriguez cracks Souza with a nice body shot.
Rodriguez lands a hook that snaps the head of Souza backwards.
Souza is trying to break the clinch but Rodriguez has him pressed against the cage.
Rodriguez prevents Souza from breaking the clinch.
Souza blocks a body shot from Rodriguez.
That's three minutes gone in the round.
Souza looks like he'd prefer to be striking at range right now.
Souza is trying to break the clinch but Rodriguez is controlling him.
Rodriguez prevents Souza from breaking the clinch.
Souza wants to break the clinch but can't.
Rodriguez has Souza pressed against the cage, preventing Souza from circling away and getting back to striking at range.
Souza is looking to break free of the clinch but Rodriguez has double underhooks.
Souza tries to break the clinch but Rodriguez is controlling the position.
Souza looks like he'd prefer to be striking at range right now.
We've been informed that Souza has been working hard on his conditioning in the buildup to the fight.
Rodriguez fails to land with a short punch on the inside.
Rodriguez lands punches inside but they're not really causing much damage.
Rodriguez throws a head punch that misses.
Rodriguez goes for a body shot but it's blocked.
Rodriguez lands a right uppercut that snaps the head of Souza backwards.
Rodriguez pressing his opponent against the cage.
Souza is trying to break the clinch but Rodriguez is controlling him.
That's four minutes gone in the round.
Souza's head jolts backwards as he takes an uppercut right on the button!
Rodriguez can't find room to land a body shot as Souza controls the action.
Souza has had enough of the clinch and is looking to separate.
Souza has had enough of the clinch and is looking to separate.
Souza wants to strike at distance but he can't break free of the clinch.
Rodriguez misses with a short punch on the inside.
Souza is trying to break the clinch but Rodriguez is controlling him.
Souza tries to break free but Rodriguez pushes him back against the cage.
Souza tries to break free but Rodriguez pushes him back against the cage.
Rodriguez tries to land a shot to the body but it's blocked.
Souza's corner calls for him to break the clinch, which he does.
Souza bobs and weaves and unloads with a good uppercut.
Souza digs a good body shot into Rodriguez's ribs.
Rodriguez lands a slapping body shot.
And thats the end of the round the fighters go back to their corners.
Jackson Rodriguez dominated that round.
The fighters get back to their feet, the hooter sounds and we're back to the action!
Rodriguez pushes Souza up against the cage in a clinch.
Rodriguez keeps control of Souza as he tries to wriggle out of the double underhooks.
A nice left hand lands by Rodriguez.
Souza is trying to push Rodriguez away but Rodriguez has him pressed against the cage, so he's going nowhere.
Souza working hard to break the clinch.
Souza working hard to break the clinch.
Rodriguez holding his opponent close, against the cage.
Rodriguez lands with a short punch from the clinch.
Souza's corner calls for him to break the clinch, which he does.
Souza thuds a left hand into Rodriguez's body.
We've had a slow start to the round here - hopefully the action picks up.
Souza throws a wild combination but nothing lands.
Rodriguez scores with a body shot.
Rodriguez tries to clinch up
and Souza counters with a one-two to the body.
Souza is breathing heavily.
Souza staying out of range there.
Souza now looks to counter with a shot at the body.
That's one minute gone in the round.
Rodriguez jabbing away but nothing is landing.
Souza changes levels and scores with a jab to the body.
Rodriguez misses with a body shot. Nice footwork from Souza.
A little jabbing left from Souza on the counter but it doesn't find it's target.
Souza connects with a good right hand that stumbles Rodriguez. Rodriguez circles away out of range and recomposes himself.
Souza throws a body shot but no joy.
Rodriguez has taken the fight to the clinch.
Rodriguez tries to throw a body punch but Souza avoids it by throwing Rodriguez back against the cage.
Souza is looking to break free of the clinch but Rodriguez has double underhooks.
Souza is trying to break the clinch but Rodriguez is controlling him.
Rodriguez lands a body shot.
Souza manages to break the clinch.
Rodriguez wants to clinch up but Souza keeps it at a distance.
A low kick from Rodriguez misses
and Rodriguez takes a counter punch right on the button for his troubles.
Rodriguez staying out of range there.
Souza lands with a nice body punch.
Souza blocks a jab.
That's two minutes gone in the round.
Nice shot by Rodriguez.
Nice defenses there by Souza.
The crowd are loving this. Great action here.
Rodriguez misses with a hook.
Souza swings and misses with a hook to the body.
Rodriguez takes a shot right to the bread basket.
Rodriguez clinches up against the cage.
A short right from Rodriguez.
Souza manages to break the clinch.
Souza misses with a straight right.
Rodriguez on the wrong end of a decent looking cross there.
Jacare Souza seems to be the more aggressive standup fighter in this bout.
Souza throws a body punch but Rodriguez moves out of range.
The fighters circling - Rodriguez throws out the jab but it was never going to land.

Rodriguez cracks Souza with an uppercut from hell and Souza crumples to the canvas, he's out! Oh no, he's recovered and he's grabbed one of Rodriguez's legs and pulled him into guard. The ref thought about stopping it there but he's let it go - good reffing!
Souza is rocked!

It looks like Jacare Souza has been cut.
Rodriguez throws a big right hand that misses.
Rodriguez gets to his feet and steps away from his opponent.
That's three minutes gone in the round.
Rodriguez throws a looping overhand right but Souza ducks down to avoid it.
Rodriguez just misses with a punch to the body.
Rodriguez throws a combination but comes up with nothing but fresh air.
Souza doesn't fully commit to the body shot counter.
Souza swings for the body but Rodriguez moves out of range.
Rodriguez connects with a nice cross there... Souza is looking wobbly and Rodriguez recognises it - he's rushed in and lands two more brutal shots that send Souza to the canvas, out cold! A brutal finish to the fight - Rodriguez jumps onto the cage to celebrate with the crowd!
Ladies and gentlemen, after 3:21 of round 2, we have a winner by way of KO (Punches). Jackson Rodriguez!
Jackson Rodriguez retains his middleweight title!
After the fight, Jackson Rodriguez was humble in paying tribute to his opponent but made it clear he wants to go on to bigger and better things. It seemed to go down well with the crowd who cheered him loudly.
|
|
|
|
|
|
|
|
|
|
|
|
|
|
|
|
|
|
|
|
|
|
|
| S |
C
A |
G |
S |
C
B |
G |
|
S |
C |
G |
|
energy
A | B |
|
hype
A | B |
|
pop
A | B |
|
mgr
A | B |
|
FIGHT
RATING
48% |
|
|
|
|
|
|
|
Co-main event
|
|
|
|
Main event
|
Coming up we have a lightweight MMA rules bout between Vellun Pitopalvelu (ranked 0 p4p, 0 weight class) and Avery Slone (ranked 0 p4p, 0 weight class). Rumors backstage are that the fighters have been paid to keep it standing but we know that would never happen in MMA!
 |
|
 |
| 176 cm
18
158 lbs
6 - 0 - 0 |
|
150 cm
18
159 lbs
0 - 1 - 0 |
Decent wrestler
Counter fighter
KO power |
|
BJJ Blue Belt
Brawler
Solid chin |
|
| |
|
Ladies and gentlemen. This fight is 5 rounds, for the lightweight championship of the world!
Introducing the champion to my left, fighting out of the red corner.
With a record of
6 - 0 - 0, fighting out of Amsterdam, Vellun Pitopalvelu!
And introducing the challenger to my right, fighting out of the blue corner.
With a record of
0 - 1 - 0, fighting out of Amsterdam, Avery Slone!
The judges for this bout are Radbod Blank, Paulsen Ambrosius and Saam Ante.
The bell rings for round one and we are underway!
Pitopalvelu ducks down and throws a hook to the body.
Slone with a poor takedown
and Pitopalvelu counters with a lovely straight right hand!
It looks like Avery Slone has been cut.
A jab lands there for Pitopalvelu.
Slone walks straight into an uppercut. Luckily it didn't land flush.
Pitopalvelu circles away from the clinch attempt
and Pitopalvelu counters with a nice jab to the body that keeps Slone thinking.
Slone looks winded!
Slone gets his head snapped back by a nice shot there.
Pitopalvelu punishes Slone's body with a nice straight punch.
Slone has done a lot of speed work in the buildup to this fight.
Slone looks shocked there as he takes a right hand to the temple.
Nice shot by Pitopalvelu.
This is a great period of action - very entertaining stuff!
A shot to the liver by Pitopalvelu. Beautiful body shot.
Pitopalvelu lands a slapping body shot.
Vellun Pitopalvelu is looking to keep the fight on the feet at all costs.
That's one minute gone in the round.
Pitopalvelu lands a jab.
Slone is rocked!
Slone tries to get into range but Pitopalvelu steps to the side and lands a beautiful hook that drops Slone! He's faceplanted into the mat, ass in the air... he's out cold! That's an image he won't want to show his grandkids when he gets older! Pitopalvelu scores the big KO victory!
Ladies and gentlemen, after 1:14 of round 1, we have a winner by way of KO (Punch). Vellun Pitopalvelu!
Vellun Pitopalvelu retains his lightweight title!
Vellun Pitopalvelu decided to thank the fans in attendance for making a great atmosphere. It seemed to go down pretty well.
|
|
|
|
|
|
|
|
|
|
|
|
|
|
|
|
|
|
|
|
|
|
|
| S |
C
A |
G |
S |
C
B |
G |
|
S |
C |
G |
|
energy
A | B |
|
hype
A | B |
|
pop
A | B |
|
mgr
A | B |
|
FIGHT
RATING
66% |
|
|
|
|
|
|
|
|
|
|

