 |
Pacio Fight Night 21 PBP Commentary |
Undercard bout
|
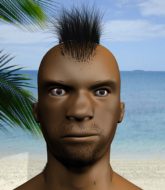
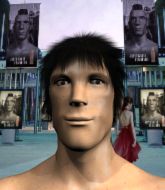
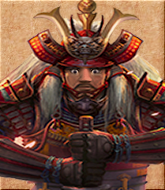
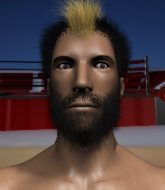
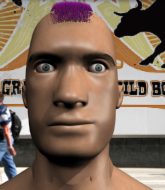
Coming up we have a heavyweight MMA rules bout between Rodolfo Cinotti (ranked 0 p4p, 0 weight class) and Marcin Kowalczyk (ranked 0 p4p, 0 weight class). These two fighters really are very evenly matched on the feet - it will be fascinating to see who can assert themselves in that aspect of the fight.
 |
|
 |
| 189 cm
21
245 lbs
4 - 2 - 0 |
|
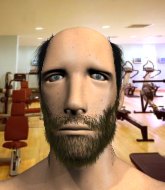
201 cm
25
242 lbs
5 - 7 - 0 |
Good wrestling
Solid boxing
Very quick |
|
BJJ White Belt
Good kicks
Determined |
|
| |
|
Ladies and gentlemen. This fight is 3 rounds, in the heavyweight division.
Introducing the fighter to my left, fighting out of the red corner.
With a record of
4 - 2 - 0, fighting out of Helsinki, Rodolfo Cinotti!
And introducing the fighter to my right, fighting out of the blue corner.
With a record of
5 - 7 - 0, fighting out of Tokyo, Marcin Kowalczyk!
The judges for this bout are Kenichi Hosakawa, Yuuki Gou and Sosuke Kotani.

The bell rings for round one and we are underway!
Kowalczyk throws a combination but it was largely blocked by Cinotti.
Good work by Kowalczyk as he checks the leg kick.
Kowalczyk scores with a jab. Cinotti acknowledges it with a nod of the head.
Cinotti has been talking about how he's improved his wrestling in the run up to the fight so let's see if that's enough to sway the balance.
Cinotti getting the better of the striking in that exchange.
Ouch! a nice leg kick from Cinotti, right into the meat.
Kowalczyk fails with an attempt to clinch.
A good leg kick by Cinotti.
Kowalczyk throws a leg kick that is checked

and Cinotti counters with a driving takedown into guard. Nice work there by Cinotti.
Cinotti lands a nice shot whilst sitting in his opponent's guard.
Cinotti lands a couple of digs.
We've seen a great period of action over the last minute or so - credit to both fighters for going all out!
Cinotti missing there with some ground and pound from the guard.
Cinotti working in close now, lands a nice elbow to the side of Kowalczyk's head.
Cinotti with a flurry of punches that miss.
Cinotti working some ground and pound from guard but it's not doing any damage.

That's one minute gone in the round.
Cinotti landing with the ground and pound.
Cinotti landing with the ground and pound.
Cinotti in full guard, throwing the ground and pound. No damage this time.
Cinotti tries to free his leg and advance position but Kowalczyk is retaining full guard.
Cinotti trying to land body shots but he keeps hitting the mat.
Cinotti cracks Kowalczyk with a solid left hand.
Cinotti has been looking to land a fair amount of strikes on the ground. He might be looking to soften his opponent up in order to work for a submission.
Kowalczyk keeping moving, preventing Cinotti from controlling successfully.
The fighters are pressed up against the cage, both looking to find a bit of space to work.
Cinotti throwing shots from guard but he's hitting more mat than opponent.
Cinotti connects with a couple of short punches.
The ref warns both fighters not to hold the cage as they work up against the meshing.

That's two minutes gone in the round.
Cinotti with a flurry of punches that miss.
Cinotti stands and throws Kowalczyk's legs to the side, diving into side control.
Cinotti working the ground and pound but Kowalczyk is defending the strikes.
Kowalczyk prevents Cinotti from improving position.
Cinotti wants to lay and pray for a moment but Kowalczyk keeps working.
Kowalczyk on the wrong end of some ground and pound.
Cinotti cracks Kowalczyk with a big elbow.

Cinotti is trying to get an arm triangle but Kowalczyk is defending well.
Kowalczyk taking a bit of punishment here - Cinotti scoring with strikes.

That's three minutes gone in the round.
Cinotti in side control, throwing shots but Kowalczyk defends.
Cinotti lands some shots froms side control.
Cinotti in side control, throwing shots but Kowalczyk defends.
Cinotti cracks Kowalczyk with a big elbow.
Cinotti is putting a hurting on Kowalczyk here, landing some big shots from side control.
Sloppy strikes there by Cinotti.
An elbow from Cinotti crashes against the mat.
Cinotti misses with an attempted head punch from side control.
The ground and pound from Cinotti seems to be hitting the mat more than his opponent.
Cinotti is chipping away with strikes.
Kowalczyk looks winded!
Cinotti lands a decent elbow from side control.
Kowalczyk taking punishment in the form of punches.

Kowalczyk is rocked!

It looks like Marcin Kowalczyk has been cut.
Cinotti scores with a big shot from side control... and another... and another! Oh Kowalczyk is done here - save him referee! More strikes land and eventually the ref does step in and Cinotti can finally stop beating on his defenseless opponent!
Ladies and gentlemen, after 4:56 of round 1, we have a winner by way of TKO (Strikes). Rodolfo Cinotti!
|
|
|
|
|
|
|
|
|
|
|
|
|
|
|
|
|
|
|
|
|
|
|
| S |
C
A |
G |
S |
C
B |
G |
|
S |
C |
G |
|
energy
A | B |
|
hype
A | B |
|
pop
A | B |
|
mgr
A | B |
|
FIGHT
RATING
47% |
|
|
|
|
|
|
|
Undercard bout
|
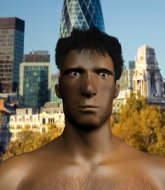
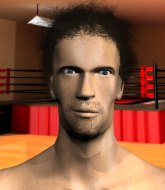
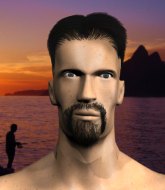
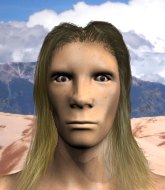
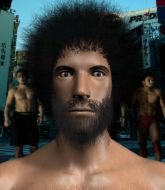
Coming up we have a welterweight MMA rules bout between Shin Murakami (ranked 0 p4p, 0 weight class) and Katsu Kazuhiro (ranked 0 p4p, 0 weight class). The crowd seem to be enjoying Kazuhiro's choice of entrance music: BUSHIDO. Rumors backstage are that the fighters have been paid to keep it standing but we know that would never happen in MMA!
 |
|
 |
| 170 cm
25
170 lbs
4 - 3 - 0 |
|
178 cm
19
178 lbs
4 - 1 - 0 |
BJJ Blue Belt
Solid Muay Thai
KO power |
|
BJJ Blue Belt
Decent boxing
Very confident |
|
| |
|
Ladies and gentlemen. This fight is 3 rounds, in the welterweight division.
Introducing the fighter to my left, fighting out of the red corner.
With a record of
4 - 3 - 0, fighting out of Tokyo, Shin Murakami!
And introducing the fighter to my right, fighting out of the blue corner.
With a record of
4 - 1 - 0, fighting out of New York, Katsu Kazuhiro!
The judges for this bout are Shigeki Sano, Yukihiro Yamamoto and Ren Mimura.
The bell rings for round one and we are underway!
Murakami doesn't react quick enough there as he takes a shot to the body.
Kazuhiro scores with a hook to the body. Murakami takes a step back and tries to catch his breath.
Murakami tries to close the distance and clinch up against the cage but Kazuhiro paws at him with a jab and circles away.
Murakami throws a half hearted mid kick.
Murakami tries to clinch there but Kazuhiro circles away.
Murakami shakes his hands off, looking to compose himself, but takes a jab to the jaw whilst he does it.
Kazuhiro sizes up Murakami with a pawing jab and scores with a straight right down the middle.
Murakami tries to clinch but is not successful on this occasion.
Kazuhiro lands a slapping body shot.
Kazuhiro cracks a nice hook into Murakami's ribs.
Kazuhiro scores with a sloppy punch to the body. Not much technique there but it did the business.
The crowd cheers as Kazuhiro lands an impressive looking overhand right. Murakami doesn't seem phased though.
The crowd cheering loudly, showing their appreciation for the quality fight we're seeing here.
Murakami thows a leg kick but Kazuhiro checks it
and Kazuhiro counters with a straight right hand.
Kazuhiro circles away from the clinch attempt.
Murakami fakes high and shoots in for a takedown but Kazuhiro avoids it really well and circles away.
Kazuhiro has been spending a lot of time sparring his boxing in the run up to the fight, trying to sharpen up those hands and look for a knockout.
That's one minute gone in the round.
Kazuhiro pushes forward with a 1-2 combination that forces Murakami back to the cage. Kazuhiro follows up with a solid lead hook to the liver.
Murakami fails with the takedown
and Kazuhiro counters with a stiff right hand.
Murakami looks to have improved his striking defense since last time we saw him fight.
Murakami fails with the takedown
and Kazuhiro connects with a straight left hand counter down the middle.
That's three failed takedown attempts in the round for Shin Murakami. That's going to take a lot out of him.
Kazuhiro paws at his opponent with the jab and then lunges in with a straight, right on the button.
Kazuhiro takes a thudding leg kick, right into the meat of the thigh.
A cross from Kazuhiro lands.
Kazuhiro lands with a good body shot.
Some wild striking there from Kazuhiro.
This is a great period of action - very entertaining stuff!
Murakami fails with an attempt to clinch.
Kazuhiro scores with a jab to the body.
That's two minutes gone in the round.
Kazuhiro scores with a sloppy right hand. Murakami should have avoided that one.
Murakami shoots in looking for a takedown. Kazuhiro tries to sprawl out of it but Murakami keeps driving through. The fighters are pinned against the cage. Kazuhiro manages to get underhooks and after a bit of a struggle, circles away and we're back to standing.
Kazuhiro jabs Murakami to the body, keeping him at a distance.
Murakami walks into a left hand.
Murakami takes a shot right to the liver - Bas would have been proud of that punch.

Murakami clinches with his opponent.
Kazuhiro lands a shot to the body.
Murakami is breathing heavily.
Kazuhiro stalling here - the referee won't stand for too much of that.
Kazuhiro stays in close to his opponent and throws a right hand to the body.
A left hand lands to the body for Kazuhiro.
That's three minutes gone in the round.
Kazuhiro throws a hook to the body. More of an arm punch but it's all scoring with the judges.
Murakami is trying to break the clinch but Kazuhiro has him pressed against the cage.

Kazuhiro jumps guard and drags Murakami to the mat. He's obviously going to be looking for submissions off his back.

Kazuhiro looking for a triangle here. Murakami is fighting it but it looks tight! Kazuhiro pulls the arm across and this one won't last much longer! Nope, Murakami is tapping out - this one is all over!
Ladies and gentlemen, after 3:30 of round 1, we have a winner by way of Submission (Triangle Choke). Katsu Kazuhiro!
After the big win, Katsu Kazuhiro made sure to do all the important stuff like thanking his sponsors Arcticus University: London and telling the interviewer how much he loves him.
|
|
|
|
|
|
|
|
|
|
|
|
|
|
|
|
|
|
|
|
|
|
|
| S |
C
A |
G |
S |
C
B |
G |
|
S |
C |
G |
|
energy
A | B |
|
hype
A | B |
|
pop
A | B |
|
mgr
A | B |
|
FIGHT
RATING
57% |
|
|
|
|
|
|
|
Undercard bout
|
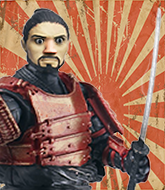
Coming up we have a lightweight MMA rules bout between Takeshi Saitou (ranked 0 p4p, 0 weight class) and Takumi Takeshi (ranked 0 p4p, 0 weight class). Saitou comes to the cage accompanied by XENO. The crowd seem to be enjoying Takeshi's choice of entrance music: Japanese Player. Both fighters look fresh as a daisy as they make their way towards the cage.
 |
|
 |
| 170 cm
19
160 lbs
2 - 6 - 0 |
|
175 cm
19
164 lbs
4 - 1 - 0 |
BJJ Blue Belt
Brawler
Good chin |
|
BJJ Purple Belt
Decent boxing
Prefers standup |
|
| |
|
Ladies and gentlemen. This fight is 3 rounds, in the lightweight division.
Introducing the fighter to my left, fighting out of the red corner.
With a record of
2 - 6 - 0, fighting out of Tokyo, Takeshi Saitou!
And introducing the fighter to my right, fighting out of the blue corner.
With a record of
4 - 1 - 0, fighting out of New York, Takumi Takeshi!
The judges for this bout are Sosuke Kotani, Yasuomi Hirokawa and Yuuki Gou.
The bell rings for round one and we are underway!
Saitou dives in for a single leg takedown but Takeshi sprawls and the fighters end up clinched against the cage.
Takeshi scores with the left hand. Saitou knows he should have avoided that one.
Takeshi defends well against a solid takedown attempt from Saitou.
Takeshi lands a nice hook to Saitou's body. Saitou takes it in his stride and looks to land his own strikes.
Saitou walks straight into an uppercut. Luckily it didn't land flush.
Saitou throws out a token jab with nothing on it.
Takeshi throws out a counter right but Saitou avoids it with no problem.
Takeshi circles away from the clinch attempt
and Takeshi counters with a lovely straight right hand!
Boom, another hit is landed. "You're gunna get knocked out" taunts Takeshi, as that shot connected.
Saitou doesn't manage to clinch there - Takeshi circles away.
Saitou has his takedown stuffed
and Takeshi counters with a good right hand that lands right on the jaw.
That's three failed takedown attempts in the round for Takeshi Saitou. That's going to take a lot out of him.
Saitou doesn't react quick enough there as he takes a shot to the body.
The fans in attendance giving it up for the two fighters, who have really let it all hang out in the last minute or so!
Takeshi avoids the clinch attempt nicely.
Takeshi is clearly trying to counter these attacks from Saitou with a body shot.
Takeshi dips down and scores with a jab to the body.
Takeshi scores with a hook to the body. Saitou takes a step back and tries to catch his breath.
We've been told by Saitou's head coaches at Cozad MMA Tokyo that he's been working on his takedown defense in preparation for this fight.
That's one minute gone in the round.
Takeshi connects with a lovely jab that went straight through the gap between Saitou's hands.
Saitou takes a shot right to the bread basket.
Saitou is breathing heavily.
Saitou fails with the takedown
and Takeshi counters with a left to the body.
Takeshi scores with a jab to the body.
Takeshi thuds his right hand into Saitou's forehead from close range. That could be painful for both fighters.
Takeshi connects with a right hand. Saitou shakes it off.
Saitou doesn't react quick enough there as he takes a shot to the body.
Takeshi throws a jab to the body, straight down the pipe. Boom. That sent Saitou stumbling backwards but he manages to regain his composure quickly.
Takumi Takeshi is looking to keep the fight on the feet at all costs.
Takeshi lunges in with an uppercut that skims his opponent's chin.
The fans in attendance giving it up for the two fighters, who have really let it all hang out in the last minute or so!
Takeshi lands a jab. Then a cross. Then finally a nice hook to the body. Good work there by Takeshi.
Saitou shakes his hands off, looking to compose himself, but takes a jab to the jaw whilst he does it.
Good shot there by Takeshi.
Saitou doesn't manage to clinch there - Takeshi circles away.
Saitou doesn't react quick enough there as he takes a shot to the body.
Nice uppercut lands for Takeshi. That snapped Saitou's head back.
That's two minutes gone in the round.
Takeshi scores with a jab to the head.
Takeshi slaps away a takedown attempt from Saitou, before circling back to the center of the mat.
Takeshi looks to land a combination. Saitou sees it coming but can only parry a couple of the shots.
Saitou on the wrong end of a vicious looking body shot.
Nice cross by Takeshi.
Takeshi connects with a right hand. Saitou shakes it off.
Takeshi is landing a lot of head punches in this opening round! Saitou had better start moving his head a bit unless he wants his face to turn into pâté.
Takeshi fakes and then throws a beautiful body shot. Saitou looks a bit winded and takes a step backwards to take a breath.
You can follow us on Twitter at...Ooooooh Saitou got wobbled bad by a big combination! Takeshi presses forward with punches and knees until Saitou stumbles to the ground! The ref watches Saitou closely before deciding to step in and end the fight!
Ladies and gentlemen, after 2:45 of round 1, we have a winner by way of TKO (Strikes). Takumi Takeshi!
A loyal slave to those sponsorship dollars, Takumi Takeshi made sure he mentioned Arcticus University: London, along with how happy he was to win his fight.
|
|
|
|
|
|
|
|
|
|
|
|
|
|
|
|
|
|
|
|
|
|
|
| S |
C
A |
G |
S |
C
B |
G |
|
S |
C |
G |
|
energy
A | B |
|
hype
A | B |
|
pop
A | B |
|
mgr
A | B |
|
FIGHT
RATING
71% |
|
|
|
|
|
|
|
Undercard bout
|
Coming up we have a lightweight MMA rules bout between Khai Sius (ranked 0 p4p, 0 weight class) and Mateuszis Rosiakos (ranked 0 p4p, 0 weight class). Both fighters look fresh as a daisy as they make their way towards the cage.
 |
|
 |
| 176 cm
19
160 lbs
1 - 3 - 0 |
|
180 cm
19
155 lbs
1 - 0 - 0 |
BJJ Blue Belt
Counter fighter
KO power |
|
Good wrestler
Solid Muay Thai
Good gas tank |
|
| |
|
Ladies and gentlemen. This fight is 3 rounds, in the lightweight division.
Introducing the fighter to my left, fighting out of the red corner.
With a record of
1 - 3 - 0, fighting out of Tokyo, Khai Sius!
And introducing the fighter to my right, fighting out of the blue corner.
With a record of
1 - 0 - 0, fighting out of Tokyo, Mateuszis Rosiakos!
The judges for this bout are Ren Mimura, Shirou Masuda and Yukihiro Yamamoto.
The bell rings for round one and we are underway!
Rosiakos closes the distance and clinches up, looking for a takedown. He shifts his weight and gets a nice trip into half guard.
The fighters are pressed up against the cage, both looking to find a bit of space to work.
Rosiakos looking for a kimura but he'll have to free his other leg if he wants to finish that. Perhaps he's just using it as a distraction technique.
Rosiakos is sneakily working for an arm triangle but Sius sees it coming and defends easily.
Rosiakos seems to be looking for submissions.
Rosiakos is working for submissions here but there's nothing on.
Rosiakos is trying a forearm choke
I don't think that's going to do much at this level of the game.
That's one minute gone in the round.
Rosiakos has freed up his trapped foot and advances to mount.
Rosiakos quickly switches position and commits to an armbar! It's a big risk for Rosiakos but it's paid off an Sius is forced to tap! Nice work by Rosiakos.
Ladies and gentlemen, after 1:47 of round 1, we have a winner by way of Submission (Armbar). Mateuszis Rosiakos!
Mateuszis Rosiakos seemed lost for words in his post fight interview but he remembered to thank his fans and directed everyone to his website.
|
|
|
|
|
|
|
|
|
|
|
|
|
|
|
|
|
|
|
|
|
|
|
| S |
C
A |
G |
S |
C
B |
G |
|
S |
C |
G |
|
energy
A | B |
|
hype
A | B |
|
pop
A | B |
|
mgr
A | B |
|
FIGHT
RATING
56% |
|
|
|
|
|
|
|
Undercard bout
|
Coming up we have a welterweight MMA rules bout between Adam Yauch (ranked 0 p4p, 0 weight class) and Shintaro Nomo (ranked 0 p4p, 0 weight class). Yauch comes to the cage accompanied by Fight For Your Right To Party. Both fighters look pumped up here. Let's hope this is a good fight!
 |
|
 |
| 184 cm
35
179 lbs
31 - 16 - 0 |
|
180 cm
29
180 lbs
21 - 8 - 0 |
Good wrestling
Excellent boxer
Granite chin |
|
Good wrestler
World class boxer
Granite chin |
|
| |
|
Ladies and gentlemen. This fight is 3 rounds, for the welterweight championship of the world!
Introducing the champion to my left, fighting out of the red corner.
With a record of
31 - 16 - 0, fighting out of London, Adam Yauch!
And introducing the challenger to my right, fighting out of the blue corner.
With a record of
21 - 8 - 0, fighting out of Las Vegas, Shintaro Nomo!
The judges for this bout are Yukihiro Shimada, Yuuki Gou and Yasuomi Hirokawa.
The bell rings for round one and we are underway!
The crowd cheers as Yauch lands an impressive looking overhand right. Nomo doesn't seem phased though.

Nomo closes the distance and clinches.
Yauch throws an elbow that misses.
Yauch working aggressively here.
A head punch on the inside from Nomo fails to land.
Nomo misses with some punches.
Yauch taking a breather.
Nomo working aggressively here.
The referee calls for Yauch to work.
Yauch throws an elbow but it's blocked.
Nomo lands a left hand that snaps the head of Yauch backwards.
Nomo swings wildly with an uppercut but Yauch uses good head movement to avoid it.
Nomo throws a punch but it's blocked by Yauch.
We've had a slow start to the round here - hopefully the action picks up.
Nomo tries a shoulder strike but it doesn't do any damage.
Nomo lands an uppercut.
Nomo has a couple of punches blocked by Yauch.
Nomo swings away with an uppercut that misses.
A head punch blocked on the inside by Yauch.

Yauch's corner calls for him to break the clinch, which he does.
That's one minute gone in the round.
Nomo clinches up with Yauch and pushes him back against the cage.
Yauch breaks the clinch.
Nomo takes the fight into the clinch.
A head punch blocked on the inside by Yauch.
Yauch's corner calls for him to break the clinch, which he does.
Nomo blocks a head kick by Yauch.
Nomo moves into range and clinches up with Yauch.
Yauch breaks the clinch and we're back to striking at distance.
Nomo tries to clinch but Yauch is having none of it.
Yauch throws a head kick that misses.
Nomo clinches up with Yauch and pushes him back against the cage.
Nomo lands a right hand that snaps the head of Yauch backwards.
Yauch lands with a left to the head.
Yauch escapes the clinch and we're back to striking.
Nomo tries to clinch but Yauch is having none of it.
This is a great period of action - very entertaining stuff!
Yauch pulls out of a head kick attempt.
Nomo moves away from the strike by Yauch.
Nomo looks like he wants to counter punch here.
Nomo drives through and clinches with Yauch against the cage.
That's two minutes gone in the round.
Yauch blocks a punch to the side of the head.
A head punch on the inside from Nomo fails to land.
Nomo misses with a hook from the clinch.
Nomo misses with a hook from the clinch.
Yauch blocks an uppercut.
Yauch breaks the clinch and we return to the middle of the mat.
Yauch works Nomo's body with a nice hook.
Yauch fakes low and throws an overhand right that catches Nomo on the side of the head.
It looks like Shintaro Nomo has been cut.
Yauch throws a head kick that misses.
Yauch fakes with a right hand and throws a good leg kick, right into the thigh. That had to hurt Nomo.
Yauch lands with a cross to side of his opponent's head.
Nomo takes the fight into the clinch.
Nomo has been looking to improve his clinch game in recent weeks. Yauch seems to have the measure of him in the clinch so far, so let's see if Nomo can turn it around.
Nomo misses with a short punch on the inside.
Yauch blocks a couple of punches on the inside.
A short uppercut from Nomo.
Nomo fails to land with a short punch on the inside.
A battle for position here, against the cage.
Nomo misses with some punches.
That's three minutes gone in the round.
Nomo misses with a short punch on the inside.
Nomo fails to land with a short punch on the inside.
Yauch stalling here - the referee won't stand for too much of that.
Yauch breaks the clinch.
Nomo has Yauch up against the cage in a clinch.
Yauch blocks an uppercut.
Yauch blocks a punch to the side of the head.
Nomo swings away with an uppercut that misses.
Nomo working some nice short punches in the clinch.
Nomo throws a punch but it's blocked by Yauch.
Nomo misses with a punch on the inside.
An uppercut on the inside fails to land for Nomo.
Yauch lands with a short shot to the head.
Nomo throws a punch but it's blocked by Yauch.
Yauch misses with a hook to the ribs.

That's four minutes gone in the round.
Nomo has a couple of punches blocked by Yauch.
Nomo swings away with an uppercut that misses.
Yauch breaks the clinch and we're back to striking at distance.
Nomo blocks a jab.
Nomo rushes Yauch and pushes him back against the cage in a clinch.
Fantastic stuff here - a very entertaining period of action, which has drawn cheers from the crowd.
Yauch takes a shot to the head.
Yauch manages to break the clinch.
Nomo tries to clinch but Yauch moves out of range.
Yauch throws a counter high kick but Nomo was just alert enough to avoid it.
Yauch keeps the fight on the outside.
A counter left hand to the body from Yauch misses its target.
Yauch lunges in with an uppercut that skims his opponent's chin.
Nomo wants to clinch but Yauch slips to the side
and Yauch counters with a lovely straight right hand!
The fight stays on the outside here - Nomo looks like he's thinking about clinching though.
Nomo tries to close the distance and clinch but Yauch swats him to one side with an open hand palm strike and circles away.
Nomo closes the distance and clinches.
Nomo misses with a punch on the inside.
Nomo swings away with an uppercut that misses.
The crowd applaud the fighters' efforts here as the round comes to an end.
Nomo dodges an elbow strike from Yauch.
Nomo lands a right uppercut that snaps the head of Yauch backwards.
And thats the end of the round the fighters go back to their corners.
Shintaro Nomo dominated that round.
The cut man is working on Shintaro Nomo's cut.
That's time! Back to the action!

Yauch just misses with a punch to the body.
Nomo has managed to clinch.
Yauch breaks from the clinch.
Nomo takes the fight into the clinch.
Nomo swings wildly with an uppercut but Yauch uses good head movement to avoid it.
Nomo working aggressively here.
Nomo has been the more effective fighter overall so far.
A head punch on the inside from Nomo fails to land.
Yauch looking to slow down the pace here.
Yauch blocks a couple of punches on the inside.
Yauch doesn't land with the attempted body shot.
We've had a slow start to the round here - hopefully the action picks up.
Nomo scores with an uppercut up the middle.
Nomo misses with a short punch on the inside.
Nomo lands with a short shot to the head.
Nomo misses with a punch on the inside.
Yauch scores with a shot to the side of Nomo's head.
Nomo misses with a punch on the inside.
That's one minute gone in the round.
Nomo misses with a short punch on the inside.
A head punch blocked on the inside by Yauch.
A short right from Nomo.
Nomo misses with a short punch on the inside.
Yauch pushes off and circles away, back to the middle of the mat.
Nomo tries to clinch but Yauch moves out of range.
Yauch is looking to counter punch.
A punch combination from Yauch misses.
Nomo fails in his attempt to clinch.
Adam Yauch is winning the standup battle so far.
Yauch circles away from the clinch attempt.
Yauch throws a combination but it was largely blocked by Nomo.
Yauch dips to his left and cracks Nomo with an uppercut!
Shintaro Nomo seems to be the more aggressive standup fighter in this bout.
Yauch turns his hip over beautifully as he lands a nice leg kick.
Nomo doesn't manage to clinch there - Yauch circles away.
Nomo moves in looking to clinch but Yauch pushes him off.
Nomo wants to clinch but Yauch slips to the side
and Yauch counters with a stiff right hand.
Nomo tries to close the distance and clinch up against the cage but Yauch paws at him with a jab and circles away.
Nomo tries to clinch but Yauch is having none of it.
Nomo is looking to clinch.
That's two minutes gone in the round.
Nomo gets a clinch.
The fans in attendance giving it up for the two fighters, who have really let it all hang out in the last minute or so!
Nomo misses with a punch on the inside.
Nomo throws a punch but it's blocked by Yauch.
Yauch's corner calls for him to break the clinch, which he does.
Nomo rushes Yauch and pushes him back against the cage in a clinch.
Nomo throws a head punch that misses.
Yauch doesn't land with the attempted body shot.
An uppercut on the inside fails to land for Nomo.
Yauch blocks an uppercut.
Yauch stalling in the clinch but Nomo improves position.
Yauch breaks the clinch and we're back to striking at distance.
Nomo closes the distance and presses his opponent up against the cage.
Yauch lands a left hand.
Yauch tries a body shot but Nomo blocks it.
Nomo letting Yauch take a breather here.
Yauch tried to land a shot to the body but connects with Nomo's elbow.
Yauch gets an overhook and lands an elbow to the side of the head.
That's three minutes gone in the round.
Nomo misses with a hook from the clinch.
A short right hand to the side of the head by Nomo.
An uppercut on the inside fails to land for Nomo.
Nomo misses with a short punch on the inside.
Shintaro Nomo seems to be working more effectively in the clinch in the fight so far.
Nomo misses with some punches.
Yauch lands a hook that snaps the head of Nomo backwards.
Yauch blocks an uppercut.
Yauch throws an elbow but it misses.
Nomo swings away with an uppercut that misses.
Yauch lands a left hand that snaps the head of Nomo backwards.
Yauch lands on the inside with an uppercut.
Yauch just leaning against Nomo, taking a breather.
Yauch blocks a punch to the side of the head.
Nomo misses with some punches.
Yauch blocks a couple of punches on the inside.
Nomo working aggressively here.
Yauch misses with a punch to the body.
Nomo swings away with an uppercut that misses.
Nomo throws a punch but it's blocked by Yauch.
That's four minutes gone in the round.
Nomo tries a shoulder strike but it doesn't do any damage.
Yauch blocks a punch to the side of the head.
This is a great period of action - very entertaining stuff!
The pace really dropping off here, momentarily.
Yauch misses with a hook from the clinch.
Yauch breaks the clinch and we return to the middle of the mat.
Yauch works Nomo's body with a nice hook.
Yauch throws a jab when Nomo was well out of range.
And an attempted straight right on the counter from Nomo! But no joy.
Nomo tries to clinch but Yauch moves out of range.
Nomo clinches with his opponent.
Nomo misses with the head strike.
Nomo misses with some punches.
Nomo throws a head punch that misses.
Nomo misses with the head strike.
Yauch escapes the clinch and we're back to striking.
Yauch misses with a body shot.
Nomo tries to close the distance and clinch but Yauch swats him to one side with an open hand palm strike and circles away.
And thats the end of the round the fighters go back to their corners.
A close second round but Shintaro Nomo will probably get the nod - 10:9.
The cut man is working on Shintaro Nomo's cut.
The fighters get back to their feet, the hooter sounds and we're back to the action! This is the final round!

Nomo moves in looking to clinch but Yauch pushes him off.
Yauch fakes a head punch and goes low to the body. Nicely done.
Nomo is looking to take this fight into the clinch.
Nomo closes the distance and presses his opponent up against the cage.
Yauch misses with a hook to the ribs.
Yauch escapes the clinch and we're back to striking.
Nomo tries to clinch up against the cage, rushing in to close the distance. Yauch manages to break the clinch and circles back to the middle of the mat.
Yauch chopping away at his opponent's legs.
Nomo moves in looking to clinch but Yauch pushes him off.
Nomo moves into range and clinches up with Yauch.
Yauch blocks a punch to the side of the head.
We've had a slow start to the round here - hopefully the action picks up.
Nomo misses with the head strike.
Yauch manages to break the clinch.
Yauch connects with a high kick.
Nomo has closed the distance and engaged Yauch in a clinch.
Yauch manages to break the clinch.
This is a great period of action - very entertaining stuff!
Nomo takes a punch to the jaw and another one to the bread basket.
That's one minute gone in the round.
Nomo has taken the fight to the clinch.
Nomo swings wildly with an uppercut but Yauch uses good head movement to avoid it.
A real battle for position is taking place between these two warriors.
An uppercut on the inside fails to land for Nomo.
Yauch lands on the inside with an uppercut.
A short right hand to the side of the head by Nomo.
Yauch blocks an uppercut.
A head punch blocked on the inside by Yauch.
Nomo working aggressively here.
Nomo swings wildly with an uppercut but Yauch uses good head movement to avoid it.
Nomo misses with a short punch on the inside.
A head punch blocked on the inside by Yauch.
Nomo working aggressively here.
Yauch can't find room to land a body shot as Nomo controls the action.
Nice body punch from Yauch.
Shintaro Nomo is fighting for a decision - hopefully he's judged it right and he's actually winning the fight.
That's two minutes gone in the round.
Yauch manages to break the clinch.
Yauch swats away the attempt to clinch by Nomo.
Nomo clinches up with Yauch and pushes him back against the cage.
Yauch pushes off and circles away, back to the middle of the mat.
Nomo moves in looking to clinch but Yauch pushes him off.
Nomo drives through and clinches with Yauch against the cage.
This is a great period of action - very entertaining stuff!
Yauch breaks from the clinch.
Yauch walks forward and throws out a flicking leg kick. Nomo checks it nicely though, as he moves to the side.
Nomo has closed the distance and engaged Yauch in a clinch.
Come on Yauch - let's have some action - none of this stalling nonsense.
Yauch will no doubt start fighting again in a minute but for now he's just having a little rest, leaning Nomo up against the cage.
That's three minutes gone in the round.
Yauch swings wildly with an uppercut but Nomo uses good head movement to avoid it.
Yauch's corner calls for him to break the clinch, which he does.
Nomo tries to clinch but Yauch moves out of range.
Yauch bobs and weaves and throws out a fast jab that snaps Nomo's head backwards.
Adam Yauch has stepped it up - he knows he needs a finish here!
Yauch avoids the clinch attempt nicely.
As Nomo looks to move away, Yauch throws a big counter combo but Nomo just gets out of the way.
Nomo tries to clinch up against the cage, rushing in to close the distance. Yauch manages to break the clinch and circles back to the middle of the mat.
Nomo tries to clinch up but Yauch circles away and keeps his distance.
Yauch is looking for a counter combo.
That's four minutes gone in the round.
Yauch misses with a wild combination.
A little jabbing left from Nomo on the counter but it doesn't find it's target.
The fight moves into the clinch position.
Yauch's corner calls for him to break the clinch, which he does.
Yauch keeps the fight on the outside.
Nomo doesn't manage to clinch there - Yauch circles away.
Yauch throws a monster uppercut resembling something out of street fighter but it doesn't land.
Nomo avoids a lazy jab quite easily.
Nomo clinches.
Yauch pushes off and circles away, back to the middle of the mat.
Yauch gets tackled into the cage by Nomo. Nomo maintains the clinch.
Yauch escapes the clinch and we're back to striking.
And that's the end of the fight!
Adam Yauch showed his dominance in that final round.
I think Nomo has won this one but let's see whether the judges agree with me. Over to the ring announcer for the scorecards.
Ladies and gentlemen, after 3 rounds of action, we go to the scorecards for a decision.
Judge Yukihiro Shimada scores the fight 29:29
Judge Yuuki Gou scores the fight 28:29
Judge Yasuomi Hirokawa scores the fight 28:29
In favor of your winner, by majority decision... Shintaro Nomo!
Shintaro Nomo is the new welterweight champion!
A less than humble Shintaro Nomo misjudged his post fight interview somewhat and came across a little too arrogant whilst trying to hype up his own abilities.
|
|
|
|
|
|
|
|
|
|
|
|
|
|
|
|
|
|
|
|
|
|
|
| S |
C
A |
G |
S |
C
B |
G |
|
S |
C |
G |
|
energy
A | B |
|
hype
A | B |
|
pop
A | B |
|
mgr
A | B |
|
FIGHT
RATING
64% |
|
|
|
|
|
|
|
Undercard bout
|
Coming up we have a bantamweight MMA rules bout between Te Rauparaha (ranked 0 p4p, 0 weight class) and Dolores Doremus (ranked 0 p4p, 0 weight class). The key to victory for Te Rauparaha has got to be keeping the fight on the feet.
 |
|
 |
| 168 cm
33
143 lbs
20 - 9 - 0 |
|
165 cm
25
144 lbs
6 - 5 - 0 |
BJJ Purple Belt
Excellent boxer
Cardio machine |
|
Excellent grappler
Decent boxing
Good gas tank |
|
| |
|
Ladies and gentlemen. This fight is 3 rounds, for the bantamweight championship of the world!
Introducing the champion to my left, fighting out of the red corner.
With a record of
20 - 9 - 0, fighting out of Tokyo, Te Rauparaha!
And introducing the challenger to my right, fighting out of the blue corner.
With a record of
6 - 5 - 0, fighting out of Hilo, Dolores Doremus!
The judges for this bout are Sosuke Kotani, Yasuomi Hirokawa and Yuuki Gou.
The bell rings for round one and we are underway!
Doremus shoots in but no luck this time.
It looked like Rauparaha wanted to counter with a hook but didn't fully commit.
Doremus shoots in from a long way out. He's driving through with the takedown attempt and he eventually gets it, landing in Rauparaha's guard.
We could do with one of the fighters taking the initiative a bit more on the ground - they're both waiting to capitalize on a mistake.
Doremus landing some decent shots from guard.
Rauparaha avoiding any damage from the ground and pound.
Doremus stands up and looks to throw the legs aside to pass to side control. Rauparaha swivels though and keeps the full guard.
Rauparaha is looking to get back to his feet but can't, whilst Doremus is controlling him.
Doremus postures up to throw the ground and pound strikes but they don't connect.
We've had a slow start to the round here - hopefully the action picks up.
Doremus works over Rauparaha with some ground and pound from guard.
Rauparaha wants to stand but Doremus is controlling the position.

Rauparaha pushes Doremus off and scrambles back to his feet.
We've been told by Rauparaha's head coaches at Body Pain_14elite_650$+VM that he's been working on his takedown defense in preparation for this fight.
Doremus with a lazy takedown attempt
and Rauparaha moves into the clinch.
That's one minute gone in the round.
Rauparaha misses with the head strike.
A head punch on the inside from Rauparaha fails to land.
Rauparaha misses with the head strike.
Doremus blocks an uppercut.
Rauparaha is pressed up against the cage. Doremus has hold of a leg and is looking to drag Rauparaha down to the mat. Rauparaha avoids the attempt though and has circled away. We're back to striking at a distance.
Te Rauparaha has stuffed three takedown attempts in the round now. That's going to take a lot out of Dolores Doremus.
Doremus throws a jab, cross combination which is slipped
and Rauparaha holds on and brings the fighters into a clinch.
Rauparaha misses with a punch on the inside.
Rauparaha gets through Doremus's defenses to land a nice punch to the side of the head.
An uppercut on the inside fails to land for Rauparaha.
Rauparaha swings away with an uppercut that misses.
Rauparaha swings away with an uppercut that misses.
Rauparaha fails to land with a short punch on the inside.
That's two minutes gone in the round.
Rauparaha working aggressively here.
Rauparaha has a couple of punches blocked by Doremus.
Rauparaha misses with a short punch on the inside.
Rauparaha swings away with an uppercut that misses.
Doremus is working for a takedown up against the cage. He can't get it on this occasion though.
Rauparaha misses with some punches.
Doremus wants a takedown.
Rauparaha misses with the head strike.
Rauparaha misses with a short punch on the inside.
Doremus blocking some punches.
Rauparaha throws a head punch that misses.
Rauparaha misses with the head strike.
Rauparaha throws a punch but it's blocked by Doremus.
We've seen a great period of action over the last minute or so - credit to both fighters for going all out!
Rauparaha tries a shoulder strike but it doesn't do any damage.
Rauparaha lands an uppercut.
That's three minutes gone in the round.
Rauparaha has a couple of punches blocked by Doremus.
Rauparaha working aggressively here.
Rauparaha throws a head punch that misses.
Rauparaha misses with the head strike.
Doremus blocks a punch to the side of the head.
Rauparaha throws a punch but it's blocked by Doremus.
An uppercut on the inside fails to land for Rauparaha.
A nice left hand lands by Rauparaha.
Doremus blocks a punch to the side of the head.
Rauparaha misses with a hook from the clinch.
Rauparaha swings away with an uppercut that misses.
Rauparaha lands a left hand.
Rauparaha misses with the head strike.
Rauparaha throws a punch but it's blocked by Doremus.
Rauparaha tries a shoulder strike but it doesn't do any damage.
That's four minutes gone in the round.
Rauparaha swings wildly with an uppercut but Doremus uses good head movement to avoid it.
Doremus is trying to work for a single leg takedown but Rauparaha pulls him back up using the underhooks.
Rauparaha swings away with an uppercut that misses.
Rauparaha working aggressively here.
Doremus blocks a punch to the side of the head.
Rauparaha misses with a hook from the clinch.
Rauparaha swings wildly with an uppercut but Doremus uses good head movement to avoid it.
Rauparaha scores with a nice hook to the head.
This has been an exciting period of action!
Doremus blocks a couple of punches on the inside.
Rauparaha lands on the inside with an uppercut.
Rauparaha fails to land with a short punch on the inside.
Doremus gets the body lock takedown. After a quick scramble, Rauparaha regains guard.
Doremus throwing shots from guard but he's hitting more mat than opponent.
And thats the end of the round the fighters go back to their corners.
Te Rauparaha dominated that round.
The corners get their ten second warning. Both fighters stand from their stools and stare eachother down, ready to get back to the action.
Doremus getting the better of the striking in that exchange.
Doremus will have to do better than that with his takedown attempts.
Rauparaha swung with a counter right hand that didn't connect.
No luck for Doremus with that takedown attempt.
Doremus fails to land the takedown.
An attempted straight right counter from Rauparaha misses the target.
Te Rauparaha has stuffed three takedown attempts in the round now. That's going to take a lot out of Dolores Doremus.
We've had a slow start to the round here - hopefully the action picks up.
Doremus fails with the takedown.
That's one minute gone in the round.
Rauparaha slaps away a takedown attempt from Doremus, before circling back to the center of the mat.
Doremus shoots in for a takedown but doesn't get it.
Rauparaha wants to take advantage of his opponent's missed offense by moving into the clinch.
Dolores Doremus seems to be the more aggressive standup fighter in this bout.
Doremus shoots in but doesn't get the takedown
and Rauparaha counters with a lovely straight right hand!
Rauparaha keeping his hands up high there, blocking the jab from Doremus.
Rauparaha is really dominating this fight. Is there anything that Doremus can do to turn this around?
That's two minutes gone in the round.
Doremus fails with a takedown attempt.
An attempted straight right counter from Rauparaha misses the target.
Both fighters are looking to counter, which isn't making for the most exciting fight in the world.
Doremus shoots in for a takedown - he's clinched up with Rauparaha but Rauparaha pushes him off and we're back to square one.
Doremus shoots in looking for a takedown. Rauparaha tries to sprawl out of it but Doremus keeps driving through. The fighters are pinned against the cage. Rauparaha manages to get underhooks and after a bit of a struggle, circles away and we're back to standing.
That's three minutes gone in the round.
Rauparaha leaves Doremus with his face pressed against the mat as he sprawls beautifully, defending against a solid takedown attempt.
A little feinted left hand from Rauparaha on the counter but he doesn't commit to it.
Doremus fails with a takedown attempt.
Rauparaha swung with a counter right hand that didn't connect.
That's four minutes gone in the round.
The crowd are starting to boo a lack of action.
Doremus changes levels and drives through with a really nice takedown into side control. Rauparaha looks really pissed at himself for not defending that better.
Rauparaha throws Doremus to one side and escapes!
Doremus looks frustrated there after his takedown attempt is stuffed easily.
As Doremus tries to get set, Rauparaha tries to push him back and clinch up but Doremus manages to avoid the attempt.
Boooooooooooooooooooo!!! God, this has been a terrible round. Come on you two, sort yourselves out!
Rauparaha stuffs the takedown.
Rauparaha seemed to be looking to counter by closing the distance.
And thats the end of the round the fighters go back to their corners.
Te Rauparaha dominated that second round.
The fighters get back to their feet, the hooter sounds and we're back to the action! Let's get this one finished - here comes the final round!
Doremus looking to score a takedown here. Rauparaha is defending well but Doremus drives through and ends up in Rauparaha's guard.
Doremus working in close now, lands a nice elbow to the side of Rauparaha's head.
Doremus connects with a couple of short punches.
Doremus throwing strikes but missing.
Doremus trying to land body shots but he keeps hitting the mat.
Doremus has the superior BJJ but he's also working some ground strikes into his gameplan.
Rauparaha wants to stand up but Doremus is controlling him.
Doremus throws a big elbow that misses.
Rauparaha working the defensive guard well to avoid strikes from Doremus.
Rauparaha knows he needs to get back to his feet asap. He's simply no match for Doremus on the ground.
We've had a slow start to the round here - hopefully the action picks up.
Rauparaha kicks Doremus off and gets to his feet.
Doremus fakes high and shoots in for a takedown but Rauparaha avoids it really well and circles away.
That's one minute gone in the round.
Doremus scores with a nice takedown into half guard. Let's see what he's got on the ground.
The fighters are starting to get a bit slippery now, which will make submissions a bit more difficult.
Doremus not throwing his punches with enough precision this time.
The two fighters exchange a few words. I couldn't hear what they were saying but maybe it's more fun if you make it up yourself. Doremus connects with a nice short shot to Rauparaha's temple.
Doremus thows a huge punch but Rauparaha dodges it nicely.
Dolores Doremus has got the better of the ground game so far.
Doremus drops an elbow to the side of Rauparaha's head.
Rauparaha looks like he's trying to stand up.
That's two minutes gone in the round.
Rauparaha has one foot on Doremus's thigh - he pushes off and manages to get back to his feet.
Doremus shoots in for a takedown but Rauparaha shows good takedown defense there and keeps this one on the feet.
Doremus has taken the fight to the clinch.
Rauparaha misses with a hook from the clinch.
Rauparaha misses with a hook from the clinch.
Fantastic stuff here - a very entertaining period of action, which has drawn cheers from the crowd.
Rauparaha pushes Doremus back against the cage and lands a hook to the side of the head.
Rauparaha working aggressively here.
Rauparaha has a couple of punches blocked by Doremus.
An uppercut on the inside fails to land for Rauparaha.
Doremus blocks an uppercut.
Dolores Doremus has stepped it up - he knows he needs a finish here!
Doremus blocks a punch to the side of the head.
That's three minutes gone in the round.
Doremus gets double underhooks and manages to take the fight to the ground.
Rauparaha wants to get back to his feet but Doremus is in a dominant position and won't allow it.
Doremus with a couple of shots to the head there. Not particularly brutal.
Rauparaha is trying to stand up but he's not managed so far.
Doremus in full guard, throwing the ground and pound. No damage this time.
Doremus scores with a decent looking elbow strike.
Doremus throws a strike but Rauparaha rolls with it and manages to sweep. Now he's in guard on top.

Doremus has a closed guard, preventing Rauparaha from standing up.
Doremus working from the bottom, still in full guard. He's managed to get a loose triangle. Rauparaha doesn't seem to be doing much to defend here, obviously he feels comfortable in the position. Rauparaha manages to throw the legs off his shoulder and he's back into guard - no problem.
Rauparaha got a little sloppy there for a moment and Doremus has worked his way into a loose triangle - can he finish it?! No, Rauparaha has managed to get both his arms back between Doremus's legs - danger averted.
That's four minutes gone in the round.

Rauparaha stands up from Doremus's guard - Rauparaha perhaps looking for a knockout.
Rauparaha walks into a straight right hand from Doremus.
Doremus dives in for a single leg takedown but Rauparaha sprawls and the fighters end up clinched against the cage.
Te Rauparaha has stuffed three takedown attempts in the round now. That's going to take a lot out of Dolores Doremus.
Doremus rushes in with a sloppy looking punch
letting Rauparaha counter with a right hand.
And that's the end of the fight!
That was a close round. You could make an argument for either fighter but I would give it to Te Rauparaha.
Well I reckon that's a shut out for Rauparaha, winning every round. Will the judges agree? They are the ones who matter, even if they are often depressingly incompetent. Over to the ring announcer for the scorecards.
Ladies and gentlemen, after 3 rounds of action, we go to the scorecards for a decision.
Judge Sosuke Kotani scores the fight 30:27
Judge Yasuomi Hirokawa scores the fight 29:28
Judge Yuuki Gou scores the fight 29:28
In favor of your winner, by unanimous decision... Te Rauparaha!
Te Rauparaha is the new bantamweight champion!
Te Rauparaha was full of energy after the big win and talked about how he thinks he can do big things in this sport. The crowd were appreciative of his determination to succeed.
|
|
|
|
|
|
|
|
|
|
|
|
|
|
|
|
|
|
|
|
|
|
|
| S |
C
A |
G |
S |
C
B |
G |
|
S |
C |
G |
|
energy
A | B |
|
hype
A | B |
|
pop
A | B |
|
mgr
A | B |
|
FIGHT
RATING
42% |
|
|
|
|
|
|
|
Co-main event
|
Coming up we have a heavyweight MMA rules bout between Jack Larsson (ranked 0 p4p, 0 weight class) and Daniel Speed (ranked 0 p4p, 0 weight class). Larsson comes to the cage accompanied by BRUTALITY. Daniel Speed will no doubt be looking to use his reach advantage to good effect.
 |
|
 |
| 189 cm
29
255 lbs
8 - 7 - 1 |
|
200 cm
40
241 lbs
42 - 23 - 0 |
Abu Dhabi Champ
Excellent boxer
Cardio machine |
|
Good wrestler
Lethal high kicks
Granite chin |
|
| |
|
Ladies and gentlemen. This fight is 3 rounds, in the heavyweight division.
Introducing the fighter to my left, fighting out of the red corner.
With a record of
8 - 7 - 1, fighting out of New York, Jack Larsson!
And introducing the fighter to my right, fighting out of the blue corner.
With a record of
42 - 23 - 0, fighting out of Helsinki, Daniel Speed!
The judges for this bout are Sosuke Kotani, Ren Mimura and Hirohito Nitta.
The bell rings for round one and we are underway!
Larsson shakes his hands off, looking to compose himself, but takes a jab to the jaw whilst he does it.
A momentary lapse in concentration from Larsson enables Speed to shoot in and score with a neat double leg. Larsson manages to secure a closed guard as the fighters hit the mat.
Larsson is trying to control the position from the bottom.
Speed is sitting in close to Larsson's body. Larsson has gone for a guillotine from the bottom. Oh damn, that looks pretty tight! Speed is panicking - it looks like this one could be all over! Yes, Speed is tapping! That was a very nice submission by Larsson.
Ladies and gentlemen, after 0:26 of round 1, we have a winner by way of Submission (Guillotine). Jack Larsson!
An out of breath and clearly excited Jack Larsson thanked HGH Nutrients Q160 Tycoons Best Quality supps for their help and support (and free stuff they sent him).
|
|
|
|
|
|
|
|
|
|
|
|
|
|
|
|
|
|
|
|
|
|
|
| S |
C
A |
G |
S |
C
B |
G |
|
S |
C |
G |
|
energy
A | B |
|
hype
A | B |
|
pop
A | B |
|
mgr
A | B |
|
FIGHT
RATING
100% |
|
|
|
|
|
|
|
Main event
|
Coming up we have a middleweight MMA rules bout between Wayde West (ranked 0 p4p, 0 weight class) and Yogi Dhamma (ranked 0 p4p, 0 weight class). Chooooooooon! I think West might be my favorite fighter, now he's come out to Sober. Dhamma has chosen Power Of Soul as his entrance music. Over to our ring announcer for the fighter introductions!
 |
|
 |
| 187 cm
28
194 lbs
16 - 8 - 0 |
|
179 cm
27
189 lbs
15 - 3 - 0 |
BJJ Brown Belt
Excellent boxer
Insanely flexible |
|
Excellent grappler
Good kicks
Good gas tank |
|
| |
|
Ladies and gentlemen. This fight is 3 rounds, in the middleweight division.
Introducing the fighter to my left, fighting out of the red corner.
With a record of
16 - 8 - 0, fighting out of Tokyo, Wayde West!
And introducing the fighter to my right, fighting out of the blue corner.
With a record of
15 - 3 - 0, fighting out of Los Angeles, Yogi Dhamma!
The judges for this bout are Tatsuya Matsuyama, Ren Mimura and Sosuke Kotani.
The bell rings for round one and we are underway!
Dhamma shoots in and bounces West off the cage to secure the takedown into guard.
Dhamma tries to free his leg and advance position but West is retaining full guard.
West wants to get back to his feet but Dhamma is in a dominant position and won't allow it.
Dhamma drops back looking for a leg! West is in trouble here! The fighters roll with the hold and West manages to kick Dhamma off! Dhamma jumps back into West's guard.
West wants to get back to his feet but Dhamma is in a dominant position and won't allow it.
We've had a slow start to the round here - hopefully the action picks up.
Dhamma is holding a leg here, probably looking for an ankle lock - he drops back and goes for it! West is in trouble! Is it all over??? No! West has escaped and now he's on top!
West is looking to stand up but Dhamma won't let him.
That's one minute gone in the round.
Dhamma is trying to control the position from the bottom.
West has to be careful here, sitting in the guard of a superior BJJ player.
West tries to stand but Dhamma is controlling from the bottom.
Dhamma working for a triangle but West defends it easily.
Dhamma is looking for a guillotine. You can't force these things though and West defends well.
Dhamma escapes his hips to the side and looks to be working for an armbar. West gives him a little smile and shakes his head. No chance.
West tries to stand but Dhamma is controlling from the bottom.
That's two minutes gone in the round.
The crowd are getting on the fighters' backs, as the pace has dropped off in the last minute or so.
Dhamma wants to sweep here but West controlling him for the moment.
West tries to stand but Dhamma is controlling from the bottom.
Dhamma throwing his legs up looking for a triangle.
West wants to stand but Dhamma has a closed guard, so he can't escape.
Dhamma looking for a guillotine here but West defends easily.
Dhamma wants to sweep but no luck.
That's three minutes gone in the round.
West has decided he wants to stand but the closed guard of Dhamma is proving hard to escape from.

The referee has decided to stand the fighters back up, so we'll restart on the feet.
West tries to land a body kick
and Dhamma counters with a shoot takedown into half guard.
Dhamma is working for a kimura but West is defending it quite comfortably.
Dhamma drops an elbow to the side of West's head.
The fighters are pressed up against the cage, both looking to find a bit of space to work.
Dhamma is pressing down on West's thigh, looking to free his foot. West is holding on for now.
West is looking to escape.
That's four minutes gone in the round.
Dhamma seems to be working for a kimura but West defends the submission attempt.
Dhamma is working for submissions here but there's nothing on.
Dhamma is sneakily working for an arm triangle but West sees it coming and defends easily.
West tries to kick Dhamma off but Dhamma keeps his base steady and stays in half guard.
Dhamma is trying to work for a kimura. This could be trouble! No, West has managed to free his arm - good work.
Dhamma is sneakily working for an arm triangle but West sees it coming and defends easily.
Boooooooooooooooooooo!!! God, this has been a terrible round. Come on you two, sort yourselves out!
West is trying to stand back up but Dhamma is controlling him
Dhamma is looking for a kimura but West is holding onto that half guard position, so it's hard for Dhamma to get the leverage.
Dhamma stops West from getting back to his feet.
And thats the end of the round the fighters go back to their corners.
Yogi Dhamma dominated that round.
OK. That's time! The bell goes and we're back to the action.
Dhamma avoids the head kick by West.
West misses with a body kick.
West looks to throw a body kick
and Dhamma decides to take the opportunity to score a takedown. He's landed in West's guard.
Dhamma is holding a leg here, probably looking for an ankle lock - he drops back and goes for it! West is in trouble! Is it all over??? No! West has escaped and now he's on top!
West would like to get this fight back to the feet but can't get free from the closed guard.
We've had a slow start to the round here - hopefully the action picks up.
The ref warns both fighters not to hold the cage as they work up against the meshing.
Dhamma is actively looking for submissions from his back. He's worked himself a little space on the bottom and seems to be going for a triangle. No, he's switched into an armbar! That was slick! West rolls with it to try and escape but Dhamma cranks on the arm and West is forced to tap out! This one is aaaaaaaaall over!
Ladies and gentlemen, after 1:56 of round 2, we have a winner by way of Submission (Armbar). Yogi Dhamma!
Yogi Dhamma gave a mention to Spartan Nutrition 160Q with Proof in his post fight interview. That will please them (and hopefully generate some sales).
|
|
|
|
|
|
|
|
|
|
|
|
|
|
|
|
|
|
|
|
|
|
|
| S |
C
A |
G |
S |
C
B |
G |
|
S |
C |
G |
|
energy
A | B |
|
hype
A | B |
|
pop
A | B |
|
mgr
A | B |
|
FIGHT
RATING
28% |
|
|
|
|
|
|
|
|
|
|

