 |
QFC Tournament 697 Round 2 PBP Commentary |
Undercard bout
|
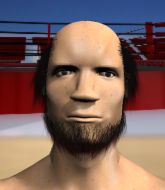
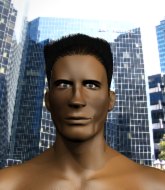
Coming up we have a welterweight MMA rules bout between Saipul Jamil (ranked 0 p4p, 0 weight class) and Jin Markham (ranked 0 p4p, 0 weight class). Saipul Jamil has the edge in experience - let's see if he can make that count tonight.
 |
|
 |
| 199 cm
23
174 lbs
1 - 0 - 0 |
|
184 cm
23
175 lbs
1 - 0 - 0 |
BJJ White Belt
Solid boxing
Good chin |
|
Good takedowns
Excellent boxer
Heavy handed |
|
| |
|
Ladies and gentlemen. This fight is 3 rounds, in the welterweight division.
Introducing the fighter to my left, fighting out of the red corner.
With a record of
1 - 0 - 0, fighting out of Sydney, Saipul Jamil!
And introducing the fighter to my right, fighting out of the blue corner.
With a record of
1 - 0 - 0, fighting out of Sydney, Jin Markham!
The judges for this bout are Eliza Hachem, Darius Henderson and Ben Watson.

The bell rings for round one and we are underway!
Markham on the receiving end of a decent leg kick there by Jamil. Jamil obviously looking to wear him down.

Markham gets a clinch.
Jamil blocks a punch to the side of the head.
Markham leaning against his opponent.
Markham lands a body shot in the clinch.
Markham is trying to work for a single leg takedown but Jamil pulls him back up using the underhooks.
Markham leaning against his opponent.
Markham tried to land a shot to the body but connects with Jamil's elbow.
Jamil working aggressively here.
Markham tries to throw a body punch but Jamil avoids it by throwing Markham back against the cage.
Jamil tries to stall but Markham uses the opportunity to gain a better position.
A right hand to the body from Markham.
Markham misses with a body punch.
Markham throws a blind hook that connects with the side of Jamils head.
We've had a slow start to the round here - hopefully the action picks up.
Markham pushes Jamil back against the cage and unloads with a body punch.
A battle for position here, against the cage.
Jamil lands a hook to the side of the head.
Jamil is trying to maintain a safe position but Markham gets an underhook and turns Jamil into the cage.

Markham works for the underhooks and manages to get a trip takedown into guard.

That's one minute gone in the round.
Markham distracts Jamil with his right hand and drops a big elbow with his other arm.
Markham throws a strike but Jamil rolls with it and manages to sweep. Now he's in guard on top.


Jamil decides he's had enough of playing guard and decides to stand. Come on Markham, up you get!
Markham takes a swing at Jamil's ribcage but misses.
Markham moves into the clinch.
Markham has a couple of punches blocked by Jamil.
Jamil tries to stall but Markham uses the opportunity to gain a better position.
Markham lands a right uppercut that snaps the head of Jamil backwards.
A short right from Markham on the inside.
A right hand to the body from Markham.
Markham lands with a short punch from the clinch.
Jamil gets an overhook and lands an elbow to the side of the head.
Markham is working on a single leg takedown against the cage. Jamil can't fight it off and eventually Markham manages to take the fight to the floor. Jamil looks annoyed but at least he's managed to land in guard.
This is a great period of action - very entertaining stuff!
Markham working some strikes from top position.
Jamil is breathing heavily.

That's two minutes gone in the round.
Jamil utilising some decent striking defenses from the guard, preventing the ground and pound.

Jamil wriggles free and stands up.
Jamil lands with a nice body kick.
Markham lands a slapping body shot.
Markham works his jab well there, keeping his opponent at a distance.
Markham fakes with an overhand right and moves in to clinch with Jamil, pushing him back against the cage.
Stalling in the clinch from Markham.
Markham lands with a left to the head.
A head punch blocked on the inside by Jamil.
A short body shot lands from Markham as the two fighters clinch.
Markham misses with a short punch on the inside.
Markham throws a head punch that misses.

That's three minutes gone in the round.
Markham tries a shoulder strike but it doesn't do any damage.
Markham stalling here - the referee won't stand for too much of that.
Jamil blocks an uppercut.
Jamil lands with a short punch from the clinch.
Jamil really does look like a pencil wearing a pair of gloves. Let's hope he has a gameplan to suit that ridiculous body shape.
Markham throws a punch but it's blocked by Jamil.
Markham misses with a punch on the inside.

Jamil's corner calls for him to break the clinch, which he does.

Jamil closes the distance and clinches.
Jamil pushes off and circles away, back to the middle of the mat.
Markham lands the left hand.
Markham clinches.
The referee is keeping an eye on Jamil - much more stalling and he will separate the fighters.
Jamil breaks the clinch and we're back to striking at distance.

That's four minutes gone in the round.
Markham pushes Jamil up against the cage in a clinch.
Jamil breaks from the clinch.
A shot to the liver by Markham. Beautiful body shot.
Markham has Jamil up against the cage in a clinch.
The crowd cheering loudly, showing their appreciation for the quality fight we're seeing here.
Jamil is looking to control Markham's arms but Markham gets an underhook and turns him. Now Jamil has his back to the cage.
Markham swings away with an uppercut that misses.
Markham lands a right hand.
Both guys are working to get underhooks.
Markham blocking some punches.
Jamil digs a right hand into Markham's ribs. Those have got to be taking their toll on Markham's gas tank.
Markham wants a takedown but no success here.
Jamil manages to break the clinch.
Markham throws a right hand that misses
and he gets countered with a snapping leg kick.
And thats the end of the round the fighters go back to their corners.
Jin Markham dominated that round.
That's the end of the interval. I'm sure that seemed a lot quicker than a minute for our two fighters! Back to the action.

Jamil fails with a rather predictable takedown attempt.
Markham gets in close and instigates a clinch.
Markham tries for a takedown but Jamil manages to get underhooks.
Jamil misses with a knee strike.
Markham is working Jamil over against the cage.
Markham gets double underhooks and manages to take the fight to the ground.
Jamil has his feet on Markham's hips. He pushes off and gets to his feet. Nice work.
Markham tries a switch kick but it misses it's target.
Markham with a body punch. A glancing blow.
Markham has been the more effective fighter overall so far.
Fantastic stuff here - a very entertaining period of action, which has drawn cheers from the crowd.
Jamil instigates a clinch.
Markham misses with the head strike.
Jamil tries to stall but Markham uses the opportunity to gain a better position.
Both fighters are absolutely exhausted here.
Jamil misses the knee to the body. Nice hip positioning from Markham.
That's one minute gone in the round.
Jamil slowing the pace effectively.
A head punch blocked on the inside by Jamil.
Jamil escapes the clinch and we're back to striking.
Markham clinches up against the cage.
Jamil is stalling here.
A real battle for position is taking place between these two warriors.
Markham goes for a takedown in the clinch but Jamil prevents it.
Markham working aggressively here.
Jamil is clearly stalling here... Pick up the pace son.
Jamil's corner calls for him to break the clinch, which he does.
Jamil keeping his hands up high there, blocking the jab from Markham.
Jamil is looking to counter the offense by Markham and move into the clinch.
That's two minutes gone in the round.
Markham looks to throw the jab but Jamil is out of range.
That kick from Jamil tenderised Markham's leg. Markham is trying to keep his angry face on.
Jamil jabs Markham to the body, keeping him at a distance.
Jamil clinches.
Jamil breaks from the clinch.
Jamil tries to clinch but Markham is having none of it.
Markham moves into the clinch.
Jamil with an attempt at a knee that misses.
Jamil doesn't land with the attempted body shot.
Jamil crunches a lovely knee into Markham's ribcage.
The crowd cheering loudly, showing their appreciation for the quality fight we're seeing here.
Jamil breaks the clinch.
Markham drives through and clinches with Jamil against the cage.
A left hand lands to the body for Markham.
Markham is looking for a takedown up against the cage. Jamil gets underhooks though and prevents the takedown attempt.
Saipul Jamil has stuffed three takedown attempts in the round now. That's going to take a lot out of Jin Markham.
That's three minutes gone in the round.
Markham misses with a hook from the clinch.
Jamil breaks the clinch and we return to the middle of the mat.
Markham avoids a punch combination nicely.
Saipul Jamil is looking to throw some combinations by the looks of things.
Jamil connects with an inside leg kick.
Jamil drops his hands and takes a jab to the jaw for his troubles.
Markham closes the distance and clinches.
Markham blocks a knee to the body. He'll have a nicely bruised forearm in the morning.
Jamil wants to stall.
Jamil doesn't land with the attempted body shot.
Jamil breaks the clinch and we're back to striking at distance.
Markham has Jamil up against the cage in a clinch.
That's four minutes gone in the round.
Markham lands a body punch in the clinch.
Jamil blocks a body shot from Markham.
Markham lands a shoulder strike that jolts his opponent's head backwards.
Markham takes an elbow to the temple.
Jamil escapes the clinch and we're back to striking.
Jin Markham is looking to keep the fight on the feet at all costs.
Jamil slips a jab and a cross from Markham.
The fans in attendance giving it up for the two fighters, who have really let it all hang out in the last minute or so!
Markham clinches up with Jamil and pushes him back against the cage.
Jamil misses the knee to the body. Nice hip positioning from Markham.
Markham slows down the pace here.
Markham looking to stall.
Markham swings wildly with an uppercut but Jamil uses good head movement to avoid it.
And thats the end of the round the fighters go back to their corners.
A close second round but Jin Markham will probably get the nod - 10:9.
The referee calls time. The cornermen exit stage left and we're back to business. This is the final round!

Markham looks to score with a jab to the body but Jamil is just out of range.
Markham clinches with his opponent.
Jamil stalling here - the referee won't stand for too much of that.
Markham just leaning against Jamil, taking a breather.
Jin Markham seems to be working more effectively in the clinch in the fight so far.
Jamil slowing the pace effectively.
Markham letting Jamil take a breather here.
Markham misses with a punch to the body.
Jamil tries to stall but Markham uses the opportunity to gain a better position.
Markham working some nice short punches in the clinch.
We've had a slow start to the round here - hopefully the action picks up.
Jamil wants to push off and get back to the center of the mat but Markham has him pressed against the cage.
Markham wants a takedown.
Markham wants to stall.
A battle for position here, against the cage.
Markham takes a big intake of breath there - he's definitely tired.
That's one minute gone in the round.
Markham leaning his opponent against the cage.
Jamil trying to stall but Markham improves his position.
Markham lands a right hand.
Nice body punch from Markham.
Markham stalling here - the referee won't stand for too much of that.
Jamil wants to break free. God knows he wants to breaaaak freeee.
A frustrated look appears on Jamil's face as he tries to break the clinch.
Jamil wants to stall.
Jamil is trying to break the clinch but Markham has him pressed against the cage.
Markham misses with a hook to the ribs.
That's two minutes gone in the round.
A few boos can be heard. I'm sure they will multiply if the fighters don't pick up the pace.
Markham throws a punch but it's blocked by Jamil.
Jamil is trying to stall.
Jamil looking to stall.
Jin Markham is fighting for a decision here - he's started to take the cautious approach.
Jamil goes for a body shot but it's blocked.
Markham takes a knee to the side of the body.
Jamil lands a short shot on the inside that snaps the head of Markham backwards.
Markham being controlled against the cage.
Jamil wants to strike at distance but he can't break free of the clinch.
That's three minutes gone in the round.
A quick uppercut on the inside from Markham.
Markham lands with a quick shot inside that doesn't really do much damage.
Markham keeps control of Jamil as he tries to wriggle out of the double underhooks.
A head punch on the inside from Markham fails to land.
Jamil trying to control the position but instead, Markham has worked for underhooks and has pushed Jamil into the cage.
Jamil is trying to stall.
That's four minutes gone in the round.
Neither fighter has done anything of merit for a good minute or two here and the crowd are not happy about it.
The ref breaks the fighters up, due to lack of action by Saipul Jamil.
Jamil darts in and clinches Markham up against the cage.
A hook to the body from Markham.
Markham stalls.
Markham lands a right hand that snaps the head of Jamil backwards.
Saipul Jamil has stepped it up - he knows he needs a finish here!
Boooooooooooooooooooo!!! God, this has been a terrible round. Come on you two, sort yourselves out!
Jamil swings away with an uppercut that misses.
Markham blocks a punch to the side of the head.
Jamil misses the knee to the body. Nice hip positioning from Markham.
And that's the end of the fight!
Jin Markham comfortably won the final round on my scorecard.
I've got Markham winning every round here. Surely the decision will go his way and he'll pick up a well deserved decision victory. Over to the ring announcer for the scorecards.
Ladies and gentlemen, after 3 rounds of action, we go to the scorecards for a decision.
Judge Eliza Hachem scores the fight for Jin Markham!
Judge Darius Henderson scores the fight for Jin Markham!
Judge Ben Watson scores the fight for Jin Markham!
Jin Markham wins by unanimous decision!
|
|
|
|
|
|
|
|
|
|
|
|
|
|
|
|
|
|
|
|
|
|
|
| S |
C
A |
G |
S |
C
B |
G |
|
S |
C |
G |
|
energy
A | B |
|
hype
A | B |
|
pop
A | B |
|
mgr
A | B |
|
FIGHT
RATING
50% |
|
|
|
|
|
|
|
Undercard bout
|
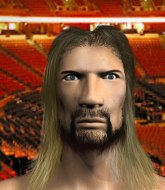
Coming up we have a welterweight MMA rules bout between Sakryugi Hontedai (ranked 0 p4p, 0 weight class) and Chang Lutang (ranked 0 p4p, 0 weight class). This should be a great matchup!
 |
|
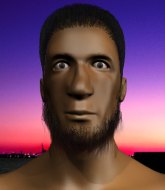 |
| 175 cm
19
179 lbs
1 - 0 - 0 |
|
180 cm
23
175 lbs
1 - 0 - 0 |
BJJ Blue Belt
Basic striking
KO power |
|
Good takedowns
Decent boxing
Tends to cut |
|
| |
|
Ladies and gentlemen. This fight is 3 rounds, in the welterweight division.
Introducing the fighter to my left, fighting out of the red corner.
With a record of
1 - 0 - 0, fighting out of Sydney, Sakryugi Hontedai!
And introducing the fighter to my right, fighting out of the blue corner.
With a record of
1 - 0 - 0, fighting out of Sydney, Chang Lutang!
The judges for this bout are Skip Squint, Chris Dean and Darius Henderson.
The bell rings for round one and we are underway!

Hontedai closes the distance and gets a double leg, slamming Lutang to the mat! Lutang manages to get full guard.
Hontedai in full guard, throwing the ground and pound. No damage this time.
Lutang keeping full guard, as Hontedai tries to pass.
Lutang really doesn't want to stay on the ground with Hontedai. If he can't get it back to his feet, it's only a matter of time before he'll be tapping out.
Hontedai throws a big elbow that misses.
Hontedai is working Lutang over from the guard. He should look to pass the guard and do a little more damage with these strikes.
Hontedai lands a couple of elbows.
Hontedai loading up with the ground and pound but he's missing more than he's landing in this flurry.
Hontedai trying to land body shots but he keeps hitting the mat.
Hontedai with a nice head shot there.
We've had a slow start to the round here - hopefully the action picks up.
Hontedai lands a couple of decent looking shots.
The fighters are pressed up against the cage, both looking to find a bit of space to work.
Hontedai trying to pass the guard but can't manage it just yet.
Hontedai sitting in guard, not really doing much.
Hontedai looking to sit in guard and control but Lutang gets the butterfly guard and sweeps. He's now in the guard on the top.

That's one minute gone in the round.
Hontedai avoiding any damage from the ground and pound.
Hontedai avoiding any damage from the ground and pound.
Lutang stops Hontedai from standing up.
Hontedai avoiding any damage from the ground and pound.
Hontedai is trying to stand up but he's not managed so far.
Hontedai is working the butterfly guard. He manages to land a nice scissor sweep and is now in half guard on the top. Nice move.

Hontedai wants to work for an arm triangle but Lutang is really keeping half guard well and defending the submission attempt.
Lutang regains full guard, whilst avoiding punches from Hontedai.
That's two minutes gone in the round.
Hontedai missing there with some ground and pound from the guard.
Hontedai tries to free his leg and advance position but Lutang is retaining full guard.
Hontedai postures up to throw the ground and pound strikes but they don't connect.
Hontedai throwing elbows and punches but not connecting, as Lutang works some decent striking defense from the bottom.
Lutang utilising some decent striking defenses from the guard, preventing the ground and pound.
Hontedai with a nice head shot there.
Lutang keeping moving, preventing Hontedai from controlling successfully.
Hontedai working some strikes from top position.
Lutang looks winded!
Hontedai is working the ground and pound from guard. He might want to try advancing position though to get more of an impact.
That's three minutes gone in the round.
Hontedai lands a nice shot whilst sitting in his opponent's guard.
Hontedai is pushing down on Lutang's leg trying to pass to half guard. Lutang is fighting to maintain full guard but Hontedai has managed to sneak the leg through.
Hontedai thumps the canvas. Not on purpose obviously - he just missed Lutang's head.
Hontedai lands a big shot. The thud that echoes around the arena is like music to the fans' ears.
Hontedai has been looking to land a fair amount of strikes on the ground. He might be looking to soften his opponent up in order to work for a submission.
Hontedai lands with a punch from half guard.
Lutang is trying to defend against the ground and pound but Hontedai scores with a couple of nice shots.
We get told so often about how wrestlers don't like to be on their backs. Let's see if Lutang can do anything to dispel that myth.
Hontedai working some ground and pound from close in. He's looking to maintain this position and strike for a while by the looks of things... although he'll probably advance to full mount in a minute now I've said that.
Hontedai drops an elbow to the side of Lutang's head.
Hontedai not doing much here.
Hontedai slips a nice elbow through Lutang's hands, connecting with Lutang's forehead.
That's four minutes gone in the round.
Lutang is trying to defend against the ground and pound but Hontedai scores with a couple of nice shots.

Lutang is rocked!
Hontedai seems to be taking a bit of a break to think of his next move. He lands a short punch in the meantime.
Lutang is still in real trouble! Can Hontedai finish him?
Hontedai landing with strikes to the body and head, softening up his opponent.
Hontedai is sitting in half guard. He's postured up and lands a nice elbow. Oh, Lutang is hurt! He's hurt bad - Hontedai fires away with more strikes and the referee jumps in to save Lutang from any more punishment! Congratulations to Hontedai! Great finish!
Ladies and gentlemen, after 4:35 of round 1, we have a winner by way of TKO (Strikes). Sakryugi Hontedai!
|
|
|
|
|
|
|
|
|
|
|
|
|
|
|
|
|
|
|
|
|
|
|
| S |
C
A |
G |
S |
C
B |
G |
|
S |
C |
G |
|
energy
A | B |
|
hype
A | B |
|
pop
A | B |
|
mgr
A | B |
|
FIGHT
RATING
35% |
|
|
|
|
|
|
|
Co-main event
|
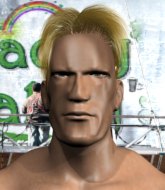
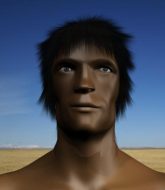
Coming up we have a welterweight MMA rules bout between Josh Neer (ranked 0 p4p, 0 weight class) and Anthony Antonio (ranked 0 p4p, 0 weight class). Josh Neer has the better chin. Will he look to stand and bang today?
 |
|
 |
| 180 cm
23
183 lbs
1 - 0 - 0 |
|
188 cm
20
153 lbs
1 - 0 - 0 |
BJJ White Belt
Excellent boxer
Good chin |
|
BJJ Blue Belt
Brawler
Tends to cut |
|
| |
|
Ladies and gentlemen. This fight is 3 rounds, in the welterweight division.
Introducing the fighter to my left, fighting out of the red corner.
With a record of
1 - 0 - 0, fighting out of Sydney, Josh Neer!
And introducing the fighter to my right, fighting out of the blue corner.
With a record of
1 - 0 - 0, fighting out of Sydney, Anthony Antonio!
The judges for this bout are Steve Erwin, Chris Dean and Skip Squint.
The bell rings for round one and we are underway!
Neer throws a right and a left that both miss.
Neer slaps away a takedown attempt from Antonio, before circling back to the center of the mat.
Neer throws out a powerful jab.
A looping hook to the body misses from Neer. Antonio does a little dance to reset his feet.
Neer misses with a series of wild punches.
Antonio shoots in for a takedown. He's persisting with it as Neer sprawls well. Neer wins this battle and keeps the fight standing. Antonio gets slowly back to his feet.
We've had a slow start to the round here - hopefully the action picks up.
The fight moves into the clinch position.
Antonio pulls guard effortlessly.
That's one minute gone in the round.
Neer pressing down on his opponent's thigh, looking to pass guard. Antonio is keeping the position for now.
Neer trying to control but Antonio is working from the bottom.
Neer is frustrating his opponent with some stalling tactics from top position.
Neer trying to control but Antonio is working from the bottom.
Antonio manages to sweep nicely, so he's now on top. Neer manages to get himself to full guard.
The ref warns both fighters not to hold the cage as they work up against the meshing.
That's two minutes gone in the round.
The crowd are showing their displeasure at the lack of action as loud boos ring out around the arena.
Neer looking for a sweep. Not yet Neer, not yet.
Antonio trying to pass the guard but can't manage it just yet.
Neer pulls Antonio in close to prevent any damage.

Antonio stands up from Neer's guard - Antonio perhaps looking for a knockout.
Neer throws a combination but it was largely blocked by Antonio.
Neer throws a body shot but no joy.
Neer fails to land with the punch combination there - jab, cross, hook, miss, miss, miss.
Neer fails to land with a series of punches.
Neer misses with a body shot.
That's three minutes gone in the round.
Boom, another hit is landed. "You're gunna get knocked out" taunts Neer, as that shot connected.
Josh Neer is looking to keep the fight on the feet at all costs.
Antonio shoots in from a long way out. He's driving through with the takedown attempt and he eventually gets it, landing in Neer's guard.
Antonio is a painfully thin specimen of a man. You do wonder whether a good body kick would snap him clean in two.
Antonio trying to control but Neer is working from the bottom.
Neer looking for a sweep. Not yet Neer, not yet.
Antonio throwing strikes but missing.
Antonio stands and steps away. Neer gets to his feet too and we're back to the striking game.
Horrible takedown attempt by Antonio or perhaps it was just good defense by Neer, which made it look bad.
Josh Neer has stuffed three takedown attempts in the round now. That's going to take a lot out of Anthony Antonio.
Neer scores with a nice one two combo and darts back out of range to avoid anything coming in the opposite direction.
That's four minutes gone in the round.
Antonio wants to clinch up but Neer keeps it at a distance.
Neer fails to land with the punch combination there - jab, cross, hook, miss, miss, miss.
Antonio is on the wrong end of a nice combination from Neer.
Fantastic stuff here - a very entertaining period of action, which has drawn cheers from the crowd.
A telegraphed takedown attempt from Antonio is defended easily by Neer.
Antonio uses good head movement to avoid the hook from Neer.
Antonio goes for a double leg but Neer avoids the attempt and the two fighters end up clinched against the cage as Neer continues to drive forward.
Neer appears to be looking for a big counter.
Antonio shoots and misses
and Neer counters with a one-two to the body.
Antonio is rocked!
Neer fails to land with a series of punches.
Antonio is still on wobbly legs! Can Neer finish him?
Antonio fails with the takedown
and Neer counters with a lovely straight right hand!
And thats the end of the round the fighters go back to their corners.
Josh Neer dominated that round.
The corners get their ten second warning. Both fighters stand from their stools and stare eachother down, ready to get back to the action.
Antonio rushes in with a sloppy looking punch
and Neer counters with a huge left! Antonio is in big trouble! He's backing up but Neer isn't giving him chance to recover. Under a barage of punches the ref has to step in to save Antonio from any more damage. A dominating finish by Neer!
Ladies and gentlemen, after 0:05 of round 2, we have a winner by way of TKO (Strikes). Josh Neer!
|
|
|
|
|
|
|
|
|
|
|
|
|
|
|
|
|
|
|
|
|
|
|
| S |
C
A |
G |
S |
C
B |
G |
|
S |
C |
G |
|
energy
A | B |
|
hype
A | B |
|
pop
A | B |
|
mgr
A | B |
|
FIGHT
RATING
37% |
|
|
|
|
|
|
|
Main event
|
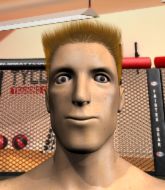
Coming up we have a welterweight MMA rules bout between Ngabdi Mulyadi (ranked 0 p4p, 0 weight class) and Ulysses Grant (ranked 0 p4p, 0 weight class). Ulysses Grant has the better chin. Will he look to stand and bang today?
 |
|
 |
| 173 cm
23
174 lbs
1 - 0 - 0 |
|
183 cm
23
170 lbs
1 - 0 - 0 |
Decent wrestler
Brawler
Cuts easily |
|
BJJ Brown Belt
Counter fighter
Very confident |
|
| |
|
Ladies and gentlemen. This fight is 3 rounds, in the welterweight division.
Introducing the fighter to my left, fighting out of the red corner.
With a record of
1 - 0 - 0, fighting out of Sydney, Ngabdi Mulyadi!
And introducing the fighter to my right, fighting out of the blue corner.
With a record of
1 - 0 - 0, fighting out of Sydney, Ulysses Grant!
The judges for this bout are Eliza Hachem, Donatello Bradman and Topper Green.
The bell rings for round one and we are underway!
Mulyadi misses with a kick to the body
and Grant counters with a shoot takedown into half guard.
Grant wants to pass the guard but Mulyadi is defending well.
Grant thumps the canvas. Not on purpose obviously - he just missed Mulyadi's head.
Mulyadi trying to control from the bottom.
Grant not doing much here.

Grant seems to be working for a kimura but Mulyadi defends the submission attempt.
Grant not landing any meaningful shots this time.
We've had a slow start to the round here - hopefully the action picks up.
Grant wants to control but Mulyadi is keeping him busy.
The fighters are pressed up against the cage, both looking to find a bit of space to work.
Grant trying to mount his opponent but Mulyadi defends it.
Grant missing with some ground and pound from the half guard.
That's one minute gone in the round.
Grant is trying to work for a kimura but Mulyadi is defending well.
Grant trying to control from Mulyadi's half guard. Mulyadi has other ideas though and has regained full guard.
Mulyadi being controlled here, momentarily.
Grant won't allow Mulyadi to sweep him here.
Grant trying to control but Mulyadi is working from the bottom.
Grant slips effortlessly into side control - very nice.
Mulyadi wants to control but Grant postures up.
That's two minutes gone in the round.
Grant tries to score with some ground and pound. Mulyadi controls his posture well this time though and the shots don't do any damage.
Mulyadi avoids any damage from the ground and pound of Grant.
Grant tries for a kimura. Not really close to a finish though.
You can see the frustration on Mulyadi's face, being in this tough position on the bottom.
Grant tries for an arm triangle. That looks pretty tight to me. Is this one over!?! Possibly, maybe, no Grant has let go of the choke. Obviously it wasn't as tight as we thought!
Grant is looking to take a break and control but Mulyadi is keeping him honest, looking to work from the bottom.
Mulyadi knows he needs to get back to his feet asap. He's simply no match for Grant on the ground.
A lull in the action here.
That's three minutes gone in the round.
The fighters are starting to get a bit slippery now, which will make submissions a bit more difficult.
Sloppy strikes there by Grant.
Grant creates some space and throws a big elbow, but Mulyadi sees it coming and moves his head just enough to avoid the strike.
Grant in side control, just content to control the action for now.
Grant thinks about going for a far side armbar but bails out and retains the dominant position instead.
Grant tries for an arm triangle. That looks pretty tight to me. Is this one over!?! Possibly, maybe, no Grant has let go of the choke. Obviously it wasn't as tight as we thought!
Mulyadi on his back here. We all know that wrestlers don't like being on their back so let's see if Mulyadi tries to get out of the position.
Grant tries for an arm triangle. That looks pretty tight to me. Is this one over!?! Possibly, maybe, no Grant has let go of the choke. Obviously it wasn't as tight as we thought!
That's four minutes gone in the round.
Mulyadi dodges the ground and pound from Grant.
Mulyadi parries the strikes from Grant easily there. Grant is wary of posturing up too much because it might enable Mulyadi to escape.
Grant working the ground and pound but he's contacting the mat, not the fighter.
Grant is looking to take a break and control but Mulyadi is keeping him honest, looking to work from the bottom.
Grant fails to land a wild elbow strike.
Grant in side control, throwing shots but Mulyadi defends.
The crowd thankful this round is nearly over.
Mulyadi tries to improve position but can't.
Mulyadi is breathing heavily.
Grant trying to control the position but Mulyadi is working away.
A lull in the action here as Grant stalls from top position.
And thats the end of the round the fighters go back to their corners.
Ulysses Grant dominated that round.
That's the end of the interval. I'm sure that seemed a lot quicker than a minute for our two fighters! Back to the action.
Mulyadi throws a sloppy head kick and Grant moves out of range easily.
Mulyadi pulls out of a head kick attempt.
Grant blocks a head kick by Mulyadi.
Grant avoids the head kick by Mulyadi.
A head kick misses from Mulyadi.
Grant raises up his leg as if looking to counter with a high kick.
Mulyadi displays some good footwork, moving neatly out of range as Grant throws out the jab.
Mulyadi walks forward and throws out a flicking leg kick. Grant checks it nicely though, as he moves to the side.
Grant looks for a takedown here. Will he get it? Mulyadi is fending him off so far but Grant persists. Nope, Mulyadi circles away and we're back to standing.
Ngabdi Mulyadi seems to be the more aggressive standup fighter in this bout.
We've had a slow start to the round here - hopefully the action picks up.
Mulyadi moves into the clinch.
Grant tries to take the fight to the ground by pulling guard but can't manage it.
Grant throws a vicious knee straight up the middle but Mulyadi blocks it with crossed arms.
That's one minute gone in the round.
Mulyadi is working for takedown but Grant is calmly controlling the position for now.
Both fighters are absolutely exhausted here.
Grant stalls.
Grant slowing the pace effectively.
Grant looking to stall.
Mulyadi blocks an elbow strike from Grant.
Mulyadi has had enough of the clinch and is looking to separate.
Mulyadi is pressed up against the cage. Grant has hold of a leg and is looking to drag Mulyadi down to the mat. Mulyadi avoids the attempt though and has circled away. We're back to striking at a distance.
Ngabdi Mulyadi has stuffed three takedown attempts in the round now. That's going to take a lot out of Ulysses Grant.
Mulyadi keeps Grant at a distance using the push kick.
Mulyadi misses with a kick to the body.
Grant displays good takedown defense there as he swats away a double leg from Mulyadi.
That's two minutes gone in the round.
A telegraphed takedown attempt from Mulyadi is defended easily by Grant.
Mulyadi thuds his shin into the meat of Grant's side.
Grant attempts a leg kick but it's missed by a good margin.
Mulyadi throws a sloppy head kick
and Grant counters with a takedown into side control! That could mean trouble for Mulyadi!
Grant is in a dominant position here, looking for a kimura. Mulyadi looks calm but he's in trouble here. Grant gets his leg over his opponent's head and yanks on the arm. Mulyadi is tapping like a morse code operator on the titanic! SOS! SOS! Grant lets go of the hold and Mulyadi can pop his arm back in it's socket.
Ladies and gentlemen, after 3:56 of round 2, we have a winner by way of Submission (Kimura). Ulysses Grant!
|
|
|
|
|
|
|
|
|
|
|
|
|
|
|
|
|
|
|
|
|
|
|
| S |
C
A |
G |
S |
C
B |
G |
|
S |
C |
G |
|
energy
A | B |
|
hype
A | B |
|
pop
A | B |
|
mgr
A | B |
|
FIGHT
RATING
36% |
|
|
|
|
|
|
|
|
|
|

