 |
KFC 11: Leary vs Commander PBP Commentary |
Undercard bout
|
|
|
|
Undercard bout
|
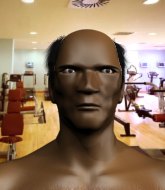
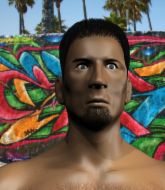
Coming up we have a welterweight MMA rules bout between Kim Myong Hyok (ranked 0 p4p, 0 weight class) and Kit Dood (ranked 0 p4p, 0 weight class). Kim Myong Hyok could well score a knockout today. He has the power to get to Kit Dood's chin.
 |
|
 |
| 180 cm
25
169 lbs
0 - 0 - 0 |
|
150 cm
25
165 lbs
1 - 2 - 0 |
BJJ White Belt
Solid boxing
Granite chin |
|
BJJ White Belt
Brawler
Powerful |
|
| |
|
Ladies and gentlemen. This fight is 3 rounds, in the welterweight division.
Introducing the fighter to my left, fighting out of the red corner.
With a record of
0 - 0 - 0, fighting out of London, Kim Myong Hyok!
And introducing the fighter to my right, fighting out of the blue corner.
With a record of
1 - 2 - 0, fighting out of Montreal, Kit Dood!
The judges for this bout are Colin Fotheringham, Paul Tew and Chris Edwards.

The bell rings for round one and we are underway!
The fight stays on the outside here - Dood looks like he's thinking about clinching though.

Dood instigates a clinch.
Stalling in the clinch from Myong Hyok.
Myong Hyok blocks a body shot from Dood.
Myong Hyok softening up his opponent with strikes, against the cage.
Myong Hyok blocks a couple of punches on the inside.
Myong Hyok wants to strike at distance but he can't break free of the clinch.
Dood tries a body shot but Myong Hyok blocks it.
Dood throws a head punch that misses.
Dood misses with some punches.
We've had a slow start to the round here - hopefully the action picks up.
Dood goes for a body shot but it's blocked.
Dood scores with a shot to the side of Myong Hyok's head.
Dood throws a head punch that misses.
Myong Hyok blocks a punch to the side of the head.
Myong Hyok is looking to break free of the clinch but Dood has double underhooks.
Dood lands a hook that snaps the head of Myong Hyok backwards.

That's one minute gone in the round.
Myong Hyok is trying to break free.
Dood misses with a hook from the clinch.
Dood misses with a shot to the kidneys.
Myong Hyok blocks a punch to the side of the head.
Myong Hyok blocks a body shot from Dood.
Myong Hyok fails to land with a short punch on the inside.
Myong Hyok working hard to break the clinch.
A head punch on the inside from Dood fails to land.
A head punch on the inside from Dood fails to land.
Dood is leaning against Myong Hyok and scores with a nice uppercut to the body.
Dood swings away with an uppercut that misses.
Dood lands a shoulder strike.
Myong Hyok blocks a couple of punches on the inside.
Dood fails to land with a short punch on the inside.
Dood misses with a punch on the inside.
A hook to the body from Dood.
Dood throws a punch but it's blocked by Myong Hyok.

That's two minutes gone in the round.
Dood has a couple of punches blocked by Myong Hyok.
Dood tries a body shot but Myong Hyok blocks it.
Dood blocks a body shot from Myong Hyok.
Dood tries to throw a body punch but Myong Hyok avoids it by throwing Dood back against the cage.
Dood working on landing some head shots here - that one got through nicely.
Dood misses with some punches.
Dood looks more muscular than last time we saw him. He must have been on the weights.
Myong Hyok wants to break the clinch but can't.
Dood misses with a short punch on the inside.
Dood has a couple of punches blocked by Myong Hyok.
Dood misses with a punch on the inside.
Dood lands a short shot on the inside that snaps the head of Myong Hyok backwards.
Wooooo! Give it up for these two warriors! They are putting on a show!
Dood swings wildly with an uppercut but Myong Hyok uses good head movement to avoid it.
Dood misses with a shot to the kidneys.
Myong Hyok blocks a couple of punches on the inside.
Dood keeps control of Myong Hyok as he tries to wriggle out of the double underhooks.

That's three minutes gone in the round.
Myong Hyok blocks a punch to the side of the head.
Dood misses with a punch on the inside.
Dood misses with a hook from the clinch.
Dood swings wildly with an uppercut but Myong Hyok uses good head movement to avoid it.
Dood misses with a short punch on the inside.
Dood keeps the fight in the clinch, despite Myong Hyok's efforts to push away.
A head punch on the inside from Dood fails to land.
Myong Hyok is looking to break free of the clinch but Dood has double underhooks.
Dood misses with a short punch on the inside.
Myong Hyok has had enough of the clinch and is looking to separate.
Myong Hyok blocks a couple of punches on the inside.
Myong Hyok wants to break free but Dood has control.
Myong Hyok blocks a couple of punches on the inside.
Dood misses with a punch on the inside.
A head punch blocked on the inside by Myong Hyok.

That's four minutes gone in the round.
Dood swings away with an uppercut that misses.
Myong Hyok working hard to break the clinch.
Dood misses with the head strike.
Dood swings wildly with an uppercut but Myong Hyok uses good head movement to avoid it.
Dood lands a right hand that snaps the head of Myong Hyok backwards.
Dood lands a shoulder strike that jolts his opponent's head backwards.
Myong Hyok can't break the clinch.
Dood misses with a short punch on the inside.
Dood misses with a short punch on the inside.
Myong Hyok is trying to work out of this bad position, with his back against the cage.
Dood swings away with an uppercut that misses.
Myong Hyok is trying to work out of this bad position, with his back against the cage.
Myong Hyok tries to break the clinch but Dood is controlling the position.
Dood tries to throw a body punch but Myong Hyok avoids it by throwing Dood back against the cage.
Dood misses with the head strike.
Myong Hyok tries to break free but Dood pushes him back against the cage.
And thats the end of the round the fighters go back to their corners.
Kit Dood dominated that round.
That's the end of the round. The referee orders the cornermen out of the cage so we can get back down to business.

Myong Hyok lands a nice looking body shot.
Dood closes the distance and presses his opponent up against the cage.
The fighters are starting to get sweaty, which will make takedowns a bit more tricky.
Myong Hyok can't break the clinch.
Myong Hyok wants to break the clinch but can't.
Myong Hyok lands a hook that snaps the head of Dood backwards.

Myong Hyok breaks the clinch.
The fight stays on the outside here - Dood looks like he's thinking about clinching though.
Kit Dood seems to be the more aggressive standup fighter in this bout.
Myong Hyok tries to keep at a distance but Dood has taken the fight into the clinch.
A head punch on the inside from Dood fails to land.
We've had a slow start to the round here - hopefully the action picks up.
Dood keeps the fight in the clinch, despite Myong Hyok's efforts to push away.
Myong Hyok blocks a couple of punches on the inside.
Myong Hyok wants to break the clinch but can't.
Dood tries a shoulder strike but it doesn't do any damage.
That's one minute gone in the round.
Dood misses with a punch to the body.
Dood misses with a shot to the kidneys.
Myong Hyok is trying to break free.
Dood throws a punch but it's blocked by Myong Hyok.
Myong Hyok is trying to break the clinch but Dood has him pressed against the cage.
Dood lands a hook to the body. It's hard to tell if that hurt Myong Hyok or not.
Dood has been the more effective fighter overall so far.
Dood lands a body punch in the clinch.
Dood prevents Myong Hyok from breaking the clinch.
Dood goes for a body shot but it's blocked.
Dood misses with a short punch on the inside.
Dood misses with a body punch.
Dood swings wildly with an uppercut but Myong Hyok uses good head movement to avoid it.
Dood misses with a body punch.
Dood lands a left hand.
Dood throws a head punch that misses.
That's two minutes gone in the round.
Dood is leaning against Myong Hyok and scores with a nice uppercut to the body.
Myong Hyok working hard to break the clinch.
Dood swings away with an uppercut that misses.
Dood lands a right hand that snaps the head of Myong Hyok backwards.
Dood goes for a body shot but it's blocked.
Dood working aggressively here.
Dood lands on the inside with an uppercut.
Myong Hyok swings wildly with an uppercut but Dood uses good head movement to avoid it.
Dood working aggressively here.
Still in the clinch, Myong Hyok scores with a nice short uppercut.
Dood goes for a body shot but it's blocked.
Myong Hyok tries to break the clinch but Dood is controlling the position.
Myong Hyok is trying to break free.
Myong Hyok is trying to break the clinch but Dood is controlling him.
Dood misses with a punch to the body.
That's three minutes gone in the round.
Dood throws a head punch that misses.
Myong Hyok works on Dood's body with a couple of short punches.
Dood tries a shoulder strike but it doesn't do any damage.
Dood misses with the head strike.
Dood tries to throw a body punch but Myong Hyok avoids it by throwing Dood back against the cage.
Dood lands a right hand that snaps the head of Myong Hyok backwards.
Dood throws a punch but it's blocked by Myong Hyok.
Myong Hyok prevents a body shot from Dood.
Dood misses with some punches.
Kit Dood seems to be working more effectively in the clinch in the fight so far.
Dood doesn't land with the attempted body shot.
Dood lands a hook that snaps the head of Myong Hyok backwards.
Myong Hyok wants to get back to striking at distance but Dood won't allow it.
Dood struggles to land a body shot inside as Myong Hyok controls his hands.
Dood keeps the fight in the clinch, despite Myong Hyok's efforts to push away.
Dood misses with a hook from the clinch.
That's four minutes gone in the round.
Dood has Myong Hyok pressed against the cage, preventing Myong Hyok from circling away and getting back to striking at range.
Myong Hyok wants to break free but Dood has control.
Dood swings wildly with an uppercut but Myong Hyok uses good head movement to avoid it.
Dood misses with a hook to the ribs.
Myong Hyok blocks a body shot from Dood.
Dood misses with a punch to the body.
Dood lands on the inside with an uppercut.
Dood misses with a hook from the clinch.
Myong Hyok wants to get back to striking at distance but Dood won't allow it.
Myong Hyok is trying to work out of this bad position, with his back against the cage.
Myong Hyok wants to break the clinch but can't.
The crowd thankful this round is nearly over.
Dood misses with a hook from the clinch.
Myong Hyok blocking some punches.
Myong Hyok breaks the clinch.
Dood is on the wrong end of a nice combination from Myong Hyok.
And thats the end of the round the fighters go back to their corners.
Kit Dood showed his class in that round. I'd imagine he'll take it on all the scorecards.
The corners get their ten second warning. Both fighters stand from their stools and stare eachother down, ready to get back to the action. This is the final round!

Myong Hyok swats away the attempt to clinch by Dood.
A little feinted left hand from Myong Hyok on the counter but he doesn't commit to it.
Dood is looking to clinch.
Myong Hyok swung with a counter right hand that didn't connect.
Dood tries to clinch up
and Myong Hyok counters with a two punch combo.
Myong Hyok circles away from the clinch attempt.
Dood wants to clinch up but Myong Hyok keeps it at a distance.
Myong Hyok tests Dood's chin there with a solid looking shot.
Kim Myong Hyok is looking to throw some combinations by the looks of things.
Myong Hyok looks to score with a jab to the body but Dood is just out of range.
Dood closes the distance and clinches.
We've had a slow start to the round here - hopefully the action picks up.
A short right from Dood.
Myong Hyok throws a punch but it's blocked by Dood.
Dood misses with a punch to the body.
Dood swings wildly with an uppercut but Myong Hyok uses good head movement to avoid it.
Myong Hyok blocking some punches.
That's one minute gone in the round.
Dood tries a shoulder strike but it doesn't do any damage.
Dood swings wildly with an uppercut but Myong Hyok uses good head movement to avoid it.
Myong Hyok is trying to slow down the pace of the fight but Dood is keeping busy.
Dood misses with a short punch on the inside.
Dood working aggressively here.
Myong Hyok working hard to break the clinch.
Myong Hyok blocks an uppercut.
Dood can't find room to land a body shot as Myong Hyok controls the action.
Myong Hyok blocks a body shot from Dood.
A head punch blocked on the inside by Myong Hyok.
Myong Hyok wants to strike at distance but he can't break free of the clinch.
Dood lands with a right to the head.
Dood lands with a quick shot inside that doesn't really do much damage.
That's two minutes gone in the round.
Dood misses with a punch to the body.
Dood has Myong Hyok pressed against the cage, preventing Myong Hyok from circling away and getting back to striking at range.
Dood has Myong Hyok pressed against the cage, preventing Myong Hyok from circling away and getting back to striking at range.
Dood tried to land a shot to the body but connects with Myong Hyok's elbow.
With the fighters clinched against the cage, Myong Hyok creates a bit of distance for himself and scores with a nice uppercut.
Dood tries a shoulder strike but it doesn't do any damage.
Myong Hyok blocks a body shot from Dood.
Dood misses with a punch on the inside.
Myong Hyok blocks a couple of punches on the inside.
Myong Hyok blocks a body shot from Dood.
Myong Hyok misses with a punch on the inside.
Dood misses with a hook to the ribs.
Myong Hyok blocks an uppercut.
Dood swings away with an uppercut that misses.
Good body shot from Dood.
An uppercut on the inside fails to land for Dood.
That's three minutes gone in the round.
Dood swings wildly with an uppercut but Myong Hyok uses good head movement to avoid it.
Myong Hyok is looking to break free of the clinch but Dood has double underhooks.
Dood tries a body shot but Myong Hyok blocks it.
Dood working aggressively here.
Myong Hyok is trying to force a seperation but Dood has the dominant position.
Myong Hyok avoiding damage.
Myong Hyok has had enough of the clinch but Dood keeps him there for the moment.
Myong Hyok wants to break free. God knows he wants to breaaaak freeee.
Myong Hyok wants to break free. God knows he wants to breaaaak freeee.
A nice right hand lands inside from Dood.
Myong Hyok lands with a short head shot on the inside.
Dood lands an uppercut.
Myong Hyok misses with a hook from the clinch.
Dood misses with a shot to the kidneys.
That's four minutes gone in the round.
Dood has a couple of punches blocked by Myong Hyok.
Dood can't find room to land a body shot as Myong Hyok controls the action.
Myong Hyok wants to push off and get back to the center of the mat but Dood has him pressed against the cage.
Dood swings wildly with an uppercut but Myong Hyok uses good head movement to avoid it.
Dood lands a nice uppercut.
Dood misses with some punches.
Dood misses with a short punch on the inside.
Dood misses with a hook from the clinch.
Dood takes a big intake of breath there - he's definitely tired.
Dood misses with the head strike.
Myong Hyok wants to break free. God knows he wants to breaaaak freeee.
Dood softening up his opponent with strikes, against the cage.
Myong Hyok blocks a couple of punches on the inside.
Dood swings away with an uppercut that misses.
Myong Hyok tries to break free but Dood pushes him back against the cage.
Kim Myong Hyok has stepped it up - he knows he needs a finish here!
Kit Dood is fighting for a decision - hopefully he's judged it right and he's actually winning the fight.
A frustrated look appears on Myong Hyok's face as he tries to break the clinch.
And that's the end of the fight!
Kit Dood comfortably won the final round on my scorecard.
I've got Dood winning every round here. Surely the decision will go his way and he'll pick up a well deserved decision victory. Over to the ring announcer for the scorecards.
Ladies and gentlemen, after 3 rounds of action, we go to the scorecards for a decision.
Judge Colin Fotheringham scores the fight 27:30
Judge Paul Tew scores the fight 27:30
Judge Chris Edwards scores the fight 27:30
In favor of your winner, by unanimous decision... Kit Dood!
|
|
|
|
|
|
|
|
|
|
|
|
|
|
|
|
|
|
|
|
|
|
|
| S |
C
A |
G |
S |
C
B |
G |
|
S |
C |
G |
|
energy
A | B |
|
hype
A | B |
|
pop
A | B |
|
mgr
A | B |
|
FIGHT
RATING
40% |
|
|
|
|
|
|
|
Undercard bout
|
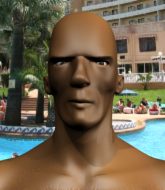
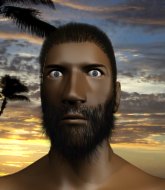
Coming up we have a bantamweight MMA rules bout between Varg Churchburn (ranked 0 p4p, 0 weight class) and Yajson Mrar (ranked 0 p4p, 0 weight class). Mrar is bobbing his head along to his entrance song: Sweet Dreams- Emily Browning. Yajson Mrar will no doubt be trying to keep this one on the feet, where he has a distinct advantage.
 |
|
 |
| 178 cm
18
145 lbs
1 - 0 - 0 |
|
164 cm
18
143 lbs
2 - 0 - 0 |
BJJ Blue Belt
Basic striking
Self confident |
|
BJJ White Belt
Excellent boxer
Powerful |
|
| |
|
Ladies and gentlemen. This fight is 3 rounds, in the bantamweight division.
Introducing the fighter to my left, fighting out of the red corner.
With a record of
1 - 0 - 0, fighting out of New York, Varg Churchburn!
And introducing the fighter to my right, fighting out of the blue corner.
With a record of
2 - 0 - 0, fighting out of New York, Yajson Mrar!
The judges for this bout are Daniel Bishop, Chris Edwards and Sam Margolis.
The bell rings for round one and we are underway!
Mrar avoids a lazy jab quite easily.
Churchburn looks to throw the jab but Mrar is out of range.
As Churchburn backs off Mrar throws a huge counter combo but Churchburn manages to avoid it all.
A slow jab from Churchburn misses its intended target.
We've been informed that Mrar has been sparring a lot of Muay Thai in the buildup to this fight so let's see if that has an impact on the result.
Churchburn tries to land with a swinging hook to the body but Mrar was well out of range. Poor timing from Churchburn.
As Churchburn backs off Mrar throws a huge counter combo but Churchburn manages to avoid it all.
Mrar scores with the left hand. Churchburn knows he should have avoided that one.

Mrar tries to keep at a distance but Churchburn has taken the fight into the clinch.
Churchburn is trying to pull guard but Mrar turns him against the cage and we stay in the clinch.
Mrar prevents a takedown attempt there.
Churchburn slows down the pace here.
We've had a slow start to the round here - hopefully the action picks up.
Mrar can't break the clinch.
Stalling in the clinch from Churchburn.
That's one minute gone in the round.
Mrar tries to break free but Churchburn pushes him back against the cage.
Churchburn wants to take the fight to the mat but Mrar manages to get underhooks and keep the fight in the clinch.
That's three failed takedown attempts in the round for Varg Churchburn. That's going to take a lot out of him.
Churchburn tries to land a knee to the body but he is off balance and Mrar avoids it.
Churchburn wants a takedown but no success here.
Churchburn stalling against the cage.
Mrar wants to break free. God knows he wants to breaaaak freeee.
Mrar prevents a body shot from Churchburn.
Churchburn prevents Mrar from breaking the clinch.
Churchburn jumps guard but Mrar stands there with Churchburn around his waist. Churchburn gives up and drops back to his feet. We remain in the clinch.
Mrar working hard to break the clinch.
Churchburn fails to pull the fight into his guard.
That's two minutes gone in the round.
A lull in the action here being met with boos from the crowd.
Churchburn prevents Mrar from breaking the clinch.
Churchburn stalling in the clinch.
Mrar wants to break free. God knows he wants to breaaaak freeee.
Churchburn pushes off and circles away, back to the middle of the mat.
Churchburn misses with an uppercut.
Mrar lands with a two punch combination before moving back out of range.
Mrar throws a wild combination but nothing lands.
Churchburn slips under a jab from Mrar.
Churchburn takes a shot to the body in his stride.
Churchburn throws a body punch but Mrar moves out of range.
Churchburn misses with a jab, cross combination.
Churchburn is looking light on his feet compared to last time was saw him fight.
Churchburn throws a big shot that misses.
Churchburn doesn't react quick enough there as he takes a shot to the body.
Mrar fails to land with a series of punches.
Churchburn has his hands up protecting his head but a hook from Mrar finds it's way round the side to connect with Churchburn's head.
Churchburn throws a jab, cross combination which is slipped
and Mrar counters with a three punch combination, finished off with a leg kick. Nice work.
That's three minutes gone in the round.
A swing and a miss from Churchburn.
Sloppy strikes from Mrar. Those never looked like landing.
Mrar throws a lazy right hand but Churchburn sees it coming a mile off and sidesteps it easily.
Mrar goes to the watering hole and comes back with a big thumbs up from the judges as he scores a three punch combo.

Churchburn is rocked!
Mrar ducks down and throws a hook to the body.
Oh Churchburn is still all over the place! His legs are completely gone! Will he be able to recover?!!
Churchburn misses with a lunging right hand
and Mrar counters with a quick right hand to the jaw.
Churchburn dives in and grabs Mrar's left leg, looking for a takedown. Mrar pushes down on Churchburn's head and hops out.
Varg Churchburn seems to be the more aggressive standup fighter in this bout.
Mrar feints a straight left to the body, then turns around with a flashy move and hits Churchburns jaw with a dramatic spinning back fist!
Mrar scores with a body shot.
Mrar scores with a punch to the gut of his opponent.
Yajson Mrar is looking to keep the fight on the feet at all costs.
Nice straight punches there by Churchburn. You know Roy Jones Jr respects the hands of Churchburn.
The crowd cheering loudly, showing their appreciation for the quality fight we're seeing here.
Churchburn tries to clinch but is not successful on this occasion.
Mrar throws a counter combo.
Churchburn just misses with a punch to the body.
Mrar throws a right and a left that both miss.
Nice shot lands for Mrar.
Churchburn throws an ugly left hook that misses
and Mrar counters with a big right hand! Oh Churchburn is in trouble here! Mrar follows up with more strikes and that's it! The ref has stopped it!
Ladies and gentlemen, after 3:44 of round 1, we have a winner by way of TKO (Strikes). Yajson Mrar!
Yajson Mrar decided to thank the fans in attendance for making a great atmosphere. It seemed to go down pretty well.
|
|
|
|
|
|
|
|
|
|
|
|
|
|
|
|
|
|
|
|
|
|
|
| S |
C
A |
G |
S |
C
B |
G |
|
S |
C |
G |
|
energy
A | B |
|
hype
A | B |
|
pop
A | B |
|
mgr
A | B |
|
FIGHT
RATING
48% |
|
|
|
|
|
|
|
Undercard bout
|
Coming up we have a featherweight MMA rules bout between Joao Claudio (ranked 0 p4p, 0 weight class) and Jin Jutsu (ranked 0 p4p, 0 weight class). Both fighters will be looking to make this an exciting fight for the fans, I'm sure!
 |
|
 |
| 173 cm
18
143 lbs
0 - 0 - 0 |
|
168 cm
23
145 lbs
1 - 2 - 0 |
Good wrestling
Brawler
Very quick |
|
Powerful takedowns
Counter fighter
Powerful |
|
| |
|
Ladies and gentlemen. This fight is 3 rounds, in the featherweight division.
Introducing the fighter to my left, fighting out of the red corner.
With a record of
0 - 0 - 0, fighting out of Las Vegas, Joao Claudio!
And introducing the fighter to my right, fighting out of the blue corner.
With a record of
1 - 2 - 0, fighting out of New York, Jin Jutsu!
The judges for this bout are James Atkins, Richard Clark and Andrew Berry.
The bell rings for round one and we are underway!

Claudio drives through with a takedown into guard.

Claudio is sitting in close to Jutsu's body. Jutsu has gone for a guillotine from the bottom. Oh damn, that looks pretty tight! Claudio is panicking - it looks like this one could be all over! Yes, Claudio is tapping! That was a very nice submission by Jutsu.
Ladies and gentlemen, after 0:18 of round 1, we have a winner by way of Submission (Guillotine). Jin Jutsu!
|
|
|
|
|
|
|
|
|
|
|
|
|
|
|
|
|
|
|
|
|
|
|
| S |
C
A |
G |
S |
C
B |
G |
|
S |
C |
G |
|
energy
A | B |
|
hype
A | B |
|
pop
A | B |
|
mgr
A | B |
|
FIGHT
RATING
100% |
|
|
|
|
|
|
|
Undercard bout
|
Coming up we have a middleweight MMA rules bout between Ken Griffey Jr (ranked 0 p4p, 0 weight class) and Lucien Michaelson (ranked 0 p4p, 0 weight class). Ken Griffey Jr is staring across the cage at his opponent, tweaking his nipples... Tweaking his own nipples that is.
 |
|
 |
| 193 cm
25
185 lbs
2 - 1 - 0 |
|
180 cm
25
185 lbs
1 - 2 - 0 |
BJJ White Belt
Excellent MT
Cardio machine |
|
BJJ White Belt
Excellent MT
Granite chin |
|
| |
|
Ladies and gentlemen. This fight is 3 rounds, in the middleweight division.
Introducing the fighter to my left, fighting out of the red corner.
With a record of
2 - 1 - 0, fighting out of London, Ken Griffey Jr!
And introducing the fighter to my right, fighting out of the blue corner.
With a record of
1 - 2 - 0, fighting out of London, Lucien Michaelson!
The judges for this bout are Daniel Bishop, Chris Edwards and James Atkins.
The bell rings for round one and we are underway!
Michaelson walks into a jab.
Michaelson looks really tired already! That doesn't bode well for a good, competitive fight!
Michaelson on the wrong end of a vicious looking body shot.
Michaelson takes one to the side of the head.
Ken Griffey Jr seems to be the more aggressive standup fighter in this bout.
Michaelson misses with a body shot.
Griffey Jr tries to counter by clinching up but Michaelson breaks away and moves out of range.
Michaelson takes a big uppercut there. He seems a bit wobbly but no, he's OK.
Griffey Jr works his jab well there, keeping his opponent at a distance.
Griffey Jr with a hook.
Griffey Jr lands with a right hand.
Griffey Jr swings wildly with a hook that is half blocked by Michaelson.
Griffey Jr loads up on a big right hand but Michaelson slips the punch.
Wooooo! Give it up for these two warriors! They are putting on a show!
Griffey Jr throws the left hand but Michaelson avoids the punch easily.
Griffey Jr has managed to clinch.
Michaelson misses with the head strike.
Stalling in the clinch from Michaelson.
Griffey Jr misses with the head strike.
Griffey Jr misses with some punches.
Michaelson swings wildly with an uppercut but Griffey Jr uses good head movement to avoid it.
Griffey Jr struggles to land a body shot inside as Michaelson controls his hands.
Michaelson lands a nice looking hook to the body, against the cage.
Griffey Jr misses with a short punch on the inside.
Griffey Jr is using his height advantage well here, landing a good percentage of his punches.
Griffey Jr prevents a takedown attempt there.
Griffey Jr escapes the clinch and we're back to striking.
That's one minute gone in the round.
Griffey Jr lands with a cross.
Griffey Jr connects with a right hand. Michaelson shakes it off.
Michaelson takes a really solid shot there but just smiles back and shrugs his shoulders.
Griffey Jr drives through and clinches with Michaelson against the cage.
Griffey Jr presses Michaelson against the cage and delivers a mid-strength body shot.
Griffey Jr breaks the clinch and we return to the middle of the mat.
Nice uppercut lands for Griffey Jr. That snapped Michaelson's head back.
Griffey Jr scores with a hook.
Griffey Jr is really peppering his opponent's head with punches.
Michaelson takes a body punch but keeps moving.
The crowd cheers as Griffey Jr lands an impressive looking overhand right. Michaelson doesn't seem phased though.
Nice shot lands for Griffey Jr.
Fantastic stuff here - a very entertaining period of action, which has drawn cheers from the crowd.
Griffey Jr takes the fight into the clinch.
Griffey Jr lands a right hand.
Griffey Jr misses with a body punch.
Griffey Jr looks to be in better condition than last time we saw him fight. Obviously he's been working hard on his cardio.
Griffey Jr pushes off and circles away, back to the middle of the mat.
A jab from Griffey Jr does it's job there.
Michaelson on the wrong end of a vicious looking body shot.
Griffey Jr keeps his opponent at a distance with a nice jab.
Griffey Jr shuffles to his left behind two crisp jabs. Michaelson eats them both and turns towards Griffey Jr to reposition himself and eats a stinging right hand-left hook combo.
That's two minutes gone in the round.
Griffey Jr lunges in with an uppercut that skims his opponent's chin.
Nice jab there from Griffey Jr.
Michaelson takes a jab on the nose there. A little bit of blood seems to be coming out. Hopefully that won't affect his breathing.
Ken Griffey Jr is looking to keep the fight on the feet at all costs.
Griffey Jr listening to his corner there, landing a nice uppercut.
Michaelson takes a shot to the eye socket. That's gotta hurt.
Griffey Jr bobs and weaves and unloads with a good uppercut.
Griffey Jr connects with a hook to the side of his opponent's head.
Griffey Jr connects with a nice looking jab.
Griffey Jr jabs Michaelson right on the nose. Michaelson blinks but takes it well.
Griffey Jr scores with a decent looking hook.

Michaelson is rocked!
Griffey Jr lands with an uppercut that bounces Michaelson off the cage and back into range.
Michaelson is still on wobbly legs! Can Griffey Jr finish him?
Griffey Jr throws out a powerful jab.
A shot to the liver by Griffey Jr. Beautiful body shot.
Griffey Jr gets a clinch.
Michaelson takes a shot to the head.
Michaelson takes a shot to the head.
Griffey Jr lands a shot to the body.
Griffey Jr throws a punch but it's blocked by Michaelson.
That's three minutes gone in the round.
A head punch on the inside from Griffey Jr fails to land.
Griffey Jr scores with a nice hook to the head.
Michaelson has a couple of punches blocked by Griffey Jr.
Griffey Jr throws a punch but it's blocked by Michaelson.
A short uppercut from Griffey Jr.
Griffey Jr tries to work over Michaelson's body with a swooping hook but it only glances the target.
Michaelson has a pretty nasty looking mouse under his right eye.
Griffey Jr misses with a short punch on the inside.
Griffey Jr pushes off and circles away, back to the middle of the mat.
The fighters circle momentarily. Griffey Jr darts into range and connects with a nice straight punch.
BOOM! Griffey Jr lands a beautiful left hook that drops Michaelson. Michaelson tries to recover but Griffey Jr is having none of it, landing more punishing shots from mount. One final crushing shot and Michaelson lies motionless on the canvas. The fight is over!
Ladies and gentlemen, after 3:35 of round 1, we have a winner by way of TKO (Strikes). Ken Griffey Jr!
Ken Griffey Jr seemed lost for words in his post fight interview but he remembered to thank his fans and directed everyone to his website.
|
|
|
|
|
|
|
|
|
|
|
|
|
|
|
|
|
|
|
|
|
|
|
| S |
C
A |
G |
S |
C
B |
G |
|
S |
C |
G |
|
energy
A | B |
|
hype
A | B |
|
pop
A | B |
|
mgr
A | B |
|
FIGHT
RATING
80% |
|
|
|
|
|
|
|
Undercard bout
|
Coming up we have a heavyweight MMA rules bout between Badir Housasi (ranked 0 p4p, 0 weight class) and Marcus Crewshall (ranked 0 p4p, 0 weight class). This should be fireworks!
 |
|
 |
| 198 cm
25
280 lbs
2 - 0 - 0 |
|
190 cm
19
220 lbs
0 - 1 - 0 |
BJJ White Belt
Excellent boxer
Big heart |
|
BJJ White Belt
Brawler
Heavy handed |
|
| |
|
Ladies and gentlemen. This fight is 3 rounds, in the heavyweight division.
Introducing the fighter to my left, fighting out of the red corner.
With a record of
2 - 0 - 0, fighting out of London, Badir Housasi!
And introducing the fighter to my right, fighting out of the blue corner.
With a record of
0 - 1 - 0, fighting out of Sydney, Marcus Crewshall!
The judges for this bout are Andrew Berry, Paul Tew and Richard Clark.
The bell rings for round one and we are underway!
Crewshall looks to clinch
and Housasi makes him pay by landing a nice hook to the body before moving out of range.
Housasi tests Crewshall's chin there with a solid looking shot.
Housasi will need to tighten up his combinations if he doesn't want to gas himself out, swinging at thin air.
Crewshall is looking to clinch but Housasi is avoiding it.
Crewshall lunges in with swinging rights and lefts but Housasi circles away quickly and effectively.
Housasi swats away the attempt to clinch by Crewshall.
We've had a slow start to the round here - hopefully the action picks up.
Crewshall tries for a takedown but Housasi circles away easily
and Housasi comes in over the top with a devastating right hand! Crewshall stumbles back against the cage, looking to regain his senses but Housasi is on him like rabid pit bull! Crewshall slumps to the ground under a storm of punches and this fight is over!
Ladies and gentlemen, after 0:51 of round 1, we have a winner by way of TKO (Strikes). Badir Housasi!
After winning the bout, Badir Housasi thanked all his fans and promised he'd do even better in his next fight. The crowd seemed to love his humility.
|
|
|
|
|
|
|
|
|
|
|
|
|
|
|
|
|
|
|
|
|
|
|
| S |
C
A |
G |
S |
C
B |
G |
|
S |
C |
G |
|
energy
A | B |
|
hype
A | B |
|
pop
A | B |
|
mgr
A | B |
|
FIGHT
RATING
43% |
|
|
|
|
|
|
|
Undercard bout
|
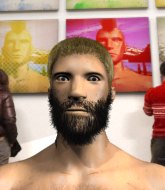
Coming up we have a lightweight MMA rules bout between Diego Escobar (ranked 0 p4p, 0 weight class) and Tyron Woodley (ranked 0 p4p, 0 weight class). Woodley comes into a darkened arena with his song building. Eminem - Till I Collapse kicks in, the lights come on and the crowd goes wild! What a showman! Diego Escobar has the better chin. Will he look to stand and bang today?
 |
|
 |
| 182 cm
18
160 lbs
2 - 0 - 0 |
|
185 cm
26
155 lbs
1 - 2 - 0 |
BJJ Blue Belt
Solid Muay Thai
KO power |
|
BJJ White Belt
Solid Muay Thai
Determined |
|
| |
|
Ladies and gentlemen. This fight is 3 rounds, in the lightweight division.
Introducing the fighter to my left, fighting out of the red corner.
With a record of
2 - 0 - 0, fighting out of Los Angeles, Diego Escobar!
And introducing the fighter to my right, fighting out of the blue corner.
With a record of
1 - 2 - 0, fighting out of London, Tyron Woodley!
The judges for this bout are Sam Margolis, Richard Clark and Colin Fotheringham.
The bell rings for round one and we are underway!
Good standup being displayed there by Escobar as he connects with a hook.
Woodley is a painfully thin specimen of a man. You do wonder whether a good body kick would snap him clean in two.
A head kick misses from Woodley.
A little feinted left hand from Escobar on the counter but he doesn't commit to it.
Good standup being displayed there by Escobar as he connects with a hook.
Escobar scores with a punch to the gut of his opponent.
Escobar has managed to clinch.
Nice body punch from Escobar.
Escobar manages to pull guard.

Escobar is looking for a guillotine. You can't force these things though and Woodley defends well.
Escobar throwing his legs up looking for a triangle.
Escobar looking for submissions off his back, moving his hips, looking for an opening.
Escobar seems to have improved his submission grappling technique since last time we saw him. Let's see if he can pull off a submission.
That's one minute gone in the round.
Escobar looking for submissions from the bottom here. Moving his hips around, possibly looking for an armbar.
Escobar has thrown up a leg looking for a triangle. Woodley doesn't defend quickly enough and Escobar has managed to lock this one up! Can Woodley escape?! NO! He's tapping out! Damn, that was a quick submission - congrats to Escobar on a fantastic submission victory.
Ladies and gentlemen, after 1:31 of round 1, we have a winner by way of Submission (Triangle). Diego Escobar!
After the fight, Diego Escobar was humble in paying tribute to his opponent but made it clear he wants to go on to bigger and better things. It seemed to go down well with the crowd who cheered him loudly.
In defeat, Tyron Woodley stepped up to the mic, saying 'I don't know what is next for me after this lose'.
|
|
|
|
|
|
|
|
|
|
|
|
|
|
|
|
|
|
|
|
|
|
|
| S |
C
A |
G |
S |
C
B |
G |
|
S |
C |
G |
|
energy
A | B |
|
hype
A | B |
|
pop
A | B |
|
mgr
A | B |
|
FIGHT
RATING
59% |
|
|
|
|
|
|
|
Undercard bout
|
|
|
|
Co-main event
|
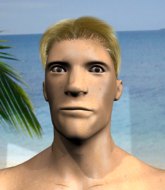
Coming up we have a middleweight MMA rules bout between Lake Dutchman (ranked 0 p4p, 0 weight class) and Thor Hammer (ranked 0 p4p, 0 weight class). These two fighters really are very evenly matched on the feet - it will be fascinating to see who can assert themselves in that aspect of the fight.
 |
|
 |
| 185 cm
26
183 lbs
2 - 0 - 0 |
|
188 cm
19
199 lbs
2 - 0 - 0 |
BJJ White Belt
Excellent MT
Cuts easily |
|
BJJ White Belt
Excellent boxer
Good gas tank |
|
| |
|
Ladies and gentlemen. This fight is 3 rounds, in the middleweight division.
Introducing the fighter to my left, fighting out of the red corner.
With a record of
2 - 0 - 0, fighting out of New York, Lake Dutchman!
And introducing the fighter to my right, fighting out of the blue corner.
With a record of
2 - 0 - 0, fighting out of Helsinki, Thor Hammer!
The judges for this bout are Andrew Berry, Donald Grub and James Atkins.
The bell rings for round one and we are underway!
Dutchman wants to clinch up but Hammer keeps it at a distance.
Hammer throws a jab but it's blocked by Dutchman.
Hammer throws a body punch but Dutchman moves out of range.
Dutchman takes a body punch that cleary hurt but he's trying not to show any weakness.
Dutchman tries to clinch but Hammer moves away
and Hammer connects with a straight left hand counter down the middle.
Hammer looks to land a left hand but Dutchman moved out of range nicely.
Hammer lands with a right hand.

It looks like Lake Dutchman has been cut.
Dutchman missing with a left hand there. Hammer was out of range so wasted energy throwing that one.
Hammer lands a straight punch to the body, keeping Dutchman at a distance.
Dutchman throws a hook but Hammer blocks it.
Dutchman moves in looking to clinch but Hammer pushes him off.
We've had a slow start to the round here - hopefully the action picks up.
Dutchman swings wildly with a right hand that was never going to find it's target.
Hammer swings for the body but Dutchman moves out of range.
Dutchman throws a leg kick that is checked
and Hammer counters with a lovely shot to the body.
Hammer is throwing a lot of body shots here, looking to wear down Dutchman rather than just go for the knockout.
Dutchman takes a punch right to his stomach. That took the wind out of him momentarily.
The crowd are loving this. Great action here.
Dutchman looks to throw the jab but Hammer is out of range.
That's one minute gone in the round.
Dutchman tries to clinch up.
Hammer throws a good cross that connects.
Hammer works his jab well there, keeping his opponent at a distance.
Hammer listening to his corner there, landing a nice uppercut.
Dutchman fakes with an overhand right and moves in to clinch with Hammer, pushing him back against the cage.
Dutchman lands an uppercut.
Hammer lands with a good tight uppercut to the head.

Hammer's corner calls for him to break the clinch, which he does.
Dutchman is looking to take this fight into the clinch.
Dutchman has his head snapped back a nice jab. A little nod from Dutchman there as he acknowledges the shot.
Hammer avoids the clinch attempt nicely.
Dutchman slips a jab from Hammer.
That's two minutes gone in the round.
Hammer misses with a body shot. Nice footwork from Dutchman.
The fans in attendance giving it up for the two fighters, who have really let it all hang out in the last minute or so!
Dutchman has Hammer up against the cage in a clinch.
Hammer's corner calls for him to break the clinch, which he does.
Hammer swats away the attempt to clinch by Dutchman.
Hammer throws a good cross that connects.
Lake Dutchman seems to be the more aggressive standup fighter in this bout.
Dutchman throws a jab to the body, straight down the pipe. Boom. That sent Hammer stumbling backwards but he manages to regain his composure quickly.
Dutchman is looking to take this fight into the clinch.
Dutchman tries to grapple but his opponent circles

and Hammer counters with a crisp one two that drops Dutchman! Hammer thinks about following him to the mat for a moment but instead steps back and waves Dutchman to his feet! Dutchman is in big trouble!
Dutchman is rocked!
Dutchman doesn't react quick enough there as he takes a shot to the body.
Oh Dutchman is still all over the place! His legs are completely gone! Will he be able to recover?!!
That's three minutes gone in the round.
Hammer cracks Dutchman with an open hand slap.
Hammer cracks Dutchman with a nasty uppercut that draws ooohs from the crowd and sends Dutchman tumbling backwards onto the mat. He tries to recover but Hammer pounces and lands a hail of unanswered strikes that forces the referee to step in to end the fight! Dutchman is not happy but he gave the referee no choice!
Ladies and gentlemen, after 3:10 of round 1, we have a winner by way of TKO (Strikes). Thor Hammer!
|
|
|
|
|
|
|
|
|
|
|
|
|
|
|
|
|
|
|
|
|
|
|
| S |
C
A |
G |
S |
C
B |
G |
|
S |
C |
G |
|
energy
A | B |
|
hype
A | B |
|
pop
A | B |
|
mgr
A | B |
|
FIGHT
RATING
53% |
|
|
|
|
|
|
|
Main event
|
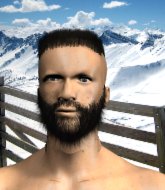
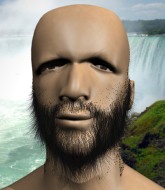
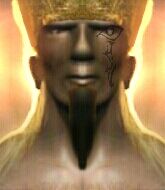
Coming up we have a light heavyweight MMA rules bout between Chris Leary (ranked 0 p4p, 0 weight class) and Cobra Commander (ranked 0 p4p, 0 weight class). Commander has chosen Cobra Theme as his entrance music. Both these fighters are unbeaten, so somebody's 0 has got to go!The atmosphere really building for this one as we go over to our ring announcer for the fighter introductions!
 |
|
 |
| 182 cm
25
208 lbs
7 - 0 - 0 |
|
199 cm
25
211 lbs
6 - 0 - 0 |
Powerful takedowns
Basic striking
Granite chin |
|
Powerful takedowns
Basic striking
Granite chin |
|
| |
|
Ladies and gentlemen. This fight is 5 rounds, for the light heavyweight championship of the world!
Introducing the champion to my left, fighting out of the red corner.
With a record of
7 - 0 - 0, fighting out of New York, Chris Leary!
And introducing the challenger to my right, fighting out of the blue corner.
With a record of
6 - 0 - 0, fighting out of Los Angeles, Cobra Commander!
The judges for this bout are Chris Edwards, Sam Margolis and James Atkins.
The bell rings for round one and we are underway!
A telegraphed takedown attempt from Commander is defended easily by Leary.
Leary moves into range and clinches up with Commander.
Leary is defending well against a takedown attempt.
Leary jumps into guard, dragging Commander to the mat.
Commander wants to control from the top but Leary keeps moving.
Leary might be looking to lock onto one of his opponent's long limbs for a submission, whilst we're on the ground.
Leary is trying to keep Commander in close.
Commander works a leg free and moves into half guard.
We've had a slow start to the round here - hopefully the action picks up.
Leary is not content to let Commander control the position.
Leary wants to get back to full guard.
Commander looking for a kimura but he'll have to free his other leg if he wants to finish that. Perhaps he's just using it as a distraction technique.
Leary is looking to improve his position.
That's one minute gone in the round.
Commander is thwarting Leary's attempts to control the position.
Commander tries to pass the half guard into mount. Leary knows what he's doing though and prevents the attempt.
Leary tries to get to full guard but Commander has control of the leg.
Leary trying to hold on to Commander's head to control him but Commander postures up.
Leary wants to improve his position but Commander is controlling well.
The ref warns both fighters not to hold the cage as they work up against the meshing.
That's two minutes gone in the round.
The crowd are starting to boo a lack of action.
Commander looking for a kimura but he'll have to free his other leg if he wants to finish that. Perhaps he's just using it as a distraction technique.
Commander trying to control the action but Leary is working from the bottom.
Commander perhaps working for something from half guard, or maybe not. It looks like he's just sitting there.
Leary moves his hips nicely and gets into full guard.
My spies in Death Valley Training Facility inform me that Commander has been getting involved in the gym's BJJ sparring sessions. Let's see whether that pays dividends!
Commander wants to pass the guard but Leary is keeping the position.
Leary trying to keep a closed guard but Commander is proving a slippery customer.
Commander tries to free his leg and advance position but Leary is retaining full guard.
That's three minutes gone in the round.
Commander pushing down on Leary's thigh, trying to pass to half guard. He's managed it... Nice work.
Commander is trying to work for a kimura but Leary is defending well.
Leary tries to roll over but Commander keeps him under control.
Leary looking for submissions off his back.
Commander seems very keen to just sit and control from half guard but Leary does not like that idea so much and is remaining active off his back.
Leary looking for submissions from an awkward position here.
Commander looking to pass the half guard. Not this time.
Leary is defending against the submission attempts here by Commander.
Commander looking to pass the half guard. Not this time.
That's four minutes gone in the round.
Leary works his way to full guard. Good work.
Commander got a little sloppy there for a moment and Leary has worked his way into a loose triangle - can he finish it?! No, Commander has managed to get both his arms back between Leary's legs - danger averted.
Commander tries to free his leg and advance position but Leary is retaining full guard.
Commander advances position into side control!
Commander tries for an arm triangle. That looks pretty tight to me. Is this one over!?! Possibly, maybe, no Commander has let go of the choke. Obviously it wasn't as tight as we thought!
Commander is looking to take a break and control but Leary is keeping him honest, looking to work from the bottom.
Boooooooooooooooooooo!!! God, this has been a terrible round. Come on you two, sort yourselves out!
Commander is looking for a kimura. He might have it! No, Leary has escaped the position, nice work there.
And thats the end of the round the fighters go back to their corners.
Cobra Commander dominated that round.
Well, the break between rounds is over. Let's get back to the scrappin!
Commander shoots in for a takedown. "I don't think so" says Leary as he avoids it easily.
No luck with that takedown attempt from Commander.
Commander shoots in looking for a double leg takedown. Leary defends it nicely.
Chris Leary has stuffed three takedown attempts in the round now. That's going to take a lot out of Cobra Commander.

Commander shoots in for a takedown and gets it.
Leary is looking for a sweep. Commander is wise to his cunning plan and keeps the top position.
We've had a slow start to the round here - hopefully the action picks up.
Leary trying to control here.
Cobra Commander has got the better of the ground game so far.
Leary wants to get back to full guard.
Commander uses his free foot to push down on Leary's thigh. Eventually he works his other foot free and he's advanced to mount - this is trouble for Leary.
That's one minute gone in the round.
Commander seems to be looking to move to his opponent's back but Leary is holding on tight.
The fighters are pressed up against the cage, both looking to find a bit of space to work.
Leary tries to reverse the position but Commander maintains control.
Leary is working hard here to advance position.
Commander has control of Leary's right arm, working for a kimura. It's a bit of a token attempt though and Leary regains control of the situation pretty easily.
Leary wants to control but Commander is having none of it.
Leary is desperately trying to get back to half guard.
Commander has been the more effective fighter overall so far.
Leary has given up his back - I dont know if this is a deliberate ploy to try and escape or if he is just struggling down there.
Commander tightening his grip on Leary, looking for the choke.
Commander avoiding Leary 's attempts to control his hands.
That's two minutes gone in the round.
Leary tries to escape the position.
Leary looks to control his opponent's hands but he's not mananging it at the moment.
Commander keeps control of the position as Leary tries to break free.
Leary trying to control the position but Commander manages to sink in the hooks.
Commander has his opponent's back and is working for the choke.
I really don't envy Leary right now.
That's three minutes gone in the round.
Leary manages to reverse the position and now he's in Commander's guard. Nice work there by Leary.
Commander is working an open guard here, looking to improve his position. No doubt that will leave him open to counters but at least he's being more offensive.
Commander looking for a guillotine here but Leary defends easily.
Commander manages to sweep nicely, so he's now on top. Leary manages to get himself to full guard.

Commander slips effortlessly into side control - very nice.
Leary tries to improve position but can't.
That's four minutes gone in the round.
Leary is moving his hips around well on the bottom and has managed to get back to half guard.
Commander is pressing down on Leary's thigh, looking to free his foot. Leary is holding on for now.
Commander prevents Leary from improving his position.
Commander is working for a submission of some sort.
Leary slips a foot under and gets full guard. Nice work.
Commander wants to control from the top but Leary keeps moving.
The crowd thankful this round is nearly over.
Leary trying to keep a closed guard but Commander is proving a slippery customer.
Commander pressing down on his opponent's thigh, looking to pass guard. Leary is keeping the position for now.
And thats the end of the round the fighters go back to their corners.
Cobra Commander showed his class in that round. I'd imagine he'll take it on all the scorecards.
That's time! Leary's corner gives him a slap on the ass as he gets ready to fight.
Leary clinches with his opponent.
Commander is looking for a takedown up against the cage. Leary gets underhooks though and prevents the takedown attempt.
Commander is trying to pull guard but Leary has him pressed against the cage.
Commander jumps guard but Leary turns him against the cage and keeps the fight standing.
Chris Leary has stuffed three takedown attempts in the round now. That's going to take a lot out of Cobra Commander.
Leary decides to pull guard.
Leary working a defensive guard here.
Commander wants to pass the guard but Leary is keeping the position.
Leary trying to control the position.
Commander tries to free his leg and advance position but Leary is retaining full guard.
We've had a slow start to the round here - hopefully the action picks up.
Commander advances position into side control!
Leary is trying to work for a sweep but Commander has mounted him!
Leary bucks up and manages to get a nice reversal! He's in guard on the top - nicely done!
That's one minute gone in the round.
Commander keeping moving, preventing Leary from controlling successfully.
Leary works a leg free and moves into half guard.
Leary is looking to take a break and control but Commander is keeping him honest, looking to work from the bottom.
Leary is really struggling to control Commander but he's trying to hold on to the position.
Commander wants to get back to full guard.
Leary is working for submissions here but there's nothing on.
Commander is looking to regain full guard. Not this time though.
That's two minutes gone in the round.
A few boos can be heard. I'm sure they will multiply if the fighters don't pick up the pace.
Commander trying to hold on to Leary's head to control him but Leary postures up.
Leary is trying to work for a kimura. This could be trouble! No, Commander has managed to free his arm - good work.
Commander is looking to sinch up a guillotine here but Leary pulls his head out easily.
Commander tries to get to full guard but Leary has control of the leg.
Leary is trying to work for a kimura but Commander is defending well.
That's three minutes gone in the round.
Leary seems very keen to just sit and control from half guard but Commander does not like that idea so much and is remaining active off his back.
Leary seems to be working for a kimura but Commander defends the submission attempt.
Leary wants to take a breather but Commander is having none of it.

The referee has motioned to the fighters to stand back up. He just wasn't happy with the level of activity.
Commander fails miserably with a takedown attempt.
Leary seems to be moving with more speed, compared to his last bout. He must have been working on that in the gym.
Leary darts in trying to clinch
so Commander counters with a double leg into guard. Good agility.
That's four minutes gone in the round.
Commander tries to free his leg and advance position but Leary is retaining full guard.
Leary looking for submissions from the bottom here. Moving his hips around, possibly looking for an armbar.
Commander is trying to work a guillotine from the top, or something like that? Don't know how he thinks he's going to get a finish from there.
Commander sneaks a leg through and gets to half guard. That was like a knife through butter how easily he passed Leary's guard.
Leary moves his hips nicely and gets into full guard.
Leary pulls Commander in close to his closed guard and prevents Commander from doing any damage or advancing position.
Commander looking to pass the guard.
Boooooooooooooooooooo!!! God, this has been a terrible round. Come on you two, sort yourselves out!
Leary looking to control.
And thats the end of the round the fighters go back to their corners.
That was a close round but Chris Leary did the better work so I'd imagine he'll take it.
That's time! Leary's corner gives him a slap on the ass as he gets ready to fight.

Leary moves into the clinch.
Commander is trying to work for a single leg takedown but Leary pulls him back up using the underhooks.
Commander is trying to pull guard but being pressed up against the cage enables Leary to keep the fight standing.
Leary pulls guard successfully.
Leary working a defensive guard here.
We've had a slow start to the round here - hopefully the action picks up.
Commander pushing down on Leary's thigh, trying to pass to half guard. He's managed it... Nice work.
Leary is looking to improve his position.
Leary trying to control but Commander postures up.
That's one minute gone in the round.
Leary wants to get back to full guard.
Commander is trying for a kimura here. Leary looks like he's in a lot of pain... and he's tapping out! Commander wins by kimura!
Ladies and gentlemen, after 1:28 of round 4, we have a winner by way of Submission (Kimura). Cobra Commander!
Cobra Commander is the new light heavyweight champion!
After winning the bout, Cobra Commander thanked all his fans and promised he'd do even better in his next fight. The crowd seemed to love his humility.
|
|
|
|
|
|
|
|
|
|
|
|
|
|
|
|
|
|
|
|
|
|
|
| S |
C
A |
G |
S |
C
B |
G |
|
S |
C |
G |
|
energy
A | B |
|
hype
A | B |
|
pop
A | B |
|
mgr
A | B |
|
FIGHT
RATING
30% |
|
|
|
|
|
|
|
|
|
|
