 |
Angry Birds War - Strike 3 PBP Commentary |
Undercard bout
|
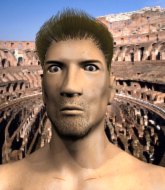
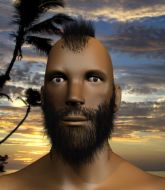
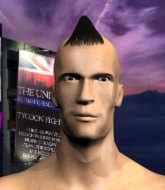
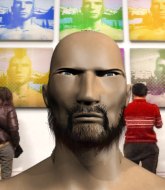
Coming up we have a welterweight MMA rules bout between Tyson Colemen (ranked 0 p4p, 0 weight class) and Rex Madson (ranked 0 p4p, 0 weight class). Colemen's entrance music is I don't give up. A fine choice. Madson has chosen U got knockout as his entrance music. Rex Madson will no doubt be looking to use his reach advantage to good effect.
 |
|
 |
| 179 cm
25
177 lbs
3 - 1 - 0 |
|
196 cm
24
180 lbs
2 - 1 - 0 |
BJJ Blue Belt
Solid Muay Thai
Big heart |
|
BJJ Blue Belt
Decent boxing
Solid chin |
|
| |
|
Ladies and gentlemen. This fight is 3 rounds, in the welterweight division.
Introducing the fighter to my left, fighting out of the red corner.
With a record of
3 - 1 - 0, fighting out of New York, Tyson Colemen!
And introducing the fighter to my right, fighting out of the blue corner.
With a record of
2 - 1 - 0, fighting out of New York, Rex Madson!
The judges for this bout are Tarja Halkonen, Johanna Lukiainen and Marco Blurström.

The bell rings for round one and we are underway!

Colemen has Madson up against the cage in a clinch.
Colemen tries to land knees in the clinch but Madson avoids the damage to the body.
Madson wants to get back to striking at distance but Colemen won't allow it.
Madson tries to circle away but Colemen has him pinned against the cage.
Madson wants to get back to striking at distance but Colemen won't allow it.
We've had a slow start to the round here - hopefully the action picks up.

Madson escapes the clinch and we're back to striking.
Madson is a painfully thin specimen of a man. You do wonder whether a good body kick would snap him clean in two.
Colemen closes the distance and clinches.

That's one minute gone in the round.
Colemen with the Thai clinch. He's looking to land a big knee but he's not managed it this time.
Madson is trying to break free.
Madson is trying to break the clinch but Colemen has him pressed against the cage.
Madson can't break the clinch.
Madson is trying to work out of this bad position, with his back against the cage.
Colemen looking to throw knees to the head but Madson is blocking nicely.

That's two minutes gone in the round.
Neither fighter has done anything of merit for a good minute or two here and the crowd are not happy about it.
Colemen lands a knee to the head.
Colemen tries a knee to the head but he's missed.
Colemen landing knees to the body. They look like they could hurt.
Colemen looking to throw knees to the head but Madson is blocking nicely.
Colemen keeps the fight in the clinch, despite Madson's efforts to push away.
Colemen looking to throw knees to the head but Madson is blocking nicely.

That's three minutes gone in the round.
Colemen has Madson pressed against the cage, preventing Madson from circling away and getting back to striking at range.
Colemen throws a vicious knee straight up the middle but Madson blocks it with crossed arms.
Madson escapes the clinch and we're back to striking.
Madson misses with a double jab
and Colemen counters with a two punch combo.
Colemen gets in close and instigates a clinch.
A frustrated look appears on Madson's face as he tries to break the clinch.

That's four minutes gone in the round.
Madson wants to get back to striking at distance but Colemen won't allow it.
Colemen throws a vicious knee straight up the middle but Madson blocks it with crossed arms.
Madson wants to break free. God knows he wants to breaaaak freeee.
Colemen taking a breather.
Boooooooooooooooooooo!!! God, this has been a terrible round. Come on you two, sort yourselves out!
Madson looks like he'd prefer to be striking at range right now.
And thats the end of the round the fighters go back to their corners.
Tyson Colemen dominated that round.
The corners get their ten second warning. Both fighters stand from their stools and stare eachother down, ready to get back to the action.

Colemen tries to clinch but is not successful on this occasion.
Madson misses with a double jab
and Colemen counters with a one-two to the body.
Colemen closes the distance and clinches.
Madson has had enough of the clinch and is looking to separate.
Colemen looking to throw knees to the head but Madson is blocking nicely.
Madson has had enough of the clinch but Colemen keeps him there for the moment.
We've had a slow start to the round here - hopefully the action picks up.
Colemen using the Thai plumb to throw knees but Madson has his back arched nicely, preventing the strike.
That's one minute gone in the round.
Colemen with the Thai clinch, lands a knee to the head.
Madson tries to break free but Colemen pushes him back against the cage.
Colemen tries to land a knee to the head but misses.
Colemen with the Thai clinch. He's looking to land a big knee but he's not managed it this time.
Madson wants to strike at distance but he can't break free of the clinch.
Madson wants to break the clinch but can't.
That's two minutes gone in the round.
Neither fighter has done anything of merit for a good minute or two here and the crowd are not happy about it.
Madson breaks the clinch and we're back to striking at distance.
Tyson Colemen is looking to throw some combinations by the looks of things.
Madson misses with a double jab.
Colemen moves into the clinch.
Colemen using the Thai plumb to throw knees but Madson has his back arched nicely, preventing the strike.
Colemen looking to throw knees to the head but Madson is blocking nicely.
Colemen looking to throw knees to the head but Madson is blocking nicely.
Colemen misses with a knee strike.
That's three minutes gone in the round.
Colemen tries a knee to the head but Madson blocks it.
Madson tries to circle away but Colemen has him pinned against the cage.
Colemen tries a knee to the head but he's missed.
Madson escapes the clinch and we're back to striking.
Colemen is looking to clinch but Madson is avoiding it.
Madson lets the fists fly and connects with a left straight followed by a right hook.
Madson tries to keep at a distance but Colemen has taken the fight into the clinch.
Madson wants to get back to striking at distance but Colemen won't allow it.
That's four minutes gone in the round.
Madson wants to strike at distance but he can't break free of the clinch.
Madson tries to circle away but Colemen has him pinned against the cage.
Madson wants to break free but Colemen has control.
Colemen is really dominating this fight. Is there anything that Madson can do to turn this around?
Boooooooooooooooooooo!!! God, this has been a terrible round. Come on you two, sort yourselves out!
Madson is trying to break free.
And thats the end of the round the fighters go back to their corners.
Tyson Colemen dominated that second round.
The fighters' corners scream their final instructions, as the referee calls time. Here we go, back to the action! This is the final round!

Some wild striking there from Madson.
Madson throws a combination but it was largely blocked by Colemen.
Colemen fails in his attempt to clinch.
Madson unleashes a big counter combination but Colemen bobs and weaves and avoids any damage.
Madson fails to land with a series of punches.
Colemen gets a clinch.
Madson wants to break free but Colemen has control.
Colemen with an attempt at a knee that misses.
We've had a slow start to the round here - hopefully the action picks up.
Colemen with the Thai clinch. He's looking to land a big knee but he's not managed it this time.
That's one minute gone in the round.
Colemen with an attempt at a knee that misses.
Madson wants to get back to striking at distance but Colemen won't allow it.
Colemen throws a vicious knee straight up the middle but Madson blocks it with crossed arms.
Madson is trying to work out of this bad position, with his back against the cage.
Colemen tries a knee to the head but Madson blocks it.
Colemen connects with a nasty looking knee right to Madson's face.
That's two minutes gone in the round.
Madson can't break the clinch.
Madson has had enough of the clinch and is looking to separate.
A knee to the head by Colemen.
The referee calls for Colemen to work.
Madson has had enough of the clinch but Colemen keeps him there for the moment.
That's three minutes gone in the round.
Colemen keeps control of Madson as he tries to wriggle out of the double underhooks.
Colemen misses with a knee strike.
Colemen tries a knee to the head but Madson blocks it.
Madson is trying to push Colemen away but Colemen has him pressed against the cage, so he's going nowhere.
Madson tries to break free but Colemen pushes him back against the cage.
Colemen has Madson pressed against the cage.
That's four minutes gone in the round.
The crowd are getting on the fighters' backs, as the pace has dropped off in the last minute or so.
Colemen connects with a knee to the head.
Colemen misses with a knee strike.
Madson wants to push off and get back to the center of the mat but Colemen has him pressed against the cage.
Rex Madson has stepped it up - he knows he needs a finish here!
Tyson Colemen is fighting for a decision here - he's started to take the cautious approach.
Boooooooooooooooooooo!!! God, this has been a terrible round. Come on you two, sort yourselves out!
Madson tries to break free but Colemen pushes him back against the cage.
And that's the end of the fight!
Tyson Colemen showed his dominance in that final round.
Well I reckon that's a shut out for Colemen, winning every round. Will the judges agree? They are the ones who matter, even if they are often depressingly incompetent. Over to the ring announcer for the scorecards.
Ladies and gentlemen, after 3 rounds of action, we go to the scorecards for a decision.
Judge Tarja Halkonen scores the fight 30:27
Judge Johanna Lukiainen scores the fight 30:27
Judge Marco Blurström scores the fight 30:27
In favor of your winner, by unanimous decision... Tyson Colemen!
Tyson Colemen made sure to give a little speech post fight, saying 'Whoever beats me u will better give me a rematch now.'.
Rex Madson spoke after the fight, saying 'Nice work dude.'.
|
|
|
|
|
|
|
|
|
|
|
|
|
|
|
|
|
|
|
|
|
|
|
| S |
C
A |
G |
S |
C
B |
G |
|
S |
C |
G |
|
energy
A | B |
|
hype
A | B |
|
pop
A | B |
|
mgr
A | B |
|
FIGHT
RATING
20% |
|
|
|
|
|
|
|
Undercard bout
|
|
|
|
Undercard bout
|
|
|
|
Undercard bout
|
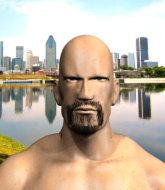
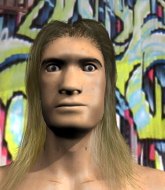
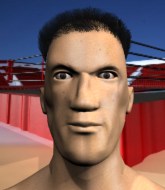
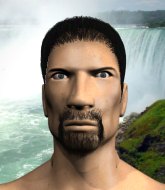
Coming up we have a lightweight MMA rules bout between Leonard Owusu (ranked 0 p4p, 0 weight class) and Brusko Ramero Genimer (ranked 0 p4p, 0 weight class). Brusko Ramero Genimer has the power to score a knockout today if he connects clean with Leonard Owusu's chin.
 |
|
 |
| 182 cm
25
160 lbs
3 - 1 - 0 |
|
175 cm
25
160 lbs
1 - 0 - 0 |
BJJ White Belt
Brawler
Likes comics |
|
BJJ Blue Belt
Solid Muay Thai
Solid chin |
|
| |
|
Ladies and gentlemen. This fight is 3 rounds, in the lightweight division.
Introducing the fighter to my left, fighting out of the red corner.
With a record of
3 - 1 - 0, fighting out of Sydney, Leonard Owusu!
And introducing the fighter to my right, fighting out of the blue corner.
With a record of
1 - 0 - 0, fighting out of Tokyo, Brusko Ramero Genimer!
The judges for this bout are Tarja Halkonen, Marco Blurström and Johanna Lukiainen.
The bell rings for round one and we are underway!
Owusu throws an uppercut from half a mile away. Genimer sees it coming and avoids it easily.
Owusu moves into the clinch.
Owusu tries to pull guard but Genimer holds him up against the cage and eventually Owusu drops back down to his feet.
Genimer is trying to break free.

Owusu breaks the clinch and we return to the middle of the mat.
Owusu walks straight into a jab right on the nose. That one stung - he's blinking and trying to clear his head.
Owusu wants to clinch.
We've had a slow start to the round here - hopefully the action picks up.
Owusu is looking to clinch but Genimer is avoiding it.
That's one minute gone in the round.
Owusu misses with the combination.
Owusu scores with a jab to the jaw of his opponent.
Horrible takedown attempt by Owusu or perhaps it was just good defense by Genimer, which made it look bad.
Genimer is loading up here, looking for a big counter of his own.
Owusu wants to clinch but Genimer slips to the side
and Genimer counters with a left and a right that stings Owusu.
Genimer closes the distance and lands a one-two.
No luck for Owusu with that takedown attempt.
That's three failed takedown attempts in the round for Leonard Owusu. That's going to take a lot out of him.
Genimer shoots in but Owusu avoids the takedown attempt easily.
That's two minutes gone in the round.
Owusu rushes Genimer and pushes him back against the cage in a clinch.
Owusu misses with a short punch on the inside.
Owusu tries for a takedown but Genimer manages to get underhooks.
Genimer breaks from the clinch.
Fantastic stuff here - a very entertaining period of action, which has drawn cheers from the crowd.
Left hook, right uppercut from Owusu.
Owusu tries to score a power double leg takedown but Genimer sees that one coming and sprawls well. That will dishearten Owusu somewhat.
It seemed like Genimer was going to counter with the hook but didn't fully commit to it.
Owusu lands a jab-cross combination.
That's three minutes gone in the round.
Owusu tries to clinch up against the cage, rushing in to close the distance. Genimer manages to break the clinch and circles back to the middle of the mat.
Genimer lets it all go there with a big combo counter but none of the punches connected.
Owusu throws a solid leg kick but Genimer takes the impact on his shin and smiles at Owusu.
Owusu scores with a nice looking left hook and follows it up with an uppercut!
Genimer darts in looking for a takedown but Owusu gets double underhooks and turns Genimer into the cage.
Owusu went nuts there looking for a big combo counter but none of the flurry connected.
Owusu throws a wild combination but nothing lands.
Genimer swings away with a counter right hand but no contact made.
Genimer misses with a few strikes there.
Owusu throws a head kick but Genimer moves out of range.
Genimer is looking for the big counter here.
Owusu has his takedown stuffed
and Genimer counters with a good right hand that lands right on the jaw.
That's four minutes gone in the round.
Owusu rushes in with a sloppy looking punch
and Genimer counters with a stiff right hand.
Owusu throws the kick towards the body but Genimer avoids it.
Owusu misses with a wild body shot.
Owusu pushes Genimer up against the cage in a clinch.
Genimer is working for takedown but Owusu is calmly controlling the position for now.
Genimer manages to break the clinch.
This has been an exciting period of action!
Genimer moves out of range of the body kick from Owusu.
Leonard Owusu seems to be the more aggressive standup fighter in this bout.
Owusu fails to land the takedown.
Owusu is pinned up against the cage taking some big shots here. The referee is looking closely deciding whether he should stop the fight.
And thats the end of the round the fighters go back to their corners.
That was a close round but I would say that Leonard Owusu will probably get the nod.
The fighters' corners scream their final instructions, as the referee calls time. Here we go, back to the action!
Owusu fails with a takedown attempt from distance.
Genimer throws a counter combo.
Owusu wants to clinch up but Genimer keeps it at a distance.
Genimer slips under a jab.
Owusu throws a body kick but he was well out of range there.

Genimer has managed to clinch.
Owusu jumps guard but Genimer stands there with Owusu around his waist. Owusu gives up and drops back to his feet. We remain in the clinch.
Owusu jumps guard but Genimer turns him against the cage and keeps the fight standing.
That's three failed takedown attempts in the round for Leonard Owusu. That's going to take a lot out of him.
We've had a slow start to the round here - hopefully the action picks up.

Owusu ties up his opponent against the cage and manages to drag the fight down to the ground. Owusu no doubt will be looking to work submissions from his guard.

Genimer got a little sloppy there for a moment and Owusu has worked his way into a loose triangle - can he finish it?! No, Genimer has managed to get both his arms back between Owusu's legs - danger averted.
That's one minute gone in the round.
Owusu is working from a closed guard but he's struggling to control his opponent.

Genimer stands up and waves to Owusu to follow him.
Owusu throws a right hand that misses
and Genimer counters with a series of strikes. Owusu will be more careful next time no doubt.
Owusu looks frustrated there after his takedown attempt is stuffed easily.
Both fighters are absolutely exhausted here.
Genimer swinging wildly here.
Good exchange - Genimer coming out on top.
That's two minutes gone in the round.
Owusu plants his feet and lands a nice head kick!
Owusu throws out a powerful jab.
Genimer avoids the clinch attempt nicely.
Genimer closes this distance looking for a takedown but Owusu circles away.
Genimer avoids the clinch attempt nicely.
Owusu has taken the fight to the clinch.
Genimer tries to circle away but Owusu has him pinned against the cage.
Owusu breaks the clinch and we're back to striking at distance.
The crowd are loving this. Great action here.
Owusu closes the distance but Genimer moves to the side
and Owusu takes a counter punch right on the button for his troubles.
That's three minutes gone in the round.
Owusu manages to get an easy takedown there - catching Genimer on his heels. He'll look to pass Genimer's guard now, I'm sure.

Genimer wriggles free and stands up.
Owusu bobs and weaves and throws out a fast jab that snaps Genimer's head backwards.
Owusu throws an uppercut from half a mile away. Genimer sees it coming and avoids it easily.
Genimer lets it all go there with a big combo counter but none of the punches connected.
Genimer on the wrong end of a nice hook.
Owusu misses with an attempted mid kick.
Genimer looks like he wants to counter punch here.
Genimer lands with a cross to side of his opponent's head.
Genimer takes a really solid shot there but just smiles back and shrugs his shoulders.
This has been an exciting period of action!
Owusu clinches.
That's four minutes gone in the round.
Owusu's corner calls for him to break the clinch, which he does.
Genimer thuds his right hand into Owusu's forehead from close range. That could be painful for both fighters.
Owusu takes a shot to the nose. Hopefully that hasn't broken it.
Owusu fails with a rather predictable takedown attempt.
Owusu throws a right and a left that both miss.
Owusu throws a body shot but no joy.
Genimer looks like he wants to counter punch here.
Genimer tries for a takedown but Owusu sees it coming a mile off and avoids it easily.
Owusu closes the distance but Genimer moves to the side
and Genimer counters with a good right hand that lands right on the jaw.
And thats the end of the round the fighters go back to their corners.
A close second round but Brusko Ramero Genimer will probably get the nod - 10:9.
That's time! Owusu's corner gives him a slap on the ass as he gets ready to fight. This is the final round!
Owusu with a lazy takedown attempt
and Genimer counters with a lovely straight right hand!
Owusu connects with the punch.
Owusu walks into a straight right hand from Genimer.
Genimer bobs and weaves and throws out a fast jab that snaps Owusu's head backwards.
Owusu with a poor takedown
and Owusu takes a counter punch right on the button for his troubles.
Owusu throws a combination but it was largely blocked by Genimer.
And an attempted straight right on the counter from Genimer! But no joy.
Brusko Ramero Genimer seems to be getting the better of the standup.
Owusu tries to close the distance and clinch up but Genimer swats him away and circles back towards the center.
Genimer is clearly trying to counter these attacks from Owusu with a body shot.
Genimer might want to mix his strikes up a bit more. He's just going for head shots at the moment and that can become a bit predictable.
We've had a slow start to the round here - hopefully the action picks up.
Genimer scores with a sloppy right hand. Owusu should have avoided that one.
Both fighters are breathing heavily.
Owusu throws an ugly left hook that misses
and Owusu takes a counter punch right on the button for his troubles.
Genimer defends well against a solid takedown attempt from Owusu.
That's three failed takedown attempts in the round for Leonard Owusu. That's going to take a lot out of him.
Owusu stuffs the takedown.
That's one minute gone in the round.
Owusu shoots in looking for a double leg takedown. Genimer defends it nicely.
Genimer looks like he wants to counter punch here.
Owusu tries to score with a leg kick but it misses it's target.
Genimer moves in looking to clinch but Owusu pushes him off.
Owusu dives in for a single leg takedown but Genimer sprawls and the fighters end up clinched against the cage.
Genimer unleashes a big counter combination but Owusu bobs and weaves and avoids any damage.
Owusu leaves Genimer with his face pressed against the mat as he sprawls beautifully, defending against a solid takedown attempt.
Owusu shoots in for a takedown. "I don't think so" says Genimer as he avoids it easily.
Owusu throws a body punch but Genimer moves out of range.
That's two minutes gone in the round.
Genimer misses with a few strikes there.
Owusu swings and misses with a shot to the body
and Genimer makes him pay by landing a nice hook to the body before moving out of range.
Genimer lands a nice looking body shot.
Owusu drops his hands momentarily and Genimer takes advantage with a crisp shot to the head.
Genimer closes the distance and clinches.
Owusu pushes off and circles away, back to the middle of the mat.
Owusu fails miserably with a takedown attempt.
Genimer lands a jab-cross combination.
That's three minutes gone in the round.
Owusu is looking to land body kicks.
Genimer throws a counter combo.
Nice shot lands for Genimer.
Genimer misses with a double jab.
Genimer slaps away a takedown attempt from Owusu, before circling back to the center of the mat.
Genimer swings away with a counter right hand but no contact made.
Genimer feints and then cracks Owusu's leading leg with a nice low kick. He's obviously looking to slow Owusu down.
Owusu throws a combination but comes up with nothing but fresh air.
Owusu throws an off balance right hand
letting Genimer counter with a right hand.
Genimer misses with a jab and misses with a cross straight after too.
Owusu went nuts there looking for a big combo counter but none of the flurry connected.
That's four minutes gone in the round.
Owusu thows a leg kick but Genimer checks it
and Genimer counters with a nice uppercut.
A solid leg kick lands there for Genimer.
Owusu shoots in but Genimer avoids the takedown attempt easily.
Genimer feints a counter leg kick.
Genimer goes to the watering hole and comes back with a big thumbs up from the judges as he scores a three punch combo.
Leonard Owusu is looking to throw some combinations by the looks of things.
We've seen a great period of action over the last minute or so - credit to both fighters for going all out!
Owusu pushing out the jab but it's not landing.
Owusu has a takedown stuffed.
A little jabbing left from Genimer on the counter but it doesn't find it's target.
And that's the end of the fight!
Brusko Ramero Genimer comfortably won the final round on my scorecard.
I think Genimer has won this one but let's see whether the judges agree with me. Over to the ring announcer for the scorecards.
Ladies and gentlemen, after 3 rounds of action, we go to the scorecards for a decision.
Judge Tarja Halkonen scores the fight 28:29
Judge Marco Blurström scores the fight 28:29
Judge Johanna Lukiainen scores the fight 29:28
In favor of your winner, by split decision... Brusko Ramero Genimer!
|
|
|
|
|
|
|
|
|
|
|
|
|
|
|
|
|
|
|
|
|
|
|
| S |
C
A |
G |
S |
C
B |
G |
|
S |
C |
G |
|
energy
A | B |
|
hype
A | B |
|
pop
A | B |
|
mgr
A | B |
|
FIGHT
RATING
47% |
|
|
|
|
|
|
|
Undercard bout
|
Coming up we have a middleweight MMA rules bout between Chipper Jones (ranked 0 p4p, 0 weight class) and Akihito Yamato (ranked 0 p4p, 0 weight class). Yamato comes into a darkened arena with his song building. Unravel-Hatsune Miku kicks in, the lights come on and the crowd goes wild! What a showman! Chipper Jones looks tired to me. Hopefully he has got enough gas left in the tank to put in a good performance.
 |
|
 |
| 180 cm
18
193 lbs
1 - 0 - 0 |
|
188 cm
18
195 lbs
2 - 1 - 0 |
BJJ Purple Belt
Counter fighter
Self confident |
|
BJJ White Belt
Solid Muay Thai
Intelligent |
|
| |
|
Ladies and gentlemen. This fight is 3 rounds, in the middleweight division.
Introducing the fighter to my left, fighting out of the red corner.
With a record of
1 - 0 - 0, fighting out of St Petersburg, Chipper Jones!
And introducing the fighter to my right, fighting out of the blue corner.
With a record of
2 - 1 - 0, fighting out of Tokyo, Akihito Yamato!
The judges for this bout are Ben Zyskovitsi, Marco Blurström and Matti Vanhoillinen.
The bell rings for round one and we are underway!
Jones with a lazy takedown attempt
and Yamato counters with a good right hand that lands right on the jaw.
Yamato throws out a loose jab but Jones uses good head movement to avoid it.
Jones tries to counter by clinching up but Yamato breaks away and moves out of range.
Jones has been working on his balance at The Bear's Den ($300), so perhaps that has help him stuff some of the takedown attempts by Yamato.
Jones gets his takedown attempt stuffed easily
and Yamato counters with a straight punch to the midsection.
Chipper Jones seems to be the more aggressive standup fighter in this bout.
Yamato misses with a wild body shot.
Jab from Yamato.
A punch lands to the side of Jones 's head but he takes it in his stride.

Jones is rocked!
Yamato fakes the body blow, causing Jones to drop his hands! Left hook to the temple! Jones goes stiff, and falls face first into the mat. Goodnight!
Ladies and gentlemen, after 0:43 of round 1, we have a winner by way of KO (Punch). Akihito Yamato!
Akihito Yamato was full of energy after the big win and talked about how he thinks he can do big things in this sport. The crowd were appreciative of his determination to succeed.
|
|
|
|
|
|
|
|
|
|
|
|
|
|
|
|
|
|
|
|
|
|
|
| S |
C
A |
G |
S |
C
B |
G |
|
S |
C |
G |
|
energy
A | B |
|
hype
A | B |
|
pop
A | B |
|
mgr
A | B |
|
FIGHT
RATING
75% |
|
|
|
|
|
|
|
Undercard bout
|
Coming up we have a welterweight MMA rules bout between Jack Lewis (ranked 0 p4p, 0 weight class) and Cicero Santos (ranked 0 p4p, 0 weight class). Over to our ring announcer for the fighter introductions!
 |
|
 |
| 180 cm
25
175 lbs
0 - 0 - 0 |
|
178 cm
25
178 lbs
1 - 1 - 1 |
Good takedowns
Brawler
KO power |
|
BJJ Purple Belt
Excellent MT
Very confident |
|
| |
|
Ladies and gentlemen. This fight is 3 rounds, in the welterweight division.
Introducing the fighter to my left, fighting out of the red corner.
With a record of
0 - 0 - 0, fighting out of Rio de Janeiro, Jack Lewis!
And introducing the fighter to my right, fighting out of the blue corner.
With a record of
1 - 1 - 1, fighting out of Rio de Janeiro, Cicero Santos!
The judges for this bout are Arvi Lind, Ben Zyskovitsi and Anni Minnemäki.
The bell rings for round one and we are underway!
A thudding body kick lands there by Santos!
Lewis gets a double leg takedown into Santos's guard.

Santos is working actively off his back, looking to secure an arm or perhaps work for a triangle.
Lewis with a flurry of punches that miss.
Lewis content to stall in guard here.
The fighters are pressed up against the cage, both looking to find a bit of space to work.
We've had a slow start to the round here - hopefully the action picks up.
That's one minute gone in the round.
Santos has an active guard here but Lewis has managed to pass into half guard.
Lewis is taking a breather. Santos says something to him but it's hard to make out. Perhaps he's telling him to get on with it and actually do something.
Santos is looking to improve his position.
That's two minutes gone in the round.
Well. There's a bit of a lull in the action here and the crowd are starting to get restless.
Lewis looks to land a strike but Santos avoids it nicely and regains full guard.
Santos had isolated an arm as going for a kimura. Lewis defends it easily.
Lewis showing good wrestling skills to control the position.

The referee has motioned to the fighters to stand back up. He just wasn't happy with the level of activity.
Santos looking to take his opponent's legs away with the low kicks.
That's three minutes gone in the round.
Santos misses with a half-hearted attempt at a head kick.
Santos fakes a jab and scores with a low kick.
Santos scores with a slapping inside leg kick.
Lewis looking to score a takedown here. Santos is defending well but Lewis drives through and ends up in Santos's guard.
Lewis stays in close to Santos's body and controls the position.
That's four minutes gone in the round.
Santos is trying to control the position from the bottom.
Lewis is intent on slowing down the pace of the fight, simply looking to control.
Boooooooooooooooooooo!!! God, this has been a terrible round. Come on you two, sort yourselves out!
Santos working a defensive guard but Lewis manages to pass into side control anyway.
And thats the end of the round the fighters go back to their corners.
Jack Lewis dominated that round.
The fighters' corners scream their final instructions, as the referee calls time. Here we go, back to the action!
Lewis looking to score a takedown here. Santos is defending well but Lewis drives through and ends up in Santos's guard.
Santos working a defensive guard here.
Santos has an active guard here but Lewis has managed to pass into half guard.
Still in half guard, Lewis seems content to control.
We've had a slow start to the round here - hopefully the action picks up.
Lewis missing with the ground and pound from half guard.
Lewis throwing shots but they're hitting the canvas more than the man.
That's one minute gone in the round.
Lewis looking for a kimura but he'll have to free his other leg if he wants to finish that. Perhaps he's just using it as a distraction technique.
Santos is defending against the submission attempts here by Lewis.
Santos keeping his head moving to avoid the ground and pound.
Lewis is really dominating this fight. Is there anything that Santos can do to turn this around?
That's two minutes gone in the round.
The crowd are showing their displeasure at the lack of action as loud boos ring out around the arena.
Santos trying to hold on to Lewis's head to control him but Lewis postures up.
Lewis sitting in half guard, looking to land shots. Santos defending well though.
Lewis not doing much here.
The ref warns both fighters not to hold the cage as they work up against the meshing.
Santos actively working from the bottom here.
Lewis sitting in half guard, looking to land shots. Santos defending well though.
That's three minutes gone in the round.
Lewis controlling the action here.
The referee decides to stand the fighters back up.
Santos throws a nice outside leg kick.
Santos tries a switch kick but it misses it's target.
Santos throws a head kick but Lewis moves out of range.
Good leg kick by Santos there. It's the ones that make that thud noise that hurt and that was an almighty thud.
Santos misses with a head kick.
Lewis is looking for a takedown here. He's shot in and has managed to get it, finishing up in Santos's half guard.
Santos wants to control but Lewis is keeping busy and won't allow it.
That's four minutes gone in the round.
Lewis not doing much here.
Lewis sitting in half guard, looking to land shots. Santos defending well though.
Lewis keeping composed on the top, looking to control the action.
Santos trying to control here.
Boooooooooooooooooooo!!! God, this has been a terrible round. Come on you two, sort yourselves out!
Lewis keeping composed on the top, looking to control the action.
Lewis not landing any meaningful shots this time.
The referee has stepped in and called for a break in the action. We'll restart on the feet.
And thats the end of the round the fighters go back to their corners.
Jack Lewis dominated that second round.
That's time! Back to the action! This is the final round!
Santos throws a head kick but Lewis moves out of range.
A momentary lapse in concentration from Santos enables Lewis to shoot in and score with a neat double leg. Santos manages to secure a closed guard as the fighters hit the mat.
Lewis throwing strikes from guard but Santos blocks nicely.
Lewis throwing strikes but missing.
Jack Lewis overall seems to be getting the better of the ground position in the fight so far.
Santos trying to control the position.
We've had a slow start to the round here - hopefully the action picks up.
There's a bit of a scramble here and now Santos is on top in guard.

Santos got a little sloppy there for a moment and Lewis has worked his way into a loose triangle - can he finish it?! No, Santos has managed to get both his arms back between Lewis's legs - danger averted.
That's one minute gone in the round.
Lewis keeping moving, preventing Santos from controlling successfully.
Santos is in a good position here but he's just trying to control... And he's not even managing to do that successfully.
Lewis is avoiding any damage by keeping wrist control.
Lewis is working for submissions here. He's thrown up his legs looking for a triangle but Santos frees his head nicely. Oh but Lewis has switched to an armbar! Santos is tapping furiously! Lovely submission there!
Ladies and gentlemen, after 2:58 of round 3, we have a winner by way of Submission (Triangle Armbar). Jack Lewis!
Jumping up and down and very excited, Jack Lewis waved his t-shirt featuring Strong Suplementos's logo in front of the cameras.
|
|
|
|
|
|
|
|
|
|
|
|
|
|
|
|
|
|
|
|
|
|
|
| S |
C
A |
G |
S |
C
B |
G |
|
S |
C |
G |
|
energy
A | B |
|
hype
A | B |
|
pop
A | B |
|
mgr
A | B |
|
FIGHT
RATING
29% |
|
|
|
|
|
|
|
Undercard bout
|
Coming up we have a lightweight MMA rules bout between Tae Bok Moon (ranked 0 p4p, 0 weight class) and JD Dayley (ranked 0 p4p, 0 weight class). We have two fighters making their debuts here, so let's see who comes out of this one with their first professional victory.
 |
|
 |
| 173 cm
16
160 lbs
0 - 0 - 0 |
|
177 cm
18
155 lbs
0 - 0 - 0 |
BJJ White Belt
Excellent MT
Good chin |
|
BJJ Blue Belt
Counter fighter
Solid chin |
|
| |
|
Ladies and gentlemen. This fight is 3 rounds, in the lightweight division.
Introducing the fighter to my left, fighting out of the red corner.
With a record of
0 - 0 - 0, fighting out of Los Angeles, Tae Bok Moon!
And introducing the fighter to my right, fighting out of the blue corner.
With a record of
0 - 0 - 0, fighting out of Las Vegas, JD Dayley!
The judges for this bout are Arvi Lind, Marco Blurström and Ben Zyskovitsi.
The bell rings for round one and we are underway!
Bok Moon thows a body kick. Dayley tries to catch it but that hurt him.
Bok Moon bobs and weaves and then throws a good body kick.
A lazy body kick from Bok Moon

and Dayley counters with a shoot takedown. Bok Moon fights it but they end up in guard.
The fighters are pressed up against the cage, both looking to find a bit of space to work.
Dayley pressing down on his opponent's thigh, looking to pass guard. Bok Moon is keeping the position for now.
Bok Moon knows he needs to get back to his feet asap. He's simply no match for Dayley on the ground.
Dayley is taking a break and basically stalling. The referee will not allow him to do that for long.
Dayley throwing elbows and punches but not connecting, as Bok Moon works some decent striking defense from the bottom.
Dayley is just sitting in guard, looking to avoid any submissions.
The ref warns both fighters not to hold the cage as they work up against the meshing.
We've had a slow start to the round here - hopefully the action picks up.
Dayley tries to free his leg and advance position but Bok Moon is retaining full guard.
Dayley has the superior BJJ but he's also working some ground strikes into his gameplan.
Bok Moon not looking particularly offensive just at the moment.
Dayley controls the pace of the fight for a moment.
That's one minute gone in the round.
Dayley passes into half guard.
Bok Moon is trying to maintain the position but Dayley is very close to passing his half guard.
Dayley not landing any meaningful shots this time.
Dayley throwing shots but Bok Moon is blocking nicely.
Dayley passes the guard and advances to mount!
Dayley controlling from the full mount.
Dayley looks like he's working for a submission but he's not found anything just yet.
Dayley punching from mount but Bok Moon doing a good job of avoiding damage.
Dayley working away from the top, dropping strikes.
Dayley is in full mount, looking to secure a guillotine but Bok Moon is surviving well by controlling Dayley's body position as best he can.
That's two minutes gone in the round.
Dayley working to secure an arm triangle but it's not happening for him just yet.
Bok Moon wriggling around on the bottom manages to avoid the strikes thrown by Dayley.
Bok Moon tries to hold on but Dayley postures up.
Dayley punishing his opponent with strikes.
Bok Moon wants to control but Dayley is having none of it.
Dayley has hold of Bok Moon's left arm, perhaps looking for a submission. The two fighters tussle over control of the isolated limb and Bok Moon manages to get his arm back to his side and away from danger.
Fantastic stuff here - a very entertaining period of action, which has drawn cheers from the crowd.
Dayley tries to control but Bok Moon wriggling away.
Dayley controlling his opponent.
Dayley tries to control but Bok Moon wriggling away.
That's three minutes gone in the round.
Dayley controlling his opponent.
Bok Moon has given up his back - I dont know if this is a deliberate ploy to try and escape or if he is just struggling down there.
Bok Moon is being controlled on the ground here - he must escape this position otherwise surely the end is near.
You can see the frustration on Bok Moon's face
He knows he is in trouble unless he improves his position sooner rather than later.
Bok Moon prevents Dayley from getting a body triangle.
Dayley is remaining active here, looking for the choke. The more discerning members of the crowd will appreciate his efforts.
That's four minutes gone in the round.
Bok Moon is being controlled on the ground here - he must escape this position otherwise surely the end is near.
Dayley is striking well from the back but Bok Moon escapes and manages to control the positon and works his way to half guard. A much better position - the crisis is over for the time being.
Bok Moon trying to hold on to Dayley's head to control him but Dayley postures up.
Dayley trying to control the action but Bok Moon is working from the bottom.
Bok Moon tries to get to full guard but Dayley has control of the leg.
Dayley wants to pass to mount but Bok Moon is defending the position.
The crowd thankful this round is nearly over.
Dayley stalling.
Dayley trying to control the action but Bok Moon is working from the bottom.
And thats the end of the round the fighters go back to their corners.
JD Dayley dominated that round.
The fighters get back to their feet, the hooter sounds and we're back to the action!
Bok Moon misses with a kick to the body.
Dayley throws a big counter head kick but Bok Moon avoids it with no problem.
Bok Moon lands with a nice low kick. That'll leave a bruise.
A slapping body kick lands there for Bok Moon.
A chopping leg kick lands by Bok Moon.
A lazy body kick from Bok Moon
and Dayley counters with a shoot takedown into half guard.
Dayley is taking a breather. Bok Moon says something to him but it's hard to make out. Perhaps he's telling him to get on with it and actually do something.
Bok Moon wants to control but Dayley is keeping busy and won't allow it.
Dayley works his way into side control.
We've had a slow start to the round here - hopefully the action picks up.
Bok Moon wants to control but Dayley postures up.
Dayley moves into full mount!
Dayley lands a shot to the body, followed up by a shot to the exposed head of his trapped opponent.
Dayley can't quite control the action as he would like just now, as Bok Moon is looking to escape.
That's one minute gone in the round.
Dayley controlling from mount.
Dayley wants to take Bok Moon's back but he can't do it this time.
Bok Moon is squirming around, avoiding Dayley's attempts to control the action.
Bok Moon can't escape the position.
Bok Moon wants to control but Dayley is having none of it.
Dayley throwing sloppy strikes, which aren't doing any damage.
Dayley fakes a shot to the body and cracks his opponent in the head. Nice ground and pound there!
Dayley looking to control but Bok Moon is working nicely, looking to advance position himself.
Dayley putting on the heat here with some good ground and pound!
That's two minutes gone in the round.
Dayley controlling the pace for now.
Bok Moon is desperately trying to get back to half guard.
Dayley can't quite control the action as he would like just now, as Bok Moon is looking to escape.
Dayley is in the full mount, landing strikes.
Dayley wants to control the pace but Bok Moon is squirming around nicely.
Dayley tucks in and makes sure he doesn't lose the dominant position.
Dayley trying to control but Bok Moon is having none of it.
That's three minutes gone in the round.
Dayley moves into side control, trying to work for a kimura. That looks painful! Will he finish!!?? No, Bok Moon has worked his arm free - good work by Bok Moon!
Dayley trying to control the position but Bok Moon is working away.
You can see the frustration on Bok Moon's face, being in this tough position on the bottom.
Bok Moon tries to buck Dayley off but Dayley is having none of it.
Dayley just content to control the position.
Bok Moon struggling a bit here.
Dayley wants to work for a kimura but he's foiled early by Bok Moon, who protects the arm well.
Dayley has hold of Bok Moon's arm here. He's working for an Americana. It looks like he might have it! Bok Moon tries to escape but he's just digging himself in deeper - Dayley cranks the arm and Bok Moon screams in pain! The ref makes a decision and ends the fight before the tap - no complains from Bok Moon, who is just happy to have his arm attached to his body.
Ladies and gentlemen, after 4:57 of round 2, we have a winner by way of Submission (Americana). JD Dayley!
|
|
|
|
|
|
|
|
|
|
|
|
|
|
|
|
|
|
|
|
|
|
|
| S |
C
A |
G |
S |
C
B |
G |
|
S |
C |
G |
|
energy
A | B |
|
hype
A | B |
|
pop
A | B |
|
mgr
A | B |
|
FIGHT
RATING
39% |
|
|
|
|
|
|
|
Undercard bout
|
Coming up we have a welterweight MMA rules bout between Takeda Shingen (ranked 0 p4p, 0 weight class) and Tony Saliva (ranked 0 p4p, 0 weight class). Shingen's ring entrance music is that housewives' favourite, Swarrrm - Scilence. Well, I have no idea who's going to take this one!
 |
|
 |
| 185 cm
19
179 lbs
2 - 1 - 0 |
|
175 cm
19
174 lbs
0 - 1 - 0 |
BJJ Purple Belt
Solid Muay Thai
KO power |
|
BJJ White Belt
Brawler
Powerful |
|
| |
|
Ladies and gentlemen. This fight is 3 rounds, in the welterweight division.
Introducing the fighter to my left, fighting out of the red corner.
With a record of
2 - 1 - 0, fighting out of Las Vegas, Takeda Shingen!
And introducing the fighter to my right, fighting out of the blue corner.
With a record of
0 - 1 - 0, fighting out of New York, Tony Saliva!
The judges for this bout are Johanna Lukiainen, Matti Vanhoillinen and Marco Blurström.
The bell rings for round one and we are underway!
Shingen uses decent footwork to sidestep a right hand from Saliva.
Saliva looking for a takedown here - he's got it.
Shingen tries to land a sweep but no joy.
The ref warns both fighters not to hold the cage as they work up against the meshing.
Shingen is working for submissions here. He's thrown up his legs looking for a triangle but Saliva frees his head nicely. Oh but Shingen has switched to an armbar! Saliva is tapping furiously! Lovely submission there!
Ladies and gentlemen, after 0:34 of round 1, we have a winner by way of Submission (Triangle Armbar). Takeda Shingen!
Takeda Shingen took to the microphone after his victory and thanked his sponsors, //buriedALIVE// Fight Gear for their support in the buildup to the fight.
|
|
|
|
|
|
|
|
|
|
|
|
|
|
|
|
|
|
|
|
|
|
|
| S |
C
A |
G |
S |
C
B |
G |
|
S |
C |
G |
|
energy
A | B |
|
hype
A | B |
|
pop
A | B |
|
mgr
A | B |
|
FIGHT
RATING
100% |
|
|
|
|
|
|
|
Co-main event
|
Coming up we have a light heavyweight MMA rules bout between Dope Boi (ranked 0 p4p, 0 weight class) and Chris Reaper (ranked 0 p4p, 0 weight class). Dope Boi could well score a knockout today. He has the power to get to Chris Reaper's chin.
 |
|
 |
| 185 cm
25
210 lbs
2 - 0 - 0 |
|
195 cm
25
205 lbs
1 - 0 - 0 |
BJJ Blue Belt
Solid Muay Thai
Hates pizza |
|
BJJ Blue Belt
Brawler
Likes musicals |
|
| |
|
Ladies and gentlemen. This fight is 3 rounds, in the light heavyweight division.
Introducing the fighter to my left, fighting out of the red corner.
With a record of
2 - 0 - 0, fighting out of Montreal, Dope Boi!
And introducing the fighter to my right, fighting out of the blue corner.
With a record of
1 - 0 - 0, fighting out of Helsinki, Chris Reaper!
The judges for this bout are Anni Minnemäki, Ben Zyskovitsi and Johanna Lukiainen.
The bell rings for round one and we are underway!
Boi is trying hard to land a takedown here. Reaper sprawls well and keeps this one on the feet.
Reaper is looking to clinch but Boi is avoiding it.
We've been hearing reports that Boi has been drilling takedowns in recent sessions so let's see if that has an impact on the result of this fight.
A really sloppy takedown attempt there from Reaper.
Reaper keeps the fight standing with a nice sprawl.
Boi lets the fists fly and connects with a left straight followed by a right hook.
Boi darts in looking for a takedown but Reaper gets double underhooks and turns Boi into the cage.
That's three failed takedown attempts in the round for Dope Boi. That's going to take a lot out of him.
Reaper looking to score a takedown here. Boi is defending well but Reaper drives through and ends up in Boi's guard.
My spies in CT + BJJ & Wrestling sparring gym inform me that Reaper has been getting involved in the gym's BJJ sparring sessions. Let's see whether that pays dividends!
Boi has a loose triangle. He'll be looking to tighten that up but Reaper can see exactly what he's planning and manages to posture up and free himself.
Reaper trying to control but Boi is working from the bottom.
That's one minute gone in the round.
Reaper advances to half guard.
Reaper is trying to work for a kimura but Boi is defending well.
Boi is trying to get back to full guard.
Boi has no desire to be mounted, so is trying to control. Reaper is working away from the top position though.
Boi is trying is best to control the position here.
That's two minutes gone in the round.
Neither fighter has done anything of merit for a good minute or two here and the crowd are not happy about it.
Boi trying to control from the bottom.
Reaper is figuring out what he wants to do next.
The referee claps his hands together and tells the fighters to work.
Boi is looking for a sweep. Reaper is wise to his cunning plan and keeps the top position.
The referee has motioned to the fighters to stand back up. He just wasn't happy with the level of activity.
Reaper blocks a head kick by Boi.
Reaper has Boi up against the cage in a clinch.
Boi dictating the pace here, as the fighters clinch against the cage.
That's three minutes gone in the round.
Boi goes for a takedown attempt but Reaper pushes him away and we're back to fighting at a distance.
Boi shoots in for a double leg but Reaper sprawls well. That's going to sap some energy.
Reaper throws a counter combo.
Boi shoots in for a takedown but Reaper shows good takedown defense.
Reaper fails with a takedown attempt.
Reaper tries to clinch up
and Boi counters with a straight punch to the midsection.
Boi has taken the fight to the clinch.
Boi gets control of Reaper's arms and successfully pulls guard. Boi will no doubt be looking for submissions off his back.
Reaper pressing down on his opponent's thigh, looking to pass guard. Boi is keeping the position for now.
That's four minutes gone in the round.
Boi can't do much from the bottom at the moment, as Reaper controls the pace.
Reaper gets to his feet and steps away from his opponent.
Boi lands with a kick to the temple. Reaper shrugs as if to say "is that all you've got?"
Boi throws a sloppy head kick and Reaper moves out of range easily.
Reaper tries a counter takedown but it's more of a dummy move, and he uses it to push himself away.
Boi dives in and grabs Reaper's left leg, looking for a takedown. Reaper pushes down on Boi's head and hops out.
Boi is breathing heavily.
Boi takes a head kick and keeps coming.
The crowd thankful this round is nearly over.
Boi bobs and weaves into range and then changes levels and scores with a nice takedown into side control.
We've seen a great period of action over the last minute or so - credit to both fighters for going all out!
Reaper is sneaking out the side here. He's bucked Boi off and has taken his back!
And thats the end of the round the fighters go back to their corners.
A close round but Chris Reaper will probably get the nod.
That's the end of the round. The referee orders the cornermen out of the cage so we can get back down to business.
Boi gets his takedown attempt stuffed easily
and Reaper counters into the clinch. Nicely done.
Boi jumps guard but his hands slip and he falls flat on his back. Well, he's made himself look a right mug there, as Reaper walks away with a smile on his face. Boi gets slowly back to his feet and shakes his head.
Reaper dives in and scores a takedown into Boi's guard.

Boi is edging up against the cage. He's using the cage to get back to his feet. Nice work there - the fighters are clinched.
Boi tries to pull guard but can't drag his opponent to the mat. Reaper just stands there and leans against the cage.
That's three failed takedown attempts in the round for Dope Boi. That's going to take a lot out of him.
A right hand to the body from Boi.
A real battle for position is taking place between these two warriors.
Boi manages to get underhooks and slows down the pace for a moment.
Boi tries to take the fight to the ground by pulling guard but can't manage it.
That's one minute gone in the round.
Boi stops a takedown attempt from Reaper.
Boi's corner calls for him to break the clinch, which he does.
Reaper doesn't manage to clinch there - Boi circles away.
It looked like Boi was looking amped, ready to throw a big counter but didn't commit.
The fight moves into the clinch position.
Boi is working for a takedown up against the cage. He can't get it on this occasion though.
Boi jumps guard but his hands slip and he falls flat on his back. Well, he's made himself look a right mug there, as Reaper walks away with a smile on his face. Boi gets slowly back to his feet and shakes his head.
Reaper fails with a takedown attempt from distance.
Boi tries to score a power double leg takedown but Reaper sees that one coming and sprawls well. That will dishearten Boi somewhat.
Dope Boi is winning the standup battle so far.
Both fighters are absolutely exhausted here.
That's two minutes gone in the round.
Reaper tries to land with a swinging hook to the body but Boi was well out of range. Poor timing from Reaper.
Boi moves into the clinch.
Boi will no doubt start fighting again in a minute but for now he's just having a little rest, leaning Reaper up against the cage.
Reaper changes levels and goes for a takedown here. Boi fights it off and pushes away nicely.
Boi misses with a takedown attempt. He shot from a bit too far out.
Reaper drives through with a really nice takedown into side control.
Reaper trying to control the action but Boi is working from the bottom.
That's three minutes gone in the round.
Boi throws a couple of punches but he's in a bad position and they don't land.
The ref warns both fighters not to hold the cage as they work up against the meshing.
Boi tries to buck Reaper off but Reaper is having none of it.
Boi wants to control but Reaper postures up.
Reaper tries to score with some ground and pound. Boi controls his posture well this time though and the shots don't do any damage.
Reaper has knee on belly and now moves to full mount! Trouble for Boi!
Boi is wriggling around trying to escape.
That's four minutes gone in the round.
Neither fighter has done anything of merit for a good minute or two here and the crowd are not happy about it.
Reaper wants to control the pace but Boi is squirming around nicely.
Boi working to try and regain half guard.
The crowd thankful this round is nearly over.
Boi sneaks a leg under to get to half guard.
Reaper controlling the action here.
And thats the end of the round the fighters go back to their corners.
A close second round but Chris Reaper will probably get the nod - 10:9.
OK. That's time! The bell goes and we're back to the action. This is the final round!
Reaper shoots in and gets a takedown into Boi's guard.
Boi controls Reaper momentarily but Reaper frees himself.
Boi managing to control the position.
Boi working from the bottom, still in full guard. He's managed to get a loose triangle. Reaper doesn't seem to be doing much to defend here, obviously he feels comfortable in the position. Reaper manages to throw the legs off his shoulder and he's back into guard - no problem.
Chris Reaper has got the better of the ground game so far.
We've had a slow start to the round here - hopefully the action picks up.
Boi is trying to hold Reaper in close to prevent damage but Reaper has managed to pass into half guard.
That's one minute gone in the round.
Boi wants to control but Reaper is keeping busy.
Boi wants to get back to his feet.
Boi is not content to let Reaper control the position.
Reaper tries to stand but his hand is stuck under Boi.
The referee has decided to stand the fighters back up, so we'll restart on the feet.
That's two minutes gone in the round.
Neither fighter has done anything of merit for a good minute or two here and the crowd are not happy about it.
Reaper throws a looping left and ducks down for a takedown. He's got his arms around Boi's waist but Boi gets an underhook and avoids the takedown by throwing Reaper off to one side.
Boi shoots for a double leg takedown but Reaper sprawls well. He's pushed Boi's face into the mat and manages to get back to his feet relatively easily.
Boi tries to close the distance and clinch up but Reaper swats him away and circles back towards the center.
Boi tries to clinch up against the cage, rushing in to close the distance. Reaper manages to break the clinch and circles back to the middle of the mat.
A big right from Reaper misses.
Reaper tries to clinch but is not successful on this occasion.
Horrible takedown attempt by Reaper or perhaps it was just good defense by Boi, which made it look bad.
Reaper takes a big intake of breath there - he's definitely tired.
Boi clinches with his opponent.
Reaper being controlled against the cage.
Reaper jumps guard but Boi turns him against the cage and keeps the fight standing.
Dope Boi has stuffed three takedown attempts in the round now. That's going to take a lot out of Chris Reaper.
That's three minutes gone in the round.
Boi pushes off and circles away, back to the middle of the mat.
Boi dives in for a single leg takedown but Reaper sprawls and the fighters end up clinched against the cage.
Reaper is looking for the big counter here.
Boi clinches up with Reaper and pushes him back against the cage.
Boi jumps guard but Reaper stands there with Boi around his waist. Boi gives up and drops back to his feet. We remain in the clinch.
Boi has Reaper pressed up against the cage and is working for takedown. Reaper manages to improve position though and keeps the fight standing.
Boi breaks the clinch and we're back to striking at distance.
Boi misses with a takedown attempt. He shot from a bit too far out.
That's four minutes gone in the round.
Reaper connects with a lovely right hand, straight down the pipe.
Boi moves to clinch but Reaper breaks away
and Reaper counters with a two punch combo.
Reaper listening to his corner there, landing a nice uppercut.
Boi keeps Reaper at a distance using the push kick.
Reaper shoots in but no luck this time.
Boi wants to clinch up but Reaper keeps it at a distance.
Boi clinches up against the cage.
Wooooo! Give it up for these two warriors! They are putting on a show!
The crowd thankful this round is nearly over.
Reaper is trying to break free.
Dope Boi has stepped it up - he knows he needs a finish here!
Chris Reaper is fighting for a decision - hopefully he's judged it right and he's actually winning the fight.
Boi is clearly stalling here... Pick up the pace son.
And that's the end of the fight!
Chris Reaper comfortably won the final round on my scorecard.
I've got Reaper winning every round here. Surely the decision will go his way and he'll pick up a well deserved decision victory. Over to the ring announcer for the scorecards.
Ladies and gentlemen, after 3 rounds of action, we go to the scorecards for a decision.
Judge Anni Minnemäki scores the fight 28:30
Judge Ben Zyskovitsi scores the fight 27:30
Judge Johanna Lukiainen scores the fight 27:30
In favor of your winner, by unanimous decision... Chris Reaper!
|
|
|
|
|
|
|
|
|
|
|
|
|
|
|
|
|
|
|
|
|
|
|
| S |
C
A |
G |
S |
C
B |
G |
|
S |
C |
G |
|
energy
A | B |
|
hype
A | B |
|
pop
A | B |
|
mgr
A | B |
|
FIGHT
RATING
35% |
|
|
|
|
|
|
|
Main event
|
Coming up we have a heavyweight MMA rules bout between Brock Mir (ranked 0 p4p, 0 weight class) and Yoshi Takano (ranked 0 p4p, 0 weight class). I can't wait for this one - let's get the fighter introductions out of the way and get this one started!
 |
|
 |
| 200 cm
20
240 lbs
1 - 0 - 0 |
|
192 cm
19
255 lbs
2 - 1 - 0 |
BJJ White Belt
Solid boxing
Good chin |
|
Decent wrestler
Decent knees
Good gas tank |
|
| |
|
Ladies and gentlemen. This fight is 3 rounds, in the heavyweight division.
Introducing the fighter to my left, fighting out of the red corner.
With a record of
1 - 0 - 0, fighting out of New York, Brock Mir!
And introducing the fighter to my right, fighting out of the blue corner.
With a record of
2 - 1 - 0, fighting out of Los Angeles, Yoshi Takano!
The judges for this bout are Marco Blurström, Matti Vanhoillinen and Tarja Halkonen.
The bell rings for round one and we are underway!
Mir tries to clinch up against the cage, rushing in to close the distance. Takano manages to break the clinch and circles back to the middle of the mat.
Takano looks to land a left hand but Mir moved out of range nicely.
Mir doesn't manage to clinch there - Takano circles away.
It seemed like Takano was going to counter with the hook but didn't fully commit to it.
Takano throws out a token jab with nothing on it.
Mir pushes forward with a 1-2 combination that forces Takano back to the cage. Mir follows up with a solid lead hook to the liver.
Mir rushes Takano and pushes him back against the cage in a clinch.
Takano presses Mir against the cage and delivers a mid-strength body shot.
Mir throws a punch but it's blocked by Takano.
Mir misses with a punch on the inside.
Takano pushes Mir back against the cage and unloads with a body punch.
Mir is breathing heavily.
Takano breaks the clinch and we return to the middle of the mat.

Takano cracks Mir with a big right hand that sends him crashing to the floor. Takano has the opportunity to follow him to the ground but instead he's beckoning Mir to stand back up!

It looks like Brock Mir has been cut.
This is a great period of action - very entertaining stuff!
Takano looking to throw a kick but he's pulled out of it.
Takano cracks the inside of Mir's front leg.
Takano cracks Mir with a big right hand that sends him to the floor! Mir looks wobbly but he's sprung back up to his feet straight away
can Takano finish him?
Mir is rocked!
Takano moves into range and lands a nice leg kick.
Oh Mir is still all over the place! His legs are completely gone! Will he be able to recover?!!
Mir darts in trying to clinch
and Takano counters with a nice jab to the body that keeps Mir thinking.
That's one minute gone in the round.
Mir drops his hands momentarily. Takano doesn't need a second invitation, landing a shot to the temple. Mir staggers and falls to the mat and the ref dives in to save him from any more punishment. Mir doesn't seem happy with the stoppage but he was done.
Ladies and gentlemen, after 1:08 of round 1, we have a winner by way of KO (Punch). Yoshi Takano!
Yoshi Takano seemed lost for words in his post fight interview but he remembered to thank his fans and directed everyone to his website.
|
|
|
|
|
|
|
|
|
|
|
|
|
|
|
|
|
|
|
|
|
|
|
| S |
C
A |
G |
S |
C
B |
G |
|
S |
C |
G |
|
energy
A | B |
|
hype
A | B |
|
pop
A | B |
|
mgr
A | B |
|
FIGHT
RATING
100% |
|
|
|
|
|
|
|
|
|
|
