 |
QFC Tournament 752 Round 1 PBP Commentary |
Undercard bout
|
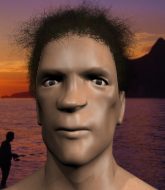
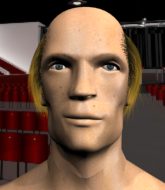
Coming up we have a lightweight MMA rules bout between Rico Quaves (ranked 0 p4p, 0 weight class) and Emanuel Salvador (ranked 0 p4p, 0 weight class). We have two fighters making their debuts here, so let's see who comes out of this one with their first professional victory.
 |
|
 |
| 178 cm
23
162 lbs
0 - 0 - 0 |
|
170 cm
25
160 lbs
0 - 0 - 0 |
BJJ Blue Belt
Counter fighter
Big heart |
|
Decent wrestler
Decent boxing
Tends to cut |
|
| |
|
Ladies and gentlemen. This fight is 3 rounds, in the lightweight division.
Introducing the fighter to my left, fighting out of the red corner.
With a record of
0 - 0 - 0, fighting out of Los Angeles, Rico Quaves!
And introducing the fighter to my right, fighting out of the blue corner.
With a record of
0 - 0 - 0, fighting out of Los Angeles, Emanuel Salvador!
The judges for this bout are Frank Antenori, Don Winkell and .

The bell rings for round one and we are underway!
Salvador lands a powerful looking uppercut that connected with his opponent's jaw.
Salvador misses with a body shot.
Quaves tries to move into range but Salvador moves to the side and lands with a nice right hand.

Salvador has managed to clinch.
Quaves taking a breather.
Quaves landing knees to the body. They look like they could hurt.
Quaves lands a nice elbow.
Quaves scores with a knee to the head.
Salvador scores with a shot to the side of Quaves's head.
A short right from Salvador.
Salvador takes a knee to the side of the body.
This is a great period of action - very entertaining stuff!
Salvador working some nice short punches in the clinch.
Quaves lands a good knee to the midsection. Salvador won't want to take too many of those.
A knee to the head by Quaves.
With the fighters up against the cage, Quaves throws an elbow but misses.
Salvador lands a right hand that snaps the head of Quaves backwards.
Quaves lands a good knee to the midsection. Salvador won't want to take too many of those.
A short right hand to the side of the head by Salvador.
Quaves misses with a punch on the inside.
A shot in the inside from Salvador.
Quaves tries to land knees in the clinch but Salvador avoids the damage to the body.

That's one minute gone in the round.
Salvador lands with a short head shot on the inside.
Salvador avoiding damage as Quaves throws knees to the body.
Salvador works on Quaves's body with a couple of short punches.
A shot in the inside from Salvador.
Quaves trying to land knees to the body.
Salvador lands a right hand.
Quaves throws a punch but it's blocked by Salvador.
Salvador blocks a knee to the body. He'll have a nicely bruised forearm in the morning.
Salvador lands with a short shot to the head.
Salvador lands a body punch - he's looking to wear down Quaves.
Quaves is breathing heavily.
A short right hand to the side of the head by Salvador.
Salvador gets through Quaves's defenses to land a nice punch to the side of the head.
Quaves lands a good knee to the midsection. Salvador won't want to take too many of those.
With the fighters clinched against the cage, Salvador creates a bit of distance for himself and scores with a nice uppercut.
This is a great period of action - very entertaining stuff!
Quaves looking to slow down the pace here.
Quaves working aggressively here.
Quaves misses the knee to the body. Nice hip positioning from Salvador.
Salvador lands with a right to the head.

That's two minutes gone in the round.
A nice right hand lands inside from Salvador.
Quaves missing with knees to the body.
Salvador working on landing some head shots here - that one got through nicely.
A shot in the inside from Salvador.
Quaves using the Thai plumb to throw knees but Salvador has his back arched nicely, preventing the strike.
Salvador lands with a light punch inside.
Quaves is trying to slow down the pace in the clinch, to catch his breath.
Quaves misses with the head strike.
Salvador lands on the inside with an uppercut.
Salvador lands with a good tight uppercut to the head.
Quaves is trying to slow down the pace of the fight but Salvador is keeping busy.
Quaves's head jolts backwards as he takes an uppercut right on the button!
Quaves misses with a knee to the head.
Quaves throws an elbow but it's blocked.
Salvador scores with a shoulder strike.
Salvador avoiding damage as Quaves throws knees to the body.
Salvador scores with an uppercut up the middle.
Salvador lands a nice uppercut.

Quaves is rocked!

That's three minutes gone in the round.
Salvador lands with a short shot to the head.
Oh Quaves is still all over the place! His legs are completely gone! Will he be able to recover?!!
Salvador softening up his opponent with strikes, against the cage.
Salvador throws a big uppercut that drops Quaves! More strikes from Salvador and the referee jumps in to stop the fight! Quaves lies dazed against the cage as Salvador celebrates with his cornermen!
Ladies and gentlemen, after 3:16 of round 1, we have a winner by way of TKO (Strikes). Emanuel Salvador!
|
|
|
|
|
|
|
|
|
|
|
|
|
|
|
|
|
|
|
|
|
|
|
| S |
C
A |
G |
S |
C
B |
G |
|
S |
C |
G |
|
energy
A | B |
|
hype
A | B |
|
pop
A | B |
|
mgr
A | B |
|
FIGHT
RATING
72% |
|
|
|
|
|
|
|
Undercard bout
|
|
|
|
Undercard bout
|
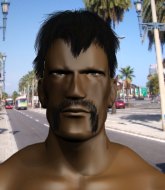
Coming up we have a lightweight MMA rules bout between Thomas Kingston (ranked 0 p4p, 0 weight class) and Buster Blighton (ranked 0 p4p, 0 weight class). We have two fighters making their debuts here, so let's see who comes out of this one with their first professional victory.
 |
|
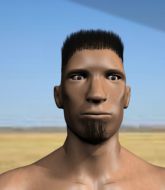 |
| 169 cm
25
162 lbs
0 - 0 - 0 |
|
186 cm
25
169 lbs
0 - 0 - 0 |
Good wrestling
Counter fighter
Granite chin |
|
BJJ Purple Belt
Brawler
Solid chin |
|
| |
|
Ladies and gentlemen. This fight is 3 rounds, in the lightweight division.
Introducing the fighter to my left, fighting out of the red corner.
With a record of
0 - 0 - 0, fighting out of Los Angeles, Thomas Kingston!
And introducing the fighter to my right, fighting out of the blue corner.
With a record of
0 - 0 - 0, fighting out of Los Angeles, Buster Blighton !
The judges for this bout are , Timothy Bukovac and Frank Antenori.
The bell rings for round one and we are underway!
Blighton shoots in looking for a takedown. Kingston tries to sprawl out of it but Blighton keeps driving through. The fighters are pinned against the cage. Kingston manages to get underhooks and after a bit of a struggle, circles away and we're back to standing.
Kingston feinted with a counter takedown.
Blighton goes for a high kick. It partially lands.
Blighton shoots in for a takedown but doesn't get it.
Blighton fails with a rather predictable takedown attempt.
Thomas Kingston has stuffed three takedown attempts in the round now. That's going to take a lot out of Buster Blighton .
Blighton tries to clinch but is not successful on this occasion.

Kingston bobs and weaves into range and then changes levels and scores with a nice takedown into side control.
We've had a slow start to the round here - hopefully the action picks up.
Kingston wants to control but Blighton is keeping him busy.
The fighters are pressed up against the cage, both looking to find a bit of space to work.
Blighton tries to get back to half guard but can't.
You can see the frustration on Blighton 's face, being in this tough position on the bottom.
Kingston landing a few strikes.
That's one minute gone in the round.
Blighton is trying to control Kingston's posture but Kingston avoids it.
Kingston lands some shots froms side control.
Blighton is positioning himself to get back to half guard.

Kingston is looking for a kimura. He might have it! No, Blighton has escaped the position, nice work there.
Kingston is trying to land an Americana. He has the arm isolated but Blighton is keeping cool and he's avoided the danger for now.
Kingston tries for an arm triangle. That looks pretty tight to me. Is this one over!?! Possibly, maybe, no Kingston has let go of the choke. Obviously it wasn't as tight as we thought!
Blighton is positioning himself to get back to half guard.
Blighton gets back to half guard.
That's two minutes gone in the round.
Blighton is looking to regain full guard. Not this time though.
Kingston controlling the pace.
Kingston seems to be taking a bit of a break to think of his next move. He lands a short punch in the meantime.
Blighton is looking to control Kingston's leg but it's slowly edging free. Can Blighton avoid being mounted?
Kingston scores with a couple of good hammerfists.

Blighton looking for submissions from an awkward position here.
That's three minutes gone in the round.
Blighton keeping control of the position.
Kingston is controlling the pace.
Blighton is looking to control Kingston's leg but it's slowly edging free. Can Blighton avoid being mounted?
Kingston is scoring with some nice ground and pound from the dominant position.
Kingston winds up and cracks Blighton with a swinging punch to the side of the head.
Blighton trying to control here.
Blighton moves into full guard.

That's four minutes gone in the round.
Blighton controls Kingston momentarily but Kingston frees himself.
Kingston landing some decent shots from guard.
Kingston lands a couple of decent looking shots.
Kingston preventing the sweep.
Blighton is working from a closed guard but he's struggling to control his opponent.
Kingston advances to half guard.
Blighton is looking to regain full guard. Not this time though.
Blighton is trying to control but can't.
The crowd thankful this round is nearly over.
Blighton actively working from the bottom here.
Kingston prevents Blighton from improving his position.
And thats the end of the round the fighters go back to their corners.
Thomas Kingston dominated that round.
The minute break is over - no more time for sponges and pep talks - back to the action!

The fight stays on the outside here - Blighton looks like he's thinking about clinching though.
Kingston appears to be looking for a counter punch to the body.
Buster Blighton seems to be the more aggressive standup fighter in this bout.
Blighton throws a jab when Kingston was well out of range.
Blighton closes the distance but Kingston moves to the side
and Kingston counters with a driving takedown into guard. Nice work there by Kingston.
Kingston controlling from the guard. I say controlling but really, he's stalling.
Kingston is in close to Blighton 's body, working some short punches and elbows.
Blighton trying to control the position.
There's a bit of a scramble here and now Blighton is on top in guard.

Thomas Kingston overall seems to be getting the better of the ground position in the fight so far.
We've had a slow start to the round here - hopefully the action picks up.
Blighton throws an elbow that misses. Kingston uses the momentum to reverse the position. He's now in Blighton 's guard. Nice move by Kingston!

Kingston sitting in guard, not really doing much.
Both fighters have adopted an aggressive gameplan on the ground!
That's one minute gone in the round.
Kingston works a leg free and moves into half guard.
Kingston is nestled in close to Blighton , controlling him well. He's worked in a nice elbow to the side of the head as well, for good measure.
Blighton is looking to control Kingston's leg but it's slowly edging free. Can Blighton avoid being mounted?
The fighters are battling for position here. Blighton manages to regain full guard. Nice work.
Kingston stopping the sweep attempt from Blighton .
Kingston has to be careful here, sitting in the guard of a superior BJJ player.
Kingston scoring with punches to the head and body.
Blighton is working the butterfly guard. He manages to land a nice scissor sweep and is now in half guard on the top. Nice move.
The ref warns both fighters not to hold the cage as they work up against the meshing.
Kingston controlling the position for now.
Kingston is staying active underneath Blighton , who seems content to just control the action from this position.
That's two minutes gone in the round.
Kingston is holding on to half guard well.
Kingston tries to get to full guard but Blighton has control of the leg.
Blighton is looking for a kimura but Kingston is holding onto that half guard position, so it's hard for Blighton to get the leverage.
Kingston trying to control here.
Blighton is trying to control the action in half guard but Kingston is working away on the bottom, looking perhaps to get back to full guard.
Kingston is really dominating this fight. Is there anything that Blighton can do to turn this around?
Kingston is holding on to half guard well.
Both fighters are absolutely exhausted here.
Blighton trying to pass the guard but Kingston defending well.
That's three minutes gone in the round.
Kingston is looking to regain full guard. Not this time though.
Kingston slips a foot under and gets full guard. Nice work.
Kingston might be looking to lock onto one of his opponent's long limbs for a submission, whilst we're on the ground.
Blighton controls the pace of the fight for a moment.
Kingston keeping moving, preventing Blighton from controlling successfully.

The referee has stepped in and called for a break in the action. We'll restart on the feet.
Blighton throws a jab, cross combination which is slipped
and Kingston counters with a takedown into side control! That could mean trouble for Blighton !
Blighton sneaks back into half guard.
That's four minutes gone in the round.
Blighton is looking for a sweep. Kingston is wise to his cunning plan and keeps the top position.
Blighton is working for an escape here. He's hooked one of Kingston's legs and he's managed to sneak out and take Kingston's back!
Blighton tightening his grip on Kingston, looking for the choke.
Kingston tries to escape the position.
Blighton is working hard for the rear naked choke here.
The fans in attendance giving it up for the two fighters, who have really let it all hang out in the last minute or so!
Blighton struggling to keep hold of the position.
And thats the end of the round the fighters go back to their corners.
That was a close second round but I would say that Thomas Kingston will probably get the nod.
OK. That's time! The bell goes and we're back to the action. Let's get this one finished - here comes the final round!

Blighton shoots in but no luck this time.

Blighton looking to shoot here. He's gone for it and he's landed a takedown into side control! Oh, that's bad for Kingston!
Kingston manages to work his way to half guard, despite Blighton 's best efforts.
Kingston on his back here. We all know that wrestlers don't like being on their back so let's see if Kingston tries to get out of the position.
Kingston moves into full guard.
Blighton stands up and looks to throw the legs aside to pass to side control. Kingston swivels though and keeps the full guard.
Kingston is throwing his legs up, looking for submissions. Blighton is aware though and is defending well.
We've had a slow start to the round here - hopefully the action picks up.
Blighton trying to control the position from guard on top but Kingston is wriggling around, looking for whatever he can.
Blighton trying to pass the guard but can't manage it just yet.
That's one minute gone in the round.
Kingston has a closed guard, preventing anything of note from happening. Perhaps he's looking to stall.
Both fighters are breathing heavily.
Kingston has a loose triangle. He'll be looking to tighten that up but Blighton can see exactly what he's planning and manages to posture up and free himself.
Kingston wants to sweep but no luck.
Blighton throwing strikes but missing.
That's two minutes gone in the round.
The crowd are showing their displeasure at the lack of action as loud boos ring out around the arena.
Blighton is stalling in the full guard.
The referee has motioned to the fighters to stand back up. He just wasn't happy with the level of activity.
Blighton is looking to take this fight into the clinch.
Kingston is looking to counter with a shot to the body.
Blighton shoots in for a double leg but Kingston sprawls well. That's going to sap some energy.
Kingston changes levels looking for a counter takedown but doesn't commit.
Blighton shoots in for a takedown! He's got it and he's managed to land in side control! That's better than Blighton was expecting from the takedown attempt, I'm sure!
Blighton is looking to take a break and control but Kingston is keeping him honest, looking to work from the bottom.
Blighton tries to advance to mount but can't.
That's three minutes gone in the round.
Kingston tries to buck Blighton off but Blighton is having none of it.
Blighton wants to lay and pray for a moment but Kingston keeps working.
Blighton tries to advance to mount but Kingston denies him.
Kingston tries to get back to half guard but can't.
Blighton tries to score with some ground and pound. Kingston controls his posture well this time though and the shots don't do any damage.
Blighton wants to control but Kingston is keeping him busy.
That's four minutes gone in the round.
My god... these two guys really need to pick up the pace or everyone will leave to go get a beer.
Blighton sitting in side control, looking to soften his opponent up with elbows and hammerfists but Kingston is avoiding damage well and looking to escape the position.
Kingston struggling a bit here.
If this pace continues, the referee will definitely step in and force a standup.
Blighton trying to control the position but Kingston is working away.
The referee has stepped in and called for a break in the action. We'll restart on the feet.
Blighton throws a head kick that Kingston semi-blocks.
Boooooooooooooooooooo!!! God, this has been a terrible round. Come on you two, sort yourselves out!
Blighton is trying hard to land a takedown here. Kingston sprawls well and keeps this one on the feet.
It looked like Kingston wanted to counter with a hook but didn't fully commit.
Thomas Kingston has stuffed three takedown attempts in the round now. That's going to take a lot out of Buster Blighton .
Kingston slips a jab and a cross from Blighton .
Buster Blighton has stepped it up - he knows he needs a finish here!
Kingston showing good head movement there, avoiding the strikes from Blighton .
And that's the end of the fight!
Buster Blighton comfortably won the final round on my scorecard.
I think Kingston has won this one but let's see what the judges have to say. Over to the ring announcer for the scorecards.
Ladies and gentlemen, after 3 rounds of action, we go to the scorecards for a decision.
Judge Percy O'Donnell scores the fight for Buster Blighton !
Judge Timothy Bukovac scores the fight for Thomas Kingston!
Judge Frank Antenori scores the fight for Thomas Kingston!
Thomas Kingston wins by split decision!
|
|
|
|
|
|
|
|
|
|
|
|
|
|
|
|
|
|
|
|
|
|
|
| S |
C
A |
G |
S |
C
B |
G |
|
S |
C |
G |
|
energy
A | B |
|
hype
A | B |
|
pop
A | B |
|
mgr
A | B |
|
FIGHT
RATING
34% |
|
|
|
|
|
|
|
Undercard bout
|
|
|
|
Undercard bout
|
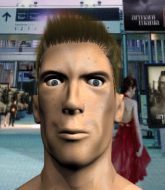
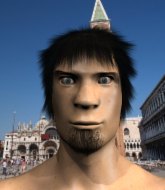
Coming up we have a lightweight MMA rules bout between Kawaki Inoshita (ranked 0 p4p, 0 weight class) and Tyson Aitchins (ranked 0 p4p, 0 weight class). We have two fighters making their debuts here, so let's see who comes out of this one with their first professional victory.
 |
|
 |
| 213 cm
24
166 lbs
0 - 0 - 0 |
|
180 cm
23
160 lbs
0 - 0 - 0 |
BJJ Purple Belt
Brawler
Good chin |
|
BJJ Blue Belt
Solid Muay Thai
Inexperienced |
|
| |
|
Ladies and gentlemen. This fight is 3 rounds, in the lightweight division.
Introducing the fighter to my left, fighting out of the red corner.
With a record of
0 - 0 - 0, fighting out of Los Angeles, Kawaki Inoshita!
And introducing the fighter to my right, fighting out of the blue corner.
With a record of
0 - 0 - 0, fighting out of Los Angeles, Tyson Aitchins!
The judges for this bout are Timothy Bukovac, Don Winkell and Frank Antenori.
The bell rings for round one and we are underway!
Aitchins shoots in with a takedown attempt and he has Inoshita pinned against the cage. Inoshita gets the underhooks and manages to circle away.
Inoshita avoids the head kick by Aitchins.
Inoshita shoots in looking for a takedown but Aitchins manages to keep the fight standing, pushing Inoshita's face into the canvas for good measure before circling away.
Aitchins closes this distance looking for a takedown but Inoshita circles away.
Inoshita misses with a takedown attempt. He shot from a bit too far out.
A really sloppy takedown attempt there from Inoshita.
That's three failed takedown attempts in the round for Kawaki Inoshita. That's going to take a lot out of him.
We've had a slow start to the round here - hopefully the action picks up.
Aitchins gets caught flat footed, as Inoshita shoots in with a quick takedown into guard.
Inoshita slows down the pace of the fight for a moment. He'll need to remain active if he doesn't want to see the fight stood back up.
The ref warns both fighters not to hold the cage as they work up against the meshing.
Aitchins controls Inoshita momentarily but Inoshita frees himself.
That's one minute gone in the round.
Inoshita stays in close to Aitchins's body and controls the position.
Aitchins has Inoshita pulled in close to control his posture.
Aitchins is trying to control the position from the bottom.
Inoshita not doing a lot at the moment. He'll have to show some more aggression or the fight will get stood up.
Inoshita wants to pass the guard but Aitchins is keeping the position.
That's two minutes gone in the round.
Neither fighter has done anything of merit for a good minute or two here and the crowd are not happy about it.
Inoshita engaging in some classic timewasting tactics.
The referee has stepped in and called for a break in the action. We'll restart on the feet.
Inoshita closes the distance and scores a nice trip takedown into half guard. Aitchins did well to prevent Inoshita getting side control.
Aitchins tries to strike from the bottom but it doesn't land.
Aitchins trying to control here but he's found himself mounted! Oh no!
Inoshita controlling from the full mount.
The fighters are pressed up against the cage, both looking to find a bit of space to work.
That's three minutes gone in the round.
Inoshita seems to have a rather negative gameplan on the ground. He seems keen to just score the takedown and hold down Aitchins for as long as he can get away with.
Aitchins is looking to improve his position but Inoshita isn't that keen on the idea.
Inoshita sitting in mount, just looking to control for the moment.
Aitchins tries to hold on but Inoshita postures up.
That's four minutes gone in the round.
The crowd are getting on the fighters' backs, as the pace has dropped off in the last minute or so.
Inoshita content just to control the position here.
Aitchins is working to get back to half guard.
Boooooooooooooooooooo!!! God, this has been a terrible round. Come on you two, sort yourselves out!
Aitchins is writhing around trying to get back to his feet.
Inoshita looking to control and managing it successfully.
Inoshita has controlled the position for a good 20 seconds, which will no doubt be starting to frustrate his opponent.
And thats the end of the round the fighters go back to their corners.
Kawaki Inoshita dominated that round.
The referee calls time. The cornermen exit stage left and we're back to business.
Inoshita closes the distance and gets a trip takedown into side control. Aitchins quickly recovers to half guard.

Aitchins kicks off Inoshita and gets to his feet.
Aitchins fails with a takedown attempt.
Inoshita tries to score a power double leg takedown but Aitchins sees that one coming and sprawls well. That will dishearten Inoshita somewhat.
Inoshita closes the distance and gets a double leg, slamming Aitchins to the mat! Aitchins manages to get full guard.
We've seen a great period of action over the last minute or so - credit to both fighters for going all out!
Inoshita stays in close to Aitchins's body and controls the position.
Inoshita continues to stall.
That's one minute gone in the round.
Inoshita postures up.
Inoshita engaging in some classic timewasting tactics.
Inoshita's ground tactics aren't going to win him many fans. Let's hope he's got fireworks for us if he gets back to his feet because he's not doing much on the ground.
That's two minutes gone in the round.
A few boos can be heard. I'm sure they will multiply if the fighters don't pick up the pace.
This is a sustained period of stalling by Inoshita.
The referee has stepped in and called for a break in the action. We'll restart on the feet.
Inoshita has his takedown stuffed
and Aitchins counters with a good right hand that lands right on the jaw.
Aitchins shoots for a takedown but Inoshita saw that one coming a mile off and avoided it easily.
Aitchins tries to drive through with a takedown attempt but Inoshita defends well and Aitchins ends up having to push Inoshita into the cage where they will battle it out in the clinch.
Inoshita was looking to counter that last move with a shot to the body but he didn't commit.
Kawaki Inoshita has stuffed three takedown attempts in the round now. That's going to take a lot out of Tyson Aitchins.
That's three minutes gone in the round.
Aitchins lands a leg kick that knocks Inoshita off balance momentarily.
Inoshita shoots in and gets a takedown into half guard. Inoshita showed some decent athleticism there.
Inoshita looks over to his corner - he wants some instructions but his corner are not responding.
Aitchins wants to control but Inoshita is keeping busy and won't allow it.
Inoshita is controlling the pace.
That's four minutes gone in the round.
Aitchins trying to control here.
Inoshita performing his best blanket impression for a moment.
The referee is asking the fighters to pick up the pace.
The referee has decided to stand the fighters back up, so we'll restart on the feet.
Boooooooooooooooooooo!!! God, this has been a terrible round. Come on you two, sort yourselves out!
Aitchins wants to clinch up but Inoshita keeps it at a distance.
Inoshita keeps the fight on the outside.
And thats the end of the round the fighters go back to their corners.
That was a close second round but I would say that Kawaki Inoshita will probably get the nod.
The minute break is over - no more time for sponges and pep talks - back to the action! This is the final round!
Inoshita with a lazy takedown attempt
and Aitchins counters by clinching up.
Aitchins drops down for a takedown but doesn't get it.
Aitchins tries to work over Inoshita's body with a swooping hook but it only glances the target.
Inoshita is really dominating this fight. Is there anything that Aitchins can do to turn this around?
Aitchins is trying to pull guard but Inoshita has him pressed against the cage.
Aitchins is trying to drag Inoshita to the mat but Inoshita just about manages to keep his footing. He used the cage to his advantage there.
Kawaki Inoshita has stuffed three takedown attempts in the round now. That's going to take a lot out of Tyson Aitchins.
Aitchins is trying to drag Inoshita to the mat but Inoshita just about manages to keep his footing. He used the cage to his advantage there.
We've had a slow start to the round here - hopefully the action picks up.
Inoshita tries to pull guard but Aitchins forces him back to his feet, against the cage.
That's one minute gone in the round.
Inoshita drops down for a takedown but doesn't get it.

Aitchins pushes off and circles away, back to the middle of the mat.
Inoshita shoots in and gets a takedown into Aitchins's guard.
Inoshita is taking a break and basically stalling. The referee will not allow him to do that for long.
Inoshita passes into half guard under a barage of strikes.
Still in half guard, Inoshita seems content to control.
That's two minutes gone in the round.
Aitchins trying to get back to full guard but Inoshita takes advantage of the position and moves to full mount!
Inoshita controlling his opponent.
Aitchins tries to hold on but Inoshita postures up.
That's three minutes gone in the round.
Inoshita tucks in and makes sure he doesn't lose the dominant position.
Inoshita continues to hold on tight.
Further stalling from Inoshita.
That's four minutes gone in the round.
The crowd are starting to boo a lack of action.
Aitchins doing his best to control the position. Can he escape?
Inoshita takes a little breather and maintains the position. The referee will be looking for him to stay active from such a dominant position though.
Boooooooooooooooooooo!!! God, this has been a terrible round. Come on you two, sort yourselves out!
Aitchins tries to lock up and control but Inoshita gives him a forearm to the face and pushes him away.
And that's the end of the fight!
Kawaki Inoshita showed his dominance in that final round.
Well I reckon that's a shut out for Inoshita, winning every round. Will the judges agree? They are the ones who matter, even if they are often depressingly incompetent. Over to the ring announcer for the scorecards.
Ladies and gentlemen, after 3 rounds of action, we go to the scorecards for a decision.
Judge Timothy Bukovac scores the fight for Kawaki Inoshita!
Judge Don Winkell scores the fight for Kawaki Inoshita!
Judge Frank Antenori scores the fight for Kawaki Inoshita!
Kawaki Inoshita wins by unanimous decision!
|
|
|
|
|
|
|
|
|
|
|
|
|
|
|
|
|
|
|
|
|
|
|
| S |
C
A |
G |
S |
C
B |
G |
|
S |
C |
G |
|
energy
A | B |
|
hype
A | B |
|
pop
A | B |
|
mgr
A | B |
|
FIGHT
RATING
25% |
|
|
|
|
|
|
|
Undercard bout
|
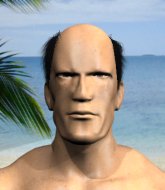
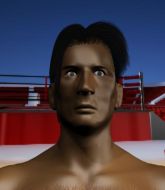
Coming up we have a lightweight MMA rules bout between Champ Chomp (ranked 0 p4p, 0 weight class) and Aires Esposito (ranked 0 p4p, 0 weight class). We have two fighters making their debuts here, so let's see who comes out of this one with their first professional victory.
 |
|
 |
| 177 cm
18
160 lbs
0 - 0 - 0 |
|
175 cm
25
165 lbs
0 - 0 - 0 |
BJJ Blue Belt
Brawler
Granite chin |
|
Good takedowns
Basic striking
Solid chin |
|
| |
|
Ladies and gentlemen. This fight is 3 rounds, in the lightweight division.
Introducing the fighter to my left, fighting out of the red corner.
With a record of
0 - 0 - 0, fighting out of Los Angeles, Champ Chomp!
And introducing the fighter to my right, fighting out of the blue corner.
With a record of
0 - 0 - 0, fighting out of Los Angeles, Aires Esposito!
The judges for this bout are Don Winkell, Frank Antenori and Jack Bonds.
The bell rings for round one and we are underway!
Chomp shoots in and gets a takedown into Esposito's guard.
Esposito has butterfly guard. He's looking to stand up here. He pushes Chomp off him and springs to his feet nicely. The crowd applauds.

Chomp clinches up against the cage.
Esposito is trying to work out of this bad position, with his back against the cage.
Chomp gets double underhooks to prevent a takedown attempt from Esposito.
Chomp lands a short shot on the inside that snaps the head of Esposito backwards.

Chomp escapes the clinch and we're back to striking.
Esposito closes the distance and gets a trip takedown into side control. Chomp quickly recovers to half guard.
Fantastic stuff here - a very entertaining period of action, which has drawn cheers from the crowd.
Esposito is figuring out what he wants to do next.
Esposito is trying to get back to his feet now but his leg is trapped.
Esposito perhaps working for something from half guard, or maybe not. It looks like he's just sitting there.
That's one minute gone in the round.
Chomp blocking the ground and pound attempt from Esposito.
Esposito landing with strikes to the body and head, softening up his opponent.
Esposito takes a deep breath and rests his weight momentarily on top of his opponent, to control the position.
Chomp strikes from the bottom but Esposito uses the opportunity to move to side control.
The fighters are pressed up against the cage, both looking to find a bit of space to work.
Esposito staying calm.
Chomp takes a nasty elbow to the side of the head.
That's two minutes gone in the round.
Esposito has knee on belly and moves into mount.
Chomp taking shots to the head.
Chomp working to try and regain half guard.
Esposito has hold of Chomp's left arm, perhaps looking for a submission. The two fighters tussle over control of the isolated limb and Chomp manages to get his arm back to his side and away from danger.
Chomp tries to lock up and control but Esposito gives him a forearm to the face and pushes him away.
Esposito controlling from mount.
Esposito punishing his opponent with strikes.
That's three minutes gone in the round.
Esposito controlling from the full mount.
Esposito manages to capitalize on a mistake by Chomp to take his back!
The ref warns both fighters not to hold the cage as they work up against the meshing.
Esposito connects with a series of strikes and the referee is calling for Chomp to escape the position.
Chomp knows he needs to get back to his feet asap. He's simply no match for Esposito on the ground.
Esposito lands with a big left hand that may well have hurt his opponent. Can Chomp hold on?!
Esposito biding his time, looking for the opening.
Esposito scores with punches from the back.
Esposito working for the rear naked choke here. He's got one arm under but Chomp is defending well. A couple of punches soften him up though and Esposito has tightened the hold! This one could be all over! It is! Chomp taps out!
Ladies and gentlemen, after 4:56 of round 1, we have a winner by way of Submission (RNC). Aires Esposito!
|
|
|
|
|
|
|
|
|
|
|
|
|
|
|
|
|
|
|
|
|
|
|
| S |
C
A |
G |
S |
C
B |
G |
|
S |
C |
G |
|
energy
A | B |
|
hype
A | B |
|
pop
A | B |
|
mgr
A | B |
|
FIGHT
RATING
42% |
|
|
|
|
|
|
|
Co-main event
|
Coming up we have a lightweight MMA rules bout between Brug Angeloz (ranked 0 p4p, 0 weight class) and Mini Mies (ranked 0 p4p, 0 weight class). We have two fighters making their debuts here, so let's see who comes out of this one with their first professional victory.
 |
|
 |
| 208 cm
23
155 lbs
0 - 0 - 0 |
|
174 cm
25
155 lbs
0 - 0 - 0 |
BJJ White Belt
Excellent boxer
Very strong |
|
Dangerous GnP
Excellent boxer
Heavy handed |
|
| |
|
Ladies and gentlemen. This fight is 3 rounds, in the lightweight division.
Introducing the fighter to my left, fighting out of the red corner.
With a record of
0 - 0 - 0, fighting out of Los Angeles, Brug Angeloz!
And introducing the fighter to my right, fighting out of the blue corner.
With a record of
0 - 0 - 0, fighting out of Los Angeles, Mini Mies!
The judges for this bout are Don Winkell, Jack Bonds and .
The bell rings for round one and we are underway!
Mies misses with a combination
and Angeloz counters with a one-two to the body.
Mies scores to the head and body with a nice combination!
Angeloz closes the distance and after a bit of a stuggle, scores a takedown into Mies's guard.
Angeloz won't allow Mies to sweep him here.
The fighters are pressed up against the cage, both looking to find a bit of space to work.
Angeloz is taking a break and basically stalling. The referee will not allow him to do that for long.
Angeloz advances position into side control!
Angeloz looking for an arm triangle but it's way too loose to do anything.
This has been an exciting period of action!
Mies is positioning himself to get back to half guard.
That's one minute gone in the round.
Angeloz working hard here to secure a kimura but he's not really in the right position for it.
Angeloz is trying to get an arm triangle but Mies is defending well.
Angeloz controls the position from side control.
Mies throws an elbow to the body but it doesn't land.
Angeloz tries to cartwheel into mount but he doesn't manage it.
Mies takes an elbow right on the bridge of the nose and winces in pain.
That's two minutes gone in the round.
Mies is trying to control Angeloz's posture but Angeloz avoids it.
Mies tries to get back to half guard but can't.
Angeloz really does look like a pencil wearing a pair of gloves. Let's hope he has a gameplan to suit that ridiculous body shape.
The fighters are starting to perspire pretty heavily.
Angeloz lands a few punches from side control.
Angeloz is trying to land an Americana. He has the arm isolated but Mies is keeping cool and he's avoided the danger for now.
Mies wants to control but Angeloz postures up.

Angeloz decides to stand up, so the ref orders Mies to his feet.
Angeloz gets the takedown into side control.
The referee tells the fighters to keep busy.
Angeloz will need to keep those long limbs tucked in whilst he's on the ground, to prevent any submissions.
Angeloz decides to stand up, so the ref orders Mies to his feet.
This has been an exciting period of action!
Angeloz drives through with a really nice takedown into side control.
That's three minutes gone in the round.
Angeloz controls the position from side control.
Angeloz tries for an arm triangle. That looks pretty tight to me. Is this one over!?! Possibly, maybe, no Angeloz has let go of the choke. Obviously it wasn't as tight as we thought!
Angeloz landing a few strikes.
Mies is looking to reverse the position.
Angeloz tries for a kimura but Mies is defending well.
Mies really doesn't want to stay on the ground with Angeloz. If he can't get it back to his feet, it's only a matter of time before he'll be tapping out.
Mies is looking to reverse the position.
The ref warns both fighters not to hold the cage as they work up against the meshing.
That's four minutes gone in the round.
Mies is letting Angeloz control him for a moment.
Mies can't do much from the bottom here.
Angeloz landing with strikes to the head and body from side control.
Angeloz is working to tighten his grip on Mies's neck. He's isolated an arm and is working for an arm triangle. Mies has recognised the danger and is trying to turn with the submission but Angeloz is really squeezing tight and eventually Mies passes out! Angeloz breaks the hold and jumps onto the cage to celebrate! Submission of the night, I'd say!
Ladies and gentlemen, after 4:45 of round 1, we have a winner by way of Submission (Arm Triangle). Brug Angeloz!
|
|
|
|
|
|
|
|
|
|
|
|
|
|
|
|
|
|
|
|
|
|
|
| S |
C
A |
G |
S |
C
B |
G |
|
S |
C |
G |
|
energy
A | B |
|
hype
A | B |
|
pop
A | B |
|
mgr
A | B |
|
FIGHT
RATING
41% |
|
|
|
|
|
|
|
Main event
|
Coming up we have a lightweight MMA rules bout between Elias Khamedd (ranked 0 p4p, 0 weight class) and Daniel Radcliff (ranked 0 p4p, 0 weight class). We have two fighters making their debuts here, so let's see who comes out of this one with their first professional victory.
 |
|
 |
| 168 cm
25
156 lbs
0 - 0 - 0 |
|
180 cm
25
155 lbs
0 - 0 - 0 |
Good wrestling
Counter fighter
KO power |
|
BJJ White Belt
Excellent MT
Solid chin |
|
| |
|
Ladies and gentlemen. This fight is 3 rounds, in the lightweight division.
Introducing the fighter to my left, fighting out of the red corner.
With a record of
0 - 0 - 0, fighting out of Los Angeles, Elias Khamedd!
And introducing the fighter to my right, fighting out of the blue corner.
With a record of
0 - 0 - 0, fighting out of Los Angeles, Daniel Radcliff!
The judges for this bout are Timothy Bukovac, Jack Bonds and Don Winkell.
The bell rings for round one and we are underway!
Radcliff stuns Khamedd with a nice body shot, before stepping back out of range.
Khamedd shoots and misses
and Radcliff counters with a crisp hook to the side of the head.
Khamedd on the receiving end of a decent leg kick there by Radcliff. Radcliff obviously looking to wear him down.
Radcliff avoids a kick to the body.
Khamedd on the wrong end of a vicious looking body shot.
Radcliff dips to his left and cracks Khamedd with an uppercut!
Khamedd shoots in but no luck this time.
Some wild striking there from Radcliff.
Radcliff scores with a body shot.
Radcliff is moving around nicely and scores here with a single head shot.
Radcliff works the jab nicely.
This is a great period of action - very entertaining stuff!
Radcliff connects with a body shot.
Nice sprawl there from Radcliff as Khamedd shoots in.
That's three failed takedown attempts in the round for Elias Khamedd. That's going to take a lot out of him.
Radcliff connects with a crisp jab.
Khamedd on the wrong end of a nice low kick. He's acting like it's no big deal but he doesn't want to take many more of those.
Khamedd dives in for a single leg takedown but Radcliff sprawls and the fighters end up clinched against the cage.
That's one minute gone in the round.
Nice body punch from Radcliff.
Good standup being displayed there by Radcliff as he connects with a hook.
Radcliff scores with a nice right hand.
Khamedd scores with a nice takedown into half guard. Let's see what he's got on the ground.
Radcliff is trying to escape back to his feet but Khamedd uses the scramble to pass into side control.
Khamedd advances to full mount.
Khamedd with good strikes from the mount here!
The fans in attendance giving it up for the two fighters, who have really let it all hang out in the last minute or so!
Radcliff wants to control but Khamedd is having none of it.
Radcliff keeping his composure momentarily, calmly looking to get back to half guard.
That's two minutes gone in the round.
The ref warns both fighters not to hold the cage as they work up against the meshing.
Khamedd controlling the position easily from mount.
Radcliff wants to hold on but Khamedd pushes him away.
Khamedd has his opponent pinned against the cage, landing some nasty ground and pound that is really making a bit of a mess out of Radcliff's face.
Radcliff really doesn't want to stay on the ground with Khamedd. If he can't get it back to his feet, it's only a matter of time before he'll be tapping out.
Khamedd is still in mount, landing shots to his trapped opponent. Radcliff can't stay in a position like this for much longer.
Khamedd lands a shot to the body, followed up by a shot to the exposed head of his trapped opponent.
Khamedd pausing momentarily but resumes with a couple of decent strikes that do a bit of damage.
That's three minutes gone in the round.
Khamedd breaks from Radcliff's wrist control and lands an elbow.
Khamedd lands a big elbow - Radcliff is in trouble! More strikes from the mount and Radcliff is forced to tap out!
Ladies and gentlemen, after 3:28 of round 1, we have a winner by way of Submission (Strikes). Elias Khamedd!
|
|
|
|
|
|
|
|
|
|
|
|
|
|
|
|
|
|
|
|
|
|
|
| S |
C
A |
G |
S |
C
B |
G |
|
S |
C |
G |
|
energy
A | B |
|
hype
A | B |
|
pop
A | B |
|
mgr
A | B |
|
FIGHT
RATING
59% |
|
|
|
|
|
|
|
|
|
|
