 |
SFC FN 2: Guerrero x Divac PBP Commentary |
Undercard bout
|
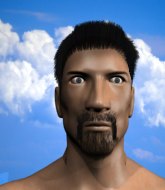
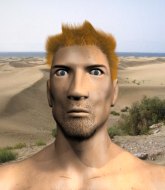
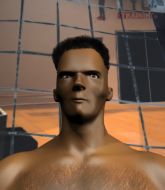
Coming up we have a super heavyweight MMA rules bout between James Ross (ranked 0 p4p, 0 weight class) and Doug Welder (ranked 0 p4p, 0 weight class). The key to victory for James Ross has got to be keeping the fight on the feet.
 |
|
 |
| 225 cm
18
300 lbs
0 - 1 - 0 |
|
218 cm
25
300 lbs
1 - 2 - 0 |
BJJ White Belt
Great elbows
Good chin |
|
BJJ Blue Belt
Brawler
Intelligent |
|
| |
|
Ladies and gentlemen. This fight is 3 rounds, in the super heavyweight division.
Introducing the fighter to my left, fighting out of the red corner.
With a record of
0 - 1 - 0, fighting out of Sydney, James Ross!
And introducing the fighter to my right, fighting out of the blue corner.
With a record of
1 - 2 - 0, fighting out of Los Angeles, Doug Welder!
The judges for this bout are Donatello Bradman, Chris Dean and Ben Hemmingworth.

The bell rings for round one and we are underway!
Ross tries to clinch up against the cage, rushing in to close the distance. Welder manages to break the clinch and circles back to the middle of the mat.
Horrible takedown attempt by Ross or perhaps it was just good defense by Welder, which made it look bad.

Welder shoots in and gets a takedown into half guard. Welder showed some decent athleticism there.
Welder working some ground and pound from close in. He's looking to maintain this position and strike for a while by the looks of things... although he'll probably advance to full mount in a minute now I've said that.
Well, if Welder is going to just lie there, perhaps we should talk about what we're having for dinner tonight
I'm having a ham and pineapple pizza
Yum. Can't wait.
Ross wants to improve his position but Welder is controlling well.
We've had a slow start to the round here - hopefully the action picks up.
Ross pushes Welder off but Welder dives into side control.
Ross wants to get back to his feet but Welder drags him back down.
Ross is trying to control Welder's posture but Welder avoids it.
The fighters are pressed up against the cage, both looking to find a bit of space to work.

That's one minute gone in the round.
Welder connects with a decent looking elbow from side control that caused Ross some visible discomfort.
Welder in side control lands a nice looking series of punches and elbows.
Welder works a knee to the body and follows up with a nice elbow to the head.
Welder is maintaining the dominant position - no doubt Ross will start to get frustrated soon if he's not already.
Welder scores with a couple of short elbows.
Welder looks up at the clock and then as Ross takes his cue and looks up at the clock too, Welder smacks him right in the chops with a big elbow! How rude!
Welder working the head with strikes.
Welder controls the position.
Let's hope that Welder has the urge to step up the pace any second now because for the last 15 or 20 seconds he's just been holding on tight.
Welder lands a knee to the body and a forearm to the face.
Welder landing with strikes to the head and body from side control.

That's two minutes gone in the round.
Welder landing strikes.
The ref warns both fighters not to hold the cage as they work up against the meshing.
Welder is working Ross over with some ground and pound from side control.

Ross is rocked!
Ross knows he needs to get back to his feet asap. He's simply no match for Welder on the ground.

Welder is in a dominant position here, looking for a kimura. Ross looks calm but he's in trouble here. Welder gets his leg over his opponent's head and yanks on the arm. Ross is tapping like a morse code operator on the titanic! SOS! SOS! Welder lets go of the hold and Ross can pop his arm back in it's socket.
Ladies and gentlemen, after 2:31 of round 1, we have a winner by way of Submission (Kimura). Doug Welder!
|
|
|
|
|
|
|
|
|
|
|
|
|
|
|
|
|
|
|
|
|
|
|
| S |
C
A |
G |
S |
C
B |
G |
|
S |
C |
G |
|
energy
A | B |
|
hype
A | B |
|
pop
A | B |
|
mgr
A | B |
|
FIGHT
RATING
44% |
|
|
|
|
|
|
|
Undercard bout
|
|
|
|
Undercard bout
|
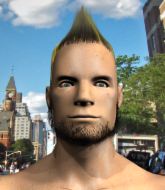
Coming up we have a welterweight MMA rules bout between Mark Bahaghari (ranked 0 p4p, 0 weight class) and Bill Bones (ranked 0 p4p, 0 weight class). Bahaghari comes into the arena with Broken blaring out of the sound system. Mark Bahaghari has the edge in experience - let's see if he can make that count tonight.
 |
|
 |
| 185 cm
24
175 lbs
1 - 0 - 0 |
|
185 cm
18
175 lbs
0 - 1 - 0 |
BJJ Blue Belt
Brawler
Cuts easily |
|
BJJ Blue Belt
Counter fighter
Tends to cut |
|
| |
|
Ladies and gentlemen. This fight is 3 rounds, in the welterweight division.
Introducing the fighter to my left, fighting out of the red corner.
With a record of
1 - 0 - 0, fighting out of Sydney, Mark Bahaghari!
And introducing the fighter to my right, fighting out of the blue corner.
With a record of
0 - 1 - 0, fighting out of Sydney, Bill Bones!
The judges for this bout are Steve Erwin, Ben Watson and Skip Squint.
The bell rings for round one and we are underway!

Bahaghari has Bones up against the cage in a clinch.
Bahaghari prevents the takedown attempt.

Bahaghari escapes the clinch and we're back to striking.
Bahaghari drives through and clinches with Bones against the cage.
Bones is looking to take this one to the mat.
Bahaghari prevents the takedown attempt.
Mark Bahaghari has stuffed three takedown attempts in the round now. That's going to take a lot out of Bill Bones.
A nice glancing elbow lands by Bones.
Bahaghari is trying to slow down the pace of the fight but Bones is keeping busy.
Bahaghari breaks the clinch.
Bahaghari looks to throw a body kick
and Bones counters with a shoot takedown into half guard.
The fighters are pressed up against the cage, both looking to find a bit of space to work.
Bones seems to be taking a bit of a break to think of his next move. He lands a short punch in the meantime.
Bones sitting in half guard, looking to land shots. Bahaghari defending well though.
Bahaghari is trying to stand back up but Bones is controlling him
Bones trying to control from Bahaghari's half guard. Bahaghari has other ideas though and has regained full guard.
Bones lands a nice shot whilst sitting in his opponent's guard.
That's one minute gone in the round.
Bones cracks Bahaghari with a solid left hand.
Bahaghari is working an open guard here, looking to improve his position. No doubt that will leave him open to counters but at least he's being more offensive.
Bahaghari is in a tricky position. We've heard reports from his gym mates at Arvins Bootcamp that he's been drilling escapes, so let's see if he can get back to his feet.
Bahaghari utilising some decent striking defenses from the guard, preventing the ground and pound.
Bahaghari wants to stand and escape but Bones is having none of it.
Bones told us pre-fight that he has been working on his escapes in training. Let's see if he can call on some of his new skills to get back to his feet.
Bones trying to control but Bahaghari is working from the bottom.
Bones slows down the pace of the fight, as he sits in guard.
Bones trying to control but Bahaghari is working from the bottom.
Bahaghari is looking to stand up but Bones isn't so interested in that idea.
We've had a lack of effective grappling in the last minute or so, which could well see a referee standup.
Bones postures up to throw the ground and pound strikes but they don't connect.

The ref stands the fighters back up due to a lack of activity.
That's two minutes gone in the round.
The crowd are showing their displeasure at the lack of action as loud boos ring out around the arena.
Bahaghari looks frustrated there after his takedown attempt is stuffed easily.
Bahaghari is trying hard to land a takedown here. Bones sprawls well and keeps this one on the feet.

Bones clinches.
Bones keeps the fight in the clinch, despite Bahaghari's efforts to push away.
Bahaghari stops a takedown attempt from Bones.
Bahaghari breaks from the clinch.
Bahaghari throws the left hand but Bones avoids the punch easily.
Bahaghari moves into the clinch.
Bones misses with a knee strike.
Bahaghari is trying to force a seperation but Bones has the dominant position.
Bahaghari breaks the clinch.

That's three minutes gone in the round.
Bahaghari has closed the distance and engaged Bones in a clinch.
Bones using the Thai plumb to throw knees but Bahaghari has his back arched nicely, preventing the strike.
A short right from Bones on the inside.
Bones changes levels and goes for a takedown here. Bahaghari fights it off and pushes away nicely.
Nice takedown defense from Bahaghari. No joy for Bones on that attempt.
Bones fakes with an overhand right and moves in to clinch with Bahaghari, pushing him back against the cage.
Bahaghari unloads a knee to the mid-section. Bones lets out a prehistoric sounding urrrrgh.
Bahaghari blocks a punch to the side of the head.
Bahaghari prevents the takedown attempt.
Bahaghari throws a vicious knee straight up the middle but Bones blocks it with crossed arms.
Bones tries to land a shot to the body but it's blocked.

Bahaghari decides to pull guard.
Bones wants to control from the top but Bahaghari keeps moving.

Bahaghari looking for a guillotine here but Bones defends easily.

That's four minutes gone in the round.
Bahaghari is wriggling around but Bones manages to pass to half guard.
Bones slips a nice elbow through Bahaghari's hands, connecting with Bahaghari's forehead.
Bones working the head and body with strikes.
Bahaghari is trying to get back to full guard.
The ref warns both fighters not to hold the cage as they work up against the meshing.
Bahaghari is trying to defend against the ground and pound but Bones scores with a couple of nice shots.
We've seen a great period of action over the last minute or so - credit to both fighters for going all out!
Bahaghari looking to work for a kimura from the bottom.
Bones thows a huge punch but Bahaghari dodges it nicely.
And thats the end of the round the fighters go back to their corners.
That was a close round but I would say that Mark Bahaghari will probably get the nod.
OK. That's time! The bell goes and we're back to the action.

Bahaghari fails to land the takedown.
Bahaghari misses with a wild body shot.
Bones with the counter takedown but Bahaghari avoids it easily.
Bahaghari throws a body punch but Bones moves out of range.
Bones shoots in and gets a takedown into half guard. Bones showed some decent athleticism there.
Bones working some ground and pound from close in. He's looking to maintain this position and strike for a while by the looks of things... although he'll probably advance to full mount in a minute now I've said that.
Bones lands a big shot. The thud that echoes around the arena is like music to the fans' ears.
We've had a slow start to the round here - hopefully the action picks up.
Bahaghari keeping his head moving to avoid the ground and pound.
Bones takes advantage of the dominant position to land a couple of big hammer fists.
Bones is working for a kimura but Bahaghari is defending it quite comfortably.
Bahaghari is looking to regain full guard. Not this time though.
That's one minute gone in the round.
Bahaghari is trying to stand up here but Bones is controlling him well.
Bones drops an elbow to the side of Bahaghari's head.
Bahaghari is looking to escape.
Nice strikes from Bones there.
Ground and pound from Bones.
Bahaghari actively working from the bottom here.
Bahaghari is trying to maintain the position but Bones is very close to passing his half guard.
Bahaghari looking for submissions off his back.
Both fighters are absolutely exhausted here.
That's two minutes gone in the round.
A lull in the action here being met with boos from the crowd.
Bones stops Bahaghari from getting back to his feet.
Bones working Bahaghari over with strikes.
Bones scores with a couple of good hammerfists.
Bones scores with a couple of good hammerfists.
Bones slips a nice elbow through Bahaghari's hands, connecting with Bahaghari's forehead.
Bahaghari trying to control from the bottom.
Bones scoring with strikes to the body and head.
Bones is nestled in close to Bahaghari, controlling him well. He's worked in a nice elbow to the side of the head as well, for good measure.
Bones trying to control the action but Bahaghari is working from the bottom.
Bahaghari wants to get back to his feet.
That's three minutes gone in the round.
Bones wants to control but Bahaghari is keeping him busy.
Bones might have to switch it up a bit here because his efforts to control Bahaghari haven't been going to plan, at least at the current moment in time.
Bones performing his best blanket impression for a moment.
The referee must be thinking about standing these guys back up.
Bones lands with a punch from half guard.
Bones lands with a punch from half guard.
Bones is nestled in close to Bahaghari, controlling him well. He's worked in a nice elbow to the side of the head as well, for good measure.
Bones has been the more effective fighter overall so far.
The two fighters exchange a few words. I couldn't hear what they were saying but maybe it's more fun if you make it up yourself. Bones connects with a nice short shot to Bahaghari's temple.
Bahaghari is trying to stand up here but Bones is controlling him well.
Bones lands with a punch from half guard.
Bones is trying to control. Bahaghari wants to improve his position but can't escape this time.
Bahaghari wants to improve his position but Bones is controlling well.
That's four minutes gone in the round.
Bones is just content to waste time from the top position. Bahaghari takes advantage of the situation and regains full guard.
Bahaghari keeping moving, preventing Bones from controlling successfully.
Bones connects with a couple of short punches.
Bahaghari wants to sweep but no luck.
Bones won't allow Bahaghari to get back to his feet.
Bahaghari has momentary wrist control but Bones slips an elbow through the middle.
Bones is intent on slowing down the pace of the fight, simply looking to control.
Boooooooooooooooooooo!!! God, this has been a terrible round. Come on you two, sort yourselves out!
Bones lands a nice shot whilst sitting in his opponent's guard.
Bones is working the ground and pound from guard. He might want to try advancing position though to get more of an impact.
Bahaghari preventing the ground and pound from doing any damage.
And thats the end of the round the fighters go back to their corners.
Bill Bones showed his class in that round. I'd imagine he'll take it on all the scorecards.
That's time! Back to the action! This is the final round!

Bones has Bahaghari up against the cage in a clinch.
Bones misses with a punch to the body.
Bones lands a hook that snaps the head of Bahaghari backwards.
Bahaghari fails to pull the fight into his guard.
Bones drops down for a takedown but doesn't get it.
Bahaghari is trying to pull guard but Bones has him pressed against the cage.
Bones is working for takedown but Bahaghari is calmly controlling the position for now.
Bones wants to take the fight to the mat but Bahaghari manages to get underhooks and keep the fight in the clinch.
Mark Bahaghari has stuffed three takedown attempts in the round now. That's going to take a lot out of Bill Bones.
We've had a slow start to the round here - hopefully the action picks up.
Bones keeps the fight in the clinch, despite Bahaghari's efforts to push away.
Bones misses with a short punch on the inside.
Bones drops to a knee looking for a takedown but Bahaghari gets the underhooks and prevents it.
An uppercut to the body lands inside from Bones.
That's one minute gone in the round.
Bones is working for a takedown up against the cage. He can't get it on this occasion though.
Bones has dropped down and is looking to force the takedown but it's defended by Bahaghari after a bit of a struggle.
Bones has hold of one of Bahaghari's legs. Bahaghari is fighting the takedown attempt but Bones gets the trip and lands the takedown into guard.
Bones has gone for a leg lock! Bahaghari slips out almost immediately though and dives into Bones's guard.

Bones takes a big intake of breath there - he's definitely tired.
Bahaghari thinks about going for a leg but decides against it, in order to maintain the position.

Bones has butterfly guard. He's looking to stand up here. He pushes Bahaghari off him and springs to his feet nicely. The crowd applauds.
Bones shoots in with a takedown attempt and he has Bahaghari pinned against the cage. Bahaghari gets the underhooks and manages to circle away.
That's two minutes gone in the round.
Bones shoots in and drives through. Bahaghari sprawls well.
Bones pushes Bahaghari up against the cage in a clinch.
Bones wants a takedown.
A frustrated look appears on Bahaghari's face as he tries to break the clinch.
Bahaghari lands a right uppercut that snaps the head of Bones backwards.
This has been an exciting period of action!
Bahaghari tries to circle away but Bones has him pinned against the cage.
Bahaghari is defending well against a takedown attempt.
Bahaghari makes some space for himself and lands an uppercut.
Bahaghari stops a takedown attempt from Bones.
Bahaghari's corner calls for him to break the clinch, which he does.
Bahaghari instigates a clinch.
Bahaghari prevents a takedown attempt there.
Bahaghari avoiding damage.
That's three minutes gone in the round.
Bones tries for a takedown. No joy.
Bones goes for a takedown attempt but Bahaghari pushes him away and we're back to fighting at a distance.
Bahaghari fails to land the takedown.
Bahaghari throws a big shot that misses.
Bones shoots in with a takedown attempt and he has Bahaghari pinned against the cage. Bahaghari gets the underhooks and manages to circle away.
Bahaghari shoots in but Bones avoids the takedown attempt easily.
Bahaghari gets off balance looking for a body kick
and Bones counters with a single leg into guard. Bahaghari didn't expect that.
That's four minutes gone in the round.
Bones stands up over Bahaghari, holding his feet. He dives back in and lands a decent shot to the head.
Bones cracks Bahaghari with a solid left hand.
Bones cracks Bahaghari with a solid left hand.
Bones trying to control the position from guard on top but Bahaghari is wriggling around, looking for whatever he can.
Bones works a leg free and moves into half guard.

Bahaghari pushes Bones off and gets back to his feet.
Bahaghari tries to keep at a distance but Bones has taken the fight into the clinch.
We've seen a great period of action over the last minute or so - credit to both fighters for going all out!
Bones misses with a shot to the kidneys.
Bahaghari tries to pull guard but Bones forces him back to his feet, against the cage.
And that's the end of the fight!
I would just about give that final round to Bill Bones.
I think Bones has won this one but let's see whether the judges agree with me. Over to the ring announcer for the scorecards.
Ladies and gentlemen, after 3 rounds of action, we go to the scorecards for a decision.
Judge Steve Erwin scores the fight 29:29
Judge Ben Watson scores the fight 27:30
Judge Skip Squint scores the fight 28:30
In favor of your winner, by majority decision... Bill Bones!
|
|
|
|
|
|
|
|
|
|
|
|
|
|
|
|
|
|
|
|
|
|
|
| S |
C
A |
G |
S |
C
B |
G |
|
S |
C |
G |
|
energy
A | B |
|
hype
A | B |
|
pop
A | B |
|
mgr
A | B |
|
FIGHT
RATING
37% |
|
|
|
|
|
|
|
Undercard bout
|
|
|
|
Undercard bout
|
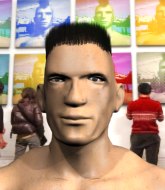
Coming up we have a welterweight MMA rules bout between Ashley Harris (ranked 0 p4p, 0 weight class) and Joe Maximez (ranked 0 p4p, 0 weight class). Over to our ring announcer for the fighter introductions!
 |
|
 |
| 190 cm
25
185 lbs
2 - 1 - 0 |
|
176 cm
23
170 lbs
5 - 0 - 0 |
BJJ White Belt
Solid boxing
KO power |
|
Good takedowns
Counter fighter
Solid chin |
|
| |
|
Ladies and gentlemen. This fight is 3 rounds, in the welterweight division.
Introducing the fighter to my left, fighting out of the red corner.
With a record of
2 - 1 - 0, fighting out of London, Ashley Harris !
And introducing the fighter to my right, fighting out of the blue corner.
With a record of
5 - 0 - 0, fighting out of Helsinki, Joe Maximez!
The judges for this bout are Ben Watson, Eliza Hachem and Skip Squint.
The bell rings for round one and we are underway!
A telegraphed takedown attempt from Maximez is defended easily by Harris .
Harris fails to land with a series of punches.
Maximez with the counter takedown but Harris avoids it easily.
Maximez is on the wrong end of a nice combination from Harris .

It looks like Joe Maximez has been cut.
Harris throws a half hearted mid kick.
We've had a slow start to the round here - hopefully the action picks up.
Harris throws a low kick but Maximez moves out of range easily.
Maximez gets his takedown attempt stuffed easily
letting Harris counter with a right hand.
That's one minute gone in the round.
Harris throws a body kick, spinning off balance
and Maximez counters with a takedown into side control.
Harris trying to remain calm as Maximez controls from the top position.
Harris 's coaches at have been working on his defensive grappling in preparation for this fight so let's see if he can get out of this tricky position.
Maximez's corner are shouting for him to control the position and he seems happy to oblige.
Harris on his back here. We all know that wrestlers don't like being on their back so let's see if Harris tries to get out of the position.
Harris takes an elbow right on the bridge of the nose and winces in pain.
Maximez is pausing for a moment. What's he doing? It looks like he's clearing his nose. Oh dude! He's shot a load of snot all down Harris 's shoulder. That is not cool.
That's two minutes gone in the round.
Maximez advances to mount.
Maximez looking to control and managing it successfully.
Harris working to try and regain half guard.
Maximez sitting in mount, just looking to control for the moment.
Harris flailing away with punches but nothing is landing.
That's three minutes gone in the round.
Maximez is working for a guillotine from mount but Harris frees his head quite easily.
Harris tries to hold on but Maximez postures up.
Maximez controlling his opponent.
That's four minutes gone in the round.
Harris tries to get back to half guard but can't.
Maximez sitting in mount, just looking to control for the moment.
The crowd thankful this round is nearly over.
And thats the end of the round the fighters go back to their corners.
Joe Maximez dominated that round.
The cut man is working on Joe Maximez's cut.
That's the end of the interval. I'm sure that seemed a lot quicker than a minute for our two fighters! Back to the action.
Harris fakes with the hands and throws a leg kick but Maximez is out of range.
Maximez wants to counter with a clinch but Harris pushes him away.
Maximez needs to keep his hands up - Harris had a free shot at his head there.
Maximez shoots in for a takedown but doesn't get it.
A left and a right from Harris both land. Nice combination.
Maximez fails with a rather predictable takedown attempt.
We've had a slow start to the round here - hopefully the action picks up.
Harris lunges in with swinging rights and lefts but Maximez circles away quickly and effectively.
Maximez misses with a jab to the body
and Harris counters with a crisp hook to the side of the head.
Harris looks to land a combination but Maximez avoids it well.
That's one minute gone in the round.
Harris cracks Maximez with an open hand slap.
That has opened up Joe Maximez's cut even more.
Harris lands with a big left! Maximez is wobbled badly! Harris comes in with a flurry of punches and drops Maximez to the floor. The ref jumps in to save him from unneccessary punishment.
Ladies and gentlemen, after 1:21 of round 2, we have a winner by way of TKO (Punches). Ashley Harris !
|
|
|
|
|
|
|
|
|
|
|
|
|
|
|
|
|
|
|
|
|
|
|
| S |
C
A |
G |
S |
C
B |
G |
|
S |
C |
G |
|
energy
A | B |
|
hype
A | B |
|
pop
A | B |
|
mgr
A | B |
|
FIGHT
RATING
32% |
|
|
|
|
|
|
|
Undercard bout
|
Coming up we have a featherweight MMA rules bout between Jouzee Alddo (ranked 0 p4p, 0 weight class) and Devon Malcolm (ranked 0 p4p, 0 weight class). Jouzee Alddo has the better chin. Will he look to stand and bang today?
 |
|
 |
| 168 cm
21
154 lbs
2 - 1 - 0 |
|
170 cm
19
150 lbs
1 - 0 - 0 |
Good wrestling
Counter fighter
Good chin |
|
Good wrestler
Counter fighter
Experienced |
|
| |
|
Ladies and gentlemen. This fight is 3 rounds, in the featherweight division.
Introducing the fighter to my left, fighting out of the red corner.
With a record of
2 - 1 - 0, fighting out of Sydney, Jouzee Alddo!
And introducing the fighter to my right, fighting out of the blue corner.
With a record of
1 - 0 - 0, fighting out of Sydney, Devon Malcolm!
The judges for this bout are John Mangel, Francis DeMontford and Chris Dean.
The bell rings for round one and we are underway!
Malcolm scores with a sloppy right hand. Alddo should have avoided that one.
Malcolm throws out a powerful jab.
Alddo takes one on the chin but keeps coming.
Alddo seems to be moving with more speed, compared to his last bout. He must have been working on that in the gym.
Malcolm bobs and weaves well there to avoid the strikes.
Alddo misses with a series of wild punches.
Alddo dives in for a single leg takedown but Malcolm sprawls and the fighters end up clinched against the cage.
Alddo goes for a double leg but Malcolm avoids the attempt and the two fighters end up clinched against the cage as Malcolm continues to drive forward.
Malcolm lands with a shot to the body.
We've had a slow start to the round here - hopefully the action picks up.
Malcolm blocks a jab.
Malcolm moves out of range as Alddo strikes.
Malcolm swings for the body but Alddo moves out of range.
Malcolm cracks Alddo with a hook to the jaw. Both fighters smile at eachother and high-five before getting back down to business.
That's one minute gone in the round.
Alddo takes one on the button.
Alddo gets cracked there but stands up to it.
A big right from Malcolm misses.
Alddo is trying to close the distance and clinch up, after that failed offence from Malcolm.
Devon Malcolm is looking to keep the fight on the feet at all costs.
Malcolm throws a body punch but Alddo moves out of range.
Alddo shoots in but no luck this time.
And an attempted straight right on the counter from Malcolm! But no joy.
That's three failed takedown attempts in the round for Jouzee Alddo. That's going to take a lot out of him.
Malcolm with a body punch. A glancing blow.
Malcolm works his jab well there, keeping his opponent at a distance.
Malcolm swings wildly with a hook that is half blocked by Alddo.
Malcolm misses the jab.
Malcolm throws an overhand right that lands on Alddo's shoulder, as Alddo tries to avoid the shot.
That's two minutes gone in the round.
Alddo misses with a low kick.
Malcolm looks like he wants to counter punch here.
Alddo shoots for a takedown but Malcolm saw that one coming a mile off and avoided it easily.
Malcolm let fly with a counter punch to the body but it didn't land.
Malcolm has been working his punching technique in the buildup to the fight and it appears to be paying off.
Malcolm keeping a good distance there, avoiding the body shot.
Malcolm moves away from the strike by Alddo.
It seemed like Malcolm was going to counter with the hook but didn't fully commit to it.
Alddo takes a swing at Malcolm's ribcage but misses.
Malcolm looked like he wanted to counter with a punch but didn't throw it.
Alddo misses with a takedown attempt - Malcolm sprawls well and throws a nice strike on the way out which just misses.
Alddo throws a hook to the side of Malcolm's head but Malcolm sees it coming and ducks under it beautifully.
Malcolm is definitely looking for the counter takedowns here.
This has been an exciting period of action!
Malcolm's corner calls for a 1-2. Malcolm obliges with the 1 part as he scores the single shot and moves back out of range.
Malcolm is landing a lot of head punches in this opening round! Alddo had better start moving his head a bit unless he wants his face to turn into pâté.
Malcolm throws a poor cross that misses
and Alddo counters with a takedown into side control! That could mean trouble for Malcolm!
Malcolm tries to buck Alddo off but Alddo is having none of it.
That's three minutes gone in the round.
Malcolm takes a nasty elbow to the side of the head.
Malcolm is looking for a sweep.
The fighters are pressed up against the cage, both looking to find a bit of space to work.
You can see the frustration on Malcolm's face, being in this tough position on the bottom.
Malcolm tries to bench press Alddo off him but Alddo keeps the position.
Alddo wants to control but Malcolm is keeping him busy.
Malcolm wants to control but Alddo postures up.
Malcolm manages to get back to half guard.
Malcolm is controlling Alddo's trapped leg to prevent Alddo from advancing to side control.
Malcolm blocking the ground and pound attempt from Alddo.
That's four minutes gone in the round.
The two fighters exchange a few words. I couldn't hear what they were saying but maybe it's more fun if you make it up yourself. Alddo connects with a nice short shot to Malcolm's temple.
Malcolm is trying to control but can't.
Malcolm makes his way to full guard. A much better position for Malcolm.
Alddo avoids a guillotine attempt easily.
Alddo postures up in Malcolm's guard and throws a big left but Malcolm blocks it.
Malcolm wants to control here, rather than go for any submissions from the bottom. At least for now.
The referee claps his hands together and tells the fighters to work.
The referee has decided to stand the fighters back up, so we'll restart on the feet.
And thats the end of the round the fighters go back to their corners.
Devon Malcolm dominated that round.
The minute break is over - no more time for sponges and pep talks - back to the action!
Malcolm misses with a looping right.
Alddo feints and then dives in with a takedown. That was a long way out but the feint bought him enough time to close the distance and complete the takedown. Now we'll play guard for a bit and see who can get the better of that position.
Malcolm tries to land a sweep but no joy.
Malcolm is persisting with the attempt to improve his position.
Jouzee Alddo overall seems to be getting the better of the ground position in the fight so far.
Malcolm seems keen to control Alddo's posture.
Alddo is looking to work some ground and pound but Malcolm has wrist control.
We've had a slow start to the round here - hopefully the action picks up.
Alddo with a flurry of punches that miss.
Alddo trying to control the position from guard on top but Malcolm is wriggling around, looking for whatever he can.
A real slowdown in the pace of the fight for a moment, as Malcolm holds on and takes a little breather.
The referee claps his hands together and tells the fighters to work.
That's one minute gone in the round.
Alddo wants to control from the top but Malcolm keeps moving.
The referee has motioned to the fighters to stand back up. He just wasn't happy with the level of activity.
Alddo tries to close the distance and clinch up against the cage but Malcolm paws at him with a jab and circles away.
Malcolm connects with a nice looking jab.
Alddo walks into a jab.
Alddo takes one on the button.
Malcolm looks to score with a jab to the body but Alddo is just out of range.
Alddo half commits to a counter takedown before pushing away, out of range.
The fighters circle momentarily. Malcolm darts into range and connects with a nice straight punch.
Malcolm throws a body punch but Alddo moves out of range.
Alddo tries to counter with a takedown but Malcolm is quick to defend against it.
Alddo misses the shot to the body.
Alddo misses with a telegraphed body shot
and Malcolm cracks him with a counter punch right on the button.
That's two minutes gone in the round.
Alddo misses with a body punch
letting Malcolm counter with a right hand.
Malcolm catches Alddo with a nice straight right. He seems pissed - ooooh, it's on now! On like donkey kong!
Malcolm throws a body shot but no joy.
Malcolm scores with a sloppy right hand. Alddo should have avoided that one.
Fantastic stuff here - a very entertaining period of action, which has drawn cheers from the crowd.
Alddo on the wrong end of a nice jab.
Malcolm stuffs a takedown. It's all about dictating where the fight takes place and Malcolm wants it to stay on the feet.
Malcolm throws a hard body shot but it just misses.
Malcolm ducks down and throws a hook to the body but Alddo moves away.
Malcolm with a hook.
Alddo steps to the side to avoid the strikes from Malcolm.
Alddo feinted with a counter takedown.
That's three minutes gone in the round.
Alddo misses with a takedown attempt
and Malcolm counters with a crisp hook to the side of the head.
Alddo darts in and lands a nice takedown into half guard.
Malcolm is trying to get back to full guard.
Malcolm has been the more effective fighter overall so far.
Alddo missing with some ground and pound from the half guard.
Malcolm is looking to regain full guard. Not this time though.
Malcolm is doing well to avoid being mounted. He's controlling the position at the moment.
Alddo has been looking to land a fair amount of strikes on the ground. He might be looking to soften his opponent up in order to work for a submission.
Malcolm trying to control here.
That's four minutes gone in the round.
Malcolm is trying to get back to full guard.
We get told so often about how wrestlers don't like to be on their backs. Let's see if Malcolm can do anything to dispel that myth.
Alddo is keeping good posture, landing some ground and pound.
Malcolm has no desire to be mounted, so is trying to control. Alddo is working away from the top position though.
Alddo throwing punches and elbows but they're not doing any damage.
Malcolm is looking for a sweep. Alddo is wise to his cunning plan and keeps the top position.
The ref warns both fighters not to hold the cage as they work up against the meshing.
The crowd thankful this round is nearly over.
Alddo lands with an elbow from half guard - that looked like it hurt.
Alddo prevents Malcolm from improving his position.
And thats the end of the round the fighters go back to their corners.
Devon Malcolm showed his class in that round. I'd imagine he'll take it on all the scorecards.
The referee calls time. The cornermen exit stage left and we're back to business. This is the final round!
Alddo ducks under an overhand right and circles away with a smile on his face.
As Malcolm tries to get set, Alddo tries to push him back and clinch up but Malcolm manages to avoid the attempt.
Alddo shoots for a takedown but Malcolm saw that one coming a mile off and avoided it easily.
Alddo drops his hands momentarily and Malcolm takes advantage with a crisp shot to the head.
Alddo tries to score a power double leg takedown but Malcolm sees that one coming and sprawls well. That will dishearten Alddo somewhat.
Malcolm throws a body punch but Alddo moves out of range.
Jouzee Alddo seems to be the more aggressive standup fighter in this bout.
We've had a slow start to the round here - hopefully the action picks up.
Alddo takes one on the chin but keeps coming.
Alddo throws a leg kick
and Malcolm counters with a lovely straight right hand!
Malcolm displays good takedown defense there as he swats away a double leg from Alddo.
Malcolm swings away with a counter right hand but no contact made.
That's three failed takedown attempts in the round for Jouzee Alddo. That's going to take a lot out of him.
That's one minute gone in the round.
Malcolm misses with a straight right.
Malcolm connects with the punch.
Malcolm connects with the punch.
Alddo fakes high and shoots in for a takedown but Malcolm avoids it really well and circles away.
Malcolm tests Alddo's chin there with a solid looking shot.
Malcolm misses the jab.
That's two minutes gone in the round.
Alddo shoots in for a takedown but Malcolm shows good takedown defense there and keeps this one on the feet.
Malcolm misses the shot to the body.
Alddo throws a hook to the body but it doesn't connect.
Alddo throws the left hand but Malcolm avoids the punch easily.
The fighters circling - Malcolm throws out the jab but it was never going to land.
Malcolm stuffs a takedown. It's all about dictating where the fight takes place and Malcolm wants it to stay on the feet.
Malcolm cracks Alddo with a good jab.
Alddo looks like he's developed a pretty tasty lump over his left eye. He'll need to avoid taking much more damage to that.
Malcolm defends well against a solid takedown attempt from Alddo.
Malcolm slaps away a takedown attempt from Alddo, before circling back to the center of the mat.
That's three minutes gone in the round.
Jab, jab by Malcolm - just one landing.
Malcolm jabbing away but nothing is landing.
A punch lands to the side of Alddo 's head but he takes it in his stride.
Alddo takes a jab right on the kisser.
Malcolm scores with a punch to the head.
Alddo takes a hook to the side of the head. I wonder if that's got his ears ringing.
Devon Malcolm is fighting for a decision - hopefully he's judged it right and he's actually winning the fight.
Malcolm works his jab well there, keeping his opponent at a distance.
Malcolm lands an overhand right.
Malcolm scores with a sloppy punch to the body. Not much technique there but it did the business.
Jouzee Alddo has stepped it up - he knows he needs a finish here!
That's four minutes gone in the round.
Alddo fails with a rather predictable takedown attempt.
And an attempted straight right on the counter from Malcolm! But no joy.
Malcolm takes a swing at Alddo's ribcage but misses.
Malcolm clobbers Alddo with an overhand right that has the crowd gasping. That made a horrendous noise.
This is a great period of action - very entertaining stuff!
Alddo takes an uppercut right on the jaw but it doesn't phase him.
Malcolm fakes a head shot and lands one to the body.
Malcolm connects with a nice looking jab.
Alddo moves in looking to clinch but Malcolm pushes him off.
Malcolm slips in close and lands a nice hook before moving back out of range.
Alddo fails with a takedown attempt from distance.
And that's the end of the fight!
Devon Malcolm comfortably won the final round on my scorecard.
I've got Malcolm winning every round here. Surely the decision will go his way and he'll pick up a well deserved decision victory. Over to the ring announcer for the scorecards.
Ladies and gentlemen, after 3 rounds of action, we go to the scorecards for a decision.
Judge John Mangel scores the fight 26:30
Judge Francis DeMontford scores the fight 26:30
Judge Chris Dean scores the fight 26:30
In favor of your winner, by unanimous decision... Devon Malcolm!
In his post fight interview, Devon Malcolm started talking himself up. Luckily his charisma kept the crowd on side and gave him a good reception.
|
|
|
|
|
|
|
|
|
|
|
|
|
|
|
|
|
|
|
|
|
|
|
| S |
C
A |
G |
S |
C
B |
G |
|
S |
C |
G |
|
energy
A | B |
|
hype
A | B |
|
pop
A | B |
|
mgr
A | B |
|
FIGHT
RATING
42% |
|
|
|
|
|
|
|
Co-main event
|
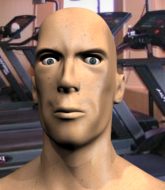
Coming up we have a bantamweight MMA rules bout between Fentz Straterloo (ranked 0 p4p, 0 weight class) and Ethan Lester (ranked 0 p4p, 0 weight class). Over to our ring announcer for the fighter introductions!
 |
|
 |
| 179 cm
25
145 lbs
2 - 0 - 0 |
|
168 cm
18
140 lbs
1 - 0 - 0 |
BJJ White Belt
Excellent MT
Prefers standup |
|
BJJ White Belt
Counter fighter
Determined |
|
| |
|
Ladies and gentlemen. This fight is 3 rounds, in the bantamweight division.
Introducing the fighter to my left, fighting out of the red corner.
With a record of
2 - 0 - 0, fighting out of Tokyo, Fentz Straterloo!
And introducing the fighter to my right, fighting out of the blue corner.
With a record of
1 - 0 - 0, fighting out of Sydney, Ethan Lester!
The judges for this bout are Skip Squint, Hugh Johnson and Winston Howard.
The bell rings for round one and we are underway!
Straterloo scores with a jab.
Jab by Straterloo.
Good leg kick by Straterloo there. It's the ones that make that thud noise that hurt and that was an almighty thud.
Crunch! Straterloo slams his shin into Lester's torso.
Straterloo fakes a couple of low kicks, before throwing one on the third attempt. It connects and Lester has to reset his feet before getting ready to engage.
Lester on the receiving end of a decent leg kick there by Straterloo. Straterloo obviously looking to wear him down.
Lester tries to check a leg kick but that clearly hurt him.
Lester chopped to the floor by a nice leg kick but he springs right back up before Straterloo can pounce on him.
Like a baseball bat into the meat of his leg there - nice leg kick by Straterloo.
Straterloo fakes a couple of low kicks, before throwing one on the third attempt. It connects and Lester has to reset his feet before getting ready to engage.
The crowd are loving this. Great action here.
Straterloo scores with a reasonable looking shot to the body. Lester doesn't seem bothered though.
Nice shot by Straterloo.
That's one minute gone in the round.
Straterloo feints and then cracks Lester's leading leg with a nice low kick. He's obviously looking to slow Lester down.
Straterloo scores with a jab to the head.
Straterloo dances in quickly and lands a nice inside leg kick on Lester. That did some damage!
Lester chopped to the floor by a nice leg kick but he springs right back up before Straterloo can pounce on him.
Straterloo throws a body kick, spinning off balance
so Lester counters with a double leg into guard. Good agility.
Lester missing there with some ground and pound from the guard.
Lester content to strike from guard, landing some decent shots.
Lester throwing strikes from guard but Straterloo blocks nicely.
Lester throwing elbows and punches but not connecting, as Straterloo works some decent striking defense from the bottom.
Straterloo avoiding any damage from the ground and pound.
That's two minutes gone in the round.
Lester throwing strikes but missing.
Lester missing there with some ground and pound from the guard.
Straterloo on his back here. We all know that wrestlers don't like being on their back so let's see if Straterloo tries to get out of the position.
Straterloo working the defensive guard well to avoid strikes from Lester.
Lester postures up to throw the ground and pound strikes but they don't connect.
The referee has motioned to the fighters to stand back up. He just wasn't happy with the level of activity.
Nice body kick there by Straterloo.
Straterloo explodes with a nice body kick and back out of range. Nice work.
The crowd are loving this. Great action here.
Lester shakes his hands off, looking to compose himself, but takes a jab to the jaw whilst he does it.
Straterloo throws a couple of head shots and lands with the final one - a decent hook, which struck Lester on the side of the head.
Fentz Straterloo is looking to keep the fight on the feet at all costs.
Straterloo paws at his opponent with the jab and then lunges in with a straight, right on the button.
Straterloo thuds his right hand into Lester's forehead from close range. That could be painful for both fighters.

Lester is rocked!
That's three minutes gone in the round.
Straterloo uses good footwork to get in and out and land a nice right hand before Lester has time to react.
Lester is still on wobbly legs! Can Straterloo finish him?
Straterloo has taken the fight to the clinch.
Lester seems to have recovered his senses.
Straterloo lands with a quick shot inside that doesn't really do much damage.
Lester's head jolts backwards as he takes an uppercut right on the button!
Straterloo avoiding damage.
Lester's head jolts backwards as he takes an uppercut right on the button!
Straterloo breaks from the clinch.
Straterloo looks to have improved his striking defense since last time we saw him fight.
Straterloo rushes Lester and presses him up against the cage.
A nice right hand lands inside from Straterloo.
That's four minutes gone in the round.
Lester takes an elbow to the temple.
Straterloo avoiding damage.
Straterloo creates a bit of space for himself and sneaks an elbow through Lester's defenses.
It looks like Ethan Lester has been cut.
Wooooo! Give it up for these two warriors! They are putting on a show!
Straterloo lands a nice elbow from the clinch.
Straterloo lands an elbow inside that Lester shrugs off.
Straterloo lands a nice elbow.
Lester is working on a leg, looking for a takedown but Straterloo is defending well.
Lester looks winded!
Straterloo is stalling here.
Straterloo lands a damaging elbow.
That has opened up Ethan Lester's cut even more.
Straterloo pushes off and circles away, back to the middle of the mat.
And thats the end of the round the fighters go back to their corners.
Fentz Straterloo dominated that round.
The cut man is working on Ethan Lester's cut.
That's the end of the interval. I'm sure that seemed a lot quicker than a minute for our two fighters! Back to the action.
Straterloo scores with a spinning back kick!
Straterloo fakes a couple of low kicks, before throwing one on the third attempt. It connects and Lester has to reset his feet before getting ready to engage.
Straterloo is using his height advantage well here, landing a good percentage of his punches.
Straterloo delivers a nice body kick.
Straterloo lands a vicious shot with the stealth of a sniper and the strength of a viper. Are vipers that strong? I can think of lots of things that are stronger than a viper - not many rhyme with sniper though.
Lester gets tackled into the cage by Straterloo. Straterloo maintains the clinch.
A short left from Straterloo.
Straterloo breaks the clinch and we return to the middle of the mat.
We've had a slow start to the round here - hopefully the action picks up.
Straterloo scores with a straight right hand, right through his opponent's guard.
Straterloo gets in close and instigates a clinch.
Straterloo is really dominating this fight. Is there anything that Lester can do to turn this around?
Lester has a body lock and is looking for a takedown. Straterloo is bouncing around trying to prevent the takedown and somehow he has indeed managed to stay on his feet.
Lester's head jolts backwards as he takes an uppercut right on the button!
That's one minute gone in the round.
Straterloo lands with a good tight uppercut to the head.
Straterloo lands on the inside with an uppercut.

Straterloo drops Lester onto one knee with a big uppercut from the clinch! Lester is propped up by the cage and works his way back to his feet!
Straterloo throws a big uppercut that drops Lester! More strikes from Straterloo and the referee jumps in to stop the fight! Lester lies dazed against the cage as Straterloo celebrates with his cornermen!
Ladies and gentlemen, after 1:27 of round 2, we have a winner by way of TKO (Strikes). Fentz Straterloo!
Ethan Lester was interviewed post fight and said 'nigga im the biggest fuckn projidy in the university ill fekin fist yo dog'.
|
|
|
|
|
|
|
|
|
|
|
|
|
|
|
|
|
|
|
|
|
|
|
| S |
C
A |
G |
S |
C
B |
G |
|
S |
C |
G |
|
energy
A | B |
|
hype
A | B |
|
pop
A | B |
|
mgr
A | B |
|
FIGHT
RATING
59% |
|
|
|
|
|
|
|
Main event
|
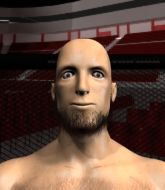
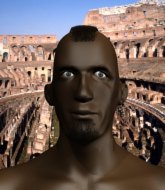
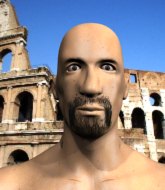
Coming up we have a middleweight MMA rules bout between Joe Guerrero (ranked 0 p4p, 0 weight class) and Roman Divac (ranked 0 p4p, 0 weight class). Divac has chosen Nas- Do you hate me now as his entrance music, which hasn't gone down very well with the crowd. Over to our ring announcer for the fighter introductions!
 |
|
 |
| 182 cm
25
185 lbs
3 - 0 - 0 |
|
186 cm
25
198 lbs
3 - 0 - 0 |
BJJ White Belt
Excellent boxer
Very strong |
|
BJJ White Belt
Excellent MT
Granite chin |
|
| |
|
Ladies and gentlemen. This fight is 5 rounds, for the middleweight championship of the world!
Introducing the champion to my left, fighting out of the red corner.
With a record of
3 - 0 - 0, fighting out of Helsinki, Joe Guerrero!
And introducing the challenger to my right, fighting out of the blue corner.
With a record of
3 - 0 - 0, fighting out of New York, Roman Divac!
The judges for this bout are Ben Watson, Eliza Hachem and Donatello Bradman.
The bell rings for round one and we are underway!
Guerrero throws a sloppy head kick
and Divac connects with a straight left hand counter down the middle.
Guerrero scores with the left hand. Divac knows he should have avoided that one.
It looks like Roman Divac has been cut.
Divac looks more muscular than last time we saw him. He must have been on the weights.
Divac has Guerrero up against the cage in a clinch.

Divac breaks the clinch.
Guerrero scores with a crisp jab that stopped Divac in his tracks.
Guerrero throws the left hand but Divac avoids the punch easily.
Guerrero slips a jab from Divac.
Guerrero thows a left - swing and a miss!
Guerrero misses with a half-hearted attempt at a head kick.
And an attempted straight right on the counter from Divac! But no joy.
Guerrero throws a head kick that misses.
Guerrero tries a head kick but it misses.
Guerrero throws a front kick aimed at Divac's knee but Divac avoids it well.
Jab from Divac.
Fantastic stuff here - a very entertaining period of action, which has drawn cheers from the crowd.
Divac avoids the head kick by Guerrero.
That's one minute gone in the round.
Guerrero throws a sloppy head kick
and Divac counters with a stiff right hand.
Divac fakes and then throws a beautiful body shot. Guerrero looks a bit winded and takes a step backwards to take a breath.
Divac throws a right hand that Guerrero ducks under and follows up with a left that Guerrero also avoids with ease.
Guerrero misses with an uppercut.
Divac looked like he wanted to counter with a punch but didn't throw it.
Guerrero tries a switch kick but it misses it's target.
Guerrero misses with a half-hearted attempt at a head kick.
And an attempted straight right on the counter from Divac! But no joy.
Guerrero is breathing heavily.
Guerrero swings widly with a right hand
and Divac connects with a straight left hand counter down the middle.
Guerrero misses with a kick to the body
and Divac counters with a straight right hand.
Guerrero is rocked!
Divac fakes the leg kick and throws a superman punch. It's knocked Guerrero out cold! Brutal finish!
Ladies and gentlemen, after 1:42 of round 1, we have a winner by way of KO (Superman Punch). Roman Divac!
Roman Divac is the new middleweight champion!
A relieved looking Roman Divac thanked the fans for their support and gave the usual line about them being amazing. They seemed to believe that he actually meant it.
|
|
|
|
|
|
|
|
|
|
|
|
|
|
|
|
|
|
|
|
|
|
|
| S |
C
A |
G |
S |
C
B |
G |
|
S |
C |
G |
|
energy
A | B |
|
hype
A | B |
|
pop
A | B |
|
mgr
A | B |
|
FIGHT
RATING
57% |
|
|
|
|
|
|
|
|
|
|
