 |
EMMA5 PBP Commentary |
Undercard bout
|
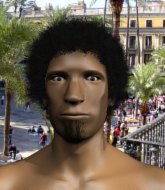
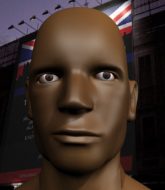
Coming up we have a welterweight MMA rules bout between Joao Pinto (ranked 0 p4p, 0 weight class) and Bea Mason (ranked 0 p4p, 0 weight class). Bea Mason has the better chin. Will he look to stand and bang today?
 |
|
 |
| 195 cm
25
170 lbs
1 - 1 - 0 |
|
183 cm
18
175 lbs
1 - 1 - 0 |
BJJ Blue Belt
Solid boxing
Intelligent |
|
Good takedowns
Brawler
Solid chin |
|
| |
|
Ladies and gentlemen. This fight is 3 rounds, in the welterweight division.
Introducing the fighter to my left, fighting out of the red corner.
With a record of
1 - 1 - 0, fighting out of Rio de Janeiro, Joao Pinto!
And introducing the fighter to my right, fighting out of the blue corner.
With a record of
1 - 1 - 0, fighting out of Helsinki, Bea Mason!
The judges for this bout are Marco Blurström, Roosa Järviläinen and Arvi Lind.

The bell rings for round one and we are underway!
Pinto tries to clinch but Mason moves out of range.
And an attempted straight right on the counter from Mason! But no joy.
No luck with that takedown attempt from Pinto.
Pinto sets himself, and Mason steps forward looking for the clinch! Pinto avoids it this time.

Mason gets tackled into the cage by Pinto. Pinto maintains the clinch.
Pinto is defending well against a takedown attempt.
Mason is working hard here but doesn't seem to be able to control effectively, up against the cage.

Mason drags the fight down to the ground.

Mason has his feet on Pinto's thighs here. He's pushed Pinto off and worked for a very quick armbar from the bottom! He's flipped onto his stomach and he's cranking hard on the arm! Pinto screams in pain and taps out! This one is all over!
Ladies and gentlemen, after 0:56 of round 1, we have a winner by way of Submission (Armbar). Bea Mason!
|
|
|
|
|
|
|
|
|
|
|
|
|
|
|
|
|
|
|
|
|
|
|
| S |
C
A |
G |
S |
C
B |
G |
|
S |
C |
G |
|
energy
A | B |
|
hype
A | B |
|
pop
A | B |
|
mgr
A | B |
|
FIGHT
RATING
70% |
|
|
|
|
|
|
|
Undercard bout
|
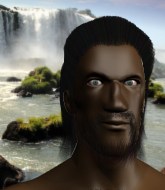
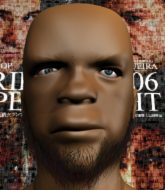
Coming up we have a light heavyweight MMA rules bout between Joao Costa (ranked 0 p4p, 0 weight class) and Austin Kollbeck (ranked 0 p4p, 0 weight class). Joao Costa could well score a knockout today. He has the power to get to Austin Kollbeck's chin.
 |
|
 |
| 205 cm
25
215 lbs
3 - 1 - 0 |
|
191 cm
21
215 lbs
2 - 2 - 0 |
Good takedowns
Brawler
Hates pizza |
|
BJJ Purple Belt
Basic striking
Very confident |
|
| |
|
Ladies and gentlemen. This fight is 3 rounds, in the light heavyweight division.
Introducing the fighter to my left, fighting out of the red corner.
With a record of
3 - 1 - 0, fighting out of Rio de Janeiro, Joao Costa!
And introducing the fighter to my right, fighting out of the blue corner.
With a record of
2 - 2 - 0, fighting out of Hilo, Austin Kollbeck!
The judges for this bout are Marco Blurström, Anni Minnemäki and Arvi Lind.
The bell rings for round one and we are underway!
Kollbeck works Costa's body with a nice hook.
Kollbeck fakes high and shoots in for a takedown but Costa avoids it really well and circles away.

Costa feints and as Kollbeck raises his hands in defense, Costa changes levels and drives through with a takedown into guard.
Costa is standing up over Kollbeck. Kollbeck looks to escape but Costa dives into side control.
Kollbeck is trying to get back to his feet.
You can see the frustration on Kollbeck's face, being in this tough position on the bottom.
We've had a slow start to the round here - hopefully the action picks up.
Costa looking to punish the body of his opponent here but Kollbeck is avoiding damage well.
Costa trying to control the action but Kollbeck is working from the bottom.
Kollbeck is trying to get back to half guard.

That's one minute gone in the round.
Kollbeck is in a bad spot here and he knows it... just holding on for now.
Kollbeck pushes Costa away and creates a bit of space to escape. He's almost out here... but no, Costa gets a good hold of his legs and remains firmly in side control.
Costa tries to stand but Kollbeck is controlling his head.
Kollbeck wants to get back to his feet.
Kollbeck is sneaking out the side here. He's bucked Costa off and has taken his back!
Kollbeck trying to control.

That's two minutes gone in the round.
Costa turns into Kollbeck and is now in his guard.
Costa will need to keep those long limbs tucked in whilst he's on the ground, to prevent any submissions.
Costa wants to pass the guard but Kollbeck is keeping the position.
Costa postures up.
Kollbeck is trying to stand up but he's not managed so far.
A big thud reverberates around the arena there as Costa accidentally thumps the mat. Hopefully he's not broken his hand.
Costa won't allow Kollbeck to sweep him here.

That's three minutes gone in the round.
Kollbeck keeping full guard, as Costa tries to pass.
Costa postures up.
Kollbeck is looking to get back to his feet but can't, whilst Costa is controlling him.
Kollbeck looks winded!
Kollbeck is working from a closed guard but he's struggling to control his opponent.
Costa trying to pass the guard but can't manage it just yet.

The referee has motioned to the fighters to stand back up. He just wasn't happy with the level of activity.
Nice takedown defense from Kollbeck. No joy for Costa on that attempt.
Kollbeck stuffs the takedown.

That's four minutes gone in the round.
The crowd are showing their displeasure at the lack of action as loud boos ring out around the arena.
Costa throws a looping left and ducks down for a takedown. He's got his arms around Kollbeck's waist but Kollbeck gets an underhook and avoids the takedown by throwing Costa off to one side.
That's three failed takedown attempts in the round for Joao Costa. That's going to take a lot out of him.
Kollbeck throws a jab but it's blocked by Costa.
Costa closes the distance and gets a double leg, slamming Kollbeck to the mat! Kollbeck manages to get full guard.
Costa trying to control the position from guard on top but Kollbeck is wriggling around, looking for whatever he can.
Costa not doing a lot at the moment. He'll have to show some more aggression or the fight will get stood up.
Kollbeck wants to get back to his feet but Costa is in a dominant position and won't allow it.
Costa really does look like a pencil wearing a pair of gloves. Let's hope he has a gameplan to suit that ridiculous body shape.
Costa trying to control but Kollbeck is working from the bottom.
The crowd thankful this round is nearly over.
Kollbeck keeping full guard, as Costa tries to pass.
And thats the end of the round the fighters go back to their corners.
Joao Costa dominated that round.
That's the end of the round. The referee orders the cornermen out of the cage so we can get back down to business.

Kollbeck looks to land a left hand but Costa moved out of range nicely.
Kollbeck throws a right and a left that both miss.
Costa throws a looping left and ducks down for a takedown. He's got his arms around Kollbeck's waist but Kollbeck gets an underhook and avoids the takedown by throwing Costa off to one side.
Costa shoots in looking for a single leg takedown. Kollbeck is trying to defend but Costa finishes it well and ends up in half guard. Let's see if he can advance position further.
Costa tries to pass the half guard into mount. Kollbeck knows what he's doing though and prevents the attempt.
Kollbeck is trying to stand up here but Costa is controlling him well.
We've had a slow start to the round here - hopefully the action picks up.
Kollbeck is refusing to be controlled, as Costa sits in half guard.
The ref warns both fighters not to hold the cage as they work up against the meshing.
Costa content to sit in half guard and control for a moment.
That's one minute gone in the round.
Kollbeck looks like he's trying to stand up.
Kollbeck is using up a lot of energy trying to get back to his feet. Perhaps he should improve his position first.
Kollbeck is controlling Costa's position as best he can from this difficult position.
The referee decides to stand the fighters back up.
Costa shoots in for a takedown. "Ole!" shouts Kollbeck as he jumps to the side.
Kollbeck cracks Costa with a good shot that sees him stumbling back into the cage.
Kollbeck swings and misses with a hook to the body.
That's two minutes gone in the round.
A few boos can be heard. I'm sure they will multiply if the fighters don't pick up the pace.
Kollbeck throws a series of punches but Costa moves out of range.
Kollbeck will have to do better than that with his takedown attempts.
A head kick misses from Kollbeck.
Costa appears to be looking for a big counter.
Kollbeck is breathing heavily.
Costa fails with a rather predictable takedown attempt.
Kollbeck wants to counter the offense by Costa and move into the clinch position.
That's three failed takedown attempts in the round for Joao Costa. That's going to take a lot out of him.
Costa misses with a half-hearted attempt at a head kick.
Kollbeck shapes to counter with a head kick.
A low kick from Kollbeck is predictable there
and Costa counters with a nice double leg into guard.
Costa won't allow Kollbeck to get back to his feet.
Costa postures up in Kollbeck's guard and throws a big left but Kollbeck blocks it.
Costa showing good wrestling skills to control the position.
The fighters are pressed up against the cage, both looking to find a bit of space to work.
Costa works a leg free and moves into half guard.
That's three minutes gone in the round.
Costa trying to pass the guard but Kollbeck defending well.
Costa is looking to take a break and control but Kollbeck is keeping him honest, looking to work from the bottom.
Costa seems content to maintain position for now, rather than mounting any offense.
Costa seems very keen to just sit and control from half guard but Kollbeck does not like that idea so much and is remaining active off his back.
The referee must be thinking about standing these guys back up.
That's four minutes gone in the round.
A lull in the action here being met with boos from the crowd.
Kollbeck wants to get back to full guard.
The referee decides to stand the fighters back up.
Kollbeck shoots in and drives through. Costa sprawls well.
Kollbeck doesn't succeed with the takedown
and Costa counters by moving into the clinch.
Kollbeck can't break the clinch.
Costa dictating the pace here, as the fighters clinch against the cage.
Kollbeck is looking to break free of the clinch but Costa has double underhooks.
Kollbeck wants to break the clinch but can't.
Boooooooooooooooooooo!!! God, this has been a terrible round. Come on you two, sort yourselves out!
A battle for position here, against the cage.
Both fighters working to control the clinch.
And thats the end of the round the fighters go back to their corners.
Joao Costa dominated that second round.
The fighters' corners scream their final instructions, as the referee calls time. Here we go, back to the action! This is the final round!

Costa wants to clinch.
Kollbeck feints and as Costa raises his hands in defense, Kollbeck changes levels and drives through with a takedown into guard.

Kollbeck gets to his feet - Costa follows without any prompting.

Kollbeck moves into the clinch.
Kollbeck has had enough of the clinch but Costa keeps him there for the moment.
We've had a slow start to the round here - hopefully the action picks up.
Kollbeck wants to break the clinch but can't.
Kollbeck misses with the head strike.

Kollbeck breaks the clinch and we're back to striking at distance.
Kollbeck throws a lazy right hand but Costa sees it coming a mile off and sidesteps it easily.
Costa moves into range and lands a nice leg kick.
That's one minute gone in the round.
Costa ducks under an overhand right and circles away with a smile on his face.
Costa has taken the fight to the clinch.

Costa breaks the clinch and we're back to striking at distance.
Costa feints and then dives in with a takedown. That was a long way out but the feint bought him enough time to close the distance and complete the takedown. Now we'll play guard for a bit and see who can get the better of that position.
Costa trying to control the position from guard on top but Kollbeck is wriggling around, looking for whatever he can.
Kollbeck wants to get back to his feet but he's too absorbed in his own little project and Costa manages to pass to side control.
Kollbeck takes a big intake of breath there - he's definitely tired.
Costa is keeping good posture, landing some ground and pound.
Costa is looking to take a break and control but Kollbeck is keeping him honest, looking to work from the bottom.
The fighters are battling for position here. Kollbeck manages to regain full guard. Nice work.
That's two minutes gone in the round.
Costa trying to control but Kollbeck is working from the bottom.
Costa advances position into side control!
Kollbeck is trying to get back to his feet.

Costa is looking for a kimura. He might have it! No, Kollbeck has escaped the position, nice work there.
Kollbeck is working hard to escape and get back to his feet. After a battle for position, Costa asserts his dominance and retains side control.
Kollbeck wants to control but Costa postures up.
That's three minutes gone in the round.
Costa postures up a little and throws a couple of hammerfists but they don't connect properly.
Kollbeck is working hard to escape and get back to his feet. After a battle for position, Costa asserts his dominance and retains side control.
Costa controls the position.
Kollbeck is trying to stand back up. He's worked his way up against the cage but Costa has just dragged him back down to the mat.
That's four minutes gone in the round.
Neither fighter has done anything of merit for a good minute or two here and the crowd are not happy about it.
Costa tries to stand but Kollbeck is controlling his head.
The referee has stepped in and called for a break in the action. We'll restart on the feet.
Nice takedown defense from Kollbeck. No joy for Costa on that attempt.
Kollbeck is looking for the big counter here.
Costa shoots in for a takedown. "Ole!" shouts Kollbeck as he jumps to the side.
Costa tries to clinch but Kollbeck is having none of it.
Kollbeck misses with a hook. Costa ducked under it nicely.
Kollbeck is really struggling to land any decent head shots against his taller opponent.
Costa uses decent footwork to sidestep a right hand from Kollbeck.
Costa gets the takedown into side control.
The crowd thankful this round is nearly over.
Costa cracks Kollbeck with a big right hand but Kollbeck just smiles back at him and invites him to have another go.
Costa creates some space and throws a big elbow, but Kollbeck sees it coming and moves his head just enough to avoid the strike.
Austin Kollbeck has stepped it up - he knows he needs a finish here!
Joao Costa is fighting for a decision here - he's started to take the cautious approach.
Costa is moving around in side control but his primary objective seems to be to maintain the position.
And that's the end of the fight!
That was a close round. You could make an argument for either fighter but I would give it to Joao Costa.
Well I reckon that's a shut out for Costa, winning every round. Will the judges agree? They are the ones who matter, even if they are often depressingly incompetent. Over to the ring announcer for the scorecards.
Ladies and gentlemen, after 3 rounds of action, we go to the scorecards for a decision.
Judge Marco Blurström scores the fight 30:27
Judge Anni Minnemäki scores the fight 30:27
Judge Arvi Lind scores the fight 30:27
In favor of your winner, by unanimous decision... Joao Costa!
|
|
|
|
|
|
|
|
|
|
|
|
|
|
|
|
|
|
|
|
|
|
|
| S |
C
A |
G |
S |
C
B |
G |
|
S |
C |
G |
|
energy
A | B |
|
hype
A | B |
|
pop
A | B |
|
mgr
A | B |
|
FIGHT
RATING
30% |
|
|
|
|
|
|
|
Undercard bout
|
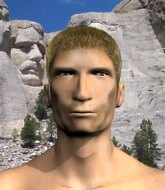
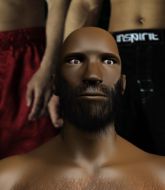
Coming up we have a light heavyweight MMA rules bout between Bayden Wood (ranked 0 p4p, 0 weight class) and Maddox Wood (ranked 0 p4p, 0 weight class). Maddox Wood is bobbing his head along to his entrance song: 3 6 mafia 1 hitta quita. Buckle up people - heeeeeeeeeere we go!
 |
|
 |
| 190 cm
26
217 lbs
4 - 3 - 0 |
|
188 cm
26
215 lbs
5 - 3 - 0 |
BJJ Purple Belt
Excellent MT
Good chin |
|
BJJ Purple Belt
Excellent MT
Determined |
|
| |
|
Ladies and gentlemen. This fight is 3 rounds, in the light heavyweight division.
Introducing the fighter to my left, fighting out of the red corner.
With a record of
4 - 3 - 0, fighting out of Helsinki, Bayden Wood!
And introducing the fighter to my right, fighting out of the blue corner.
With a record of
5 - 3 - 0, fighting out of Helsinki, Maddox Wood!
The judges for this bout are Matti Vanhoillinen, Anni Minnemäki and Marco Blurström.
The bell rings for round one and we are underway!
Maddox Wood scores with a three punch combo!
Bayden Wood has been working on his boxing with his coaches at Shark Tank MMA in the buildup to the fight.
Maddox Wood clinches up with Bayden Wood and pushes him back against the cage.
Maddox Wood tries a knee to the head but he's missed.
The pace really dropping off here, momentarily.
Bayden Wood is trying to stall.
Bayden Wood tries to land a knee to the head but Maddox Wood blocks with his arms.
Maddox Wood trying to land knees to the body.
Bayden Wood using the Thai plumb to throw knees but Maddox Wood has his back arched nicely, preventing the strike.
Maddox Wood makes some space for himself and lands an uppercut.
Bayden Wood with an attempt at a knee that misses.
Maddox Wood tried to land a shot to the body but connects with Bayden Wood's elbow.
Maddox Wood with an attempt at a knee that misses.
Maddox Wood pushes Bayden Wood back against the cage and unloads with a body punch.
Bayden Wood lands a knee to the head.
Maddox Wood tries to land a knee to the head but Bayden Wood blocks with his arms.
The fans in attendance giving it up for the two fighters, who have really let it all hang out in the last minute or so!
Bayden Wood avoiding damage as Maddox Wood throws knees to the body.
Maddox Wood taking a breather.
Maddox Wood utilising his Muay Thai to score with a knee to the body.
Maddox Wood is stalling here.
That's one minute gone in the round.
Bayden Wood using the Thai plumb to throw knees but Maddox Wood has his back arched nicely, preventing the strike.
Bayden Wood tries to land a knee to the head but Maddox Wood blocks with his arms.
Maddox Wood unloads a knee to the mid-section.
Bayden Wood is breathing heavily.
Maddox Wood with the Thai clinch. He's looking to land a big knee but he's not managed it this time.
Maddox Wood will no doubt start fighting again in a minute but for now he's just having a little rest, leaning Bayden Wood up against the cage.
Maddox Wood with an attempt at a knee that misses.
Maddox Wood with an attempt at a knee that misses.
Maddox Wood scores a nice knee to the body.
Maddox Wood with the Thai clinch, lands a knee to the head.
Maddox Wood lands a hook that snaps the head of Bayden Wood backwards.
Maddox Wood with a knee to the head.
Maddox Wood on the defensive, avoiding the knees to the body.
Maddox Wood misses with a knee strike.
Bayden Wood is trying to maintain a safe position but Maddox Wood gets an underhook and turns Bayden Wood into the cage.
Bayden Wood takes a knee right on the jaw!
Wooooo! Give it up for these two warriors! They are putting on a show!
Bayden Wood with an attempt at a knee that misses.
Maddox Wood controlling the action here for a moment.
Maddox Wood crunches a lovely knee into Bayden Wood's ribcage.
That's two minutes gone in the round.
Maddox Wood tries to land a knee to the head but misses.
Maddox Wood misses the knee to the body. Nice hip positioning from Bayden Wood.
Maddox Wood lands a body punch - he's looking to wear down Bayden Wood.
Maddox Wood landing knees to the head.
Maddox Wood lands a body punch.
Maddox Wood connects with a nasty looking knee right to Bayden Wood's face.
Bayden Wood with a knee to the head.
Maddox Wood working on landing some head shots here - that one got through nicely.
Maddox Wood taking a breather.
Bayden Wood with an attempt at a knee that misses.
A shot in the inside from Maddox Wood.
Stalling in the clinch from Maddox Wood.
Maddox Wood lands a nice knee to the body.
Bayden Wood takes a knee right on the jaw!
Maddox Wood working Bayden Wood over with knees to the body.
Maddox Wood scores with a knee to the head.
Maddox Wood works on Bayden Wood's body with a couple of short punches.
That's three minutes gone in the round.
Maddox Wood lands a knee to the head.
Maddox Wood lands a good knee to the midsection. Bayden Wood won't want to take too many of those.
Maddox Wood misses the knee to the body. Nice hip positioning from Bayden Wood.
Maddox Wood looking to throw knees to the head but Bayden Wood is blocking nicely.
Maddox Wood tries to land a knee to the head but Bayden Wood blocks with his arms.
Maddox Wood slowing the pace effectively.
Maddox Wood tries to land a knee to the head but Bayden Wood blocks with his arms.
A shot in the inside from Maddox Wood.
Bayden Wood blocks a body shot from Maddox Wood.
Maddox Wood leaning his opponent against the cage.
Maddox Wood connects with a nasty looking knee right to Bayden Wood's face.
Maddox Wood misses the knee to the body. Nice hip positioning from Bayden Wood.
Bayden Wood on the defensive, avoiding the knees to the body.
Maddox Wood misses with a knee strike.
Bayden Wood with an attempt at a knee that misses.
Maddox Wood lands a hook to the side of the head.
Bayden Wood with an attempt at a knee that misses.
That's four minutes gone in the round.
Bayden Wood with the Thai clinch. He's looking to land a big knee but he's not managed it this time.
The crowd are loving this. Great action here.
A short body shot lands from Maddox Wood as the two fighters clinch.
Maddox Wood throws a hook to the body. More of an arm punch but it's all scoring with the judges.
Maddox Wood lands a good knee to the midsection. Bayden Wood won't want to take too many of those.
The fighters are going at a pretty good pace and they're both starting to sweat now.
Knees in the clinch landing for Maddox Wood.
Knees to the body from Maddox Wood.
Bayden Wood fails to land with a short punch on the inside.
Maddox Wood lands a nice looking hook to the body, against the cage.
Maddox Wood with an attempt at a knee that misses.
Maddox Wood scores with a shot to the side of Bayden Wood's head.
Maddox Wood tries to land a knee to the head but misses.
Some stalling of biblical proportions here from Maddox Wood.
Maddox Wood looking to throw knees to the head but Bayden Wood is blocking nicely.
Maddox Wood scores with a knee to the head.
Maddox Wood throws a vicious knee straight up the middle but Bayden Wood blocks it with crossed arms.
The crowd applaud the fighters' efforts here as the round comes to an end.
Maddox Wood throws a knee to the head but misses.
Maddox Wood lands on the inside with an uppercut.
Bayden Wood misses with a knee to the head.
Bayden Wood is looking to score with knees to the body. Maybe he'll change it up and go body then head. Maddox Wood is defending well for now.
And thats the end of the round the fighters go back to their corners.
Maddox Wood dominated that round.
That's the end of the round. The referee orders the cornermen out of the cage so we can get back down to business.
Maddox Wood lets the fists fly and connects with a left straight followed by a right hook.
Bayden Wood throws a right and a left that Maddox Wood avoids nicely.
Bayden Wood is looking to throw some combinations by the looks of things.
Maddox Wood swings away with a leg kick that misses.
Maddox Wood closes the distance and pushes Bayden Wood back into the cage.
A hook to the body from Maddox Wood.
Maddox Wood is leaning against Bayden Wood and scores with a nice uppercut to the body.
A bit of stalling here from Maddox Wood.
Maddox Wood lands with a right to the head.
Maddox Wood is clearly stalling here... Pick up the pace son.
Maddox Wood putting his Muay Thai to good use. He has Bayden Wood in a tight clinch and is doing some damage with knees to the body.
Maddox Wood landing knees to the head.
Maddox Wood misses the knee to the body. Nice hip positioning from Bayden Wood.
Maddox Wood lands with a quick shot inside that doesn't really do much damage.
This is a great period of action - very entertaining stuff!
Maddox Wood throws a hook to the body. More of an arm punch but it's all scoring with the judges.
Both fighters are absolutely exhausted here.
Maddox Wood lands a hook to the body. It's hard to tell if that hurt Bayden Wood or not.
A right hand to the body from Maddox Wood.
Maddox Wood crunches a lovely knee into Bayden Wood's ribcage.
Maddox Wood lands a body punch in the clinch.
That's one minute gone in the round.
Maddox Wood with the Thai clinch, lands a knee to the head.
Maddox Wood tries a knee to the head but Bayden Wood blocks it.
Maddox Wood dictating the pace here, as the fighters clinch against the cage.
Maddox Wood misses the knee to the body. Nice hip positioning from Bayden Wood.
Maddox Wood missing with knees to the body.
Maddox Wood with the Thai clinch. He's looking to land a big knee but he's not managed it this time.
Bayden Wood misses with a short punch on the inside.
Bayden Wood looking to stall.
Maddox Wood has been the more effective fighter overall so far.
A hook to the body from Maddox Wood.
Maddox Wood unloads a knee to the mid-section. Bayden Wood lets out a prehistoric sounding urrrrgh.
Maddox Wood scores a nice knee to the body.
Maddox Wood seems to be working more effectively in the clinch in the fight so far.
Maddox Wood landing knees to the body. They look like they could hurt.
Maddox Wood works for underhooks and lands a body shot in the process.
Maddox Wood tries a knee to the head but he's missed.
Bayden Wood managing to block the knees to the body from Maddox Wood.
Maddox Wood with the Thai clinch, lands a knee to the head.
Bayden Wood is looking to score with knees to the body. Maybe he'll change it up and go body then head. Maddox Wood is defending well for now.
That's two minutes gone in the round.
Maddox Wood avoiding damage.
Maddox Wood looking to throw knees to the head but Bayden Wood is blocking nicely.
Fantastic stuff here - a very entertaining period of action, which has drawn cheers from the crowd.
Maddox Wood connects with a knee to the head.
Bayden Wood lands a short shot on the inside that snaps the head of Maddox Wood backwards.
Maddox Wood throws a vicious knee straight up the middle but Bayden Wood blocks it with crossed arms.
Maddox Wood putting his Muay Thai to good use. He has Bayden Wood in a tight clinch and is doing some damage with knees to the body.
Bayden Wood tries to land a knee to the head but Maddox Wood blocks with his arms.
Bayden Wood tries to pull guard but Maddox Wood won't allow it.
Maddox Wood will no doubt start fighting again in a minute but for now he's just having a little rest, leaning Bayden Wood up against the cage.
Bayden Wood is looking to score with knees to the body. Maybe he'll change it up and go body then head. Maddox Wood is defending well for now.
Bayden Wood tries to land a knee to the head but Maddox Wood blocks with his arms.
Maddox Wood connects with a nasty looking knee right to Bayden Wood's face.
Maddox Wood tries to land a knee to the body but he is off balance and Bayden Wood avoids it.
Maddox Wood with the Thai clinch. He's looking to land a big knee but he's not managed it this time.
Bayden Wood wants a takedown but no success here.
That's three minutes gone in the round.
Maddox Wood tries to land a knee to the head but Bayden Wood blocks with his arms.
Knees in the clinch landing for Maddox Wood.
Maddox Wood lands an uppercut.
Bayden Wood tries to land a knee to the head but misses.
Bayden Wood scores a nice knee to the body.
Maddox Wood is leaning against Bayden Wood and scores with a nice uppercut to the body.
Maddox Wood lands a nice knee to the body.
Maddox Wood lands a nice knee to the body.
Maddox Wood leaning his opponent against the cage.
Bayden Wood throws a knee to the head but misses.
Maddox Wood dictating the pace here, as the fighters clinch against the cage.
Maddox Wood lands with a right to the head.
Maddox Wood looking to throw knees to the head but Bayden Wood is blocking nicely.
Maddox Wood content to slow the pace in the clinch.
Bayden Wood using the Thai plumb to throw knees but Maddox Wood has his back arched nicely, preventing the strike.
That's four minutes gone in the round.
Maddox Wood lands a nice knee to the body.
The fans in attendance giving it up for the two fighters, who have really let it all hang out in the last minute or so!
The referee is keeping an eye on Maddox Wood - much more stalling and he will separate the fighters.
Bayden Wood trying to stall but Maddox Wood improves his position.
Knees in the clinch landing for Maddox Wood.
Maddox Wood tries a knee to the head but he's missed.
Bayden Wood takes a knee right on the jaw!
Maddox Wood lands a short shot on the inside that snaps the head of Bayden Wood backwards.
A hook to the body from Maddox Wood.
Maddox Wood is struggling to control the position.
Bayden Wood throws a head punch that misses.
Bayden Wood misses with a punch on the inside.
Bayden Wood trying to stall but Maddox Wood improves his position.
Bayden Wood throws a vicious knee straight up the middle but Maddox Wood blocks it with crossed arms.
Maddox Wood throws a knee to the head but misses.
Maddox Wood tries a knee to the head but Bayden Wood blocks it.
Bayden Wood stalling in the clinch but Maddox Wood improves position.
Maddox Wood unloads a knee to the mid-section. Bayden Wood lets out a prehistoric sounding urrrrgh.
And thats the end of the round the fighters go back to their corners.
Maddox Wood showed his class in that round. I'd imagine he'll take it on all the scorecards.
That's the end of the interval. I'm sure that seemed a lot quicker than a minute for our two fighters! Back to the action. This is the final round!
A slapping leg kick lands for Bayden Wood.
Maddox Wood takes the fight into the clinch.
Bayden Wood has managed to pull guard. Let's see whether he can work an aggressive guard. It will also be interesting to see what tactics Maddox Wood uses from the top position.
Maddox Wood throwing strikes but missing.
Maddox Wood wants to control from the top but Bayden Wood keeps moving.
We've had a slow start to the round here - hopefully the action picks up.
Maddox Wood throws a big elbow that misses.
Bayden Wood keeping moving, preventing Maddox Wood from controlling successfully.
The ref warns both fighters not to hold the cage as they work up against the meshing.
That's one minute gone in the round.
Maddox Wood controlling from the guard. I say controlling but really, he's stalling.
My spies in Hell's Furnace Gym inform me that Maddox Wood has been getting involved in the gym's BJJ sparring sessions. Let's see whether that pays dividends!
Maddox Wood connects with a couple of short punches.
Bayden Wood is looking to get back to his feet but can't, whilst Maddox Wood is controlling him.
The referee has decided to stand the fighters back up, so we'll restart on the feet.
Maddox Wood forces Bayden Wood back against the cage and clinches.
Maddox Wood crunches a lovely knee into Bayden Wood's ribcage.
Bayden Wood is looking for a takedown up against the cage. Maddox Wood gets underhooks though and prevents the takedown attempt.
Bayden Wood can't find room to land a body shot as Maddox Wood controls the action.
Bayden Wood throws a knee to the head but misses.
Both fighters are breathing heavily.
That's two minutes gone in the round.
A body shot lands from Maddox Wood.
Bayden Wood trying to stall but Maddox Wood improves his position.
Maddox Wood looking to throw knees to the head but Bayden Wood is blocking nicely.
Maddox Wood connects with a nasty looking knee right to Bayden Wood's face.
Bayden Wood looking to throw knees to the head but Maddox Wood is blocking nicely.
Maddox Wood lands a hook that snaps the head of Bayden Wood backwards.
Kneeeeees! The crowd are calling for knees to the body. Maddox Wood obliges.
Maddox Wood lands a knee to the head.
Maddox Wood unloads a knee to the mid-section.
We've seen a great period of action over the last minute or so - credit to both fighters for going all out!
Maddox Wood tries to land a knee to the head but misses.
Maddox Wood lands a knee to the head there! That was nasty!
Maddox Wood lands a knee to the head there! That was nasty!
A shot in the inside from Maddox Wood.
Maddox Wood lands a knee to the head.
Maddox Wood tries a knee to the head but he's missed.
Maddox Wood tries to land a knee to the head but Bayden Wood blocks with his arms.
Bayden Wood misses with a knee to the head.
Maddox Wood connects with a knee to the head.
Bayden Wood lands with a short shot to the head.
That's three minutes gone in the round.
Bayden Wood on the defensive, avoiding the knees to the body.
Bayden Wood is trying to drag Maddox Wood to the mat but Maddox Wood just about manages to keep his footing. He used the cage to his advantage there.
Bayden Wood takes a shot to the head.
Maddox Wood connects with a nasty looking knee right to Bayden Wood's face.
Maddox Wood throws a vicious knee straight up the middle but Bayden Wood blocks it with crossed arms.
Bayden Wood throws a vicious knee straight up the middle but Maddox Wood blocks it with crossed arms.
Bayden Wood misses with a knee strike.
Maddox Wood has Bayden Wood pushed against the cage.
Bayden Wood tries a knee to the head but he's missed.
Maddox Wood misses with a knee to the head.
Maddox Wood lands a left hand that snaps the head of Bayden Wood backwards.
Bayden Wood misses with a knee strike.
Both fighters working to control the clinch.
Bayden Wood avoiding damage as Maddox Wood throws knees to the body.
Bayden Wood with an attempt at a knee that misses.
That's four minutes gone in the round.
Maddox Wood is leaning against Bayden Wood and scores with a nice uppercut to the body.
Kneeeeees! The crowd are calling for knees to the body. Maddox Wood obliges.
Maddox Wood throws a vicious knee straight up the middle but Bayden Wood blocks it with crossed arms.
Maddox Wood landing some nice looking knees to the body.
We've seen a great period of action over the last minute or so - credit to both fighters for going all out!
Bayden Wood managing to block the knees to the body from Maddox Wood.
Bayden Wood misses with a knee to the head.
A knee to the head by Maddox Wood.
Maddox Wood looking to throw knees to the head but Bayden Wood is blocking nicely.
Bayden Wood takes a shot to the head.
Maddox Wood throws a knee to the head but misses.
Bayden Wood looking to stall.
Bayden Wood trying to control the position but instead, Maddox Wood has worked for underhooks and has pushed Bayden Wood into the cage.
Maddox Wood using the Thai plumb to throw knees but Bayden Wood has his back arched nicely, preventing the strike.
Bayden Wood has stepped it up - he knows he needs a finish here!
Maddox Wood is fighting for a decision - hopefully he's judged it right and he's actually winning the fight.
Bayden Wood tries to land a knee to the head but Maddox Wood blocks with his arms.
A knee to the head by Maddox Wood.
And that's the end of the fight!
Maddox Wood comfortably won the final round on my scorecard.
I've got Maddox Wood winning every round here. Surely the decision will go his way and he'll pick up a well deserved decision victory. Over to the ring announcer for the scorecards.
Ladies and gentlemen, after 3 rounds of action, we go to the scorecards for a decision.
Judge Matti Vanhoillinen scores the fight 27:30
Judge Anni Minnemäki scores the fight 27:30
Judge Marco Blurström scores the fight 27:30
In favor of your winner, by unanimous decision... Maddox Wood!
A victorious Maddox Wood thanked his army of followers in his post fight interview, telling people to make sure they follow him on Twitter.
|
|
|
|
|
|
|
|
|
|
|
|
|
|
|
|
|
|
|
|
|
|
|
| S |
C
A |
G |
S |
C
B |
G |
|
S |
C |
G |
|
energy
A | B |
|
hype
A | B |
|
pop
A | B |
|
mgr
A | B |
|
FIGHT
RATING
72% |
|
|
|
|
|
|
|
Undercard bout
|
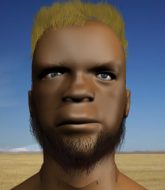
Coming up we have a light heavyweight MMA rules bout between Joe Angry (ranked 0 p4p, 0 weight class) and Dirk Diggler (ranked 0 p4p, 0 weight class). The key to victory for Joe Angry has got to be keeping the fight on the feet.
 |
|
 |
| 190 cm
25
212 lbs
4 - 0 - 0 |
|
185 cm
26
217 lbs
4 - 2 - 0 |
BJJ White Belt
Excellent MT
Very strong |
|
BJJ Purple Belt
Basic striking
Determined |
|
| |
|
Ladies and gentlemen. This fight is 5 rounds, for the light heavyweight championship of the world!
Introducing the champion to my left, fighting out of the red corner.
With a record of
4 - 0 - 0, fighting out of Helsinki, Joe Angry!
And introducing the challenger to my right, fighting out of the blue corner.
With a record of
4 - 2 - 0, fighting out of Helsinki, Dirk Diggler!
The judges for this bout are Anni Minnemäki, Johanna Lukiainen and Roosa Järviläinen.
The bell rings for round one and we are underway!
Diggler throws a combination but it was largely blocked by Angry.
A lazy left from Angry finds it's target.

Angry drops Diggler with a hook right on the temple. He thinks about going to the ground but Diggler looks back up at him and smiles so Angry waves him back to his feet - he obviously thinks he can knock him out after that shot landed.

Diggler is rocked!

It looks like Dirk Diggler has been cut.
Diggler gets tagged by a hook that puts him to sleep! Angry points and yells something to his unconcious foe before strutting off. Diggler wakes up just in time to hear Angry thank his coaches in the post fight interview.
Ladies and gentlemen, after 0:15 of round 1, we have a winner by way of KO (Punch). Joe Angry!
Joe Angry is the new light heavyweight champion!
|
|
|
|
|
|
|
|
|
|
|
|
|
|
|
|
|
|
|
|
|
|
|
| S |
C
A |
G |
S |
C
B |
G |
|
S |
C |
G |
|
energy
A | B |
|
hype
A | B |
|
pop
A | B |
|
mgr
A | B |
|
FIGHT
RATING
100% |
|
|
|
|
|
|
|
Co-main event
|
Coming up we have a middleweight MMA rules bout between Thomas Farrier (ranked 0 p4p, 0 weight class) and Filip Hansson (ranked 0 p4p, 0 weight class). The crowd giving both fighters a great reception on their way into the arena. That's good to see.
 |
|
 |
| 174 cm
18
193 lbs
1 - 1 - 0 |
|
175 cm
18
183 lbs
5 - 2 - 0 |
BJJ Blue Belt
Brawler
Big heart |
|
BJJ Blue Belt
Brawler
Likes musicals |
|
| |
|
Ladies and gentlemen. This fight is 3 rounds, in the middleweight division.
Introducing the fighter to my left, fighting out of the red corner.
With a record of
1 - 1 - 0, fighting out of Los Angeles, Thomas Farrier!
And introducing the fighter to my right, fighting out of the blue corner.
With a record of
5 - 2 - 0, fighting out of Helsinki, Filip Hansson!
The judges for this bout are Arvi Lind, Roosa Järviläinen and Matti Vanhoillinen.
The bell rings for round one and we are underway!
Hansson is looking to clinch.
Farrier shuffles to his left behind two crisp jabs. Hansson eats them both and turns towards Farrier to reposition himself and eats a stinging right hand-left hook combo.
It looks like Filip Hansson has been cut.
Hansson is looking to clinch.
Farrier has been working on his boxing with his coaches at Crapollas Gym in the buildup to the fight.
Hansson takes the fight into the clinch.
Hansson lands a right uppercut that snaps the head of Farrier backwards.
Hansson tries a body shot but Farrier blocks it.
Hansson misses with a shot to the kidneys.
Hansson wants a takedown.
Farrier pulls guard effortlessly.
Farrier is working the butterfly guard. He manages to land a nice scissor sweep and is now in half guard on the top. Nice move.

Farrier prevents Hansson from improving his position.
Hansson has his hands clasped together around Farrier's back. He's all about the action.
Farrier controlling the action here.
That's one minute gone in the round.
Hansson wants to improve his position but Farrier is controlling well.
The referee calls for the fighters to work.
Farrier passes the guard and advances to mount!
Farrier controlling the position easily from mount.
Farrier putting on the heat here with some good ground and pound!
That's two minutes gone in the round.
Hansson is writhing around trying to get back to his feet.
The ref warns both fighters not to hold the cage as they work up against the meshing.
Farrier blocks Hansson's feeble attempts to strike from the bottom.
Farrier controlling the pace for now.
Farrier seems to have a rather negative gameplan on the ground. He seems keen to just score the takedown and hold down Hansson for as long as he can get away with.
Farrier avoids the attempt from Hansson to control.
Farrier tucks in and makes sure he doesn't lose the dominant position.
Farrier is working for a guillotine from mount but Hansson frees his head quite easily.
That's three minutes gone in the round.
Farrier controlling the pace for now.
Farrier has controlled the position for a good 20 seconds, which will no doubt be starting to frustrate his opponent.
Hansson wants to control but Farrier is having none of it.
Farrier with the ground and pound from mount.
Farrier looking to control but Hansson is working nicely, looking to advance position himself.
Farrier controlling from mount.
That's four minutes gone in the round.
Hansson tries to hold on but Farrier postures up.
Farrier controlling from mount.
Hansson wants to control but Farrier is having none of it.
Farrier trying to control but Hansson is having none of it.
Farrier takes a little breather and maintains the position. The referee will be looking for him to stay active from such a dominant position though.
The crowd thankful this round is nearly over.
Hansson is trying to escape the mount.
And thats the end of the round the fighters go back to their corners.
Thomas Farrier dominated that round.
The cut man is working on Filip Hansson's cut.
That's the end of the interval. I'm sure that seemed a lot quicker than a minute for our two fighters! Back to the action.
Farrier fails with the takedown.
Boom, another hit is landed. "You're gunna get knocked out" taunts Hansson, as that shot connected.
Hansson has managed to clinch.
Hansson is pressed up against the cage. Farrier has hold of a leg and is looking to drag Hansson down to the mat. Hansson avoids the attempt though and has circled away. We're back to striking at a distance.
Nice sprawl there from Farrier as Hansson shoots in.
Hansson thuds a left hand into Farrier's body.
Nice sprawl there from Hansson as Farrier shoots in.
That's three failed takedown attempts in the round for Thomas Farrier. That's going to take a lot out of him.
Farrier wants to clinch
and Hansson connects with a straight left hand counter down the middle.
We've had a slow start to the round here - hopefully the action picks up.
Farrier gets his takedown attempt stuffed easily
and Hansson counters with a crisp hook to the side of the head.
Farrier walks straight into an uppercut. Luckily it didn't land flush.
Farrier closes the distance and presses his opponent up against the cage.
Hansson tries to land knees in the clinch but Farrier avoids the damage to the body.
That's one minute gone in the round.
Farrier breaks the clinch and we return to the middle of the mat.
Hansson tries to clinch but is not successful on this occasion.
Farrier is really dominating this fight. Is there anything that Hansson can do to turn this around?
Farrier tries to clinch up against the cage, rushing in to close the distance. Hansson manages to break the clinch and circles back to the middle of the mat.
Hansson rushes Farrier and pushes him back against the cage in a clinch.
Hansson looks like he'd prefer to be striking at range right now.
Farrier breaks from the clinch.
Thomas Farrier is looking to throw some combinations by the looks of things.
A punch lands to the side of Farrier 's head but he takes it in his stride.
Hansson closes the distance and presses his opponent up against the cage.
Farrier jumps guard and drags Hansson to the mat. He's obviously going to be looking for submissions off his back.
Hansson wants to stand but Farrier has a closed guard, so he can't escape.
Farrier is trying to control the position from the bottom.
Hansson trying to control the position from guard on top but Farrier is wriggling around, looking for whatever he can.
That's two minutes gone in the round.
Hansson looking to pass the guard.
Farrier will have to put a bit more behind his punches if he's going to do any damage from this position.
Hansson trying to control the position from guard on top but Farrier is wriggling around, looking for whatever he can.
Hansson engaging in some classic timewasting tactics.
If this pace continues, the referee will definitely step in and force a standup.
Farrier is trying to keep Hansson in close.
The referee has stepped in and called for a break in the action. We'll restart on the feet.
Hansson fails with an attempt to clinch.
Farrier seem to be loading up, looking for a big counter.
Hansson fails with a takedown attempt.
That's three minutes gone in the round.
Farrier moves into the clinch.
Hansson looking to stall.
Hansson wants to push off and get back to the center of the mat but Farrier has him pressed against the cage.
Farrier breaks the clinch.
Farrier rushes Hansson and pushes him back against the cage in a clinch.
Farrier misses with a knee strike.
Farrier has Hansson pressed against the cage, preventing Hansson from circling away and getting back to striking at range.
Farrier breaks the clinch and we're back to striking at distance.
Farrier forces Hansson back against the cage and clinches.
Farrier prevents Hansson from breaking the clinch.
Farrier tries to jump guard but he falls flat on his backside. Hansson smiles and moves away.
Hansson clinches.
That's four minutes gone in the round.
Farrier has Hansson pressed against the cage, preventing Hansson from circling away and getting back to striking at range.
Farrier blocking some punches.
Hansson goes for a body shot but it's blocked.
Farrier tries to pull guard but can't drag his opponent to the mat. Hansson just stands there and leans against the cage.
Hansson wants to push off and get back to the center of the mat but Farrier has him pressed against the cage.
Farrier tries to land knees in the clinch but Hansson avoids the damage to the body.
Filip Hansson seems to be working more effectively in the clinch in the fight so far.
Farrier pushes off and circles away, back to the middle of the mat.
Hansson tries to close the distance and clinch but Farrier swats him to one side with an open hand palm strike and circles away.
Farrier appears to be looking for a counter takedown.
Farrier shoots in for a double leg but Hansson sprawls well. That's going to sap some energy.
Hansson tries to counter with a clinch but Farrier shakes him off and moves away.
Hansson scores with a three punch combo!
Fantastic stuff here - a very entertaining period of action, which has drawn cheers from the crowd.
Farrier misses with an uppercut. Hansson saw that one coming.
Filip Hansson seems to be getting the better of the standup.
Hansson tries to grapple but his opponent circles
and Farrier counters with a big head kick but Hansson shrugs it off.
And thats the end of the round the fighters go back to their corners.
Filip Hansson showed his class in that round. I'd imagine he'll take it on all the scorecards.
The cut man is working on Filip Hansson's cut.
That's time! Back to the action! The crowd applaud as we get ready to start the final round!
Hansson wants to clinch
and Farrier counters with a crisp hook to the side of the head.
Hansson goes for a double leg but Farrier avoids the attempt and the two fighters end up clinched against the cage as Farrier continues to drive forward.
Farrier drops down looking for a counter takedown but Hansson sprawls and moves away.
Ohhhhh! A huge head kick from Farrier! Hansson is out on his feet! Farrier rushes in and throws more strikes. The ref is looking closely - Hansson is covering up but the punishment is just too much and the ref steps in to stop the fight! Hansson is staring into space, just thankful that the beatdown has ended. Brutal finish.
Ladies and gentlemen, after 0:17 of round 3, we have a winner by way of TKO (Strikes). Thomas Farrier!
After the fight, Thomas Farrier was humble in paying tribute to his opponent but made it clear he wants to go on to bigger and better things. It seemed to go down well with the crowd who cheered him loudly.
|
|
|
|
|
|
|
|
|
|
|
|
|
|
|
|
|
|
|
|
|
|
|
| S |
C
A |
G |
S |
C
B |
G |
|
S |
C |
G |
|
energy
A | B |
|
hype
A | B |
|
pop
A | B |
|
mgr
A | B |
|
FIGHT
RATING
41% |
|
|
|
|
|
|
|
Main event
|
Coming up we have a heavyweight MMA rules bout between Christophe Dupree (ranked 0 p4p, 0 weight class) and Morgan Clark (ranked 0 p4p, 0 weight class). Dupree's entrance music is Hail Mary. A fine choice. Clark is bobbing his head along to his entrance song: God Of Thunder. Rumors backstage are that the fighters have been paid to keep it standing but we know that would never happen in MMA!
 |
|
 |
| 190 cm
18
244 lbs
1 - 2 - 0 |
|
188 cm
19
265 lbs
2 - 2 - 0 |
BJJ Blue Belt
Brawler
Granite chin |
|
BJJ Blue Belt
Counter fighter
Solid chin |
|
| |
|
Ladies and gentlemen. This fight is 3 rounds, in the heavyweight division.
Introducing the fighter to my left, fighting out of the red corner.
With a record of
1 - 2 - 0, fighting out of Montreal, Christophe Dupree!
And introducing the fighter to my right, fighting out of the blue corner.
With a record of
2 - 2 - 0, fighting out of Los Angeles, Morgan Clark!
The judges for this bout are Tarja Halkonen, Anni Minnemäki and Roosa Järviläinen.
The bell rings for round one and we are underway!
Dupree avoids the head kick by Clark.
Dupree misses with the combination.
Clark tries a low kick but Dupree avoids it.
Christophe Dupree seems to be the more aggressive standup fighter in this bout.
Dupree lunges at Clark with a hook that half lands and is half blocked by Clark's hand.
Clark misses with a jab and misses with a cross straight after too.
Oooooh!!! Dupree has knocked Clark down with a huge combo! Dupree steps away and waves a wobbly Clark back to his feet! This one might not go much longer!
Clark is rocked!
It looks like Morgan Clark has been cut.
The crowd are loving this. Great action here.
Dupree lands with a precision combination! Left, right, uppercut and Clark falls flat on his face, eyes wide open but he's out!
Ladies and gentlemen, after 0:29 of round 1, we have a winner by way of KO (Punches). Christophe Dupree!
Christophe Dupree took to the microphone after his victory and thanked his sponsors, Hell's Balls Recovery (160) for their support in the buildup to the fight.
|
|
|
|
|
|
|
|
|
|
|
|
|
|
|
|
|
|
|
|
|
|
|
| S |
C
A |
G |
S |
C
B |
G |
|
S |
C |
G |
|
energy
A | B |
|
hype
A | B |
|
pop
A | B |
|
mgr
A | B |
|
FIGHT
RATING
100% |
|
|
|
|
|
|
|
|
|
|
