 |
QFC Tournament 817 Round 1 PBP Commentary |
Undercard bout
|
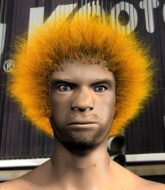
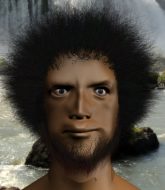
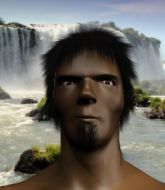
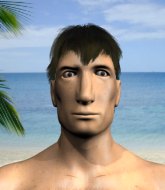
Coming up we have a bantamweight MMA rules bout between Bryan McLawhorn (ranked 6232 p4p, 264 weight class) and Mark McStinkerson (ranked 6424 p4p, 0 weight class). We have two fighters making their debuts here, so let's see who comes out of this one with their first professional victory.
 |
|
 |
| 155 cm
18
130 lbs
0 - 0 - 0 |
|
165 cm
22
138 lbs
0 - 0 - 0 |
BJJ Blue Belt
Basic striking
Granite chin |
|
BJJ Blue Belt
Decent boxing
Solid chin |
|
| |
|
Ladies and gentlemen. This fight is 3 rounds, in the bantamweight division.
Introducing the fighter to my left, fighting out of the red corner.
With a record of
0 - 0 - 0, fighting out of London, Bryan McLawhorn!
And introducing the fighter to my right, fighting out of the blue corner.
With a record of
0 - 0 - 0, fighting out of London, Mark McStinkerson!
The judges for this bout are Andrew Berry, Steven Brown and Richard Clark.

The bell rings for round one and we are underway!
McLawhorn displays good takedown defense there as he swats away a double leg from McStinkerson.
McLawhorn takes a shot right to the liver - Bas would have been proud of that punch.

McLawhorn clinches.
McStinkerson jumps guard but McLawhorn turns him against the cage and keeps the fight standing.
McStinkerson is working for takedown but McLawhorn is calmly controlling the position for now.
Bryan McLawhorn has stuffed three takedown attempts in the round now. That's going to take a lot out of Mark McStinkerson.
McStinkerson goes for a takedown attempt but McLawhorn pushes him away and we're back to fighting at a distance.

McLawhorn shoots in and gets a takedown into half guard. McLawhorn showed some decent athleticism there.
We've had a slow start to the round here - hopefully the action picks up.
McLawhorn is keen to just control but McStinkerson is a slippery customer.

That's one minute gone in the round.
McStinkerson has hold of McLawhorn's hands but McLawhorn slips his arm to the side and lands an elbow.
McLawhorn wants to get back to his feet.
McLawhorn is trying to control the action in half guard but McStinkerson is working away on the bottom, looking perhaps to get back to full guard.
McLawhorn trying to control the pace.
McLawhorn tries to stand but can't do so whilst McStinkerson controls his leg.
McLawhorn performing his best blanket impression for a moment.

That's two minutes gone in the round.
Neither fighter has done anything of merit for a good minute or two here and the crowd are not happy about it.
McStinkerson wants to control but McLawhorn is keeping busy and won't allow it.

The referee has motioned to the fighters to stand back up. He just wasn't happy with the level of activity.
McLawhorn fails with a rather predictable takedown attempt.
McStinkerson is definitely looking for the counter takedowns here.
McLawhorn will have to do better than that with his takedown attempts.
McStinkerson gets caught napping as McLawhorn dives in and scores a takedown. McStinkerson manages to retain guard.
McLawhorn trying to stand up but can't free himself from McStinkerson's guard.
McStinkerson tries to land a sweep but no joy.

That's three minutes gone in the round.

McStinkerson working for a triangle but McLawhorn defends it easily.
McLawhorn advances to half guard.
McLawhorn seems very keen to just sit and control from half guard but McStinkerson does not like that idea so much and is remaining active off his back.
McStinkerson tries to get to full guard but McLawhorn has control of the leg.
McLawhorn seems very keen to just sit and control from half guard but McStinkerson does not like that idea so much and is remaining active off his back.
McLawhorn slows the pace down in half guard.
McLawhorn wants to free his trapped foot but McStinkerson is holding on for dear life with his legs.

That's four minutes gone in the round.
The crowd are getting on the fighters' backs, as the pace has dropped off in the last minute or so.
McLawhorn is just sitting in half guard, waiting for something to happen.
The fighters are pressed up against the cage, both looking to find a bit of space to work.
McLawhorn tries to stand but his arm is trapped.
The referee decides to stand the fighters back up.
Boooooooooooooooooooo!!! God, this has been a terrible round. Come on you two, sort yourselves out!
McLawhorn looks for a takedown here. Will he get it? McStinkerson is fending him off so far but McLawhorn persists. Nope, McStinkerson circles away and we're back to standing.
McStinkerson tries a counter takedown but it's more of a dummy move, and he uses it to push himself away.
McLawhorn throws a poor cross that misses
and McStinkerson counters with a nice jab to the body that keeps McLawhorn thinking.
A telegraphed takedown attempt from McLawhorn is defended easily by McStinkerson.
And thats the end of the round the fighters go back to their corners.
Bryan McLawhorn dominated that round.
The fighters' corners scream their final instructions, as the referee calls time. Here we go, back to the action!

A really sloppy takedown attempt there from McStinkerson.
McLawhorn misses with a takedown attempt

and McStinkerson moves into the clinch.
McStinkerson tries to break free but McLawhorn pushes him back against the cage.
McStinkerson is pressed up against the cage. McLawhorn has hold of a leg and is looking to drag McStinkerson down to the mat. McStinkerson avoids the attempt though and has circled away. We're back to striking at a distance.
McStinkerson wants to clinch.
McLawhorn is looking to counter with head kicks.
McLawhorn shoots in for a takedown but McStinkerson shows good takedown defense there and keeps this one on the feet.
That's three failed takedown attempts in the round for Bryan McLawhorn. That's going to take a lot out of him.
McStinkerson darts in looking for a takedown but McLawhorn gets double underhooks and turns McStinkerson into the cage.
We've had a slow start to the round here - hopefully the action picks up.
McStinkerson rushes McLawhorn and pushes him back against the cage in a clinch.
McLawhorn wants a takedown but no success here.
McStinkerson can't break the clinch.
McLawhorn looking to throw knees to the head but McStinkerson is blocking nicely.
That's one minute gone in the round.
A frustrated look appears on McStinkerson's face as he tries to break the clinch.

McStinkerson breaks from the clinch.
McStinkerson stuffs the takedown attempt from McLawhorn. McLawhorn gets slowly back to his feet.
McLawhorn shoots in for a takedown but doesn't get it.
Both fighters are absolutely exhausted here.
McLawhorn tries to drive through with a takedown attempt but McStinkerson defends well and McLawhorn ends up having to push McStinkerson into the cage where they will battle it out in the clinch.
Bryan McLawhorn seems to be the more aggressive standup fighter in this bout.
McLawhorn takes a step back and watches a body kick go sailing past his mid section.
McLawhorn shoots in for a takedown. "Ole!" shouts McStinkerson as he jumps to the side.
McStinkerson moves into range and throws a combination. A nice jab followed by a hook to the body.
McStinkerson gets a clinch.
McStinkerson is defending well against a takedown attempt.
That's two minutes gone in the round.
McStinkerson lands a body punch.

McStinkerson jumps into guard, dragging McLawhorn to the mat.
McStinkerson is active off his back here, looking for submissions.
McStinkerson working from the bottom, still in full guard. He's managed to get a loose triangle. McLawhorn doesn't seem to be doing much to defend here, obviously he feels comfortable in the position. McLawhorn manages to throw the legs off his shoulder and he's back into guard - no problem.
McStinkerson pulls McLawhorn in close to prevent any damage.
McStinkerson has his foot on McLawhorn's thigh. He's trying to push off and get in position for a triangle, I think. McLawhorn works his way back into a safe position though.
That's three minutes gone in the round.
McLawhorn controls the pace of the fight for a moment.
The referee is asking the fighters to pick up the pace.
McLawhorn looking to sit in guard and control but McStinkerson gets the butterfly guard and sweeps. He's now in the guard on the top.


McLawhorn is working an open guard so McStinkerson takes the opportunity to get back to his feet.
McLawhorn misses with a takedown attempt
enabling McStinkerson to counter with a crisp jab.
McLawhorn closes the distance and after a bit of a stuggle, scores a takedown into McStinkerson's guard.

McStinkerson uses the cage to get back to his feet.
That's four minutes gone in the round.
McStinkerson goes for a spinning back kick but it misses.
McLawhorn tries for a takedown but McStinkerson sees it coming a mile off and avoids it easily.
We've seen a great period of action over the last minute or so - credit to both fighters for going all out!
McStinkerson lands a jab followed by a nice looking cross.
No luck for McStinkerson with that takedown attempt.
McStinkerson shoots in for a takedown but McLawhorn shows good takedown defense there and keeps this one on the feet.
McStinkerson shoots in for a takedown - he's clinched up with McLawhorn but McLawhorn pushes him off and we're back to square one.
McLawhorn moves into range and clinches up with McStinkerson.
McStinkerson slowing the pace effectively.
The pace really dropping off here, momentarily.
And thats the end of the round the fighters go back to their corners.
Mark McStinkerson showed his class in that round. I'd imagine he'll take it on all the scorecards.
Well, the break between rounds is over. Let's get back to the scrappin! This is the final round!

McLawhorn shoots in for a takedown. "I don't think so" says McStinkerson as he avoids it easily.
McLawhorn leaves McStinkerson with his face pressed against the mat as he sprawls beautifully, defending against a solid takedown attempt.
Horrible takedown attempt by McLawhorn or perhaps it was just good defense by McStinkerson, which made it look bad.
McLawhorn misses with a takedown
and McStinkerson counters with a lovely shot to the body.
That's three failed takedown attempts in the round for Bryan McLawhorn. That's going to take a lot out of him.
McStinkerson fails with a rather predictable takedown attempt.
Both fighters are breathing heavily.
We've had a slow start to the round here - hopefully the action picks up.
McStinkerson tries for a takedown but McLawhorn sees it coming a mile off and avoids it easily.
McStinkerson shoots in with a takedown attempt and he has McLawhorn pinned against the cage. McLawhorn gets the underhooks and manages to circle away.
That's one minute gone in the round.
McStinkerson throws a looping left and ducks down for a takedown. He's got his arms around McLawhorn's waist but McLawhorn gets an underhook and avoids the takedown by throwing McStinkerson off to one side.
McLawhorn tries to clinch there but McStinkerson circles away.
McLawhorn closes the distance and gets a double leg, slamming McStinkerson to the mat! McStinkerson manages to get full guard.
McStinkerson pushes McLawhorn off and scrambles back to his feet.
McLawhorn tries to clinch up but McStinkerson circles away and keeps his distance.
McLawhorn misses with a takedown
and McStinkerson counters with a nice body shot.
McStinkerson defends well against a solid takedown attempt from McLawhorn.
McLawhorn bobs and weaves into range and then changes levels and scores with a nice takedown into side control.
McStinkerson sneaks out the side door and pushes McLawhorn away - he's back to his feet. The crowd show their appreciation for the escape.
This is a great period of action - very entertaining stuff!
McStinkerson fails with a rather predictable takedown attempt.
Mark McStinkerson seems to be getting the better of the standup.
That's two minutes gone in the round.
McStinkerson tries to clinch up against the cage, rushing in to close the distance. McLawhorn manages to break the clinch and circles back to the middle of the mat.
McStinkerson throws a combination. McLawhorn tries to block but a couple of punches get through.
McLawhorn shoots in for a takedown. "Ole!" shouts McStinkerson as he jumps to the side.
McStinkerson pulls out of a head kick attempt.
A quick step to the side and McLawhorn tries to counter with a shot to the body but it doesn't connect.
McLawhorn closes the distance, clinches up and gets a nice trip takedown into side control. Very smooth.
McLawhorn remains in side control and seems content to stay there. It's a versatile position from which he can work both strikes and submissions, whilst maintaining that control, so maybe he'll sit here for a while.
McStinkerson looks to move to half guard but instead McLawhorn has passed into mount! Damn!
That's three minutes gone in the round.
McLawhorn with shots to the head and body - McStinkerson looks very uncomfortable down there.

McLawhorn jumps to side control looking for an arm triangle but McStinkerson manages to avoid the submission attempt.
McStinkerson wants to control but McLawhorn postures up.
McStinkerson is trying to avoid being dragged into an even worse position than he's already in but McLawhorn is staying active.
McStinkerson controls the position for a moment.
That's four minutes gone in the round.
A lull in the action here being met with boos from the crowd.
McLawhorn tries to land with some ground and pound but misses.

McLawhorn decides to stand up, so the ref orders McStinkerson to his feet.
McLawhorn has McStinkerson up against the cage in a clinch.
McStinkerson looks like he'd prefer to be striking at range right now.
McLawhorn tries to jump guard but he falls flat on his backside. McStinkerson smiles and moves away.
Bryan McLawhorn is looking to throw some combinations by the looks of things.
McLawhorn is looking to clinch but McStinkerson is avoiding it.
McStinkerson flicks out a counter leg kick but McLawhorn steps away.
Bryan McLawhorn has stepped it up - he knows he needs a finish here!
Mark McStinkerson is fighting for a decision here - he's started to take the cautious approach.
McStinkerson closes this distance looking for a takedown but McLawhorn circles away.
And that's the end of the fight!
Mark McStinkerson comfortably won the final round on my scorecard.
Well McStinkerson has outworked and out performed his opponent in all aspects of the game today. He was simply too good and the decision should be no more than a formality. Over to the ring announcer for the scorecards.
Ladies and gentlemen, after 3 rounds of action, we go to the scorecards for a decision.
Judge Andrew Berry scores the fight for Mark McStinkerson!
Judge Steven Brown scores the fight for Mark McStinkerson!
Judge Richard Clark scores the fight for Mark McStinkerson!
Mark McStinkerson wins by unanimous decision!
|
|
|
|
|
|
|
|
|
|
|
|
|
|
|
|
|
|
|
|
|
|
|
| S |
C
A |
G |
S |
C
B |
G |
|
S |
C |
G |
|
energy
A | B |
|
hype
A | B |
|
pop
A | B |
|
mgr
A | B |
|
FIGHT
RATING
41% |
|
|
|
|
|
|
|
Undercard bout
|
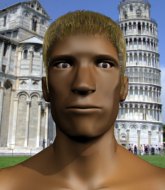
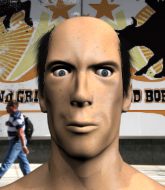
Coming up we have a bantamweight MMA rules bout between Junior Diaz (ranked 6262 p4p, 0 weight class) and Limonjelo Smiff (ranked 6426 p4p, 0 weight class). We have two fighters making their debuts here, so let's see who comes out of this one with their first professional victory.
 |
|
 |
| 170 cm
23
140 lbs
0 - 0 - 0 |
|
170 cm
23
139 lbs
0 - 0 - 0 |
BJJ Brown Belt
Brawler
Good chin |
|
Good takedowns
Basic striking
Experienced |
|
| |
|
Ladies and gentlemen. This fight is 3 rounds, in the bantamweight division.
Introducing the fighter to my left, fighting out of the red corner.
With a record of
0 - 0 - 0, fighting out of London, Junior Diaz!
And introducing the fighter to my right, fighting out of the blue corner.
With a record of
0 - 0 - 0, fighting out of London, Limonjelo Smiff!
The judges for this bout are James Atkins, Daniel Bishop and Richard Clark.
The bell rings for round one and we are underway!
Diaz wants to clinch.
Diaz tries a switch kick but it misses it's target.
Smiff drops down looking to force a counter takedown but Diaz defends it well.
Diaz looks to clinch
and Smiff counters with a single leg into guard. Diaz didn't expect that.
Smiff scores with a decent looking elbow strike.
Diaz working a defensive guard here.
Diaz can't keep his opponent in guard - Smiff advances to half guard, no doubt looking to mount.
The referee walks around the fighters to get a better view of the action. Smiff lands a nice short elbow.
We've had a slow start to the round here - hopefully the action picks up.
Smiff landing with strikes to the body and head, softening up his opponent.
Diaz trying to control from the bottom.
Smiff is keeping good posture, landing some ground and pound.
The fighters are pressed up against the cage, both looking to find a bit of space to work.
That's one minute gone in the round.
Smiff is controlling the pace.
Smiff seems to be taking a bit of a break to think of his next move. He lands a short punch in the meantime.
Diaz taking some punishment here, with Smiff in his half guard.
Diaz won't allow Smiff to pass to mount.
Smiff drops an elbow to the side of Diaz's head.
Smiff wants to control but Diaz is keeping him busy.
Smiff is just sitting in half guard, waiting for something to happen.
Smiff landing with strikes to the body and head, softening up his opponent.

Diaz is rocked!

It looks like Junior Diaz has been cut.
The ref warns both fighters not to hold the cage as they work up against the meshing.
That's two minutes gone in the round.
Diaz is trying to control but can't.
Smiff seems content to maintain position for now, rather than mounting any offense.
Smiff has freed up his trapped foot and advances to mount.
Smiff connects with a couple of good shots from mount.
Smiff content just to control the position here.
Smiff working away from the top, dropping strikes.
That's three minutes gone in the round.
Smiff is landing with some decent strikes but Diaz is trying to advance his position so the referee is letting the fight continue.
Diaz is in a horrible position here. Smiff smacks him with another shot as he tries to escape the position.
Oh Diaz is still in real trouble! Will he be able to recover?!!
Smiff loads up with a big shot that hurts Diaz! He's pulled Smiff in close but Smiff has postured up and lands more strikes. Can Diaz survive? More strikes from Smiff and Diaz is out! The ref jumps in to save him! Brutal ground and pound!
Ladies and gentlemen, after 3:31 of round 1, we have a winner by way of KO (Strikes). Limonjelo Smiff!
|
|
|
|
|
|
|
|
|
|
|
|
|
|
|
|
|
|
|
|
|
|
|
| S |
C
A |
G |
S |
C
B |
G |
|
S |
C |
G |
|
energy
A | B |
|
hype
A | B |
|
pop
A | B |
|
mgr
A | B |
|
FIGHT
RATING
42% |
|
|
|
|
|
|
|
Undercard bout
|
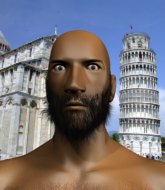
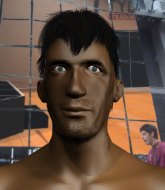
Coming up we have a bantamweight MMA rules bout between Wong Jack Man (ranked 6240 p4p, 0 weight class) and Little Jimmy (ranked 6110 p4p, 0 weight class). We have two fighters making their debuts here, so let's see who comes out of this one with their first professional victory.
 |
|
 |
| 169 cm
23
137 lbs
0 - 0 - 0 |
|
157 cm
19
145 lbs
0 - 0 - 0 |
Good takedowns
Basic striking
Granite chin |
|
BJJ Purple Belt
Counter fighter
Determined |
|
| |
|
Ladies and gentlemen. This fight is 3 rounds, in the bantamweight division.
Introducing the fighter to my left, fighting out of the red corner.
With a record of
0 - 0 - 0, fighting out of London, Wong Jack Man!
And introducing the fighter to my right, fighting out of the blue corner.
With a record of
0 - 0 - 0, fighting out of London, Little Jimmy!
The judges for this bout are Phil Schofield, Daniel Bishop and Donald Grub.
The bell rings for round one and we are underway!
Jack Man closes the distance and gets a trip takedown into side control. Jimmy quickly recovers to half guard.
Jimmy is trying to get back to full guard.
Jack Man wants to control but Jimmy is keeping him busy.
Jimmy wants to get back to his feet.
Jimmy actively working from the bottom here.
Jack Man is figuring out what he wants to do next.
Jack Man moves into full mount! Jimmy won't be happy about that!
Jimmy taking shots to the head.
We've had a slow start to the round here - hopefully the action picks up.
Jimmy is writhing around trying to get back to his feet.
The crowd growing excited in anticipation of a finish here! Right on cue, Jack Man cracks his opponent with a massive right hand that draws loud cheers!
Jimmy regains half guard.
Ground and pound from Jack Man.
That's one minute gone in the round.
Jimmy is trying to maintain the position but Jack Man is very close to passing his half guard.
Jack Man prevents Jimmy from improving his position.
The ref warns both fighters not to hold the cage as they work up against the meshing.
Jimmy has hold of Jack Man's hands but Jack Man slips his arm to the side and lands an elbow.
The fighters are pressed up against the cage, both looking to find a bit of space to work.
The two fighters exchange a few words. I couldn't hear what they were saying but maybe it's more fun if you make it up yourself. Jack Man connects with a nice short shot to Jimmy's temple.
Jack Man wants to lay and pray for a moment but Jimmy keeps working.
Jack Man landing with strikes to the body and head, softening up his opponent.
Jack Man scoring with strikes to the body and head.

Jimmy is rocked!
Jack Man takes a deep breath and rests his weight momentarily on top of his opponent, to control the position.
Jack Man lands with an elbow from half guard - that looked like it hurt.
Jimmy is still in real trouble! Can Jack Man finish him?
Jimmy wants to improve his position but Jack Man is controlling well.
Jimmy seems to have recovered his senses.
That's two minutes gone in the round.
Jack Man wants to take a breather but Jimmy is having none of it.
Jack Man will need to keep those long limbs tucked in whilst he's on the ground, to prevent any submissions.
Jimmy wants to control but Jack Man is keeping busy.
Jimmy is trying to defend against the ground and pound but Jack Man scores with a couple of nice shots.
Jack Man prevents Jimmy from improving his position.
Jack Man slips a nice elbow through Jimmy's hands, connecting with Jimmy's forehead.
Ground and pound from Jack Man.
Jimmy wants to improve his position but Jack Man is controlling well.
That's three minutes gone in the round.
Jack Man is looking for a kimura but he's never going to get it from there.
Jack Man is trying to control. Jimmy wants to improve his position but can't escape this time.
Jack Man landing with strikes to the body and head, softening up his opponent.
Jimmy wants to control but Jack Man is keeping busy and won't allow it.
Jimmy is looking to regain full guard. Not this time though.
Jack Man performing his best blanket impression for a moment.
The referee walks around the fighters to get a better view of the action. Jack Man lands a nice short elbow.
That's four minutes gone in the round.
Jimmy has no desire to be mounted, so is trying to control. Jack Man is working away from the top position though.
Jimmy should think about turning a few of those tyres round his middle into muscle if he wants people to take him seriously as an athlete.
Jack Man is taking a breather. Jimmy says something to him but it's hard to make out. Perhaps he's telling him to get on with it and actually do something.
Jack Man is keen to just control but Jimmy is a slippery customer.
Jack Man lands strikes from half guard.
Jimmy trying to control from the bottom.
Jimmy is trying to get back to full guard.
Jack Man winds up and cracks Jimmy with a swinging punch to the side of the head.
The crowd thankful this round is nearly over.
Jack Man tries to pass the half guard into mount. Jimmy knows what he's doing though and prevents the attempt.
Jimmy looking to work for a kimura from the bottom.
And thats the end of the round the fighters go back to their corners.
Wong Jack Man dominated that round.
The corners get their ten second warning. Both fighters stand from their stools and stare eachother down, ready to get back to the action.
Jack Man shoots in for a takedown from distance. He catches Jimmy napping and manages to drive through into side control!
Jimmy tries to wriggle free to get back to his feet but he's given up his back! Oops.
Jack Man struggling to keep hold of the position.
Jack Man lands with a nice looking elbow that stuns Jimmy.
Jack Man lands a punch that was close to the back of the head but the ref thinks it's OK.
Jack Man is punishing Jimmy with strikes - can he finish him?!
Jack Man is really dominating this fight. Is there anything that Jimmy can do to turn this around?
Jack Man scores with some strikes to the side of the head there. Good, points scoring shots.
The crowd are loving this. Great action here.
Jimmy trying to control the position but Jack Man manages to sink in the hooks.
Jack Man struggling to keep hold of the position.
That's one minute gone in the round.
Jimmy manages to reverse the position and now he's in Jack Man's guard. Nice work there by Jimmy.
Jack Man wants to sweep but no luck.
Jack Man looking to control.
Jimmy stopping the sweep attempt from Jack Man.
Jimmy wants to control from the top but Jack Man keeps moving.
That's two minutes gone in the round.
Jimmy stopping the sweep attempt from Jack Man.
Jack Man not looking particularly offensive just at the moment.
Jimmy stopping the sweep attempt from Jack Man.
Jack Man throws a couple of weedy looking strikes off his back.
Jack Man wants to sweep but no luck.
Jack Man is adopting a defensive guard.
The referee has decided to stand the fighters back up, so we'll restart on the feet.
Jack Man misses with a straight left.
Jimmy avoids a lazy jab quite easily.
Jimmy is definitely looking for the counter takedowns here.
Jimmy is trying hard to land a takedown here. Jack Man sprawls well and keeps this one on the feet.
That's three minutes gone in the round.
A telegraphed right hand from Jack Man misses the target.
Jack Man just misses with a punch to the body.
Jimmy is looking to clinch.
Jack Man finds nothing but air with that leg kick attempt.
Jack Man stuffs the takedown.
Wong Jack Man seems to be the more aggressive standup fighter in this bout.
Jimmy is breathing heavily.
Jack Man swings away with a leg kick that misses.
Jack Man gets the takedown into side control.
Jack Man cracks Jimmy with a big right hand but Jimmy just smiles back at him and invites him to have another go.
Jimmy is trying to improve his position.
Jack Man working the head and body with strikes.
That's four minutes gone in the round.
Check out the look on Jack Man's face as he threw that strike - that's one determined fighter!
Jack Man wants to control but Jimmy is keeping him busy.
Jack Man lands a knee to the body and follows it up with some ground and pound to the head. That will wear Jimmy down.
Jimmy takes a couple of big shots there - the referee warns him that he has to defend himself better.
Jimmy is looking for a sweep.
This has been an exciting period of action!
Jimmy is not content to let Jack Man control the position.
Jack Man landing with strikes to the head and body from side control.
Jack Man lands a knee to the body and a forearm to the face.
Jimmy is looking for a sweep.
And thats the end of the round the fighters go back to their corners.
Wong Jack Man dominated that second round.
That's time! Back to the action! This is the final round!
Jimmy misses with a takedown attempt - Jack Man sprawls well and throws a nice strike on the way out which just misses.
Jack Man is looking to counter punch.
Jimmy throws a looping left and ducks down for a takedown. He's got his arms around Jack Man's waist but Jack Man gets an underhook and avoids the takedown by throwing Jimmy off to one side.
Jack Man misses with an uppercut.
Jimmy uses decent footwork to sidestep a right hand from Jack Man.
Jimmy uses good footwork to avoid the strikes from Jack Man.
Jack Man shoots in and scores a nice double leg takedown into half guard.
We've had a slow start to the round here - hopefully the action picks up.
Ground and pound from Jack Man.
Jack Man content to sit in half guard and control for a moment.
Jimmy is staying active underneath Jack Man, who seems content to just control the action from this position.
That's one minute gone in the round.
Jack Man trying to mount his opponent but Jimmy defends it.
Jack Man moves into side control, avoiding a weak kimura attempt from Jimmy.
Jack Man lands some shots froms side control.
Jimmy tries to improve position but can't.
Jimmy takes a big intake of breath there - he's definitely tired.
Jack Man moves into full mount!
Jack Man looks like he's working for a submission but he's not found anything just yet.
Jack Man is in the full mount, landing strikes.
Wong Jack Man is fighting for a decision here - he's started to take the cautious approach.
That's two minutes gone in the round.
Jack Man wants to control the pace but Jimmy is squirming around nicely.
Jimmy keeping his composure momentarily, calmly looking to get back to half guard.
Jimmy defends a decent attempt at a guillotine from Jack Man.
Jack Man looking to control but Jimmy is working nicely, looking to advance position himself.
Jimmy really trying hard to get back to half guard here.
That's three minutes gone in the round.
Jack Man controlling the position easily from mount.
Jimmy is looking to get to half guard.
Jack Man landing strikes from the mount.
Jimmy tries to hold on but Jack Man pushes him away.
Jimmy tries to get back to half guard but can't.
Jack Man controlling the position easily from mount.
Jack Man looking to finish Jimmy with some ground and pound. This is bad for Jimmy!
That's four minutes gone in the round.
Jack Man controlling from the full mount.
Jack Man lands with some strikes.
Jack Man prevents Jimmy from getting the reversal.
Jack Man takes a little breather and maintains the position. The referee will be looking for him to stay active from such a dominant position though.
Jack Man working away from the top, dropping strikes.
Jack Man controlling the position easily from mount.
Jimmy is flailing around like a fish out of water, trying to land strikes.
Little Jimmy has stepped it up - he knows he needs a finish here!
The crowd thankful this round is nearly over.
Jimmy in a bad spot here, taking shots to the head.
And that's the end of the fight!
Wong Jack Man showed his dominance in that final round.
Well Jack Man has outscored his opponent in every aspect of the fight today. Only a scarily incompetent judge or two will keep him from a well deserved win... Over to the ring announcer for the scorecards.
Ladies and gentlemen, after 3 rounds of action, we go to the scorecards for a decision.
Judge Phil Schofield scores the fight for Wong Jack Man!
Judge Daniel Bishop scores the fight for Wong Jack Man!
Judge Donald Grub scores the fight for Wong Jack Man!
Wong Jack Man wins by unanimous decision!
|
|
|
|
|
|
|
|
|
|
|
|
|
|
|
|
|
|
|
|
|
|
|
| S |
C
A |
G |
S |
C
B |
G |
|
S |
C |
G |
|
energy
A | B |
|
hype
A | B |
|
pop
A | B |
|
mgr
A | B |
|
FIGHT
RATING
40% |
|
|
|
|
|
|
|
Undercard bout
|
|
|
|
Undercard bout
|
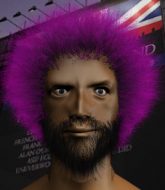
Coming up we have a bantamweight MMA rules bout between Quincy Tricott (ranked 6321 p4p, 0 weight class) and Jole Jolt The Rim Job (ranked 6264 p4p, 0 weight class). We have two fighters making their debuts here, so let's see who comes out of this one with their first professional victory.
 |
|
 |
| 166 cm
23
139 lbs
0 - 0 - 0 |
|
175 cm
23
145 lbs
0 - 0 - 0 |
Good takedowns
Basic striking
KO power |
|
BJJ Blue Belt
Excellent boxer
Granite chin |
|
| |
|
Ladies and gentlemen. This fight is 3 rounds, in the bantamweight division.
Introducing the fighter to my left, fighting out of the red corner.
With a record of
0 - 0 - 0, fighting out of London, Quincy Tricott!
And introducing the fighter to my right, fighting out of the blue corner.
With a record of
0 - 0 - 0, fighting out of London, Jole Jolt The Rim Job !
The judges for this bout are Daniel Bishop, Sam Margolis and Phil Schofield.
The bell rings for round one and we are underway!
Jolt The Rim Job closes the distance looking to clinch
and Tricott counters with a nice double leg into side control. Jolt The Rim Job won't be happy with that.
Tricott lands a few punches from side control.
Jolt The Rim Job takes a nasty elbow to the side of the head.
Jolt The Rim Job is not content to let Tricott control the position.
Tricott working the body and head with strikes.
Tricott lands a knee to the body and a forearm to the face.
Jolt The Rim Job trying his best to control but Tricott has mounted him.
Tricott landing punches.
This has been an exciting period of action!
Jolt The Rim Job tries to reverse the position but Tricott maintains control.
That's one minute gone in the round.
Tricott has his opponent pinned against the cage, landing some nasty ground and pound that is really making a bit of a mess out of Jolt The Rim Job 's face.
Jolt The Rim Job is rocked!
Tricott is still in mount, landing shots to his trapped opponent. Jolt The Rim Job can't stay in a position like this for much longer.
Jolt The Rim Job is still in real trouble! Can Tricott finish him?
Tricott is in full mount looking to finish with strikes. He lands a big shot, followed by another and Jolt The Rim Job goes limp! The ref jumps in to end the fight - a big win for Tricott!
Ladies and gentlemen, after 1:30 of round 1, we have a winner by way of KO (Strikes). Quincy Tricott!
|
|
|
|
|
|
|
|
|
|
|
|
|
|
|
|
|
|
|
|
|
|
|
| S |
C
A |
G |
S |
C
B |
G |
|
S |
C |
G |
|
energy
A | B |
|
hype
A | B |
|
pop
A | B |
|
mgr
A | B |
|
FIGHT
RATING
76% |
|
|
|
|
|
|
|
Undercard bout
|
Coming up we have a bantamweight MMA rules bout between Jose Miguel (ranked 6036 p4p, 0 weight class) and Daba Doo (ranked 6428 p4p, 0 weight class). We have two fighters making their debuts here, so let's see who comes out of this one with their first professional victory.
 |
|
 |
| 225 cm
18
130 lbs
0 - 0 - 0 |
|
165 cm
23
135 lbs
0 - 0 - 0 |
BJJ Purple Belt
Brawler
Intelligent |
|
Good wrestler
Basic striking
Granite chin |
|
| |
|
Ladies and gentlemen. This fight is 3 rounds, in the bantamweight division.
Introducing the fighter to my left, fighting out of the red corner.
With a record of
0 - 0 - 0, fighting out of London, Jose Miguel!
And introducing the fighter to my right, fighting out of the blue corner.
With a record of
0 - 0 - 0, fighting out of London, Daba Doo!
The judges for this bout are James Ackerman, Chris Edwards and Paul Tew.
The bell rings for round one and we are underway!
Miguel tries to close the distance and clinch up against the cage but Doo paws at him with a jab and circles away.
Miguel sets himself, and Doo steps forward looking for the clinch! Miguel avoids it this time.
Miguel tries to clinch up but Doo circles away and keeps his distance.
Miguel wants to clinch.
Doo clinches up with Miguel and pushes him back against the cage.
Doo scores with a shoulder strike.
Doo taking a break, stalling in the clinch.
A right hook to the body lands for Doo.
We've had a slow start to the round here - hopefully the action picks up.
Miguel tried to land a shot to the body but connects with Doo's elbow.
Good body shot from Doo.
Doo just leaning against Miguel, taking a breather.
Doo lands with a short head shot on the inside.
Miguel is rocked!
Doo unloads with a big right hand that wobbles Miguel! He's leaning against the cage trying to keep his feet but Doo is unloading with more strikes now! Miguel drops to his knees and the referee stops the fight for a TKO!
Ladies and gentlemen, after 1:56 of round 1, we have a winner by way of TKO (Strikes). Daba Doo!
|
|
|
|
|
|
|
|
|
|
|
|
|
|
|
|
|
|
|
|
|
|
|
| S |
C
A |
G |
S |
C
B |
G |
|
S |
C |
G |
|
energy
A | B |
|
hype
A | B |
|
pop
A | B |
|
mgr
A | B |
|
FIGHT
RATING
51% |
|
|
|
|
|
|
|
Co-main event
|
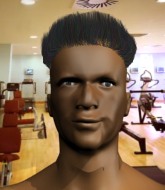
Coming up we have a bantamweight MMA rules bout between Jake Hughes (ranked 6261 p4p, 0 weight class) and Darragh Hollingsworth (ranked 6345 p4p, 465 weight class). We have two fighters making their debuts here, so let's see who comes out of this one with their first professional victory.
 |
|
 |
| 170 cm
23
140 lbs
0 - 0 - 0 |
|
169 cm
20
140 lbs
0 - 0 - 0 |
BJJ White Belt
Excellent boxer
Self confident |
|
BJJ Blue Belt
Brawler
Granite chin |
|
| |
|
Ladies and gentlemen. This fight is 3 rounds, in the bantamweight division.
Introducing the fighter to my left, fighting out of the red corner.
With a record of
0 - 0 - 0, fighting out of London, Jake Hughes!
And introducing the fighter to my right, fighting out of the blue corner.
With a record of
0 - 0 - 0, fighting out of London, Darragh Hollingsworth!
The judges for this bout are Donald Grub, Andrew Berry and Daniel Bishop.
The bell rings for round one and we are underway!
Hollingsworth goes for a double leg but Hughes avoids the attempt and the two fighters end up clinched against the cage as Hughes continues to drive forward.
Hughes tries to close the distance and clinch but Hollingsworth swats him to one side with an open hand palm strike and circles away.
Hughes tries to score a power double leg takedown but Hollingsworth sees that one coming and sprawls well. That will dishearten Hughes somewhat.
Hughes shoots in looking for a takedown but Hollingsworth manages to keep the fight standing, pushing Hughes's face into the canvas for good measure before circling away.
Hughes closes the distance and gets a trip takedown into side control. Hollingsworth quickly recovers to half guard.
Hollingsworth makes some distance and scrambles quickly back to his feet. Nice work!
Hughes throws a head kick but Hollingsworth moves out of range.
Hughes moves in looking to clinch but Hollingsworth pushes him off.
Hollingsworth tries a counter takedown but it's more of a dummy move, and he uses it to push himself away.
Hughes fails in his attempt to clinch.
Hollingsworth with the counter takedown but Hughes avoids it easily.
Hughes lands a jab-cross combination.
This is a great period of action - very entertaining stuff!
Hollingsworth goes for a double leg but Hughes avoids the attempt and the two fighters end up clinched against the cage as Hughes continues to drive forward.
Hughes has taken the fight to the clinch.
That's one minute gone in the round.
Hughes wants to break free. God knows he wants to breaaaak freeee.
Hughes leaning against his opponent.
Hughes jumps guard but his hands slip and he falls flat on his back. Well, he's made himself look a right mug there, as Hollingsworth walks away with a smile on his face. Hughes gets slowly back to his feet and shakes his head.
That's three failed takedown attempts in the round for Jake Hughes. That's going to take a lot out of him.
Hughes is looking to clinch but Hollingsworth is avoiding it.
Hollingsworth forces Hughes back against the cage and clinches.
Hughes is trying to break the clinch but Hollingsworth is controlling him.
Hollingsworth pushes off and circles away, back to the middle of the mat.
Hughes misses with a half-hearted attempt at a head kick.
Hollingsworth dives in for a single leg takedown but Hughes sprawls and the fighters end up clinched against the cage.
Hughes misses with a wild combination.
Hughes shoots in for a takedown. "I don't think so" says Hollingsworth as he avoids it easily.
Hughes closes the distance and clinches up with Hollingsworth, looking for a takedown. Hughes pushes Hollingsworth against the cage but Hollingsworth circles to the side and manages to break the clinch.
That's two minutes gone in the round.
Hollingsworth looks frustrated there after his takedown attempt is stuffed easily.
No luck for Hughes with that takedown attempt.
Hughes shoots for a double leg takedown but Hollingsworth sprawls well. He's pushed Hughes's face into the mat and manages to get back to his feet relatively easily.
The fight moves into the clinch position.
Hughes taking a breather.
Hollingsworth successfully pulls guard.
Hughes got a little sloppy there for a moment and Hollingsworth has worked his way into a loose triangle - can he finish it?! No, Hughes has managed to get both his arms back between Hollingsworth's legs - danger averted.
Hollingsworth working the defensive guard well to avoid strikes from Hughes.
That's three minutes gone in the round.
Hughes looking to pass the guard.
Hollingsworth avoiding any damage from the ground and pound.
Hollingsworth is looking for a guillotine. You can't force these things though and Hughes defends well.
The fighters are pressed up against the cage, both looking to find a bit of space to work.
Hollingsworth is trying to control the position from the bottom.
Hughes wants to get up but he can't break Hollingsworth's closed guard. He needs to be careful trying to break the legs open, as he's open to submissions here.
Hollingsworth is working the butterfly guard. He manages to land a nice scissor sweep and is now in half guard on the top. Nice move.
That's four minutes gone in the round.
The crowd are showing their displeasure at the lack of action as loud boos ring out around the arena.
Hughes is trying to get back to full guard.
Hughes is doing well to control the position and prevent Hollingsworth from advancing to side control.
Hughes is looking for a sweep. Hollingsworth is wise to his cunning plan and keeps the top position.
Hollingsworth throwing shots but Hughes is blocking nicely.
Hollingsworth sitting in half guard, looking to land shots. Hughes defending well though.
Hughes is trying to stand.
Hollingsworth is taking a breather. Hughes says something to him but it's hard to make out. Perhaps he's telling him to get on with it and actually do something.
Hollingsworth not throwing his punches with enough precision this time.
And thats the end of the round the fighters go back to their corners.
Darragh Hollingsworth dominated that round.
The referee calls time. The cornermen exit stage left and we're back to business.
Hollingsworth has managed to clinch.
Hollingsworth has Hughes pressed against the cage, preventing Hughes from circling away and getting back to striking at range.
Hughes tries to circle away but Hollingsworth has him pinned against the cage.
Hollingsworth is working for a takedown up against the cage. He can't get it on this occasion though.
Hollingsworth looking for a takedown.
Hughes jumps guard but Hollingsworth turns him against the cage and keeps the fight standing.
Hughes has dropped down and is looking to force the takedown but it's defended by Hollingsworth after a bit of a struggle.
Hollingsworth misses with an elbow over the top.
Hollingsworth pulls guard.
We've had a slow start to the round here - hopefully the action picks up.
Hollingsworth is working the butterfly guard. He manages to land a nice scissor sweep and is now in half guard on the top. Nice move.
Hollingsworth works his way into full mount!
Hughes knows he needs to get back to his feet asap. He's simply no match for Hollingsworth on the ground.
Hughes is looking to get to half guard.
That's one minute gone in the round.
Hollingsworth trying to control but Hughes is having none of it.
Hughes is in a horrible position here, under a barrage of strikes, he's managing to avoid any damage.
Hughes can't escape the position.
Hughes wants to control but Hollingsworth is having none of it.
That's two minutes gone in the round.
Neither fighter has done anything of merit for a good minute or two here and the crowd are not happy about it.
Hughes is really trying hard to get back to his feet.
Hughes is wriggling around trying to escape.
Hughes tries to hold on but Hollingsworth postures up.
Hollingsworth has been the more effective fighter overall so far.
Hollingsworth with a couple of short strikes.
Hughes is trying to reverse the position but instead Hollingsworth has taken his back - oops!
Hughes prevents Hollingsworth from getting a body triangle.
Hughes preventing the rear naked choke attempt from Hollingsworth.
That's three minutes gone in the round.
Hollingsworth is working really hard to secure the rear naked choke. Hughes defends successfully for a significant amount of time. Both fighters are looking very determined.
Hughes covering up well under a series of strikes from Hollingsworth.
Hughes trying to control but he's just got himself in more trouble.
You can see the frustration on Hughes's face
He knows he is in trouble unless he improves his position sooner rather than later.
Hollingsworth misses with a punch to the head.
That's four minutes gone in the round.
A lull in the action here being met with boos from the crowd.
Hollingsworth gets his hands free as Hughes looks to control.
Hughes prevents Hollingsworth from getting a body triangle.
Hughes covering up well under a series of strikes from Hollingsworth.
Hollingsworth keeps control of the position as Hughes tries to break free.
Hollingsworth tries to keep control of the position but Hughes is staying busy.
Boooooooooooooooooooo!!! God, this has been a terrible round. Come on you two, sort yourselves out!
Hughes is staying cool under pressure, defending well against the rear naked choke attempt from his opponent.
Hughes wants to control his opponent's hands but Hollingsworth gets his hands free.
And thats the end of the round the fighters go back to their corners.
Darragh Hollingsworth showed his class in that round. I'd imagine he'll take it on all the scorecards.
That's time! Back to the action! And we move into the final round!
Nice sprawl there from Hollingsworth as Hughes shoots in.
Hughes is looking to take this fight into the clinch.
Hollingsworth closes the distance and pushes Hughes back into the cage.
Hughes is trying to pull guard but Hollingsworth turns him against the cage and we stay in the clinch.
Hughes tries to throw a body punch but Hollingsworth avoids it by throwing Hughes back against the cage.
Hughes wants to break free. God knows he wants to breaaaak freeee.
A frustrated look appears on Hughes's face as he tries to break the clinch.
We've had a slow start to the round here - hopefully the action picks up.
Hollingsworth missing with knees to the body.
Hollingsworth keeps the fight in the clinch, despite Hughes's efforts to push away.
Hollingsworth just leaning against Hughes, taking a breather.
Hughes wants to take the fight to the mat but Hollingsworth manages to get underhooks and keep the fight in the clinch.
That's three failed takedown attempts in the round for Jake Hughes. That's going to take a lot out of him.
That's one minute gone in the round.
Hughes tries to take the fight to the ground by pulling guard but can't manage it.
Hughes tries to pull guard but Hollingsworth won't allow it.
Hollingsworth goes for a body shot but it's blocked.

Hughes's corner calls for him to break the clinch, which he does.
A telegraphed takedown attempt from Hollingsworth is defended easily by Hughes.
Nice takedown defense from Hollingsworth. No joy for Hughes on that attempt.
Hollingsworth shoots in for a takedown but doesn't get it.
Hughes moves in looking to clinch but Hollingsworth pushes him off.
Hughes goes for a double leg but Hollingsworth avoids the attempt and the two fighters end up clinched against the cage as Hollingsworth continues to drive forward.
Hughes shoots in for a takedown but Hollingsworth shows good takedown defense.
Hollingsworth tries to counter with a clinch but Hughes shakes him off and moves away.
Both fighters are breathing heavily.
That's two minutes gone in the round.
Hollingsworth is trying hard to land a takedown here. Hughes sprawls well and keeps this one on the feet.
Hughes wants to take advantage of his opponent's missed offense by moving into the clinch.
Hughes lands a nice looking body kick.
Hughes is trying hard to land a takedown here. Hollingsworth sprawls well and keeps this one on the feet.
Hughes tries to clinch up.
Hughes keeps the fight standing with a nice sprawl.
Hughes tries to score a power double leg takedown but Hollingsworth sees that one coming and sprawls well. That will dishearten Hughes somewhat.
A looping hook to the body misses from Hollingsworth. Hughes does a little dance to reset his feet.
Hughes is looking to counter the offense by Hollingsworth and move into the clinch.
Jake Hughes is winning the standup battle so far.
Hughes is trying hard to land a takedown here. Hollingsworth sprawls well and keeps this one on the feet.
Hughes shoots in for a double leg but Hollingsworth sprawls well. That's going to sap some energy.
That's three minutes gone in the round.
Excellent takedown into side control there by Hollingsworth.
Hughes bucks up and tries to throw Hollingsworth off but instead Hollingsworth has got his back!
Hughes can't escape the position.
Hollingsworth trying to control.
Hughes trying to control the position but Hollingsworth manages to sink in the hooks.
Darragh Hollingsworth has got the better of the ground game so far.
Hollingsworth really has the hooks in deep now - there seems like no escape for Hughes.
The ref warns both fighters not to hold the cage as they work up against the meshing.
That's four minutes gone in the round.
Hollingsworth controlling well, preventing Hughes from escaping the position.
Hughes wants to get back to his feet.
Hollingsworth working for a choke but Hughes is defending well.
The crowd thankful this round is nearly over.
I really don't envy Hughes right now.
And that's the end of the fight!
Darragh Hollingsworth comfortably won the final round on my scorecard.
Well Hollingsworth has outworked and out performed his opponent in all aspects of the game today. He was simply too good and the decision should be no more than a formality. Over to the ring announcer for the scorecards.
Ladies and gentlemen, after 3 rounds of action, we go to the scorecards for a decision.
Judge Donald Grub scores the fight for Darragh Hollingsworth!
Judge Andrew Berry scores the fight for Darragh Hollingsworth!
Judge Daniel Bishop scores the fight for Darragh Hollingsworth!
Darragh Hollingsworth wins by unanimous decision!
|
|
|
|
|
|
|
|
|
|
|
|
|
|
|
|
|
|
|
|
|
|
|
| S |
C
A |
G |
S |
C
B |
G |
|
S |
C |
G |
|
energy
A | B |
|
hype
A | B |
|
pop
A | B |
|
mgr
A | B |
|
FIGHT
RATING
34% |
|
|
|
|
|
|
|
Main event
|
Coming up we have a bantamweight MMA rules bout between Daniel Wagner (ranked 6452 p4p, 268 weight class) and Jonathan Ray (ranked 6219 p4p, 263 weight class). We have two fighters making their debuts here, so let's see who comes out of this one with their first professional victory.
 |
|
 |
| 175 cm
18
140 lbs
0 - 0 - 0 |
|
179 cm
19
140 lbs
0 - 0 - 0 |
BJJ Purple Belt
Basic striking
Big heart |
|
BJJ Purple Belt
Brawler
Tends to cut |
|
| |
|
Ladies and gentlemen. This fight is 3 rounds, in the bantamweight division.
Introducing the fighter to my left, fighting out of the red corner.
With a record of
0 - 0 - 0, fighting out of London, Daniel Wagner!
And introducing the fighter to my right, fighting out of the blue corner.
With a record of
0 - 0 - 0, fighting out of London, Jonathan Ray!
The judges for this bout are James Atkins, Richard Clark and Sam Margolis.
The bell rings for round one and we are underway!
Ray shoots in for a takedown and gets it. Let's see what he's got on the mat.
Wagner looking for submissions off his back, moving his hips, looking for an opening.
Ray wanted to stand there but Wagner had control of the position.
Wagner is trying to keep Ray in close.
Ray trying to control but Wagner is working from the bottom.
Ray looking to pass the guard.
We've had a slow start to the round here - hopefully the action picks up.
Wagner had isolated an arm as going for a kimura. Ray defends it easily.
Wagner working for a triangle but Ray defends it easily.
That's one minute gone in the round.
Wagner has a butterfly guard looking to sweep but Ray has passed into side control.
Ray is a painfully thin specimen of a man. You do wonder whether a good body kick would snap him clean in two.
Ray scoring with punches from side control.
Wagner reaches up around Ray's neck trying to control. But Ray takes advantage instantly and he's locked on an arm triangle! Big trouble for Wagner! Oh that looks nasty! A human being's head is not meant to turn that color! Wagner is out! He's gone limp! The ref steps in to break the fighters up and Ray celebrates the victory with the fans!
Ladies and gentlemen, after 1:49 of round 1, we have a winner by way of Submission (Arm Triangle). Jonathan Ray!
|
|
|
|
|
|
|
|
|
|
|
|
|
|
|
|
|
|
|
|
|
|
|
| S |
C
A |
G |
S |
C
B |
G |
|
S |
C |
G |
|
energy
A | B |
|
hype
A | B |
|
pop
A | B |
|
mgr
A | B |
|
FIGHT
RATING
40% |
|
|
|
|
|
|
|
|
|
|

