 |
IXF 22 PBP Commentary |
Undercard bout
|
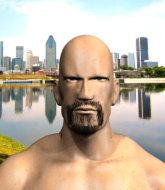
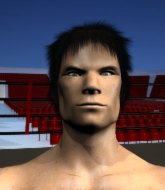
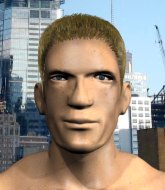
Coming up we have a middleweight MMA rules bout between Mikhail Gorin (ranked 8085 p4p, 628 weight class) and Colten Bronsten (ranked 4355 p4p, 464 weight class). Colten Bronsten is the more experienced fighter, so let's see if that makes a difference tonight.
 |
|
 |
| 180 cm
25
198 lbs
0 - 1 - 0 |
|
182 cm
25
193 lbs
2 - 1 - 0 |
BJJ Blue Belt
Excellent boxer
Good chin |
|
BJJ Purple Belt
Decent boxing
Solid chin |
|
| |
|
Ladies and gentlemen. This fight is 3 rounds, in the middleweight division.
Introducing the fighter to my left, fighting out of the red corner.
With a record of
0 - 1 - 0, fighting out of The Island, Mikhail Gorin!
And introducing the fighter to my right, fighting out of the blue corner.
With a record of
2 - 1 - 0, fighting out of The Island, Colten Bronsten!
The judges for this bout are Bart Greer, Peter Branson and Sandra Marshall.

The bell rings for round one and we are underway!
Gorin throws an overhand right that lands on Bronsten's shoulder, as Bronsten tries to avoid the shot.
Bronsten throws a jab, cross combination which is slipped
and Gorin counters nicely by changing levels and landing a hook to the body.
Bronsten looks more muscular than last time we saw him. He must have been on the weights.
Good exchange - Gorin coming out on top.

It looks like Colten Bronsten has been cut.
Gorin definitely looks more muscular than last time we saw him fight.
Bronsten fakes low and throws an overhand right that catches Gorin on the side of the head.
A big right from Gorin misses.
Bronsten throws out a counter right but Gorin avoids it with no problem.
Gorin misses with a jab, cross combination.
Gorin connects with a right that clearly hurt Bronsten. He's backed up against the cage with nowhere to go as Gorin proceeds to tee off with vicious combinations till Bronsten collapses and taps out under the pressure!
Ladies and gentlemen, after 0:30 of round 1, we have a winner by way of TKO (Strikes). Mikhail Gorin!
Mikhail Gorin decided to thank the fans in attendance for making a great atmosphere. It seemed to go down pretty well.
|
|
|
|
|
|
|
|
|
|
|
|
|
|
|
|
|
|
|
|
|
|
|
| S |
C
A |
G |
S |
C
B |
G |
|
S |
C |
G |
|
energy
A | B |
|
hype
A | B |
|
pop
A | B |
|
mgr
A | B |
|
FIGHT
RATING
100% |
|
|
|
|
|
|
|
Undercard bout
|
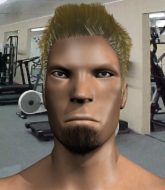
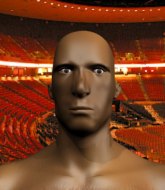
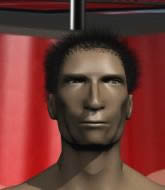
Coming up we have a light heavyweight MMA rules bout between Andros Adelaide (ranked 4603 p4p, 548 weight class) and Jay Doom (ranked 4794 p4p, 561 weight class). Jay Doom has the better chin. Will he look to stand and bang today?
 |
|
 |
| 185 cm
25
215 lbs
2 - 1 - 0 |
|
178 cm
19
220 lbs
3 - 1 - 0 |
BJJ White Belt
Solid boxing
Self confident |
|
Good wrestler
Counter fighter
Powerful |
|
| |
|
Ladies and gentlemen. This fight is 3 rounds, in the light heavyweight division.
Introducing the fighter to my left, fighting out of the red corner.
With a record of
2 - 1 - 0, fighting out of The Island, Andros Adelaide!
And introducing the fighter to my right, fighting out of the blue corner.
With a record of
3 - 1 - 0, fighting out of The Island, Jay Doom!
The judges for this bout are Santiago Holmes, Winston Alpacca and Daniel Franklin.
The bell rings for round one and we are underway!

Doom tries to sprawl but Adelaide drives through with a takedown into half guard.
Doom tries to roll over but Adelaide keeps him under control.
Doom works his way to full guard. Good work.
The ref warns both fighters not to hold the cage as they work up against the meshing.
Doom working a defensive guard here.
Doom manages to sweep nicely, so he's now on top. Adelaide manages to get himself to full guard.

We've had a slow start to the round here - hopefully the action picks up.
Adelaide is looking to stand up but Doom isn't so interested in that idea.
Doom wants to control from the top but Adelaide keeps moving.

That's one minute gone in the round.
Doom stands and throws Adelaide's legs to the side, diving into side control.
Doom misses with a strike but at least he's keeping busy, looking to cause some damage - that will still help him when it comes to the judges scorecards.
Doom wants to control but Adelaide is keeping him busy.
Doom postures up a little and throws a couple of hammerfists but they don't connect properly.
Adelaide on his back here. We all know that wrestlers don't like being on their back so let's see if Adelaide tries to get out of the position.
Doom is chipping away with strikes.
Adelaide is working to avoid the ground and pound but Doom connects with a decent elbow.
Doom has the superior BJJ but he's also working some ground strikes into his gameplan.

That's two minutes gone in the round.

Doom has an Americana. Adelaide didn't react quickly enough there and he's in big trouble now! He tries to squirm out but is forced to tap! Doom is delighted and gyrates in front of the ring girls. They seem to like the attention - it'll be interesting to see if Doom hooks up with any of them at the after show party.
Ladies and gentlemen, after 2:22 of round 1, we have a winner by way of Submission (Americana). Jay Doom!
Jay Doom bigged himself up after the win. The crowd seemed to love it.
|
|
|
|
|
|
|
|
|
|
|
|
|
|
|
|
|
|
|
|
|
|
|
| S |
C
A |
G |
S |
C
B |
G |
|
S |
C |
G |
|
energy
A | B |
|
hype
A | B |
|
pop
A | B |
|
mgr
A | B |
|
FIGHT
RATING
36% |
|
|
|
|
|
|
|
Undercard bout
|
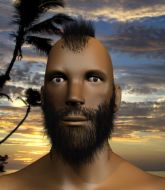
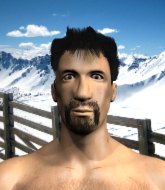
Coming up we have a welterweight MMA rules bout between Tomas McCall (ranked 4722 p4p, 452 weight class) and Kamakiri Yoritomo (ranked 4767 p4p, 453 weight class). Yoritomo has chosen Praying Mantis - Praying Mantis as his entrance music, which hasn't gone down very well with the crowd. Well, the cameraman is lingering on a pretty young lady for a bit too long there. Keep your eyes on the prize buddy or you'll miss the fighter intros!
 |
|
 |
| 178 cm
25
170 lbs
1 - 1 - 0 |
|
181 cm
19
177 lbs
2 - 1 - 0 |
BJJ Brown Belt
Basic striking
Very strong |
|
BJJ White Belt
Excellent MT
Solid chin |
|
| |
|
Ladies and gentlemen. This fight is 3 rounds, in the welterweight division.
Introducing the fighter to my left, fighting out of the red corner.
With a record of
1 - 1 - 0, fighting out of The Island, Tomas McCall!
And introducing the fighter to my right, fighting out of the blue corner.
With a record of
2 - 1 - 0, fighting out of The Island, Kamakiri Yoritomo!
The judges for this bout are Daniel Franklin, Santiago Holmes and Bart Greer.
The bell rings for round one and we are underway!
Yoritomo tries to close the distance and clinch but McCall swats him to one side with an open hand palm strike and circles away.
The fight stays on the outside here - McCall looks like he's thinking about clinching though.
A swing and a miss from Yoritomo.
Yoritomo misses with a hook. McCall ducked under it nicely.
McCall wants to clinch up but Yoritomo keeps it at a distance.
McCall has been working on his boxing with his coaches at ELITE Island Gym - 19 Elite Coaches in the buildup to the fight.
McCall tries to clinch there but Yoritomo circles away.
Yoritomo looks more muscular than last time we saw him. He must have been on the weights.
Yoritomo is looking to clinch.
Yoritomo swings for the body but McCall moves out of range.
It looked like McCall wanted to counter with a hook but didn't fully commit.
McCall tries to clinch but is not successful on this occasion.
And an attempted straight right on the counter from Yoritomo! But no joy.
McCall wants to clinch up but Yoritomo keeps it at a distance.
Yoritomo was about to counter that last move with a leg kick but changes his mind.
McCall is looking to clinch but Yoritomo is avoiding it.
We've had a slow start to the round here - hopefully the action picks up.
McCall tries to clinch but is not successful on this occasion.
Yoritomo loads up on a big right hand but McCall slips the punch.
McCall wants to clinch up but Yoritomo keeps it at a distance.
Yoritomo keeps the fight on the outside.
Yoritomo jabbing away but nothing is landing.
McCall appears to be looking for a big counter.
McCall throws the left hand but Yoritomo avoids the punch easily.
That's one minute gone in the round.
McCall tries to close the distance and clinch up against the cage but Yoritomo paws at him with a jab and circles away.
Yoritomo circles away from the clinch attempt.
Yoritomo lands with a right hand.
Yoritomo connects with a single shot there.
Tomas McCall seems to be the more aggressive standup fighter in this bout.
McCall tries to close the distance and clinch up against the cage but Yoritomo paws at him with a jab and circles away.
McCall tries to clinch but is not successful on this occasion.
Yoritomo listening to his corner there, landing a nice uppercut.
McCall takes a shot to the body in his stride.
Yoritomo swings for the body but McCall moves out of range.
Yoritomo moves in looking to clinch but McCall pushes him off.
McCall tries to clinch but Yoritomo moves out of range.
McCall tries to clinch there but Yoritomo circles away.
Yoritomo lands a nice looking body shot.
Yoritomo throws a couple of head shots and lands with the final one - a decent hook, which struck McCall on the side of the head.
Yoritomo moving in and out of range nicely, whilst landing the scoring shot.
This has been an exciting period of action!
Yoritomo turns his hip over beautifully as he lands a nice leg kick.

McCall darts in and clinches Yoritomo up against the cage.
That's two minutes gone in the round.
Yoritomo fails to land with a short punch on the inside.
An uppercut on the inside fails to land for Yoritomo.
McCall jumps guard but Yoritomo turns him against the cage and keeps the fight standing.
Yoritomo misses with a short punch on the inside.
McCall decides to pull guard.
McCall has a closed guard, preventing anything of note from happening. Perhaps he's looking to stall.
McCall has controlled the position for a good 20 seconds, which will no doubt be starting to frustrate his opponent.
McCall keeping moving, preventing Yoritomo from controlling successfully.
Yoritomo must be cautious of submissions here, given that his opponent has the superior Jiu Jitsu.
McCall has his hands on Yoritomo's head, controlling the position.

That's three minutes gone in the round.
Yoritomo wants to pass the guard but McCall is keeping the position.
McCall seems keen to control rather than go for a submission, at least for now.

The referee has motioned to the fighters to stand back up. He just wasn't happy with the level of activity.
Yoritomo scores with a reasonable looking shot to the body. McCall doesn't seem bothered though.
McCall tries to clinch but Yoritomo is having none of it.
Yoritomo misses with a straight left.
McCall is looking to clinch but Yoritomo is avoiding it.
A telegraphed right hand from Yoritomo misses the target.

That's four minutes gone in the round.
McCall closes the distance and pushes Yoritomo back into the cage.
McCall successfully pulls guard.
McCall is doing well to control the posture of his opponent and prevent any damage.
This is a sustained period of stalling by McCall.
McCall's ground tactics aren't going to win him many fans. Let's hope he's got fireworks for us if he gets back to his feet because he's not doing much on the ground.
The ref warns both fighters not to hold the cage as they work up against the meshing.
Yoritomo trying to control but McCall is working from the bottom.
McCall wants to sweep but no luck.

McCall working for a triangle but Yoritomo defends it easily.
McCall keeping moving, preventing Yoritomo from controlling successfully.
And thats the end of the round the fighters go back to their corners.
Kamakiri Yoritomo dominated that round.
The referee calls time. The cornermen exit stage left and we're back to business.

McCall is looking to take this fight into the clinch.
Yoritomo has been the more effective fighter overall so far.
McCall tries to clinch but fails miserably
and Yoritomo connects with a straight left hand counter down the middle.
Yoritomo lands an overhand left. A wild punch that just about connected.

Yoritomo forces McCall back against the cage and clinches.
Yoritomo throws a blind hook that connects with the side of McCalls head.
McCall has not gone for a single takedown so far in this fight, which seems like a very strange tactic when you consider that he has the superior wrestling and BJJ.
Yoritomo swings away with an uppercut that misses.
McCall pulls guard effortlessly.
Yoritomo controls the pace of the fight for a moment.
McCall is pulling down on Yoritomo's head. It's preventing any offense from Yoritomo, at least for the moment.
Yoritomo wants to control from the top but McCall keeps moving.
We've had a slow start to the round here - hopefully the action picks up.
McCall looking to try and escape his hips here, looking for a submission. It looks like he's going for a triangle but Yoritomo is defending well. McCall quickly switches to an armbar and extends the arm! Yoritomo has no choice but to tap, to a very quick submission! Wow, that was lightning fast! McCall celebrates on the cage, with the crowd.
Ladies and gentlemen, after 1:57 of round 2, we have a winner by way of Submission (Armbar). Tomas McCall!
Kamakiri Yoritomo spoke after the fight, saying 'The trouble with being a good sport is that you have to lose to prove it.'.
|
|
|
|
|
|
|
|
|
|
|
|
|
|
|
|
|
|
|
|
|
|
|
| S |
C
A |
G |
S |
C
B |
G |
|
S |
C |
G |
|
energy
A | B |
|
hype
A | B |
|
pop
A | B |
|
mgr
A | B |
|
FIGHT
RATING
41% |
|
|
|
|
|
|
|
Undercard bout
|
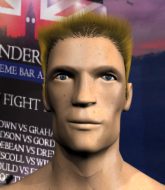
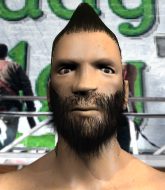
Coming up we have a middleweight MMA rules bout between Hal Jordan (ranked 3360 p4p, 369 weight class) and Tomo Jr (ranked 4144 p4p, 449 weight class). Both fighters look fresh as a daisy as they make their way towards the cage.
 |
|
 |
| 188 cm
26
190 lbs
2 - 0 - 0 |
|
180 cm
25
190 lbs
2 - 1 - 0 |
BJJ Blue Belt
Solid Muay Thai
Very strong |
|
Good takedowns
Brawler
Good gas tank |
|
| |
|
Ladies and gentlemen. This fight is 3 rounds, in the middleweight division.
Introducing the fighter to my left, fighting out of the red corner.
With a record of
2 - 0 - 0, fighting out of The Island, Hal Jordan!
And introducing the fighter to my right, fighting out of the blue corner.
With a record of
2 - 1 - 0, fighting out of The Island, Tomo Jr!
The judges for this bout are Dirk Anderson, Santiago Holmes and Peter Branson.
The bell rings for round one and we are underway!
Jordan lunges in with an uppercut that skims his opponent's chin.

Jr closes the distance, clinches up and gets a nice trip takedown into side control. Very smooth.
Jordan is trying to escape the position but Jr is controlling the position.
Jr tries to move into full mount but can't pass Jordan's legs.
A lull in the action here.
It looks like Jr might be adopting somewhat of a lay and pray gameplan here, which I'm sure won't go down too well with the paying fans in attendance... Or the ring announcers come to think of it.
The fighters are pressed up against the cage, both looking to find a bit of space to work.
We've had a slow start to the round here - hopefully the action picks up.
Jr wants to control but Jordan is keeping him busy.
That's one minute gone in the round.
Jordan is trying to escape the position but Jr is controlling the position.
Jordan prevents Jr from moving into mount.
Jordan definitely looks more muscular than last time we saw him fight.
A lull in the action here.
If this pace continues, the referee will definitely step in and force a standup.
Jr trying to control the action but Jordan is working from the bottom.
The referee decides to stand the fighters back up.
Jr has done a lot of speed work in the buildup to this fight.
That's two minutes gone in the round.
The crowd are showing their displeasure at the lack of action as loud boos ring out around the arena.
Jordan scores with a nice head shot.
Jordan cracks Jr with an open hand slap.
Jordan keeps the fight standing with a nice sprawl.
An attempted straight right counter from Jordan misses the target.
Jr misses with a takedown
enabling Jordan to counter with a crisp jab.
Jordan moving in and out of range nicely, whilst landing the scoring shot.
Jr shoots in for a takedown but doesn't get it.
Hal Jordan has stuffed three takedown attempts in the round now. That's going to take a lot out of Tomo Jr.
That's three minutes gone in the round.
Jr shoots and misses
and Jordan counters with a crisp hook to the side of the head.
Jordan is using his height advantage well here, landing a good percentage of his punches.
Jr has his takedown stuffed
and Jordan counters nicely by changing levels and landing a hook to the body.
Jr shoots and misses
and Jordan counters with a nice jab to the body that keeps Jr thinking.
Jr looks winded!
Jordan scores with the left hand. Jr knows he should have avoided that one.
Jr misses with a takedown attempt
and Jordan counters with a quick right hand to the jaw.
Jr walks into a stiff left hand from Jordan.

Jr is rocked!
Jordan throws a shot to the body.
Jr is still on wobbly legs! Can Jordan finish him?
Both fighters step back and shake their arms out. Jordan engages and cracks Jr with a massive lead left hook - Jr tumbles to the floor, out cold! What a shot! Jordan is delighted - all that hard work in training paid off!
Ladies and gentlemen, after 3:48 of round 1, we have a winner by way of KO (Punch). Hal Jordan!
|
|
|
|
|
|
|
|
|
|
|
|
|
|
|
|
|
|
|
|
|
|
|
| S |
C
A |
G |
S |
C
B |
G |
|
S |
C |
G |
|
energy
A | B |
|
hype
A | B |
|
pop
A | B |
|
mgr
A | B |
|
FIGHT
RATING
37% |
|
|
|
|
|
|
|
Undercard bout
|
Coming up we have a middleweight MMA rules bout between Eric Alequin (ranked 3837 p4p, 423 weight class) and La Requis (ranked 3490 p4p, 389 weight class). I'm sure you'll be fascinated to know that I was talking to some pointless Z list celebrity before the fight and he thought that La Requis was going to win. Let's see if he was right.
 |
|
 |
| 181 cm
26
188 lbs
2 - 2 - 0 |
|
186 cm
26
190 lbs
3 - 1 - 0 |
Powerful takedowns
Basic striking
KO power |
|
BJJ White Belt
Excellent MT
Heavy handed |
|
| |
|
Ladies and gentlemen. This fight is 3 rounds, in the middleweight division.
Introducing the fighter to my left, fighting out of the red corner.
With a record of
2 - 2 - 0, fighting out of The Island, Eric Alequin!
And introducing the fighter to my right, fighting out of the blue corner.
With a record of
3 - 1 - 0, fighting out of The Island, La Requis!
The judges for this bout are Sandra Marshall, Peter Branson and Michael Johnstone.
The bell rings for round one and we are underway!
Alequin fails with the takedown.
Alequin takes one to the chin there.
Alequin misses with an uppercut. Requis saw that one coming.
Requis doesn't manage to clinch there - Alequin circles away.
Requis gets caught napping as Alequin dives in and scores a takedown. Requis manages to retain guard.
Alequin wants to control from the top but Requis keeps moving.
Alequin prevents Requis from getting back to his feet.
We've had a slow start to the round here - hopefully the action picks up.
Alequin thinks about going for a leg but decides against it, in order to maintain the position.
Alequin engaging in some classic timewasting tactics.
Alequin lands a nice shot whilst sitting in his opponent's guard.
That's one minute gone in the round.
Alequin scoring with punches to the head and body.
Alequin won't allow Requis to get back to his feet.
Alequin wants to control from the top but Requis keeps moving.
Alequin pushing down on Requis's thigh, trying to pass to half guard. He's managed it... Nice work.
We get told so often about how wrestlers don't like to be on their backs. Let's see if Requis can do anything to dispel that myth.
Requis taking some punishment here, with Alequin in his half guard.
Alequin moves nicely into side control.
Alequin is in a dominant position here, looking for a kimura. Requis looks calm but he's in trouble here. Alequin gets his leg over his opponent's head and yanks on the arm. Requis is tapping like a morse code operator on the titanic! SOS! SOS! Alequin lets go of the hold and Requis can pop his arm back in it's socket.
Ladies and gentlemen, after 1:59 of round 1, we have a winner by way of Submission (Kimura). Eric Alequin!
After winning the bout, Eric Alequin thanked all his fans and promised he'd do even better in his next fight. The crowd seemed to love his humility.
|
|
|
|
|
|
|
|
|
|
|
|
|
|
|
|
|
|
|
|
|
|
|
| S |
C
A |
G |
S |
C
B |
G |
|
S |
C |
G |
|
energy
A | B |
|
hype
A | B |
|
pop
A | B |
|
mgr
A | B |
|
FIGHT
RATING
45% |
|
|
|
|
|
|
|
Undercard bout
|
Coming up we have a welterweight MMA rules bout between Timmy Thompson (ranked 2128 p4p, 254 weight class) and Max Chaos (ranked 3583 p4p, 364 weight class). The crowd seem to be enjoying Chaos's choice of entrance music: Cannibal Corpse - Hammer Smashed Face. Both fighters look fresh as a daisy as they make their way towards the cage.
 |
|
 |
| 165 cm
24
170 lbs
3 - 0 - 0 |
|
180 cm
18
180 lbs
3 - 0 - 0 |
BJJ Blue Belt
Excellent MT
Good chin |
|
Good wrestler
Basic striking
Granite chin |
|
| |
|
Ladies and gentlemen. This fight is 3 rounds, in the welterweight division.
Introducing the fighter to my left, fighting out of the red corner.
With a record of
3 - 0 - 0, fighting out of The Island, Timmy Thompson!
And introducing the fighter to my right, fighting out of the blue corner.
With a record of
3 - 0 - 0, fighting out of The Island, Max Chaos!
The judges for this bout are Bart Greer, Peter Branson and Michael Johnstone.
The bell rings for round one and we are underway!
Chaos takes the fight into the clinch.
Thompson tries to throw a body punch but Chaos avoids it by throwing Thompson back against the cage.
A short uppercut from Thompson.
Thompson could do with losing a few pounds - he looks very soft around the mid section, to put it politely.
The referee is keeping an eye on Chaos - much more stalling and he will separate the fighters.
Thompson tries to throw a body punch but Chaos avoids it by throwing Thompson back against the cage.
Thompson tries to land a shot to the body but it's blocked.
Chaos stalling.
Thompson blocks a knee to the body. He'll have a nicely bruised forearm in the morning.
Thompson lands with a short head shot on the inside.
A head punch on the inside from Chaos fails to land.
Thompson is trying to force a seperation but Chaos has the dominant position.
Chaos prevents a body shot from Thompson.
Chaos tries to land knees in the clinch but Thompson avoids the damage to the body.
We've had a slow start to the round here - hopefully the action picks up.
Thompson misses with a punch on the inside.
Thompson tries a body shot but Chaos blocks it.
Thompson lands a body punch.
Thompson on the defensive, avoiding the knees to the body.
Chaos misses with a hook to the ribs.
Thompson blocks an uppercut.
That's one minute gone in the round.
Thompson managing to block the knees to the body from Chaos.
Thompson looks like he'd prefer to be striking at range right now.
Thompson misses with a body punch.
Thompson lands on the inside with an uppercut.
Chaos misses with a hook from the clinch.
Thompson lands a left hand that snaps the head of Chaos backwards.
Thompson blocks a couple of punches on the inside.
Thompson misses with a hook to the ribs.
Thompson blocks a punch to the side of the head.
A head punch blocked on the inside by Chaos.
Thompson lands a nice shot to the body.
Chaos missing with knees to the body.
An uppercut to the body lands inside from Thompson.
Thompson working aggressively here.
Thompson misses with a body punch.
Chaos looks more muscular than last time we saw him. He must have been on the weights.
Chaos working aggressively here.
Chaos tries a body shot but Thompson blocks it.
Thompson can't find room to land a body shot as Chaos controls the action.
Thompson avoiding damage as Chaos throws knees to the body.
Chaos just leaning against Thompson, taking a breather.
That's two minutes gone in the round.
Thompson tries to work over Chaos's body with a swooping hook but it only glances the target.
Chaos trying to land knees to the body.
Thompson swings wildly with an uppercut but Chaos uses good head movement to avoid it.
Thompson can't find room to land a body shot as Chaos controls the action.
Thompson lands with a short head shot on the inside.
Chaos working aggressively here.
Wooooo! Give it up for these two warriors! They are putting on a show!
Chaos blocks a body shot from Thompson.
Thompson misses with a body punch.
Thompson misses with a punch to the body.
Thompson works for underhooks and lands a body shot in the process.
Chaos tried to land a shot to the body but connects with Thompson's elbow.
An uppercut on the inside fails to land for Chaos.
Thompson blocks a body shot from Chaos.
Chaos is looking to score with knees to the body. Maybe he'll change it up and go body then head. Thompson is defending well for now.
Thompson scores with a shot to the side of Chaos's head.
Chaos tries to land a shot to the body but it's blocked.
A right hook to the body lands for Thompson.
Chaos trying to land knees to the body.
That's three minutes gone in the round.
Chaos misses with a punch to the body.
Thompson is trying to break the clinch but Chaos has him pressed against the cage.
Thompson doesn't land with the attempted body shot.
Chaos tries a shoulder strike but it doesn't do any damage.
Chaos blocks a punch to the side of the head.
Thompson tries a body shot but Chaos blocks it.
Chaos throws a head punch that misses.
Thompson tries to throw a body punch but Chaos avoids it by throwing Thompson back against the cage.
The pace really dropping off here, momentarily.
Thompson goes for a body shot but it's blocked.
Chaos is pushing Thompson up against the cage, for a bit of lean and pray action. Action being used the in the loosest possible sense of the word.
Thompson tries to work over Chaos's body with a swooping hook but it only glances the target.
Chaos's head jolts backwards as he takes an uppercut right on the button!
Thompson avoiding damage as Chaos throws knees to the body.
Chaos missing with knees to the body.
That's four minutes gone in the round.
Thompson managing to block the knees to the body from Chaos.
Chaos goes for a body shot but it's blocked.
Thompson tries to throw a body punch but Chaos avoids it by throwing Thompson back against the cage.
Thompson misses with a punch to the body.
Chaos tries to work over Thompson's body with a swooping hook but it only glances the target.
Thompson prevents a body shot from Chaos.
Thompson lands with a light punch inside.
Thompson lands punches inside but they're not really causing much damage.
Chaos misses the knee to the body. Nice hip positioning from Thompson.
Thompson throws a hook to the body. More of an arm punch but it's all scoring with the judges.
Chaos misses the knee to the body. Nice hip positioning from Thompson.
An uppercut to the body lands inside from Thompson.
A head punch on the inside from Thompson fails to land.
Chaos misses with a punch on the inside.
The crowd are loving this. Great action here.
Chaos missing with knees to the body.
Thompson lands a body punch.
Thompson struggles to land a body shot inside as Chaos controls his hands.
Thompson lands a nice looking hook to the body, against the cage.
Chaos misses with a hook to the ribs.
And thats the end of the round the fighters go back to their corners.
That was a close round but I would say that Timmy Thompson will probably get the nod.
That's time! Back to the action!
Chaos drives through and clinches with Thompson against the cage.
Chaos misses the knee to the body. Nice hip positioning from Thompson.
Thompson avoiding damage as Chaos throws knees to the body.
Chaos misses with a hook from the clinch.
Chaos can't find room to land a body shot as Thompson controls the action.
Thompson misses with a punch to the body.
Chaos misses the knee to the body. Nice hip positioning from Thompson.
Thompson on the defensive, avoiding the knees to the body.
Thompson struggles to land a body shot inside as Chaos controls his hands.
Chaos trying to land knees to the body.
Chaos throws a head punch that misses.
Thompson tries to circle away but Chaos has him pinned against the cage.
A head punch blocked on the inside by Chaos.
Thompson blocks a knee to the body. He'll have a nicely bruised forearm in the morning.
We've had a slow start to the round here - hopefully the action picks up.
A hook to the body from Thompson.
An uppercut on the inside fails to land for Chaos.
Chaos tries a body shot but Thompson blocks it.
Chaos is looking to score with knees to the body. Maybe he'll change it up and go body then head. Thompson is defending well for now.
Timmy Thompson has scored more points in the clinch so far.
A hook to the body from Thompson.
Thompson misses with a hook to the ribs.
That's one minute gone in the round.
Chaos misses the knee to the body. Nice hip positioning from Thompson.
A short right from Thompson.
Thompson lands with a short head shot on the inside.
Chaos goes for a body shot but it's blocked.
Thompson lands a body punch in the clinch.
Thompson lands an uppercut.
Chaos prevents a body shot from Thompson.
Chaos misses with a punch to the body.
Thompson blocks a punch to the side of the head.
Thompson struggles to land a body shot inside as Chaos controls his hands.
Chaos tried to land a shot to the body but connects with Thompson's elbow.
Thompson tries a body shot but Chaos blocks it.
Chaos is looking to score with knees to the body. Maybe he'll change it up and go body then head. Thompson is defending well for now.
Chaos tries to land knees in the clinch but Thompson avoids the damage to the body.
Chaos working aggressively here.
A short body shot lands from Thompson as the two fighters clinch.
Chaos misses with the head strike.

Thompson's corner calls for him to break the clinch, which he does.
Nice body punch from Thompson.
We've been told by Thompson's head coaches at ELITE Island Gym - 19 Elite Coaches that he's been working on his takedown defense in preparation for this fight.
That's two minutes gone in the round.
A left lands for Thompson.
The fans in attendance giving it up for the two fighters, who have really let it all hang out in the last minute or so!
Chaos clinches up against the cage.
Chaos misses with a punch to the body.
Thompson tries to throw a body punch but Chaos avoids it by throwing Thompson back against the cage.
Thompson misses with a hook to the ribs.
Chaos misses with a hook to the ribs.
Chaos is looking to score with knees to the body. Maybe he'll change it up and go body then head. Thompson is defending well for now.
Chaos prevents a body shot from Thompson.
Thompson digs a right hand underneath Chaos's ribcage. Chaos let out a lung full of air as it connected.
Thompson misses with a body punch.
Thompson lands a body shot in the clinch.
A head punch blocked on the inside by Chaos.
With the fighters clinched against the cage, Thompson creates a bit of distance for himself and scores with a nice uppercut.
Chaos keeps the fight in the clinch, despite Thompson's efforts to push away.
Chaos is looking to score with knees to the body. Maybe he'll change it up and go body then head. Thompson is defending well for now.
Thompson can't find room to land a body shot as Chaos controls the action.
We are yet to see a takedown attempt from Chaos in the fight. On paper you would think he is the more dominant ground fighter so let's see if these unusual tactics pay off.
Chaos misses the knee to the body. Nice hip positioning from Thompson.
Thompson digs a right hand into Chaos's ribs. Those have got to be taking their toll on Chaos's gas tank.
That's three minutes gone in the round.
Thompson breaks the clinch.
Chaos instigates a clinch.
Thompson lands with a quick shot inside that doesn't really do much damage.
A left hand lands to the body for Thompson.
Thompson lands with a right to the head.
Thompson makes some space for himself and lands an uppercut.
Thompson swings away with an uppercut that misses.
Thompson blocking some punches.
Chaos misses the knee to the body. Nice hip positioning from Thompson.
Chaos tries to land a knee to the body but he is off balance and Thompson avoids it.
Thompson managing to block the knees to the body from Chaos.
Chaos tried to land a shot to the body but connects with Thompson's elbow.
Chaos trying to land knees to the body.
Thompson tries to break free but Chaos pushes him back against the cage.
Thompson cracks Chaos with a nice body shot.
Thompson can't find room to land a body shot as Chaos controls the action.
Thompson misses with a shot to the kidneys.
Thompson can't find room to land a body shot as Chaos controls the action.
That's four minutes gone in the round.
Thompson lands a left hand.
Thompson blocks an uppercut.
Chaos blocks a couple of punches on the inside.
Thompson managing to block the knees to the body from Chaos.
This is a great period of action - very entertaining stuff!
Thompson works for underhooks and lands a body shot in the process.
Chaos manages to get underhooks and slows down the pace for a moment.
Thompson tried to land a shot to the body but connects with Chaos's elbow.
Chaos misses with a shot to the kidneys.
Chaos misses the knee to the body. Nice hip positioning from Thompson.
Chaos goes for a body shot but it's blocked.
Chaos tries to throw a body punch but Thompson avoids it by throwing Chaos back against the cage.
A right handed body shot lands from Thompson.
Chaos dictating the pace here, as the fighters clinch against the cage.
Chaos tries to land knees in the clinch but Thompson avoids the damage to the body.
Chaos struggles to land a body shot inside as Thompson controls his hands.
Chaos goes for a body shot but it's blocked.
And thats the end of the round the fighters go back to their corners.
That was a close second round but I would say that Timmy Thompson will probably get the nod.
OK. That's time! The bell goes and we're back to the action. Let's get this one finished - here comes the final round!

Chaos rushes Thompson and presses him up against the cage.
Chaos tries a body shot but Thompson blocks it.
Thompson blocks a knee to the body. He'll have a nicely bruised forearm in the morning.
Chaos blocks a body shot from Thompson.
Chaos tries to throw a body punch but Thompson avoids it by throwing Chaos back against the cage.
Chaos swings away with an uppercut that misses.
Chaos misses with a body punch.
A hook to the body from Chaos.
Chaos blocks a couple of punches on the inside.
Thompson misses with a hook from the clinch.
A body shot lands from Thompson.
Chaos doesn't land with the attempted body shot.
Chaos tries to land a knee to the body but he is off balance and Thompson avoids it.
We've had a slow start to the round here - hopefully the action picks up.
With the fighters clinched against the cage, Thompson creates a bit of distance for himself and scores with a nice uppercut.
Chaos misses with a shot to the kidneys.
Thompson tries to throw a body punch but Chaos avoids it by throwing Thompson back against the cage.
A short right from Thompson.
Chaos misses with a punch on the inside.
Thompson swings away with an uppercut that misses.
That's one minute gone in the round.
A quick uppercut on the inside from Thompson.
Thompson doesn't land with the attempted body shot.
Chaos tried to land a shot to the body but connects with Thompson's elbow.
Chaos trying to land knees to the body.
Chaos blocks a body shot from Thompson.
Thompson gets through Chaos's defenses to land a nice punch to the side of the head.
Chaos throws a head punch that misses.
Thompson managing to block the knees to the body from Chaos.
Thompson wants to break the clinch but can't.
Thompson can't find room to land a body shot as Chaos controls the action.
A head punch on the inside from Chaos fails to land.
Chaos swings wildly with an uppercut but Thompson uses good head movement to avoid it.
Thompson throws a punch but it's blocked by Chaos.
Thompson struggles to land a body shot inside as Chaos controls his hands.
Chaos has Thompson pushed against the cage.
Thompson tries a body shot but Chaos blocks it.
Max Chaos has stepped it up - he knows he needs a finish here!
That's two minutes gone in the round.
Thompson leaning against his opponent.
Thompson works for underhooks and lands a body shot in the process.
Chaos fails to land with a short punch on the inside.
Chaos lands with a short head shot on the inside.
Thompson tried to land a shot to the body but connects with Chaos's elbow.
Chaos misses with a body punch.
Thompson wants to strike at distance but he can't break free of the clinch.
Chaos takes a shot to the head.
Thompson scores with a shoulder strike.
Chaos stalling.
The crowd cheering loudly, showing their appreciation for the quality fight we're seeing here.
Thompson tries a shoulder strike but it doesn't do any damage.
Thompson tried to land a shot to the body but connects with Chaos's elbow.
A head punch on the inside from Thompson fails to land.
Thompson avoiding damage as Chaos throws knees to the body.
Chaos tries to work over Thompson's body with a swooping hook but it only glances the target.
Chaos tries a body shot but Thompson blocks it.
Chaos tries to land a shot to the body but it's blocked.
Thompson on the defensive, avoiding the knees to the body.
That's three minutes gone in the round.
Thompson on the defensive, avoiding the knees to the body.
An uppercut on the inside fails to land for Thompson.
Chaos prevents a body shot from Thompson.
Chaos trying to land knees to the body.
Thompson misses with a short punch on the inside.
Thompson tried to land a shot to the body but connects with Chaos's elbow.
Thompson misses with a punch to the body.
Chaos tries to land knees in the clinch but Thompson avoids the damage to the body.
Chaos content to slow the pace in the clinch.
Chaos doesn't land with the attempted body shot.
Chaos misses the knee to the body. Nice hip positioning from Thompson.
Thompson misses with a hook to the ribs.
Chaos throws a head punch that misses.
Thompson tries to break the clinch but Chaos is controlling the position.
Chaos trying to land knees to the body.
Chaos blocks a body shot from Thompson.
Nice body punch from Thompson - that landed with a thud.
Chaos prevents a body shot from Thompson.
Thompson avoiding damage as Chaos throws knees to the body.
That's four minutes gone in the round.
An uppercut on the inside fails to land for Thompson.
Chaos tries to land knees in the clinch but Thompson avoids the damage to the body.
Thompson tries to work over Chaos's body with a swooping hook but it only glances the target.
Thompson misses with a body punch.
Thompson misses with a shot to the kidneys.
Thompson throws a head punch that misses.
With the fighters clinched against the cage, Thompson creates a bit of distance for himself and scores with a nice uppercut.
Thompson misses with a punch to the body.
Thompson throws a blind hook that connects with the side of Chaoss head.
Timmy Thompson is fighting for a decision here - he's started to take the cautious approach.
Thompson struggles to land a body shot inside as Chaos controls his hands.
Thompson lands a hook that snaps the head of Chaos backwards.
Chaos misses with a punch on the inside.
The crowd are loving this. Great action here.
Chaos stalling here - the referee won't stand for too much of that.
Chaos struggles to land a body shot inside as Thompson controls his hands.
Thompson can't find room to land a body shot as Chaos controls the action.
Chaos misses with some punches.
Chaos blocks a body shot from Thompson.
And that's the end of the fight!
That was a close round. You could make an argument for either fighter but I would give it to Timmy Thompson.
Well Thompson has outscored his opponent in every aspect of the fight today. Only a scarily incompetent judge or two will keep him from a well deserved win... Over to the ring announcer for the scorecards.
Ladies and gentlemen, after 3 rounds of action, we go to the scorecards for a decision.
Judge Bart Greer scores the fight 30:27
Judge Peter Branson scores the fight 30:27
Judge Michael Johnstone scores the fight 30:27
In favor of your winner, by unanimous decision... Timmy Thompson!
|
|
|
|
|
|
|
|
|
|
|
|
|
|
|
|
|
|
|
|
|
|
|
| S |
C
A |
G |
S |
C
B |
G |
|
S |
C |
G |
|
energy
A | B |
|
hype
A | B |
|
pop
A | B |
|
mgr
A | B |
|
FIGHT
RATING
50% |
|
|
|
|
|
|
|
Undercard bout
|
Coming up we have a lightweight MMA rules bout between Ben Seimens (ranked 3035 p4p, 337 weight class) and Ernest Graves (ranked 2165 p4p, 259 weight class). Over to our ring announcer for the fighter introductions!
 |
|
 |
| 170 cm
25
155 lbs
2 - 1 - 0 |
|
172 cm
19
160 lbs
5 - 2 - 0 |
BJJ Blue Belt
Solid boxing
Very quick |
|
BJJ Blue Belt
Excellent MT
Knockout power |
|
| |
|
Ladies and gentlemen. This fight is 3 rounds, in the lightweight division.
Introducing the fighter to my left, fighting out of the red corner.
With a record of
2 - 1 - 0, fighting out of The Island, Ben Seimens!
And introducing the fighter to my right, fighting out of the blue corner.
With a record of
5 - 2 - 0, fighting out of The Island, Ernest Graves!
The judges for this bout are Peter Branson, Michael Johnstone and Dirk Anderson.
The bell rings for round one and we are underway!
Seimens lunges at Graves with a hook that half lands and is half blocked by Graves's hand.
Seimens waving his hands out in front of him, looking to distract Graves.
Graves scores with a jab.
Graves misses the body punch
and Seimens counters with a straight right hand.
It looks like Ernest Graves has been cut.
Graves throws a body shot but no joy.
Seimens definitely looks more muscular than last time we saw him fight.
Graves with a nice cross.
Graves dives in and grabs Seimens's left leg, looking for a takedown. Seimens pushes down on Graves's head and hops out.
Graves throws a monster uppercut resembling something out of street fighter but it doesn't land.
Ernest Graves seems to be the more aggressive standup fighter in this bout.
Graves misses with an uppercut. Seimens saw that one coming.
Seimens drops Graves with a naaaaasty hook - Graves is in real trouble here! Seimens dives in to side control and pounds out his opponent for a TKO victory! The crowd goes nuts!
Ladies and gentlemen, after 0:30 of round 1, we have a winner by way of TKO (Strikes). Ben Seimens!
In his post fight interview, Ben Seimens started talking himself up. Luckily his charisma kept the crowd on side and gave him a good reception.
|
|
|
|
|
|
|
|
|
|
|
|
|
|
|
|
|
|
|
|
|
|
|
| S |
C
A |
G |
S |
C
B |
G |
|
S |
C |
G |
|
energy
A | B |
|
hype
A | B |
|
pop
A | B |
|
mgr
A | B |
|
FIGHT
RATING
100% |
|
|
|
|
|
|
|
Undercard bout
|
Coming up we have a light heavyweight MMA rules bout between Maunu Tua (ranked 2647 p4p, 356 weight class) and Lauro Turturro (ranked 2835 p4p, 378 weight class). The key to victory for Maunu Tua has got to be keeping the fight on the feet.
 |
|
 |
| 182 cm
25
210 lbs
5 - 0 - 0 |
|
184 cm
26
208 lbs
3 - 0 - 0 |
BJJ Blue Belt
Solid boxing
Good chin |
|
Powerful takedowns
Brawler
Granite chin |
|
| |
|
Ladies and gentlemen. This fight is 3 rounds, in the light heavyweight division.
Introducing the fighter to my left, fighting out of the red corner.
With a record of
5 - 0 - 0, fighting out of The Island, Maunu Tua!
And introducing the fighter to my right, fighting out of the blue corner.
With a record of
3 - 0 - 0, fighting out of The Island, Lauro Turturro!
The judges for this bout are Daniel Franklin, Peter Branson and Sandra Marshall.
The bell rings for round one and we are underway!
Tua dives in and grabs Turturro's left leg, looking for a takedown. Turturro pushes down on Tua's head and hops out.
Turturro scores with a takedown into Tua's guard.
Turturro stays in close to Tua's body and controls the position.
Turturro stands and throws Tua's legs to the side, diving into side control.
Turturro trying to control the action but Tua is working from the bottom.
Turturro tries for a kimura but Tua is defending well.
The ref warns both fighters not to hold the cage as they work up against the meshing.
Tua can't do much from the bottom here.
We've had a slow start to the round here - hopefully the action picks up.
Turturro trying to control the position but Tua is working away.
Tua tries to bench press Turturro off him but Turturro keeps the position.
Tua is not content to let Turturro control the position.
That's one minute gone in the round.
Turturro tries for an arm triangle. That looks pretty tight to me. Is this one over!?! Possibly, maybe, no Turturro has let go of the choke. Obviously it wasn't as tight as we thought!
Turturro tries for an arm triangle. That looks pretty tight to me. Is this one over!?! Possibly, maybe, no Turturro has let go of the choke. Obviously it wasn't as tight as we thought!
Turturro looking for an arm triangle but it's way too loose to do anything.
Turturro is in a dominant position here, looking for a kimura. Tua looks calm but he's in trouble here. Turturro gets his leg over his opponent's head and yanks on the arm. Tua is tapping like a morse code operator on the titanic! SOS! SOS! Turturro lets go of the hold and Tua can pop his arm back in it's socket.
Ladies and gentlemen, after 1:51 of round 1, we have a winner by way of Submission (Kimura). Lauro Turturro!
Lauro Turturro was full of energy after the big win and talked about how he thinks he can do big things in this sport. The crowd were appreciative of his determination to succeed.
|
|
|
|
|
|
|
|
|
|
|
|
|
|
|
|
|
|
|
|
|
|
|
| S |
C
A |
G |
S |
C
B |
G |
|
S |
C |
G |
|
energy
A | B |
|
hype
A | B |
|
pop
A | B |
|
mgr
A | B |
|
FIGHT
RATING
46% |
|
|
|
|
|
|
|
Co-main event
|
Coming up we have a light heavyweight MMA rules bout between Lighty LightHeavyweight (ranked 1387 p4p, 201 weight class) and Johnny Truth (ranked 1330 p4p, 193 weight class). Over to our ring announcer for the fighter introductions!
 |
|
 |
| 175 cm
26
220 lbs
5 - 1 - 0 |
|
183 cm
19
197 lbs
6 - 0 - 0 |
Good wrestling
Counter fighter
Very strong |
|
BJJ White Belt
Excellent boxer
Powerful |
|
| |
|
Ladies and gentlemen. This fight is 3 rounds, in the light heavyweight division.
Introducing the fighter to my left, fighting out of the red corner.
With a record of
5 - 1 - 0, fighting out of The Island, Lighty LightHeavyweight!
And introducing the fighter to my right, fighting out of the blue corner.
With a record of
6 - 0 - 0, fighting out of The Island, Johnny Truth!
The judges for this bout are David Hoff, Peter Branson and Winston Alpacca.
The bell rings for round one and we are underway!
A cross from Truth lands.
LightHeavyweight clinches.
Still in the clinch, Truth scores with a nice short uppercut.
Truth wants to break free. God knows he wants to breaaaak freeee.
Truth prevents a body shot from LightHeavyweight.
LightHeavyweight misses with a punch to the body.
Truth looks like he'd prefer to be striking at range right now.
Truth tries to land a shot to the body but it's blocked.
Truth blocks a body shot from LightHeavyweight.
Truth misses with a hook to the ribs.
Truth pushes LightHeavyweight back against the cage and lands a hook to the side of the head.
LightHeavyweight takes a shot to the head.
Truth wants to get back to striking at distance but LightHeavyweight won't allow it.
LightHeavyweight working aggressively here.
Truth works for underhooks and lands a body shot in the process.
We've had a slow start to the round here - hopefully the action picks up.
Truth wants to break free. God knows he wants to breaaaak freeee.
Nice body punch from LightHeavyweight - that landed with a thud.
Truth wants to break free but LightHeavyweight has control.
Some stalling of biblical proportions here from Truth.
LightHeavyweight tries to work over Truth's body with a swooping hook but it only glances the target.
LightHeavyweight works on Truth's body with a couple of short punches.
That's one minute gone in the round.
An uppercut to the body lands inside from Truth.
Truth misses with a body punch.
Truth blocking some punches.
Truth tries a body shot but LightHeavyweight blocks it.
Truth's coach down at ELITE Island Gym - 19 Elite Coaches was telling us pre-fight that they have been working on Truth's balance. Obviously they view that as a key factor in the outcome of this fight.
Truth scores with an uppercut up the middle.
Truth lands a left hand that snaps the head of LightHeavyweight backwards.
Truth is trying to work out of this bad position, with his back against the cage.
Truth tries to throw a body punch but LightHeavyweight avoids it by throwing Truth back against the cage.
Nice body punch from LightHeavyweight.
A head punch blocked on the inside by LightHeavyweight.
LightHeavyweight working aggressively here.
Truth has had enough of the clinch but LightHeavyweight keeps him there for the moment.
Truth misses with a body punch.
Truth can't break the clinch.
LightHeavyweight keeps the fight in the clinch, despite Truth's efforts to push away.
A short right from LightHeavyweight on the inside.
LightHeavyweight lands an uppercut.
Truth is trying to break the clinch but LightHeavyweight has him pressed against the cage.
That's two minutes gone in the round.
LightHeavyweight tried to land a shot to the body but connects with Truth's elbow.
With the fighters clinched against the cage, Truth creates a bit of distance for himself and scores with a nice uppercut.
LightHeavyweight blocks a punch to the side of the head.
LightHeavyweight misses with a hook to the ribs.
Truth is trying to break free.
Truth blocks a punch to the side of the head.
Truth working aggressively here.

Truth breaks the clinch.
The fans in attendance giving it up for the two fighters, who have really let it all hang out in the last minute or so!
Truth keeping his hands up high there, blocking the jab from LightHeavyweight.
LightHeavyweight misses with a wild body shot.
Truth scores with a reasonable looking shot to the body. LightHeavyweight doesn't seem bothered though.
Truth feints a straight left to the body, then turns around with a flashy move and hits LightHeavyweights jaw with a dramatic spinning back fist!
A cross from Truth lands.
LightHeavyweight lands an overhand left. A wild punch that just about connected.
It looks like Johnny Truth has been cut.
A punch combination from Truth misses.
Truth looks to score with a combo but nothing lands.
That's three minutes gone in the round.
Truth avoids the clinch attempt nicely.
LightHeavyweight wants to clinch.
Truth throws a combination that misses
enabling LightHeavyweight to counter with a crisp jab.
Truth throws the left hand but LightHeavyweight avoids the punch easily.
It looked like LightHeavyweight was trying to counter with a body shot coming off that last attack from Truth.
LightHeavyweight walks straight into an uppercut. Luckily it didn't land flush.
LightHeavyweight tries to clinch but Truth moves out of range.
LightHeavyweight throws a hook but Truth avoids it easily.
Truth throws a couple of head shots and lands with the final one - a decent hook, which struck LightHeavyweight on the side of the head.
LightHeavyweight dodges the punch combination from Truth.
That's four minutes gone in the round.
Truth rushes in with a sloppy looking punch
and LightHeavyweight counters with a right hand to the body.
LightHeavyweight wants to clinch
and Truth counters with a straight punch to the midsection.
LightHeavyweight clinches with his opponent.
LightHeavyweight scores with a shoulder strike.
Fantastic stuff here - a very entertaining period of action, which has drawn cheers from the crowd.
Truth struggles to land a body shot inside as LightHeavyweight controls his hands.
LightHeavyweight throws a blind hook that connects with the side of Truths head.
Truth lands a hook that snaps the head of LightHeavyweight backwards.
LightHeavyweight lands with a short shot to the head.
Truth has used his reach advantage pretty well so far tonight.
Truth's head jolts backwards as he takes an uppercut right on the button!
A nice right hand lands inside from LightHeavyweight.
Truth lands a body shot in the clinch.
LightHeavyweight keeps the fight in the clinch, despite Truth's efforts to push away.
A short right from LightHeavyweight.
A head punch on the inside from LightHeavyweight fails to land.
LightHeavyweight works on Truth's body with a couple of short punches.
And thats the end of the round the fighters go back to their corners.
A close round but Johnny Truth will probably get the nod.
The cut man is working on Johnny Truth's cut.
That's time! Back to the action!
No joy there for LightHeavyweight, who threw a few shots but didn't land.
LightHeavyweight throws a body punch but Truth moves out of range.
Truth looked like he wanted to counter with a punch but didn't throw it.
Truth displays some good footwork, moving neatly out of range as LightHeavyweight throws out the jab.
Truth blocks a jab.
LightHeavyweight throws an uppercut from half a mile away. Truth sees it coming and avoids it easily.
Truth appears to be waiting to throw a counter punch to the body.
LightHeavyweight tries to clinch up but Truth circles away and keeps his distance.
Truth connects with a lovely right hand, straight down the pipe.
LightHeavyweight misses with a double jab
and Truth cracks him with a counter punch right on the button.
We've had a slow start to the round here - hopefully the action picks up.
LightHeavyweight throws a combination but comes up with nothing but fresh air.
Truth circles away from the clinch attempt
and Truth makes him pay by landing a nice hook to the body before moving out of range.
LightHeavyweight is looking light on his feet compared to last time was saw him fight.
That's one minute gone in the round.
Truth defending well as LightHeavyweight loads up on a big left hand.
A nice combination there by Truth.

It looks like Lighty LightHeavyweight has been cut.
LightHeavyweight misses with a jab to the body
and Truth counters with a good right hand that lands right on the jaw.
Truth lands a jab to the head.
Truth lands a body shot.
Truth misses with an uppercut.
LightHeavyweight misses the jab.
Truth feints a straight left to the body, then turns around with a flashy move and hits LightHeavyweights jaw with a dramatic spinning back fist!
LightHeavyweight closes the distance and presses his opponent up against the cage.
LightHeavyweight can't find room to land a body shot as Truth controls the action.
LightHeavyweight misses with the head strike.
Truth struggles to land a body shot inside as LightHeavyweight controls his hands.
The crowd are loving this. Great action here.
LightHeavyweight throws a blind hook that connects with the side of Truths head.
That's two minutes gone in the round.
Truth can't break the clinch.
LightHeavyweight scores with a nice hook to the head.
Truth blocks a body shot from LightHeavyweight.
Truth working hard to break the clinch.
LightHeavyweight throws a hook to the body. More of an arm punch but it's all scoring with the judges.
A short uppercut from LightHeavyweight.
LightHeavyweight misses with a hook to the ribs.
Truth misses with a hook from the clinch.
LightHeavyweight scores with a shoulder strike.
LightHeavyweight lands a short shot on the inside that snaps the head of Truth backwards.
Truth is trying to push LightHeavyweight away but LightHeavyweight has him pressed against the cage, so he's going nowhere.
Truth throws a punch but it's blocked by LightHeavyweight.
LightHeavyweight misses with a punch to the body.
A nice right hand lands inside from LightHeavyweight.
Truth misses with a punch on the inside.
A right hook to the body lands for LightHeavyweight.
Nice body punch from LightHeavyweight - that landed with a thud.
Truth is breathing heavily.
LightHeavyweight working some nice short punches in the clinch.
That's three minutes gone in the round.
A nice left hand lands by LightHeavyweight.
LightHeavyweight lands with a right to the head.
LightHeavyweight makes some space for himself and lands an uppercut.
Good body shot from LightHeavyweight.
LightHeavyweight lands with a light punch inside.
Nice body punch from Truth - that landed with a thud.
Truth throws a punch but it's blocked by LightHeavyweight.
Truth has a couple of punches blocked by LightHeavyweight.
Truth blocks a body shot from LightHeavyweight.
Truth struggles to land a body shot inside as LightHeavyweight controls his hands.
A hook to the body from LightHeavyweight.
LightHeavyweight misses with a hook to the ribs.
LightHeavyweight has Truth pressed against the cage, preventing Truth from circling away and getting back to striking at range.
A head punch on the inside from Truth fails to land.
LightHeavyweight scores with a shoulder strike.
LightHeavyweight keeps the fight in the clinch, despite Truth's efforts to push away.
LightHeavyweight lands with a short head shot on the inside.
That's four minutes gone in the round.
LightHeavyweight lands with a short head shot on the inside.
The crowd are loving this. Great action here.
Truth makes some space for himself and lands an uppercut.
Still in the clinch, LightHeavyweight scores with a nice short uppercut.
Truth is rocked!
LightHeavyweight scores with a shoulder strike.
Truth is still on wobbly legs! Can LightHeavyweight finish him?
A right handed body shot lands from LightHeavyweight.
Truth takes a shot to the head.
LightHeavyweight lands a body punch in the clinch.
LightHeavyweight is working Truth over against the cage.
LightHeavyweight lands a nice uppercut.
LightHeavyweight throws a big uppercut that drops Truth! More strikes from LightHeavyweight and the referee jumps in to stop the fight! Truth lies dazed against the cage as LightHeavyweight celebrates with his cornermen!
Ladies and gentlemen, after 4:35 of round 2, we have a winner by way of TKO (Strikes). Lighty LightHeavyweight!
Lighty LightHeavyweight seemed lost for words in his post fight interview but he remembered to thank his fans and directed everyone to his website.
|
|
|
|
|
|
|
|
|
|
|
|
|
|
|
|
|
|
|
|
|
|
|
| S |
C
A |
G |
S |
C
B |
G |
|
S |
C |
G |
|
energy
A | B |
|
hype
A | B |
|
pop
A | B |
|
mgr
A | B |
|
FIGHT
RATING
69% |
|
|
|
|
|
|
|
Main event
|
Coming up we have a light heavyweight MMA rules bout between Xandar Capri (ranked 2440 p4p, 336 weight class) and Rex Butt (ranked 1861 p4p, 263 weight class). Xandar Capri has the edge in experience - let's see if he can make that count tonight.
 |
|
 |
| 195 cm
26
215 lbs
6 - 2 - 0 |
|
190 cm
25
210 lbs
4 - 1 - 0 |
BJJ White Belt
Excellent MT
KO power |
|
Decent wrestler
Decent boxing
Heavy handed |
|
| |
|
Ladies and gentlemen. This fight is 3 rounds, in the light heavyweight division.
Introducing the fighter to my left, fighting out of the red corner.
With a record of
6 - 2 - 0, fighting out of The Island, Xandar Capri!
And introducing the fighter to my right, fighting out of the blue corner.
With a record of
4 - 1 - 0, fighting out of The Island, Rex Butt!
The judges for this bout are Dirk Anderson, Daniel Franklin and Michael Johnstone.
The bell rings for round one and we are underway!
Capri clinches up with Butt and pushes him back against the cage.
Capri misses with a hook from the clinch.
Butt misses with a hook from the clinch.
Capri misses with some punches.
Capri goes for a body shot but it's blocked.
Butt throws a blind hook that connects with the side of Capris head.
Capri tried to land a shot to the body but connects with Butt's elbow.
A short right from Butt.
Capri lands a hook that snaps the head of Butt backwards.
It looks like Rex Butt has been cut.
A nice right hand lands inside from Butt.
Capri goes for a body shot but it's blocked.
Capri fails to land with a short punch on the inside.
Butt swings away with an uppercut that misses.
Capri throws a head punch that misses.
Butt blocks a punch to the side of the head.
Butt swings wildly with an uppercut but Capri uses good head movement to avoid it.
Capri fails to land with a short punch on the inside.
Butt swings away with an uppercut that misses.
Capri tries to work over Butt's body with a swooping hook but it only glances the target.
Butt lands punches inside but they're not really causing much damage.
Fantastic stuff here - a very entertaining period of action, which has drawn cheers from the crowd.
Butt lands a shoulder strike that jolts his opponent's head backwards.
Capri lands with a right to the head.
That's one minute gone in the round.
Butt blocks a punch to the side of the head.
Butt pushes Capri back against the cage and lands a hook to the side of the head.

Capri is rocked!
Capri blocks a body shot from Butt.
Butt has had enough of the clinch and is looking to separate.
Butt blocking some punches.
Butt gets through Capri's defenses to land a nice punch to the side of the head.
Butt tries a shoulder strike but it doesn't do any damage.
Capri pushes Butt back against the cage and lands a hook to the side of the head.
Butt throws a hook to the body. More of an arm punch but it's all scoring with the judges.
Capri is breathing heavily.
Butt lands a body punch - he's looking to wear down Capri.
Butt gets through Capri's defenses to land a nice punch to the side of the head.
Butt lands a hook that snaps the head of Capri backwards.
Oh Capri is still all over the place! His legs are completely gone! Will he be able to recover?!!
Butt lands an uppercut.
A right hand to the body from Butt.
Butt pushes Capri back against the cage and lands a hook to the side of the head.
Fantastic stuff here - a very entertaining period of action, which has drawn cheers from the crowd.
Butt lands with a good tight uppercut to the head.
Butt cracks Capri with a nice body shot.
Butt lands a big right hand that drops Capri! The killer instinct kicks in and Butt finishes his opponent with a series of strikes from mount. A dominating finish by Butt!
Ladies and gentlemen, after 1:56 of round 1, we have a winner by way of TKO (Strikes). Rex Butt!
A very excited looking Rex Butt made sure he remembered to thank all the fans both in the arena and on the internet. He said all the coolest people spend all day on MMA websites, which got a big reaction.
|
|
|
|
|
|
|
|
|
|
|
|
|
|
|
|
|
|
|
|
|
|
|
| S |
C
A |
G |
S |
C
B |
G |
|
S |
C |
G |
|
energy
A | B |
|
hype
A | B |
|
pop
A | B |
|
mgr
A | B |
|
FIGHT
RATING
68% |
|
|
|
|
|
|
|
|
|
|
