 |
LOL 1B PBP Commentary |
Undercard bout
|
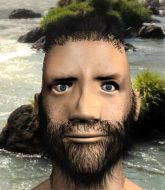
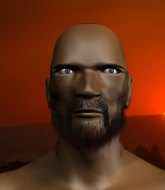
Coming up we have a super heavyweight MMA rules bout between Yegor Savaryn (ranked 5792 p4p, 181 weight class) and Nic Tatarapulous (ranked 6555 p4p, 195 weight class). Chooooooooon! I think Savaryn might be my favorite fighter, now he's come out to Anvil - Hammering sounds. We have two fighters making their debuts here, so let's see who comes out of this one with their first professional victory.
 |
|
 |
| 203 cm
25
225 lbs
0 - 0 - 0 |
|
200 cm
25
225 lbs
0 - 0 - 0 |
Decent wrestler
Solid Muay Thai
KO power |
|
BJJ White Belt
Decent boxing
Granite chin |
|
| |
|
Ladies and gentlemen. This fight is 3 rounds, in the super heavyweight division.
Introducing the fighter to my left, fighting out of the red corner.
With a record of
0 - 0 - 0, fighting out of Helsinki, Yegor Savaryn!
And introducing the fighter to my right, fighting out of the blue corner.
With a record of
0 - 0 - 0, fighting out of Sydney, Nic Tatarapulous!
The judges for this bout are Richard Clark, Phil Schofield and William Gold.

The bell rings for round one and we are underway!
Savaryn uses some good footwork to avoid the body shot by Tatarapulous.
Tatarapulous tries to clinch but Savaryn moves out of range.
Like a baseball bat into the meat of his leg there - nice leg kick by Savaryn.
Tatarapulous throws an overhand right that lands on Savaryn's shoulder, as Savaryn tries to avoid the shot.
Tatarapulous tries to clinch
and Savaryn counters with a nice low kick that buckles Tatarapulous's knee momentarily.
Tatarapulous throws a series of punches but Savaryn moves out of range.
Tatarapulous wants to clinch.
Tatarapulous misses the jab.
We've had a slow start to the round here - hopefully the action picks up.
Tatarapulous doesn't manage to clinch there - Savaryn circles away.
Savaryn swung with a counter right hand that didn't connect.
Tatarapulous throws a poor cross that misses
and he gets countered with a snapping leg kick.
Tatarapulous is moving around nicely and scores here with a single head shot.
Tatarapulous moves out of range of the strikes.
Savaryn lands a leg kick. The shin dug right into the meat of the thigh.

That's one minute gone in the round.
Tatarapulous tries to clinch up against the cage, rushing in to close the distance. Savaryn manages to break the clinch and circles back to the middle of the mat.

Tatarapulous clinches.
Tatarapulous lands with a light punch inside.
Tatarapulous blocks a body shot from Savaryn.
Tatarapulous can't find room to land a body shot as Savaryn controls the action.
Savaryn has a couple of punches blocked by Tatarapulous.
Savaryn tries to land a shot to the body but it's blocked.
Tatarapulous misses with a hook from the clinch.
Savaryn tries to work over Tatarapulous's body with a swooping hook but it only glances the target.
Savaryn working on landing some head shots here - that one got through nicely.
Tatarapulous tries a knee to the head but Savaryn blocks it.
Tatarapulous tries to land a shot to the body but it's blocked.
Savaryn tries to land a shot to the body but it's blocked.
Savaryn lands with a right to the head.
Savaryn misses with a short punch on the inside.
Savaryn misses with a hook from the clinch.
Tatarapulous blocks a punch to the side of the head.
Tatarapulous tried to land a shot to the body but connects with Savaryn's elbow.

That's two minutes gone in the round.
Savaryn lands a left hand.
Savaryn throws a punch but it's blocked by Tatarapulous.
Tatarapulous works on Savaryn's body with a couple of short punches.
Savaryn tries to land a shot to the body but it's blocked.
This is a great period of action - very entertaining stuff!
Tatarapulous makes some space for himself and lands an uppercut.
Savaryn throws a head punch that misses.
Savaryn avoids the elbow strike from Tatarapulous, against the cage.
Tatarapulous working aggressively here.
Savaryn lands with a good tight uppercut to the head.
Savaryn throws a head punch that misses.
Tatarapulous scores with a hook to the body.
Savaryn is breathing heavily.
Tatarapulous blocks an uppercut.
Tatarapulous lands with a short head shot on the inside.
Savaryn blocks a body shot from Tatarapulous.
Savaryn misses with a short punch on the inside.
Savaryn doesn't land with the attempted body shot.
Tatarapulous lands a short shot on the inside that snaps the head of Savaryn backwards.
Tatarapulous blocks a punch to the side of the head.
Tatarapulous tries a body shot but Savaryn blocks it.

That's three minutes gone in the round.
Tatarapulous misses with a hook to the ribs.
Tatarapulous misses with a short punch on the inside.
Tatarapulous lands an uppercut.
Savaryn misses with the head strike.
Savaryn misses with a short punch on the inside.
A head punch on the inside from Savaryn fails to land.
Savaryn tries to work over Tatarapulous's body with a swooping hook but it only glances the target.
Tatarapulous controlling the action here for a moment.
Tatarapulous digs a right hand into Savaryn's ribs. Those have got to be taking their toll on Savaryn's gas tank.
With the fighters up against the cage, Tatarapulous throws an elbow but misses.
Tatarapulous prevents a body shot from Savaryn.
Tatarapulous wants to stall.
Tatarapulous blocking some punches.
Savaryn has a couple of punches blocked by Tatarapulous.
Tatarapulous blocking some punches.
Tatarapulous lands a right hand.

That's four minutes gone in the round.
Savaryn lands a shoulder strike that jolts his opponent's head backwards.
A short right from Tatarapulous.
Savaryn misses with a shot to the kidneys.
Savaryn lands a shoulder strike.
Savaryn scores with a shot to the side of Tatarapulous's head.
The crowd cheering loudly, showing their appreciation for the quality fight we're seeing here.
Savaryn swings wildly with an uppercut but Tatarapulous uses good head movement to avoid it.
Savaryn struggles to land a body shot inside as Tatarapulous controls his hands.
Tatarapulous lands with a short head shot on the inside.
Savaryn misses with some punches.
Nice body punch from Tatarapulous.
Savaryn throws a head punch that misses.
Savaryn fails to land with a short punch on the inside.
Tatarapulous misses with the head strike.
Savaryn misses with a hook to the ribs.
Savaryn throws a head punch that misses.
Savaryn misses with the head strike.
Savaryn tries to work over Tatarapulous's body with a swooping hook but it only glances the target.
Tatarapulous tries to land a shot to the body but it's blocked.
And thats the end of the round the fighters go back to their corners.
A close round but Nic Tatarapulous will probably get the nod.
Well, the break between rounds is over. Let's get back to the scrappin!

Tatarapulous walks forward and throws a big overhand right! Savaryn drops to the floor like a sack of potatoes! Tatarapulous swarms on him with more punches until the referee wrestles him away from Savaryn's unconscious body! Wow, that was brutal!
Ladies and gentlemen, after 0:05 of round 2, we have a winner by way of TKO (Strikes). Nic Tatarapulous!
In defeat, Yegor Savaryn stepped up to the mic, saying 'Wow, you good.. No no, i just wasnt ready.'.
|
|
|
|
|
|
|
|
|
|
|
|
|
|
|
|
|
|
|
|
|
|
|
| S |
C
A |
G |
S |
C
B |
G |
|
S |
C |
G |
|
energy
A | B |
|
hype
A | B |
|
pop
A | B |
|
mgr
A | B |
|
FIGHT
RATING
48% |
|
|
|
|
|
|
|
Undercard bout
|
Coming up we have a super heavyweight MMA rules bout between Fok Boi (ranked 5729 p4p, 205 weight class) and Sake Chu (ranked 5923 p4p, 187 weight class). Chu has chosen Daughtry - Renegade as his entrance music, which hasn't gone down very well with the crowd. We have two fighters making their debuts here, so let's see who comes out of this one with their first professional victory.
 |
|
 |
| 211 cm
25
288 lbs
0 - 0 - 0 |
|
185 cm
25
195 lbs
0 - 0 - 0 |
Decent wrestler
Solid boxing
Big right hand |
|
BJJ White Belt
Excellent boxer
Heavy handed |
|
| |
|
Ladies and gentlemen. This fight is 3 rounds, in the super heavyweight division.
Introducing the fighter to my left, fighting out of the red corner.
With a record of
0 - 0 - 0, fighting out of Las Vegas, Fok Boi!
And introducing the fighter to my right, fighting out of the blue corner.
With a record of
0 - 0 - 0, fighting out of London, Sake Chu!
The judges for this bout are James Ackerman, Daniel Bishop and Sam Margolis.
The bell rings for round one and we are underway!

Oooooh!!! Chu has knocked Boi down with a huge combo! Chu steps away and waves a wobbly Boi back to his feet! This one might not go much longer!

It looks like Fok Boi has been cut.
Boi tries to bum rush Chu with a series of wild strikes but Chu uses good footwork to avoid the assault.
Chu stuffs the takedown.
Chu swings widly with a right hand
and Boi counters with a stiff right hand.
Wooooo! Give it up for these two warriors! They are putting on a show!
A looping hook to the body misses from Chu. Boi does a little dance to reset his feet.
Chu misses with a body shot. Nice footwork from Boi.
Chu misses with a hook

and Boi counters with a takedown into side control! That could mean trouble for Chu!
Boi has control of an arm but Chu manages to advance to Boi's back!
Boi manages to reverse the position and now he's in Chu's guard. Nice work there by Boi.
Chu working a defensive guard but Boi passes into half guard.
Chu preventing any damage for now, controlling his opponent's head.

Boi stands up from half guard... He's had enough of that ground malarky for the time being.
Boi slips under a jab.
Chu stuffs a takedown. It's all about dictating where the fight takes place and Chu wants it to stay on the feet.
The sound of bone on bone echoes around the arena as Chu checks a leg kick.
That's one minute gone in the round.
Chu is the aggressor but that punch slipped nicely by Boi.
Boi half commits to a counter takedown before pushing away, out of range.
Chu waving his hands out in front of him, looking to distract Boi.
Chu throws a shot from downtown. Boi moves away and avoids it.
Chu scores with a straight right hand, right through his opponent's guard.
Boi scores with a three punch combo!
Boi closes the distance, clinches up and gets a nice trip takedown into side control. Very smooth.
Chu is trying to control Boi's posture but Boi avoids it.
Chu trying to remain calm as Boi controls from the top position.
The ref warns both fighters not to hold the cage as they work up against the meshing.
Chu tries to work a leg under to get back to half guard but Boi wriggles his own leg back out and remains in side control.
Chu really doesn't want to stay on the ground with Boi. If he can't get it back to his feet, it's only a matter of time before he'll be tapping out.
Chu looking for a sweep but Boi has passed into full mount! Oh no!
This is a great period of action - very entertaining stuff!
Chu really trying hard to get back to half guard here.
Boi avoids the attempt from Chu to control.
That's two minutes gone in the round.
Chu tries to control the position but Boi now has his back.
Boi biding his time, controlling Chu.
Boi somehow managing to miss with a strike from the back.
Boi avoiding Chu 's attempts to control his hands.
A bit of a pause in the action here. Boi controlling the positon.
Chu staying busy and making it hard for Boi to control.
Chu can't escape the position.
Boi has the hooks sunk in and you can see the will to fight slowly draining out of Chu's body.
Chu trying to control the hands but Boi won't let him.
That's three minutes gone in the round.
Boi keeps control of the position as Chu tries to break free.
Will Boi go for the finish here or will he try and keep control of the position?

Boi working for a RNC but it's not happening just yet.
Boi gets his hands free as Chu looks to control.
I really don't envy Chu right now.
Chu staying busy and making it hard for Boi to control.
The fighters are pressed up against the cage, both looking to find a bit of space to work.
You can see the frustration on Chu's face
He knows he is in trouble unless he improves his position sooner rather than later.
Boi avoiding Chu 's attempts to control his hands.
Boi has his hand under the chin of his opponent looking for the choke. He's nearly got it! This one could be all over! But no, Chu has freed his hand and lives to survive another
well, another couple of seconds at least!
That's four minutes gone in the round.
Chu is in bad spot here.
Chu is being controlled on the ground here - he must escape this position otherwise surely the end is near.
Boi misses with punches from the back.
Chu fending off the submission attempt from Boi.
Boi controlling well, preventing Chu from escaping the position.
Chu trying to control the action but Boi just sinks the hooks in.
Boi keeps control of the position as Chu tries to break free.
Boi patiently working for the choke. Which fighter will keep their nerve here?
And thats the end of the round the fighters go back to their corners.
Fok Boi dominated that round.
The cut man is working on Fok Boi's cut.
The fighters get back to their feet, the hooter sounds and we're back to the action!
Chu throws a hook but Boi avoids it easily.
Boi tries to drive through with a takedown attempt but Chu defends well and Boi ends up having to push Chu into the cage where they will battle it out in the clinch.
Chu throws out a token jab with nothing on it.
Boi went nuts there looking for a big combo counter but none of the flurry connected.
Boi shoots in but no luck this time.
Chu pushing out the jab but it's not landing.
Boi is trying to close the distance and clinch up, after that failed offence from Chu.
Boi misses with a head kick.
Boi keeping a good distance there, avoiding the body shot.
Chu feints and then winds up with a huge right hand that connects perfectly and sends Boi sprawling to the canvas! Boi rolls over backwards and springs off the cage and manages to regain his footing - how acrobatic! Oh, he's still wobbly - can Chu finish him?!
Sake Chu seems to be the more aggressive standup fighter in this bout.
The crowd are loving this. Great action here.
Boi tries to score a power double leg takedown but Chu sees that one coming and sprawls well. That will dishearten Boi somewhat.
Chu is clearly trying to counter these attacks from Boi with a body shot.
That's three failed takedown attempts in the round for Fok Boi. That's going to take a lot out of him.
Boi slips under a jab.
Chu changes levels and scores with a jab to the body.
Chu is really struggling to land any decent head shots against his taller opponent.
Boi tries a low kick but Chu avoids it.
Fok Boi is looking to throw some combinations by the looks of things.
Boi uses some good footwork to avoid the body shot by Chu.
Boi wants to take advantage of his opponent's missed offense by moving into the clinch.
Boi tries to shoot in for a takedown. He's got hold of a leg but Chu swivels and escapes.
Chu takes a swing at Boi's ribcage but misses.
Sloppy strikes from Chu. Those never looked like landing.
Boi throws a big counter combination but Chu scrambles out of danger and avoids any damage.
That's one minute gone in the round.
Boi wants to clinch.
Chu pushing out the jab but it's not landing.
Boi swung with a counter right hand that didn't connect.
Chu looks to score with a jab to the body but Boi is just out of range.
Boi moves in looking to clinch but Chu pushes him off.
Chu now looks to counter with a shot at the body.
Chu fakes the body blow, causing Boi to drop his hands! Left hook to the temple! Boi goes stiff, and falls face first into the mat. Goodnight!
Ladies and gentlemen, after 1:28 of round 2, we have a winner by way of KO (Punch). Sake Chu!
A victorious Sake Chu thanked his army of followers in his post fight interview, telling people to make sure they follow him on Twitter.
|
|
|
|
|
|
|
|
|
|
|
|
|
|
|
|
|
|
|
|
|
|
|
| S |
C
A |
G |
S |
C
B |
G |
|
S |
C |
G |
|
energy
A | B |
|
hype
A | B |
|
pop
A | B |
|
mgr
A | B |
|
FIGHT
RATING
58% |
|
|
|
|
|
|
|
Undercard bout
|
Coming up we have a super heavyweight MMA rules bout between Giuseppe Healy (ranked 7058 p4p, 207 weight class) and Scotty Gonzalez (ranked 5018 p4p, 171 weight class). Gonzalez has chosen Summer On Lock by Royce Da 5'9 as his entrance music, which hasn't gone down very well with the crowd. Scotty Gonzalez has the better chin. Will he look to stand and bang today?
 |
|
 |
| 195 cm
25
230 lbs
0 - 1 - 0 |
|
209 cm
25
260 lbs
1 - 0 - 0 |
BJJ Purple Belt
Solid boxing
Big heart |
|
BJJ White Belt
Excellent boxer
Heavy handed |
|
| |
|
Ladies and gentlemen. This fight is 3 rounds, in the super heavyweight division.
Introducing the fighter to my left, fighting out of the red corner.
With a record of
0 - 1 - 0, fighting out of London, Giuseppe Healy!
And introducing the fighter to my right, fighting out of the blue corner.
With a record of
1 - 0 - 0, fighting out of Helsinki, Scotty Gonzalez!
The judges for this bout are James Glass, Sam Margolis and Steven Brown.
The bell rings for round one and we are underway!
Gonzalez clobbers Healy with an overhand right that has the crowd gasping. That made a horrendous noise.
We've been hearing reports that Healy has been drilling takedowns in recent sessions so let's see if that has an impact on the result of this fight.
Gonzalez throws a right hand that Healy ducks under and follows up with a left that Healy also avoids with ease.
Gonzalez gets caught flat footed, as Healy shoots in with a quick takedown into guard.
Gonzalez is looking to stand back up but Healy counters by passing into half guard. Oops... bit sloppy there by Gonzalez.
Gonzalez pushes Healy off looking to stand but Healy dives back in and keeps control.
Gonzalez felt the need to train up his defensive grappling in the buildup to the fight. Presumably he was expecting to be in a difficult position like this, so let's see if he can get out of it.
We get told so often about how wrestlers don't like to be on their backs. Let's see if Gonzalez can do anything to dispel that myth.
Healy is looking for a kimura but Gonzalez is holding onto that half guard position, so it's hard for Healy to get the leverage.

Gonzalez kicks Healy off and gets back to his feet.
Gonzalez throws a right and a left that both miss.
The crowd cheering loudly, showing their appreciation for the quality fight we're seeing here.
Healy misses the shot to the body.
Healy connects with a hook to the side of his opponent's head.
Gonzalez fails to land with a series of punches.
A big right from Healy misses.
Healy dodges the punch combination from Gonzalez.
Healy misses with a jab and misses with a cross straight after too.
Gonzalez unleashes a big counter combination but Healy bobs and weaves and avoids any damage.
Scotty Gonzalez seems to be the more aggressive standup fighter in this bout.
Gonzalez fails to land with a series of punches.
Gonzalez fails to land with the punch combination there - jab, cross, hook, miss, miss, miss.
Gonzalez misses with a series of wild punches.
Healy looks to land a right hand but Gonzalez moved out of range.
Healy throws a right and a left that both miss.
That's one minute gone in the round.
Gonzalez shuffles to his left behind two crisp jabs. Healy eats them both and turns towards Gonzalez to reposition himself and eats a stinging right hand-left hook combo.
Healy pushing out the jab but it's not landing.
Gonzalez is loading up here, looking for a big counter of his own.
Healy scores with a jab. Gonzalez acknowledges it with a nod of the head.
Gonzalez thows a left - swing and a miss!
Gonzalez lands an overhand left. A wild punch that just about connected.
Gonzalez throws a series of punches but Healy avoids them all with ease.
A little feinted left hand from Healy on the counter but he doesn't commit to it.
Gonzalez misses with a jab and misses with a cross straight after too.
Gonzalez looks winded!
Healy throws a monster uppercut resembling something out of street fighter but it doesn't land.
Healy shoots in for a takedown! He's got it and he's managed to land in side control! That's better than Healy was expecting from the takedown attempt, I'm sure!
The fans in attendance giving it up for the two fighters, who have really let it all hang out in the last minute or so!
Healy is looking to finish here, going for an Americana. Gonzalez knows the correct defense though, so he's OK.
Gonzalez wants to escape from the position here - easier said than done!
Gonzalez really doesn't want to stay on the ground with Healy. If he can't get it back to his feet, it's only a matter of time before he'll be tapping out.
Healy working hard here to secure a kimura but he's not really in the right position for it.
Healy tries for a kimura. Not really close to a finish though.
That's two minutes gone in the round.
Healy tries for an arm triangle. That looks pretty tight to me. Is this one over!?! Possibly, maybe, no Healy has let go of the choke. Obviously it wasn't as tight as we thought!
Healy wants to work for a kimura but he's foiled early by Gonzalez, who protects the arm well.
Gonzalez is looking to work his way out of this bad position but Healy is controlling him well.
Healy has hold of Gonzalez's arm here. He's working for an Americana. It looks like he might have it! Gonzalez tries to escape but he's just digging himself in deeper - Healy cranks the arm and Gonzalez screams in pain! The ref makes a decision and ends the fight before the tap - no complains from Gonzalez, who is just happy to have his arm attached to his body.
Ladies and gentlemen, after 3:58 of round 1, we have a winner by way of Submission (Americana). Giuseppe Healy!
|
|
|
|
|
|
|
|
|
|
|
|
|
|
|
|
|
|
|
|
|
|
|
| S |
C
A |
G |
S |
C
B |
G |
|
S |
C |
G |
|
energy
A | B |
|
hype
A | B |
|
pop
A | B |
|
mgr
A | B |
|
FIGHT
RATING
75% |
|
|
|
|
|
|
|
Undercard bout
|
Coming up we have a super heavyweight MMA rules bout between Trip Dunham (ranked 5901 p4p, 185 weight class) and Marcus Behnder (ranked 4457 p4p, 149 weight class). Trip Dunham had a look across the cage there at his opponent. He definitely means business
 |
|
 |
| 187 cm
25
210 lbs
0 - 0 - 0 |
|
190 cm
25
212 lbs
1 - 0 - 0 |
BJJ Purple Belt
Solid boxing
Granite chin |
|
BJJ White Belt
Excellent MT
Solid chin |
|
| |
|
Ladies and gentlemen. This fight is 3 rounds, in the super heavyweight division.
Introducing the fighter to my left, fighting out of the red corner.
With a record of
0 - 0 - 0, fighting out of New York, Trip Dunham!
And introducing the fighter to my right, fighting out of the blue corner.
With a record of
1 - 0 - 0, fighting out of Los Angeles, Marcus Behnder!
The judges for this bout are Richard Clark, Chris Edwards and James Glass.
The bell rings for round one and we are underway!
A swing and a miss from Behnder.
Behnder's jab looks to have found its range, popping Dunham under the eye.
Nice takedown defense from Behnder. No joy for Dunham on that attempt.
Behnder let fly with a counter punch to the body but it didn't land.
Dunham uses some good footwork to avoid the body shot by Behnder.
Dunham is looking to counter the offense by Behnder and move into the clinch.
Behnder swings for the body but Dunham moves out of range.
Dunham tries to counter with a takedown but Behnder is quick to defend against it.
Dunham has his takedown stuffed
and Behnder counters with a quick right hand to the jaw.
Nice cross by Behnder.
We've had a slow start to the round here - hopefully the action picks up.
Left hook, right uppercut from Behnder.
Behnder looks to score with a jab to the body but Dunham is just out of range.
This fight brought to you by 5M nutrition - it's mmmmm tasty. Nice jab by Behnder.
The crowd are loving this. Great action here.
Behnder throws a low kick but Dunham moves out of range easily.
That's one minute gone in the round.
A big right from Behnder misses.
Behnder circles away from the clinch attempt
and Behnder counters nicely by changing levels and landing a hook to the body.
Behnder throws a couple of head shots and lands with the final one - a decent hook, which struck Dunham on the side of the head.
Dunham doesn't react quick enough there as he takes a shot to the body.
Dunham doesn't succeed with the takedown
letting Behnder counter with a right hand.
That's three failed takedown attempts in the round for Trip Dunham. That's going to take a lot out of him.
Behnder dips down and scores with a jab to the body.
A looping hook to the body misses from Behnder. Dunham does a little dance to reset his feet.
Dunham throws a head kick that misses and slips in the process. He scrambles back to his feet and the fighters circle.
That's two minutes gone in the round.
Dunham gets cracked there but stands up to it.
Dunham fails with the takedown.
Behnder connects with a right hand. Dunham shakes it off.
The crowd cheering loudly, showing their appreciation for the quality fight we're seeing here.
Behnder looks to score with a jab to the body but Dunham is just out of range.
Dunham ducks under a wild hook from Behnder.
Dunham drops down looking for a counter takedown but Behnder sprawls and moves away.
Dunham tries to clinch but Behnder moves out of range.
Behnder is landing a lot of head punches in this opening round! Dunham had better start moving his head a bit unless he wants his face to turn into pâté.
Dunham feints and then dives in with a takedown. That was a long way out but the feint bought him enough time to close the distance and complete the takedown. Now we'll play guard for a bit and see who can get the better of that position.
Behnder working a defensive guard here.
Dunham drops back for a leg! It's a sloppy attempt though and Dunham jumps back into guard quickly, to retain the dominant position.
That's three minutes gone in the round.
Dunham trying to control but Behnder is working from the bottom.
The ref warns both fighters not to hold the cage as they work up against the meshing.

Behnder throwing his legs up looking for a triangle.
Dunham decides to stand up and beckons his opponent to follow.
Dunham throws a sloppy body shot
and Behnder cracks him with a counter punch right on the button.
That's four minutes gone in the round.
The crowd are hurling abuse towards the fighters... You can hardly blame them though because there isn't a lot going on in the fight.
Behnder misses with an uppercut. Dunham saw that one coming.
Marcus Behnder is looking to keep the fight on the feet at all costs.
Dunham tries to grapple but his opponent circles
and Behnder counters with a quick right hand to the jaw.
Dunham shoots in but no luck this time.
Behnder ducks down and throws a hook to the body but Dunham moves away.
We've been informed that Behnder has been working hard on his conditioning in the buildup to the fight.
A head kick by Dunham misses
and Behnder counters with a straight punch to the midsection.
Behnder lands with a right hand.
Dunham darts in trying to clinch
and Behnder counters with a crisp right hand that drops Dunham! Behnder lets Dunham back up to his feet, looking for a finish!
And thats the end of the round the fighters go back to their corners.
Marcus Behnder dominated that round.
That's the end of the round. The referee orders the cornermen out of the cage so we can get back down to business.
Behnder throws a shot from downtown. Dunham moves away and avoids it.
Behnder cracks Dunham with an open hand slap.
Behnder lands a nice shot to the body.
Dunham slips a jab from Behnder.
Dunham fails with an attempt to clinch.
Dunham throws a lazy body kick
and Behnder counters with a nice uppercut.
Behnder lands with a straight right. Dunham didn't see that one coming.
Behnder has been the more effective fighter overall so far.
Dunham fakes high and shoots in for a takedown but Behnder avoids it really well and circles away.
Trip Dunham is looking to throw some combinations by the looks of things.
We've had a slow start to the round here - hopefully the action picks up.
Dunham tries for a takedown but Behnder circles away easily
and Behnder counters with a crisp right hand that drops Dunham! Behnder lets Dunham back up to his feet, looking for a finish!

Dunham is rocked!
Trip Dunham seems to be the more aggressive standup fighter in this bout.
That's one minute gone in the round.
Dunham tries to clinch
and Behnder counters with a nice body shot.
Dunham wants to clinch
and Behnder counters with a crisp right hand that drops Dunham! Behnder lets Dunham back up to his feet, looking for a finish!
Oh Dunham is still all over the place! His legs are completely gone! Will he be able to recover?!!
Behnder fakes high and swings low for a body shot but Dunham manages to avoid it.
Dunham seems to have got his legs back now.
Dunham shoots and misses
and Behnder counters with a crisp right hand that drops Dunham! Behnder lets Dunham back up to his feet, looking for a finish!
That's three failed takedown attempts in the round for Trip Dunham. That's going to take a lot out of him.
This has been an exciting period of action!
Dunham is holding his hands too far apart here. Behnder throws a hard, straight punch right down the pipe and BOOM! Dunham is out! That punch landed square on the jaw - what a shot!
Ladies and gentlemen, after 1:39 of round 2, we have a winner by way of KO (Punch). Marcus Behnder!
After winning the bout, Marcus Behnder thanked all his fans and promised he'd do even better in his next fight. The crowd seemed to love his humility.
|
|
|
|
|
|
|
|
|
|
|
|
|
|
|
|
|
|
|
|
|
|
|
| S |
C
A |
G |
S |
C
B |
G |
|
S |
C |
G |
|
energy
A | B |
|
hype
A | B |
|
pop
A | B |
|
mgr
A | B |
|
FIGHT
RATING
62% |
|
|
|
|
|
|
|
Undercard bout
|
Coming up we have a super heavyweight MMA rules bout between Frank Martin (ranked 6700 p4p, 197 weight class) and Edward Beerhands (ranked 4893 p4p, 165 weight class). Beerhands is bobbing his head along to his entrance song: Drinkin'. Fingers crossed for an exciting fight - I'm sure both fighters are looking for a nice under the table bonus!
 |
|
 |
| 178 cm
25
178 lbs
0 - 1 - 0 |
|
185 cm
25
205 lbs
1 - 0 - 0 |
BJJ Brown Belt
Good kicks
Granite chin |
|
Good wrestler
Counter fighter
Granite chin |
|
| |
|
Ladies and gentlemen. This fight is 3 rounds, in the super heavyweight division.
Introducing the fighter to my left, fighting out of the red corner.
With a record of
0 - 1 - 0, fighting out of New York, Frank Martin!
And introducing the fighter to my right, fighting out of the blue corner.
With a record of
1 - 0 - 0, fighting out of Montreal, Edward Beerhands!
The judges for this bout are Richard Clark, William Gold and Donald Grub.
The bell rings for round one and we are underway!
Martin with a lazy takedown attempt
and Beerhands counters with a straight right hand.
Martin shoots and misses
and Beerhands counters with a lovely shot to the body.
Beerhands's coach down at Fit-Out was telling us pre-fight that they have been working on Beerhands's balance. Obviously they view that as a key factor in the outcome of this fight.
Martin tries for a takedown but Beerhands circles away easily
and Beerhands connects with a straight left hand counter down the middle.
It looks like Frank Martin has been cut.
That's three failed takedown attempts in the round for Frank Martin. That's going to take a lot out of him.
Martin takes a shot right to the liver - Bas would have been proud of that punch.
Martin shoots in looking for a double leg takedown. Beerhands defends it nicely.
Martin darts in trying to clinch
letting Beerhands counter with a right hand.
We've had a slow start to the round here - hopefully the action picks up.
Martin doesn't succeed with the takedown
and Beerhands counters with a nice right hand that sends Martin toppling to the canvas! Martin scrambles and gets back to his feet - can Beerhands finish him?!
The fans in attendance giving it up for the two fighters, who have really let it all hang out in the last minute or so!
Martin with a lazy takedown attempt
and Beerhands counters with a nice right hand that sends Martin toppling to the canvas! Martin scrambles and gets back to his feet - can Beerhands finish him?!
Martin is rocked!
That's one minute gone in the round.
Martin with a poor takedown
and Beerhands counters with a huge right that knocks Martin out cold! Beerhands is running around with a crazed look on his face - you can see how much that meant to him!
Ladies and gentlemen, after 1:06 of round 1, we have a winner by way of KO (Punch). Edward Beerhands!
A very excited looking Edward Beerhands made sure he remembered to thank all the fans both in the arena and on the internet. He said all the coolest people spend all day on MMA websites, which got a big reaction.
|
|
|
|
|
|
|
|
|
|
|
|
|
|
|
|
|
|
|
|
|
|
|
| S |
C
A |
G |
S |
C
B |
G |
|
S |
C |
G |
|
energy
A | B |
|
hype
A | B |
|
pop
A | B |
|
mgr
A | B |
|
FIGHT
RATING
100% |
|
|
|
|
|
|
|
Undercard bout
|
Coming up we have a super heavyweight MMA rules bout between Johnson Mitchell (ranked 7296 p4p, 230 weight class) and Zachary White (ranked 4318 p4p, 139 weight class). These two fighters really are very evenly matched on the feet - it will be fascinating to see who can assert themselves in that aspect of the fight.
 |
|
 |
| 208 cm
25
284 lbs
0 - 1 - 0 |
|
183 cm
25
210 lbs
1 - 0 - 0 |
BJJ White Belt
Solid Muay Thai
Prefers standup |
|
BJJ White Belt
Excellent boxer
Heavy handed |
|
| |
|
Ladies and gentlemen. This fight is 3 rounds, in the super heavyweight division.
Introducing the fighter to my left, fighting out of the red corner.
With a record of
0 - 1 - 0, fighting out of Las Vegas, Johnson Mitchell!
And introducing the fighter to my right, fighting out of the blue corner.
With a record of
1 - 0 - 0, fighting out of London, Zachary White!
The judges for this bout are Andrew Berry, William Gold and Phil Schofield.
The bell rings for round one and we are underway!
White connects with a crisp jab.
Mitchell uses some good footwork to avoid the body shot by White.
White connects with a jab.
White misses with an uppercut.
Mitchell throwing a counter right hand but White manages to avoid it.
White connects with a looping right hand.
Nice jab there from White.
White misses with a few strikes there.
Mitchell misses with a body shot. Nice footwork from White.
A nice side step and White releases a counter shot to the body, but it doesn't find it's home.
White looks more muscular than last time we saw him. He must have been on the weights.
Mitchell on the wrong end of a decent looking cross there.
White connects with a nice looking jab.
Mitchell is rocked!
White dips down and scores with a jab to the body.
This is a great period of action - very entertaining stuff!
Mitchell on the wrong end of a decent looking cross there.
Oh Mitchell is still all over the place! His legs are completely gone! Will he be able to recover?!!
White takes the fight into the clinch.
Mitchell seems to have got his legs back now.
That's one minute gone in the round.
Mitchell working hard to break the clinch.
White makes some space for himself and lands an uppercut.
Mitchell misses with a body punch.
Mitchell is trying to break the clinch but White is controlling him.

Mitchell's corner calls for him to break the clinch, which he does.
Mitchell has his hands up protecting his head but a hook from White finds it's way round the side to connect with Mitchell's head.
Mitchell walks into a picture perfect straight right hand from White! He's gone down face first to the canvas, unconscious before he even hit the floor! Ohhhh. My. Goodness! That boys and girls was a beautiful knockout! Give that man a biscuit!
Ladies and gentlemen, after 1:28 of round 1, we have a winner by way of KO (Punch). Zachary White!
Zachary White made sure to give a little speech post fight, saying 'I am the best there ever has been or ever will be, I'm calling out Kimbo Slice I can fuck you up anytime anywhere.'.
|
|
|
|
|
|
|
|
|
|
|
|
|
|
|
|
|
|
|
|
|
|
|
| S |
C
A |
G |
S |
C
B |
G |
|
S |
C |
G |
|
energy
A | B |
|
hype
A | B |
|
pop
A | B |
|
mgr
A | B |
|
FIGHT
RATING
64% |
|
|
|
|
|
|
|
Undercard bout
|
Coming up we have a super heavyweight MMA rules bout between Leroy Brown (ranked 7389 p4p, 217 weight class) and Stud Toddler (ranked 3933 p4p, 122 weight class). Leroy Brown has a significant reach advantage - let's see if he can make it count.
 |
|
 |
| 193 cm
25
245 lbs
0 - 1 - 0 |
|
178 cm
25
190 lbs
1 - 0 - 0 |
BJJ White Belt
Excellent MT
KO power |
|
BJJ Purple Belt
Solid Muay Thai
Determined |
|
| |
|
Ladies and gentlemen. This fight is 3 rounds, in the super heavyweight division.
Introducing the fighter to my left, fighting out of the red corner.
With a record of
0 - 1 - 0, fighting out of Los Angeles, Leroy Brown!
And introducing the fighter to my right, fighting out of the blue corner.
With a record of
1 - 0 - 0, fighting out of Los Angeles, Stud Toddler!
The judges for this bout are Chris Edwards, Phil Schofield and James Atkins.
The bell rings for round one and we are underway!
Brown uses good footwork to avoid the strikes from Toddler.
Toddler's coach down at Team Alpha Midget was telling us pre-fight that they have been working on Toddler's balance. Obviously they view that as a key factor in the outcome of this fight.
Brown looks to land a combination but Toddler avoids it well.
Toddler slips under a jab from Brown.
Toddler throws a hook to the side of Brown's head but Brown sees it coming and ducks under it beautifully.
Toddler moves in looking to clinch but Brown pushes him off.
Brown definitely looks more muscular than last time we saw him fight.
Toddler doesn't manage to clinch there - Brown circles away.
Brown went nuts there looking for a big combo counter but none of the flurry connected.
Brown slips a jab from Toddler.
Brown tries to counter by clinching up but Toddler breaks away and moves out of range.
Toddler pushing out the jab but it's not landing.
Brown is looking to counter with a shot to the body.
Toddler misses with a looping left.
Brown is trying to close the distance and clinch up, after that failed offence from Toddler.
Toddler connects with a lovely right hand, straight down the pipe.
We've had a slow start to the round here - hopefully the action picks up.
Toddler waving his hands out in front of him, looking to distract Brown.
Brown scores with a body shot.
Toddler goes to the watering hole and comes back with a big thumbs up from the judges as he scores a three punch combo.
Stud Toddler seems to be the more aggressive standup fighter in this bout.
Toddler swings for the body but Brown moves out of range.
A counter left hand to the body from Brown misses its target.
Toddler throws a jab but it's blocked by Brown.
That's one minute gone in the round.
Well, he's not going to score with shots like that. A lazy body kick attempt from Brown.
Brown catches Toddler with a nice straight right. He seems pissed - ooooh, it's on now! On like donkey kong!
Brown misses with a looping right.
Toddler scores with a jab to the body.
Toddler swings away but doesn't land with a series of punches.
A quick step to the side and Brown tries to counter with a shot to the body but it doesn't connect.
Toddler is really struggling to land any decent head shots against his taller opponent.
Brown connects with a looping left hand that seems like it dazed Toddler momentarily.
Toddler looks to throw the jab but Brown is out of range.
A big right from Toddler misses.
Brown defending well as Toddler loads up on a big left hand.
Toddler throws a monster uppercut resembling something out of street fighter but it doesn't land.
Brown is looking to counter punch.
Toddler throws an overhand right that lands on Brown's shoulder, as Brown tries to avoid the shot.
Brown is looking to counter with a shot to the body.
Toddler throws a big shot that misses.
Brown misses with an uppercut
and Toddler counters nicely by changing levels and landing a hook to the body.
Toddler throws a big shot that misses.
That's two minutes gone in the round.
Toddler darts in trying to clinch
and Brown counters with a nice jab to the body that keeps Toddler thinking.
Toddler might want to mix his strikes up a bit more. He's just going for head shots at the moment and that can become a bit predictable.
Wooooo! Give it up for these two warriors! They are putting on a show!
Toddler bobs and weaves well there to avoid the strikes.
Brown uses decent footwork to sidestep a right hand from Toddler.
Brown digs a good hook to Toddler's body.
Toddler fails to land with the punch combination there - jab, cross, hook, miss, miss, miss.
Brown takes a swing at Toddler's ribcage but misses.
Brown avoids a punch combination nicely.
It looked like Brown was looking amped, ready to throw a big counter but didn't commit.
Brown uses some good footwork to avoid the body shot by Toddler.
Brown is looking to counter punch.
Toddler throws a hook to the body but it doesn't connect.

Brown moves into the clinch.
That's three minutes gone in the round.

Toddler pulls Brown into guard.
Brown is frustrating his opponent with some stalling tactics from top position.
Brown stands and throws Toddler's legs to the side, diving into side control.
Brown knows he needs to get back to his feet asap. He's simply no match for Toddler on the ground.
Toddler prevents Brown from moving into mount.
Brown slows the pace down.
Brown is looking to finish here, going for an Americana. Toddler knows the correct defense though, so he's OK.
Brown will need to keep those long limbs tucked in whilst he's on the ground, to prevent any submissions.
Brown slows the pace down.
That's four minutes gone in the round.
Toddler is looking for a sweep.
Brown tries to advance to mount but Toddler denies him.
Brown thinks about going for a far side armbar but bails out and retains the dominant position instead.
Toddler is being controlled here.
You can see the frustration on Toddler's face, being in this tough position on the bottom.
And thats the end of the round the fighters go back to their corners.
A close round but Stud Toddler will probably get the nod.
The referee calls time. The cornermen exit stage left and we're back to business.
Toddler misses with a hook.
Toddler wings a very wild body shot but it does the job and lands to the midsection.
Toddler throws a jab when Brown was well out of range.
Toddler lands a lovely overhand right.
Toddler connects nicely with a jab. Noted by the judges no doubt.
Brown displays some good footwork, moving neatly out of range as Toddler throws out the jab.
A punch lands to the side of Brown 's head but he takes it in his stride.
Toddler throws a nice looking combination but Brown bobs and weaves to avoid any damage.
Toddler rushes in with a sloppy looking punch
and Brown counters with a good right hand that lands right on the jaw.
Toddler ducks down and throws a hook to the body but Brown moves away.
Brown appears to be looking for a counter punch to the body.
Toddler throws a two punch combo that lands nicely.
The crowd cheering loudly, showing their appreciation for the quality fight we're seeing here.
Brown pushing out the jab but it's not landing.
Brown misses with a body shot.
Toddler pushing out the jab but it's not landing.
Brown swung with a counter right hand that didn't connect.
That's one minute gone in the round.
Brown cracks Toddler with a hook to the jaw. Both fighters smile at eachother and high-five before getting back down to business.
Good standup being displayed there by Toddler as he connects with a hook.
Toddler throws a lazy uppercut
and Brown counters by moving into the clinch.
Brown lands a nice looking hook to the body, against the cage.
Brown is leaning against Toddler and scores with a nice uppercut to the body.
Brown lands a hook that snaps the head of Toddler backwards.
Brown manages to pull guard. Let's see whether he can land a sub off his back.
Toddler is trying to work a guillotine from the top, or something like that? Don't know how he thinks he's going to get a finish from there.
Toddler wants to pass the guard but Brown is keeping the position.
Toddler drops back looking for a leg! Brown is in trouble here! The fighters roll with the hold and Brown manages to kick Toddler off! Toddler jumps back into Brown's guard.
That's two minutes gone in the round.
Brown escapes his hips to the side and looks to be working for an armbar. Toddler gives him a little smile and shakes his head. No chance.
Toddler is trying to work a guillotine from the top, or something like that? Don't know how he thinks he's going to get a finish from there.
Toddler trying to control the position from guard on top but Brown is wriggling around, looking for whatever he can.
Brown had isolated an arm as going for a kimura. Toddler defends it easily.
That's three minutes gone in the round.
Brown is looking for a guillotine. You can't force these things though and Toddler defends well.
Brown trying to control the position here.
Brown on his back here. We all know that wrestlers don't like being on their back so let's see if Brown tries to get out of the position.
Brown is throwing his legs up, looking for submissions. Toddler is aware though and is defending well.
The ref warns both fighters not to hold the cage as they work up against the meshing.
Brown is trying to keep Toddler in close.
Toddler passes easily into side control. Nice work.
That's four minutes gone in the round.
A few boos can be heard. I'm sure they will multiply if the fighters don't pick up the pace.
Toddler is working to tighten his grip on Brown's neck. He's isolated an arm and is working for an arm triangle. Brown has recognised the danger and is trying to turn with the submission but Toddler is really squeezing tight and eventually Brown passes out! Toddler breaks the hold and jumps onto the cage to celebrate! Submission of the night, I'd say!
Ladies and gentlemen, after 4:20 of round 2, we have a winner by way of Submission (Arm Triangle). Stud Toddler!
|
|
|
|
|
|
|
|
|
|
|
|
|
|
|
|
|
|
|
|
|
|
|
| S |
C
A |
G |
S |
C
B |
G |
|
S |
C |
G |
|
energy
A | B |
|
hype
A | B |
|
pop
A | B |
|
mgr
A | B |
|
FIGHT
RATING
45% |
|
|
|
|
|
|
|
Co-main event
|
Coming up we have a super heavyweight MMA rules bout between Louie Matthews (ranked 4476 p4p, 150 weight class) and Chief Chippewa (ranked 4260 p4p, 169 weight class). The key to victory for Louie Matthews has got to be keeping the fight on the feet.
 |
|
 |
| 183 cm
25
215 lbs
1 - 0 - 0 |
|
200 cm
25
300 lbs
1 - 0 - 0 |
BJJ Purple Belt
Solid Muay Thai
Big heart |
|
Good wrestler
Brawler
Experienced |
|
| |
|
Ladies and gentlemen. This fight is 3 rounds, in the super heavyweight division.
Introducing the fighter to my left, fighting out of the red corner.
With a record of
1 - 0 - 0, fighting out of London, Louie Matthews!
And introducing the fighter to my right, fighting out of the blue corner.
With a record of
1 - 0 - 0, fighting out of Las Vegas, Chief Chippewa!
The judges for this bout are Donald Grub, Daniel Bishop and Sam Margolis.
The bell rings for round one and we are underway!
Chippewa closes the distance and takes a jab right on the nose as he does so.

It looks like Chief Chippewa has been cut.
Matthews moves away from the strike by Chippewa.
Chippewa takes a punch right to his stomach. That took the wind out of him momentarily.
Chippewa rushes in with a sloppy looking punch
and Matthews counters with a shot to the ribs. That looked like it hurt.
Chippewa misses with a looping right.
Chippewa tries to clinch up but Matthews circles away and keeps his distance.
Matthews definitely looks more muscular than last time we saw him fight.
Matthews fakes low and throws an overhand right that catches Chippewa on the side of the head.
Matthews closes the distance and lands a one-two.
Matthews with a nice cross.
Chippewa throws a lazy uppercut
and Chippewa takes a counter punch right on the button for his troubles.
That has opened up Chief Chippewa's cut even more.
Fantastic stuff here - a very entertaining period of action, which has drawn cheers from the crowd.
Chippewa shoots in for a takedown and gets it. Let's see what he's got on the mat.
Chippewa looking to pass the guard.
Matthews looking for submissions from the bottom here. Moving his hips around, possibly looking for an armbar.
Chippewa works a leg free and moves into half guard.
That's one minute gone in the round.
Matthews moves into full guard.
Chippewa pressing down on his opponent's thigh, looking to pass guard. Matthews is keeping the position for now.
Matthews trying to keep a closed guard but Chippewa is proving a slippery customer.
Matthews keeping full guard, as Chippewa tries to pass.
Chippewa slips nicely into half guard.
Chippewa is looking for a kimura but Matthews is holding onto that half guard position, so it's hard for Chippewa to get the leverage.
That's two minutes gone in the round.
Neither fighter has done anything of merit for a good minute or two here and the crowd are not happy about it.
Matthews looking for submissions from an awkward position here.
Matthews trying to hold on to Chippewa's head to control him but Chippewa postures up.
Chippewa is looking for a kimura here.
Chippewa looking to pass the half guard. Not this time.
Matthews is trying to stand.
That's three minutes gone in the round.
Matthews looking to work for a kimura from the bottom.
Chippewa passes the half guard and he's now in mount! Big trouble for Matthews!
Chippewa swings around for an armbar but it's a sloppy attempt and Matthews is now in Chippewa's guard. A big mistake from Chippewa there, giving up the dominant position!
Chippewa has a loose triangle. He'll be looking to tighten that up but Matthews can see exactly what he's planning and manages to posture up and free himself.
Our spies down at at ELITE Island Gym - All Elite Coaches ($800/Week) inform us that Chippewa has really been working on his submissions in the buildup to this fight. Will it pay off?
Chippewa working for a triangle but Matthews defends it easily.
Chippewa looking for submissions from the bottom here. Moving his hips around, possibly looking for an armbar.
That's four minutes gone in the round.
Chippewa looking for a guillotine here but Matthews defends easily.
Matthews sneaks a leg through and gets to half guard. That was like a knife through butter how easily he passed Chippewa's guard.
Chippewa is looking to regain full guard. Not this time though.
Chippewa moves his hips nicely and gets into full guard.
And thats the end of the round the fighters go back to their corners.
Louie Matthews dominated that round.
The cut man is working on Chief Chippewa's cut.
That's time! Back to the action!
Matthews avoids a lazy jab quite easily.
Chippewa misses with a hook to the body
letting Matthews counter with a right hand.
Matthews steps to the side to avoid the strikes from Chippewa.
Chippewa fakes a strike and closes the distance, dragging Matthews to the ground. Chippewa is now in Matthews's guard.
Matthews trying to control the position.
Matthews keeping full guard, as Chippewa tries to pass.
Chippewa pushing down on Matthews's thigh, trying to pass to half guard. He's managed it... Nice work.
We've had a slow start to the round here - hopefully the action picks up.
Chippewa wants to free his trapped foot but Matthews is holding on for dear life with his legs.
Chippewa is trying for a guillotine from the top but the pressure isn't in the right place so Matthews is just riding it out for now. Chippewa eventually gives up the hold.
Matthews is trying to maintain the position but Chippewa is very close to passing his half guard.
That's one minute gone in the round.
Matthews tries to get to full guard but Chippewa has control of the leg.
Chippewa is looking to pass Matthews's guard but actually Matthews recovers to full guard.
Chippewa tries to free his leg and advance position but Matthews is retaining full guard.
That's two minutes gone in the round.
A lull in the action here being met with boos from the crowd.
Chippewa postures up.
Matthews has a loose triangle. He'll be looking to tighten that up but Chippewa can see exactly what he's planning and manages to posture up and free himself.
Chippewa stands up and looks to throw the legs aside to pass to side control. Matthews swivels though and keeps the full guard.
Chippewa keeps trying to improve his position.
Chippewa thinks about going for a leg but decides against it, in order to maintain the position.
Chippewa trying to pass the guard but can't manage it just yet.
That's three minutes gone in the round.
Chippewa is persisting with the attempt to improve his position.
The referee claps his hands together and tells the fighters to work.
Chippewa sitting in guard doing not very much at all here. Matthews doesn't need a second invitation though! He's locked up a guillotine and he's squeezing tight! That is tiiiiiiiiight! Chippewa paying the price for stalling here - he's pushing hard on the arm trying to free himself but it's no use! He's tapped! WOW, quick submission from Matthews - great work!
Ladies and gentlemen, after 3:30 of round 2, we have a winner by way of Submission (Guillotine). Louie Matthews!
|
|
|
|
|
|
|
|
|
|
|
|
|
|
|
|
|
|
|
|
|
|
|
| S |
C
A |
G |
S |
C
B |
G |
|
S |
C |
G |
|
energy
A | B |
|
hype
A | B |
|
pop
A | B |
|
mgr
A | B |
|
FIGHT
RATING
36% |
|
|
|
|
|
|
|
Main event
|
Coming up we have a super heavyweight MMA rules bout between Mark Boortz (ranked 3929 p4p, 120 weight class) and Chris Karter (ranked 4331 p4p, 141 weight class). Chris Karter is the more experienced fighter, so let's see if that makes a difference tonight.
 |
|
 |
| 191 cm
25
189 lbs
1 - 0 - 0 |
|
182 cm
25
190 lbs
1 - 0 - 0 |
BJJ Purple Belt
Solid boxing
Big right hand |
|
BJJ Purple Belt
Decent boxing
Heavy handed |
|
| |
|
Ladies and gentlemen. This fight is 3 rounds, in the super heavyweight division.
Introducing the fighter to my left, fighting out of the red corner.
With a record of
1 - 0 - 0, fighting out of New York, Mark Boortz!
And introducing the fighter to my right, fighting out of the blue corner.
With a record of
1 - 0 - 0, fighting out of St Petersburg, Chris Karter!
The judges for this bout are James Glass, Andrew Berry and James Ackerman.
The bell rings for round one and we are underway!
Karter walks into a stiff left hand from Boortz.
Karter ducks under a wild hook from Boortz.
Boortz lands a vicious shot with the stealth of a sniper and the strength of a viper. Are vipers that strong? I can think of lots of things that are stronger than a viper - not many rhyme with sniper though.
Karter's hands are dropping dangerously low here and Boortz connects clean with a right hook that sends him down to one knee! Karter scrambles back to his feet.
Boortz lands a leg kick that knocks Karter off balance momentarily.
Karter punishes Boortz's body with a nice straight punch.
Boortz throws a front kick aimed at Karter's knee but Karter avoids it well.
Boortz listening to his corner there, landing a nice uppercut.
Boortz moves into the clinch.
Boortz struggles to land a body shot inside as Karter controls his hands.
Karter tries to break free but Boortz pushes him back against the cage.
Karter misses with some punches.
Boortz is trying to pull guard but Karter turns him against the cage and we stay in the clinch.
Karter tries to pull guard but Boortz won't allow it.
This has been an exciting period of action!
Karter is trying to slow down the pace in the clinch, to catch his breath.
Boortz scores with a shot to the side of Karter's head.
Boortz has Karter pressed against the cage, preventing Karter from circling away and getting back to striking at range.
That's one minute gone in the round.
Boortz blocks a couple of punches on the inside.
A head punch blocked on the inside by Karter.
Boortz lands a short shot on the inside that snaps the head of Karter backwards.

Karter is rocked!
Boortz unloads with a big right hand that wobbles Karter! He's leaning against the cage trying to keep his feet but Boortz is unloading with more strikes now! Karter drops to his knees and the referee stops the fight for a TKO!
Ladies and gentlemen, after 1:20 of round 1, we have a winner by way of TKO (Strikes). Mark Boortz!
|
|
|
|
|
|
|
|
|
|
|
|
|
|
|
|
|
|
|
|
|
|
|
| S |
C
A |
G |
S |
C
B |
G |
|
S |
C |
G |
|
energy
A | B |
|
hype
A | B |
|
pop
A | B |
|
mgr
A | B |
|
FIGHT
RATING
59% |
|
|
|
|
|
|
|
|
|
|
