 |
ROTI-09 PBP Commentary |
Undercard bout
|
|
|
|
Undercard bout
|
|
|
|
Undercard bout
|
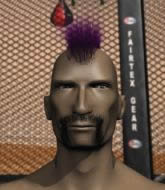
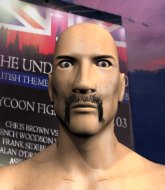
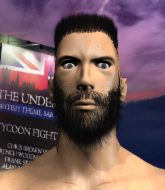
Coming up we have a middleweight MMA rules bout between King Boyce (ranked 5474 p4p, 556 weight class) and Sammy Skewers (ranked 5316 p4p, 549 weight class). We have two fighters making their debuts here, so let's see who comes out of this one with their first professional victory.
 |
|
 |
| 192 cm
18
190 lbs
0 - 0 - 0 |
|
177 cm
18
185 lbs
0 - 0 - 0 |
BJJ Blue Belt
Basic striking
Big heart |
|
Good wrestler
Brawler
Solid chin |
|
| |
|
Ladies and gentlemen. This fight is 3 rounds, in the middleweight division.
Introducing the fighter to my left, fighting out of the red corner.
With a record of
0 - 0 - 0, fighting out of The Island, King Boyce!
And introducing the fighter to my right, fighting out of the blue corner.
With a record of
0 - 0 - 0, fighting out of The Island, Sammy Skewers!
The judges for this bout are David Hoff, Michael Johnstone and Dirk Anderson.

The bell rings for round one and we are underway!
Skewers looks for a takedown but Boyce sprawls well.
Boyce tries to clinch up.

Boyce takes the fight into the clinch.
Boyce lands a knee to the head there! That was nasty!
A knee to the head by Boyce.
Boyce tries a knee to the head but he's missed.
Boyce tries to land a knee to the head but misses.
Boyce with the Thai clinch. He's looking to land a big knee but he's not managed it this time.
Boyce utilising his Muay Thai to score with a knee to the body.
Boyce lands a good knee to the midsection. Skewers won't want to take too many of those.
Skewers changes levels and goes for a takedown here. Boyce fights it off and pushes away nicely.
Skewers throws a right and a left that both miss.
Boyce is looking to take this fight into the clinch.
Skewers shoots in but Boyce avoids the takedown attempt easily.
King Boyce has stuffed three takedown attempts in the round now. That's going to take a lot out of Sammy Skewers.

That's one minute gone in the round.
Boyce tries to clinch up.
The fight moves into the clinch position.
Boyce connects with a knee to the head.
Boyce landing some nice looking knees to the body.
Boyce with the Thai clinch, lands a knee to the head.
Boyce using the Thai clinch to land knees to the body.
Skewers looks winded!
Skewers jumps guard but Boyce turns him against the cage and keeps the fight standing.
Boyce scores a nice knee to the body.
Boyce landing some nice looking knees to the body.
Knees in the clinch landing for Boyce.
Kneeeeees! The crowd are calling for knees to the body. Boyce obliges.
This has been an exciting period of action!
Boyce landing knees to the body.
Boyce lands a nice knee to the body.
Boyce lands a knee to the head there! That was nasty!

That's two minutes gone in the round.
Skewers avoiding damage as Boyce throws knees to the body.
Boyce looking to throw knees to the head but Skewers is blocking nicely.
Skewers goes for a takedown attempt but Boyce pushes him away and we're back to fighting at a distance.
Skewers throws a big shot that misses.
Boyce tries to clinch but Skewers is having none of it.
Boyce fails in his attempt to clinch.
Boyce moves in looking to clinch but Skewers pushes him off.
Boyce is looking to clinch but Skewers is avoiding it.
Boyce is looking to clinch.
Boyce moves into the clinch successfully.
A knee to the head by Boyce.
Boyce with the Thai clinch, lands a knee to the head.
Skewers is trying to push Boyce away but Boyce has him pressed against the cage, so he's going nowhere.
Skewers looking to slow down the pace here.
Skewers on the defensive, avoiding the knees to the body.

That's three minutes gone in the round.
Boyce landing knees to the body. They look like they could hurt.
Boyce with a knee to the head.
Skewers trying to stall but Boyce improves his position.
Boyce looking to throw knees to the head but Skewers is blocking nicely.
Skewers on the defensive, avoiding the knees to the body.
Boyce tries a knee to the head but Skewers blocks it.
Skewers on the defensive, avoiding the knees to the body.
Skewers is trying to push Boyce away but Boyce has him pressed against the cage, so he's going nowhere.
Boyce with an attempt at a knee that misses.
Boyce missing with knees to the body.
Boyce tries to land a knee to the body but he is off balance and Skewers avoids it.
Boyce using the Thai plumb to throw knees but Skewers has his back arched nicely, preventing the strike.

Skewers gets a trip takedown into half guard.

Boyce is looking to sinch up a guillotine here but Skewers pulls his head out easily.
Skewers wants to free his trapped foot but Boyce is holding on for dear life with his legs.

That's four minutes gone in the round.
Skewers scoring with strikes to the body and head.
Skewers wants to control but Boyce is keeping him busy.
The ref warns both fighters not to hold the cage as they work up against the meshing.
The crowd cheering loudly, showing their appreciation for the quality fight we're seeing here.
Boyce looks like he's trying to stand up.
Boyce tries to get to full guard but Skewers has control of the leg.
Boyce trying to control from the bottom.
Boyce is looking to sinch up a guillotine here but Skewers pulls his head out easily.
Skewers passes the half guard and he's now in mount! Big trouble for Boyce!
Skewers tries to control but Boyce wriggling away.
And thats the end of the round the fighters go back to their corners.
King Boyce dominated that round.
The corners get their ten second warning. Both fighters stand from their stools and stare eachother down, ready to get back to the action.

Skewers shoots in for a double leg but Boyce sprawls well. That's going to sap some energy.
Boyce avoids a kick to the body.
Boyce moves in looking to clinch but Skewers pushes him off.
Boyce doesn't manage to clinch there - Skewers circles away.
Boyce tries to close the distance and clinch up but Skewers swats him away and circles back towards the center.
Boyce tries to clinch up against the cage, rushing in to close the distance. Skewers manages to break the clinch and circles back to the middle of the mat.
Boyce sets himself, and Skewers steps forward looking for the clinch! Boyce avoids it this time.
Boyce has managed to clinch.
Boyce putting his Muay Thai to good use. He has Skewers in a tight clinch and is doing some damage with knees to the body.
Skewers tries to score a body lock takedown but Boyce shows good agility there to stay on his feet.
Boyce lands a knee to the head.
Boyce landing knees to the body.
We've had a slow start to the round here - hopefully the action picks up.
Boyce lands a knee to the head.
Boyce landing knees to the body.
Boyce lands a knee to the head there! That was nasty!
Both fighters are absolutely exhausted here.
Wooooo! Give it up for these two warriors! They are putting on a show!
Boyce using the Thai clinch to land knees to the body.
Boyce lands a nice knee to the body.
That's one minute gone in the round.
Skewers takes a knee to the side of the body.
Boyce with a knee to the head.
Boyce misses with a knee to the head.
Boyce landing some nice looking knees to the body.
Boyce keeps the fight in the clinch, despite Skewers's efforts to push away.
Boyce is defending well against a takedown attempt.
King Boyce has stuffed three takedown attempts in the round now. That's going to take a lot out of Sammy Skewers.
Boyce with the Thai clinch, lands a knee to the head.
Boyce tries a knee to the head but Skewers blocks it.
Skewers has dropped down and is looking to force the takedown but it's defended by Boyce after a bit of a struggle.
Boyce is really dominating this fight. Is there anything that Skewers can do to turn this around?
Boyce lands a knee to the head there! That was nasty!
Skewers wants to break free. God knows he wants to breaaaak freeee.
Skewers misses with the head strike.
Skewers wants a takedown.
Boyce lands a knee to the body.
That's two minutes gone in the round.
Boyce landing some nice looking knees to the body.
Skewers drops to a knee looking for a takedown but Boyce gets the underhooks and prevents it.
Boyce utilising his Muay Thai to score with a knee to the body.
The fans in attendance giving it up for the two fighters, who have really let it all hang out in the last minute or so!
Boyce lands a nice knee to the body.
Skewers takes a knee to the side of the body.
Boyce with the Thai clinch, lands a knee to the head.
Skewers lands a takedown into guard.
Boyce manages to sweep nicely, so he's now on top. Skewers manages to get himself to full guard.

Boyce controlling from the guard. I say controlling but really, he's stalling.
We get told so often about how wrestlers don't like to be on their backs. Let's see if Skewers can do anything to dispel that myth.
Skewers is working an open guard here, looking to improve his position. No doubt that will leave him open to counters but at least he's being more offensive.
That's three minutes gone in the round.

Boyce avoids a guillotine attempt easily.
Boyce drops back looking for a leg! Skewers is in trouble here! The fighters roll with the hold and Skewers manages to kick Boyce off! Boyce jumps back into Skewers's guard.
Boyce stands up and looks to throw the legs aside to pass to side control. Skewers swivels though and keeps the full guard.
Boyce trying to stand up but can't free himself from Skewers's guard.
That's four minutes gone in the round.
A lull in the action here being met with boos from the crowd.
Skewers keeping moving, preventing Boyce from controlling successfully.
Sammy Skewers has got the better of the ground game so far.
Skewers tries to land a sweep but no joy.
Boyce trying to control the position from guard on top but Skewers is wriggling around, looking for whatever he can.
Boyce trying to stand up but can't free himself from Skewers's guard.
Skewers looking to hit a scissor sweep but Boyce is one step ahead there.
Boyce advances position into side control!
Boyce wants to stand but Skewers is controlling his arm.
And thats the end of the round the fighters go back to their corners.
King Boyce dominated that second round.
The fighters' corners scream their final instructions, as the referee calls time. Here we go, back to the action! This is the final round!

Skewers swats away the attempt to clinch by Boyce.
Boyce tries to clinch up against the cage, rushing in to close the distance. Skewers manages to break the clinch and circles back to the middle of the mat.
Boyce is looking to clinch.
Skewers swings away with a counter right hand but no contact made.
Boyce moves out of range of the body kick from Skewers.
Skewers throws a front kick aimed at Boyce's knee but Boyce avoids it well.
Boyce doesn't manage to clinch there - Skewers circles away.
Boyce doesn't manage to clinch there - Skewers circles away.
Boyce wants to clinch up but Skewers keeps it at a distance.
Boyce tries to clinch up but Skewers circles away and keeps his distance.
Boyce tries to clinch up but Skewers circles away and keeps his distance.
We've had a slow start to the round here - hopefully the action picks up.
Boyce tries to clinch but Skewers is having none of it.
Skewers fakes a strike and closes the distance, dragging Boyce to the ground. Skewers is now in Boyce's guard.
Skewers takes a big intake of breath there - he's definitely tired.
Boyce wants to sweep here but Skewers controlling him for the moment.
Boyce looking for a guillotine here but Skewers defends easily.
That's one minute gone in the round.
Skewers controlling from the guard. I say controlling but really, he's stalling.
Skewers has a momentary lapse of concentration, allowing Boyce to throw up a leg and lock on what appears to be a pretty tight triangle! Skewers is fighting it off but it's all too little too late - Boyce pulls down on the head and he's put Skewers to sleep! This one is all over!
Ladies and gentlemen, after 1:37 of round 3, we have a winner by way of Submission (Triangle). King Boyce!
|
|
|
|
|
|
|
|
|
|
|
|
|
|
|
|
|
|
|
|
|
|
|
| S |
C
A |
G |
S |
C
B |
G |
|
S |
C |
G |
|
energy
A | B |
|
hype
A | B |
|
pop
A | B |
|
mgr
A | B |
|
FIGHT
RATING
61% |
|
|
|
|
|
|
|
Undercard bout
|
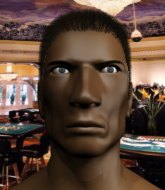
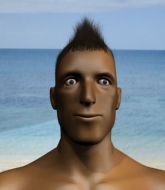
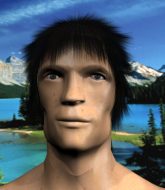
Coming up we have a light heavyweight MMA rules bout between Arnold Dalton (ranked 7355 p4p, 627 weight class) and Piet Smit (ranked 7277 p4p, 623 weight class). Smit has chosen Baby Got Back as his entrance music. The fight MMA fans around the world have waited their entire lives for!
 |
|
 |
| 180 cm
25
212 lbs
0 - 1 - 0 |
|
188 cm
25
210 lbs
0 - 1 - 0 |
Decent wrestler
Solid boxing
Granite chin |
|
BJJ Purple Belt
Brawler
Tends to cut |
|
| |
|
Ladies and gentlemen. This fight is 3 rounds, in the light heavyweight division.
Introducing the fighter to my left, fighting out of the red corner.
With a record of
0 - 1 - 0, fighting out of The Island, Arnold Dalton!
And introducing the fighter to my right, fighting out of the blue corner.
With a record of
0 - 1 - 0, fighting out of The Island, Piet Smit!
The judges for this bout are Winston Alpacca, Dirk Anderson and David Hoff.
The bell rings for round one and we are underway!
Dalton scores with a hook.

Smit gets a clinch.
Dalton misses with a short punch on the inside.
Smit is looking to take this one to the mat.
Dalton misses with a short punch on the inside.
Smit with the Thai clinch. He's looking to land a big knee but he's not managed it this time.
Smit is looking for a takedown.
Smit has a body lock and is looking for a takedown. Dalton is bouncing around trying to prevent the takedown and somehow he has indeed managed to stay on his feet.
Arnold Dalton has stuffed three takedown attempts in the round now. That's going to take a lot out of Piet Smit.
Dalton misses with a hook to the ribs.
Dalton struggles to land a body shot inside as Smit controls his hands.
Dalton misses with the head strike.
We've had a slow start to the round here - hopefully the action picks up.
Smit blocking some punches.
Dalton throws a blind hook that connects with the side of Smits head.
Smit taking a breather.
Dalton misses with a hook to the ribs.
That's one minute gone in the round.
Dalton misses with a hook from the clinch.
Dalton has a couple of punches blocked by Smit.
Dalton throws a punch but it's blocked by Smit.
Smit displaying some good clinch control by pressing Dalton up against the cage.
A head punch blocked on the inside by Smit.
Smit blocks a couple of punches on the inside.
Smit blocks a punch to the side of the head.
Dalton lands a right uppercut that snaps the head of Smit backwards.
Dalton misses with some punches.
Smit is looking for a takedown up against the cage. Dalton gets underhooks though and prevents the takedown attempt.
Dalton misses with a punch on the inside.
Dalton misses with a short punch on the inside.
That's two minutes gone in the round.
Dalton softening up his opponent with strikes, against the cage.
With the fighters clinched against the cage, Dalton creates a bit of distance for himself and scores with a nice uppercut.
Dalton pushes Smit back against the cage and lands a hook to the side of the head.
An uppercut on the inside fails to land for Dalton.
Dalton misses with a punch on the inside.
Dalton looks to be in better condition than last time we saw him fight. Obviously he's been working hard on his cardio.
Dalton misses with a body punch.
An uppercut on the inside fails to land for Dalton.
Dalton lands with a short punch from the clinch.
Dalton struggles to land a body shot inside as Smit controls his hands.
Dalton throws a head punch that misses.
Dalton being controlled against the cage.
This has been an exciting period of action!
Dalton tries to land a shot to the body but it's blocked.
That's three minutes gone in the round.
Dalton scores with a nice hook to the head.
Smit blocks a knee to the body. He'll have a nicely bruised forearm in the morning.
Smit drops down for a takedown but doesn't get it.
Smit is looking for a takedown.
Dalton content to slow the pace in the clinch.
Dalton tries a shoulder strike but it doesn't do any damage.
Dalton prevents a takedown attempt there.
We've been informed that Smit has been working hard on his conditioning in the buildup to the fight.
A real battle for position is taking place between these two warriors.
Smit has hold of a leg and is looking for a trip takedown. Dalton avoids it nicely though and we remain in the clinch.
A shot in the inside from Dalton.
Smit tries to score a body lock takedown but Dalton shows good agility there to stay on his feet.
That's four minutes gone in the round.
Smit is trying to drag Dalton to the mat but Dalton just about manages to keep his footing. He used the cage to his advantage there.
Dalton is stalling here.
Dalton misses with a punch on the inside.
Dalton throws a head punch that misses.
Smit drops down looking for an ankle pick but Dalton pulls his leg out and moves away.
Dalton throws a looping overhand right but Smit ducks down to avoid it.
A swing and a miss from Dalton.
Arnold Dalton is looking to keep the fight on the feet at all costs.
Dalton circles away from the clinch attempt
and Dalton counters with a stiff right hand.
The crowd thankful this round is nearly over.
A left lands for Dalton.
Sloppy strikes from Dalton. Those never looked like landing.
Smit closes the distance and presses his opponent up against the cage.
And thats the end of the round the fighters go back to their corners.
Arnold Dalton dominated that round.
The minute break is over - no more time for sponges and pep talks - back to the action!
Dalton throws the left hand but Smit avoids the punch easily.
Dalton closes the distance and clinches.
Dalton is defending well against a takedown attempt.
Dalton tries a shoulder strike but it doesn't do any damage.
Smit goes for a takedown attempt but Dalton pushes him away and we're back to fighting at a distance.
Smit rushes Dalton and presses him up against the cage.
A shot in the inside from Dalton.
Dalton misses with a punch on the inside.
Dalton working aggressively here.
We've had a slow start to the round here - hopefully the action picks up.
Smit blocks a punch to the side of the head.
Dalton has a couple of punches blocked by Smit.
Dalton throws a punch but it's blocked by Smit.
Dalton pushes Smit back against the cage and lands a hook to the side of the head.
Dalton trying to land knees to the body.
That's one minute gone in the round.
Dalton tries a shoulder strike but it doesn't do any damage.
Dalton lands with a short punch from the clinch.
Smit trying to land knees to the body.
Smit blocking some punches.
Smit blocks an uppercut.
Dalton lands a body punch in the clinch.
Dalton swings wildly with an uppercut but Smit uses good head movement to avoid it.
Smit stalling in the clinch.
Smit swings away with an uppercut that misses.
Dalton is struggling to control the position.
An uppercut on the inside fails to land for Dalton.
That's two minutes gone in the round.
Smit blocks a punch to the side of the head.
Dalton prevents a takedown attempt there.
Arnold Dalton has stuffed three takedown attempts in the round now. That's going to take a lot out of Piet Smit.
Smit being controlled against the cage.
Smit is looking for a takedown up against the cage. Dalton gets underhooks though and prevents the takedown attempt.
Smit prevents a body shot from Dalton.
Dalton can't find room to land a body shot as Smit controls the action.
Smit blocking some punches.
Dalton tries to throw a body punch but Smit avoids it by throwing Dalton back against the cage.
Dalton softening up his opponent with strikes, against the cage.
Dalton tries a shoulder strike but it doesn't do any damage.
That's three minutes gone in the round.
Dalton misses with some punches.
Dalton misses with a shot to the kidneys.
Dalton could do with losing a few pounds - he looks very soft around the mid section, to put it politely.
An uppercut on the inside fails to land for Dalton.
Dalton swings wildly with an uppercut but Smit uses good head movement to avoid it.
Dalton throws a head punch that misses.
Dalton throws a punch but it's blocked by Smit.
A head punch blocked on the inside by Smit.
Dalton is really dominating this fight. Is there anything that Smit can do to turn this around?
Dalton lands a short shot on the inside that snaps the head of Smit backwards.
Dalton working aggressively here.
Dalton lands a body shot.
The fighters are pressed against the cage, as the pace of the fight slows.
Dalton misses with the head strike.
That's four minutes gone in the round.
Smit changes levels and goes for a takedown here. Dalton fights it off and pushes away nicely.
Dalton instigates a clinch.
Smit manages to pull guard.
Smit has his hands on Dalton's head, controlling the position.
Smit is trying to keep Dalton in close.
Smit looking for submissions off his back, moving his hips, looking for an opening.
The crowd thankful this round is nearly over.
Dalton is looking to advance position but Smit has hit a scissor sweep - now he's on top in mount!

The crowd are loving this. Great action here.
Dalton working to try and regain half guard.
And thats the end of the round the fighters go back to their corners.
Arnold Dalton dominated that second round.
The fighters' corners scream their final instructions, as the referee calls time. Here we go, back to the action! This is the final round!
Dalton moves into the clinch successfully.
Smit is looking for a takedown.
Dalton misses with a short punch on the inside.
Smit wants a takedown.
Dalton working aggressively here.
Smit has dropped down and is looking to force the takedown but it's defended by Dalton after a bit of a struggle.
Arnold Dalton has stuffed three takedown attempts in the round now. That's going to take a lot out of Piet Smit.
Smit is trying to drag Dalton to the mat but Dalton just about manages to keep his footing. He used the cage to his advantage there.
Arnold Dalton has scored more points in the clinch so far.
Dalton swings away with an uppercut that misses.
We've had a slow start to the round here - hopefully the action picks up.
Dalton displaying some good clinch control by pressing Smit up against the cage.

Smit breaks the clinch and we're back to striking at distance.
That's one minute gone in the round.
No luck for Smit with that takedown attempt.
Dalton appears to be looking for a big counter.
Dalton has taken the fight to the clinch.
A short right from Dalton.
Dalton lands with a short head shot on the inside.
Dalton misses with a hook to the ribs.
Dalton lands a right hand.
Dalton stalls.
Dalton misses with a hook from the clinch.
Dalton stalling in the clinch.
An uppercut on the inside fails to land for Dalton.
Smit blocks a couple of punches on the inside.
That's two minutes gone in the round.
Dalton lands with a quick shot inside that doesn't really do much damage.
Dalton swings away with an uppercut that misses.
Dalton gets through Smit's defenses to land a nice punch to the side of the head.
Smit drops to a knee looking for a takedown but Dalton gets the underhooks and prevents it.
Dalton misses with a hook from the clinch.
Arnold Dalton is fighting for a decision here - he's started to take the cautious approach.
Dalton throws a punch but it's blocked by Smit.
Dalton stops a takedown attempt from Smit.
Dalton throws a punch but it's blocked by Smit.
Dalton working on landing some head shots here - that one got through nicely.
The crowd cheering loudly, showing their appreciation for the quality fight we're seeing here.
Dalton fails to land with a short punch on the inside.
That's three minutes gone in the round.
Smit manages to pull guard. Let's see whether he can land a sub off his back.
Smit looking for submissions off his back, moving his hips, looking for an opening.
The fighters are pressed up against the cage, both looking to find a bit of space to work.
Dalton stands up and looks to throw the legs aside to pass to side control. Smit swivels though and keeps the full guard.
Dalton has a momentary lapse of concentration, allowing Smit to throw up a leg and lock on what appears to be a pretty tight triangle! Dalton is fighting it off but it's all too little too late - Smit pulls down on the head and he's put Dalton to sleep! This one is all over!
Ladies and gentlemen, after 3:35 of round 3, we have a winner by way of Submission (Triangle). Piet Smit!
During a confident post fight interview, Piet Smit thanked all his fans. He seemed very genuine when describing how motivated his fans keep him.
|
|
|
|
|
|
|
|
|
|
|
|
|
|
|
|
|
|
|
|
|
|
|
| S |
C
A |
G |
S |
C
B |
G |
|
S |
C |
G |
|
energy
A | B |
|
hype
A | B |
|
pop
A | B |
|
mgr
A | B |
|
FIGHT
RATING
49% |
|
|
|
|
|
|
|
Undercard bout
|
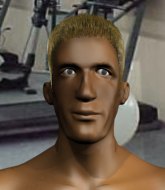
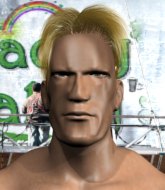
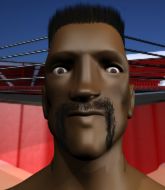
Coming up we have a light heavyweight MMA rules bout between Synbad Calcat (ranked 7392 p4p, 633 weight class) and Drax Tauro (ranked 25495 p4p, 661 weight class). Both these guys have really solid chins. Will we see a standup war or will they both decide that a knockout is unlikely and try to win the fight elsewhere?
 |
|
 |
| 200 cm
25
210 lbs
0 - 1 - 0 |
|
185 cm
25
205 lbs
0 - 2 - 0 |
BJJ White Belt
Solid Muay Thai
Granite chin |
|
BJJ White Belt
Excellent boxer
Powerful |
|
| |
|
Ladies and gentlemen. This fight is 3 rounds, in the light heavyweight division.
Introducing the fighter to my left, fighting out of the red corner.
With a record of
0 - 1 - 0, fighting out of The Island, Synbad Calcat!
And introducing the fighter to my right, fighting out of the blue corner.
With a record of
0 - 2 - 0, fighting out of The Island, Drax Tauro !
The judges for this bout are Winston Alpacca, Bart Greer and Dirk Anderson.
The bell rings for round one and we are underway!
Tauro takes an uppercut right on the button but keeps his composure.
Tauro fakes low and throws an overhand right that catches Calcat on the side of the head.
Tauro swings for the body but Calcat moves out of range.
Tauro misses the shot to the body.
Calcat moves into the clinch.
Calcat misses with a body punch.
Calcat will no doubt start fighting again in a minute but for now he's just having a little rest, leaning Tauro up against the cage.
Tauro digs a right hand into Calcat's ribs. Those have got to be taking their toll on Calcat's gas tank.
Calcat leaning his opponent against the cage.
Tauro lands a body shot.
Calcat definitely looks more muscular than last time we saw him fight.
Calcat tries a shoulder strike but it doesn't do any damage.
We've had a slow start to the round here - hopefully the action picks up.
Calcat tries to throw a body punch but Tauro avoids it by throwing Calcat back against the cage.
Nice body punch from Tauro .
Calcat tries to land a knee to the body but he is off balance and Tauro avoids it.
Calcat tries to throw a body punch but Tauro avoids it by throwing Calcat back against the cage.
Calcat lands an uppercut.
Calcat is trying to maintain a safe position but Tauro gets an underhook and turns Calcat into the cage.
That's one minute gone in the round.
A battle for position here, against the cage.
Tauro will no doubt start fighting again in a minute but for now he's just having a little rest, leaning Calcat up against the cage.
Calcat being controlled against the cage.
A frustrated look appears on Tauro 's face as he tries to break the clinch.
Tauro lands a shot to the body.
Tauro lands a shoulder strike that jolts his opponent's head backwards.
Tauro avoiding damage as Calcat throws knees to the body.
Calcat taking a breather.
Tauro lands on the inside with an uppercut.
Calcat is breathing heavily.
The referee is keeping an eye on Tauro - much more stalling and he will separate the fighters.
Calcat misses with a short punch on the inside.
Calcat is looking to control Tauro 's arms but Tauro gets an underhook and turns him. Now Calcat has his back to the cage.
A nice left hand lands by Tauro .
Tauro is trying to break the clinch but Calcat is controlling him.
That's two minutes gone in the round.
A hook to the body from Tauro .
A head punch blocked on the inside by Tauro .
Tauro misses with a shot to the kidneys.
Tauro 's corner calls for him to break the clinch, which he does.
Tauro uses good footwork to get in and out and land a nice right hand before Calcat has time to react.
Calcat walks straight into an uppercut. Luckily it didn't land flush.
Tauro throws the left hand but Calcat avoids the punch easily.
Fantastic stuff here - a very entertaining period of action, which has drawn cheers from the crowd.
Tauro misses with a looping right.
An attempted straight right counter from Calcat misses the target.
Tauro scores with a sloppy right hand. Calcat should have avoided that one.

Calcat is rocked!
Tauro lands with a massive overhand right! Stick a fork in Calcat - he's out cold! Ermm... I think I just mixed my metaphors but yeah... That was a nice KO! Big win for Tauro !
Ladies and gentlemen, after 2:38 of round 1, we have a winner by way of KO (Punch). Drax Tauro !
|
|
|
|
|
|
|
|
|
|
|
|
|
|
|
|
|
|
|
|
|
|
|
| S |
C
A |
G |
S |
C
B |
G |
|
S |
C |
G |
|
energy
A | B |
|
hype
A | B |
|
pop
A | B |
|
mgr
A | B |
|
FIGHT
RATING
44% |
|
|
|
|
|
|
|
Undercard bout
|
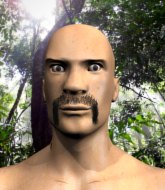
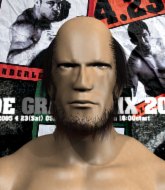
Coming up we have a middleweight MMA rules bout between John Edmonds (ranked 5333 p4p, 551 weight class) and Porky Nobriega (ranked 7243 p4p, 608 weight class). Edmonds's entrance music is Frankie Smith - Double Dutch Bus. A fine choice. John Edmonds has the edge in experience - let's see if he can make that count tonight.
 |
|
 |
| 185 cm
18
190 lbs
1 - 0 - 0 |
|
169 cm
18
192 lbs
0 - 1 - 0 |
Decent wrestler
Counter fighter
KO power |
|
BJJ White Belt
Good kicks
Determined |
|
| |
|
Ladies and gentlemen. This fight is 3 rounds, in the middleweight division.
Introducing the fighter to my left, fighting out of the red corner.
With a record of
1 - 0 - 0, fighting out of The Island, John Edmonds!
And introducing the fighter to my right, fighting out of the blue corner.
With a record of
0 - 1 - 0, fighting out of The Island, Porky Nobriega!
The judges for this bout are Dirk Anderson, Bart Greer and Winston Alpacca.
The bell rings for round one and we are underway!
Nobriega falls off balance throwing a combination

and Edmonds counters with a driving takedown into guard. Nice work there by Edmonds.
Edmonds is standing up over Nobriega. Nobriega looks to escape but Edmonds dives into side control.
Edmonds has hold of Nobriega's arm here. He's working for an Americana. It looks like he might have it! Nobriega tries to escape but he's just digging himself in deeper - Edmonds cranks the arm and Nobriega screams in pain! The ref makes a decision and ends the fight before the tap - no complains from Nobriega, who is just happy to have his arm attached to his body.
Ladies and gentlemen, after 0:32 of round 1, we have a winner by way of Submission (Americana). John Edmonds!
John Edmonds seemed lost for words in his post fight interview but he remembered to thank his fans and directed everyone to his website.
|
|
|
|
|
|
|
|
|
|
|
|
|
|
|
|
|
|
|
|
|
|
|
| S |
C
A |
G |
S |
C
B |
G |
|
S |
C |
G |
|
energy
A | B |
|
hype
A | B |
|
pop
A | B |
|
mgr
A | B |
|
FIGHT
RATING
100% |
|
|
|
|
|
|
|
Undercard bout
|
Coming up we have a middleweight MMA rules bout between Dae Won Bong (ranked 5614 p4p, 561 weight class) and Newfie Islander (ranked 5518 p4p, 559 weight class). Bong kept the crowd waiting but all that was forgotten when his ring entrance music started. The incomparable musical genius that is Cypress Hill - Hits From the Bong. Islander has chosen I Feel Like A Newfie as his entrance music. Over to our ring announcer for the fighter introductions!
 |
|
 |
| 185 cm
18
195 lbs
1 - 0 - 0 |
|
182 cm
18
188 lbs
0 - 0 - 0 |
BJJ White Belt
Counter fighter
Prefers standup |
|
BJJ White Belt
Excellent MT
Heavy handed |
|
| |
|
Ladies and gentlemen. This fight is 3 rounds, in the middleweight division.
Introducing the fighter to my left, fighting out of the red corner.
With a record of
1 - 0 - 0, fighting out of The Island, Dae Won Bong!
And introducing the fighter to my right, fighting out of the blue corner.
With a record of
0 - 0 - 0, fighting out of The Island, Newfie Islander!
The judges for this bout are David Hoff, Daniel Franklin and Santiago Holmes.
The bell rings for round one and we are underway!
Islander tries to clinch but Bong moves out of range.
Bong circles away from the clinch attempt
and Bong cracks him with a counter punch right on the button.
Bong looks to land a right hand but Islander moved out of range.
Bong throws a monster uppercut resembling something out of street fighter but it doesn't land.
Islander closes the distance looking to clinch
and Bong counters with a good right hand that lands right on the jaw.
Islander moves to clinch but Bong breaks away
letting Bong counter with a right hand.
We've had a slow start to the round here - hopefully the action picks up.
Islander closes the distance looking to clinch
enabling Bong to counter with a crisp jab.
Bong seems to be moving with more speed, compared to his last bout. He must have been working on that in the gym.
Bong throws a couple of head shots and lands with the final one - a decent hook, which struck Islander on the side of the head.
Bong swings wildly with a right hand that was never going to find it's target.
That's one minute gone in the round.
Islander darts in trying to clinch
and Bong counters with a nice body shot.
Islander tries to close the distance and clinch up against the cage but Bong paws at him with a jab and circles away.
Islander tries to clinch up against the cage, rushing in to close the distance. Bong manages to break the clinch and circles back to the middle of the mat.
Bong circles away from the clinch attempt.
Bong circles away from the clinch attempt
and Bong connects with a straight left hand counter down the middle.
Islander drives through and clinches with Bong against the cage.
Islander lands with a quick shot inside that doesn't really do much damage.
A short right from Bong.
Islander working some nice short punches in the clinch.
Bong stalling the fight.
Bong goes for a body shot but it's blocked.
Islander tries to break free but Bong pushes him back against the cage.
That's two minutes gone in the round.
Both fighters working to control the clinch.
Bong blocking some punches.
Islander dictating the pace here, as the fighters clinch against the cage.
Bong has had enough of the clinch but Islander keeps him there for the moment.
Islander is trying to push Bong away but Bong has him pressed against the cage, so he's going nowhere.
Islander presses Bong against the cage and delivers a mid-strength body shot.
A short right from Bong.
The fans in attendance giving it up for the two fighters, who have really let it all hang out in the last minute or so!

Bong breaks the clinch and we're back to striking at distance.
Islander closes the distance but Bong moves to the side
and Bong counters with a lovely straight right hand!
Islander wants to clinch up but Bong keeps it at a distance.
Islander misses with a two punch combination.
Islander looks to clinch
and Bong counters with a straight punch to the midsection.
Islander tries to close the distance and clinch but Bong swats him to one side with an open hand palm strike and circles away.
Islander tries to clinch but Bong moves away
and Bong counters with a straight right hand.
Islander tries to clinch
letting Bong counter with a right hand.
That's three minutes gone in the round.
Islander moves to clinch but Bong breaks away
and Bong counters with a good right hand that lands right on the jaw.

Islander is rocked!
Islander wants to clinch but Bong slips to the side
and Bong counters with a nice uppercut.
Islander is still on wobbly legs! Can Bong finish him?
Islander closes the distance looking to clinch
and Bong counters with a straight right hand.
Islander misses with a combination
and Bong counters with a big right hand! Oh Islander is in trouble here! Bong follows up with more strikes and that's it! The ref has stopped it!
Ladies and gentlemen, after 3:37 of round 1, we have a winner by way of TKO (Strikes). Dae Won Bong!
During a confident post fight interview, Dae Won Bong thanked all his fans. He seemed very genuine when describing how motivated his fans keep him.
|
|
|
|
|
|
|
|
|
|
|
|
|
|
|
|
|
|
|
|
|
|
|
| S |
C
A |
G |
S |
C
B |
G |
|
S |
C |
G |
|
energy
A | B |
|
hype
A | B |
|
pop
A | B |
|
mgr
A | B |
|
FIGHT
RATING
46% |
|
|
|
|
|
|
|
Undercard bout
|
Coming up we have a welterweight MMA rules bout between Ren Askcrew (ranked 7426 p4p, 568 weight class) and Trash Warmsley (ranked 5827 p4p, 505 weight class). Over to our ring announcer for the fighter introductions!
 |
|
 |
| 185 cm
25
174 lbs
0 - 1 - 0 |
|
189 cm
18
177 lbs
1 - 0 - 0 |
Good takedowns
Brawler
Good chin |
|
BJJ White Belt
Basic striking
Prefers standup |
|
| |
|
Ladies and gentlemen. This fight is 3 rounds, in the welterweight division.
Introducing the fighter to my left, fighting out of the red corner.
With a record of
0 - 1 - 0, fighting out of The Island, Ren Askcrew!
And introducing the fighter to my right, fighting out of the blue corner.
With a record of
1 - 0 - 0, fighting out of The Island, Trash Warmsley!
The judges for this bout are Bart Greer, Santiago Holmes and Michael Johnstone.
The bell rings for round one and we are underway!
The fight stays on the outside here - Warmsley looks like he's thinking about clinching though.
Warmsley pulls out of a head kick attempt.
Askcrew closes the distance and looks for a trip takedown... aaaand he's got it - Askcrew lands in his opponent's guard.

Askcrew gets to his feet - Warmsley follows without any prompting.
Askcrew throws a series of punches but Warmsley avoids them all with ease.
Askcrew looks to have improved his striking defense since last time we saw him fight.
Askcrew moves into the clinch.
Warmsley tries to land a knee to the head but Askcrew blocks with his arms.
Warmsley swings wildly with an uppercut but Askcrew uses good head movement to avoid it.
Askcrew is looking to break free of the clinch but Warmsley has double underhooks.
We've had a slow start to the round here - hopefully the action picks up.
Warmsley lands with a left to the head.
Warmsley throws a knee to the head but misses.
Warmsley breaks the clinch and we're back to striking at distance.
The fight stays on the outside here - Warmsley looks like he's thinking about clinching though.
That's one minute gone in the round.
Warmsley throws a wild combination but nothing lands.
As Warmsley looks to move away, Askcrew throws a big counter combo but Warmsley just gets out of the way.
Warmsley looks to land a combination but Askcrew avoids it well.
Warmsley misses with a kick to the body.
Warmsley looks more muscular than last time we saw him. He must have been on the weights.
Warmsley throws a right and a left that Askcrew avoids nicely.
Warmsley instigates a clinch.
Warmsley throws a punch but it's blocked by Askcrew.
Warmsley gets double underhooks to prevent a takedown attempt from Askcrew.
Askcrew pulls guard.
Warmsley engaging in some classic timewasting tactics.
Warmsley is looking to stand up but Askcrew won't let him.
Askcrew tries to land a sweep but no joy.
That's two minutes gone in the round.
Warmsley is trying to tuck his arms in to keep them safe but Askcrew has managed to isolate one of them and has got a loose triangle. Warmsley is looking to defend but Askcrew has done well to lock his legs together - this could be big trouble for Warmsley! Askcrew pulls down on the head and a little smile comes across his face - he knows he's got it. Yep, Warmsley taps out and this one is all over!
Ladies and gentlemen, after 2:19 of round 1, we have a winner by way of Submission (Triangle). Ren Askcrew!
|
|
|
|
|
|
|
|
|
|
|
|
|
|
|
|
|
|
|
|
|
|
|
| S |
C
A |
G |
S |
C
B |
G |
|
S |
C |
G |
|
energy
A | B |
|
hype
A | B |
|
pop
A | B |
|
mgr
A | B |
|
FIGHT
RATING
48% |
|
|
|
|
|
|
|
Co-main event
|
Coming up we have a light heavyweight MMA rules bout between Wonderful Dragon (ranked 4657 p4p, 533 weight class) and Rodney Halford (ranked 6924 p4p, 612 weight class). I can't wait for this one - let's get the fighter introductions out of the way and get this one started!
 |
|
 |
| 194 cm
25
210 lbs
1 - 0 - 0 |
|
181 cm
25
200 lbs
0 - 1 - 0 |
Good wrestling
Counter fighter
Self confident |
|
BJJ White Belt
Excellent MT
Determined |
|
| |
|
Ladies and gentlemen. This fight is 3 rounds, in the light heavyweight division.
Introducing the fighter to my left, fighting out of the red corner.
With a record of
1 - 0 - 0, fighting out of The Island, Wonderful Dragon!
And introducing the fighter to my right, fighting out of the blue corner.
With a record of
0 - 1 - 0, fighting out of The Island, Rodney Halford!
The judges for this bout are Michael Johnstone, Peter Branson and David Hoff.
The bell rings for round one and we are underway!
Dragon shoots in for a takedown from distance. He catches Halford napping and manages to drive through into side control!
Halford wants to get back to his feet but Dragon is dominant here and he's now got Halford's back!
The fighters are pressed up against the cage, both looking to find a bit of space to work.
Halford tries to roll but Dragon sticks to his back.
A bit of a pause in the action here. Dragon controlling the positon.
Dragon is throwing punches to the body, looking to soften Halford up.
Dragon lands a shot to the head.
Dragon landing with strikes.
Halford looks more muscular than last time we saw him. He must have been on the weights.
Dragon scores with a nice shot to the head of his opponent. Halford is looking for a way out.
That's one minute gone in the round.
What can Halford do to escape this position? He's going to have to figure it out pretty quick if he wants to stay in the fight!
Dragon is working the ground and pound. Can Halford escape?
Dragon lands with a nice looking elbow that stuns Halford.
Dragon is looking to finish with some ground and pound!
Dragon really has the hooks in deep now - there seems like no escape for Halford.
Dragon scores with punches from the back.
Dragon controlling from the back.
That's two minutes gone in the round.
Dragon lands a shot to the head.
Dragon has the hooks sunk in and you can see the will to fight slowly draining out of Halford's body.
Dragon's ground tactics aren't going to win him many fans. Let's hope he's got fireworks for us if he gets back to his feet because he's not doing much on the ground.
Dragon is punishing Halford with strikes - can he finish him?!
Dragon keeps control of the position easily here as Halford tries to buck him off.
Dragon lands strikes to the head.
Dragon will need to keep those long limbs tucked in whilst he's on the ground, to prevent any submissions.
That's three minutes gone in the round.
Halford is very frustrated here, being controlled quite effectively by Dragon.
The ref warns both fighters not to hold the cage as they work up against the meshing.
Dragon is punishing Halford with strikes - can he finish him?!
So, who will make the next big move? In this position it could be crucial.
Halford grimaces as he takes a shot to the body.
Dragon cracks Halford with a big shot to body and one to the head - really punishing Halford from the back mount here, looking to soften him up.
A bit of a pause in the action here. Dragon controlling the positon.
Dragon seems to have a rather negative gameplan on the ground. He seems keen to just score the takedown and hold down Halford for as long as he can get away with.
Dragon has controlled the position for a good 20 seconds, which will no doubt be starting to frustrate his opponent.
Dragon has been looking to land a fair amount of strikes on the ground. He might be looking to soften his opponent up in order to work for a submission.
Dragon scores with strikes from the back.
That's four minutes gone in the round.
Dragon is riding his opponent, not letting Halford buck him off.
The referee is taking a good look at Halford as he is on the wrong end of some big shots from Dragon!
I would not like to be Halford right now.
Halford covers up after that shot from Dragon.
A bit of a pause in the action here. Dragon controlling the positon.
And thats the end of the round the fighters go back to their corners.
Wonderful Dragon dominated that round.
That's the end of the round. The referee orders the cornermen out of the cage so we can get back down to business.
Halford connects with an inside leg kick.
Halford throws a body kick that digs right into the meat.
Halford displays good takedown defense there as he swats away a double leg from Dragon.
And Halford responds with a good body kick, but Dragon manages to step out the way in time.
Halford throws a body kick that digs right into the meat.
Dragon gets to the clinch - let's see what his plan is here.
Halford looking to stall.
We've had a slow start to the round here - hopefully the action picks up.
Dragon successfully pulls guard.
Dragon has control of Halford's left arm, preventing Halford from doing any damage.
Dragon continues to stall.
That's one minute gone in the round.
Dragon striking off his back.
We've had a lack of effective grappling in the last minute or so, which could well see a referee standup.
That's two minutes gone in the round.
A few boos can be heard. I'm sure they will multiply if the fighters don't pick up the pace.
Halford wants to control from the top but Dragon keeps moving.

The referee has motioned to the fighters to stand back up. He just wasn't happy with the level of activity.
No joy there for Halford, who threw a few shots but didn't land.
Dragon throwing a counter right hand but Halford manages to avoid it.
Dragon takes one to the chin there.
Halford lands a jab, followed by a cross and another cross, as Dragon backs up against the cage.
Halford throws a body shot but no joy.
Halford looking to land some kicks to the body here.
Halford lands a jab.
Halford looks to land a combination but Dragon avoids it well.
Dragon shoots and misses
and Halford counters with a right hand to the body.
Halford tries a switch kick but it misses it's target.
A counter left hand to the body from Dragon misses its target.
Halford lands with a nice body punch.
A kick lands to the mid section there for Halford.
Rodney Halford seems to be getting the better of the standup.
That's three minutes gone in the round.
Halford throws a hook to the body but it doesn't connect.
Dragon takes a shot right to the liver - Bas would have been proud of that punch.
Halford digs a good body shot into Dragon's ribs.
Rodney Halford is looking to keep the fight on the feet at all costs.
Halford thows a body kick. Dragon tries to catch it but that hurt him.
Dragon clinches up against the cage.
Halford is trying to maintain a safe position but Dragon gets an underhook and turns Halford into the cage.
Dragon tries to pull guard but Halford holds him up against the cage and eventually Dragon drops back down to his feet.
That's three failed takedown attempts in the round for Wonderful Dragon. That's going to take a lot out of him.
Dragon jumps guard but Halford stands there with Dragon around his waist. Dragon gives up and drops back to his feet. We remain in the clinch.
Halford wants to push off and get back to the center of the mat but Dragon has him pressed against the cage.
Halford tries to stall but Dragon uses the opportunity to gain a better position.
That's four minutes gone in the round.
Dragon fails to pull the fight into his guard.
Dragon throws a vicious knee straight up the middle but Halford blocks it with crossed arms.
Dragon jumps guard but Halford turns him against the cage and keeps the fight standing.
Dragon is looking for a takedown up against the cage. Halford gets underhooks though and prevents the takedown attempt.
Dragon is trying to pull guard but being pressed up against the cage enables Halford to keep the fight standing.
Halford wants to break the clinch but can't.
Halford looks like he'd prefer to be striking at range right now.
Dragon is trying to pull guard but being pressed up against the cage enables Halford to keep the fight standing.
Dragon jumps guard but his hands slip and he falls flat on his back. Well, he's made himself look a right mug there, as Halford walks away with a smile on his face. Dragon gets slowly back to his feet and shakes his head.
The crowd thankful this round is nearly over.
Dragon takes a nasty kick to the mid section... That should keep him thinking. Does he try and block and risk a head kick landing?
Both fighters are absolutely exhausted here.
Dragon takes a push kick to the midsection and stumbles backwards.
Dragon will be looking to protect his midsection after taking some solid kicks to the body.
Halford tries a head kick but it misses.
And thats the end of the round the fighters go back to their corners.
Rodney Halford showed his class in that round. I'd imagine he'll take it on all the scorecards.
The referee calls time. The cornermen exit stage left and we're back to business. So, we enter the final round. Let's see if either fighter can bring us a finish, or whether we're going to the judges scorecards.
Dragon is trying hard to land a takedown here. Halford sprawls well and keeps this one on the feet.
No luck for Dragon with that takedown attempt.
Halford misses with a half-hearted attempt at a head kick.
Dragon takes a kick to the body and keeps moving.
Dragon takes a body punch but keeps moving.
Dragon takes a body punch that cleary hurt but he's trying not to show any weakness.
Halford connects with a leg kick. Dragon looked like he was expecting something else and didn't defend it.
We've had a slow start to the round here - hopefully the action picks up.
Dragon takes a shot right to the bread basket.
Dragon doesn't react quick enough there as he takes a shot to the body.
Both fighters are breathing heavily.
Halford changes levels and scores with a jab to the body.
Dragon closes the distance looking to clinch
and Halford counters with a right hand to the body.
That's one minute gone in the round.
Halford lands a jab. Then a cross. Then finally a nice hook to the body. Good work there by Halford.
Dragon on the wrong end of a kick to the body.
Halford scores with a jab to the body.
Halford throws a feint and then finishes with a kick to the body.
Dragon shoots in for a takedown - he's clinched up with Halford but Halford pushes him off and we're back to square one.
That's three failed takedown attempts in the round for Wonderful Dragon. That's going to take a lot out of him.
Dragon takes a nasty kick to the mid section... That should keep him thinking. Does he try and block and risk a head kick landing?
Dragon walks forward, straight into a front kick from Halford.
That's two minutes gone in the round.
Halford lands with a nice combination. Dragon backs away looking to recover.
The crowd cheering loudly, showing their appreciation for the quality fight we're seeing here.
Halford lands with a shot to the body.
Halford lands a jab to the nose.
Dragon with a lazy takedown attempt
and Halford counters with a body kick that brings a smile to the face of both fighters.
Halford lands with a nice body kick.
Halford lands with a nice body punch.
Halford lands with a kick to the ribs.
Halford is throwing a lot of body shots here, looking to wear down Dragon rather than just go for the knockout.
Dragon takes a body punch but keeps moving.
Halford changes levels and scores with a jab to the body.
Halford connects with a leg kick. He turned his hip over nicely there.
Thud! ouch! good body kick from Halford - that will leave a mark!
That's three minutes gone in the round.
Halford lands a kick to the ribs of his opponent. Nice work there - in and out in a flash.
Halford fakes and then throws a beautiful body shot. Dragon looks a bit winded and takes a step backwards to take a breath.
Wonderful Dragon has stepped it up - he knows he needs a finish here!
Halford connects with a body shot.
Halford lands with a good body shot.
Rodney Halford seems to be the more aggressive standup fighter in this bout.
Halford punishes Dragon's body with a nice straight punch.
Rodney Halford is fighting for a decision here - he's started to take the cautious approach.
Halford thows a body kick. Dragon tries to catch it but that hurt him.
Halford works Dragon's body with a nice hook.
Halford keeps the fight on the outside.
A telegraphed takedown attempt from Dragon is defended easily by Halford.
Halford thinks about the counter body kick.
That's four minutes gone in the round.
Halford thows a body kick. Dragon tries to catch it but that hurt him.
Halford lands a leg kick. The shin dug right into the meat of the thigh.
Halford ducks down and throws a hook to the body.
The crowd are loving this. Great action here.
The fight stays on the outside here - Dragon looks like he's thinking about clinching though.
Halford throws a front kick that sends Dragon stumbling back into the cage.
Halford lands a body shot.
And that's the end of the fight!
Rodney Halford comfortably won the final round on my scorecard.
I think Halford has won this one but let's see whether the judges agree with me. Over to the ring announcer for the scorecards.
Ladies and gentlemen, after 3 rounds of action, we go to the scorecards for a decision.
Judge Michael Johnstone scores the fight for Rodney Halford!
Judge Peter Branson scores the fight for Rodney Halford!
Judge David Hoff scores the fight for Rodney Halford!
Rodney Halford wins by unanimous decision!
|
|
|
|
|
|
|
|
|
|
|
|
|
|
|
|
|
|
|
|
|
|
|
| S |
C
A |
G |
S |
C
B |
G |
|
S |
C |
G |
|
energy
A | B |
|
hype
A | B |
|
pop
A | B |
|
mgr
A | B |
|
FIGHT
RATING
50% |
|
|
|
|
|
|
|
Main event
|
Coming up we have a light heavyweight MMA rules bout between JT Smith (ranked 4563 p4p, 527 weight class) and King Diamond (ranked 4051 p4p, 483 weight class). JT Smith has the edge in experience - let's see if he can make that count tonight.
 |
|
 |
| 185 cm
24
218 lbs
1 - 0 - 0 |
|
184 cm
25
200 lbs
1 - 0 - 0 |
Good wrestling
Basic striking
Big heart |
|
BJJ White Belt
Excellent boxer
Tends to cut |
|
| |
|
Ladies and gentlemen. This fight is 3 rounds, in the light heavyweight division.
Introducing the fighter to my left, fighting out of the red corner.
With a record of
1 - 0 - 0, fighting out of The Island, JT Smith!
And introducing the fighter to my right, fighting out of the blue corner.
With a record of
1 - 0 - 0, fighting out of The Island, King Diamond!
The judges for this bout are David Hoff, Bart Greer and Daniel Franklin.
The bell rings for round one and we are underway!
Smith shoots in for a takedown - he's clinched up with Diamond but Diamond pushes him off and we're back to square one.
Smith moves into range and clinches up with Diamond.
Diamond stays in close to his opponent and throws a right hand to the body.
Diamond misses with a knee strike.
Smith wants a takedown.
Diamond lands a left hand that snaps the head of Smith backwards.
Smith has clasped his hands together around Diamond's back... aaand, he's got a takedown into side control. Nicely done.
Smith tries for an arm triangle. That looks pretty tight to me. Is this one over!?! Possibly, maybe, no Smith has let go of the choke. Obviously it wasn't as tight as we thought!
Diamond really doesn't want to stay on the ground with Smith. If he can't get it back to his feet, it's only a matter of time before he'll be tapping out.
Smith tries for an arm triangle. That looks pretty tight to me. Is this one over!?! Possibly, maybe, no Smith has let go of the choke. Obviously it wasn't as tight as we thought!
Smith advances to full mount.
Wooooo! Give it up for these two warriors! They are putting on a show!
Smith lands a shot to the body, followed up by a shot to the exposed head of his trapped opponent.
That's one minute gone in the round.
Diamond keeping his composure momentarily, calmly looking to get back to half guard.
Diamond wants to hold on but Smith pushes him away.
Smith landing shots from mount.
A nice elbow there by Smith.
Smith has hold of Diamond's left arm, perhaps looking for a submission. The two fighters tussle over control of the isolated limb and Diamond manages to get his arm back to his side and away from danger.
Smith trying to control but Diamond is having none of it.
Smith working for a guillotine from mount but Diamond is in no mood to give up.
Smith working for a guillotine from mount but Diamond is in no mood to give up.
The fighters are pressed up against the cage, both looking to find a bit of space to work.
Diamond is bucking up trying to escape but Smith cracks him with another couple of good strikes.
That's two minutes gone in the round.
Smith connects with a couple of good shots from mount.
Diamond tries to get back to half guard but can't.
Smith scores with a couple of good head shots there.
Wooooo! Give it up for these two warriors! They are putting on a show!
Diamond defends a decent attempt at a guillotine from Smith.
Smith landing strikes from the mount.
Smith is thinking about an arm triangle here, looking to tighten it up before moving to side control. Diamond can see it coming though and defends well with a couple of strikes to the head and some good arm positioning.
Smith is working for a guillotine from mount but Diamond frees his head quite easily.
BOOM! Smith connects with a massive shot to the dome!
Diamond wants to control but Smith is having none of it.
Diamond is trying to escape the mount.
That's three minutes gone in the round.
Smith is working for a guillotine from mount but Diamond frees his head quite easily.
Smith tries to control but Diamond wriggling away.
Smith landing strikes from the mount.
Smith jumps to side control looking for an arm triangle but Diamond manages to avoid the submission attempt.
Smith tries for a kimura. Not really close to a finish though.
Diamond is looking to reverse the position.
That's four minutes gone in the round.
Smith is looking to take a break and control but Diamond is keeping him honest, looking to work from the bottom.
The ref warns both fighters not to hold the cage as they work up against the meshing.
Smith is working Diamond over with some ground and pound from side control.
Smith scores with a couple of nice shots to the head there. The referee takes a look at Diamond to see if he's OK.
Smith is looking for a kimura. He might have it! No, Diamond has escaped the position, nice work there.
Smith is looking for a kimura. He might have it! No, Diamond has escaped the position, nice work there.
Smith controlling the position.
Smith in side control, working for a kimura. He's got hold of an arm and he's torquing it... Diamond is tapping! That's the end of the fight!
Ladies and gentlemen, after 4:59 of round 1, we have a winner by way of Submission (Kimura). JT Smith!
|
|
|
|
|
|
|
|
|
|
|
|
|
|
|
|
|
|
|
|
|
|
|
| S |
C
A |
G |
S |
C
B |
G |
|
S |
C |
G |
|
energy
A | B |
|
hype
A | B |
|
pop
A | B |
|
mgr
A | B |
|
FIGHT
RATING
49% |
|
|
|
|
|
|
|
|
|
|
