 |
QFC Tournament 905 Round 2 PBP Commentary |
Undercard bout
|
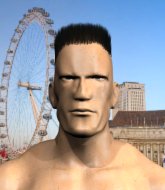
Coming up we have a bantamweight MMA rules bout between Vip Winner (ranked 5070 p4p, 0 weight class) and Wolfgang Matthews (ranked 5072 p4p, 0 weight class). I don't know about you partner, but I'm pumped for this one!
 |
|
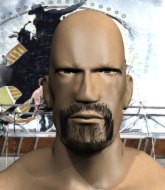 |
| 165 cm
21
140 lbs
1 - 0 - 0 |
|
173 cm
21
139 lbs
1 - 0 - 0 |
Good takedowns
Basic striking
KO power |
|
BJJ White Belt
Excellent boxer
Heavy handed |
|
| |
|
Ladies and gentlemen. This fight is 3 rounds, in the bantamweight division.
Introducing the fighter to my left, fighting out of the red corner.
With a record of
1 - 0 - 0, fighting out of Helsinki, Vip Winner!
And introducing the fighter to my right, fighting out of the blue corner.
With a record of
1 - 0 - 0, fighting out of Helsinki, Wolfgang Matthews!
The judges for this bout are Anni Minnemäki, Marco Blurström and Arvi Lind.

The bell rings for round one and we are underway!

Matthews closes the distance and clinches up, looking for a takedown. He shifts his weight and gets a nice trip into half guard.
Winner is refusing to be controlled, as Matthews sits in half guard.
Winner trying to control here.
Matthews wants to control but Winner is keeping him busy.
Winner works his way to full guard. Good work.
We've had a slow start to the round here - hopefully the action picks up.

Matthews is trying to tuck his arms in to keep them safe but Winner has managed to isolate one of them and has got a loose triangle. Matthews is looking to defend but Winner has done well to lock his legs together - this could be big trouble for Matthews! Winner pulls down on the head and a little smile comes across his face - he knows he's got it. Yep, Matthews taps out and this one is all over!
Ladies and gentlemen, after 1:57 of round 1, we have a winner by way of Submission (Triangle). Vip Winner!
|
|
|
|
|
|
|
|
|
|
|
|
|
|
|
|
|
|
|
|
|
|
|
| S |
C
A |
G |
S |
C
B |
G |
|
S |
C |
G |
|
energy
A | B |
|
hype
A | B |
|
pop
A | B |
|
mgr
A | B |
|
FIGHT
RATING
69% |
|
|
|
|
|
|
|
Undercard bout
|
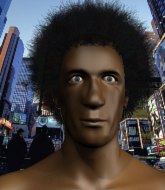
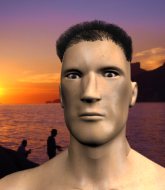
Coming up we have a bantamweight MMA rules bout between Peyton Hughes (ranked 5210 p4p, 0 weight class) and Bobby Ambrose (ranked 5350 p4p, 0 weight class). There are an array of beautiful celebrities at ringside tonight! I wonder if any of them paid for their tickets.
 |
|
 |
| 190 cm
18
135 lbs
1 - 0 - 0 |
|
160 cm
21
135 lbs
1 - 0 - 0 |
BJJ Blue Belt
Brawler
Inexperienced |
|
BJJ White Belt
Brawler
Tends to cut |
|
| |
|
Ladies and gentlemen. This fight is 3 rounds, in the bantamweight division.
Introducing the fighter to my left, fighting out of the red corner.
With a record of
1 - 0 - 0, fighting out of Helsinki, Peyton Hughes!
And introducing the fighter to my right, fighting out of the blue corner.
With a record of
1 - 0 - 0, fighting out of Helsinki, Bobby Ambrose !
The judges for this bout are Johanna Lukiainen, Tarja Halkonen and Ben Zyskovitsi.
The bell rings for round one and we are underway!
Ambrose is looking to slow Hughes down with leg kicks.
Hughes pulls out of a head kick attempt.
Ambrose is looking for the big counter here.

Hughes fakes an overhand right and shoots for a takedown. Ambrose sprawls well initially but Hughes persists and gets the takedown into half guard.
Ambrose trying to hold on to Hughes's head to control him but Hughes postures up.
Ambrose tries to strike from the bottom but it doesn't land.

Hughes stands up out of the half guard.
Hughes misses with a takedown attempt. He shot from a bit too far out.
Ambrose closes this distance looking for a takedown but Hughes circles away.
We've had a slow start to the round here - hopefully the action picks up.

Ambrose rushes Hughes and presses him up against the cage.
Ambrose is fighting off a takedown attempt but Hughes is just too persistent for him and manages to trip Ambrose to the mat. Ambrose regains guard as soon as the fighters hit the mat.
We've seen a great period of action over the last minute or so - credit to both fighters for going all out!
Hughes preventing the sweep.

Ambrose throwing his legs up looking for a triangle.

That's one minute gone in the round.
Hughes won't allow Ambrose to sweep him here.
Ambrose is active off his back here, looking for submissions.
Hughes drops back for a leg but he's not going to get it - he lets go and Ambrose dives on top into guard.

Hughes has an active guard here but Ambrose has managed to pass into half guard.
Ambrose sitting and controlling from the half guard.

That's two minutes gone in the round.
Ambrose is looking for a kimura but Hughes is holding onto that half guard position, so it's hard for Ambrose to get the leverage.
Ambrose looking to pass the half guard. Not this time.
Hughes really does look like a pencil wearing a pair of gloves. Let's hope he has a gameplan to suit that ridiculous body shape.
Hughes punching from the bottom.
Hughes gets full guard.
Hughes seems keen to control Ambrose 's posture.
Hughes tries to strike from the bottom.

That's three minutes gone in the round.
Ambrose trying to control the position from guard on top but Hughes is wriggling around, looking for whatever he can.
Hughes wants to sweep but no luck.
The fighters are starting to perspire pretty heavily.
Ambrose tries to stand but Hughes is controlling from the bottom.

The referee has stepped in and called for a break in the action. We'll restart on the feet.
Ambrose fails with a rather predictable takedown attempt.
Ambrose looks winded!
Ambrose has Hughes up against the cage in a clinch.
The pace really dropping off here, momentarily.

That's four minutes gone in the round.
A few boos can be heard. I'm sure they will multiply if the fighters don't pick up the pace.
Ambrose gets the body lock takedown. After a quick scramble, Hughes regains guard.
The ref warns both fighters not to hold the cage as they work up against the meshing.
Hughes will have to put a bit more behind his punches if he's going to do any damage from this position.
Hughes looking for submissions off his back, moving his hips, looking for an opening.
Ambrose trying to control but Hughes is working from the bottom.
Hughes looking to control the pace of the fight rather than finish it.
The crowd thankful this round is nearly over.
Ambrose stays in close to Hughes's body and controls the position.
And thats the end of the round the fighters go back to their corners.
A close round but Bobby Ambrose will probably get the nod.
Well, the break between rounds is over. Let's get back to the scrappin!

Hughes fails in his attempt to clinch.
Ambrose throws a body kick that misses.
Ambrose fails with the takedown.
Hughes fakes a strike and closes the distance, dragging Ambrose to the ground. Hughes is now in Ambrose 's guard.
Hughes keeps in close for a moment and lands a decent shot to the side of Ambrose 's head.
Ambrose wants to sweep here but Hughes controlling him for the moment.
Hughes wants to control from the top but Ambrose keeps moving.
We've had a slow start to the round here - hopefully the action picks up.
Hughes stays in close to Ambrose 's body and controls the position.
That's one minute gone in the round.
Ambrose is looking to get back to his feet but can't, whilst Hughes is controlling him.
Ambrose looking to control.
Hughes scoring with punches to the head and body.
Hughes throwing strikes from guard but Ambrose blocks nicely.
Ambrose being controlled here, momentarily.
The referee has stepped in and called for a break in the action. We'll restart on the feet.
Ambrose gets caught napping as Hughes dives in and scores a takedown. Ambrose manages to retain guard.
That's two minutes gone in the round.
Hughes decides to stand up and beckons his opponent to follow.
Ambrose is looking to take this fight into the clinch.
The fight stays on the outside here - Hughes looks like he's thinking about clinching though.
Ambrose has taken the fight to the clinch.

Hughes manages to break the clinch.
Ambrose throws a looping left and ducks down for a takedown. He's got his arms around Hughes's waist but Hughes gets an underhook and avoids the takedown by throwing Ambrose off to one side.
Ambrose is breathing heavily.
Ambrose fails with a takedown attempt.
Peyton Hughes has stuffed three takedown attempts in the round now. That's going to take a lot out of Bobby Ambrose .
That's three minutes gone in the round.
Hughes shoots in for a double leg but Ambrose sprawls well. That's going to sap some energy.
Ambrose instigates a clinch.
Hughes jumps guard and drags Ambrose to the mat. He's obviously going to be looking for submissions off his back.
Hughes looking for submissions off his back, moving his hips, looking for an opening.
Hughes looking to control.
Hughes looking for a sweep. Not yet Hughes, not yet.
Ambrose is holding a leg here, probably looking for an ankle lock - he drops back and goes for it! Hughes is in trouble! Is it all over??? No! Hughes has escaped and now he's on top!

Hughes works a leg free and moves into half guard.
That's four minutes gone in the round.
Hughes is looking to take a break and control but Ambrose is keeping him honest, looking to work from the bottom.
Hughes stops Ambrose from getting back to his feet.
Hughes is looking for a kimura but he's never going to get it from there.
Ambrose wants to get back to full guard.
Hughes will need to keep those long limbs tucked in whilst he's on the ground, to prevent any submissions.
Boooooooooooooooooooo!!! God, this has been a terrible round. Come on you two, sort yourselves out!
Hughes wants to get back to his feet.
And thats the end of the round the fighters go back to their corners.
Peyton Hughes dominated that second round.
That's the end of the interval. I'm sure that seemed a lot quicker than a minute for our two fighters! Back to the action. And we move into the final round!

Ambrose tries to close the distance and clinch up but Hughes swats him away and circles back towards the center.
Ambrose tries to clinch but is not successful on this occasion.

Hughes instigates a clinch.
Hughes is looking to take this one to the mat.
Hughes has clasped his hands together around Ambrose 's back... aaand, he's got a takedown into side control. Nicely done.

Ambrose sneaks out the side door and pushes Hughes away - he's back to his feet. The crowd show their appreciation for the escape.
Ambrose has closed the distance and engaged Hughes in a clinch.
Ambrose is trying to pull guard but Hughes turns him against the cage and we stay in the clinch.
Fantastic stuff here - a very entertaining period of action, which has drawn cheers from the crowd.
Ambrose prevents the takedown attempt.
Ambrose tries a knee to the head but Hughes blocks it.
Ambrose can't get the takedown.
Ambrose takes a big intake of breath there - he's definitely tired.
Hughes displaying some good clinch control by pressing Ambrose up against the cage.
That's one minute gone in the round.
Hughes lands a takedown into guard.
Hughes is working Ambrose over from the guard. He should look to pass the guard and do a little more damage with these strikes.
Hughes controlling from the guard. I say controlling but really, he's stalling.
Hughes trying to control the position from guard on top but Ambrose is wriggling around, looking for whatever he can.
Ambrose is active off his back here, looking for submissions.
That's two minutes gone in the round.
Hughes is holding a leg here, probably looking for an ankle lock - he drops back and goes for it! Ambrose is in trouble! Is it all over??? No! Ambrose has escaped and now he's on top!
Ambrose being controlled here momentarily.
Hughes's ground tactics aren't going to win him many fans. Let's hope he's got fireworks for us if he gets back to his feet because he's not doing much on the ground.
That's three minutes gone in the round.
Ambrose working some strikes from top position.
Ambrose wants to control from the top but Hughes keeps moving.
Ambrose must be cautious of submissions here, given that his opponent has the superior Jiu Jitsu.
Hughes lands a beautiful sweep and he's now moved into his opponent's guard.
Ambrose has a loose triangle. He'll be looking to tighten that up but Hughes can see exactly what he's planning and manages to posture up and free himself.
Ambrose tries to land a sweep but no joy.
That's four minutes gone in the round.
Hughes slows down the pace of the fight for a moment. He'll need to remain active if he doesn't want to see the fight stood back up.
Ambrose has a loose triangle. He'll be looking to tighten that up but Hughes can see exactly what he's planning and manages to posture up and free himself.
Hughes gets to his feet and steps away from his opponent.
The crowd thankful this round is nearly over.
Ambrose avoids the head kick by Hughes.
Ambrose gets to the clinch - let's see what his plan is here.
And that's the end of the fight!
I would just about give that final round to Bobby Ambrose .
I think Ambrose has won this one but let's see whether the judges agree with me. Over to the ring announcer for the scorecards.
Ladies and gentlemen, after 3 rounds of action, we go to the scorecards for a decision.
Judge Johanna Lukiainen scores the fight for Peyton Hughes!
Judge Tarja Halkonen scores the fight for Peyton Hughes!
Judge Ben Zyskovitsi scores the fight for Peyton Hughes!
Peyton Hughes wins by unanimous decision!
|
|
|
|
|
|
|
|
|
|
|
|
|
|
|
|
|
|
|
|
|
|
|
| S |
C
A |
G |
S |
C
B |
G |
|
S |
C |
G |
|
energy
A | B |
|
hype
A | B |
|
pop
A | B |
|
mgr
A | B |
|
FIGHT
RATING
32% |
|
|
|
|
|
|
|
Co-main event
|
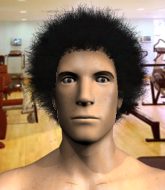
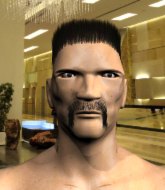
Coming up we have a bantamweight MMA rules bout between Tyson Buzz (ranked 5173 p4p, 0 weight class) and Kunkka Phoenix (ranked 5280 p4p, 0 weight class). Tyson Buzz has the better chin. Will he look to stand and bang today?
 |
|
 |
| 191 cm
18
137 lbs
1 - 0 - 0 |
|
166 cm
18
145 lbs
1 - 0 - 0 |
BJJ White Belt
Excellent boxer
Granite chin |
|
BJJ White Belt
Brawler
Enjoys gardening |
|
| |
|
Ladies and gentlemen. This fight is 3 rounds, in the bantamweight division.
Introducing the fighter to my left, fighting out of the red corner.
With a record of
1 - 0 - 0, fighting out of Helsinki, Tyson Buzz!
And introducing the fighter to my right, fighting out of the blue corner.
With a record of
1 - 0 - 0, fighting out of Helsinki, Kunkka Phoenix!
The judges for this bout are Arvi Lind, Tarja Halkonen and Marco Blurström.
The bell rings for round one and we are underway!
Nice takedown defense from Buzz. No joy for Phoenix on that attempt.
Buzz misses with a jab and misses with a cross straight after too.
Phoenix moves into range and clinches up with Buzz.
Phoenix leaning against his opponent.
A frustrated look appears on Buzz's face as he tries to break the clinch.
A frustrated look appears on Buzz's face as he tries to break the clinch.
A frustrated look appears on Buzz's face as he tries to break the clinch.
Phoenix holding his opponent close, against the cage.
Phoenix is trying to pull guard but being pressed up against the cage enables Buzz to keep the fight standing.
Buzz gets underhooks to prevent Phoenix's takedown attempt.
Tyson Buzz has stuffed three takedown attempts in the round now. That's going to take a lot out of Kunkka Phoenix.
We've had a slow start to the round here - hopefully the action picks up.
Phoenix is looking for a takedown up against the cage. Buzz gets underhooks though and prevents the takedown attempt.

Phoenix pushes off and circles away, back to the middle of the mat.
Phoenix is looking to land body kicks.
Phoenix uses decent footwork to sidestep a right hand from Buzz.
Tyson Buzz seems to be the more aggressive standup fighter in this bout.
Buzz lands a slapping body shot.
That's one minute gone in the round.
Phoenix tries to land with a swinging hook to the body but Buzz was well out of range. Poor timing from Phoenix.
Buzz ducks down and throws a hook to the body but Phoenix moves away.
Phoenix changes levels for a counter takedown but doesn't follow through with his attempt.
Buzz really does look like a pencil wearing a pair of gloves. Let's hope he has a gameplan to suit that ridiculous body shape.
Phoenix has his head slapped from side to side by a 3 punch combination. That must have hurt him.
Buzz tries to bum rush Phoenix with a series of wild strikes but Phoenix uses good footwork to avoid the assault.
Buzz just misses with a punch to the body.
Phoenix misses with a takedown attempt
and Buzz counters with a stiff right hand.
A slow jab from Buzz misses its intended target.
Phoenix misses with a double jab.
Buzz throws a right hand that misses
and Phoenix counters by clinching up.
Phoenix has Buzz pressed against the cage, preventing Buzz from circling away and getting back to striking at range.
Phoenix blocks a body shot from Buzz.
Buzz is trying to break the clinch but Phoenix is controlling him.
Phoenix trying to land knees to the body.
Buzz wants to break free but Phoenix has control.
Buzz looks like he'd prefer to be striking at range right now.
That's two minutes gone in the round.
Phoenix prevents Buzz from breaking the clinch.
Come on Phoenix - let's have some action - none of this stalling nonsense.
Phoenix wants to take the fight to the mat but Buzz manages to get underhooks and keep the fight in the clinch.
Buzz wants to get back to striking at distance but Phoenix won't allow it.
Buzz working hard to break the clinch.
Buzz is trying to work out of this bad position, with his back against the cage.
Buzz is looking to break free of the clinch but Phoenix has double underhooks.
Phoenix tried to land a shot to the body but connects with Buzz's elbow.
Buzz has had enough of the clinch but Phoenix keeps him there for the moment.
Phoenix prevents Buzz from breaking the clinch.
Phoenix trying to land knees to the body.
That's three minutes gone in the round.
Buzz fails to land with a short punch on the inside.
Buzz working hard to break the clinch.
Phoenix tries to pull guard but Buzz won't allow it.
Buzz working hard to break the clinch.
Phoenix breaks the clinch.
Phoenix rushes Buzz and pushes him back against the cage in a clinch.
Buzz wants to get back to striking at distance but Phoenix won't allow it.
Phoenix works for the underhooks and manages to get a trip takedown into guard.
Buzz is wriggling around but Phoenix manages to pass to half guard.
The ref warns both fighters not to hold the cage as they work up against the meshing.
The two fighters exchange a few words. I couldn't hear what they were saying but maybe it's more fun if you make it up yourself. Phoenix connects with a nice short shot to Buzz's temple.
Buzz has no desire to be mounted, so is trying to control. Phoenix is working away from the top position though.
Phoenix has the superior BJJ but he's also working some ground strikes into his gameplan.
Buzz is looking for a sweep. Phoenix is wise to his cunning plan and keeps the top position.
That's four minutes gone in the round.
Buzz is trying to stand up here but Phoenix is controlling him well.
Buzz tries to get to full guard but Phoenix has control of the leg.
Phoenix is thwarting Buzz's attempts to control the position.
Buzz wants to get back to full guard.
Buzz trying to control from the bottom.
The fighters are battling for position here. Buzz manages to regain full guard. Nice work.
Buzz is breathing heavily.
Phoenix is intent on slowing down the pace of the fight, simply looking to control.
Buzz bucks up whilst keeping hold of a body lock, managing to reverse the position. Now he's in top in Phoenix's guard.
Fantastic stuff here - a very entertaining period of action, which has drawn cheers from the crowd.
Phoenix is doing well to control the posture of his opponent and prevent any damage.
Buzz preventing the sweep.
Phoenix trying to control the position here.
Phoenix keeping moving, preventing Buzz from controlling successfully.
And thats the end of the round the fighters go back to their corners.
That was a close round but I would say that Tyson Buzz will probably get the nod.
The referee calls time. The cornermen exit stage left and we're back to business.
Phoenix looks shocked there as he takes a right hand to the temple.
Buzz defends well against a solid takedown attempt from Phoenix.
Phoenix ducks under an overhand right and circles away with a smile on his face.
Tyson Buzz is winning the standup battle so far.
Buzz misses with the combination.
Phoenix keeping a good distance there, avoiding the body shot.
Buzz throws a wild combination but nothing lands.
Phoenix tries a counter takedown but it's more of a dummy move, and he uses it to push himself away.
Phoenix is trying hard to land a takedown here. Buzz sprawls well and keeps this one on the feet.
Phoenix shoots in for a takedown. He's persisting with it as Buzz sprawls well. Buzz wins this battle and keeps the fight standing. Phoenix gets slowly back to his feet.
A little feinted left hand from Buzz on the counter but he doesn't commit to it.
Tyson Buzz has stuffed three takedown attempts in the round now. That's going to take a lot out of Kunkka Phoenix.
We've had a slow start to the round here - hopefully the action picks up.
Buzz lands three nice shots there - that looked like it hurt!
Buzz misses with a looping left.
That's one minute gone in the round.
Buzz lands a nice hook to Phoenix's body. Phoenix takes it in his stride and looks to land his own strikes.
Buzz lands with a two punch combination before moving back out of range.
Phoenix needs to keep his hands up - Buzz had a free shot at his head there.
Buzz with a nice cross.
Buzz connects with a lovely right hand, straight down the pipe.
Phoenix slips a jab and a cross from Buzz.
Buzz throws a right and a left that both miss.
Both fighters are absolutely exhausted here.
Buzz slaps away a takedown attempt from Phoenix, before circling back to the center of the mat.
Buzz displays good takedown defense there as he swats away a double leg from Phoenix.
Buzz is using his reach advantage well here, landing the more effective single shots from range.
Buzz lands a pitter patter jab to the forehead of his opponent.
Buzz is really dominating this fight. Is there anything that Phoenix can do to turn this around?
Wooooo! Give it up for these two warriors! They are putting on a show!
Buzz misses with a wild combination.
That's two minutes gone in the round.
Buzz lands a jab-cross combination.
A jab from Buzz does it's job there.
Buzz swings for the body but Phoenix moves out of range.
Buzz is using his height advantage well here, landing a good percentage of his punches.
Buzz feints a straight left to the body, then turns around with a flashy move and hits Phoenixs jaw with a dramatic spinning back fist!
Phoenix slips a jab from Buzz.
Phoenix feints the counter takedown.
Phoenix goes for a double leg but Buzz avoids the attempt and the two fighters end up clinched against the cage as Buzz continues to drive forward.
Phoenix darts in looking for a takedown but Buzz gets double underhooks and turns Phoenix into the cage.
Buzz misses with a combination
and Phoenix counters with a left to the body.
Nice uppercut lands for Buzz. That snapped Phoenix's head back.
Buzz lands with a hook. Phoenix tried to avoid it but it clipped the top of his head.
Phoenix has a takedown stuffed.
That's three minutes gone in the round.
Buzz misses with a few strikes there.
A right-left combo lands from Buzz.
Buzz misses with an uppercut
and Phoenix holds on and brings the fighters into a clinch.
Phoenix fails to pull guard.
Phoenix has Buzz pressed against the cage, preventing Buzz from circling away and getting back to striking at range.
Phoenix breaks the clinch and we return to the middle of the mat.
Buzz tries to land with a swinging hook to the body but Phoenix was well out of range. Poor timing from Buzz.
Buzz tests Phoenix's chin there with a solid looking shot.
Good exchange - Buzz coming out on top.
A combination from Buzz does no damage.
Phoenix takes one on the chin but seems OK.
That's four minutes gone in the round.
Phoenix fakes with an overhand right and moves in to clinch with Buzz, pushing him back against the cage.
Phoenix pushes Buzz back against the cage and lands a hook to the side of the head.
This is a great period of action - very entertaining stuff!
Buzz misses with a hook from the clinch.
An uppercut on the inside fails to land for Buzz.
Phoenix tries to land a knee to the head but misses.
Phoenix tries to score a body lock takedown but Buzz shows good agility there to stay on his feet.
Phoenix fails to pull the fight into his guard.
A frustrated look appears on Buzz's face as he tries to break the clinch.
Phoenix fails to pull guard.
Phoenix is trying to pull guard but being pressed up against the cage enables Buzz to keep the fight standing.
Buzz tries to break free but Phoenix pushes him back against the cage.
And thats the end of the round the fighters go back to their corners.
Tyson Buzz dominated that second round.
The minute break is over - no more time for sponges and pep talks - back to the action! This is the final round!
Buzz misses with a wild combination.
Phoenix wants to counter with a clinch but Buzz pushes him away.
Buzz lands with a cross to side of his opponent's head.
Buzz falls off balance throwing a combination
and Phoenix moves into the clinch.
Buzz scores with a shoulder strike.
Buzz is trying to break free.
Phoenix prevents a body shot from Buzz.
We've had a slow start to the round here - hopefully the action picks up.
Phoenix has dropped down and is looking to force the takedown but it's defended by Buzz after a bit of a struggle.
Phoenix tries to pull guard but Buzz won't allow it.
Buzz prevents a takedown attempt there.
Tyson Buzz has stuffed three takedown attempts in the round now. That's going to take a lot out of Kunkka Phoenix.
Phoenix takes a big intake of breath there - he's definitely tired.
Buzz tries to break free but Phoenix pushes him back against the cage.
That's one minute gone in the round.
Buzz tries to break the clinch but Phoenix is controlling the position.
A short right from Buzz on the inside.
Buzz wants to break the clinch but can't.
Phoenix breaks from the clinch.
Phoenix doesn't react quick enough there as he takes a shot to the body.
Buzz lands a jab, followed by a cross and another cross, as Phoenix backs up against the cage.
Buzz stuffs a takedown. It's all about dictating where the fight takes place and Buzz wants it to stay on the feet.
Buzz cracks Phoenix with a hook to the jaw. Both fighters smile at eachother and high-five before getting back down to business.
Tyson Buzz is looking to throw some combinations by the looks of things.
Buzz throws a nice hook to the body that draws an oooh from the crowd.
Buzz lands a body shot.
Buzz misses with a two punch combination.
Phoenix gets cracked there but stands up to it.
Wooooo! Give it up for these two warriors! They are putting on a show!
Buzz scores with a one two! Phoenix had his feet all tangled up there and couldn't avoid the strikes.

Phoenix is rocked!
That's two minutes gone in the round.
Buzz drops Phoenix with a straight right hand, right on the button! Buzz follows him down to the mat and pounds him out with hammerfists until the referee jumps in to end the fight!
Ladies and gentlemen, after 2:09 of round 3, we have a winner by way of TKO (Strikes). Tyson Buzz!
|
|
|
|
|
|
|
|
|
|
|
|
|
|
|
|
|
|
|
|
|
|
|
| S |
C
A |
G |
S |
C
B |
G |
|
S |
C |
G |
|
energy
A | B |
|
hype
A | B |
|
pop
A | B |
|
mgr
A | B |
|
FIGHT
RATING
58% |
|
|
|
|
|
|
|
Main event
|
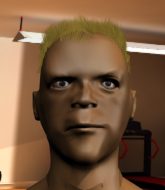
Coming up we have a bantamweight MMA rules bout between Oleg Magnarson (ranked 5391 p4p, 0 weight class) and Park Shin Bum (ranked 4874 p4p, 0 weight class). Well, the cameraman is lingering on a pretty young lady for a bit too long there. Keep your eyes on the prize buddy or you'll miss the fighter intros!
 |
|
 |
| 178 cm
21
140 lbs
1 - 0 - 0 |
|
175 cm
21
140 lbs
1 - 0 - 0 |
Good wrestling
Basic striking
Granite chin |
|
BJJ Blue Belt
Decent boxing
Determined |
|
| |
|
Ladies and gentlemen. This fight is 3 rounds, in the bantamweight division.
Introducing the fighter to my left, fighting out of the red corner.
With a record of
1 - 0 - 0, fighting out of Helsinki, Oleg Magnarson!
And introducing the fighter to my right, fighting out of the blue corner.
With a record of
1 - 0 - 0, fighting out of Helsinki, Park Shin Bum!
The judges for this bout are Arvi Lind, Ben Zyskovitsi and Marco Blurström.
The bell rings for round one and we are underway!
Magnarson fails with a takedown attempt.
Magnarson tries to clinch but Shin Bum is having none of it.
Magnarson tries to drive through with a takedown attempt but Shin Bum defends well and Magnarson ends up having to push Shin Bum into the cage where they will battle it out in the clinch.
Shin Bum connects with a hook to the side of his opponent's head.
Magnarson misses with a takedown attempt
and Magnarson takes a counter punch right on the button for his troubles.
That's three failed takedown attempts in the round for Oleg Magnarson. That's going to take a lot out of him.
Magnarson tries to clinch but fails miserably
and Shin Bum counters with a left to the body.
Shin Bum fakes and then throws a beautiful body shot. Magnarson looks a bit winded and takes a step backwards to take a breath.
Magnarson fails with the takedown
and Shin Bum connects with a straight left hand counter down the middle.
Shin Bum throws a series of strikes that have Magnarson backpedaling.
Shin Bum moves into range and throws a lovely three punch combination.
This has been an exciting period of action!
Magnarson doesn't succeed with the takedown
and Shin Bum counters with a quick right hand to the jaw.
Shin Bum catches Magnarson with a nice straight right. He seems pissed - ooooh, it's on now! On like donkey kong!
Magnarson really does look like a pencil wearing a pair of gloves. Let's hope he has a gameplan to suit that ridiculous body shape.
Nice cross by Shin Bum.
Magnarson shoots in looking for a takedown but Shin Bum manages to keep the fight standing, pushing Magnarson's face into the canvas for good measure before circling away.
Park Shin Bum is looking to keep the fight on the feet at all costs.
That's one minute gone in the round.
Magnarson darts in and clinches Shin Bum up against the cage.
Magnarson jumps into guard, dragging Shin Bum to the mat.
Magnarson on his back here. We all know that wrestlers don't like being on their back so let's see if Magnarson tries to get out of the position.
Magnarson is throwing his legs up, looking for submissions. Shin Bum is aware though and is defending well.
Shin Bum wants to control from the top but Magnarson keeps moving.
Shin Bum stopping the sweep attempt from Magnarson.
Magnarson wants to control the position but Shin Bum says "no thanks buddy" and passes to half guard.
Magnarson trying to control from the bottom.
Shin Bum is just sitting in half guard, waiting for something to happen.
Magnarson manages to get to full guard.
Shin Bum won't allow Magnarson to sweep him here.
Shin Bum looking to sit in guard and control but Magnarson gets the butterfly guard and sweeps. He's now in the guard on the top.
That's two minutes gone in the round.
Shin Bum looking to sweep here. No luck so far.
Magnarson trying to control but Shin Bum is working from the bottom.
Magnarson postures up and lands some nice ground and pound.
Magnarson working from the guard for now, landing some ground and pound.
Magnarson preventing the sweep.
Magnarson's corner is telling him to maintain position.
Shin Bum working the defensive guard well to avoid strikes from Magnarson.
Magnarson with a couple of shots to the head there. Not particularly brutal.
Magnarson postures up and lands some nice ground and pound.
Shin Bum looks winded!
Fantastic stuff here - a very entertaining period of action, which has drawn cheers from the crowd.
Shin Bum is trying to control the position but Magnarson postures up.
Magnarson makes a bit of distance and scores with some ground and pound, still in guard.
Magnarson wants to pass the guard but Shin Bum is keeping the position.
Magnarson postures up.
That's three minutes gone in the round.
Magnarson with a couple of shots to the head there. Not particularly brutal.
Magnarson is in close to Shin Bum's body, working some short punches and elbows.
Magnarson working some strikes from top position.
Magnarson scoring with some ground and pound.
Magnarson scoring with punches to the head and body.
Magnarson lands a couple of elbows.
Magnarson with a nice head shot there.
Magnarson scoring with punches to the head and body.
Shin Bum keeping moving, preventing Magnarson from controlling successfully.
Shin Bum keeping full guard, as Magnarson tries to pass.
Magnarson chips away with some ground and pound.
Magnarson is sitting in guard, working some ground and pound.
Magnarson content to strike from guard, landing some decent shots.
That's four minutes gone in the round.
Shin Bum is trying to control the position from the bottom.
Magnarson working some strikes from top position.
Shin Bum is rocked!
Magnarson lands a couple of elbows.
Shin Bum is still in real trouble! Can Magnarson finish him?
The crowd are loving this. Great action here.
Magnarson slips effortlessly into side control - very nice.
Magnarson scores with a couple of short elbows.
Shin Bum is working to avoid the ground and pound but Magnarson connects with a decent elbow.
Magnarson is looking to finish here, going for an Americana. Shin Bum knows the correct defense though, so he's OK.
Shin Bum is not content to let Magnarson control the position.
Shin Bum takes an elbow right on the bridge of the nose and winces in pain.
And thats the end of the round the fighters go back to their corners.
Oleg Magnarson dominated that round.
The fighters' corners scream their final instructions, as the referee calls time. Here we go, back to the action!
Magnarson fails with the takedown.
Shin Bum seems to have recovered his senses.
Magnarson shoots in but Shin Bum avoids the takedown attempt easily.
Magnarson gets to the clinch - let's see what his plan is here.
Shin Bum wants to break free. God knows he wants to breaaaak freeee.
Shin Bum wants to break free. God knows he wants to breaaaak freeee.
Magnarson goes for a takedown attempt but Shin Bum pushes him away and we're back to fighting at a distance.
That's three failed takedown attempts in the round for Oleg Magnarson. That's going to take a lot out of him.
Shin Bum lands a straight punch to the body, keeping Magnarson at a distance.
We've had a slow start to the round here - hopefully the action picks up.
Magnarson moves to clinch but Shin Bum breaks away
letting Shin Bum counter with a right hand.
Shin Bum misses with an uppercut.
Magnarson has his takedown stuffed
and Shin Bum counters with a straight right hand.
That's one minute gone in the round.
Shin Bum gets caught on his heels momentarily as he allows Magnarson to score an easy takedown into full guard.
Magnarson lands a couple of digs.
Shin Bum keeping full guard, as Magnarson tries to pass.
Magnarson is working the ground and pound from guard. He might want to try advancing position though to get more of an impact.
Magnarson missing there with some ground and pound from the guard.
Magnarson with a couple of shots to the head there. Not particularly brutal.
The fighters are pressed up against the cage, both looking to find a bit of space to work.
Shin Bum looking to control.
Shin Bum is breathing heavily.
Magnarson lands a couple of decent looking shots.
Shin Bum trying to control the position.
Magnarson keeps in close for a moment and lands a decent shot to the side of Shin Bum's head.
Magnarson stands up over Shin Bum, holding his feet. He dives back in and lands a decent shot to the head.
Magnarson working in close now, lands a nice elbow to the side of Shin Bum's head.
That's two minutes gone in the round.
Magnarson working some strikes from top position.
Magnarson connects with a couple of short punches.
Magnarson content to strike from guard, landing some decent shots.
This is a great period of action - very entertaining stuff!
Magnarson is working the ground and pound from guard. He might want to try advancing position though to get more of an impact.
Magnarson is working the ground and pound from guard. He might want to try advancing position though to get more of an impact.
The ref warns both fighters not to hold the cage as they work up against the meshing.
Shin Bum has momentary wrist control but Magnarson slips an elbow through the middle.
Magnarson is in close to Shin Bum's body, working some short punches and elbows.
Magnarson is working the ground and pound from guard. He might want to try advancing position though to get more of an impact.
Magnarson scores with a decent looking elbow strike.
Shin Bum trying to control the position.
Magnarson lands a couple of digs.
Shin Bum keeping moving, preventing Magnarson from controlling successfully.
Magnarson distracts Shin Bum with his right hand and drops a big elbow with his other arm.
Magnarson chips away with some ground and pound.
Magnarson keeps in close for a moment and lands a decent shot to the side of Shin Bum's head.
That's three minutes gone in the round.
Magnarson showing good wrestling skills to control the position.
Magnarson lands a couple of elbows.
Magnarson arches his back and unloads with a massive left and a right! Shin Bum's eyes roll back into his head, he's out cold! The ref dives in to stop the fight - wow, they were hard shots!
Ladies and gentlemen, after 3:35 of round 2, we have a winner by way of KO (Strikes). Oleg Magnarson!
A less than humble Oleg Magnarson misjudged his post fight interview somewhat and came across a little too arrogant whilst trying to hype up his own abilities.
|
|
|
|
|
|
|
|
|
|
|
|
|
|
|
|
|
|
|
|
|
|
|
| S |
C
A |
G |
S |
C
B |
G |
|
S |
C |
G |
|
energy
A | B |
|
hype
A | B |
|
pop
A | B |
|
mgr
A | B |
|
FIGHT
RATING
56% |
|
|
|
|
|
|
|
|
|
|
