 |
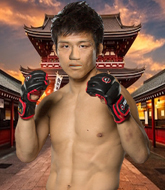
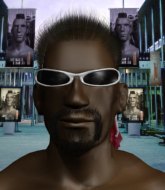
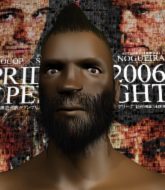
WPFC 14 - Power vs. Craig PBP Commentary |
Undercard bout
|
Coming up we have a lightweight MMA rules bout between Koki Haranda (ranked 4386 p4p, 435 weight class) and Kaiji Inoue (ranked 4049 p4p, 410 weight class). These two fighters really are very evenly matched on the feet - it will be fascinating to see who can assert themselves in that aspect of the fight.
 |
|
 |
| 185 cm
19
165 lbs
1 - 1 - 0 |
|
175 cm
19
150 lbs
2 - 0 - 0 |
BJJ White Belt
Excellent MT
Granite chin |
|
BJJ Purple Belt
World class MT
Solid chin |
|
| |
|
Ladies and gentlemen. This fight is 3 rounds, in the lightweight division.
Introducing the fighter to my left, fighting out of the red corner.
With a record of
1 - 1 - 0, fighting out of Tokyo, Koki Haranda!
And introducing the fighter to my right, fighting out of the blue corner.
With a record of
2 - 0 - 0, fighting out of London, Kaiji Inoue!
The judges for this bout are Franklyn Lucas, Reed Andrews and Joseph Jones.

The bell rings for round one and we are underway!
Haranda plants his feet and lands a nice head kick!
Haranda tries to land with a swinging hook to the body but Inoue was well out of range. Poor timing from Haranda.
Inoue lands with a good body shot.
A cross from Inoue lands.
Haranda goes for a spinning back kick but it misses.
Haranda tries to move into range but Inoue moves to the side and lands with a nice right hand.
Haranda displays good takedown defense there as he swats away a double leg from Inoue.
Haranda throws a hook but Inoue avoids it easily.
Haranda throws a hook but Inoue blocks it.
Inoue will have to do better than that with his takedown attempts.

Inoue has closed the distance and engaged Haranda in a clinch.
Haranda working aggressively here.
An uppercut on the inside fails to land for Inoue.
Inoue lands with a good tight uppercut to the head.
The crowd cheering loudly, showing their appreciation for the quality fight we're seeing here.
Inoue content to slow the pace in the clinch.
Inoue is working on a leg, looking for a takedown but Haranda is defending well.
Koki Haranda has stuffed three takedown attempts in the round now. That's going to take a lot out of Kaiji Inoue.
A head punch blocked on the inside by Inoue.
Inoue looks more muscular than last time we saw him. He must have been on the weights.
Haranda scores with a shoulder strike.
Haranda swings wildly with an uppercut but Inoue uses good head movement to avoid it.
Inoue lands with a short shot to the head.
A short right from Haranda.

That's one minute gone in the round.
Inoue scores with a shoulder strike.
Inoue lands a nice elbow.

It looks like Koki Haranda has been cut.
Inoue has hold of a leg and is looking for a trip takedown. Haranda avoids it nicely though and we remain in the clinch.
Inoue is trying to work for a single leg takedown but Haranda pulls him back up using the underhooks.
Haranda goes for a body shot but it's blocked.
Inoue is working for takedown but Haranda is calmly controlling the position for now.
Inoue gets an overhook and lands an elbow to the side of the head.
Haranda throws a punch but it's blocked by Inoue.
Inoue tries to work over Haranda's body with a swooping hook but it only glances the target.
Haranda misses with the head strike.
Haranda fails to land with a short punch on the inside.
A head punch on the inside from Haranda fails to land.
Inoue blocks a punch to the side of the head.
Haranda tries a shoulder strike but it doesn't do any damage.
Haranda has a couple of punches blocked by Inoue.
A head punch on the inside from Inoue fails to land.
A head punch blocked on the inside by Inoue.
Inoue gets through Haranda's defenses to land a nice punch to the side of the head.
Haranda lands with a left to the head.
With the fighters clinched against the cage, Inoue creates a bit of distance for himself and scores with a nice uppercut.
This has been an exciting period of action!
Inoue gets through Haranda's defenses to land a nice punch to the side of the head.
Inoue blocks a punch to the side of the head.

That's two minutes gone in the round.
Inoue lands a nice looking hook to the body, against the cage.
Inoue pushes off an throws an elbow but Haranda leans to the side and avoids it. We're back to clinching against the cage.
Inoue lands an elbow just above Haranda 's eye.
Haranda tries to work over Inoue's body with a swooping hook but it only glances the target.
Inoue blocks a couple of punches on the inside.
Haranda misses with a short punch on the inside.
Inoue lands punches inside but they're not really causing much damage.
Haranda misses with a hook from the clinch.
Haranda lands a shoulder strike.
Haranda misses with the head strike.
Inoue blocks a body shot from Haranda.
Haranda misses with some punches.
Haranda throws a punch but it's blocked by Inoue.
Inoue is leaning against Haranda and scores with a nice uppercut to the body.
Inoue lands a right uppercut that snaps the head of Haranda backwards.
Haranda stops a takedown attempt from Inoue.
Haranda fails to land with a short punch on the inside.
Haranda throws a head punch that misses.
Haranda takes an elbow to the temple.
Haranda fails to land with a short punch on the inside.
Inoue lands a nice elbow from the clinch.
Koki Haranda's cut is getting worse.
Inoue blocks a punch to the side of the head.

That's three minutes gone in the round.
Inoue blocks a punch to the side of the head.
Haranda working aggressively here.
Inoue lands an elbow inside.
A nice left hand lands by Inoue.
Koki Haranda's cut is bleeding quite badly. He's got to try and protect it.
A right hand to the body from Inoue.
Inoue comes over the top with an elbow. That landed flush.
Inoue drops down looking for an ankle pick but Haranda pulls his leg out and moves away.
Wow, both these guys are really going for it!
Inoue shoots in for a takedown but Haranda shows good takedown defense.
Nice uppercut lands for Inoue. That snapped Haranda's head back.
Haranda looks to have improved his striking defense since last time we saw him fight.
Inoue moves out of range as Haranda throws a body kick.
Inoue lands with a straight right. Haranda didn't see that one coming.
Haranda swings wildly with a right hand that was never going to find it's target.
Inoue defending well as Haranda loads up on a big left hand.
Haranda sets himself, and Inoue steps forward looking for the clinch! Haranda avoids it this time.
Inoue staying out of range there.
Inoue clinches.
The fans in attendance giving it up for the two fighters, who have really let it all hang out in the last minute or so!
Haranda blocks a knee to the body. He'll have a nicely bruised forearm in the morning.
Inoue scores with a knee to the head.
Jeez, Koki Haranda's cut is really nasty now. The referee must be thinking about getting that checked.
Inoue blocks a couple of punches on the inside.
Haranda tries a shoulder strike but it doesn't do any damage.
A right hand to the body from Inoue.

That's four minutes gone in the round.
Inoue is working for takedown but Haranda is calmly controlling the position for now.
A quick uppercut on the inside from Inoue.
Inoue is working on a leg, looking for a takedown but Haranda is defending well.
Haranda lands a right hand.
Haranda working aggressively here.
Haranda tries a shoulder strike but it doesn't do any damage.
Haranda prevents a takedown attempt there.
Haranda working aggressively here.
Inoue works on Haranda's body with a couple of short punches.
Inoue lands punches inside but they're not really causing much damage.
Inoue lands a nice elbow from the clinch.
Haranda gets underhooks to prevent Inoue's takedown attempt.
Haranda lands a hook to the side of the head.
Haranda lands a short shot on the inside that snaps the head of Inoue backwards.
The crowd applaud the fighters' efforts here as the round comes to an end.
Inoue blocks a punch to the side of the head.
Haranda prevents a takedown attempt there.
Haranda misses with some punches.
Inoue lands an elbow that stopped Haranda in his tracks for a moment.
Haranda fails to land with a short punch on the inside.
And thats the end of the round the fighters go back to their corners.
A close round but Kaiji Inoue will probably get the nod.
The cut man is working on Koki Haranda's cut.
That's the end of the round. The referee orders the cornermen out of the cage so we can get back down to business.

Nice uppercut lands for Inoue. That snapped Haranda's head back.
Inoue forces Haranda back against the cage and clinches.
Haranda swings away with an uppercut that misses.
A nice glancing elbow lands by Inoue.
A short right hand to the side of the head by Inoue.
Haranda swings away with an uppercut that misses.
Inoue tries to land a shot to the body but it's blocked.
Haranda scores with a shot to the side of Inoue's head.
Inoue blocks an uppercut.
Inoue lands a glancing elbow in the clinch.
Haranda has a couple of punches blocked by Inoue.
Inoue lands an elbow just above Haranda 's eye.
Haranda is pressed up against the cage. Inoue has hold of a leg and is looking to drag Haranda down to the mat. Haranda avoids the attempt though and has circled away. We're back to striking at a distance.
Inoue moves out of range as Haranda strikes.
Haranda jabbing away but nothing is landing.
Inoue was about to counter that last move with a leg kick but changes his mind.
The crowd cheering loudly, showing their appreciation for the quality fight we're seeing here.
Inoue instigates a clinch.
Inoue lands a hook that snaps the head of Haranda backwards.
Inoue stalling.
Haranda misses with a hook from the clinch.
Haranda fails to land with a short punch on the inside.
Haranda tries a shoulder strike but it doesn't do any damage.
That's one minute gone in the round.
Haranda misses with a punch on the inside.
Inoue looking for a takedown.
Haranda takes an elbow to the forehead.
The referee calls the doctor in to look at Koki Haranda's cut. Oh no, the doctor has called an end to the bout!
Ladies and gentlemen, after 1:19 of round 2, we have a winner by way of TKO (Cut). Kaiji Inoue!
Our winner, Kaiji Inoue, made sure he spent some time buttering up the crowd during his post fight interview, which will no doubt bring him a few more fans.
|
|
|
|
|
|
|
|
|
|
|
|
|
|
|
|
|
|
|
|
|
|
|
| S |
C
A |
G |
S |
C
B |
G |
|
S |
C |
G |
|
energy
A | B |
|
hype
A | B |
|
pop
A | B |
|
mgr
A | B |
|
FIGHT
RATING
56% |
|
|
|
|
|
|
|
Undercard bout
|
Coming up we have a light heavyweight MMA rules bout between Ashad Cae (ranked 2363 p4p, 286 weight class) and Caramon Majere (ranked 2729 p4p, 322 weight class). Caramon Majere has the power to score a knockout today if he connects clean with Ashad Cae's chin.
 |
|
 |
| 195 cm
26
215 lbs
3 - 0 - 0 |
|
190 cm
19
206 lbs
4 - 2 - 0 |
BJJ White Belt
Excellent boxer
Big heart |
|
BJJ Blue Belt
Excellent MT
Granite chin |
|
| |
|
Ladies and gentlemen. This fight is 3 rounds, in the light heavyweight division.
Introducing the fighter to my left, fighting out of the red corner.
With a record of
3 - 0 - 0, fighting out of Helsinki, Ashad Cae!
And introducing the fighter to my right, fighting out of the blue corner.
With a record of
4 - 2 - 0, fighting out of New York, Caramon Majere!
The judges for this bout are Columbo Gatti, Bruno Lombardi and Dean Styles.
The bell rings for round one and we are underway!
Cae blocks a head kick by Majere.
Cae misses with a series of wild punches.
Cae swings for the body but Majere moves out of range.
Majere tries to counter by closing the distance.
Majere throws a head kick but Cae moves out of range.
Cae getting the better of the striking in that exchange.
The fighters circling - Cae throws out the jab but it was never going to land.
Majere wants to counter with a clinch but Cae pushes him away.
Cae feints a jab promting Majere to slip. Cae then demonstrates his capabilities by jabbing again. Majere slips again and ducks right into an uppercut.

It looks like Caramon Majere has been cut.
Cae avoids the clinch attempt nicely.
Majere rushes Cae and presses him up against the cage.
Majere keeps control of Cae as he tries to wriggle out of the double underhooks.
Majere keeps control of Cae as he tries to wriggle out of the double underhooks.
Cae wants to get back to striking at distance but Majere won't allow it.
Cae has had enough of the clinch but Majere keeps him there for the moment.
Nice elbow from Majere.
It looks like Ashad Cae has been cut.
Majere with the Thai clinch, lands a knee to the head.
This has been an exciting period of action!

Cae breaks the clinch.
Majere moves into range and clinches up with Cae.
Cae softening up his opponent with strikes, against the cage.
That's one minute gone in the round.
Majere lands an elbow just above Cae 's eye.
Majere dictating the pace here, as the fighters clinch against the cage.
Cae wants to break the clinch but can't.
Cae avoiding damage as Majere throws knees to the body.
Cae tries to break free but Majere pushes him back against the cage.
Majere tries a knee to the head but Cae blocks it.
Cae blocks a knee to the body. He'll have a nicely bruised forearm in the morning.
A frustrated look appears on Cae's face as he tries to break the clinch.
Majere scores with a knee to the head.
I was talking to Cae's coach per-fight and he was telling me that they'd been working on the clinch in the runup to this fight.
Cae is trying to break free.
Majere lands a knee to the body.
Majere misses with a knee strike.
Cae takes an elbow to the temple.
Majere comes over the top with an elbow. That landed flush.
Majere connects with a nasty looking knee right to Cae's face.
Majere lands a nice knee to the body.
Cae is breathing heavily.
Majere lands a knee to the head.
The fans in attendance giving it up for the two fighters, who have really let it all hang out in the last minute or so!
Majere missing with knees to the body.
That's two minutes gone in the round.
Majere using the Thai clinch to land knees to the body.
Majere lands a knee to the head there! That was nasty!
Majere misses with a knee strike.
Majere missing with knees to the body.
With the fighters up against the cage, Majere throws an elbow but misses.
Majere misses the knee to the body. Nice hip positioning from Cae.
Majere throws a vicious knee straight up the middle but Cae blocks it with crossed arms.
Cae dodges an elbow strike from Majere.
Cae blocks an elbow strike.

Majere manages to pull guard. Let's see whether he can land a sub off his back.

Cae wants to stand up, so he's looking to wriggle free of Majere's closed guard. He's half up but Majere has locked on to an arm! Uh oh! Majere pivots and extends the arm, Cae falls face first to the mat and taps??... does he?? YES! He's tapping! Excellent counter grappling there by Majere! Well done that man!
Ladies and gentlemen, after 2:53 of round 1, we have a winner by way of Submission (Armbar). Caramon Majere!
|
|
|
|
|
|
|
|
|
|
|
|
|
|
|
|
|
|
|
|
|
|
|
| S |
C
A |
G |
S |
C
B |
G |
|
S |
C |
G |
|
energy
A | B |
|
hype
A | B |
|
pop
A | B |
|
mgr
A | B |
|
FIGHT
RATING
62% |
|
|
|
|
|
|
|
Undercard bout
|
Coming up we have a middleweight MMA rules bout between Sturm Brightblade (ranked 5475 p4p, 445 weight class) and Vasiliy Kulik (ranked 4483 p4p, 408 weight class). Rumors backstage are that the fighters have been paid to keep it standing but we know that would never happen in MMA!
 |
|
 |
| 184 cm
19
190 lbs
1 - 2 - 0 |
|
200 cm
19
195 lbs
1 - 0 - 0 |
BJJ Blue Belt
Basic striking
Granite chin |
|
BJJ Blue Belt
Excellent MT
Heavy handed |
|
| |
|
Ladies and gentlemen. This fight is 3 rounds, in the middleweight division.
Introducing the fighter to my left, fighting out of the red corner.
With a record of
1 - 2 - 0, fighting out of New York, Sturm Brightblade!
And introducing the fighter to my right, fighting out of the blue corner.
With a record of
1 - 0 - 0, fighting out of Helsinki, Vasiliy Kulik!
The judges for this bout are Russell Pearce, David Schapiro and Joseph Jones.
The bell rings for round one and we are underway!
Brightblade doesn't react quick enough there as he takes a shot to the body.
Kulik misses with an uppercut. Brightblade saw that one coming.
Kulik avoids a kick to the body.
Kulik has been working on his striking defense in training and it's paying off as Brightblade is landing a low percentage of strikes.
Kulik is a painfully thin specimen of a man. You do wonder whether a good body kick would snap him clean in two.
Kulik lands with a hook. Brightblade tried to avoid it but it clipped the top of his head.
Kulik scores with a nice head shot.
It looks like Sturm Brightblade has been cut.
Kulik tests Brightblade's chin there with a solid looking shot.
Kulik misses with a straight right.
Kulik throws a hook to the body but it doesn't connect.
Brightblade misses with a body punch
and Kulik counters with a good right hand that lands right on the jaw.
Kulik swings away but doesn't land with a series of punches.
Kulik takes a kick to the side of the head.
The crowd cheering loudly, showing their appreciation for the quality fight we're seeing here.
A punch combination from Kulik misses.
Brightblade throws a body kick, spinning off balance
and Kulik counters with a lovely straight right hand!

Kulik sends Brightblade crashing to the mat with a devastating uppercut! Kulik is motioning to the referee to let Brightblade up. He wants to try and finish this one on the feet!

Brightblade is rocked!
Kulik connects with a left and a right that sees a clearly hurt Brightblade covering up! Kulik comes in with a big uppercut and Brightblade goes doooown! He's slumped up against the cage, eyes staring blankly into space.
Ladies and gentlemen, after 0:57 of round 1, we have a winner by way of KO (Strikes). Vasiliy Kulik!
|
|
|
|
|
|
|
|
|
|
|
|
|
|
|
|
|
|
|
|
|
|
|
| S |
C
A |
G |
S |
C
B |
G |
|
S |
C |
G |
|
energy
A | B |
|
hype
A | B |
|
pop
A | B |
|
mgr
A | B |
|
FIGHT
RATING
100% |
|
|
|
|
|
|
|
Undercard bout
|
Coming up we have a lightweight MMA rules bout between Raistlin Majere (ranked 3360 p4p, 351 weight class) and Scruffy Bushrod (ranked 3393 p4p, 357 weight class). Scruffy Bushrod has the eye of the tiger tonight.
 |
|
 |
| 180 cm
19
155 lbs
3 - 1 - 0 |
|
170 cm
19
158 lbs
2 - 2 - 0 |
BJJ Brown Belt
Counter fighter
Good chin |
|
BJJ Blue Belt
Basic striking
Determined |
|
| |
|
Ladies and gentlemen. This fight is 3 rounds, in the lightweight division.
Introducing the fighter to my left, fighting out of the red corner.
With a record of
3 - 1 - 0, fighting out of New York, Raistlin Majere!
And introducing the fighter to my right, fighting out of the blue corner.
With a record of
2 - 2 - 0, fighting out of New York, Scruffy Bushrod!
The judges for this bout are Bruno Lombardi, John Kavanagh and Chad Campbell.
The bell rings for round one and we are underway!
Majere uses some good footwork to avoid the body shot by Bushrod.
Bushrod is looking to chop away at Majere's legs.
Majere attempts a counter takedown but Bushrod avoids it well and moves away.
Bushrod misses with a half-hearted attempt at a head kick.
Bushrod moves into range and lands a nice leg kick.
Majere throws a leg kick but Bushrod checks it.
Bushrod pivots as if he's going to throw a leg kick but stops half way.
Majere throws a combination but comes up with nothing but fresh air.
Bushrod attempts a low kick but it misses it's target.
Majere tries to clinch up.
Bushrod tries to land a body kick

and Majere counters with a nice double leg into guard.
We've had a slow start to the round here - hopefully the action picks up.
Majere advances position into side control!
Majere tries to advance to mount but can't.

Majere thinks about going for a far side armbar but bails out and retains the dominant position instead.
That's one minute gone in the round.
Majere misses with the ground and pound.
Majere wants to lay and pray for a moment but Bushrod keeps working.
Bushrod tries to buck Majere off but Majere is having none of it.
Bushrod is persisting with the attempt to improve his position.
Majere wants to lay and pray for a moment but Bushrod keeps working.
Majere is going to have to think about doing something other than just controlling because Bushrod is managing to avoid having the position dictated to him.
That's two minutes gone in the round.
The crowd are showing their displeasure at the lack of action as loud boos ring out around the arena.
Majere working away.
Majere is trying to get an arm triangle but Bushrod is defending well.
Majere working the head with strikes.
Majere wants to work for a kimura but he's foiled early by Bushrod, who protects the arm well.
Majere is looking for a kimura. He might have it! No, Bushrod has escaped the position, nice work there.
Bushrod really doesn't want to stay on the ground with Majere. If he can't get it back to his feet, it's only a matter of time before he'll be tapping out.
That's three minutes gone in the round.
Bushrod is looking to reverse the position.
Majere tries to move into full mount but can't pass Bushrod's legs.
Majere looking for an arm triangle but it's way too loose to do anything.
Majere wants to control but Bushrod is keeping him busy.
Majere lands some shots froms side control.
We've been hearing that Majere has been drilling a lot of ground and pound in training, so let's see if he get the finish.
Majere trying to control the action but Bushrod is working from the bottom.
That's four minutes gone in the round.
Bushrod is trying to improve his position.
Majere wants to work for a kimura but he's foiled early by Bushrod, who protects the arm well.
Majere swings around for an armbar but Bushrod sees it coming a mile off and turns beautifully into Majere's guard.
The crowd thankful this round is nearly over.
Bushrod postures up.
Bushrod avoids a guillotine attempt easily.
Majere looking to sweep here. No luck so far.
And thats the end of the round the fighters go back to their corners.
Raistlin Majere dominated that round.
The fighters get back to their feet, the hooter sounds and we're back to the action!
Bushrod tries a head kick but it misses.
Majere feinted with a counter takedown.
Bushrod does a little shimmy and throws a leg kick. The leg kick missed by a considerable margin though, making him look a little bit silly for doing the shimmy.
Majere appears to be looking for a counter takedown.
Majere lands a high kick!
Bushrod lands a nice looking body kick.
A head kick misses from Bushrod.
Bushrod throws a right hand that Majere ducks under and follows up with a left that Majere also avoids with ease.
Thud! ouch! good body kick from Bushrod - that will leave a mark!
Bushrod throws a leg kick
and Majere counters with a takedown into side control.
Majere is really dominating this fight. Is there anything that Bushrod can do to turn this around?
We've seen a great period of action over the last minute or so - credit to both fighters for going all out!
Majere trying to control the action but Bushrod is working from the bottom.
The fighters are pressed up against the cage, both looking to find a bit of space to work.
Majere thinks about going for a far side armbar but bails out and retains the dominant position instead.
Majere tries for a kimura but Bushrod is defending well.
We get told so often about how wrestlers don't like to be on their backs. Let's see if Bushrod can do anything to dispel that myth.
That's one minute gone in the round.
Bushrod is not content to let Majere control the position.
Bushrod is positioning himself to get back to half guard.
Majere is looking for a kimura. He might have it! No, Bushrod has escaped the position, nice work there.
That's two minutes gone in the round.
My god... these two guys really need to pick up the pace or everyone will leave to go get a beer.
Majere moves into full mount!
Majere is in full mount, looking to secure a guillotine but Bushrod is surviving well by controlling Majere's body position as best he can.
Majere looking for a guillotine from mount but Bushrod is having none of it.
Majere avoids the attempt from Bushrod to control.
Majere prevents Bushrod from getting the reversal.
That's three minutes gone in the round.
Majere moves into side control, trying to work for a kimura. That looks painful! Will he finish!!?? No, Bushrod has worked his arm free - good work by Bushrod!
Bushrod is trying to get back to half guard.
Majere tries to land with some ground and pound but misses.
Majere advances to full mount.
Majere with the ground and pound from mount.
Majere is working for a guillotine from mount but Bushrod frees his head quite easily.
Majere trying to control but Bushrod is having none of it.
That's four minutes gone in the round.
Bushrod tries to reverse the position but Majere maintains control.
Bushrod is in a horrible position here. Majere smacks him with another shot as he tries to escape the position.
Majere is working on an americana here. Ooh, that looks pretty nasty! Nope, Bushrod has managed to escape the submission attempt.
The crowd thankful this round is nearly over.
Bushrod is writhing around trying to get back to his feet.
And thats the end of the round the fighters go back to their corners.
Raistlin Majere dominated that second round.
That's the end of the interval. I'm sure that seemed a lot quicker than a minute for our two fighters! Back to the action. This is the final round!

Bushrod throws a head kick that misses.
Majere drops down looking for a counter takedown but Bushrod sprawls and moves away.
Majere tries to clinch up against the cage, rushing in to close the distance. Bushrod manages to break the clinch and circles back to the middle of the mat.
Bushrod looking to throw a kick but he's pulled out of it.
A solid leg kick lands there for Bushrod.
Majere blocks a low kick nicely.
Majere tries to clinch but Bushrod moves out of range.
Bushrod throws a leg kick but Majere checks it.
Majere throws a sloppy head kick and Bushrod moves out of range easily.
Majere avoids the head kick by Bushrod.
We've had a slow start to the round here - hopefully the action picks up.
Bushrod lands with a kick to the temple. Majere shrugs as if to say "is that all you've got?"
Scruffy Bushrod seems to be getting the better of the standup.
A looping hook to the body misses from Bushrod. Majere does a little dance to reset his feet.
Majere throws a leg kick but Bushrod moved away.
Majere throws a front kick aimed at Bushrod's knee but Bushrod avoids it well.
A clash of legs there as Majere blocks the low kick.
Majere drops down looking for a counter takedown but Bushrod sprawls and moves away.
That's one minute gone in the round.
Majere blocks a leg kick.
Bushrod dances in quickly and lands a nice inside leg kick on Majere. That did some damage!
Bushrod pivots as if he's going to throw a leg kick but stops half way.
Majere feinted with a counter takedown.
Majere checks a leg kick nicely.
Bushrod looks to throw a body kick
and Majere counters with a nice double leg into guard.
Bushrod can't keep his opponent in guard - Majere advances to half guard, no doubt looking to mount.
Majere scores with a couple of good hammerfists.
Bushrod won't allow Majere to pass to mount.
Bushrod wants to control but Majere is keeping busy and won't allow it.
Bushrod wants to improve his position but Majere is controlling well.
Bushrod on the receiving end of some nice ground and pound.
That's two minutes gone in the round.
Majere is sneakily working for an arm triangle but Bushrod sees it coming and defends easily.
Raistlin Majere overall seems to be getting the better of the ground position in the fight so far.
Majere is looking to take a break and control but Bushrod is keeping him honest, looking to work from the bottom.
Majere is just content to waste time from the top position. Bushrod takes advantage of the situation and regains full guard.
Majere landing some decent shots from guard.
Majere stands up and looks to throw the legs aside to pass to side control. Bushrod swivels though and keeps the full guard.
That's three minutes gone in the round.
Majere slips effortlessly into side control - very nice.
Majere landing with strikes to the head and body from side control.
Bushrod tries to improve position but can't.
Majere looking to control but instead Bushrod has slipped a leg in, to regain half guard.
Bushrod trying to control from the bottom.
Bushrod is looking for a sweep. Majere is wise to his cunning plan and keeps the top position.
Majere moves into full mount! Bushrod won't be happy about that!
Bushrod is just holding on here. Majere manages to take his back.
That's four minutes gone in the round.
Majere is working for the choke. He's slipped one arm under the chin. Bushrod has to defend the other arm for all he's worth... but Majere has managed to get that arm free too and he's tightening the choke! Bushrod taps out and looks absolutely disgusted with himself. Majere doesn't care though - he's delighted!
Ladies and gentlemen, after 4:21 of round 3, we have a winner by way of Submission (RNC). Raistlin Majere!
|
|
|
|
|
|
|
|
|
|
|
|
|
|
|
|
|
|
|
|
|
|
|
| S |
C
A |
G |
S |
C
B |
G |
|
S |
C |
G |
|
energy
A | B |
|
hype
A | B |
|
pop
A | B |
|
mgr
A | B |
|
FIGHT
RATING
45% |
|
|
|
|
|
|
|
Undercard bout
|
Coming up we have a welterweight MMA rules bout between David McDonald (ranked 2319 p4p, 267 weight class) and Azrell Bryn Makar (ranked 3107 p4p, 336 weight class). These two fighters really are very evenly matched on the feet - it will be fascinating to see who can assert themselves in that aspect of the fight.
 |
|
 |
| 180 cm
19
179 lbs
5 - 1 - 0 |
|
180 cm
19
175 lbs
3 - 2 - 0 |
BJJ Brown Belt
Basic striking
Good chin |
|
BJJ Purple Belt
Basic striking
Very confident |
|
| |
|
Ladies and gentlemen. This fight is 3 rounds, in the welterweight division.
Introducing the fighter to my left, fighting out of the red corner.
With a record of
5 - 1 - 0, fighting out of New York, David McDonald!
And introducing the fighter to my right, fighting out of the blue corner.
With a record of
3 - 2 - 0, fighting out of New York, Azrell Bryn Makar!
The judges for this bout are Jonathan Paton, Reed Andrews and Joseph Jones.
The bell rings for round one and we are underway!
Bryn Makar shoots in looking for a single leg takedown. McDonald is trying to defend but Bryn Makar finishes it well and ends up in half guard. Let's see if he can advance position further.
McDonald wants to improve his position but Bryn Makar is controlling well.
McDonald regains full guard. Nicely done.
Bryn Makar won't allow McDonald to sweep him here.
Bryn Makar trying to control but McDonald is working from the bottom.
Bryn Makar is in a good position here but he's just trying to control... And he's not even managing to do that successfully.
Bryn Makar lands a nice shot whilst sitting in his opponent's guard.
Bryn Makar won't allow McDonald to sweep him here.
We've had a slow start to the round here - hopefully the action picks up.
Bryn Makar with a couple of shots to the head there. Not particularly brutal.
McDonald tries to land a sweep but no joy.
Bryn Makar trying to control the position from guard on top but McDonald is wriggling around, looking for whatever he can.
Bryn Makar working some ground and pound from guard but it's not doing any damage.
That's one minute gone in the round.
McDonald is working from a closed guard but he's struggling to control his opponent.
Bryn Makar landing with the ground and pound.
In the pre-fight buildup videos we saw Bryn Makar working his ground and pound in the gym. So far it seems to be working well.
Bryn Makar working in close now, lands a nice elbow to the side of McDonald's head.
Bryn Makar scoring with punches to the head and body.
McDonald is working actively off his back, looking to secure an arm or perhaps work for a triangle.
Bryn Makar chips away with some ground and pound.
McDonald is looking for a triangle but Bryn Makar pushes his legs off easily.
The ref warns both fighters not to hold the cage as they work up against the meshing.
Bryn Makar working in close now, lands a nice elbow to the side of McDonald's head.
Bryn Makar is posturing up here but McDonald has hold of an arm and he's gone for an armbar! Bryn Makar tries to roll out but it's too tight and Bryn Makar has to tap! Slick submission there by McDonald!
Ladies and gentlemen, after 2:55 of round 1, we have a winner by way of Submission (Armbar). David McDonald!
|
|
|
|
|
|
|
|
|
|
|
|
|
|
|
|
|
|
|
|
|
|
|
| S |
C
A |
G |
S |
C
B |
G |
|
S |
C |
G |
|
energy
A | B |
|
hype
A | B |
|
pop
A | B |
|
mgr
A | B |
|
FIGHT
RATING
44% |
|
|
|
|
|
|
|
Undercard bout
|
Coming up we have a welterweight MMA rules bout between Ivar Lothbrok (ranked 3356 p4p, 353 weight class) and Yellow Man (ranked 4427 p4p, 407 weight class). Yellow Man is staring across the cage at his opponent, tweaking his nipples.
 |
|
 |
| 178 cm
19
180 lbs
2 - 2 - 0 |
|
175 cm
25
170 lbs
3 - 1 - 0 |
BJJ Purple Belt
Counter fighter
Good chin |
|
Powerful takedowns
Brawler
Powerful |
|
| |
|
Ladies and gentlemen. This fight is 3 rounds, in the welterweight division.
Introducing the fighter to my left, fighting out of the red corner.
With a record of
2 - 2 - 0, fighting out of New York, Ivar Lothbrok!
And introducing the fighter to my right, fighting out of the blue corner.
With a record of
3 - 1 - 0, fighting out of New York, Yellow Man!
The judges for this bout are Reed Andrews, Jonathan Paton and Jorge Garcia.
The bell rings for round one and we are underway!
Lothbrok slaps away a takedown attempt from Man, before circling back to the center of the mat.
Lothbrok appears to be looking for a big counter.
Lothbrok misses the shot to the body.

Lothbrok gets to the clinch - let's see what his plan is here.
Man misses with a knee strike.
Lothbrok breaks the clinch.
Lothbrok moves in looking to clinch but Man pushes him off.
Lothbrok misses with a two punch combination.
Lothbrok moves forwards but Man connects with a nice, crisp jab.
Yellow Man seems to be the more aggressive standup fighter in this bout.
Lothbrok throws a body kick that sends a sickening thudding noise reverberating around the arena.
We've had a slow start to the round here - hopefully the action picks up.
Man throws a jab but it's blocked by Lothbrok.
Man tries to keep at a distance but Lothbrok has taken the fight into the clinch.
Man is trying to pull guard but being pressed up against the cage enables Lothbrok to keep the fight standing.
That's one minute gone in the round.
Man being controlled against the cage.
Lothbrok pushes off and circles away, back to the middle of the mat.
Man throws a hook to the body but it doesn't connect.
Man fails to land the takedown.
Ivar Lothbrok has stuffed three takedown attempts in the round now. That's going to take a lot out of Yellow Man.
Lothbrok dodges the punch combination from Man.
Lothbrok is looking to take this fight into the clinch.
Lothbrok closes the distance and clinches.
Lothbrok manages to break the clinch.
That's two minutes gone in the round.
Lothbrok throws a right hand that Man ducks under and follows up with a left that Man also avoids with ease.
Man uses good head movement to avoid the hook from Lothbrok.
Lothbrok leaves Man with his face pressed against the mat as he sprawls beautifully, defending against a solid takedown attempt.
Lothbrok tries to clinch but is not successful on this occasion.
Lothbrok tries to close the distance and clinch up against the cage but Man paws at him with a jab and circles away.
Lothbrok moves into the clinch.
Lothbrok just leaning against Man, taking a breather.
Lothbrok stalling the fight.
The crowd are getting pretty annoyed with Lothbrok for his constant stalling in the clinch and are voicing their displeasure.

Man's corner calls for him to break the clinch, which he does.
Lothbrok slips a jab from Man.
Man throws a series of punches but Lothbrok moves out of range.
Lothbrok lands with a kick to the temple. Man shrugs as if to say "is that all you've got?"
That's three minutes gone in the round.
Man keeps the fight on the outside.
Man throws a hard body shot but it just misses.
Lothbrok misses with a few strikes there.
Man shoots in for a takedown! He's got it and he's managed to land in side control! That's better than Man was expecting from the takedown attempt, I'm sure!
We could do with one of the fighters taking the initiative a bit more on the ground - they're both waiting to capitalize on a mistake.
Lothbrok tries to improve position but can't.
Man wants to control but Lothbrok is keeping him busy.
Lothbrok wings away with a couple of strikes but they don't land.
Lothbrok is moving his hips around well on the bottom and has managed to get back to half guard.
Lothbrok looking for submissions off his back.
Lothbrok moves into full guard.
That's four minutes gone in the round.
Man wants to control from the top but Lothbrok keeps moving.
Lothbrok seems keen to control rather than go for a submission, at least for now.
Lothbrok wants to sweep but no luck.
Man throwing strikes but missing.
Man trying to control the position from guard on top but Lothbrok is wriggling around, looking for whatever he can.
Man throwing shots from guard but he's hitting more mat than opponent.
And thats the end of the round the fighters go back to their corners.
Ivar Lothbrok dominated that round.
The fighters get back to their feet, the hooter sounds and we're back to the action!
Man fakes high and shoots in for a takedown but Lothbrok avoids it really well and circles away.
Lothbrok looks to land a body kick but Man moved away.
And Man tries to counter it with a takedown but Lothbrok pushes his down on his head and steps out.
Man looks to land a right hand but Lothbrok moved out of range.
Lothbrok moves into range and clinches up with Man.
Man is trying to drag Lothbrok to the mat but Lothbrok just about manages to keep his footing. He used the cage to his advantage there.
Lothbrok escapes the clinch and we're back to striking.
We've had a slow start to the round here - hopefully the action picks up.
Lothbrok stuffs the takedown attempt from Man. Man gets slowly back to his feet.
Ivar Lothbrok has stuffed three takedown attempts in the round now. That's going to take a lot out of Yellow Man.
Man is on the wrong end of a nice combination from Lothbrok.
That's one minute gone in the round.
A punch combination from Man misses.
Lothbrok has taken the fight to the clinch.
Lothbrok is defending well against a takedown attempt.
Lothbrok breaks the clinch and we're back to striking at distance.
The fight stays on the outside here - Lothbrok looks like he's thinking about clinching though.
Lothbrok looks to have improved his striking defense since last time we saw him fight.
Lothbrok fails with an attempt to clinch.
Lothbrok lands a jab to Man's midsection.
Lothbrok closes the distance and lands a one-two.
Man swings away but doesn't land with a series of punches.
Man takes a thudding leg kick, right into the meat of the thigh.
Lothbrok tries to clinch but Man is having none of it.
That's two minutes gone in the round.
Man misses with the combination.
This fight brought to you by 5M nutrition - it's mmmmm tasty. Nice jab by Lothbrok.
Wooooo! Give it up for these two warriors! They are putting on a show!
Lothbrok swings for the body but Man moves out of range.
Man avoids the clinch attempt nicely.
Ivar Lothbrok is winning the standup battle so far.
Lothbrok tries to clinch up but Man circles away and keeps his distance.
Lothbrok scores with a hook to the body. Man takes a step back and tries to catch his breath.
Man swings wildly with a couple of big hooks
and Lothbrok counters with a three punch combo that has Man backing up. Man nods at Lothbrok to acknowledge the strikes.
Lothbrok avoids the body shot from Man.
Man misses with a straight left.
Lothbrok throws a right and a left that Man avoids nicely.
That's three minutes gone in the round.
Lothbrok steps to the side to avoid the strikes from Man.
Lothbrok is on the wrong end of a nice combination from Man.
Man misses with a jab and misses with a cross straight after too.
Lothbrok tries to clinch there but Man circles away.
Lothbrok moves into range and clinches up with Man.
Lothbrok stalling.
Man drops down looking for an ankle pick but Lothbrok pulls his leg out and moves away.
Man closes this distance looking for a takedown but Lothbrok circles away.
Man is breathing heavily.
Man avoids a punch combination nicely.
Man avoids the clinch attempt nicely.
Man shoots for a takedown but Lothbrok saw that one coming a mile off and avoided it easily.
That's four minutes gone in the round.
Lothbrok stuffs the takedown.
Lothbrok tries to clinch but is not successful on this occasion.
A looping hook to the body misses from Lothbrok. Man does a little dance to reset his feet.
Ivar Lothbrok is looking to throw some combinations by the looks of things.
Lothbrok displaying good standup as he scores with a three punch combination.
This is a great period of action - very entertaining stuff!
The fight stays on the outside here - Lothbrok looks like he's thinking about clinching though.
Man throws a jab, cross combination which is slipped
and Lothbrok connects with a straight left hand counter down the middle.
Lothbrok closes the distance and clinches.
Man tries to pull guard but can't drag his opponent to the mat. Lothbrok just stands there and leans against the cage.
Lothbrok is clearly stalling here... Pick up the pace son.
Lothbrok stalling the fight.
And thats the end of the round the fighters go back to their corners.
Ivar Lothbrok dominated that second round.
That's time! Lothbrok's corner gives him a slap on the ass as he gets ready to fight. This is the final round!
Lothbrok is moving around nicely and scores here with a single head shot.
Man dives in for a single leg takedown but Lothbrok sprawls and the fighters end up clinched against the cage.
Man tries to keep at a distance but Lothbrok has taken the fight into the clinch.
Lothbrok has Man pushed against the cage.
Man wants to get back to striking at distance but Lothbrok won't allow it.
Man pushes off and circles away, back to the middle of the mat.
Lothbrok throws a head kick that misses and slips in the process. He scrambles back to his feet and the fighters circle.
Man is looking for the big counter here.
We've had a slow start to the round here - hopefully the action picks up.
Lothbrok throws a right high kick that is partially blocked by Man.
Lothbrok scores with a punch to the head.
Lothbrok tries to close the distance and clinch up but Man swats him away and circles back towards the center.
Man with the counter takedown but Lothbrok avoids it easily.
Man shoots in for a takedown but doesn't get it.
That's one minute gone in the round.
Lothbrok tries to clinch up but Man circles away and keeps his distance.
Man tries to drive through with a takedown attempt but Lothbrok defends well and Man ends up having to push Lothbrok into the cage where they will battle it out in the clinch.
Ivar Lothbrok has stuffed three takedown attempts in the round now. That's going to take a lot out of Yellow Man.
Some wild striking there from Man.
Man swings for the body but Lothbrok moves out of range.
Lothbrok appears to be looking for a counter takedown.
Lothbrok has taken the fight to the clinch.
Man goes for a takedown in the clinch but Lothbrok prevents it.
Man takes a big intake of breath there - he's definitely tired.
Come on Lothbrok - let's have some action - none of this stalling nonsense.
Man tries to take the fight to the ground by pulling guard but can't manage it.
Lothbrok looks like he'd prefer to be striking at range right now.
That's two minutes gone in the round.
Lothbrok taking a break, stalling in the clinch.
Man breaks the clinch and we return to the middle of the mat.
Lothbrok moves into the clinch successfully.
Man tries for a takedown but Lothbrok manages to get underhooks.
Some stalling of biblical proportions here from Lothbrok.
The pace really dropping off here, momentarily.
Lothbrok seems to have come into the fight with the intention of avoiding any damage in the clinch, rather than actually showing any aggression.
Lothbrok manages to break the clinch.
Ivar Lothbrok is looking to keep the fight on the feet at all costs.
Man dives in for a single leg takedown but Lothbrok sprawls and the fighters end up clinched against the cage.
Man has his front leg slapped to the side - a nice low kick landing there from Lothbrok.
Lothbrok motions for Man to come forward. Lothbrok throws a leg kick but it misses it's target.
Lothbrok throws a head kick that misses and slips in the process. He scrambles back to his feet and the fighters circle.
Man with the counter takedown but Lothbrok avoids it easily.
That's three minutes gone in the round.
Lothbrok misses with a few strikes there.
Lothbrok is really dominating this fight. Is there anything that Man can do to turn this around?
Lothbrok fails with an attempt to clinch.
Man looks for a takedown here. Will he get it? Lothbrok is fending him off so far but Man persists. Nope, Lothbrok circles away and we're back to standing.
Man tries to drive through with a takedown attempt but Lothbrok defends well and Man ends up having to push Lothbrok into the cage where they will battle it out in the clinch.
Lothbrok scores with a big left there. The judges will like that one.
Man on the wrong end of a vicious looking body shot.
Lothbrok tries to clinch up.
Man closes this distance looking for a takedown but Lothbrok circles away.
Lothbrok swung with a counter right hand that didn't connect.
Lothbrok tries to clinch but Man moves out of range.
Lothbrok tries to close the distance and clinch but Man swats him to one side with an open hand palm strike and circles away.
Lothbrok moves out of range of the strikes.
That's four minutes gone in the round.
Lothbrok tries to clinch but Man is having none of it.
Lothbrok moves in looking to clinch but Man pushes him off.
Man avoids the clinch attempt nicely.
Lothbrok pushes forward with a 1-2 combination that forces Man back to the cage. Lothbrok follows up with a solid lead hook to the liver.
A combination from Man does no damage.
Lothbrok is looking for a counter combo.
Lothbrok tries to clinch but is not successful on this occasion.
Man is on the wrong end of a nice combination from Lothbrok.
This has been an exciting period of action!
Lothbrok tries to bum rush Man with a series of wild strikes but Man uses good footwork to avoid the assault.
And Man tries to counter it with a takedown but Lothbrok pushes his down on his head and steps out.
Lothbrok feints a jab promting Man to slip. Lothbrok then demonstrates his capabilities by jabbing again. Man slips again and ducks right into an uppercut.
Lothbrok tries to clinch but is not successful on this occasion.
Lothbrok leaves Man with his face pressed against the mat as he sprawls beautifully, defending against a solid takedown attempt.
And that's the end of the fight!
Ivar Lothbrok showed his dominance in that final round.
Well Lothbrok has outscored his opponent in every aspect of the fight today. Only a scarily incompetent judge or two will keep him from a well deserved win... Over to the ring announcer for the scorecards.
Ladies and gentlemen, after 3 rounds of action, we go to the scorecards for a decision.
Judge Reed Andrews scores the fight 30:27
Judge Jonathan Paton scores the fight 30:27
Judge Jorge Garcia scores the fight 30:27
In favor of your winner, by unanimous decision... Ivar Lothbrok!
|
|
|
|
|
|
|
|
|
|
|
|
|
|
|
|
|
|
|
|
|
|
|
| S |
C
A |
G |
S |
C
B |
G |
|
S |
C |
G |
|
energy
A | B |
|
hype
A | B |
|
pop
A | B |
|
mgr
A | B |
|
FIGHT
RATING
46% |
|
|
|
|
|
|
|
Undercard bout
|
Coming up we have a lightweight MMA rules bout between Peter Dryswood (ranked 4133 p4p, 420 weight class) and Frank Scramp (ranked 3752 p4p, 388 weight class). Peter Dryswood could well score a knockout today. He has the power to get to Frank Scramp's chin.
 |
|
 |
| 173 cm
25
156 lbs
1 - 0 - 0 |
|
169 cm
25
145 lbs
3 - 0 - 0 |
Good wrestling
Brawler
Granite chin |
|
Good takedowns
Brawler
Determined |
|
| |
|
Ladies and gentlemen. This fight is 3 rounds, in the lightweight division.
Introducing the fighter to my left, fighting out of the red corner.
With a record of
1 - 0 - 0, fighting out of New York, Peter Dryswood!
And introducing the fighter to my right, fighting out of the blue corner.
With a record of
3 - 0 - 0, fighting out of New York, Frank Scramp!
The judges for this bout are David Schapiro, John Kavanagh and Russell Pearce.
The bell rings for round one and we are underway!
A telegraphed takedown attempt from Dryswood is defended easily by Scramp.
Dryswood gets the takedown into side control.
The ground and pound from Dryswood seems to be hitting the mat more than his opponent.
Dryswood working away.
Dryswood throws a knee to the body but it doesn't do much damage.
Scramp is trying to control Dryswood's posture but Dryswood avoids it.
Dryswood in side control, throwing shots but Scramp defends.
Dryswood cracks Scramp with an elbow. That is naaassty.
Dryswood knows he needs to get back to his feet asap. He's simply no match for Scramp on the ground.
We've had a slow start to the round here - hopefully the action picks up.
Dryswood creates some space and throws a big elbow, but Scramp sees it coming and moves his head just enough to avoid the strike.
Sloppy strikes there by Dryswood.
Scramp wants to control but Dryswood postures up.
Dryswood lands a knee to the body and follows it up with some ground and pound to the head. That will wear Scramp down.
Scramp tries to improve position but can't.
Scramp can't do much from the bottom here.
That's one minute gone in the round.
Dryswood working the head with strikes.
Dryswood misses with a strike but at least he's keeping busy, looking to cause some damage - that will still help him when it comes to the judges scorecards.
Scramp tries to buck Dryswood off but Dryswood is having none of it.
Dryswood in side control, trying to ground and pound but not landing this time.
Dryswood lands some shots froms side control.
Dryswood looking to punish the body of his opponent here but Scramp is avoiding damage well.
Dryswood grinds an elbow into Scramp's temple.
The ref warns both fighters not to hold the cage as they work up against the meshing.
Dryswood is trying to ground and pound but Scramp uses the momentary lack of control by Dryswood to regain half guard.
Dryswood scoring with strikes to the body and head.
The fighters are pressed up against the cage, both looking to find a bit of space to work.
Scramp trying to hold on to Dryswood's head to control him but Dryswood postures up.
Dryswood throwing shots but they're hitting the canvas more than the man.
We've been hearing that Dryswood has been drilling a lot of ground and pound in training, so let's see if he get the finish.
Scramp is pressing down on Dryswood's left leg trying to get back to full guard. He's managed it.
That's two minutes gone in the round.
Hammerfist, elbow! yells Dryswood's corner. There ya go! There ya go!
Dryswood throws a strike but Scramp rolls with it and manages to sweep. Now he's in guard on top.

Scramp is pushing down on Dryswood's leg trying to pass to half guard. Dryswood is fighting to maintain full guard but Scramp has managed to sneak the leg through.
Scramp seems to be working for a kimura but Dryswood defends the submission attempt.
We've seen a great period of action over the last minute or so - credit to both fighters for going all out!
Dryswood landing rabbit punches to the side of Scramp's head. Not doing much damage but still scoring a few points.
Scramp wants to stand but Dryswood has hold of a leg and an arm, so he's trapped for now.
Scramp is looking to take a break and control but Dryswood is keeping him honest, looking to work from the bottom.
Scramp thows a huge punch but Dryswood dodges it nicely.
Dryswood punching from the bottom.
Dryswood is trying to get back to full guard.
Dryswood misses with some strikes from the bottom.
Dryswood flails away from the bottom but he's not doing any damage.
That's three minutes gone in the round.
Dryswood landing strikes from the bottom.
Scramp trying to control the action but Dryswood is working from the bottom.
Dryswood throws some strikes from the bottom but Scramp isn't bothered - he's working on a kimura... it looks tight... it is! Dryswood is tapping and screaming like a little girl! Ouch, that looks painful! Good win for Scramp!
Ladies and gentlemen, after 3:23 of round 1, we have a winner by way of Submission (Kimura). Frank Scramp!
|
|
|
|
|
|
|
|
|
|
|
|
|
|
|
|
|
|
|
|
|
|
|
| S |
C
A |
G |
S |
C
B |
G |
|
S |
C |
G |
|
energy
A | B |
|
hype
A | B |
|
pop
A | B |
|
mgr
A | B |
|
FIGHT
RATING
42% |
|
|
|
|
|
|
|
Undercard bout
|
Coming up we have a lightweight MMA rules bout between Lewis Anderson (ranked 3252 p4p, 345 weight class) and Masakazu Ebihara (ranked 5077 p4p, 467 weight class). Masakazu Ebihara has the better chin. Will he look to stand and bang today?
 |
|
 |
| 178 cm
19
160 lbs
2 - 1 - 0 |
|
177 cm
24
164 lbs
1 - 0 - 0 |
BJJ White Belt
Excellent MT
Cardio machine |
|
BJJ White Belt
Good kicks
Solid chin |
|
| |
|
Ladies and gentlemen. This fight is 3 rounds, in the lightweight division.
Introducing the fighter to my left, fighting out of the red corner.
With a record of
2 - 1 - 0, fighting out of New York, Lewis Anderson!
And introducing the fighter to my right, fighting out of the blue corner.
With a record of
1 - 0 - 0, fighting out of New York, Masakazu Ebihara!
The judges for this bout are Steve Montenegro, David Schapiro and Eddie Farnsworth.
The bell rings for round one and we are underway!
Ebihara wants to clinch but Anderson slips to the side
and Anderson counters with a solid body kick.
Anderson bobs and weaves and then throws a good body kick.
Ebihara fakes with an overhand right and moves in to clinch with Anderson, pushing him back against the cage.
Ebihara escapes the clinch and we're back to striking.
Ebihara throws a head kick but Anderson moves out of range.
A lazy left from Anderson finds it's target.
We've been told by Anderson's head coaches at Greedy's School of MMA that he's been working on his takedown defense in preparation for this fight.
Nice takedown defense from Anderson. No joy for Ebihara on that attempt.
Ebihara closes the distance and clinches.
Ebihara tries to land a knee to the head but Anderson blocks with his arms.
Ebihara tries to pull guard but Anderson holds him up against the cage and eventually Ebihara drops back down to his feet.
Ebihara tries to land a knee to the head but misses.
Ebihara keeps the fight in the clinch, despite Anderson's efforts to push away.
Anderson can't break the clinch.
That's one minute gone in the round.
The two fighters are working to gain dominance in the clinch.
Ebihara fails to land with a short punch on the inside.
Anderson can't break the clinch.
Anderson misses with a body punch.
Anderson blocks a knee to the body. He'll have a nicely bruised forearm in the morning.
A quick uppercut on the inside from Ebihara.
Ebihara pushes off and circles away, back to the middle of the mat.
Anderson swats away the attempt to clinch by Ebihara.
Anderson throws a quick counter kick to the body but Ebihara avoids it.
Anderson avoids the head kick by Ebihara.
Anderson thinks about countering with a body kick.
Ebihara tries to clinch but is not successful on this occasion.
Ebihara tries to clinch
and Anderson counters with a series of strikes. Ebihara will be more careful next time no doubt.
Ebihara throws a body shot but no joy.
Ebihara looks to clinch

and Anderson counters with a head kick that drops Ebihara to the mat! Ebihara scrambles across the canvas and gets back to his feet, still wobbly!

Ebihara is rocked!
Wooooo! Give it up for these two warriors! They are putting on a show!
Ebihara closes the distance looking to clinch
and Anderson counters with a big left hand that crumples Ebihara! He was out before he hit the floor! Brutal knockout!
Ladies and gentlemen, after 2:58 of round 1, we have a winner by way of KO (Punch). Lewis Anderson!
|
|
|
|
|
|
|
|
|
|
|
|
|
|
|
|
|
|
|
|
|
|
|
| S |
C
A |
G |
S |
C
B |
G |
|
S |
C |
G |
|
energy
A | B |
|
hype
A | B |
|
pop
A | B |
|
mgr
A | B |
|
FIGHT
RATING
53% |
|
|
|
|
|
|
|
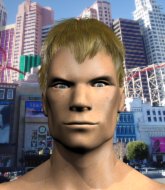
Co-main event
|
Coming up we have a lightweight MMA rules bout between Ryland Rasmussen (ranked 2502 p4p, 276 weight class) and Abdur Rahman Hodges (ranked 6050 p4p, 497 weight class). These two fighters really are very evenly matched on the feet - it will be fascinating to see who can assert themselves in that aspect of the fight.
 |
|
 |
| 167 cm
19
160 lbs
3 - 2 - 0 |
|
170 cm
19
158 lbs
1 - 1 - 0 |
BJJ Purple Belt
Basic striking
Experienced |
|
BJJ Purple Belt
Basic striking
Solid chin |
|
| |
|
Ladies and gentlemen. This fight is 3 rounds, in the lightweight division.
Introducing the fighter to my left, fighting out of the red corner.
With a record of
3 - 2 - 0, fighting out of New York, Ryland Rasmussen!
And introducing the fighter to my right, fighting out of the blue corner.
With a record of
1 - 1 - 0, fighting out of New York, Abdur Rahman Hodges!
The judges for this bout are Jorge Garcia, Columbo Gatti and John Roberts.
The bell rings for round one and we are underway!
Hodges tries to land a body kick
so Rasmussen counters with a double leg into guard. Good agility.
Rasmussen wants to control from the top but Hodges keeps moving.
Hodges trying to keep a closed guard but Rasmussen is proving a slippery customer.
Hodges has a loose triangle. He'll be looking to tighten that up but Rasmussen can see exactly what he's planning and manages to posture up and free himself.
We've been hearing that Rasmussen has been drilling a lot of ground and pound in training, so let's see if he get the finish.
Rasmussen tries to free his leg and advance position but Hodges is retaining full guard.
There's a bit of a scramble here and now Hodges is on top in guard.
Hodges stands up and looks to throw the legs aside to pass to side control. Rasmussen swivels though and keeps the full guard.
We've had a slow start to the round here - hopefully the action picks up.
Rasmussen is active off his back here, looking for submissions.
Rasmussen is looking for a triangle but Hodges pushes his legs off easily.
Rasmussen wants to sweep but no luck.
That's one minute gone in the round.
Rasmussen keeping moving, preventing Hodges from controlling successfully.
Rasmussen has his foot on Hodges's thigh. He's trying to push off and get in position for a triangle, I think. Hodges works his way back into a safe position though.
Hodges throwing strikes but missing.
Hodges trying to control the position from guard on top but Rasmussen is wriggling around, looking for whatever he can.
Rasmussen working the defensive guard well to avoid strikes from Hodges.
Hodges trying to control the position from guard on top but Rasmussen is wriggling around, looking for whatever he can.
Rasmussen working from the bottom, still in full guard. He's managed to get a loose triangle. Hodges doesn't seem to be doing much to defend here, obviously he feels comfortable in the position. Hodges manages to throw the legs off his shoulder and he's back into guard - no problem.
Rasmussen is working the butterfly guard. He manages to land a nice scissor sweep and is now in half guard on the top. Nice move.

Rasmussen seems content to maintain position for now, rather than mounting any offense.
That's two minutes gone in the round.
Hodges is trying to get back to full guard.
Hodges wants to get back to his feet.
Rasmussen wants to pass to mount but Hodges is defending the position.
Hodges looking for submissions from an awkward position here.
Rasmussen wants to pass the guard but Hodges is defending well.
Hodges is working for an escape here. He's hooked one of Rasmussen's legs and he's managed to sneak out and take Rasmussen's back!
Rasmussen tries to roll but Hodges sticks to his back.
Hodges avoiding Rasmussen 's attempts to control his hands.
That's three minutes gone in the round.
Hodges has the hooks in. Rasmussen is trying to push off one leg but he has to do so cautiously to avoid being submitted.
Hodges sinks in the hooks and is looking for the choke. He's got it! Rasmussen taps out!
Ladies and gentlemen, after 3:27 of round 1, we have a winner by way of Submission (RNC). Abdur Rahman Hodges!
|
|
|
|
|
|
|
|
|
|
|
|
|
|
|
|
|
|
|
|
|
|
|
| S |
C
A |
G |
S |
C
B |
G |
|
S |
C |
G |
|
energy
A | B |
|
hype
A | B |
|
pop
A | B |
|
mgr
A | B |
|
FIGHT
RATING
34% |
|
|
|
|
|
|
|
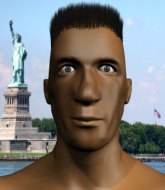
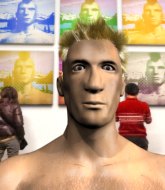
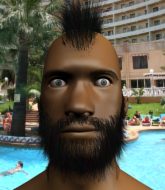
Main event
|
Coming up we have a middleweight MMA rules bout between Irish Power (ranked 2190 p4p, 256 weight class) and Will Craig (ranked 3782 p4p, 368 weight class). Man, I cannot wait for this one!
 |
|
 |
| 172 cm
25
185 lbs
6 - 0 - 0 |
|
190 cm
19
190 lbs
3 - 1 - 0 |
Good wrestling
Basic striking
Very strong |
|
BJJ Blue Belt
Excellent boxer
Determined |
|
| |
|
Ladies and gentlemen. This fight is 5 rounds, for the middleweight championship of the world!
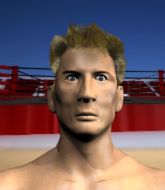
Introducing the champion to my left, fighting out of the red corner.
With a record of
6 - 0 - 0, fighting out of Tokyo, Irish Power!
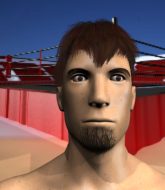
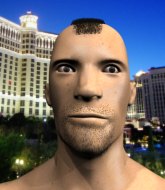
And introducing the challenger to my right, fighting out of the blue corner.
With a record of
3 - 1 - 0, fighting out of New York, Will Craig!
The judges for this bout are Jonathan Paton, Dean Styles and Russell Pearce.
The bell rings for round one and we are underway!
Power lands with an overhand left.
Power looks to land a left hand but Craig moved out of range nicely.
Irish Power seems to be the more aggressive standup fighter in this bout.
Power forces Craig back against the cage and clinches.
Power stays in close to his opponent and throws a right hand to the body.
Craig working hard to break the clinch.
Craig has had enough of the clinch but Power keeps him there for the moment.
Power lands punches inside but they're not really causing much damage.
Craig wants to break free. God knows he wants to breaaaak freeee.
Power lands a shoulder strike that jolts his opponent's head backwards.
Power has a couple of punches blocked by Craig.
Power keeps control of Craig as he tries to wriggle out of the double underhooks.
Power lands with a short shot to the head.
Craig tries to circle away but Power has him pinned against the cage.
Craig can't break the clinch.
We've had a slow start to the round here - hopefully the action picks up.
A head punch blocked on the inside by Craig.
Craig wants to break free. God knows he wants to breaaaak freeee.
Power lands a hook to the side of the head.
Craig has had enough of the clinch and is looking to separate.
Craig escapes the clinch and we're back to striking.
Power clinches up against the cage.
That's one minute gone in the round.
Good body shot from Power.
A short right hand to the side of the head by Power.
Power lands with a short shot to the head.
Power lands a right hand that snaps the head of Craig backwards.
Craig is rocked!
Craig looks winded!
Power lands a right hand that snaps the head of Craig backwards.
Craig is still on wobbly legs! Can Power finish him?
Power lands a shoulder strike that jolts his opponent's head backwards.
Power gets through Craig's defenses to land a nice punch to the side of the head.
We can't be sure of the tactics at this early stage but we have heard that Craig has been working on his takedowns a lot in the buildup to the fight and we can only assume he's going to look to take this to the mat.
Power lands a nice shot to the body.
Power lands with a good tight uppercut to the head.
Craig is trying to force a seperation but Power has the dominant position.
Power lands a right hand that snaps the head of Craig backwards.
Wooooo! Give it up for these two warriors! They are putting on a show!
Power gets through Craig's defenses to land a nice punch to the side of the head.
Craig tries to circle away but Power has him pinned against the cage.
Power lands a body punch - he's looking to wear down Craig.
A hook to the body from Power.
An uppercut to the body lands inside from Power.
Craig seems to have recovered his senses.
Power lands with a quick shot inside that doesn't really do much damage.
That's two minutes gone in the round.
Good body shot from Power.
Good body shot from Power.
Power lands with a right to the head.
A short right from Power.
A short right from Power.
Power makes some space for himself and lands an uppercut.
Power dips a shoulder and cracks Craig with a mighty uppercut! Craig falls back against the cage and Power unloads with a barrage of strikes! Craig is completely out with his eyes open, only supported by the cage! Save him ref! Eventually the ref decides to do his job and jumps in - Power screams abuse at the incompetent official before going over to celebrate with his corner. Brutal stuff!
Ladies and gentlemen, after 2:29 of round 1, we have a winner by way of TKO (Strikes). Irish Power!
Irish Power retains his middleweight title!
|
|
|
|
|
|
|
|
|
|
|
|
|
|
|
|
|
|
|
|
|
|
|
| S |
C
A |
G |
S |
C
B |
G |
|
S |
C |
G |
|
energy
A | B |
|
hype
A | B |
|
pop
A | B |
|
mgr
A | B |
|
FIGHT
RATING
59% |
|
|
|
|
|
|
|
|
|
|
