 |
Extreme XXXII PBP Commentary |
Undercard bout
|
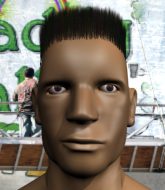
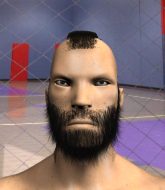
Coming up we have a welterweight MMA rules bout between Mike Rob (ranked 0 p4p, 0 weight class) and Joey Robledo (ranked 0 p4p, 0 weight class). Robledo has chosen DJ Khaled as his entrance music. Joey Robledo will no doubt be trying to keep this one on the feet, where he has a distinct advantage.
 |
|
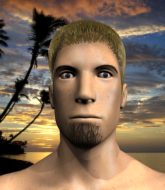 |
| 196 cm
21
173 lbs
6 - 10 - 1 |
|
180 cm
20
165 lbs
0 - 0 - 0 |
BJJ Blue Belt
Counter striker
Good chin |
|
BJJ Blue Belt
World class boxer
Heavy handed |
|
| |
|
Ladies and gentlemen. This fight is 3 rounds, in the welterweight division.
Introducing the fighter to my left, fighting out of the red corner.
With a record of
6 - 10 - 1, fighting out of Amsterdam, Mike Rob!
And introducing the fighter to my right, fighting out of the blue corner.
With a record of
0 - 0 - 0, fighting out of Hilo, Joey Robledo!
The judges for this bout are Albert Achterberg, Paulsen Ambrosius and Radbod Blank.

The bell rings for round one and we are underway!
Robledo scores with a punch to the head.
Robledo throws a combination but it was largely blocked by Rob.
Robledo tried to score with a low kick but Rob checks it.
We've had a slow start to the round here - hopefully the action picks up.
Robledo comes forward and lands a shot to the body, then darts back out of range.

That's one minute gone in the round.
Robledo swings away but doesn't land with a series of punches.
Rob fails with a takedown attempt from distance.
Both fighters are looking to counter, which isn't making for the most exciting fight in the world.

That's two minutes gone in the round.
The crowd are starting to boo a lack of action.
Robledo misses with the combination.
Robledo leaves Rob with his face pressed against the mat as he sprawls beautifully, defending against a solid takedown attempt.

That's three minutes gone in the round.
Robledo tries to clinch up but Rob circles away and keeps his distance.

That's four minutes gone in the round.
A lull in the action here being met with boos from the crowd.
A combination from Robledo does no damage.
Robledo moves in looking to clinch but Rob pushes him off.
And thats the end of the round the fighters go back to their corners.
Joey Robledo dominated that round.
That's time! Rob's corner gives him a slap on the ass as he gets ready to fight.

Robledo moves into range and throws a lovely three punch combination.
Rob fails with a rather predictable takedown attempt.
That's one minute gone in the round.
Rob shoots in for a takedown - he's clinched up with Robledo but Robledo pushes him off and we're back to square one.
That's two minutes gone in the round.
The crowd are starting to boo a lack of action.

Robledo moves into the clinch.
Robledo lands a shot to the body.
Robledo is trying to break the clinch but Rob is controlling him.
That's three minutes gone in the round.
A shot in the inside from Robledo.

Robledo breaks the clinch and we return to the middle of the mat.
Robledo misses with a jab, cross combination.
Rob has his head slapped from side to side by a 3 punch combination. That must have hurt him.
Joey Robledo is looking to keep the fight on the feet at all costs.
Horrible takedown by Rob or perhaps it was just good defense by Robledo which made him look bad.
That's three failed takedown attempts in the round for Mike Rob. That's going to take a lot out of him.
That's four minutes gone in the round.
Robledo lands a body shot.
And thats the end of the round the fighters go back to their corners.
Joey Robledo showed his class in that round. I'd imagine he'll take it on all the scorecards.
That's the end of the interval. I'm sure that seemed a lot quicker than a minute for our two fighters! Back to the action. The crowd applaud as we get ready to start the final round!

Robledo wants to clinch.
Robledo's corner calls for a 1,2 combination and Robledo duly obliges.
That's one minute gone in the round.
Rob tries to shoot in for a takedown. He's got hold of a leg but Robledo swivels and escapes.
That's two minutes gone in the round.
Well. There's a bit of a lull in the action here and the crowd are starting to get restless.
Rob fails to land the takedown.
Rob really does look like a pencil wearing a pair of gloves. Let's hope he has a gameplan to suit that ridiculous body shape.
Robledo lands with a right that hurts Rob. Rob looks to clinch but Robledo throws a short knee that drops Rob. This one is all over!
Ladies and gentlemen, after 2:38 of round 3, we have a winner by way of TKO (Punch and Knee). Joey Robledo!
|
|
|
|
|
|
|
|
|
|
|
|
|
|
|
|
|
|
|
|
|
|
|
| S |
C
A |
G |
S |
C
B |
G |
|
S |
C |
G |
|
energy
A | B |
|
hype
A | B |
|
pop
A | B |
|
mgr
A | B |
|
FIGHT
RATING
26% |
|
|
|
|
|
|
|
Undercard bout
|
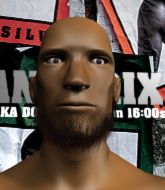
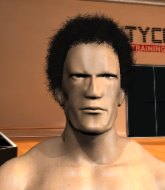
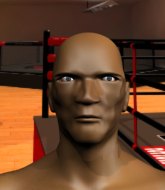
Coming up we have a bantamweight MMA rules bout between Kenta Matsumoto (ranked 0 p4p, 0 weight class) and Bob Nelson (ranked 0 p4p, 0 weight class). Matsumoto comes to the cage accompanied by Rusko - Woo Boost. Kenta Matsumoto is staring across the cage at his opponent, tweaking his nipples... Tweaking his own nipples that is.
 |
|
 |
| 167 cm
25
140 lbs
0 - 2 - 0 |
|
222 cm
24
136 lbs
4 - 4 - 0 |
Decent wrestler
Solid boxing
Good chin |
|
BJJ Blue Belt
Basic striking
Knockout power |
|
| |
|
Ladies and gentlemen. This fight is 3 rounds, in the bantamweight division.
Introducing the fighter to my left, fighting out of the red corner.
With a record of
0 - 2 - 0, fighting out of Amsterdam, Kenta Matsumoto!
And introducing the fighter to my right, fighting out of the blue corner.
With a record of
4 - 4 - 0, fighting out of Amsterdam, Bob Nelson!
The judges for this bout are Patrick Alders, Nard Betker and Daniel Blasius.
The bell rings for round one and we are underway!
No luck for Nelson with that takedown attempt.
Matsumoto lands a beauty of a right hand that gets the crowd cheering.
Matsumoto throws a body kick but he wasn't in range.
The sound of bone on bone echoes around the arena as Nelson checks a leg kick.
A head kick misses from Matsumoto.
Matsumoto shoots for a takedown but Nelson saw that one coming a mile off and avoided it easily.
Nelson shoots and misses
and Matsumoto counters with a good right hand that lands right on the jaw.
Matsumoto chopping away at his opponent's legs.
Matsumoto paws at his opponent with the jab and then lunges in with a straight, right on the button.
Matsumoto moves into the clinch successfully.
Nelson tries to take the fight to the ground by pulling guard but can't manage it.
Kenta Matsumoto has stuffed three takedown attempts in the round now. That's going to take a lot out of Bob Nelson.
Matsumoto is trying to break the clinch but Nelson has him pressed against the cage.
Nelson has hold of a leg and is looking for a trip takedown. Matsumoto avoids it nicely though and we remain in the clinch.
Matsumoto gets underhooks to prevent Nelson's takedown attempt.
Nelson looks gassed!
Nelson keeps the fight in the clinch, despite Matsumoto's efforts to push away.
Nelson has Matsumoto pressed against the cage, preventing Matsumoto from circling away and getting back to striking at range.
That's one minute gone in the round.
Matsumoto tries to break the clinch but Nelson is controlling the position.
Nelson is trying to drag Matsumoto to the mat but Matsumoto just about manages to keep his footing. He used the cage to his advantage there.
Matsumoto is trying to work out of this bad position, with his back against the cage.
Matsumoto looks like he'd prefer to be striking at range right now.
Nelson has Matsumoto pressed against the cage, preventing Matsumoto from circling away and getting back to striking at range.
Matsumoto effectively controlling the action here.
Matsumoto manages to break the clinch.
Matsumoto misses with a series of wild punches.

Matsumoto shoots in and scores a nice double leg takedown into half guard.
Matsumoto content to sit in half guard and control for a moment.
That's two minutes gone in the round.
Matsumoto seems to have a rather negative gameplan on the ground. He seems keen to just score the takedown and hold down Nelson for as long as he can get away with.

Nelson looking to work for a kimura from the bottom.
That's three minutes gone in the round.
Nelson won't allow Matsumoto to pass to mount.
Matsumoto controlling the pace.
Matsumoto wants to get back to his feet.
Matsumoto is controlling the pace.
The fighters are starting to perspire pretty heavily.
Matsumoto is looking to advance position but Nelson won't allow it.
That's four minutes gone in the round.
Well. There's a bit of a lull in the action here and the crowd are starting to get restless.
Matsumoto controlling the action here.
Nelson actively working from the bottom here.
Nelson is a painfully thin specimen of a man. You do wonder whether a good body kick would snap him clean in two.
Matsumoto drops an elbow to the side of Nelson's head.
And thats the end of the round the fighters go back to their corners.
Kenta Matsumoto dominated that round.
The fighters' corners scream their final instructions, as the referee calls time. Here we go, back to the action!
Nelson avoids a punch combination nicely.
Matsumoto throws a right and a left that both miss.
Matsumoto defends well against a solid takedown attempt from Nelson.
Nelson takes a punch to the jaw and another one to the bread basket.
Matsumoto circles away from the clinch attempt
and Matsumoto counters with a left and a right that stings Nelson.
Matsumoto swings away but doesn't land with a series of punches.
Matsumoto instigates a clinch.
Matsumoto lands a nice shot to the body.
Matsumoto working hard to break the clinch.
Both fighters are absolutely exhausted here.
Matsumoto breaks the clinch and we return to the middle of the mat.
Kenta Matsumoto is looking to throw some combinations by the looks of things.
Matsumoto's corner calls for a 1,2 combination and Matsumoto duly obliges.
Matsumoto moves into the clinch.
That's one minute gone in the round.
Matsumoto's corner calls for him to break the clinch, which he does.
Danga de danga de dang - Matsumoto scores with a four punch combination!
Matsumoto tries a head kick but it misses.
Matsumoto circles away from the clinch attempt
and Matsumoto counters with a shoot takedown. Nelson fights it but they end up in guard.
Nelson working from the bottom, still in full guard. He's managed to get a loose triangle. Matsumoto doesn't seem to be doing much to defend here, obviously he feels comfortable in the position. Matsumoto manages to throw the legs off his shoulder and he's back into guard - no problem.
Nelson escapes his hips to the side and looks to be working for an armbar. Matsumoto gives him a little smile and shakes his head. No chance.
Matsumoto slows down the pace of the fight for a moment. He'll need to remain active if he doesn't want to see the fight stood back up.
That's two minutes gone in the round.
Nelson has a loose triangle. He'll be looking to tighten that up but Matsumoto can see exactly what he's planning and manages to posture up and free himself.
Matsumoto is stalling in the full guard.
That's three minutes gone in the round.
Nelson looking for submissions from the bottom here. Moving his hips around, possibly looking for an armbar.
Matsumoto pressing down on his opponent's thigh, looking to pass guard. Nelson is keeping the position for now.
Matsumoto content to stall in guard here.
That's four minutes gone in the round.
My god... these two guys really need to pick up the pace or everyone will leave to go get a beer.
Nelson has a loose triangle. He'll be looking to tighten that up but Matsumoto can see exactly what he's planning and manages to posture up and free himself.
The ref warns both fighters not to hold the cage as they work up against the meshing.
Matsumoto stands up and looks to throw the legs aside to pass to side control. Nelson swivels though and keeps the full guard.
The fighters are pressed up against the cage, both looking to find a bit of space to work.
Nelson is active off his back here, looking for submissions.
Matsumoto knows he needs to get back to his feet asap. He's simply no match for Nelson on the ground.
Matsumoto is taking a break and basically stalling. The referee will not allow him to do that for long.
And thats the end of the round the fighters go back to their corners.
Kenta Matsumoto dominated that second round.
That's time! Matsumoto's corner gives him a slap on the ass as he gets ready to fight. This is the final round!
Matsumoto misses with a head kick.
Matsumoto pulls out of a head kick attempt.
Nelson avoids the head kick by Matsumoto.
Nelson tries for a takedown but Matsumoto circles away easily
and Matsumoto counters with a series of strikes. Nelson will be more careful next time no doubt.
Nelson tries to grapple but his opponent circles
and Matsumoto counters with a one-two to the body.
Nelson checks the leg kick.
We've had a slow start to the round here - hopefully the action picks up.
Nelson doesn't succeed with the takedown
enabling Matsumoto to counter with a crisp jab.
Both fighters are breathing heavily.
Matsumoto has managed to clinch.
Matsumoto looks like he'd prefer to be striking at range right now.
That's one minute gone in the round.
Matsumoto is looking to break free of the clinch but Nelson has double underhooks.
Nelson prevents Matsumoto from breaking the clinch.
Matsumoto working hard to break the clinch.
Matsumoto escapes the clinch and we're back to striking.
Matsumoto gets taken down but at least he's managed to land in guard.
Matsumoto seems keen to control Nelson's posture.
Matsumoto looking to sweep here. No luck so far.
That's two minutes gone in the round.
Matsumoto controlling the position.
Matsumoto wants to sweep but no luck.
Matsumoto is pulling down on Nelson's head. It's preventing any offense from Nelson, at least for the moment.
Matsumoto is working an open guard here, looking to improve his position. No doubt that will leave him open to counters but at least he's being more offensive.
That's three minutes gone in the round.
Nelson wants to control from the top but Matsumoto keeps moving.
Nelson preventing the sweep.
Kenta Matsumoto is fighting for a decision here - he's started to take the cautious approach.

Neither fighter is doing enough for the referee's liking and he's decided to stand them back up.
Matsumoto lands with a good body shot.
No luck with that takedown attempt from Matsumoto.
Matsumoto fakes with an overhand right and moves in to clinch with Nelson, pushing him back against the cage.
That's four minutes gone in the round.
Neither fighter has done anything of merit for a good minute or two here and the crowd are not happy about it.
Matsumoto gets through Nelson's defenses to land a nice punch to the side of the head.
Matsumoto is trying to force a seperation but Nelson has the dominant position.
Matsumoto is trying to break the clinch but Nelson has him pressed against the cage.
Nelson keeps control of Matsumoto as he tries to wriggle out of the double underhooks.
Nelson drops to a knee looking for a takedown but Matsumoto gets the underhooks and prevents it.
Kenta Matsumoto has stuffed three takedown attempts in the round now. That's going to take a lot out of Bob Nelson.
Matsumoto stops a takedown attempt from Nelson.
And that's the end of the fight!
Kenta Matsumoto showed his dominance in that final round.
Well Matsumoto has outscored his opponent in every aspect of the fight today. Only a scarily incompetent judge or two will keep him from a well deserved win... Over to the ring announcer for the scorecards.
Ladies and gentlemen, after 3 rounds of action, we go to the scorecards for a decision.
Judge Patrick Alders scores the fight 30:27
Judge Nard Betker scores the fight 30:27
Judge Daniel Blasius scores the fight 30:27
In favor of your winner, by unanimous decision... Kenta Matsumoto!
|
|
|
|
|
|
|
|
|
|
|
|
|
|
|
|
|
|
|
|
|
|
|
| S |
C
A |
G |
S |
C
B |
G |
|
S |
C |
G |
|
energy
A | B |
|
hype
A | B |
|
pop
A | B |
|
mgr
A | B |
|
FIGHT
RATING
24% |
|
|
|
|
|
|
|
Undercard bout
|
|
|
|
Undercard bout
|
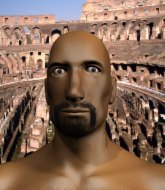
Coming up we have a super heavyweight MMA rules bout between Wang Lee (ranked 0 p4p, 0 weight class) and Billy Anderson (ranked 0 p4p, 0 weight class). Lee kept the crowd waiting but all that was forgotten when his ring entrance music started. The incomparable musical genius that is 50 Cent - Still In The Hood Ft. Gif Majorz. The crowd seem to be enjoying Anderson's choice of entrance music: 50 Cent - Bang ya Head Harder Ft Lloyd Banks, Dr. Dre and Candice Pillay . The crowd giving both fighters a great reception on their way into the arena. That's good to see.
 |
|
 |
| 189 cm
19
300 lbs
0 - 2 - 0 |
|
190 cm
18
268 lbs
0 - 0 - 0 |
Good wrestling
Counter striker
Good in bed |
|
BJJ Brown Belt
Counter striker
Inexperienced |
|
| |
|
Ladies and gentlemen. This fight is 3 rounds, in the super heavyweight division.
Introducing the fighter to my left, fighting out of the red corner.
With a record of
0 - 2 - 0, fighting out of Amsterdam, Wang Lee!
And introducing the fighter to my right, fighting out of the blue corner.
With a record of
0 - 0 - 0, fighting out of Amsterdam, Billy Anderson!
The judges for this bout are Saam Ante, Daniel Blasius and Paulsen Ambrosius.
The bell rings for round one and we are underway!
Anderson with a jab.
Anderson wants to clinch.
Anderson lands a two punch combo.
Lee will have to do better than that with his takedown attempts.
A kick lands to the mid section there for Anderson.
That's one minute gone in the round.
Lee will have to do better than that with his takedown attempts.
Billy Anderson is looking to keep the fight on the feet at all costs.
Lee has a takedown stuffed.
That's three failed takedown attempts in the round for Wang Lee. That's going to take a lot out of him.
Lee shoots in but Anderson avoids the takedown attempt easily.
Lee blocks a head kick by Anderson.
That's two minutes gone in the round.
My god... these two guys really need to pick up the pace or everyone will leave to go get a beer.
A telegraphed takedown attempt from Lee is defended easily by Anderson.
Lee shoots in looking for a takedown. Anderson tries to sprawl out of it but Lee keeps driving through. The fighters are pinned against the cage. Anderson manages to get underhooks and after a bit of a struggle, circles away and we're back to standing.
That's three minutes gone in the round.
Anderson tries to close the distance and clinch up but Lee swats him away and circles back towards the center.
A really sloppy takedown attempt there from Lee.
Anderson is looking to take this fight into the clinch.
That's four minutes gone in the round.
Well. There's a bit of a lull in the action here and the crowd are starting to get restless.
Lee closes the distance and scores a nice trip takedown into half guard. Anderson did well to prevent Lee getting side control.
Lee is trying to work for a kimura but Anderson is defending well.
Lee is working for a kimura but Anderson is defending it quite comfortably.
Anderson actively working from the bottom here.
And thats the end of the round the fighters go back to their corners.
Billy Anderson dominated that round.
OK. That's time! The bell goes and we're back to the action.
Lee keeps the fight on the outside.
Lee fails with a takedown attempt from distance.
Anderson tries to clinch but Lee is having none of it.
We've had a slow start to the round here - hopefully the action picks up.
Anderson has closed the distance and engaged Lee in a clinch.
Lee tries to pull guard but can't drag his opponent to the mat. Anderson just stands there and leans against the cage.
That's one minute gone in the round.
Lee tries to jump guard but he falls flat on his backside. Anderson smiles and moves away.
That's three failed takedown attempts in the round for Wang Lee. That's going to take a lot out of him.
Lee gets a takedown into half guard.
Anderson actively working from the bottom here.
Anderson actively working from the bottom here.
That's two minutes gone in the round.
Lee wants to work for an arm triangle but Anderson is really keeping half guard well and defending the submission attempt.
Anderson missing with punches from the bottom.
Anderson moves his hips nicely and gets into full guard.
The ref warns both fighters not to hold the cage as they work up against the meshing.
Lee thinks about going for a leg but decides against it, in order to maintain the position.
Lee is trying to work a guillotine from the top, or something like that? Don't know how he thinks he's going to get a finish from there.
Both fighters are absolutely exhausted here.
That's three minutes gone in the round.
Anderson working from the bottom, still in full guard. He's managed to get a loose triangle. Lee doesn't seem to be doing much to defend here, obviously he feels comfortable in the position. Lee manages to throw the legs off his shoulder and he's back into guard - no problem.
Lee drops back, looking for a kneebar! Anderson looks panicked! The fighters roll across the mat, one looking to finish, one looking to escape. Anderson looks to have wriggled free... Yes, he's got his leg free and he's dived into side control! Good work there from Anderson!
Anderson has hold of Lee's arm here. He's working for an Americana. It looks like he might have it! Lee tries to escape but he's just digging himself in deeper - Anderson cranks the arm and Lee screams in pain! The ref makes a decision and ends the fight before the tap - no complains from Lee, who is just happy to have his arm attached to his body.
Ladies and gentlemen, after 4:04 of round 2, we have a winner by way of Submission (Americana). Billy Anderson!
|
|
|
|
|
|
|
|
|
|
|
|
|
|
|
|
|
|
|
|
|
|
|
| S |
C
A |
G |
S |
C
B |
G |
|
S |
C |
G |
|
energy
A | B |
|
hype
A | B |
|
pop
A | B |
|
mgr
A | B |
|
FIGHT
RATING
24% |
|
|
|
|
|
|
|
Undercard bout
|
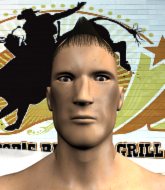
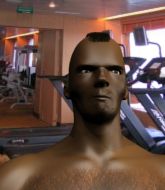
Coming up we have a light heavyweight MMA rules bout between Bobby Drysdale (ranked 0 p4p, 0 weight class) and Ismael Turkilmaz (ranked 0 p4p, 0 weight class). Turkilmaz has chosen Young Jeezy - Still On It as his entrance music. There are an array of beautiful celebrities at ringside tonight! I wonder if any of them paid for their tickets.
 |
|
|
| 188 cm
18
205 lbs
1 - 0 - 0 |
|
198 cm
19
217 lbs
1 - 0 - 0 |
BJJ Brown Belt
Basic striking
Granite chin |
|
Good wrestler
Decent boxing
Tends to cut |
|
| |
|
Ladies and gentlemen. This fight is 3 rounds, in the light heavyweight division.
Introducing the fighter to my left, fighting out of the red corner.
With a record of
1 - 0 - 0, fighting out of Amsterdam, Bobby Drysdale!
And introducing the fighter to my right, fighting out of the blue corner.
With a record of
1 - 0 - 0, fighting out of Hilo, Ismael Turkilmaz!
The judges for this bout are Nard Betker, Wagner Zegers and Aafke Stam.
The bell rings for round one and we are underway!
Drysdale shoots in and drives through. Turkilmaz sprawls well.
Excellent takedown into side control there by Drysdale.
Drysdale passes to full mount! That's big trouble for Turkilmaz!
We get told so often about how wrestlers don't like to be on their backs. Let's see if Turkilmaz can do anything to dispel that myth.
Drysdale looking to ground and pound his opponent to a finish here.

It looks like Ismael Turkilmaz has been cut.
Drysdale moves to the back position.
Drysdale looking for the choke but no joy.
Turkilmaz tries to roll but Drysdale sticks to his back.
Drysdale is staying calm and holding on to the back position, whilst working on a rear naked choke. Turkilmaz is defending well though. Drysdale let's go of the attempt for now.
We've seen a great period of action over the last minute or so - credit to both fighters for going all out!
Turkilmaz has the hand control, trying to stop the rear naked choke.
That's one minute gone in the round.
Drysdale working for a RNC but it's not happening just yet.
Drysdale is staying calm and holding on to the back position, whilst working on a rear naked choke. Turkilmaz is defending well though. Drysdale let's go of the attempt for now.
Turkilmaz is trying to get back to his feet but Drysdale has full control of the position and if anything, Turkilmaz has just worked his way into a worse spot.
Drysdale is staying calm and holding on to the back position, whilst working on a rear naked choke. Turkilmaz is defending well though. Drysdale let's go of the attempt for now.
Drysdale is remaining active here, looking for the choke. The more discerning members of the crowd will appreciate his efforts.
That's two minutes gone in the round.
Drysdale has both hooks in and is working for a choke. Turkilmaz is in real trouble here. Drysdale gets an arm under the chin and tightens the submission attempt... is this the end? Yes, Turkilmaz is tapping out! Drysdale wins by rear naked choke!
Ladies and gentlemen, after 2:19 of round 1, we have a winner by way of Submission (RNC). Bobby Drysdale!
|
|
|
|
|
|
|
|
|
|
|
|
|
|
|
|
|
|
|
|
|
|
|
| S |
C
A |
G |
S |
C
B |
G |
|
S |
C |
G |
|
energy
A | B |
|
hype
A | B |
|
pop
A | B |
|
mgr
A | B |
|
FIGHT
RATING
81% |
|
|
|
|
|
|
|
Undercard bout
|
Coming up we have a featherweight MMA rules bout between Mike Rob Sr (ranked 0 p4p, 0 weight class) and Mack Junior (ranked 0 p4p, 0 weight class). Junior is bobbing his head along to his entrance song: I Come Thru: 50 cent feat. Maino, Dubs Dollah . Mack Junior has the power to score a knockout today if he connects clean with Mike Rob Sr's chin.
 |
|
 |
| 190 cm
18
155 lbs
0 - 2 - 0 |
|
190 cm
19
145 lbs
3 - 2 - 0 |
BJJ Blue Belt
Excellent boxer
Self confident |
|
BJJ White Belt
Excellent boxer
Heavy handed |
|
| |
|
Ladies and gentlemen. This fight is 3 rounds, in the featherweight division.
Introducing the fighter to my left, fighting out of the red corner.
With a record of
0 - 2 - 0, fighting out of Amsterdam, Mike Rob Sr!
And introducing the fighter to my right, fighting out of the blue corner.
With a record of
3 - 2 - 0, fighting out of Amsterdam, Mack Junior!
The judges for this bout are Saam Ante, Daniel Blasius and Patrick Alders.
The bell rings for round one and we are underway!
Junior bobbing and weaving, closes the distance and lands a hook to the side of Rob Sr's head.
Rob Sr really does look like a pencil wearing a pair of gloves. Let's hope he has a gameplan to suit that ridiculous body shape.
Rob Sr wants to clinch up but Junior keeps it at a distance.
Rob Sr fails with a rather predictable takedown attempt.
Rob Sr misses with the combination.
Junior fails with an attempt to clinch.
Mike Rob Sr seems to be the more aggressive standup fighter in this bout.
Rob Sr has Junior up against the cage in a clinch.
That's one minute gone in the round.
Junior is trying to break the clinch but Rob Sr has him pressed against the cage.
Junior avoiding damage as Rob Sr throws knees to the body.
Junior gets double underhooks to prevent a takedown attempt from Rob Sr.
Junior misses the knee to the body. Nice hip positioning from Rob Sr.
Rob Sr wants a takedown.
That's three failed takedown attempts in the round for Mike Rob Sr. That's going to take a lot out of him.
Rob Sr jumps guard but his hands slip and he falls flat on his back. Well, he's made himself look a right mug there, as Junior walks away with a smile on his face. Rob Sr gets slowly back to his feet and shakes his head.
A big right followed by a crushing left from Junior knocks Rob Sr out cold! Ouch - that one's going to be featured in highlight reels for years to come!
Ladies and gentlemen, after 1:33 of round 1, we have a winner by way of KO (Punches). Mack Junior!
|
|
|
|
|
|
|
|
|
|
|
|
|
|
|
|
|
|
|
|
|
|
|
| S |
C
A |
G |
S |
C
B |
G |
|
S |
C |
G |
|
energy
A | B |
|
hype
A | B |
|
pop
A | B |
|
mgr
A | B |
|
FIGHT
RATING
34% |
|
|
|
|
|
|
|
Undercard bout
|
Coming up we have a light heavyweight MMA rules bout between Klucth Diesel (ranked 0 p4p, 0 weight class) and Winky Monk (ranked 0 p4p, 0 weight class). Diesel's entrance music is Bombshell. A fine choice. Monk has chosen elephant man haters as his entrance music. Winky Monk looks lathargic as he enters the arena. Wake up son, you're about to have a fight!
 |
|
 |
| 190 cm
19
190 lbs
1 - 3 - 0 |
|
190 cm
24
203 lbs
7 - 3 - 0 |
BJJ White Belt
Brawler
KO power |
|
BJJ Blue Belt
Decent boxing
Knockout power |
|
| |
|
Ladies and gentlemen. This fight is 3 rounds, in the light heavyweight division.
Introducing the fighter to my left, fighting out of the red corner.
With a record of
1 - 3 - 0, fighting out of Amsterdam, Klucth Diesel!
And introducing the fighter to my right, fighting out of the blue corner.
With a record of
7 - 3 - 0, fighting out of Amsterdam, Winky Monk!
The judges for this bout are Patrick Alders, Albert Achterberg and Radbod Blank.
The bell rings for round one and we are underway!
Diesel throws a half hearted mid kick.
Diesel connects with a good right hand that stumbles Monk. Monk circles away out of range and recomposes himself.
Diesel scores with a head kick.
Monk clinches.
A frustrated look appears on Diesel's face as he tries to break the clinch.
Monk can't find room to land a body shot as Diesel controls the action.
Monk can't find room to land a body shot as Diesel controls the action.
Monk lands a body punch - he's looking to wear down Diesel.
A head punch on the inside from Monk fails to land.
Diesel breaks the clinch and we return to the middle of the mat.
Monk fakes high and swings low for a body shot but Diesel manages to avoid it.
Diesel lands with a nice body kick.
Monk circles away from the clinch attempt.
Monk misses with a series of wild punches.
Monk will need to tighten up his combinations if he doesn't want to gas himself out, swinging at thin air.
That's one minute gone in the round.
A head kick misses from Diesel.
Diesel throws a head kick but Monk moves out of range.
Diesel tries to clinch but fails miserably
and Monk counters with a left and a right that stings Diesel.
Monk looks gassed!
Diesel swings wildly with a couple of big hooks
and Monk counters with a three punch combination, finished off with a leg kick. Nice work.
Diesel misses with the combination.
Monk stuffs the takedown attempt from Diesel. Diesel gets slowly back to his feet.
Monk throws a combination but comes up with nothing but fresh air.
Monk keeps the fight on the outside.
Thud! ouch! good body kick from Diesel - that will leave a mark!
That's two minutes gone in the round.
Diesel showing good head movement there, avoiding the strikes from Monk.
Diesel goes for a spinning back kick but it misses.
No luck for Diesel with that takedown attempt.
We've seen a great period of action over the last minute or so - credit to both fighters for going all out!
Diesel chopping away at his opponent's legs.
Diesel ducks under an overhand right and circles away with a smile on his face.
The sound of bone on bone echoes around the arena as Diesel checks a leg kick.
Diesel throws a right and a left that Monk avoids nicely.
Diesel misses with a takedown attempt
and Monk counters with a nice leg kick.
That's three failed takedown attempts in the round for Klucth Diesel. That's going to take a lot out of him.
Diesel circles away from the clinch attempt
and Diesel counters with a solid body kick.
That's three minutes gone in the round.
Diesel throws a head kick but Monk moves out of range.
Diesel throws a head kick that misses.
Diesel throws a sloppy head kick and Monk moves out of range easily.
Diesel throws a wild combination but nothing lands.
Diesel throws a sloppy head kick and Monk moves out of range easily.
Diesel dances in quickly and lands a nice inside leg kick on Monk. That did some damage!
Monk keeps the fight on the outside.
Monk gets a clinch.
Monk escapes the clinch and we're back to striking.
That's four minutes gone in the round.
A few boos can be heard. I'm sure they will multiply if the fighters don't pick up the pace.
Diesel goes for a high kick. It partially lands.
Diesel throws a head kick that misses
and Monk holds on and brings the fighters into a clinch.
Monk has a couple of punches blocked by Diesel.
Monk tries a shoulder strike but it doesn't do any damage.
Diesel tries a knee to the head but Monk blocks it.
Monk misses with a shot to the kidneys.
Diesel keeps the fight in the clinch, despite Monk's efforts to push away.
Diesel keeps control of Monk as he tries to wriggle out of the double underhooks.
Monk tries to throw a body punch but Diesel avoids it by throwing Monk back against the cage.
Diesel is trying to break free.
Diesel blocks a body shot from Monk.
The crowd applaud the fighters efforts here as the round comes to an end.
Monk tries a body shot but Diesel blocks it.
Monk doesn't land with the attempted body shot.
Monk is trying to break free.
Diesel is trying to force a seperation but Monk has the dominant position.
And thats the end of the round the fighters go back to their corners.
Winky Monk dominated that round.
The minute break is over - no more time for sponges and pep talks - back to the action!
Diesel throws a head kick that connects with a bit of head and a bit of hand.
Monk tries to clinch but fails miserably
and Diesel counters by clinching up.
Diesel drops down looking for an ankle pick but Monk pulls his leg out and moves away.
Diesel avoids a punch combination nicely.
Diesel has taken the fight to the clinch.
Monk works on Diesel's body with a couple of short punches.
Monk tries to land a shot to the body but it's blocked.
Monk is breathing heavily.
Diesel escapes the clinch and we're back to striking.
Monk rushes forward with a series of wild hooks but Diesel moves out of range and avoids them all easily.
Diesel scores with a leg kick.
That's one minute gone in the round.
Diesel misses with a half-hearted attempt at a head kick.
Diesel moves in looking to clinch but Monk pushes him off.
Monk wants to clinch.
Diesel lands with a kick to the ribs.
Diesel looks to land a right hand but Monk moved out of range.
Diesel shoots in for a takedown but Monk shows good takedown defense there and keeps this one on the feet.
Diesel clinches.
Diesel manages to break the clinch.
Diesel has managed to clinch.
Diesel is trying to break free.
That's two minutes gone in the round.
Monk goes for a body shot but it's blocked.
Monk misses with a punch to the body.
Monk tries to work over Diesel's body with a swooping hook but it only glances the target.
Diesel blocks an uppercut.
Monk looking to throw knees to the head but Diesel is blocking nicely.
Diesel can't get the takedown.
That's three failed takedown attempts in the round for Klucth Diesel. That's going to take a lot out of him.
Monk tries to land a knee to the body but he is off balance and Diesel avoids it.
Diesel fails to pull guard.
Monk has had enough of the clinch but Diesel keeps him there for the moment.
Monk misses with a body punch.
Diesel looks to throw an elbow but misses.
Monk misses with a short punch on the inside.
A frustrated look appears on Monk's face as he tries to break the clinch.
Diesel tries to break free but Monk pushes him back against the cage.
Diesel lands a right hand.
Monk tried to land a shot to the body but connects with Diesel's elbow.
Monk keeps the fight in the clinch, despite Diesel's efforts to push away.
Diesel manages to break the clinch.
That's three minutes gone in the round.
A nice leg kick lands there from Diesel.
A slapping leg kick lands for Diesel.
Diesel lunges in with swinging rights and lefts but Monk circles away quickly and effectively.
Diesel misses with a double jab
and Monk counters with a series of strikes. Diesel will be more careful next time no doubt.
Diesel works over Monk's head and body with a nice combination.
Klucth Diesel is winning the standup battle so far.
Diesel shoots in for a takedown but Monk shows good takedown defense.
Diesel plants his feet and lands a nice head kick!
Klucth Diesel is looking to throw some combinations by the looks of things.
Monk closes the distance but Diesel moves to the side
and Diesel counters with a head kick.
Diesel connects nicely with a jab. Noted by the judges no doubt.
That's four minutes gone in the round.
Diesel lands a nice looking kick to the body. Monk takes a step back to recover.
The crowd are loving this. Great action here.
Diesel bobs and weaves and throws out a fast jab that snaps Monk's head backwards.
Diesel closes the distance and presses his opponent up against the cage.
Diesel pushes off and circles away, back to the middle of the mat.
Monk throws a combination but comes up with nothing but fresh air.
Diesel fails with an attempt to clinch.
Diesel misses with a half-hearted attempt at a head kick.
The crowd applaud the fighters efforts here as the round comes to an end.
Diesel avoids a punch combination nicely.
Diesel is the aggressor but that punch slipped nicely by Monk.
And thats the end of the round the fighters go back to their corners.
Klucth Diesel dominated that second round.
That's the end of the interval. I'm sure that seemed a lot quicker than a minute for our two fighters! Back to the action. This is the final round!
Diesel throws a series of punches but Monk avoids them all with ease.
Some wild striking there from Monk.
A solid body kick from Diesel.
Diesel throws a nice head kick!
Diesel closes the distance and clinches.
Diesel tries to circle away but Monk has him pinned against the cage.
Monk misses with some punches.
Diesel goes for a takedown attempt but Monk pushes him away and we're back to fighting at a distance.
Diesel misses with an attempted mid kick.
Monk takes a big intake of breath there - he's definitely tired.
A head kick misses from Diesel.
That's one minute gone in the round.
Diesel moves in looking to clinch but Monk pushes him off.
Diesel throws a head kick but Monk moves out of range.
Monk avoids a punch combination nicely.
Diesel will have to do better than that with his takedown attempts.
A chopping leg kick lands by Monk.
Monk clinches but Diesel breaks the clinch
and Diesel counters with a stiff right hand.
Diesel takes a body punch that cleary hurt but he's trying not to show any weakness.
A head kick misses from Diesel.
That's two minutes gone in the round.
Diesel throws a head kick that misses and slips in the process. He scrambles back to his feet and the fighters circle.
Monk wants to clinch up but Diesel keeps it at a distance.
Monk tries to close the distance and clinch but Diesel swats him to one side with an open hand palm strike and circles away.
Monk tries to clinch up.
No joy there for Diesel, who threw a few shots but didn't land.
Diesel connects with a single shot there.
Monk throws a hook to the body but it doesn't connect.
Diesel throws a right and a left that Monk avoids nicely.
Winky Monk is looking to keep the fight on the feet at all costs.
Monk tries to clinch but Diesel is having none of it.
Monk has developed a nice purple lump on his ribcage, as a result of some heavy body kicks from Diesel.
A head kick misses from Monk.
Diesel throws a body kick but he wasn't in range.
That's three minutes gone in the round.
Monk tries to clinch up but Diesel circles away and keeps his distance.
Monk displays some good footwork, moving neatly out of range as Diesel throws out the jab.
Diesel moves in looking to clinch but Monk pushes him off.
Diesel goes for a spinning back kick but it misses.
Monk leaves Diesel with his face pressed against the mat as he sprawls beautifully, defending against a solid takedown attempt.
That's three failed takedown attempts in the round for Klucth Diesel. That's going to take a lot out of him.
Diesel throws a jab, cross combination which is slipped
and Monk counters with a shot to the ribs. That looked like it hurt.
Some wild striking there from Monk.
Diesel throws a lazy head kick
and Monk counters with a one-two to the body.
Monk closes the distance but Diesel moves to the side
and Diesel counters with a nice body kick.
That's four minutes gone in the round.
Well. There's a bit of a lull in the action here and the crowd are starting to get restless.
Diesel has closed the distance and engaged Monk in a clinch.
Monk lands a body shot in the clinch.
Monk struggles to land a body shot inside as Diesel controls his hands.
Monk breaks the clinch and we're back to striking at distance.
Diesel misses with a takedown attempt - Monk sprawls well and throws a nice strike on the way out which just misses.
Diesel lands a two punch combo.
Diesel throws a head kick but Monk moves out of range.
Monk falls off balance throwing a combination
and Diesel counters with a single leg into guard. Monk didn't expect that.
Monk looking for submissions from the bottom here. Moving his hips around, possibly looking for an armbar.
Diesel knows he needs to get back to his feet asap. He's simply no match for Monk on the ground.
Diesel sneaks a leg through and gets to half guard. That was like a knife through butter how easily he passed Monk's guard.
And that's the end of the fight!
Klucth Diesel showed his dominance in that final round.
I think Diesel has won this one but let's see what the judges have to say. Over to the ring announcer for the scorecards.
Ladies and gentlemen, after 3 rounds of action, we go to the scorecards for a decision.
Judge Patrick Alders scores the fight 29:28
Judge Albert Achterberg scores the fight 29:28
Judge Radbod Blank scores the fight 29:28
In favor of your winner, by unanimous decision... Klucth Diesel!
|
|
|
|
|
|
|
|
|
|
|
|
|
|
|
|
|
|
|
|
|
|
|
| S |
C
A |
G |
S |
C
B |
G |
|
S |
C |
G |
|
energy
A | B |
|
hype
A | B |
|
pop
A | B |
|
mgr
A | B |
|
FIGHT
RATING
57% |
|
|
|
|
|
|
|
Undercard bout
|
Coming up we have a light heavyweight MMA rules bout between John Major (ranked 0 p4p, 0 weight class) and Mink Dre (ranked 0 p4p, 0 weight class). Over to our ring announcer for the fighter introductions!
 |
|
 |
| 200 cm
20
200 lbs
1 - 6 - 0 |
|
190 cm
24
205 lbs
5 - 0 - 0 |
BJJ White Belt
Excellent boxer
Good chin |
|
BJJ Blue Belt
Decent boxing
Granite chin |
|
| |
|
Ladies and gentlemen. This fight is 3 rounds, in the light heavyweight division.
Introducing the fighter to my left, fighting out of the red corner.
With a record of
1 - 6 - 0, fighting out of Amsterdam, John Major!
And introducing the fighter to my right, fighting out of the blue corner.
With a record of
5 - 0 - 0, fighting out of Amsterdam, Mink Dre!
The judges for this bout are Patrick Alders, Saam Ante and Albert Achterberg.
The bell rings for round one and we are underway!
Major shoots in with a takedown attempt and he has Dre pinned against the cage. Dre gets the underhooks and manages to circle away.
A telegraphed takedown attempt from Major is defended easily by Dre.
Major shoots in for a takedown. "Ole!" shouts Dre as he jumps to the side.
That's three failed takedown attempts in the round for John Major. That's going to take a lot out of him.
Dre throws a hard body shot but it just misses.
Major throws a combination but comes up with nothing but fresh air.
Dre circles away from the clinch attempt.
Dre lands a straight punch to the body, keeping Major at a distance.
Major is breathing heavily.
Dre looks to land a combination but Major avoids it well.
Dre swings away but doesn't land with a series of punches.
Dre throws a combination that misses
and Major counters with a three punch combo that has Dre backing up. Dre nods at Major to acknowledge the strikes.
Dre throws a two punch combo that lands nicely.
It looks like John Major has been cut.
The crowd are loving this. Great action here.
Dre lands a nice looking body shot.
Dre misses with a series of wild punches.
That's one minute gone in the round.
Dre connects with a superb combination that knocks Major out cold! The referee charges across the mat and tackles Dre before he can land any more shots to the unconscious Major!
Ladies and gentlemen, after 1:08 of round 1, we have a winner by way of KO (Punches). Mink Dre!
|
|
|
|
|
|
|
|
|
|
|
|
|
|
|
|
|
|
|
|
|
|
|
| S |
C
A |
G |
S |
C
B |
G |
|
S |
C |
G |
|
energy
A | B |
|
hype
A | B |
|
pop
A | B |
|
mgr
A | B |
|
FIGHT
RATING
100% |
|
|
|
|
|
|
|
Co-main event
|
Coming up we have a welterweight MMA rules bout between Johny Bravo (ranked 0 p4p, 0 weight class) and DJ Benn (ranked 0 p4p, 0 weight class). The crowd seem to be enjoying Benn's choice of entrance music: Geto Boys - Damn It Feels Good To Be A Gangsta. These two fighters really are very evenly matched on the feet - it will be fascinating to see who can assert themselves in that aspect of the fight.
 |
|
 |
| 190 cm
20
169 lbs
7 - 3 - 0 |
|
175 cm
28
166 lbs
14 - 10 - 0 |
BJJ Blue Belt
Solid Muay Thai
Experienced |
|
BJJ Purple Belt
Decent boxing
Solid chin |
|
| |
|
Ladies and gentlemen. This fight is 5 rounds, for the welterweight championship of the world!
Introducing the champion to my left, fighting out of the red corner.
With a record of
7 - 3 - 0, fighting out of Amsterdam, Johny Bravo!
And introducing the challenger to my right, fighting out of the blue corner.
With a record of
14 - 10 - 0, fighting out of Amsterdam, DJ Benn!
The judges for this bout are Saam Ante, Aafke Stam and Patrick Alders.
The bell rings for round one and we are underway!
Benn throws a head kick that misses and slips in the process. He scrambles back to his feet and the fighters circle.
Bravo looks to land a combination but Benn avoids it well.
Benn moves into range and throws a lovely three punch combination.
Benn swings wildly with a couple of big hooks
and Bravo counters with a body kick.
Bravo is looking to clinch.
Benn keeps the fight on the outside.
Bravo tries to close the distance and clinch up but Benn swats him away and circles back towards the center.
Benn throws a wild combination but nothing lands.
Benn lands a jab-cross combination.
A shot to the body from Benn misses
and Bravo counters with a big head kick but Benn shrugs it off.
Bravo tries to close the distance and clinch but Benn swats him to one side with an open hand palm strike and circles away.
Benn misses with a jab, cross combination.
Benn throws a right high kick that is partially blocked by Bravo.
Benn has a takedown stuffed.
Benn misses with a double jab.
Benn lets the fists fly and connects with a left straight followed by a right hook.
That's one minute gone in the round.
Bravo throws a wild combination but nothing lands.
Benn throws a sloppy head kick
and Bravo counters with a thumping low kick.
Benn missing with a left hand there. Bravo was out of range so wasted energy throwing that one.
Bravo is looking to clinch but Benn is avoiding it.
Benn is moving around nicely and scores here with a single head shot.
Benn lands a nice shot to the body.
Bravo avoids the head kick by Benn.
Benn throws a lazy head kick
and Bravo counters by clinching up.
An uppercut on the inside fails to land for Benn.
Bravo connects with a knee to the head.
Benn throws a head punch that misses.
Benn misses with a punch on the inside.
Benn doesn't land with the attempted body shot.
Benn misses with some punches.
Benn misses with some punches.
Bravo blocking some punches.
Bravo blocks a couple of punches on the inside.
Benn has a body lock and is looking for a takedown. Bravo is bouncing around trying to prevent the takedown and somehow he has indeed managed to stay on his feet.
That's two minutes gone in the round.
Benn fails to land with a short punch on the inside.
With the fighters clinched against the cage, Benn creates a bit of distance for himself and scores with a nice uppercut.
Benn tries for a takedown but Bravo manages to get underhooks.
Johny Bravo has stuffed three takedown attempts in the round now. That's going to take a lot out of DJ Benn.
Bravo is trying to maintain a safe position but Benn gets an underhook and turns Bravo into the cage.
A hook to the body from Bravo.
Bravo unloads a knee to the mid-section.
Benn is trying to break the clinch but Bravo is controlling him.
Benn prevents the takedown attempt.
Benn stops a takedown attempt from Bravo.
Benn gets underhooks to prevent Bravo's takedown attempt.
Bravo landing knees to the head.
It looks like DJ Benn has been cut.
Bravo is trying to drag Benn to the mat but Benn just about manages to keep his footing. He used the cage to his advantage there.
Bravo stalling.
Bravo tries for a takedown. No joy.
Benn lands an uppercut.
Benn has hold of a leg and is looking for a trip takedown. Bravo avoids it nicely though and we remain in the clinch.
Benn fails to land with a short punch on the inside.
Benn lands with a short punch from the clinch.
Benn misses with some punches.
Bravo is trying to drag Benn to the mat but Benn just about manages to keep his footing. He used the cage to his advantage there.
Bravo is breathing heavily.
That's three minutes gone in the round.
Benn stops a takedown attempt from Bravo.
A battle for position here, against the cage.
Benn has dropped down and is working for a takedown. Bravo is trying to keep an underhook but Benn manages to get the takedown into half guard.
Bravo blocking the ground and pound attempt from Benn.
Bravo blocking the ground and pound attempt from Benn.
The fighters are pressed up against the cage, both looking to find a bit of space to work.
Benn thows a huge punch but Bravo dodges it nicely.
Bravo blocking the ground and pound attempt from Benn.
Benn sitting in half guard, looking to land shots. Bravo defending well though.
Benn is sneakily working for an arm triangle but Bravo sees it coming and defends easily.
Benn seems to be taking a bit of a break to think of his next move. He lands a short punch in the meantime.
Benn with the ground and pound but Bravo uses the opportunity to regain guard.
That's four minutes gone in the round.
Benn keeps in close for a moment and lands a decent shot to the side of Bravo's head.
Benn missing there with some ground and pound from the guard.
Bravo avoiding any damage from the ground and pound.
Benn postures up and lands some nice ground and pound.
Benn being controlled here momentarily.
Benn is looking to work some ground and pound but Bravo has wrist control.
The crowd applaud the fighters efforts here as the round comes to an end.
Benn won't allow Bravo to sweep him here.
Benn is in close to Bravo's body, working some short punches and elbows.
Benn is looking to work some ground and pound but Bravo has wrist control.
And thats the end of the round the fighters go back to their corners.
DJ Benn dominated that round.
The cut man is working on DJ Benn's cut.
That's the end of the interval. I'm sure that seemed a lot quicker than a minute for our two fighters! Back to the action.
Horrible takedown by Benn or perhaps it was just good defense by Bravo which made him look bad.
Benn scores with a nice looking left hook and follows it up with an uppercut!
Bravo is on the wrong end of a nice combination from Benn.
Benn dips down and scores with a jab to the body.
Bravo really does look like a pencil wearing a pair of gloves. Let's hope he has a gameplan to suit that ridiculous body shape.
Benn throws a head kick that misses
and Bravo counters with a nice kick to the body.
Bravo throws a sloppy head kick and Benn moves out of range easily.
A head kick by Benn misses
and Bravo counters by moving into the clinch.
Bravo utilising his Muay Thai to score with a knee to the body.
A nice left hand lands by Benn.
Benn has a couple of punches blocked by Bravo.
Benn throws a head punch that misses.
Bravo prevents the takedown attempt.
Benn lands with a short head shot on the inside.
Benn lands a hook that snaps the head of Bravo backwards.
Bravo looking for a takedown.
That's one minute gone in the round.
Benn misses with a short punch on the inside.
Benn takes an elbow to the temple.
Bravo is working for a takedown up against the cage. He can't get it on this occasion though.
Both fighters are absolutely exhausted here.
Benn lands with a left to the head.
Bravo blocks a couple of punches on the inside.
Bravo tries to stall but Benn uses the opportunity to gain a better position.
Bravo has Benn pressed up against the cage and is working for takedown. Benn manages to improve position though and keeps the fight standing.
That's three failed takedown attempts in the round for Johny Bravo. That's going to take a lot out of him.
Bravo content to slow the pace in the clinch.
Benn has dropped down and is working for a takedown. Bravo is trying to keep an underhook but Benn manages to get the takedown into half guard.
Benn missing with some ground and pound from the half guard.
Benn frees up his trapped foot and advances to mount.
Bravo on his back here. We all know that wrestlers don't like being on their back so let's see if Bravo tries to get out of the position.
Benn is giving the impression that he's looking to ground and pound but he switches suddenly into a beautiful far side armbar! Bravo is forced to tap! Great finish!
Ladies and gentlemen, after 1:57 of round 2, we have a winner by way of Submission (Armbar). DJ Benn! DJ Benn retains his welterweight title!
|
|
|
|
|
|
|
|
|
|
|
|
|
|
|
|
|
|
|
|
|
|
|
| S |
C
A |
G |
S |
C
B |
G |
|
S |
C |
G |
|
energy
A | B |
|
hype
A | B |
|
pop
A | B |
|
mgr
A | B |
|
FIGHT
RATING
81% |
|
|
|
|
|
|
|
Main event
|
Coming up we have a featherweight MMA rules bout between Daniel Diaz (ranked 0 p4p, 0 weight class) and Jones Shane (ranked 0 p4p, 0 weight class). Shane has chosen Elephant Man - Haters (feat Hunt & Jim Jones) as his entrance music. Jones Shane will no doubt be trying to keep this one on the feet, where he has a distinct advantage.
 |
|
 |
| 170 cm
19
145 lbs
1 - 5 - 0 |
|
193 cm
24
153 lbs
15 - 2 - 0 |
BJJ Blue Belt
Brawler
Good chin |
|
BJJ Blue Belt
Decent boxing
Powerful |
|
| |
|
Ladies and gentlemen. This fight is 3 rounds, in the featherweight division.
Introducing the fighter to my left, fighting out of the red corner.
With a record of
1 - 5 - 0, fighting out of Amsterdam, Daniel Diaz!
And introducing the fighter to my right, fighting out of the blue corner.
With a record of
15 - 2 - 0, fighting out of Amsterdam, Jones Shane!
The judges for this bout are Aafke Stam, Daniel Blasius and Paulsen Ambrosius.
The bell rings for round one and we are underway!
Nice takedown defense from Shane. No joy for Diaz on that attempt.
Diaz fakes high and shoots in for a takedown but Shane avoids it really well and circles away.
Daniel Diaz seems to be the more aggressive standup fighter in this bout.
Diaz shoots in looking for a takedown. Shane tries to sprawl out of it but Diaz keeps driving through. The fighters are pinned against the cage. Shane manages to get underhooks and after a bit of a struggle, circles away and we're back to standing.
That's three failed takedown attempts in the round for Daniel Diaz. That's going to take a lot out of him.
Shane tries to close the distance and clinch up against the cage but Diaz paws at him with a jab and circles away.
Diaz tries for a takedown but Shane sees it coming a mile off and avoids it easily.
A really sloppy takedown attempt there from Diaz.
We've had a slow start to the round here - hopefully the action picks up.
Diaz shoots in for a takedown but Shane shows good takedown defense there and keeps this one on the feet.
No luck with that takedown attempt from Diaz.
Diaz fails with the takedown.
Diaz is breathing heavily.
That's one minute gone in the round.
Diaz fails miserably with a takedown attempt.
Diaz shoots in for a takedown. "I don't think so" says Shane as he avoids it easily.
Diaz shoots in for a takedown but Shane shows good takedown defense there and keeps this one on the feet.
Shane rushes Diaz and pushes him back against the cage in a clinch.
Diaz tries to score a body lock takedown but Shane shows good agility there to stay on his feet.
Shane lands a body shot.
Shane breaks the clinch.
Shane moves into range and clinches up with Diaz.
Shane landing knees to the head.
Knees to the body from Shane.
That's two minutes gone in the round.
Diaz can't get the takedown.
Shane misses the knee to the body. Nice hip positioning from Diaz.
Shane breaks the clinch and we return to the middle of the mat.
Diaz closes the distance and clinches up with Shane, looking for a takedown. Diaz pushes Shane against the cage but Shane circles to the side and manages to break the clinch.
Shane has closed the distance and engaged Diaz in a clinch.
Shane working on landing some head shots here - that one got through nicely.
Diaz drops down for a takedown but doesn't get it.
Diaz drops down looking for an ankle pick but Shane pulls his leg out and moves away.
Diaz dodges the punch combination from Shane.
That's three minutes gone in the round.
Shane connects with a solid leg kick.
Diaz takes a thudding leg kick, right into the meat of the thigh.
Shane swings away but doesn't land with a series of punches.
Shane is a painfully thin specimen of a man. You do wonder whether a good body kick would snap him clean in two.
Diaz takes a body punch that cleary hurt but he's trying not to show any weakness.
Shane lands a two punch combo.
It looks like Daniel Diaz has been cut.
Jones Shane is looking to keep the fight on the feet at all costs.
We've seen a great period of action over the last minute or so - credit to both fighters for going all out!
Shane misses with a head kick.
Diaz stumbles momentarily as he takes a strong leg kick from Shane.
Diaz fails with a rather predictable takedown attempt.
Shane takes the fight into the clinch.
That's four minutes gone in the round.
Still in the clinch, Shane scores with a nice short uppercut.
Shane tries to land a knee to the body but he is off balance and Diaz avoids it.
Shane pushes Diaz back against the cage and unloads with a body punch.
Shane escapes the clinch and we're back to striking.
Diaz changes levels and drives through with a really nice takedown into side control. Shane looks really pissed at himself for not defending that better.
Shane tries to work a leg under to get back to half guard but Diaz wriggles his own leg back out and remains in side control.
Shane wants to get back to his feet but Diaz drags him back down.
The crowd applaud the fighters efforts here as the round comes to an end.
Shane is using up a lot of energy trying to get back to his feet. Perhaps he should improve his position first.
Shane bucks up and tries to throw Diaz off but instead Diaz has got his back!
Diaz tries to keep control of the position but Shane is staying busy.
And thats the end of the round the fighters go back to their corners.
Jones Shane dominated that round.
The cut man is working on Daniel Diaz's cut.
That's the end of the round. The referee orders the cornermen out of the cage so we can get back down to business.
Diaz misses with a takedown attempt. He shot from a bit too far out.
Diaz looking to shoot here. He's gone for it and he's landed a takedown into mount! Oh, that's bad for Shane!
Shane is desperately trying to improve his position but Diaz has a good base and remains in mount.
Diaz takes a little breather and maintains the position. The referee will be looking for him to stay active from such a dominant position though.
Shane is looking to improve his position but Diaz isn't that keen on the idea.
Diaz controlling the pace for now.
Diaz tries to control but Shane wriggling away.
Shane is really trying hard to get back to his feet.
Both fighters are absolutely exhausted here.
That's one minute gone in the round.
Diaz content just to control the position here.
Shane throws a strike from the bottom but Diaz uses the opportunity to take his back.
Shane is trying to get back to his feet but Diaz has full control of the position and if anything, Shane has just worked his way into a worse spot.
Diaz trying to control.
Shane tries to roll but Diaz sticks to his back.
Shane controlling the position well but he knows he's in a bad position.
Diaz wants to control but Shane is keeping busy.
Shane is trying to stand back up.
That's two minutes gone in the round.
The crowd are hurling abuse towards the fighters... You can hardly blame them though because there isn't a lot going on in the fight.
Shane is in bad spot here.
Shane controlling the position well but he knows he's in a bad position.
Diaz trying to secure his dominant position for a moment - making sure Shane doesn't escape.
The fighters are pressed up against the cage, both looking to find a bit of space to work.
That's three minutes gone in the round.
Shane is trying to stand back up.
A bit of a pause in the action here. Diaz controlling the positon.
Shane is really stuck here.
The ref warns both fighters not to hold the cage as they work up against the meshing.
You know, I was talking to some of our celebrities at ringside tonight and they were split right down the middle on who was going to win this fight.
Shane is trying to get back to his feet but Diaz has full control of the position and if anything, Shane has just worked his way into a worse spot.
Diaz controls the action.
Shane trying to get back to his feet but Diaz is in full control for now.
That's four minutes gone in the round.
A few boos can be heard. I'm sure they will multiply if the fighters don't pick up the pace.
Good control from Diaz.
The referee stands the fighters back up. Daniel Diaz just wasn't active enough from the dominant position.
No luck with that takedown attempt from Diaz.
Diaz shoots in and drives through. Shane sprawls well.
That's three failed takedown attempts in the round for Daniel Diaz. That's going to take a lot out of him.
Diaz takes a punch right to his stomach. That took the wind out of him momentarily.
Diaz avoids a punch combination nicely.
The crowd thankful this round is nearly over.
Diaz shoots in for a takedown - he's clinched up with Shane but Shane pushes him off and we're back to square one.
Diaz closes the distance and clinches up, looking for a takedown. He shifts his weight and gets a nice trip into half guard.
And thats the end of the round the fighters go back to their corners.
Daniel Diaz dominated that second round.
The cut man is working on Daniel Diaz's cut.
The fighters' corners scream their final instructions, as the referee calls time. Here we go, back to the action! This is the final round!
Shane stuffs the takedown attempt from Diaz. Diaz gets slowly back to his feet.
A telegraphed takedown attempt from Diaz is defended easily by Shane.
Diaz shoots in and drives through. Shane sprawls well.
That's three failed takedown attempts in the round for Daniel Diaz. That's going to take a lot out of him.
A head kick from Shane lands but Diaz takes it in his stride.
Diaz looks for a takedown here. Will he get it? Shane is fending him off so far but Diaz persists. Nope, Shane circles away and we're back to standing.
Shane lands with a head kick! That's gotta hurt.
Diaz misses with a takedown attempt - Shane sprawls well and throws a nice strike on the way out which just misses.
Both fighters are breathing heavily.
Shane cracks the inside of Diaz's front leg.
Jones Shane seems to be getting the better of the standup.
That's one minute gone in the round.
Diaz closes the distance and clinches up with Shane, looking for a takedown. Diaz pushes Shane against the cage but Shane circles to the side and manages to break the clinch.
Shane throws a nice looking combination but Diaz bobs and weaves to avoid any damage.
Shane gets to the clinch - let's see what his plan is here.
A nice glancing elbow lands by Shane.
Shane escapes the clinch and we're back to striking.
Diaz shoots in for a takedown. "I don't think so" says Shane as he avoids it easily.
A punch combination from Shane misses.
Shane displays good takedown defense there as he swats away a double leg from Diaz.
Nice sprawl there from Shane as Diaz shoots in.
That's two minutes gone in the round.
A few boos can be heard. I'm sure they will multiply if the fighters don't pick up the pace.
Shane throws a nice hook to the body that draws an oooh from the crowd.
Nice takedown defense from Shane. No joy for Diaz on that attempt.
A decent looking cross lands there for Shane.
Shane scores with a nice one two combo and darts back out of range to avoid anything coming in the opposite direction.
Shane misses with a jab and misses with a cross straight after too.
Diaz fails miserably with a takedown attempt.
Diaz throws a looping left and ducks down for a takedown. He's got his arms around Shane's waist but Shane gets an underhook and avoids the takedown by throwing Diaz off to one side.
Shane throws a two punch combo that lands nicely.
Daniel Diaz is looking to throw some combinations by the looks of things.
That's three minutes gone in the round.
Diaz drives through with a takedown into guard.
Shane working for a triangle but Diaz defends it easily.
Diaz is frustrating his opponent with some stalling tactics from top position.
Shane looking for submissions from the bottom here. Moving his hips around, possibly looking for an armbar.
Shane is active off his back here, looking for submissions.
Diaz advances to half guard.
Diaz slows the pace down in half guard.
That's four minutes gone in the round.
Shane pushes Diaz off but Diaz dives into side control.
Shane is trying to stand back up. He's worked his way up against the cage but Diaz has just dragged him back down to the mat.
Diaz controlling from side mount.
Diaz tries to move to mount but Shane blocks the move with his legs.
Shane wants to escape from the position here - easier said than done!
Shane seems a little lost for a moment, as Diaz dominates the positioning.
The crowd applaud the fighters efforts here as the round comes to an end.
Shane is trying to get back to his feet.
Diaz trying to control the action but Shane is working from the bottom.
And that's the end of the fight!
Jones Shane comfortably won the final round on my scorecard.
I think Shane has won this one but let's see whether the judges agree with me. Over to the ring announcer for the scorecards.
Ladies and gentlemen, after 3 rounds of action, we go to the scorecards for a decision.
Judge Aafke Stam scores the fight 28:29
Judge Daniel Blasius scores the fight 28:29
Judge Paulsen Ambrosius scores the fight 28:29
In favor of your winner, by unanimous decision... Jones Shane!
|
|
|
|
|
|
|
|
|
|
|
|
|
|
|
|
|
|
|
|
|
|
|
| S |
C
A |
G |
S |
C
B |
G |
|
S |
C |
G |
|
energy
A | B |
|
hype
A | B |
|
pop
A | B |
|
mgr
A | B |
|
FIGHT
RATING
63% |
|
|
|
|
|
|
|
|
|
|
