|
TWGC 26 (155lbs, D1): Finals - Round 1 PBP Commentary |
Undercard bout
|
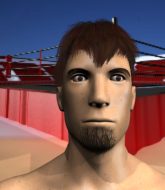
Coming up we have a lightweight Tycoon World Grappling Championship rules bout between Ebyn Dall (ranked 805 p4p, 0 weight class) and Aaron Hoyle (ranked 5205 p4p, 0 weight class). Dall comes to the cage accompanied by Under the Blood. Both fighters look fresh as a daisy as they make their way towards the cage.
This TWGC bout is 1 fifteen minute round in the lightweight division. Introducing today's competitors. In the red corner, competing out of New York, with a TWGC record of 8 wins and 5 losses; Ebyn Dall! And in the blue corner, fighting out of Montreal, with a TWGC record of 10 wins and 3 losses; Aaron Hoyle!
The judges for this bout are James Glass, James Atkins and Colin Fotheringham.
The fighters connect hands in the middle of the mat and we are under way.

Dall shoots in from a long way out. He's driving through with the takedown attempt and he eventually gets it, landing in Hoyle's guard. Score +2 for takedown into guard / half guard: Dall (2) vs (0) Hoyle
Hoyle trying to control the position here.
Hoyle is trying to keep Dall in close.
Dall trying to control the position from guard on top but Hoyle is wriggling around, looking for whatever he can.
Dall is going to have to think about doing something other than just controlling because Hoyle is managing to avoid having the position dictated to him.
Hoyle controls Dall momentarily but Dall frees himself.
Hoyle keeping moving, preventing Dall from controlling successfully.
We've had a slow start to the round here - hopefully the action picks up.
Dall looking to control the position here, rather than advance.
Hoyle is trying to control the position but Dall postures up.
Our spies down at at The Foundry inform us that Hoyle has really been working on his submissions in the buildup to this fight. Will it pay off?
The fighters are pressed up against the cage, both looking to find a bit of space to work.

That's one minute gone in the round.
Dall trying to pass the guard but can't manage it just yet.
Dall wants to control from the top but Hoyle keeps moving.
Hoyle is trying to control the position from the bottom.
Dall wants to control from the top but Hoyle keeps moving.
Hoyle is trying to control the position but Dall postures up.
Hoyle has control of Dall's left arm, preventing Dall from doing any damage.
Dall trying to control the position from guard on top but Hoyle is wriggling around, looking for whatever he can.

Hoyle is looking for a triangle but Dall pushes his legs off easily.
Hoyle working a defensive guard here.

That's two minutes gone in the round.
Dall passes Hoyle's right leg, so he's now in half guard.
Dall wants to pass the guard but Hoyle is defending well.
Dall is keen to just control but Hoyle is a slippery customer.

Dall is sneakily working for an arm triangle but Hoyle sees it coming and defends easily.
Dall controlling the action here.
The ref warns both fighters not to hold the cage as they work up against the meshing.
Dall looking for a submission but Hoyle manages to get full guard, putting an end to that submission attempt.
Hoyle is working an open guard here, looking to improve his position. No doubt that will leave him open to counters but at least he's being more offensive.
Dall has gone for a leg lock! Hoyle slips out almost immediately though and dives into Dall's guard. Score +2 for sweep to guard / half guard: Dall (2) vs (2) Hoyle
We've been hearing good reports from Dall's training camp. Apparently he has been rolling around with some good quality BJJ practitioners and has been sharpening his skills. Let's see if that has an impact on the fight today.
Hoyle passes Dall's right leg, so he's now in half guard.

That's three minutes gone in the round.
Dall is looking to get full guard. It looks like he might be successful but at the last minute Hoyle jumps into side control! Score +3 for passing guard: Dall (2) vs (5) Hoyle
Hoyle looking for an arm triangle but it's way too loose to do anything.
Dall stops Hoyle from passing to mount.
Dall manages to get one leg in to regain half guard.
Hoyle works his way into full mount! Score +3 for passing guard: Dall (2) vs (8) Hoyle
Hoyle looking to control but Dall is working nicely, looking to advance position himself.
Dall keeping his composure momentarily, calmly looking to get back to half guard.
Dall wants to control but Hoyle is having none of it.
Dall regains half guard.

That's four minutes gone in the round.
Hoyle is trying for a guillotine from the top but the pressure isn't in the right place so Dall is just riding it out for now. Hoyle eventually gives up the hold.
Hoyle uses his free foot to push down on Dall's thigh. Eventually he works his other foot free and he's advanced to mount - this is trouble for Dall. Score +3 for passing guard: Dall (2) vs (11) Hoyle
Dall is writhing around trying to get back to his feet.
Dall is squirming around, avoiding Hoyle's attempts to control the action.
Hoyle is looking to work his way around to Dall's back. He needs to be careful though, as he's in danger of losing this dominant position.
Dall sneaks a leg back under and regains half guard and is working straight away to try and get back to guard. He hasn't managed just yet though.
Hoyle is pressing down on Dall's thigh, looking to free his foot. Dall is holding on for now.
Dall is looking to sinch up a guillotine here but Hoyle pulls his head out easily.

That's five minutes gone in the round.
Dall actively working from the bottom here.
Dall is looking to improve his position.
Dall looking for submissions off his back.
Dall wants to control but Hoyle is keeping busy and won't allow it.
Hoyle wants to lay and pray for a moment but Dall keeps working.
Hoyle is looking to advance position but Dall won't allow it.
Dall tries to get to full guard but Hoyle has control of the leg.
Dall trying to control but Hoyle postures up.
Hoyle is looking to advance position but Dall won't allow it.

That's six minutes gone in the round.
Dall wants to control but Hoyle is keeping busy.
Hoyle is trying to control. Dall wants to improve his position but can't escape this time.
Dall looking to work for a kimura from the bottom.
Dall wants to improve his position but Hoyle is controlling well.
Neither fighter is being very active at the moment, with Hoyle in particular looking to stall.
Dall gets back to full guard.
Hoyle is pushing down on Dall's leg trying to pass to half guard. Dall is fighting to maintain full guard but Hoyle has managed to sneak the leg through.
Hoyle is looking to advance position but Dall won't allow it.

That's seven minutes gone in the round.
Dall looking for submissions from an awkward position here.
Hoyle is thwarting Dall's attempts to control the position.
Hoyle wants to control but Dall is keeping him busy.
Dall wants to get back to full guard but Hoyle has passed into side control. Score +3 for passing guard: Dall (2) vs (14) Hoyle
Hoyle wants to work for a kimura but he's foiled early by Dall, who protects the arm well.
Hoyle has knee on belly and moves into mount. Score +2 for reaching mount: Dall (2) vs (16) Hoyle
Dall sneaks a leg back under and regains half guard and is working straight away to try and get back to guard. He hasn't managed just yet though.
Dall has no desire to be mounted, so is trying to control. Hoyle is working away from the top position though.
Dall is looking for a sweep. Hoyle is wise to his cunning plan and keeps the top position.

That's eight minutes gone in the round.
Dall makes his way to full guard. A much better position for Dall.
Hoyle sneaks a leg through and gets to half guard. That was like a knife through butter how easily he passed Dall's guard.
Dall trying to hold on to Hoyle's head to control him but Hoyle postures up.
Dall makes his way to full guard. A much better position for Dall.
Dall is active off his back here, looking for submissions.
Hoyle is intent on slowing down the pace of the fight, simply looking to control.
Dall had isolated an arm as going for a kimura. Hoyle defends it easily.
Hoyle trying to control the position from guard on top but Dall is wriggling around, looking for whatever he can.
Dall has his foot on Hoyle's thigh. He's trying to push off and get in position for a triangle, I think. Hoyle works his way back into a safe position though.

That's nine minutes gone in the round.
Dall is active off his back here, looking for submissions.
Dall has a loose triangle. He'll be looking to tighten that up but Hoyle can see exactly what he's planning and manages to posture up and free himself.
Dall looking for submissions off his back, moving his hips, looking for an opening.
Dall is breathing heavily.
Dall looking for submissions off his back, moving his hips, looking for an opening.
Hoyle seems content to control from guard here. He's going to have to remain active though if he doesn't want to get stood back up.
Hoyle trying to control but Dall is working from the bottom.
Dall is throwing his legs up, looking for submissions. Hoyle is aware though and is defending well.
Hoyle tries to free his leg and advance position but Dall is retaining full guard.
Hoyle being controlled here momentarily.
Hoyle wants to pass the guard but Dall is keeping the position.

That's ten minutes gone in the round.
Hoyle slips nicely into half guard.
Dall is looking to improve his position.
Hoyle with a momentary lay and pray from half guard.
Dall looking for submissions from an awkward position here.
Hoyle wants to lay and pray for a moment but Dall keeps working.
Dall is looking to improve his position.
Dall looking for submissions from an awkward position here.
Dall has no desire to be mounted, so is trying to control. Hoyle is working away from the top position though.

That's eleven minutes gone in the round.
Dall is not content to let Hoyle control the position.
Hoyle is sneakily working for an arm triangle but Dall sees it coming and defends easily.
Hoyle wants to pass the guard but Dall is defending well.
Dall is refusing to be controlled, as Hoyle sits in half guard.
Hoyle trying to pass the guard but Dall defending well.
Hoyle is trying to control the action in half guard but Dall is working away on the bottom, looking perhaps to get back to full guard.
Hoyle prevents Dall from improving his position.
Dall looking for submissions off his back.
Dall looking to work for a kimura from the bottom.

That's twelve minutes gone in the round.
Hoyle is trying to control. Dall wants to improve his position but can't escape this time.
Dall has a hand on Hoyle's thigh, trying to get back to full guard. Hoyle takes advantage of the position though and mounts him! Score +3 for passing guard: Dall (2) vs (19) Hoyle
Dall sneaks a leg back under and regains half guard and is working straight away to try and get back to guard. He hasn't managed just yet though.
Dall wants to control but Hoyle is keeping busy.
Hoyle trying to control the action but Dall is working from the bottom.
Hoyle works his way into full mount! Score +3 for passing guard: Dall (2) vs (22) Hoyle
Hoyle can't quite control the action as he would like just now, as Dall is looking to escape.
Dall is wriggling around trying to escape.

That's thirteen minutes gone in the round.
Dall gets back to half guard.
Dall moves his hips nicely and gets into full guard.
Dall not looking particularly offensive just at the moment.
Hoyle trying to control but Dall is working from the bottom.
Dall trying to control the position.
Hoyle looking to pass the guard.
Dall working from the bottom, still in full guard. He's managed to get a loose triangle. Hoyle doesn't seem to be doing much to defend here, obviously he feels comfortable in the position. Hoyle manages to throw the legs off his shoulder and he's back into guard - no problem.
Dall looking for submissions from the bottom here. Moving his hips around, possibly looking for an armbar.
Hoyle advances position into side control! Score +3 for passing guard: Dall (2) vs (25) Hoyle

That's fourteen minutes gone in the round.
Dall is looking to reverse the position.
Hoyle has knee on belly and moves into mount. Score +2 for reaching mount: Dall (2) vs (27) Hoyle
Dall is wriggling around trying to escape.
Hoyle avoids the attempt from Dall to control.
Dall is squirming around, avoiding Hoyle's attempts to control the action.
Hoyle avoids the attempt from Dall to control.
Boooooooooooooooooooo!!! God, this has been a terrible round. Come on you two, sort yourselves out!
Hoyle tries to control but Dall wriggling away.
And that's the end of the fight!
Hoyle wins on points by 27 to 2.
A loyal slave to those sponsorship dollars, Aaron Hoyle made sure he mentioned Sportivité, along with how happy he was to win his fight. |
|
|
|
Undercard bout
|
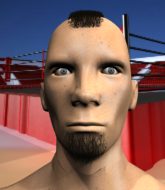
Coming up we have a lightweight Tycoon World Grappling Championship rules bout between Remi Daucourt (ranked 2388 p4p, 0 weight class) and Carlton Lassiter (ranked 3476 p4p, 0 weight class). Carlton Lassiter told me before the fight that he's been watching a lot of DVDs so let's see if that helps him in this one! I can't wait to find out!
This TWGC bout is 1 fifteen minute round in the lightweight division. Introducing today's competitors. In the red corner, competing out of Montreal, with a TWGC record of 5 wins and 1 losses; Remi Daucourt! And in the blue corner, fighting out of Hilo, with a TWGC record of 5 wins and 1 losses; Carlton Lassiter!
The judges for this bout are Richard Clark, Paul Tew and Colin Fotheringham.
The official calls the fighters to the middle and the contest is under way.

Lassiter rushes Daucourt and pushes him back against the cage in a clinch.
Daucourt wants the takedown. Lassiter is fighting it off but Daucourt persists and manages to bring the fight to the ground, ending up in Lassiter's guard against the cage. Score +2 for takedown into guard / half guard: Daucourt (2) vs (0) Lassiter
Daucourt pressing down on his opponent's thigh, looking to pass guard. Lassiter is keeping the position for now.
Lassiter working a defensive guard here.
Lassiter wants to sweep here but Daucourt controlling him for the moment.
Daucourt advances position into side control! Score +3 for passing guard: Daucourt (5) vs (0) Lassiter
We've had a slow start to the round here - hopefully the action picks up.
Daucourt tries to move into full mount but can't pass Lassiter's legs.
Daucourt has knee on belly and moves into mount. Score +2 for reaching mount: Daucourt (7) vs (0) Lassiter
That's one minute gone in the round.
Daucourt mounts Lassiter! Really nice guard pass there!
Daucourt content just to control the position here.
Daucourt is trying to take his opponent's back.
Lassiter tries to get back to half guard but can't.
Daucourt working for a guillotine from mount but Lassiter is in no mood to give up.
Lassiter tries to get back to half guard but can't.
Lassiter tries to hold on but Daucourt postures up.
That's two minutes gone in the round.
Daucourt wants to take Lassiter's back here but Lassiter is holding on to an arm, himself looking to escape.
Lassiter is in all sorts of trouble here.
Daucourt controlling from the full mount.
Lassiter can't escape the position.
Lassiter keeps trying to improve his position.
Daucourt takes Lassiter's back. Score +3 for taking back: Daucourt (10) vs (0) Lassiter
Lassiter tries to escape but Daucourt has the hooks in and won't let him break free.
Lassiter showing good submission defense here.
Daucourt trying to control momentarily.
That's three minutes gone in the round.
Lassiter is in a world of trouble here. He's outmatched on the ground here and he'd better get Daucourt off his back sharpish unless he wants to be submitted.
Daucourt working for a choke but Lassiter is defending well.
Daucourt seems to have improved his submission grappling technique since last time we saw him. Let's see if he can pull off a submission.
Lassiter trying to control but he's just got himself in more trouble.
You can see the frustration on Lassiter's face
He knows he is in trouble unless he improves his position sooner rather than later.
Daucourt is looking to control Lassiter but Lassiter is wriggling around and keeping busy.
The fighters are pressed up against the cage, both looking to find a bit of space to work.
Lassiter is trying to break free.
That's four minutes gone in the round.
Daucourt wants to control the position but Lassiter frees himself and scrambles - Daucourt manages to regain control in side control.
Daucourt wants to control but Lassiter is keeping him busy.
Daucourt is looking for a kimura. He might have it! No, Lassiter has escaped the position, nice work there.
Daucourt trying to control the position but Lassiter is working away.
Lassiter tries to bench press Daucourt off him but Daucourt keeps the position.
Lassiter manages to get back to half guard.
Lassiter is looking to regain full guard. Not this time though.
That's five minutes gone in the round.
Daucourt is pressing down on Lassiter's thigh, looking to free his foot. Lassiter is holding on for now.
Lassiter wants to get back to full guard.
Daucourt looking for a kimura but he'll have to free his other leg if he wants to finish that. Perhaps he's just using it as a distraction technique.
Daucourt is looking to take a break and control but Lassiter is keeping him honest, looking to work from the bottom.
Daucourt is trying to work for a kimura but Lassiter is defending well.
That's six minutes gone in the round.
Lassiter wants to control but Daucourt is keeping busy.
Lassiter works his way to full guard. Good work.
Daucourt stands and throws Lassiter's legs to the side, diving into side control. Score +3 for passing guard: Daucourt (13) vs (0) Lassiter
Daucourt wants to control but Lassiter is keeping him busy.
Lassiter is sneaking out the side here. He's bucked Daucourt off and has taken his back! Score +4 for clean sweep to past guard: Daucourt (13) vs (4) Lassiter
Lassiter is persistently looking for the submission but Daucourt is defending it well.
Lassiter working for a RNC but it's not happening just yet.
That's seven minutes gone in the round.
Daucourt breaks Lassiter's hooks off and manages to turn into his guard.
Score +2 for sweep to guard / half guard: Daucourt (15) vs (4) Lassiter
Daucourt wants to control from the top but Lassiter keeps moving.
Daucourt sneaks a leg through and gets to half guard. That was like a knife through butter how easily he passed Lassiter's guard.
Daucourt is stalling here. Lassiter is in no mood to hang around though. He's locked up a kimura from the bottom! Daucourt seems to be keeping calm but he's forced to roll out of the hold and Lassiter has ended up in side control on the top. Nice work. Score +4 for clean sweep to past guard: Daucourt (15) vs (8) Lassiter
Daucourt sneaks a leg under to get back to half guard.
Lassiter seems to be working for a kimura but Daucourt defends the submission attempt.
Daucourt moves into full guard.
That's eight minutes gone in the round.
Daucourt has his foot on Lassiter's thigh. He's trying to push off and get in position for a triangle, I think. Lassiter works his way back into a safe position though.
Lassiter tries to free his leg and advance position but Daucourt is retaining full guard.
Daucourt manages to sweep nicely, so he's now on top. Lassiter manages to get himself to full guard.
Score +2 for sweep to guard / half guard: Daucourt (17) vs (8) Lassiter
Daucourt looking to pass the guard.
Daucourt works a leg free and moves into half guard.
Lassiter is trying to get back to full guard.
Lassiter won't allow Daucourt to pass to mount.
Daucourt takes a deep breath and rests his weight momentarily on top of his opponent, to control the position.
Lassiter won't allow Daucourt to pass to mount.
Daucourt is just sitting in half guard, waiting for something to happen.
That's nine minutes gone in the round.
Lassiter is working for an escape here. He's hooked one of Daucourt's legs and he's managed to sneak out and take Daucourt's back! Score +4 for clean sweep to past guard: Daucourt (17) vs (12) Lassiter
Lassiter is persistently looking for the submission but Daucourt is defending it well.
Lassiter is hanging on to Daucourt's back as he tries to escape.
Lassiter not allowing Daucourt to control his hands.
You can see the frustration on Daucourt's face
He knows he is in trouble unless he improves his position sooner rather than later.
That's ten minutes gone in the round.
Daucourt showing good submission defense here.
Daucourt looking very determined here, making life difficult for Lassiter.
Lassiter looking for the choke but no joy.
Daucourt wants to control his opponent's hands but Lassiter gets his hands free.
Lassiter is trying to stick to Daucourt's back but Daucourt is turning into Lassiter. He's managed to reverse the position - now he's in Lassiter's guard. Polite applause from the crowd in appreciation of some nice Jiu Jitsu by Daucourt. Score +2 for sweep to guard / half guard: Daucourt (19) vs (12) Lassiter
Daucourt stands up and looks to throw the legs aside to pass to side control. Lassiter swivels though and keeps the full guard.
Daucourt stopping the sweep attempt from Lassiter.
That's eleven minutes gone in the round.
Daucourt drops back looking for a heel hook - he quickly realises he's not going to get it but Lassiter manages to dive on top of him before he can escape and now Daucourt has Lassiter in his guard. Score +2 for sweep to guard / half guard: Daucourt (19) vs (14) Lassiter
Daucourt tries to land a sweep but no joy.
Daucourt not looking particularly offensive just at the moment.
Daucourt controlling Lassiter's posture.
Lassiter tries to free his leg and advance position but Daucourt is retaining full guard.
Daucourt is looking for a triangle here but Lassiter uses the submission attempt to pass into side control.
Score +3 for passing guard: Daucourt (19) vs (17) Lassiter
Lassiter is trying to land an Americana. He has the arm isolated but Daucourt is keeping cool and he's avoided the danger for now.
That's twelve minutes gone in the round.
Lassiter looking for an arm triangle but it's way too loose to do anything.
Daucourt is looking for a sweep.
Daucourt is sneaking out the side here. He's bucked Lassiter off and has taken his back! Score +4 for clean sweep to past guard: Daucourt (23) vs (17) Lassiter
Despite being in a bad position, Lassiter is controlling the hands, preventing any submission attempts.
Daucourt tries to keep control of the position but Lassiter is staying busy.
Daucourt is working for the rear naked choke. He has one arm under the chin but Lassiter has hold of the other arm. A bit of a stalemate here.
That's thirteen minutes gone in the round.
Lassiter trying to control but not successfully.
Daucourt is remaining active here, looking for the choke. The more discerning members of the crowd will appreciate his efforts.
The ref warns both fighters not to hold the cage as they work up against the meshing.
Daucourt wants to control but Lassiter is keeping busy.
Daucourt working for a RNC but it's not happening just yet.
Daucourt controlling the position well here. Lassiter rolled but Daucourt kept the hooks locked in and stayed in the dominant position.
Daucourt is working for the rear naked choke. He has one arm under the chin but Lassiter has hold of the other arm. A bit of a stalemate here.
That's fourteen minutes gone in the round.
Lassiter tries to break free.
Daucourt working for a choke but Lassiter is defending well.
Lassiter looking very determined here, making life difficult for Daucourt.
Boooooooooooooooooooo!!! God, this has been a terrible round. Come on you two, sort yourselves out!
Daucourt looking for the RNC.
Lassiter is in bad spot here.
And that's the end of the fight!
Daucourt takes the fight on points by 23 to 17.
After the big win, Remi Daucourt made sure to do all the important stuff like thanking his sponsors Sportivité and telling the interviewer how much he loves him. |
|
|
|
Co-main event
|
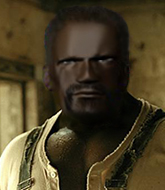
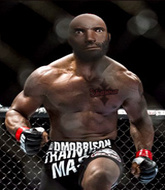
Coming up we have a lightweight Tycoon World Grappling Championship rules bout between David Morrison Jr. (ranked 1787 p4p, 102 weight class) and Ricardo Gracie (ranked 2404 p4p, 0 weight class). Morrison Jr. comes to the cage accompanied by Face The Pain. Over to our ring announcer for the fighter introductions!
This TWGC bout is 1 fifteen minute round in the lightweight division. Introducing today's competitors. In the red corner, competing out of New York, with a TWGC record of 19 wins and 6 losses; David Morrison Jr.! And in the blue corner, fighting out of Montreal, with a TWGC record of 7 wins and 6 losses; Ricardo Gracie!
The judges for this bout are Andrew Berry, William Gold and Sam Margolis.
The fighters bow as they face eachother in the middle of the mat and we are under way.
Gracie has taken the fight to the clinch.
Gracie is fighting off a takedown attempt but Morrison Jr. is just too persistent for him and manages to trip Gracie to the mat. Gracie regains guard as soon as the fighters hit the mat. Score +2 for takedown into guard / half guard: Morrison Jr. (2) vs (0) Gracie
Morrison Jr. tries to free his leg and advance position but Gracie is retaining full guard.
Gracie tries to land a sweep but no joy.
The fighters are pressed up against the cage, both looking to find a bit of space to work.
Morrison Jr. pressing down on his opponent's thigh, looking to pass guard. Gracie is keeping the position for now.
Gracie looking for submissions off his back, moving his hips, looking for an opening.
We've had a slow start to the round here - hopefully the action picks up.
Gracie is looking for a triangle but Morrison Jr. pushes his legs off easily.
Morrison Jr. slows down the pace of the fight for a moment. He'll need to remain active if he doesn't want to see the fight stood back up.
That's one minute gone in the round.
Morrison Jr. wants to control from the top but Gracie keeps moving.
Morrison Jr. is posturing up here but Gracie has hold of an arm and he's gone for an armbar! Morrison Jr. tries to roll out but it's too tight and Morrison Jr. has to tap! Slick submission there by Gracie!
Ladies and gentlemen, after 1:32 of round 1, we have a winner by way of Submission (Armbar). Ricardo Gracie!
During a confident post fight interview, Ricardo Gracie thanked all his fans. He seemed very genuine when describing how motivated his fans keep him. |
|
|
|
Main event
|
Coming up we have a lightweight Tycoon World Grappling Championship rules bout between Dado Mata (ranked 946 p4p, 108 weight class) and Masa Wasa (ranked 1907 p4p, 104 weight class). Mata comes into the arena with 和楽器バンド / 千本桜 blaring out of the sound system. Wasa is bouncing up and down as he enters the arena, backed by Welcome To The Jungle. Masa Wasa has the eye of the tiger tonight.
This TWGC bout is 1 fifteen minute round in the lightweight division. Introducing today's competitors. In the red corner, competing out of New York, with a TWGC record of 19 wins and 13 losses; Dado Mata! And in the blue corner, fighting out of New York, with a TWGC record of 19 wins and 14 losses; Masa Wasa!
The judges for this bout are Steven Brown, William Gold and James Glass.
The fighters bow as they face eachother in the middle of the mat and we are under way.
Wasa dives in for a single leg takedown but Mata sprawls and the fighters end up clinched against the cage.
Mata fails with a takedown attempt.
Mata looks frustrated there after his takedown attempt is stuffed easily.
Mata has his takedown stuffed

and Wasa counters with a nice double leg into guard. Score +2 for takedown into guard / half guard: Mata (0) vs (2) Wasa
That's three failed takedown attempts in the round for Dado Mata. That's going to take a lot out of him.
Wasa forces his way into half guard.
Mata tries to get to full guard but Wasa has control of the leg.
We've had a slow start to the round here - hopefully the action picks up.
Wasa trying to control from half guard but Mata is working away.
Mata is looking to regain full guard. Not this time though.
That's one minute gone in the round.
Mata is working hard here to advance position.
Wasa seems very keen to just sit and control from half guard but Mata does not like that idea so much and is remaining active off his back.
Mata's coaches at Mello MMA have been working on his defensive grappling in preparation for this fight so let's see if he can get out of this tricky position.
Wasa has freed up his trapped foot and advances to mount. Score +3 for passing guard: Mata (0) vs (5) Wasa
Wasa looking to control but Mata is working nicely, looking to advance position himself.
Wasa fails to take his opponent's back.
The fighters are pressed up against the cage, both looking to find a bit of space to work.
That's two minutes gone in the round.
Mata defends a decent attempt at a guillotine from Wasa.
Mata working to try and regain half guard.
Wasa trying to control but he's not successful this time.
Mata is looking to get to half guard.
That's three minutes gone in the round.
Wasa controlling the position easily from mount.
Wasa trying to control but Mata is having none of it.
Wasa moves to the back. Score +3 for taking back: Mata (0) vs (8) Wasa
That's four minutes gone in the round.
Wasa is working really hard to secure the rear naked choke. Mata defends successfully for a significant amount of time. Both fighters are looking very determined.
Mata manages to reverse the position and now he's in Wasa's guard. Nice work there by Mata.
Score +2 for sweep to guard / half guard: Mata (2) vs (8) Wasa
Wasa can't keep his opponent in guard - Mata advances to half guard, no doubt looking to mount.
Wasa wants to improve his position but Mata is controlling well.
Mata is trying to work for a kimura. This could be trouble! No, Wasa has managed to free his arm - good work.
That's five minutes gone in the round.
Wasa tries to get to full guard but Mata has control of the leg.
Mata controlling the pace.
Wasa actively working from the bottom here.
Mata seems to be trying to get a kimura but instead Wasa has recovered full guard.
Mata wants to pass the guard but Wasa is keeping the position.
That's six minutes gone in the round.
There's a bit of a scramble here and now Wasa is on top in guard.
Score +2 for sweep to guard / half guard: Mata (2) vs (10) Wasa
Mata looking for a sweep. Not yet Mata, not yet.
Mata is trying to keep Wasa in close.
Wasa forces his way into half guard.
Mata manages to get to full guard.
Wasa passes into half guard.
That's seven minutes gone in the round.
Mata is looking to improve his position.
Mata trying to hold on to Wasa's head to control him but Wasa postures up.
Mata is looking to regain full guard. He's left an arm up in the air though and Wasa has latched onto it... Big trouble! Wasa pivots for an armbar - it's in tight and it Mata is tapping in no time flat! Great counter grappling there from Wasa!
Ladies and gentlemen, after 7:52 of round 1, we have a winner by way of Submission (Armbar). Masa Wasa!
An out of breath Masa Wasa thanked his loyal fans in his post fight interview, giving them credit for his success over the course of his career. |
|
|
|
|
|
|