 |
RFC Showdown in Tokyo 34 PBP Commentary |
Undercard bout
|
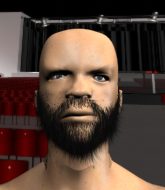
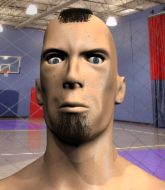
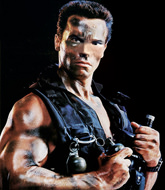
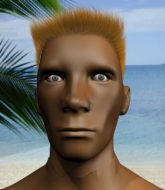
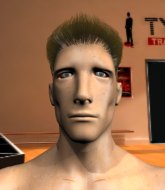
Coming up we have a light heavyweight MMA rules bout between Jamie James (ranked 22929 p4p, 646 weight class) and Martin Kabara (ranked 7266 p4p, 589 weight class). There are an array of beautiful celebrities at ringside tonight! I wonder if any of them paid for their tickets.
 |
|
 |
| 182 cm
20
214 lbs
0 - 1 - 0 |
|
188 cm
19
225 lbs
0 - 1 - 0 |
BJJ Purple Belt
Excellent MT
Cardio machine |
|
BJJ Blue Belt
Excellent boxer
Good gas tank |
|
| |
|
Ladies and gentlemen. This fight is 3 rounds, in the light heavyweight division.
Introducing the fighter to my left, fighting out of the red corner.
With a record of
0 - 1 - 0, fighting out of Las Vegas, Jamie James!
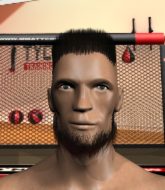
And introducing the fighter to my right, fighting out of the blue corner.
With a record of
0 - 1 - 0, fighting out of Sydney, Martin Kabara!
The judges for this bout are Hirohito Nitta, Taro Takaoka and Yasuomi Hirokawa.

The bell rings for round one and we are underway!
James punishes Kabara's body with a nice straight punch.
James lands with a right hand.
Kabara keeping a good distance there, avoiding the body shot.
Kabara appeared to try and counter that last move with a leg kick.
James scores with a jab to the body.
James throws a hard body shot but it just misses.
It seemed like Kabara was going to counter with the hook but didn't fully commit to it.
James lands a jab to Kabara's midsection.
James is looking to wear down Kabara with body shots, infact he's throwing more body shots than head shots at the moment.
James misses the body punch
and Kabara counters with a lovely straight right hand!
Kabara has been working on his striking defense in training and it's paying off as James is landing a low percentage of strikes.
Good leg kick by James there. It's the ones that make that thud noise that hurt and that was an almighty thud.
Nice uppercut lands for James. That snapped Kabara's head back.
James keeps Kabara at a distance using the push kick.
Wooooo! Give it up for these two warriors! They are putting on a show!

James cracks Kabara with a big right hand that sends him crashing to the floor. James has the opportunity to follow him to the ground but instead he's beckoning Kabara to stand back up!

Kabara is rocked!
James ducks low and lands a nice hook to the body of his opponent.
Kabara is still on wobbly legs! Can James finish him?
Kabara looks winded!

That's one minute gone in the round.
James connects with a body shot that sends Kabara's belly button to the back.
James changes levels and scores with a jab to the body.
Kabara seems to have recovered his senses.
Kabara is keeping his hands low and just asking to be knocked out. James Raises his leg and lands a stunning axe kick! Kabara is out cold, face down on the mat!
Ladies and gentlemen, after 1:16 of round 1, we have a winner by way of KO (Head Kick). Jamie James!
After the fight, Jamie James was humble in paying tribute to his opponent but made it clear he wants to go on to bigger and better things. It seemed to go down well with the crowd who cheered him loudly.
|
|
|
|
|
|
|
|
|
|
|
|
|
|
|
|
|
|
|
|
|
|
|
| S |
C
A |
G |
S |
C
B |
G |
|
S |
C |
G |
|
energy
A | B |
|
hype
A | B |
|
pop
A | B |
|
mgr
A | B |
|
FIGHT
RATING
85% |
|
|
|
|
|
|
|
Undercard bout
|
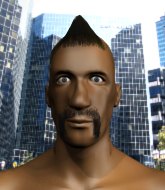
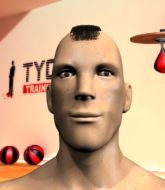
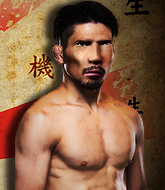
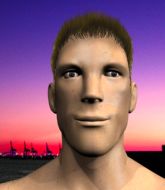
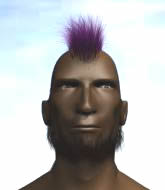
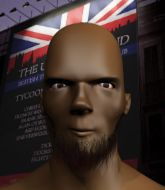
Coming up we have a middleweight MMA rules bout between Littel Big (ranked 4341 p4p, 440 weight class) and Riley Pierce (ranked 23275 p4p, 540 weight class). Pierce has chosen The Thunder Rolls as his entrance music. Over to our ring announcer for the fighter introductions!
 |
|
 |
| 185 cm
21
185 lbs
1 - 1 - 0 |
|
185 cm
22
188 lbs
0 - 1 - 0 |
BJJ White Belt
World class boxer
Cardio machine |
|
Powerful takedowns
Solid Muay Thai
Fast |
|
| |
|
Ladies and gentlemen. This fight is 3 rounds, in the middleweight division.
Introducing the fighter to my left, fighting out of the red corner.
With a record of
1 - 1 - 0, fighting out of Montreal, Littel Big!
And introducing the fighter to my right, fighting out of the blue corner.
With a record of
0 - 1 - 0, fighting out of Amsterdam, Riley Pierce!
The judges for this bout are Yukihiro Shimada, Taro Takaoka and Shigeki Sano.
The bell rings for round one and we are underway!

Pierce gets a clinch.

Big breaks the clinch and we return to the middle of the mat.
Big tries to land with a swinging hook to the body but Pierce was well out of range. Poor timing from Big.
Pierce tries to close the distance and clinch up but Big swats him away and circles back towards the center.
Big seem to be loading up, looking for a big counter.
Pierce avoids a punch combination nicely.
Big uses good footwork to avoid the strikes from Pierce.
Big stuffs a takedown. It's all about dictating where the fight takes place and Big wants it to stay on the feet.
Pierce avoids the body shot from Big.
Big lands a powerful looking uppercut that connected with his opponent's jaw.
Pierce gets cracked there but stands up to it.
Big thows a left - swing and a miss!
It seemed like Pierce was going to counter with the hook but didn't fully commit to it.
Pierce has his head slapped from side to side by a 3 punch combination. That must have hurt him.

Pierce scores with a takedown into Big's guard.
The crowd are loving this. Great action here.
Big wants to stand and escape but Pierce is having none of it.
The ref warns both fighters not to hold the cage as they work up against the meshing.
Pierce pushes down on Big's leg and manages to get into half guard.
Big trying to control but Pierce postures up.
Pierce throwing shots but Big is blocking nicely.
That's one minute gone in the round.
Pierce is working hard to pass the guard. He's done it - he's now in full mount! Trouble for Big!
Pierce prevents Big from getting the reversal.
Pierce moves to the back.
Big is trying to get back to his feet but Pierce has full control of the position and if anything, Big has just worked his way into a worse spot.
Big knows he needs to get back to his feet asap. He's simply no match for Pierce on the ground.
Big tries to roll but Pierce sticks to his back.

Pierce is working the back position looking for the choke. Oh, he's slid into an armbar! Beautiful transition and Big taps out! Fantastic Jiu Jitsu from Pierce.
Ladies and gentlemen, after 1:44 of round 1, we have a winner by way of Submission (Armbar). Riley Pierce!
A victorious Riley Pierce thanked his army of followers in his post fight interview, telling people to make sure they follow him on Twitter.
|
|
|
|
|
|
|
|
|
|
|
|
|
|
|
|
|
|
|
|
|
|
|
| S |
C
A |
G |
S |
C
B |
G |
|
S |
C |
G |
|
energy
A | B |
|
hype
A | B |
|
pop
A | B |
|
mgr
A | B |
|
FIGHT
RATING
67% |
|
|
|
|
|
|
|
Undercard bout
|
Coming up we have a lightweight MMA rules bout between Ruff Tuff (ranked 23182 p4p, 549 weight class) and Mama Tosen (ranked 4258 p4p, 428 weight class). Rumors backstage are that the fighters have been paid to keep it standing but we know that would never happen in MMA!
 |
|
 |
| 175 cm
24
163 lbs
0 - 4 - 0 |
|
177 cm
22
154 lbs
1 - 3 - 0 |
BJJ Blue Belt
Solid boxing
Granite chin |
|
BJJ Brown Belt
Dangerous knees
Granite chin |
|
| |
|
Ladies and gentlemen. This fight is 3 rounds, in the lightweight division.
Introducing the fighter to my left, fighting out of the red corner.
With a record of
0 - 4 - 0, fighting out of Sydney, Ruff Tuff!
And introducing the fighter to my right, fighting out of the blue corner.
With a record of
1 - 3 - 0, fighting out of Los Angeles, Mama Tosen!
The judges for this bout are Kenichi Hosakawa, Hirohito Nitta and Shigeki Fujiwara.
The bell rings for round one and we are underway!
Tosen misses with a looping left.
Mama Tosen seems to be the more aggressive standup fighter in this bout.
Tosen misses with a looping right.
Tosen swings and misses with a hook to the body.
Tuff throws a nice looking combination but Tosen bobs and weaves to avoid any damage.
Tosen doesn't fully commit to the body shot counter.
Tuff fails to land with a series of punches.
Tosen misses with an uppercut.
A jab from Tosen does it's job there.
Tuff's corner calls for a 1, 2 combination and Tuff duly obliges.
A jab from Tosen misses.
Tuff on the wrong end of a decent looking cross there.
Tosen connects with a lovely jab that went straight through the gap between Tuff's hands.
Some wild striking there from Tosen.
This has been an exciting period of action!
Danga de danga de dang - Tosen scores with a four punch combination!
Tosen punishes Tuff's body with a nice straight punch.
A combination from Tuff does no damage.
Tosen cracks Tuff with a good jab.
No joy there for Tuff, who threw a few shots but didn't land.
Tosen staying out of range there.
Tosen looks like he wants to counter punch here.
Tosen misses with a jab to the body
and Tuff counters with a one-two to the body.
That's one minute gone in the round.
Tuff throws a poor cross that misses
and Tosen counters with a straight right hand.
Tosen bobs and weaves and unloads with a good uppercut.
Tuff throws a wild combination but nothing lands.
Tosen scores with a jab to the body.
Tosen has managed to clinch.
Tosen with a knee to the head.
Tuff wants to push off and get back to the center of the mat but Tosen has him pressed against the cage.
Tosen scores with a knee to the head.

It looks like Ruff Tuff has been cut.
Tosen lands a nice knee to the body.
Tuff is breathing heavily.
Tosen pressing his opponent against the cage.
Tosen putting his Muay Thai to good use. He has Tuff in a tight clinch and is doing some damage with knees to the body.
The fans in attendance giving it up for the two fighters, who have really let it all hang out in the last minute or so!
Tosen crunches a lovely knee into Tuff's ribcage.
A body shot lands from Tosen.
Tosen lands a right hand that snaps the head of Tuff backwards.
Tosen landing knees to the head.
Tosen lands a body shot.
A knee to the head by Tosen.

That's two minutes gone in the round.
Tosen utilising his Muay Thai to score with a knee to the body.
Tosen lands with a short shot to the head.
Tosen softening up his opponent with strikes, against the cage.
Tosen has the Thai clinch. He lands a big knee to the head that stumbles Tuff - he's in trouble! Another big knee to the head from Tosen, and another! Tuff is out on his feet - the ref jumps in to save him and ends the fight!
Ladies and gentlemen, after 2:24 of round 1, we have a winner by way of TKO (Knees). Mama Tosen!
|
|
|
|
|
|
|
|
|
|
|
|
|
|
|
|
|
|
|
|
|
|
|
| S |
C
A |
G |
S |
C
B |
G |
|
S |
C |
G |
|
energy
A | B |
|
hype
A | B |
|
pop
A | B |
|
mgr
A | B |
|
FIGHT
RATING
79% |
|
|
|
|
|
|
|
Undercard bout
|
Coming up we have a featherweight MMA rules bout between Daleb Managedov (ranked 2625 p4p, 265 weight class) and Shiro Tanaka (ranked 3135 p4p, 303 weight class). Managedov's ring entrance music is that housewives' favourite, Chechen Mob Song. Tanaka is bobbing his head along to his entrance song: The good the bad and the ugly theme song. Both fighters look pumped up here. Let's hope this is a good fight!
 |
|
 |
| 177 cm
26
155 lbs
6 - 5 - 0 |
|
172 cm
20
149 lbs
5 - 2 - 0 |
Good wrestling
Brawler
Very strong |
|
BJJ Purple Belt
Excellent MT
Good gas tank |
|
| |
|
Ladies and gentlemen. This fight is 3 rounds, in the featherweight division.
Introducing the fighter to my left, fighting out of the red corner.
With a record of
6 - 5 - 0, fighting out of St Petersburg, Daleb Managedov!
And introducing the fighter to my right, fighting out of the blue corner.
With a record of
5 - 2 - 0, fighting out of Amsterdam, Shiro Tanaka!
The judges for this bout are Shigeki Sano, Hirohito Nitta and Kenichi Hosakawa.
The bell rings for round one and we are underway!
Tanaka gets a clinch.
Tanaka avoiding damage.
Tanaka fails to land with a short punch on the inside.
Tanaka tries to work over Managedov's body with a swooping hook but it only glances the target.
Managedov drops down for a takedown but doesn't get it.
Tanaka is leaning against Managedov and scores with a nice uppercut to the body.
Managedov is trying to push Tanaka away but Tanaka has him pressed against the cage, so he's going nowhere.
Tanaka pushes off an throws an elbow but Managedov leans to the side and avoids it. We're back to clinching against the cage.
We've had a slow start to the round here - hopefully the action picks up.
Tanaka tries to land knees in the clinch but Managedov avoids the damage to the body.

Tanaka pushes off and circles away, back to the middle of the mat.
Tanaka moves into the clinch.
Tanaka escapes the clinch and we're back to striking.
That's one minute gone in the round.
Tanaka tries to clinch but Managedov moves out of range.
Tanaka scores with a jab to the jaw.
Tanaka stuffs the takedown.

Managedov changes levels and drives through with a really nice takedown into side control. Tanaka looks really pissed at himself for not defending that better.
Managedov lands an elbow.
Managedov scores with a couple of nice shots to the head there. The referee takes a look at Tanaka to see if he's OK.
Managedov in side control lands a nice looking series of punches and elbows.
Check out the look on Managedov's face as he threw that strike - that's one determined fighter!
Tanaka is looking to regain half guard here but Managedov keeps moving and retains side control.
Wooooo! Give it up for these two warriors! They are putting on a show!
Tanaka is trying to control Managedov's posture but Managedov avoids it.
Tanaka is trying to improve his position.
Tanaka is putting a lot of effort into getting back to his feet here.
Managedov postures up a little and throws a couple of hammerfists but they don't connect properly.
That's two minutes gone in the round.
Tanaka gets one leg under and gets the fight to half guard.
Managedov landing with strikes to the body and head, softening up his opponent.
Tanaka is trying to stand up here but Managedov is controlling him well.
Tanaka is using up a lot of energy trying to get back to his feet. Perhaps he should improve his position first.
Managedov seems to be taking a bit of a break to think of his next move. He lands a short punch in the meantime.
Tanaka is refusing to be controlled, as Managedov sits in half guard.
Tanaka trying to control from the bottom.
Managedov lands with a punch from half guard.
Tanaka looking to work for a kimura from the bottom.
Tanaka moves his hips nicely and gets into full guard.
Tanaka utilising some decent striking defenses from the guard, preventing the ground and pound.
Managedov has to be careful here, sitting in the guard of a superior BJJ player.

That's three minutes gone in the round.
Managedov scoring with punches to the head and body.
Managedov is looking to work some ground and pound but Tanaka has wrist control.
Managedov won't allow Tanaka to get back to his feet.
Tanaka is active off his back here, looking for submissions.
Managedov postures up and scores with a shot to the body and a follow up elbow to the head.
Managedov stops Tanaka from standing up.
Tanaka working a defensive guard here.
Managedov lands a couple of elbows.
Tanaka trying to keep a closed guard but Managedov is proving a slippery customer.
Managedov scores with a decent looking elbow strike.
Tanaka manages to sweep nicely, so he's now on top. Managedov manages to get himself to full guard.

Tanaka trying to control but Managedov is working from the bottom.

That's four minutes gone in the round.
Tanaka sneaks a leg through and gets to half guard. That was like a knife through butter how easily he passed Managedov's guard.
Tanaka wants to stand but Managedov has hold of a leg and an arm, so he's trapped for now.
Tanaka is sneakily working for an arm triangle but Managedov sees it coming and defends easily.
Tanaka trying to control from half guard but Managedov is working away.
Tanaka is trying a forearm choke
I don't think that's going to do much at this level of the game.
Managedov is looking to improve his position.
And thats the end of the round the fighters go back to their corners.
That was a close round but I would say that Daleb Managedov will probably get the nod.
The minute break is over - no more time for sponges and pep talks - back to the action!

Tanaka swats away the attempt to clinch by Managedov.
Tanaka closes the distance and pushes Managedov back into the cage.
Tanaka tries to work over Managedov's body with a swooping hook but it only glances the target.
Managedov blocks a couple of punches on the inside.
Tanaka breaks from the clinch.
Managedov scores with a straight right hand, right through his opponent's guard.
Tanaka tries to close the distance and clinch but Managedov swats him to one side with an open hand palm strike and circles away.
Tanaka is looking to take this fight into the clinch.
We've had a slow start to the round here - hopefully the action picks up.
Tanaka gets taken down but at least he's managed to land in guard.
Tanaka is looking for a triangle but Managedov pushes his legs off easily.
That's one minute gone in the round.
Tanaka wants to get back to his feet but Managedov is in a dominant position and won't allow it.
Tanaka had isolated an arm as going for a kimura. Managedov defends it easily.
Tanaka looking for submissions from the bottom here. Moving his hips around, possibly looking for an armbar.
Tanaka wants to stand but Managedov is controlling the position.
Managedov chips away with some ground and pound.
Managedov scoring with some ground and pound.
Managedov stands up over Tanaka, holding his feet. He dives back in and lands a decent shot to the head.
Managedov wants to control from the top but Tanaka keeps moving.
Tanaka has his foot on Managedov's thigh. He's trying to push off and get in position for a triangle, I think. Managedov works his way back into a safe position though.
Tanaka has thrown up a leg looking for a triangle. Managedov doesn't defend quickly enough and Tanaka has managed to lock this one up! Can Managedov escape?! NO! He's tapping out! Damn, that was a quick submission - congrats to Tanaka on a fantastic submission victory.
Ladies and gentlemen, after 2:55 of round 2, we have a winner by way of Submission (Triangle). Shiro Tanaka!
After the fight, Shiro Tanaka was humble in paying tribute to his opponent but made it clear he wants to go on to bigger and better things. It seemed to go down well with the crowd who cheered him loudly.
|
|
|
|
|
|
|
|
|
|
|
|
|
|
|
|
|
|
|
|
|
|
|
| S |
C
A |
G |
S |
C
B |
G |
|
S |
C |
G |
|
energy
A | B |
|
hype
A | B |
|
pop
A | B |
|
mgr
A | B |
|
FIGHT
RATING
41% |
|
|
|
|
|
|
|
Undercard bout
|
Coming up we have a super heavyweight MMA rules bout between Lurch Addams (ranked 1695 p4p, 72 weight class) and Yhorm Cinder (ranked 2317 p4p, 93 weight class). Yhorm Cinder has the eye of the tiger tonight.
 |
|
 |
| 225 cm
22
280 lbs
8 - 3 - 1 |
|
225 cm
28
300 lbs
7 - 3 - 0 |
BJJ Purple Belt
Excellent MT
Granite chin |
|
BJJ Purple Belt
Basic striking
Determined |
|
| |
|
Ladies and gentlemen. This fight is 3 rounds, in the super heavyweight division.
Introducing the fighter to my left, fighting out of the red corner.
With a record of
8 - 3 - 1, fighting out of Amsterdam, Lurch Addams!
And introducing the fighter to my right, fighting out of the blue corner.
With a record of
7 - 3 - 0, fighting out of Helsinki, Yhorm Cinder!
The judges for this bout are Shirou Masuda, Yasuomi Hirokawa and Sosuke Kotani.
The bell rings for round one and we are underway!
Cinder has his takedown stuffed
and Addams counters with a thumping low kick.

Addams gets to the clinch - let's see what his plan is here.
Cinder stops a takedown attempt from Addams.
Addams throws a knee to the head but misses.
Addams misses the knee to the body. Nice hip positioning from Cinder.
Addams just leaning against Cinder, taking a breather.
Addams blocks a couple of punches on the inside.
Addams scores a nice knee to the body.
Cinder working on landing some head shots here - that one got through nicely.
We've had a slow start to the round here - hopefully the action picks up.
Addams with a knee to the head.

It looks like Yhorm Cinder has been cut.
Addams landing knees to the body.
Cinder looks winded!
Addams gets an overhook and lands an elbow to the side of the head.
Addams utilising his Muay Thai to score with a knee to the body.
The crowd are loving this. Great action here.
A nice glancing elbow lands by Addams.
That's one minute gone in the round.
Some stalling of biblical proportions here from Addams.
Addams utilising his Muay Thai to score with a knee to the body.
Addams with the Thai clinch, lands a knee to the head.
Addams is stalling here.
Addams gets an overhook and lands an elbow to the side of the head.
Addams breaks the clinch.
Addams feints with a shoulder and throws a nice leg kick to Cinder's calf.
Addams moves into the clinch successfully.
Addams is looking to score with knees to the body. Maybe he'll change it up and go body then head. Cinder is defending well for now.
Addams scores with a knee to the head.
Cinder tries to land a knee to the head but Addams blocks with his arms.
That's two minutes gone in the round.
Addams utilising his Muay Thai to score with a knee to the body.
Addams really does look like a pencil wearing a pair of gloves. Let's hope he has a gameplan to suit that ridiculous body shape.
Addams connects with a knee to the head.
That has opened up Yhorm Cinder's cut even more.
Cinder looks more muscular than last time we saw him. He must have been on the weights.
The crowd cheering loudly, showing their appreciation for the quality fight we're seeing here.
Addams landing knees to the body.
Addams breaks the clinch.
Addams darts in and clinches Cinder up against the cage.
Addams lands an elbow that stopped Cinder in his tracks for a moment.
Addams looks to throw an elbow but misses.
Addams displaying some good clinch control by pressing Cinder up against the cage.
Cinder wants a takedown.
Addams pushes off and fires off an elbow that misses, before clinching up again, against the cage.
Cinder avoiding damage as Addams throws knees to the body.
That's three minutes gone in the round.
Cinder tries for a takedown. No joy.
Lurch Addams has stuffed three takedown attempts in the round now. That's going to take a lot out of Yhorm Cinder.
Addams throws an elbow but it misses.
Addams lands a nice elbow.
Addams manages to break the clinch.
Addams has Cinder up against the cage in a clinch.
Addams misses with an elbow over the top.
With the two fighters working up against the cage, Addams just misses with a elbow thrown towards Cinder's brow.
Cinder has hold of one of Addams's legs. Addams is fighting the takedown attempt but Cinder gets the trip and lands the takedown into guard.
Addams looking for a sweep. Not yet Addams, not yet.

Addams is looking to cinch up a triangle. Cinder throws the leg off to one side though and gets in tight to Addams's body to avoid the submission. Addams has instead reached around Cinder's neck and now has a guillotine! Oh, this is biiiig trouble! Addams arches his back and squeezes and forces the tap from his hapless opponent.
Ladies and gentlemen, after 4:55 of round 1, we have a winner by way of Submission (Guillotine). Lurch Addams!
Our winner, Lurch Addams, made sure he spent some time buttering up the crowd during his post fight interview, which will no doubt bring him a few more fans.
|
|
|
|
|
|
|
|
|
|
|
|
|
|
|
|
|
|
|
|
|
|
|
| S |
C
A |
G |
S |
C
B |
G |
|
S |
C |
G |
|
energy
A | B |
|
hype
A | B |
|
pop
A | B |
|
mgr
A | B |
|
FIGHT
RATING
53% |
|
|
|
|
|
|
|
Undercard bout
|
Coming up we have a middleweight MMA rules bout between Twisty Kneereaper (ranked 1417 p4p, 182 weight class) and Abraham Alcantara (ranked 1941 p4p, 245 weight class). The fight MMA fans around the world have waited their entire lives for!
 |
|
 |
| 177 cm
22
185 lbs
6 - 4 - 0 |
|
180 cm
29
200 lbs
9 - 8 - 0 |
BJJ Brown Belt
Excellent boxer
Cardio machine |
|
BJJ Purple Belt
Dangerous knees
Granite chin |
|
| |
|
Ladies and gentlemen. This fight is 3 rounds, in the middleweight division.
Introducing the fighter to my left, fighting out of the red corner.
With a record of
6 - 4 - 0, fighting out of New York, Twisty Kneereaper!
And introducing the fighter to my right, fighting out of the blue corner.
With a record of
9 - 8 - 0, fighting out of Sydney, Abraham Alcantara!
The judges for this bout are Yukihiro Shimada, Shirou Masuda and Taro Takaoka.
The bell rings for round one and we are underway!
Alcantara blocks the body kick.
Alcantara is clearly looking to counter with head kicks.
Alcantara has his head snapped back a nice jab. A little nod from Alcantara there as he acknowledges the shot.
Alcantara throws a nice looking combination but Kneereaper bobs and weaves to avoid any damage.
Kneereaper tries to counter by clinching up but Alcantara breaks away and moves out of range.
Alcantara misses with a wild combination.
Nice jab there from Kneereaper.
We've had a slow start to the round here - hopefully the action picks up.
Kneereaper throws a body kick but he was well out of range there.
Both fighters are looking to counter, which isn't making for the most exciting fight in the world.
Kneereaper jabs at Alcantara's body.
That's one minute gone in the round.
A lazy left from Kneereaper finds it's target.
Alcantara gets in close and instigates a clinch.
Kneereaper lands an uppercut.
Alcantara fails to land with a short punch on the inside.
A hook to the body from Kneereaper.
Kneereaper blocks a couple of punches on the inside.
Kneereaper gets through Alcantara's defenses to land a nice punch to the side of the head.
A nice left hand lands by Alcantara.
Kneereaper tries to take the fight to the ground by pulling guard but can't manage it.
Kneereaper tries to work over Alcantara's body with a swooping hook but it only glances the target.
Alcantara tries to land knees in the clinch but Kneereaper avoids the damage to the body.
A short right from Kneereaper on the inside.
Alcantara lands an elbow just above Kneereaper 's eye.
A short right from Kneereaper on the inside.
This is a great period of action - very entertaining stuff!
Alcantara creates a bit of distance and throws an elbow that only just misses.
Still in the clinch, Kneereaper scores with a nice short uppercut.
Kneereaper scores with a hook to the body.
Kneereaper scores with a hook to the body.
Alcantara looks winded!
That's two minutes gone in the round.
A right hand to the body from Kneereaper.
A right hand to the body from Kneereaper.
Kneereaper digs a right hand into Alcantara's ribs. Those have got to be taking their toll on Alcantara's gas tank.
Kneereaper lands with a right to the head.
Kneereaper lands a left hand that snaps the head of Alcantara backwards.
A nice left hand lands by Kneereaper.
Kneereaper lands with a good tight uppercut to the head.
A short body shot lands from Kneereaper as the two fighters clinch.
A short right hand to the side of the head by Kneereaper.
Alcantara has been looking to improve his clinch game in recent weeks. Kneereaper seems to have the measure of him in the clinch so far, so let's see if Alcantara can turn it around.
Kneereaper blocks an elbow strike.
Kneereaper scores with an uppercut up the middle.
Kneereaper stays in close to his opponent and throws a right hand to the body.
A shot in the inside from Kneereaper.
Kneereaper successfully pulls guard.
Kneereaper looking for submissions from the bottom here. Moving his hips around, possibly looking for an armbar.
Alcantara avoids a guillotine attempt easily.
Kneereaper is throwing his legs up, looking for submissions. Alcantara is aware though and is defending well.
Kneereaper is working for submissions here. He's thrown up his legs looking for a triangle but Alcantara frees his head nicely. Oh but Kneereaper has switched to an armbar! Alcantara is tapping furiously! Lovely submission there!
Ladies and gentlemen, after 3:58 of round 1, we have a winner by way of Submission (Triangle Armbar). Twisty Kneereaper!
After winning the bout, Twisty Kneereaper thanked all his fans and promised he'd do even better in his next fight. The crowd seemed to love his humility.
|
|
|
|
|
|
|
|
|
|
|
|
|
|
|
|
|
|
|
|
|
|
|
| S |
C
A |
G |
S |
C
B |
G |
|
S |
C |
G |
|
energy
A | B |
|
hype
A | B |
|
pop
A | B |
|
mgr
A | B |
|
FIGHT
RATING
69% |
|
|
|
|
|
|
|
Undercard bout
|
Coming up we have a featherweight MMA rules bout between Theodore Jasper (ranked 1475 p4p, 167 weight class) and Chief Navajo (ranked 1344 p4p, 153 weight class). Theodore Jasper has the better chin. Will he look to stand and bang today?
 |
|
 |
| 176 cm
20
156 lbs
7 - 3 - 0 |
|
173 cm
29
154 lbs
6 - 6 - 0 |
BJJ Blue Belt
Solid boxing
Cardio machine |
|
Good wrestler
Counter fighter
Powerful |
|
| |
|
Ladies and gentlemen. This fight is 3 rounds, in the featherweight division.
Introducing the fighter to my left, fighting out of the red corner.
With a record of
7 - 3 - 0, fighting out of Sydney, Theodore Jasper!
And introducing the fighter to my right, fighting out of the blue corner.
With a record of
6 - 6 - 0, fighting out of Las Vegas, Chief Navajo!
The judges for this bout are Shigeki Fujiwara, Yukihiro Yamamoto and Yasuomi Hirokawa.
The bell rings for round one and we are underway!
Jasper looks to score with a combo but nothing lands.
Jasper lands a really nice looking cross but Navajo seems unphased.
Jasper scores with a nice right hand.
Jasper throws a combination but comes up with nothing but fresh air.
Jasper misses the jab.
Navajo is definitely looking for the counter takedowns here.
We've had a slow start to the round here - hopefully the action picks up.
Jasper throws a one two combo.
Navajo is rocked!
Navajo is aggressively charging in as Jasper backs up avoiding any damage. Jasper tosses out a jab and Navajo runs right into it face first! Navajo is out cold! Jasper dropped down on all fours and is barking in Navajo's face like a pit bull in celebration until the ref was finally able to pull him away!
Ladies and gentlemen, after 0:55 of round 1, we have a winner by way of KO (Punch). Theodore Jasper!
Theodore Jasper seemed lost for words in his post fight interview but he remembered to thank his fans and directed everyone to his website.
|
|
|
|
|
|
|
|
|
|
|
|
|
|
|
|
|
|
|
|
|
|
|
| S |
C
A |
G |
S |
C
B |
G |
|
S |
C |
G |
|
energy
A | B |
|
hype
A | B |
|
pop
A | B |
|
mgr
A | B |
|
FIGHT
RATING
69% |
|
|
|
|
|
|
|
Undercard bout
|
Coming up we have a featherweight MMA rules bout between Daquan Bowman (ranked 973 p4p, 120 weight class) and Ludwig Mandrill (ranked 839 p4p, 99 weight class). Over to our ring announcer for the fighter introductions!
 |
|
 |
| 172 cm
22
147 lbs
10 - 4 - 0 |
|
172 cm
22
155 lbs
8 - 3 - 0 |
BJJ Purple Belt
Excellent MT
Cardio machine |
|
Good wrestler
Decent boxing
Granite chin |
|
| |
|
Ladies and gentlemen. This fight is 3 rounds, in the featherweight division.
Introducing the fighter to my left, fighting out of the red corner.
With a record of
10 - 4 - 0, fighting out of St Petersburg, Daquan Bowman!
And introducing the fighter to my right, fighting out of the blue corner.
With a record of
8 - 3 - 0, fighting out of Las Vegas, Ludwig Mandrill!
The judges for this bout are Yuuki Gou, Yukihiro Shimada and Sosuke Kotani.
The bell rings for round one and we are underway!
Bowman misses with a body kick.
A momentary lapse in concentration from Bowman enables Mandrill to shoot in and score with a neat double leg. Bowman manages to secure a closed guard as the fighters hit the mat.
Mandrill wants to control from the top but Bowman keeps moving.
Mandrill thinks about going for a leg but decides against it, in order to maintain the position.
Mandrill throws a big elbow that misses.
Mandrill postures up.
We've had a slow start to the round here - hopefully the action picks up.
Mandrill sitting in guard here, content to control.
Mandrill missing there with some ground and pound from the guard.
That's one minute gone in the round.
Mandrill loading up with the ground and pound but he's missing more than he's landing in this flurry.
The referee claps his hands together and tells the fighters to work.
Mandrill is taking a break and basically stalling. The referee will not allow him to do that for long.

The referee has stepped in and called for a break in the action. We'll restart on the feet.
Mandrill takes a punch right to his stomach. That took the wind out of him momentarily.
Bowman scores with a push kick.
Bowman misses the shot to the body.
Bowman shakes his hands off, looking to compose himself, but takes a jab to the jaw whilst he does it.
Mandrill's corner calls for a 1-2. Mandrill obliges with the 1 part as he scores the single shot and moves back out of range.
Bowman ducks under an overhand right and circles away with a smile on his face.
Mandrill swings wildly with a right hand that was never going to find it's target.
That's two minutes gone in the round.
Mandrill lands a jab.
Bowman looks to have improved his striking defense since last time we saw him fight.
A decent looking cross lands there for Mandrill.
Mandrill moves into range and connects with a jab.
The fans in attendance giving it up for the two fighters, who have really let it all hang out in the last minute or so!
A jab from Mandrill misses.
Mandrill waving his hands out in front of him, looking to distract Bowman.
Bowman misses with an uppercut. Mandrill saw that one coming.
Mandrill moves forwards but Bowman connects with a nice, crisp jab.
Bowman throws out a loose jab but Mandrill uses good head movement to avoid it.
That's three minutes gone in the round.
Bowman slips a straight right by Mandrill.
A left and a right from Mandrill both land. Nice combination.
A swing and a miss from Bowman.
Mandrill steps in looking to clinch after the strikes miss from Bowman.
Bowman has his hands up protecting his head but a hook from Mandrill finds it's way round the side to connect with Bowman's head.
Mandrill lands a nice hook to Bowman's body. Bowman takes it in his stride and looks to land his own strikes.
Bowman bobs and weaves and throws out a fast jab that snaps Mandrill's head backwards.
Mandrill looks for a takedown here. Will he get it? Bowman is fending him off so far but Mandrill persists. Nope, Bowman circles away and we're back to standing.
A punch combination from Mandrill misses.
Mandrill has a takedown stuffed.
That's four minutes gone in the round.
Mandrill misses with a right hand
and Bowman counters with a nice uppercut.
Fantastic stuff here - a very entertaining period of action, which has drawn cheers from the crowd.
A punch lands to the side of Mandrill 's head but he takes it in his stride.
Ludwig Mandrill seems to be the more aggressive standup fighter in this bout.
Mandrill has his hands up protecting his head but a hook from Bowman finds it's way round the side to connect with Mandrill's head.
Bowman's hands are dropping dangerously low here and Mandrill connects clean with a right hook that sends him down to one knee! Bowman scrambles back to his feet.
Mandrill scores with a hook.
Bowman lands a head kick. Mandrill smiles back at him and beckons him forward.
It looks like Ludwig Mandrill has been cut.
Bowman keeping a good distance there, avoiding the body shot.
Mandrill might want to mix his strikes up a bit more. He's just going for head shots at the moment and that can become a bit predictable.
Mandrill misses with a lunging right hand
and Bowman counters with a good right hand that lands right on the jaw.
And thats the end of the round the fighters go back to their corners.
Ludwig Mandrill dominated that round.
The cut man is working on Ludwig Mandrill's cut.
That's time! Bowman's corner gives him a slap on the ass as he gets ready to fight.
Bowman avoids the body shot from Mandrill.
Bowman connects with a nice looking jab.
Mandrill misses with an uppercut
and Bowman cracks him with a counter punch right on the button.
Bowman misses with a body shot. Nice footwork from Mandrill.
Bowman throws a jab but it's blocked by Mandrill.
Mandrill darts in and lands a nice takedown into half guard.
We've had a slow start to the round here - hopefully the action picks up.
Bowman preventing any damage for now, controlling his opponent's head.
Mandrill is looking to take a break and control but Bowman is keeping him honest, looking to work from the bottom.
That's one minute gone in the round.
Mandrill missing with the ground and pound from half guard.
Bowman trying to control from the bottom.
The ref warns both fighters not to hold the cage as they work up against the meshing.
Mandrill not landing any meaningful shots this time.
Mandrill not throwing his punches with enough precision this time.
Mandrill thows a wild elbow that connects with the canvas.
Bowman wants to control but Mandrill is keeping busy and won't allow it.
Mandrill working over Bowman with some ground and pound. Bowman looks like he wants out of this position, which is understandable.
Bowman wants to control but Mandrill is keeping busy and won't allow it.
That's two minutes gone in the round.
The crowd are starting to boo a lack of action.
Mandrill thumps the canvas. Not on purpose obviously - he just missed Bowman's head.
Mandrill not landing any meaningful shots this time.
Mandrill thows a huge punch but Bowman dodges it nicely.
Bowman looking to work for a kimura from the bottom.
Mandrill is taking a breather. Bowman says something to him but it's hard to make out. Perhaps he's telling him to get on with it and actually do something.
It looks like the ref is thinking about a standup.
Mandrill is looking to take a break and control but Bowman is keeping him honest, looking to work from the bottom.
The referee has decided to stand the fighters back up, so we'll restart on the feet.
Bowman throws a poor cross that misses
and Mandrill counters with a good right hand that lands right on the jaw.
That's three minutes gone in the round.
Mandrill uses some good footwork to avoid the body shot by Bowman.
Bowman looks to land a left hand but Mandrill moved out of range nicely.
Bowman moves out of range of the strikes.
Bowman thinks about countering with a body kick.
Mandrill moving in and out of range nicely, whilst landing the scoring shot.
Mandrill has been the more effective fighter overall so far.
Bowman punishes Mandrill's body with a nice straight punch.
Bowman throws a monster uppercut resembling something out of street fighter but it doesn't land.
It seemed like Mandrill was going to counter with the hook but didn't fully commit to it.
Bowman moves away from the strike by Mandrill.
Mandrill connects with a body shot.
Bowman lands a two punch combo.
That's four minutes gone in the round.
Mandrill connects with a hook to the side of his opponent's head.
Mandrill takes an uppercut right on the jaw but it doesn't phase him.
This is a great period of action - very entertaining stuff!
Bowman looks to land a right hand but Mandrill moved out of range.
As Bowman backs off Mandrill throws a huge counter combo but Bowman manages to avoid it all.
Bowman gets cracked there but stands up to it.
Bowman tries a head kick but it misses.
Bowman throws a head kick that misses and slips in the process. He scrambles back to his feet and the fighters circle.
Mandrill lands a right hook to the body.
Bowman throws a head kick that Mandrill semi-blocks.
And thats the end of the round the fighters go back to their corners.
A close second round but Ludwig Mandrill will probably get the nod - 10:9.
The cut man is working on Ludwig Mandrill's cut.
The fighters' corners scream their final instructions, as the referee calls time. Here we go, back to the action! This is the final round!

Mandrill catches Bowman with a nice straight right. He seems pissed - ooooh, it's on now! On like donkey kong!
Mandrill connects with a jab.
A swing and a miss from Mandrill.
Mandrill misses with a body shot.
Bowman swings widly with a right hand
and Mandrill counters with a crisp hook to the side of the head.

Bowman is rocked!
Mandrill drops Bowman with a big left hand! Bowman is injured, injured bad! Mandrill jumps in and finished him with strikes! The fight is over!
Ladies and gentlemen, after 0:40 of round 3, we have a winner by way of TKO (Strikes). Ludwig Mandrill!
|
|
|
|
|
|
|
|
|
|
|
|
|
|
|
|
|
|
|
|
|
|
|
| S |
C
A |
G |
S |
C
B |
G |
|
S |
C |
G |
|
energy
A | B |
|
hype
A | B |
|
pop
A | B |
|
mgr
A | B |
|
FIGHT
RATING
53% |
|
|
|
|
|
|
|
Co-main event
|
Coming up we have a heavyweight MMA rules bout between Bryan Mayhem (ranked 939 p4p, 119 weight class) and Grant Alyoshin (ranked 1208 p4p, 150 weight class). The crowd seem to be enjoying Alyoshin's choice of entrance music: Video killed the radio star. Grant Alyoshin is staring across the cage at his opponent, tweaking his nipples.
 |
|
 |
| 175 cm
22
243 lbs
14 - 5 - 0 |
|
200 cm
22
245 lbs
4 - 2 - 0 |
Good wrestling
Brawler
Cardio machine |
|
Good wrestler
Dangerous knees
Good gas tank |
|
| |
|
Ladies and gentlemen. This fight is 3 rounds, in the heavyweight division.
Introducing the fighter to my left, fighting out of the red corner.
With a record of
14 - 5 - 0, fighting out of Los Angeles, Bryan Mayhem!
And introducing the fighter to my right, fighting out of the blue corner.
With a record of
4 - 2 - 0, fighting out of Los Angeles, Grant Alyoshin!
The judges for this bout are Hirohito Nitta, Yasuomi Hirokawa and Yuuki Gou.
The bell rings for round one and we are underway!
Mayhem fakes high and swings low for a body shot but Alyoshin manages to avoid it.
Mayhem dips down and scores with a jab to the body.
Alyoshin swats away the attempt to clinch by Mayhem.
Alyoshin now looks to counter with a shot at the body.
We've been told by Mayhem's head coaches at Crapollas Gym that he's been working on his takedown defense in preparation for this fight.
Alyoshin scores with a spinning back kick!
Alyoshin keeps the fight on the outside.
Alyoshin looked like he wanted to counter with a punch but didn't throw it.
Alyoshin swats away the attempt to clinch by Mayhem.
Alyoshin keeps the fight on the outside.
Alyoshin throws out a counter right but Mayhem avoids it with no problem.
We've had a slow start to the round here - hopefully the action picks up.
Mayhem rushes Alyoshin and presses him up against the cage.
Alyoshin looking to throw knees to the head but Mayhem is blocking nicely.
A shot in the inside from Alyoshin.
Alyoshin unloads a knee to the mid-section.
Alyoshin breaks the clinch and we return to the middle of the mat.
Mayhem misses with a wild body shot.
Alyoshin uses decent footwork to sidestep a right hand from Mayhem.
That's one minute gone in the round.
Mayhem tries to clinch but Alyoshin moves away
and Alyoshin counters nicely by changing levels and landing a hook to the body.
Mayhem is breathing heavily.
Alyoshin scores with the left hand. Mayhem knows he should have avoided that one.
Bryan Mayhem seems to be the more aggressive standup fighter in this bout.
Mayhem tries to close the distance and clinch up but Alyoshin swats him away and circles back towards the center.
Mayhem takes one to the chin there.
Alyoshin gets tackled into the cage by Mayhem. Mayhem maintains the clinch.
Mayhem misses with a punch on the inside.
Mayhem misses with a hook to the ribs.
Alyoshin digs a right hand underneath Mayhem's ribcage. Mayhem let out a lung full of air as it connected.
Alyoshin throws a knee to the head but misses.
Alyoshin breaks the clinch and we return to the middle of the mat.
Mayhem takes a push kick to the midsection and stumbles backwards.
Alyoshin jabs Mayhem right on the nose. Mayhem blinks but takes it well.
Mayhem closes the distance but Alyoshin moves to the side
and Alyoshin cracks him with a counter punch right on the button.
Mayhem is rocked!
We've seen a great period of action over the last minute or so - credit to both fighters for going all out!
Mayhem gets caught by a big overhand right and goes down! Alyoshin gets on top of him and starts throwing some serious punches until the ref intervenes and stops the fight!
Ladies and gentlemen, after 2:56 of round 1, we have a winner by way of TKO (Strikes). Grant Alyoshin!
Grant Alyoshin thanked the fans post fight for their support.
|
|
|
|
|
|
|
|
|
|
|
|
|
|
|
|
|
|
|
|
|
|
|
| S |
C
A |
G |
S |
C
B |
G |
|
S |
C |
G |
|
energy
A | B |
|
hype
A | B |
|
pop
A | B |
|
mgr
A | B |
|
FIGHT
RATING
54% |
|
|
|
|
|
|
|
Main event
|
Coming up we have a lightweight MMA rules bout between Scar Ambe (ranked 699 p4p, 87 weight class) and Jb Brown (ranked 2150 p4p, 242 weight class). Ambe comes to the cage accompanied by Yung Bleu - Perk Emotions. Brown is bouncing up and down as he enters the arena, backed by A lot by 21 savage/j cole. Scar Ambe had a look across the cage there at his opponent. He definitely means business
 |
|
 |
| 177 cm
29
160 lbs
18 - 8 - 0 |
|
174 cm
21
168 lbs
6 - 2 - 1 |
Good wrestling
Basic striking
Insanely flexible |
|
Excellent grappler
Decent boxing
Knockout power |
|
| |
|
Ladies and gentlemen. This fight is 3 rounds, in the lightweight division.
Introducing the fighter to my left, fighting out of the red corner.
With a record of
18 - 8 - 0, fighting out of Las Vegas, Scar Ambe!
And introducing the fighter to my right, fighting out of the blue corner.
With a record of
6 - 2 - 1, fighting out of Los Angeles, Jb Brown!
The judges for this bout are Tatsuya Matsuyama, Hirohito Nitta and Yasuomi Hirokawa.
The bell rings for round one and we are underway!
Ambe moves into the clinch successfully.
Brown is looking to take this one to the mat.
Ambe slowing the pace effectively.
Brown is trying to drag Ambe to the mat but Ambe just about manages to keep his footing. He used the cage to his advantage there.
Ambe misses with some punches.
Ambe is pressed up against the cage. Brown has hold of a leg and is looking to drag Ambe down to the mat. Ambe avoids the attempt though and has circled away. We're back to striking at a distance.
Scar Ambe has stuffed three takedown attempts in the round now. That's going to take a lot out of Jb Brown.
Ambe with a hook.
Ambe has managed to clinch.
Ambe tries to land a knee to the body but he is off balance and Brown avoids it.
Ambe has been talking about how he's improved his wrestling in the run up to the fight so let's see if that's enough to sway the balance.
Brown looking for a takedown.
Brown wants to take the fight to the mat but Ambe manages to get underhooks and keep the fight in the clinch.
Brown has a body lock and is looking for a takedown. Ambe is bouncing around trying to prevent the takedown and somehow he has indeed managed to stay on his feet.
We've had a slow start to the round here - hopefully the action picks up.
Ambe tries a knee to the head but Brown blocks it.
Brown wants to take the fight to the mat but Ambe manages to get underhooks and keep the fight in the clinch.
Ambe pressing his opponent against the cage.
Brown is looking for a takedown up against the cage. Ambe gets underhooks though and prevents the takedown attempt.
That's one minute gone in the round.
An uppercut on the inside fails to land for Ambe.
A quick uppercut on the inside from Ambe.
Ambe swings wildly with an uppercut but Brown uses good head movement to avoid it.
Brown tries for a takedown. No joy.
Ambe misses with a punch on the inside.
Ambe lands punches inside but they're not really causing much damage.
Ambe softening up his opponent with strikes, against the cage.
Ambe lands a left hand that snaps the head of Brown backwards.
Brown wants a takedown.
Ambe swings wildly with an uppercut but Brown uses good head movement to avoid it.
Brown changes levels and goes for a takedown here. Ambe fights it off and pushes away nicely.
Ambe clinches up with Brown and pushes him back against the cage.
Brown drops down looking for an ankle pick but Ambe pulls his leg out and moves away.
That's two minutes gone in the round.
Brown tries to clinch there but Ambe circles away.
Ambe throws a big shot that misses.
Scar Ambe seems to be the more aggressive standup fighter in this bout.
Brown shoots in looking for a takedown. Ambe tries to sprawl out of it but Brown keeps driving through. The fighters are pinned against the cage. Ambe manages to get underhooks and after a bit of a struggle, circles away and we're back to standing.
Ambe misses with a looping right.
Ambe defends well against a solid takedown attempt from Brown.
Ambe pulls out of a head kick attempt.
This has been an exciting period of action!
Ambe lunges in with an uppercut that skims his opponent's chin.
Brown on the wrong end of a decent looking cross there.
Ambe throws a hook but Brown avoids it easily.
Brown fails with an attempt to clinch.
Ambe throws a hook but Brown avoids it easily.
Ambe scores with a hook.
Ambe closes the distance and clinches.
Ambe tries a shoulder strike but it doesn't do any damage.
Stalling in the clinch from Ambe.
That's three minutes gone in the round.
Ambe misses with some punches.
Brown is looking for a takedown up against the cage. Ambe gets underhooks though and prevents the takedown attempt.
Ambe gets underhooks to prevent Brown's takedown attempt.
Brown drops down looking for an ankle pick but Ambe pulls his leg out and moves away.
Ambe scores with a jab. Brown acknowledges it with a nod of the head.
Scar Ambe is looking to keep the fight on the feet at all costs.
Brown scores with a nice takedown into half guard. Let's see what he's got on the ground.
Ambe manages to get to full guard.
Ambe wants to control but instead he gets his guard passed and Brown is now in half guard.
Brown prevents Ambe from improving his position.
Ambe holds on for dear life, maintaining half guard for now.
That's four minutes gone in the round.
Ambe is looking to improve his position.
Ambe manages to get to full guard.
Ambe tries to land a sweep but no joy.
Ambe looking to control the pace of the fight rather than finish it.
Ambe can't do much from the bottom at the moment, as Brown controls the pace.
And thats the end of the round the fighters go back to their corners.
Scar Ambe dominated that round.
Well, the break between rounds is over. Let's get back to the scrappin!
Brown takes a jab on the nose. He smiles like he loves it and keeps coming.
Ambe slips a straight right by Brown.
Brown scores with a nice head shot.
Ambe has Brown up against the cage in a clinch.
Ambe makes some space for himself and lands an uppercut.
Brown can't get the takedown.
Brown drops down for a takedown but doesn't get it.
Brown drops down for a takedown but doesn't get it.
Scar Ambe has stuffed three takedown attempts in the round now. That's going to take a lot out of Jb Brown.
We've had a slow start to the round here - hopefully the action picks up.
Brown drops down looking for an ankle pick but Ambe pulls his leg out and moves away.
Ambe ducks under a wild hook from Brown.
Ambe tries to clinch but Brown is having none of it.
Ambe tries to clinch up but Brown circles away and keeps his distance.
That's one minute gone in the round.
Ambe pushes Brown up against the cage in a clinch.
Brown is looking to take this one to the mat.
Brown jumps guard but Ambe turns him against the cage and keeps the fight standing.
Ambe tries a shoulder strike but it doesn't do any damage.
Brown tries for a takedown. No joy.
Brown is trying to work for a single leg takedown but Ambe pulls him back up using the underhooks.
Brown drops down for a takedown but doesn't get it.
Scar Ambe has scored more points in the clinch so far.
Ambe working aggressively here.
Brown drops down looking for an ankle pick but Ambe pulls his leg out and moves away.
Ambe tries to clinch but is not successful on this occasion.
Ambe tries to clinch up.
Brown is definitely looking for the counter takedowns here.
Ambe moves into the clinch.
Brown looking for a takedown.
Brown drops to a knee looking for a takedown but Ambe gets the underhooks and prevents it.
Ambe misses with a short punch on the inside.
That's two minutes gone in the round.
Ambe scores with a shot to the side of Brown's head.
Ambe lands a short shot on the inside that snaps the head of Brown backwards.
A head punch on the inside from Ambe fails to land.
Brown is working for takedown but Ambe is calmly controlling the position for now.
Brown wants a takedown.
Ambe has a couple of punches blocked by Brown.
Ambe misses with a short punch on the inside.
Ambe lands a nice uppercut.
We've seen a great period of action over the last minute or so - credit to both fighters for going all out!
Brown tries for a takedown. No joy.
Ambe swings wildly with an uppercut but Brown uses good head movement to avoid it.
Ambe lands a shoulder strike.
Ambe lands a hook that snaps the head of Brown backwards.
Ambe stalling against the cage.
Ambe trying to land knees to the body.
That's three minutes gone in the round.
Brown jumps guard but Ambe stands there with Brown around his waist. Brown gives up and drops back to his feet. We remain in the clinch.
Brown tries to pull guard but Ambe holds him up against the cage and eventually Brown drops back down to his feet.
Ambe misses with a punch on the inside.
Ambe is really dominating this fight. Is there anything that Brown can do to turn this around?
Brown goes for a takedown attempt but Ambe pushes him away and we're back to fighting at a distance.
No luck for Brown with that takedown attempt.
Ambe moves into the clinch.
Ambe lands a nice uppercut.
Brown has Ambe pressed up against the cage and is working for takedown. Ambe manages to improve position though and keeps the fight standing.
Ambe has Brown pushed against the cage.
Ambe tries a shoulder strike but it doesn't do any damage.
With the fighters clinched against the cage, Ambe creates a bit of distance for himself and scores with a nice uppercut.
That's four minutes gone in the round.
Ambe swings wildly with an uppercut but Brown uses good head movement to avoid it.
A quick uppercut on the inside from Ambe.
Ambe fails to land with a short punch on the inside.
Ambe pushes Brown against the cage. Ambe is working some dirty boxing. Ambe pushes off with a quick right hook! Brown goes down! Brown tries to stand but stumbles back to his kness! Ambe moves in to finish and the ref steps in to prevent any more damage!
Ladies and gentlemen, after 4:24 of round 2, we have a winner by way of TKO (Strikes). Scar Ambe!
Scar Ambe thanked the fans post fight for their support.
|
|
|
|
|
|
|
|
|
|
|
|
|
|
|
|
|
|
|
|
|
|
|
| S |
C
A |
G |
S |
C
B |
G |
|
S |
C |
G |
|
energy
A | B |
|
hype
A | B |
|
pop
A | B |
|
mgr
A | B |
|
FIGHT
RATING
47% |
|
|
|
|
|
|
|
|
|
|
