 |
QFC Tournament 967 Round 1 PBP Commentary |
Undercard bout
|
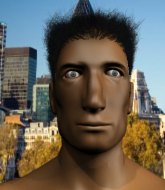
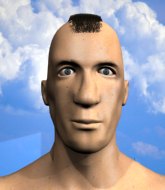
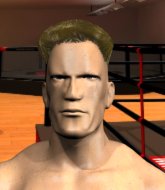
Coming up we have a middleweight MMA rules bout between Pico Santos (ranked 4568 p4p, 451 weight class) and Dexter King (ranked 4382 p4p, 0 weight class). King is bouncing up and down as he enters the arena, backed by Its Time to TAP. We have two fighters making their debuts here, so let's see who comes out of this one with their first professional victory.
 |
|
 |
| 188 cm
21
168 lbs
0 - 0 - 0 |
|
178 cm
23
200 lbs
0 - 0 - 0 |
BJJ Blue Belt
Brawler
Inexperienced |
|
Good takedowns
Counter fighter
Experienced |
|
| |
|
Ladies and gentlemen. This fight is 3 rounds, in the middleweight division.
Introducing the fighter to my left, fighting out of the red corner.
With a record of
0 - 0 - 0, fighting out of Sydney, Pico Santos!
And introducing the fighter to my right, fighting out of the blue corner.
With a record of
0 - 0 - 0, fighting out of Sydney, Dexter King!
The judges for this bout are Summer Carpenter, Topper Green and Chris Dean.

The bell rings for round one and we are underway!

King gets caught flat footed, as Santos shoots in with a quick takedown into guard.

King looking for submissions from the bottom but instead Santos passes into half guard.
Santos tries to stand but his arm is trapped.
King regains full guard. Nicely done.
King is working the butterfly guard. He manages to land a nice scissor sweep and is now in half guard on the top. Nice move.

The ref warns both fighters not to hold the cage as they work up against the meshing.
King wants to work for an arm triangle but Santos is really keeping half guard well and defending the submission attempt.
King is thinking about going for an arm triangle but he can't free his leg.
We've had a slow start to the round here - hopefully the action picks up.
King is working for a submission here. He's got hold of the far side arm and he's looking for a kimura. He's cranking on the arm and he's got it! Santos is tapping out! Ouch, that looked like it hurt!
Ladies and gentlemen, after 1:55 of round 1, we have a winner by way of Submission (Kimura). Dexter King!
A relieved looking Dexter King thanked the fans for their support and gave the usual line about them being amazing. They seemed to believe that he actually meant it.
|
|
|
|
|
|
|
|
|
|
|
|
|
|
|
|
|
|
|
|
|
|
|
| S |
C
A |
G |
S |
C
B |
G |
|
S |
C |
G |
|
energy
A | B |
|
hype
A | B |
|
pop
A | B |
|
mgr
A | B |
|
FIGHT
RATING
79% |
|
|
|
|
|
|
|
Undercard bout
|
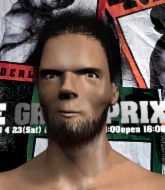
Coming up we have a middleweight MMA rules bout between Warner AZ (ranked 2972 p4p, 0 weight class) and Josh Jacobs (ranked 2914 p4p, 0 weight class). We have two fighters making their debuts here, so let's see who comes out of this one with their first professional victory.
 |
|
 |
| 225 cm
23
185 lbs
0 - 0 - 0 |
|
198 cm
18
190 lbs
0 - 0 - 0 |
BJJ Blue Belt
Brawler
Good chin |
|
BJJ Blue Belt
Brawler
Determined |
|
| |
|
Ladies and gentlemen. This fight is 3 rounds, in the middleweight division.
Introducing the fighter to my left, fighting out of the red corner.
With a record of
0 - 0 - 0, fighting out of Sydney, Warner AZ!
And introducing the fighter to my right, fighting out of the blue corner.
With a record of
0 - 0 - 0, fighting out of Sydney, Josh Jacobs!
The judges for this bout are Skip Squint, Summer Carpenter and Topper Green.
The bell rings for round one and we are underway!

Jacobs clinches up with AZ and pushes him back against the cage.
Jacobs doesn't land with the attempted body shot.
AZ jumps guard.
Jacobs preventing the sweep.
AZ trying to keep a closed guard but Jacobs is proving a slippery customer.
AZ wants to sweep but no luck.
Jacobs trying to control the position from guard on top but AZ is wriggling around, looking for whatever he can.
AZ managing to control the position.
We've had a slow start to the round here - hopefully the action picks up.
AZ is working from a closed guard but he's struggling to control his opponent.
Jacobs must be cautious of submissions here, given that his opponent has the superior Jiu Jitsu.
Jacobs is fighting to break AZ's control of his arms but AZ is doing a good job of controlling the position at the moment.

That's one minute gone in the round.
AZ not looking particularly offensive just at the moment.

The referee has motioned to the fighters to stand back up. He just wasn't happy with the level of activity.
AZ shoots in and bounces Jacobs off the cage to secure the takedown into guard.

Jacobs manages to wriggle out and sneak his way back up to his feet, so the fighters are now clinched up against the cage.

Jacobs manages to pull guard.
Jacobs has a closed guard, preventing anything of note from happening. Perhaps he's looking to stall.
AZ showing good wrestling skills to control the position.

That's two minutes gone in the round.
AZ loading up with the ground and pound but he's missing more than he's landing in this flurry.
AZ works a leg free and moves into half guard.
Jacobs trying to control here.

AZ stands, ready to strike. The ref makes him back up and allows Jacobs to get to his feet.

AZ gets in close and instigates a clinch.

That's three minutes gone in the round.
Jacobs being controlled against the cage.
AZ tries to pull guard but Jacobs holds him up against the cage and eventually AZ drops back down to his feet.
AZ has hold of a leg and is looking for a trip takedown. Jacobs avoids it nicely though and we remain in the clinch.
The referee calls for AZ to work.
AZ is looking for a takedown.
That's three failed takedown attempts in the round for Warner AZ. That's going to take a lot out of him.
AZ prevents a takedown attempt there.
Jacobs working hard to break the clinch.

That's four minutes gone in the round.
A few boos can be heard. I'm sure they will multiply if the fighters don't pick up the pace.
AZ scores a nice knee to the body.
AZ taking a break, stalling in the clinch.

AZ escapes the clinch and we're back to striking.
AZ shoots in and bounces Jacobs off the cage to secure the takedown into guard.
Jacobs manages to wriggle out and sneak his way back up to his feet, so the fighters are now clinched up against the cage.
A real battle for position is taking place between these two warriors.
AZ jumps guard but his hands slip and he falls flat on his back. Well, he's made himself look a right mug there, as Jacobs walks away with a smile on his face. AZ gets slowly back to his feet and shakes his head.
The crowd thankful this round is nearly over.
A jab from Jacobs finds it's way through AZ's defenses.
Jacobs changes levels and looks for a double leg takedown. AZ tries to avoid it but Jacobs manages to keep hold of a leg and drag AZ to the ground. AZ escapes though and pops straight back up to his feet.
AZ went nuts there looking for a big combo counter but none of the flurry connected.
AZ tries a switch kick but it misses it's target.
And thats the end of the round the fighters go back to their corners.
A close round but Josh Jacobs will probably get the nod.
The fighters' corners scream their final instructions, as the referee calls time. Here we go, back to the action!

AZ tries a head kick but it misses.
AZ forces Jacobs back against the cage and clinches.
Jacobs is trying to break the clinch but AZ is controlling him.
AZ displaying some good clinch control by pressing Jacobs up against the cage.
AZ stalling here - the referee won't stand for too much of that.
The crowd are getting pretty annoyed with AZ for his constant stalling in the clinch and are voicing their displeasure.
AZ tries to jump guard but he falls flat on his backside. Jacobs smiles and moves away.
We've had a slow start to the round here - hopefully the action picks up.
Jacobs shoots in but no luck this time.
It looked like AZ wanted to counter with a hook but didn't fully commit.
Jacobs shoots in but no luck this time.
Jacobs throws a jab when AZ was well out of range.
Jacobs fails with a rather predictable takedown attempt.
Warner AZ has stuffed three takedown attempts in the round now. That's going to take a lot out of Josh Jacobs.
That's one minute gone in the round.
AZ gets the takedown into side control.
Jacobs trying to remain calm as AZ controls from the top position.
Jacobs is trying to improve his position.
The fighters are pressed up against the cage, both looking to find a bit of space to work.
Jacobs is breathing heavily.
AZ working away.
AZ stands up and we're back to a striking position.
AZ manages to get an easy takedown there - catching Jacobs on his heels. He'll look to pass Jacobs's guard now, I'm sure.
AZ content to stall in guard here.
That's two minutes gone in the round.
Jacobs is trying to keep AZ in close.
Jacobs keeping full guard, as AZ tries to pass.
AZ works over Jacobs with some ground and pound from guard.
Jacobs keeping moving, preventing AZ from controlling successfully.
AZ sitting in guard, not really doing much.
We must be close to a standup if these guys don't pick up the pace.
That's three minutes gone in the round.
AZ stands up from Jacobs's guard - AZ perhaps looking for a knockout.
Jacobs shoots in for a takedown. "Ole!" shouts AZ as he jumps to the side.
AZ dives in and scores a takedown into Jacobs's guard.
AZ landing some decent shots from guard.
AZ pushes down on Jacobs's leg and manages to get into half guard.
That's four minutes gone in the round.
Jacobs trying to hold on to AZ's head to control him but AZ postures up.
AZ stands, ready to strike. The ref makes him back up and allows Jacobs to get to his feet.
AZ lands a nice leg kick that just misses Jacobs's sensitive parts.
AZ scores with a nice right hand.
AZ fakes an overhand right and shoots for a takedown. Jacobs sprawls well initially but AZ persists and gets the takedown into half guard.
Jacobs pushes AZ off but AZ dives into side control.
The crowd thankful this round is nearly over.
The crowd cheering loudly, showing their appreciation for the quality fight we're seeing here.
AZ has knee on belly and now moves to full mount! Trouble for Jacobs!
And thats the end of the round the fighters go back to their corners.
Warner AZ dominated that second round.
Well, the break between rounds is over. Let's get back to the scrappin! This is the final round!

AZ looking to shoot here. He's gone for it and he's landed a takedown into side control! Oh, that's bad for Jacobs!
Sloppy strikes there by AZ.
Jacobs tries to improve position but can't.
The ref warns both fighters not to hold the cage as they work up against the meshing.
AZ working the head with strikes.
AZ scoring with punches from side control.
Warner AZ overall seems to be getting the better of the ground position in the fight so far.
AZ working the body and head with strikes.
We've had a slow start to the round here - hopefully the action picks up.
Jacobs throws AZ to one side and escapes!
Jacobs gets taken down but at least he's managed to land in guard.
Jacobs wriggles free and stands up.
Warner AZ is looking to throw some combinations by the looks of things.
Jacobs takes a big intake of breath there - he's definitely tired.
That's one minute gone in the round.
AZ shoots for a takedown but Jacobs saw that one coming a mile off and avoided it easily.
AZ shoots in for a takedown and gets it. Let's see what he's got on the mat.
Jacobs is working an open guard so AZ takes the opportunity to get back to his feet.
AZ fails with a takedown attempt from distance.
Jacobs now looks to counter with a shot at the body.
Jacobs misses with a takedown attempt. He shot from a bit too far out.
AZ drops down and drives through with a powerful takedown into guard.
Jacobs is wriggling around but AZ manages to pass to half guard.

AZ is looking for a kimura but Jacobs is holding onto that half guard position, so it's hard for AZ to get the leverage.
That's two minutes gone in the round.
The fans in attendance giving it up for the two fighters, who have really let it all hang out in the last minute or so!
AZ postures up and decides to stand up, from the half guard. The ref calls for Jacobs to stand up.
Jacobs tries to clinch up but AZ circles away and keeps his distance.
AZ connects with a high kick.
AZ gets a double leg takedown into Jacobs's guard.
AZ postures up.
AZ prevents Jacobs from getting back to his feet.
AZ is stalling in the full guard.
Jacobs working from the bottom, still in full guard. He's managed to get a loose triangle. AZ doesn't seem to be doing much to defend here, obviously he feels comfortable in the position. AZ manages to throw the legs off his shoulder and he's back into guard - no problem.
That's three minutes gone in the round.
Jacobs controls AZ momentarily but AZ frees himself.
AZ advances to half guard.
AZ is sneakily working for an arm triangle but Jacobs sees it coming and defends easily.
Jacobs tries to regain full guard. Instead though, AZ has advanced to mount. Uh oh.
That's four minutes gone in the round.
Jacobs is wriggling around trying to escape.
Jacobs tries to control the position but AZ now has his back.
AZ has the hooks sunk in and you can see the will to fight slowly draining out of Jacobs's body.
And that's the end of the fight!
Warner AZ showed his dominance in that final round.
Well AZ has outscored his opponent in every aspect of the fight today. Only a scarily incompetent judge or two will keep him from a well deserved win... Over to the ring announcer for the scorecards.
Ladies and gentlemen, after 3 rounds of action, we go to the scorecards for a decision.
Judge Skip Squint scores the fight for Warner AZ!
Judge Summer Carpenter scores the fight for Warner AZ!
Judge Topper Green scores the fight for Warner AZ!
Warner AZ wins by unanimous decision!
|
|
|
|
|
|
|
|
|
|
|
|
|
|
|
|
|
|
|
|
|
|
|
| S |
C
A |
G |
S |
C
B |
G |
|
S |
C |
G |
|
energy
A | B |
|
hype
A | B |
|
pop
A | B |
|
mgr
A | B |
|
FIGHT
RATING
43% |
|
|
|
|
|
|
|
Undercard bout
|
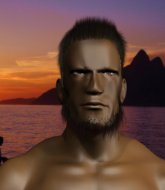
Coming up we have a middleweight MMA rules bout between Roli Boli (ranked 4482 p4p, 0 weight class) and Klass Kincaid (ranked 4562 p4p, 0 weight class). We have two fighters making their debuts here, so let's see who comes out of this one with their first professional victory.
 |
|
 |
| 175 cm
18
190 lbs
0 - 0 - 0 |
|
186 cm
18
200 lbs
0 - 0 - 0 |
BJJ Blue Belt
Brawler
Self confident |
|
BJJ Blue Belt
Brawler
Determined |
|
| |
|
Ladies and gentlemen. This fight is 3 rounds, in the middleweight division.
Introducing the fighter to my left, fighting out of the red corner.
With a record of
0 - 0 - 0, fighting out of Sydney, Roli Boli!
And introducing the fighter to my right, fighting out of the blue corner.
With a record of
0 - 0 - 0, fighting out of Sydney, Klass Kincaid!
The judges for this bout are John Mangel, Eliza Hachem and Francis DeMontford.
The bell rings for round one and we are underway!
Kincaid moves into range and clinches up with Boli.
Boli jumps guard but his hands slip and he falls flat on his back. Well, he's made himself look a right mug there, as Kincaid walks away with a smile on his face. Boli gets slowly back to his feet and shakes his head.
Boli will have to do better than that with his takedown attempts.
Boli throws a body kick that misses.
Boli wants to clinch.
Like a baseball bat into the meat of his leg there - nice leg kick by Kincaid.
Boli is trying hard to land a takedown here. Kincaid sprawls well and keeps this one on the feet.
That's three failed takedown attempts in the round for Roli Boli. That's going to take a lot out of him.
We've had a slow start to the round here - hopefully the action picks up.
Kincaid tries for a takedown but Boli circles away easily
and Boli counters with a flying knee. Nice.
Kincaid drops down and drives through with a powerful takedown into guard.
Boli looking to hit a scissor sweep but Kincaid is one step ahead there.
The ref warns both fighters not to hold the cage as they work up against the meshing.
There's a bit of a scramble here and now Boli is on top in guard.

That's one minute gone in the round.
There's a bit of a scramble here and now Kincaid is on top in guard.
The fighters are pressed up against the cage, both looking to find a bit of space to work.
Kincaid wanted to stand there but Boli had control of the position.
Boli looking to hit a scissor sweep but Kincaid is one step ahead there.
Boli has an omoplata and is looking to use it perhaps as a submission or perhaps to transition. Kincaid is in a bit of discomfort here, but he's managed to free himself and has dived into side control! That didn't work out too well for Boli.
That's two minutes gone in the round.
Boli is looking to slip a leg under and get half guard but Kincaid is one step ahead and moves to full mount!
Kincaid landing strikes from the mount and Boli is in trouble!
Boli is writhing around trying to get back to his feet.
Kincaid scoring with some good ground and pound from mount here. Will he manage to finish Boli?
Kincaid wants to control the pace but Boli is squirming around nicely.
Boli wants to control but Kincaid is having none of it.
Kincaid trying to control but Boli is having none of it.
That's three minutes gone in the round.

Kincaid stands up from the dominant position. He obviously fancies his chances standing.
Nice takedown defense from Kincaid. No joy for Boli on that attempt.
A telegraphed takedown attempt from Boli is defended easily by Kincaid.
Boli is breathing heavily.
Kincaid scores with a takedown into Boli's guard.

Boli has his feet on Kincaid's hips. He pushes off and gets to his feet. Nice work.
That's four minutes gone in the round.
Boli tries a head kick but it misses.
Boli could do with losing a few pounds - he looks very soft around the mid section, to put it politely.
Kincaid moves into the clinch.
Good anti-grappling being displayed by Kincaid as Boli tries to tie him up.
Boli is defending well against a takedown attempt.
Kincaid is trying to pull guard but Boli has him pressed against the cage.
Kincaid is looking for a takedown.

Kincaid's corner calls for him to break the clinch, which he does.
This is a great period of action - very entertaining stuff!
Boli shoots for a double leg takedown but Kincaid sprawls well. He's pushed Boli's face into the mat and manages to get back to his feet relatively easily.
Kincaid throws a looping left and ducks down for a takedown. He's got his arms around Boli's waist but Boli gets an underhook and avoids the takedown by throwing Kincaid off to one side.
Boli throws a big counter combination but Kincaid scrambles out of danger and avoids any damage.
And thats the end of the round the fighters go back to their corners.
Klass Kincaid dominated that round.
That's time! Back to the action!
Kincaid closes the distance and presses his opponent up against the cage.
Boli manages to break the clinch.
Boli fails with a takedown attempt.
Boli tries a head kick but it misses.
Kincaid displays good takedown defense there as he swats away a double leg from Boli.
Nice takedown defense from Boli. No joy for Kincaid on that attempt.
We've had a slow start to the round here - hopefully the action picks up.
Boli tries to close the distance and clinch up but Kincaid swats him away and circles back towards the center.
Kincaid avoids a punch combination nicely.
Kincaid clinches.
That's one minute gone in the round.
Kincaid cracks Boli with a nice body shot.
Both fighters are absolutely exhausted here.
Boli blocks a knee to the body. He'll have a nicely bruised forearm in the morning.
Kincaid wants to strike at distance but he can't break free of the clinch.
Boli avoiding damage.
Boli doesn't land with the attempted body shot.
Kincaid breaks from the clinch.
Kincaid shoots in for a takedown from distance. He catches Boli napping and manages to drive through into side control!
Boli explodes and escapes back to his feet! Nice escape there!
Boli tries for a takedown but Kincaid sees it coming a mile off and avoids it easily.
That's three failed takedown attempts in the round for Roli Boli. That's going to take a lot out of him.
Kincaid darts in and clinches Boli up against the cage.
That's two minutes gone in the round.
Fantastic stuff here - a very entertaining period of action, which has drawn cheers from the crowd.
Kincaid tries for a takedown. No joy.
Kincaid misses with a shot to the kidneys.
Boli has dropped down and is looking to force the takedown but it's defended by Kincaid after a bit of a struggle.
Kincaid throws an elbow that misses.
Boli tries to pull guard but can't drag his opponent to the mat. Kincaid just stands there and leans against the cage.
Kincaid tries to take the fight to the ground by pulling guard but can't manage it.
Kincaid has had enough of the clinch and is looking to separate.
Kincaid decides to pull guard.
Kincaid looking for a sweep. Not yet Kincaid, not yet.
Kincaid throwing some rather feeble looking strikes off his back.
Kincaid looking for subs off his back but Boli has passed one foot through into half guard.
That's three minutes gone in the round.
Boli is looking to advance position but Kincaid won't allow it.
Kincaid looking for submissions from an awkward position here.
Kincaid has no desire to be mounted, so is trying to control. Boli is working away from the top position though.
Boli is keen to just control but Kincaid is a slippery customer.
That's four minutes gone in the round.
A few boos can be heard. I'm sure they will multiply if the fighters don't pick up the pace.
Boli looking for a kimura but he'll have to free his other leg if he wants to finish that. Perhaps he's just using it as a distraction technique.
Boli takes a deep breath and rests his weight momentarily on top of his opponent, to control the position.
The crowd thankful this round is nearly over.
Kincaid trying to control from the bottom.
The referee has stepped in and called for a break in the action. We'll restart on the feet.
And thats the end of the round the fighters go back to their corners.
A close second round but Klass Kincaid will probably get the nod - 10:9.
The corners get their ten second warning. Both fighters stand from their stools and stare eachother down, ready to get back to the action. This is the final round!
Kincaid throws a combination but it was largely blocked by Boli.
Boli pushes Kincaid away with a front kick.
Kincaid shoots in for a takedown but Boli shows good takedown defense.
Boli goes for a double leg but Kincaid avoids the attempt and the two fighters end up clinched against the cage as Kincaid continues to drive forward.
Boli throws a series of punches but Kincaid avoids them all with ease.
Boli shoots in for a takedown but doesn't get it.
Kincaid stuffs the takedown.
That's three failed takedown attempts in the round for Roli Boli. That's going to take a lot out of him.
Boli tries to clinch there but Kincaid circles away.
We've had a slow start to the round here - hopefully the action picks up.
Kincaid scores a trip takedown into side control. Nice.
Both fighters are breathing heavily.
Boli trying to remain calm as Kincaid controls from the top position.
Boli takes a nasty elbow to the side of the head.
Boli is being controlled here.
That's one minute gone in the round.
Boli gets one leg under and gets the fight to half guard.
Kincaid throwing shots but they're hitting the canvas more than the man.
Kincaid is working for a submission here. He's got hold of the far side arm and he's looking for a kimura. He's cranking on the arm and he's got it! Boli is tapping out! Ouch, that looked like it hurt!
Ladies and gentlemen, after 1:43 of round 3, we have a winner by way of Submission (Kimura). Klass Kincaid!
|
|
|
|
|
|
|
|
|
|
|
|
|
|
|
|
|
|
|
|
|
|
|
| S |
C
A |
G |
S |
C
B |
G |
|
S |
C |
G |
|
energy
A | B |
|
hype
A | B |
|
pop
A | B |
|
mgr
A | B |
|
FIGHT
RATING
45% |
|
|
|
|
|
|
|
Undercard bout
|
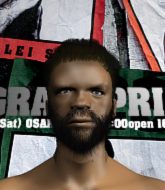
Coming up we have a middleweight MMA rules bout between Leinart AZ (ranked 4566 p4p, 0 weight class) and Max Svensoon (ranked 4451 p4p, 0 weight class). We have two fighters making their debuts here, so let's see who comes out of this one with their first professional victory.
 |
|
 |
| 160 cm
23
185 lbs
0 - 0 - 0 |
|
200 cm
18
183 lbs
0 - 0 - 0 |
BJJ White Belt
Excellent MT
Good chin |
|
BJJ Blue Belt
Counter fighter
Determined |
|
| |
|
Ladies and gentlemen. This fight is 3 rounds, in the middleweight division.
Introducing the fighter to my left, fighting out of the red corner.
With a record of
0 - 0 - 0, fighting out of Sydney, Leinart AZ!
And introducing the fighter to my right, fighting out of the blue corner.
With a record of
0 - 0 - 0, fighting out of Sydney, Max Svensoon!
The judges for this bout are Ben Watson, Hugh Johnson and John Mangel.
The bell rings for round one and we are underway!
AZ changes levels and looks for a double leg takedown. Svensoon tries to avoid it but AZ manages to keep hold of a leg and drag Svensoon to the ground. Svensoon escapes though and pops straight back up to his feet.
AZ shoots in for a takedown but Svensoon shows good takedown defense there and keeps this one on the feet.
AZ really is a fat lump.
Svensoon defends well against a solid takedown attempt from AZ.
AZ moves out of the way of the counter high kick fromSvensoon.
That's three failed takedown attempts in the round for Leinart AZ. That's going to take a lot out of him.
AZ shoots in looking for a single leg takedown. Svensoon is trying to defend but AZ finishes it well and ends up in half guard. Let's see if he can advance position further.
Svensoon manages to create a bit of space in order to work his way back to his feet. AZ keeps hold of his opponent and drives him back against the cage.
Svensoon's corner calls for him to break the clinch, which he does.
Svensoon shoots in for a takedown but doesn't get it.
Svensoon is a painfully thin specimen of a man. You do wonder whether a good body kick would snap him clean in two.
AZ gets tackled into the cage by Svensoon. Svensoon maintains the clinch.
Fantastic stuff here - a very entertaining period of action, which has drawn cheers from the crowd.
AZ is trying to push Svensoon away but Svensoon has him pressed against the cage, so he's going nowhere.
Svensoon wants a takedown.
Svensoon breaks from the clinch.
That's one minute gone in the round.
AZ fails with the takedown
and Svensoon counters by clinching up.
With the fighters clinched against the cage, Svensoon creates a bit of distance for himself and scores with a nice uppercut.
AZ fails to pull the fight into his guard.
Both guys are working to get underhooks.
Svensoon misses with a body punch.
AZ fails to pull guard.
Svensoon manages to pull guard. Let's see whether he can land a sub off his back.
AZ postures up to throw the ground and pound strikes but they don't connect.
Svensoon has his foot on AZ's thigh. He's trying to push off and get in position for a triangle, I think. AZ works his way back into a safe position though.
AZ knows he needs to get back to his feet asap. He's simply no match for Svensoon on the ground.
Svensoon keeping moving, preventing AZ from controlling successfully.
Svensoon is avoiding any damage by keeping wrist control.
The ref warns both fighters not to hold the cage as they work up against the meshing.
That's two minutes gone in the round.
AZ trying to control but Svensoon is working from the bottom.
AZ tries to stand but Svensoon is controlling from the bottom.
Svensoon keeping moving, preventing AZ from controlling successfully.
The referee has motioned to the fighters to stand back up. He just wasn't happy with the level of activity.
AZ shoots in for a takedown. "I don't think so" says Svensoon as he avoids it easily.
AZ is breathing heavily.
Svensoon displays good takedown defense there as he swats away a double leg from AZ.
That's three minutes gone in the round.
Svensoon misses with a half-hearted attempt at a head kick.
AZ tries to counter by clinching up but Svensoon breaks away and moves out of range.
Svensoon fakes a jab and throws a low kick but AZ checks it well.
AZ closes this distance looking for a takedown but Svensoon circles away.
No joy there for AZ, who threw a few shots but didn't land.
Svensoon scoring well with a low kick there.
Svensoon has AZ up against the cage in a clinch.
Svensoon has managed to pull guard. Let's see whether he can work an aggressive guard. It will also be interesting to see what tactics AZ uses from the top position.
Svensoon looking to control the pace of the fight rather than finish it.
That's four minutes gone in the round.
There's a bit of a scramble here and now Svensoon is on top in guard.
Svensoon is intent on slowing down the pace of the fight, simply looking to control.
Svensoon works a leg free and moves into half guard.
The crowd thankful this round is nearly over.
Svensoon is looking to pass the guard... He's managed it - he's now in full mount!
And thats the end of the round the fighters go back to their corners.
Max Svensoon dominated that round.
That's time! Back to the action!
AZ looks to score with a combo but nothing lands.
Svensoon darts in looking for a takedown but AZ gets double underhooks and turns Svensoon into the cage.
Svensoon fakes a couple of low kicks, before throwing one on the third attempt. It connects and AZ has to reset his feet before getting ready to engage.
Svensoon rushes AZ and presses him up against the cage.
Svensoon is working AZ over against the cage.
Svensoon jumps into guard, dragging AZ to the mat.
Svensoon is trying to control the position but AZ postures up.
AZ drops back for a leg but he's not going to get it - he lets go and Svensoon dives on top into guard.
We've had a slow start to the round here - hopefully the action picks up.
AZ is working from a closed guard but he's struggling to control his opponent.
The fighters are pressed up against the cage, both looking to find a bit of space to work.
Svensoon wants to control from the top but AZ keeps moving.
That's one minute gone in the round.
Svensoon slips effortlessly into side control - very nice.
Svensoon tries for a kimura. Not really close to a finish though.
You can see the frustration on AZ's face as Svensoon controls the position.
That's two minutes gone in the round.
A lull in the action here being met with boos from the crowd.
AZ tries to improve position but can't.
AZ on his back here. We all know that wrestlers don't like being on their back so let's see if AZ tries to get out of the position.
Svensoon tries for a kimura but AZ is defending well.
Svensoon is breathing heavily.
AZ tries to get back to half guard but can't.
Svensoon decides to stand back up.
AZ dives in for a single leg takedown but Svensoon sprawls and the fighters end up clinched against the cage.
Nice takedown defense from AZ. No joy for Svensoon on that attempt.
AZ wants to clinch.
That's three minutes gone in the round.
AZ tries to clinch but Svensoon is having none of it.
AZ is trying hard to land a takedown here. Svensoon sprawls well and keeps this one on the feet.
Svensoon swats away the attempt to clinch by AZ.
Svensoon fails to land with a series of punches.
AZ tries to counter by clinching up but Svensoon breaks away and moves out of range.
Svensoon ducks under a wild hook from AZ.
Svensoon with the counter takedown but AZ avoids it easily.
Svensoon moves into range and clinches up with AZ.
That's four minutes gone in the round.
AZ is trying to pull guard but Svensoon turns him against the cage and we stay in the clinch.
That's three failed takedown attempts in the round for Leinart AZ. That's going to take a lot out of him.
Svensoon prevents AZ from breaking the clinch.
Svensoon is looking for a takedown.
Svensoon lands a nice elbow.
Svensoon manages to pull guard.
AZ has gone for a leg lock! Svensoon slips out almost immediately though and dives into AZ's guard.
Svensoon stands up and waves to AZ to follow him.
Boooooooooooooooooooo!!! God, this has been a terrible round. Come on you two, sort yourselves out!
AZ swings away but doesn't land with a series of punches.
And thats the end of the round the fighters go back to their corners.
Max Svensoon showed his class in that round. I'd imagine he'll take it on all the scorecards.
The referee calls time. The cornermen exit stage left and we're back to business. This is the final round!
Svensoon fakes with the hands and throws a leg kick but AZ is out of range.
AZ tries to clinch up but Svensoon circles away and keeps his distance.
Leinart AZ seems to be the more aggressive standup fighter in this bout.
AZ moves out of range as Svensoon throws a body kick.
AZ throws a quick counter kick to the body but Svensoon avoids it.
Max Svensoon seems to be getting the better of the standup.
AZ tries to clinch but Svensoon moves away
and Svensoon counters with a two punch combo.
Svensoon fakes with an overhand right and moves in to clinch with AZ, pushing him back against the cage.
Svensoon is stalling here. The referee will be looking to step in if he doesn't pick up the pace.
AZ tries to jump guard but he falls flat on his backside. Svensoon smiles and moves away.
We've had a slow start to the round here - hopefully the action picks up.
AZ tries to close the distance and clinch up but Svensoon swats him away and circles back towards the center.
Svensoon raises up his leg as if looking to counter with a high kick.
AZ is looking to clinch.
AZ finds nothing but air with that leg kick attempt.
Both fighters are breathing heavily.
That's one minute gone in the round.
AZ displays good takedown defense there as he swats away a double leg from Svensoon.
Svensoon on the wrong end of a nice low kick. He's acting like it's no big deal but he doesn't want to take many more of those.
Svensoon throws a series of punches but AZ avoids them all with ease.
Svensoon avoids the clinch attempt nicely.
Svensoon with the counter takedown but AZ avoids it easily.
Svensoon keeps AZ at a distance using the push kick.
AZ fails with a rather predictable takedown attempt.
Svensoon looks like he wanted to counter with a high kick but didn't throw it.
Leinart AZ is looking to throw some combinations by the looks of things.
AZ stuffs the takedown attempt from Svensoon. Svensoon gets slowly back to his feet.
That's two minutes gone in the round.
Svensoon fakes high and shoots in for a takedown but AZ avoids it really well and circles away.
Leinart AZ has stuffed three takedown attempts in the round now. That's going to take a lot out of Max Svensoon.
Svensoon clinches up with AZ and pushes him back against the cage.
AZ wants to break free but Svensoon has control.
Svensoon has hold of a leg and is looking for a trip takedown. AZ avoids it nicely though and we remain in the clinch.
Svensoon lands with a short shot to the head.
That's three minutes gone in the round.
Svensoon jumps guard.
AZ might be looking to lock onto one of his opponent's long limbs for a submission, whilst we're on the ground.
Svensoon is looking for a triangle but AZ pushes his legs off easily.
AZ not doing a lot at the moment. He'll have to show some more aggression or the fight will get stood up.
Svensoon wants to sweep but no luck.
Svensoon pulls AZ in to control the position.
AZ trying to control the position from guard on top but Svensoon is wriggling around, looking for whatever he can.
AZ slows down the pace of the fight, as he sits in guard.
That's four minutes gone in the round.
A few boos can be heard. I'm sure they will multiply if the fighters don't pick up the pace.
The fighters are working up against the cage. Svensoon manages to wriggle his way back to his feet, so the fighters are now clinched against the cage.
AZ drops down for a takedown but doesn't get it.
Svensoon has hold of a leg and is looking for a trip takedown. AZ avoids it nicely though and we remain in the clinch.
Boooooooooooooooooooo!!! God, this has been a terrible round. Come on you two, sort yourselves out!
Svensoon's corner calls for him to break the clinch, which he does.
Leinart AZ has stepped it up - he knows he needs a finish here!
Max Svensoon is fighting for a decision here - he's started to take the cautious approach.
The sound of bone on bone echoes around the arena as Svensoon checks a leg kick.
And that's the end of the fight!
Max Svensoon comfortably won the final round on my scorecard.
Well Svensoon has outworked and out performed his opponent in all aspects of the game today. He was simply too good and the decision should be no more than a formality. Over to the ring announcer for the scorecards.
Ladies and gentlemen, after 3 rounds of action, we go to the scorecards for a decision.
Judge Ben Watson scores the fight for Max Svensoon!
Judge Hugh Johnson scores the fight for Max Svensoon!
Judge John Mangel scores the fight for Max Svensoon!
Max Svensoon wins by unanimous decision!
|
|
|
|
|
|
|
|
|
|
|
|
|
|
|
|
|
|
|
|
|
|
|
| S |
C
A |
G |
S |
C
B |
G |
|
S |
C |
G |
|
energy
A | B |
|
hype
A | B |
|
pop
A | B |
|
mgr
A | B |
|
FIGHT
RATING
34% |
|
|
|
|
|
|
|
Undercard bout
|
Coming up we have a middleweight MMA rules bout between Yoshi Togata (ranked 4567 p4p, 0 weight class) and Alki Mattos (ranked 4383 p4p, 0 weight class). We have two fighters making their debuts here, so let's see who comes out of this one with their first professional victory.
 |
|
 |
| 186 cm
23
180 lbs
0 - 0 - 0 |
|
190 cm
22
165 lbs
0 - 0 - 0 |
BJJ Purple Belt
Brawler
Granite chin |
|
BJJ Blue Belt
Decent boxing
Solid chin |
|
| |
|
Ladies and gentlemen. This fight is 3 rounds, in the middleweight division.
Introducing the fighter to my left, fighting out of the red corner.
With a record of
0 - 0 - 0, fighting out of Sydney, Yoshi Togata!
And introducing the fighter to my right, fighting out of the blue corner.
With a record of
0 - 0 - 0, fighting out of Sydney, Alki Mattos!
The judges for this bout are Donatello Bradman, Ben Watson and Topper Green.
The bell rings for round one and we are underway!
Mattos drives through and clinches with Togata against the cage.
Togata has dropped down and is looking to force the takedown but it's defended by Mattos after a bit of a struggle.
Togata is trying to pull guard but being pressed up against the cage enables Mattos to keep the fight standing.
Togata is trying to pull guard but Mattos turns him against the cage and we stay in the clinch.
That's three failed takedown attempts in the round for Yoshi Togata. That's going to take a lot out of him.
Togata breaks from the clinch.
Togata throws a series of punches but Mattos avoids them all with ease.
Togata avoids a kick to the body.
Mattos dodges the punch combination from Togata.
Togata throws a combination but it was largely blocked by Mattos.
Mattos is a painfully thin specimen of a man. You do wonder whether a good body kick would snap him clean in two.
Mattos looks for a takedown here. Will he get it? Togata is fending him off so far but Mattos persists. Nope, Togata circles away and we're back to standing.
As Mattos tries to get set, Togata tries to push him back and clinch up but Mattos manages to avoid the attempt.
We've had a slow start to the round here - hopefully the action picks up.
Togata shoots in with a takedown attempt and he has Mattos pinned against the cage. Mattos gets the underhooks and manages to circle away.
Mattos closes the distance and presses his opponent up against the cage.
That's one minute gone in the round.
Togata is trying to drag Mattos to the mat but Mattos just about manages to keep his footing. He used the cage to his advantage there.
Mattos fails to pull the fight into his guard.
Mattos breaks the clinch and we return to the middle of the mat.
Mattos darts in looking for a takedown but Togata gets double underhooks and turns Mattos into the cage.
Togata doesn't manage to clinch there - Mattos circles away.
Mattos lands a nice hook to Togata's body. Togata takes it in his stride and looks to land his own strikes.
Mattos misses with a body kick.
Togata tries to keep at a distance but Mattos has taken the fight into the clinch.
Mattos throws an elbow but it's blocked.
That's two minutes gone in the round.
Mattos has dropped down and is looking to force the takedown but it's defended by Togata after a bit of a struggle.
Mattos tries to pull guard but Togata forces him back to his feet, against the cage.
Mattos breaks from the clinch.
Mattos tries to score a power double leg takedown but Togata sees that one coming and sprawls well. That will dishearten Mattos somewhat.
Togata keeps the fight standing with a nice sprawl.
Togata changes levels looking for a counter takedown but doesn't commit.
Togata is looking to clinch.
Togata closes the distance and scores a nice trip takedown into half guard. Mattos did well to prevent Togata getting side control.
Mattos really doesn't want to stay on the ground with Togata. If he can't get it back to his feet, it's only a matter of time before he'll be tapping out.
This is a great period of action - very entertaining stuff!
Togata is thwarting Mattos's attempts to control the position.
Togata takes a deep breath and rests his weight momentarily on top of his opponent, to control the position.
That's three minutes gone in the round.
Mattos trying to hold on to Togata's head to control him but Togata postures up.
Mattos wants to get back to full guard but Togata has mounted him!
Togata takes a little breather and maintains the position. The referee will be looking for him to stay active from such a dominant position though.
Togata lands a nice shot to the head.
The ref warns both fighters not to hold the cage as they work up against the meshing.
Togata working the ground and pound effectively.
Mattos is bucking up trying to escape but Togata cracks him with another couple of good strikes.
Mattos is squirming around, avoiding Togata's attempts to control the action.
That's four minutes gone in the round.
Mattos tries to reverse the position but Togata maintains control.
Mattos keeps trying to improve his position.
Togata is dominating on the ground here - he's now on his opponent's back, looking to sink in the hooks. Mattos is in real trouble.
Togata looking to break Mattos's wrist control so he can sink in the choke. Mattos remaining controlled and patient though - he really has to keep calm otherwise Togata will wrap this one up with the rear naked choke!
Togata controls the action.
Togata has his opponent's back and is working for the choke.
This has been an exciting period of action!
Will Togata go for the finish here or will he try and keep control of the position?
And thats the end of the round the fighters go back to their corners.
Yoshi Togata dominated that round.
OK. That's time! The bell goes and we're back to the action.
Mattos dives in and grabs Togata's left leg, looking for a takedown. Togata pushes down on Mattos's head and hops out.
A punch lands to the side of Togata 's head but he takes it in his stride.
Mattos dives in for a single leg takedown but Togata sprawls and the fighters end up clinched against the cage.
Togata seemed to be looking to counter by closing the distance.
Togata gets tackled into the cage by Mattos. Mattos maintains the clinch.
Mattos stalling.
Mattos is trying to maintain a safe position but Togata gets an underhook and turns Mattos into the cage.
Mattos has dropped down and is looking to force the takedown but it's defended by Togata after a bit of a struggle.
Yoshi Togata has stuffed three takedown attempts in the round now. That's going to take a lot out of Alki Mattos.
Mattos tries to pull guard but Togata holds him up against the cage and eventually Mattos drops back down to his feet.
Mattos working hard to break the clinch.
We've had a slow start to the round here - hopefully the action picks up.
Togata works for the underhooks and manages to get a trip takedown into guard.
Togata decides he's had enough of playing guard and decides to stand. Come on Mattos, up you get!
Togata scores with a nice takedown into half guard. Let's see what he's got on the ground.
The fighters are pressed up against the cage, both looking to find a bit of space to work.
That's one minute gone in the round.
Togata is thinking about going for an arm triangle but he can't free his leg.
Mattos is breathing heavily.
Ground and pound from Togata.
Togata is trying to control. Mattos wants to improve his position but can't escape this time.
Togata has been looking to land a fair amount of strikes on the ground. He might be looking to soften his opponent up in order to work for a submission.
Togata is scoring with some nice ground and pound from the dominant position.
Mattos is looking to get full guard. It looks like he might be successful but at the last minute Togata jumps into side control!
Togata is really dominating this fight. Is there anything that Mattos can do to turn this around?
Mattos takes an elbow right on the bridge of the nose and winces in pain.
Togata prevents Mattos from escaping the position.
That's two minutes gone in the round.
Togata is looking for a kimura. He might have it! No, Mattos has escaped the position, nice work there.
Togata advances nicely into full mount.
Mattos tries to hold on but Togata postures up.
Mattos tries to improve his position but instead Togata has taken his back!
Togata trying to control momentarily.
You can see the frustration on Mattos's face
He knows he is in trouble unless he improves his position sooner rather than later.
Yoshi Togata overall seems to be getting the better of the ground position in the fight so far.
That's three minutes gone in the round.
Togata is persistently looking for the submission but Mattos is defending it well.
Togata is looking for the choke from the back position but Mattos is controlling his hands well.
Togata is working for the choke. He's slipped one arm under the chin. Mattos has to defend the other arm for all he's worth... but Togata has managed to get that arm free too and he's tightening the choke! Mattos taps out and looks absolutely disgusted with himself. Togata doesn't care though - he's delighted!
Ladies and gentlemen, after 3:49 of round 2, we have a winner by way of Submission (RNC). Yoshi Togata!
|
|
|
|
|
|
|
|
|
|
|
|
|
|
|
|
|
|
|
|
|
|
|
| S |
C
A |
G |
S |
C
B |
G |
|
S |
C |
G |
|
energy
A | B |
|
hype
A | B |
|
pop
A | B |
|
mgr
A | B |
|
FIGHT
RATING
44% |
|
|
|
|
|
|
|
Undercard bout
|
Coming up we have a middleweight MMA rules bout between Trindon Blash (ranked 4454 p4p, 0 weight class) and Bin Lio (ranked 4499 p4p, 415 weight class). We have two fighters making their debuts here, so let's see who comes out of this one with their first professional victory.
 |
|
 |
| 183 cm
21
185 lbs
0 - 0 - 0 |
|
170 cm
18
155 lbs
0 - 0 - 0 |
BJJ Blue Belt
Brawler
Good chin |
|
BJJ Blue Belt
Brawler
Determined |
|
| |
|
Ladies and gentlemen. This fight is 3 rounds, in the middleweight division.
Introducing the fighter to my left, fighting out of the red corner.
With a record of
0 - 0 - 0, fighting out of Sydney, Trindon Blash!
And introducing the fighter to my right, fighting out of the blue corner.
With a record of
0 - 0 - 0, fighting out of Sydney, Bin Lio!
The judges for this bout are Chris Dean, Summer Carpenter and Francis DeMontford.
The bell rings for round one and we are underway!
Lio is trying hard to land a takedown here. Blash sprawls well and keeps this one on the feet.
Lio tries to drive through with a takedown attempt but Blash defends well and Lio ends up having to push Blash into the cage where they will battle it out in the clinch.
Blash has Lio up against the cage in a clinch.
Blash gets control of Lio's arms and successfully pulls guard. Blash will no doubt be looking for submissions off his back.
Blash is pulling down on Lio's head to control his posture.
Blash wants to get back to his feet but he's too absorbed in his own little project and Lio manages to pass to side control.
Lio is just content to waste time from the top position. Blash takes advantage of the situation and regains full guard.
We've had a slow start to the round here - hopefully the action picks up.
Lio trying to control but Blash is working from the bottom.
That's one minute gone in the round.
Lio won't allow Blash to sweep him here.
Lio missing there with some ground and pound from the guard.
Lio wants to stand but Blash has a closed guard, so he can't escape.
Lio trying to control but Blash is working from the bottom.
Blash is working an open guard here, looking to improve his position. No doubt that will leave him open to counters but at least he's being more offensive.
Blash pulls Lio in close to his closed guard and prevents Lio from doing any damage or advancing position.
Blash has controlled the position for a good 20 seconds, which will no doubt be starting to frustrate his opponent.
The referee decides to stand the fighters back up.
That's two minutes gone in the round.
My god... these two guys really need to pick up the pace or everyone will leave to go get a beer.
Blash lands with a thumping leg kick.
A telegraphed takedown attempt from Lio is defended easily by Blash.
Trindon Blash has stuffed three takedown attempts in the round now. That's going to take a lot out of Bin Lio.
Blash closes the distance and clinches.
Blash breaks the clinch and we return to the middle of the mat.
Blash tries to close the distance and clinch up against the cage but Lio paws at him with a jab and circles away.
That's three minutes gone in the round.
Lio takes a swing at Blash's ribcage but misses.
Lio fails with the takedown.
Blash shoots in for a takedown and gets it.
Lio is trying to stand.
Blash is trying to control. Lio wants to improve his position but can't escape this time.
Blash thumps the canvas. Not on purpose obviously - he just missed Lio's head.
The referee walks around the fighters to get a better view of the action. Blash lands a nice short elbow.
That's four minutes gone in the round.
Lio tries to get to full guard but Blash has control of the leg.
Lio is in trouble now - Blash has advanced to mount!
Lio wants to control but Blash is having none of it.
Blash has control of Lio's right arm, working for a kimura. It's a bit of a token attempt though and Lio regains control of the situation pretty easily.
Blash pausing momentarily but resumes with a couple of decent strikes that do a bit of damage.
And thats the end of the round the fighters go back to their corners.
Trindon Blash dominated that round.
That's time! Back to the action!
Lio throws a right and a left that Blash avoids nicely.
Lio tries to sprawl but Blash drives through with a takedown into half guard.
Blash will need to keep those long limbs tucked in whilst he's on the ground, to prevent any submissions.
Lio won't allow Blash to pass to mount.
Lio trying to control but Blash postures up.
Lio wants to improve his position but Blash is controlling well.
Blash content to control rather than advance.
We've had a slow start to the round here - hopefully the action picks up.
That's one minute gone in the round.
Blash tries to stand and escape but Lio is controlling the position.
Blash is really dominating this fight. Is there anything that Lio can do to turn this around?
Lio flails away from the bottom but he's not doing any damage.
Lio is looking to regain full guard. Not this time though.
The ref stands the fighters back up due to a lack of activity.
Blash does a little shimmy and throws a leg kick. The leg kick missed by a considerable margin though, making him look a little bit silly for doing the shimmy.
As Blash backs off Lio throws a huge counter combo but Blash manages to avoid it all.
Blash throws a sloppy head kick and Lio moves out of range easily.
Lio stuffs a takedown. It's all about dictating where the fight takes place and Lio wants it to stay on the feet.
Blash closes the distance and clinches.
Blash wants a takedown.
Lio tries to land a knee to the head but Blash blocks with his arms.
Lio fails to pull guard.
Blash blocking some punches.
That's two minutes gone in the round.
Blash stops a takedown attempt from Lio.
Lio stalling the fight.
A battle for position here, against the cage.
Blash jumps into guard, dragging Lio to the mat.
Blash not looking particularly offensive just at the moment.
Blash keeping moving, preventing Lio from controlling successfully.
Blash looking for a sweep. Not yet Blash, not yet.
Blash trying to strike off his back.
Lio trying to control the position from guard on top but Blash is wriggling around, looking for whatever he can.
That's three minutes gone in the round.
Blash is controlling Lio's posture.
Lio got a little sloppy there for a moment and Blash has worked his way into a loose triangle - can he finish it?! No, Lio has managed to get both his arms back between Blash's legs - danger averted.
The referee decides to stand the fighters back up.
Blash drives through with a takedown into guard.
Blash is standing up over Lio. Lio looks to escape but Blash dives into side control.
The ref warns both fighters not to hold the cage as they work up against the meshing.
Both fighters are absolutely exhausted here.
You can see the frustration on Lio's face, being in this tough position on the bottom.
Lio is looking for a sweep.
That's four minutes gone in the round.
Blash tries to get to his feet but Lio is in the middle of advancing position himself and ends up with Blash in his guard.
Blash has to be careful here, sitting in the guard of a superior BJJ player.
Blash controls from within his opponent's guard.
Lio manages to sweep nicely, so he's now on top. Blash manages to get himself to full guard.
Boooooooooooooooooooo!!! God, this has been a terrible round. Come on you two, sort yourselves out!
Lio preventing the sweep.
And thats the end of the round the fighters go back to their corners.
That was a close second round but I would say that Trindon Blash will probably get the nod.
The minute break is over - no more time for sponges and pep talks - back to the action! This is the final round!
Lio showing good head movement there, avoiding the strikes from Blash.
No luck with that takedown attempt from Lio.
Blash tries a head kick but it misses.
Blash moves out of the way of the counter high kick fromLio.
Blash fakes an overhand right and shoots for a takedown. Lio sprawls well initially but Blash persists and gets the takedown into half guard.
Blash is keeping good posture, landing some ground and pound.
Lio is staying active underneath Blash, who seems content to just control the action from this position.
We've had a slow start to the round here - hopefully the action picks up.
Blash prevents Lio from improving his position.
Lio trying to control but Blash postures up.
That's one minute gone in the round.
Blash keeping composed on the top, looking to control the action.
We must be close to a standup if these guys don't pick up the pace.
Blash passes into side control, despite Lio's attempt to control the position.
Blash tries to stand but Lio is controlling his head.
Blash tries for a kimura. Not really close to a finish though.
Lio is trying to get back to half guard. He's pushing on Blash's leg. He's managed it. Nice work.
That's two minutes gone in the round.
The crowd are getting on the fighters' backs, as the pace has dropped off in the last minute or so.
Blash tries to stand but his hand is stuck under Lio.
Blash is working for a kimura but Lio is defending it quite comfortably.
Lio tries to roll over but Blash keeps him under control.
The ref stands the fighters back up due to a lack of activity.
That's three minutes gone in the round.
Blash throws a body kick but he was well out of range there.
Blash tries to clinch but Lio is having none of it.
Blash throws a half hearted mid kick.
Despite the aggression on Lio's face he doesn't fully commit to the counter.
Blash gets the takedown into side control.
Both fighters are breathing heavily.
Lio is looking for a sweep.
Blash blocks the strikes from Lio.
Blash tries to stand but Lio is controlling his head.
I wouldn't like to be where Lio is right now.
That's four minutes gone in the round.
Blash wants to lay and pray for a moment but Lio keeps working.
I wouldn't like to be where Lio is right now.
The referee is asking the fighters to pick up the pace.
Lio is trying to improve his position.
The referee has stepped in and called for a break in the action. We'll restart on the feet.
A really sloppy takedown attempt there from Blash.
Bin Lio has stepped it up - he knows he needs a finish here!
Trindon Blash is fighting for a decision here - he's started to take the cautious approach.
Boooooooooooooooooooo!!! God, this has been a terrible round. Come on you two, sort yourselves out!
Blash throws a wild body kick that Lio sees coming a mile off.
And that's the end of the fight!
Trindon Blash showed his dominance in that final round.
Well Blash has outscored his opponent in every aspect of the fight today. Only a scarily incompetent judge or two will keep him from a well deserved win... Over to the ring announcer for the scorecards.
Ladies and gentlemen, after 3 rounds of action, we go to the scorecards for a decision.
Judge Chris Dean scores the fight for Trindon Blash!
Judge Summer Carpenter scores the fight for Trindon Blash!
Judge Francis DeMontford scores the fight for Trindon Blash!
Trindon Blash wins by unanimous decision!
After the fight, Trindon Blash was humble in paying tribute to his opponent but made it clear he wants to go on to bigger and better things. It seemed to go down well with the crowd who cheered him loudly.
|
|
|
|
|
|
|
|
|
|
|
|
|
|
|
|
|
|
|
|
|
|
|
| S |
C
A |
G |
S |
C
B |
G |
|
S |
C |
G |
|
energy
A | B |
|
hype
A | B |
|
pop
A | B |
|
mgr
A | B |
|
FIGHT
RATING
28% |
|
|
|
|
|
|
|
Co-main event
|
Coming up we have a middleweight MMA rules bout between Luis Garces (ranked 4502 p4p, 0 weight class) and Anton Chigurh (ranked 4481 p4p, 0 weight class). We have two fighters making their debuts here, so let's see who comes out of this one with their first professional victory.
 |
|
 |
| 183 cm
20
183 lbs
0 - 0 - 0 |
|
180 cm
23
190 lbs
0 - 0 - 0 |
BJJ Blue Belt
Brawler
Good chin |
|
Good wrestler
Basic striking
Solid chin |
|
| |
|
Ladies and gentlemen. This fight is 3 rounds, in the middleweight division.
Introducing the fighter to my left, fighting out of the red corner.
With a record of
0 - 0 - 0, fighting out of Sydney, Luis Garces!
And introducing the fighter to my right, fighting out of the blue corner.
With a record of
0 - 0 - 0, fighting out of Sydney, Anton Chigurh!
The judges for this bout are Hugh Johnson, Donatello Bradman and Steve Erwin.
The bell rings for round one and we are underway!
Chigurh gets caught flat footed, as Garces shoots in with a quick takedown into guard.
Chigurh bucks up whilst keeping hold of a body lock, managing to reverse the position. Now he's in top in Garces's guard.
Garces wants to sweep but no luck.
Chigurh cracks Garces with a solid left hand.
Garces looking for submissions off his back, moving his hips, looking for an opening.
Garces knows he needs to get back to his feet asap. He's simply no match for Chigurh on the ground.
Chigurh is working the ground and pound from guard. He might want to try advancing position though to get more of an impact.
Chigurh postures up and scores with a shot to the body and a follow up elbow to the head.
Chigurh postures up and lands some nice ground and pound.
Chigurh keeps in close for a moment and lands a decent shot to the side of Garces's head.
Chigurh is in close to Garces's body, working some short punches and elbows.
Chigurh has the superior BJJ but he's also working some ground strikes into his gameplan.
The fans in attendance giving it up for the two fighters, who have really let it all hang out in the last minute or so!
Chigurh pushes down on Garces's leg and manages to get into half guard.
Garces on the receiving end of some nice ground and pound.
Chigurh wants to pass the guard but Garces is defending well.
The ref warns both fighters not to hold the cage as they work up against the meshing.
Chigurh drops an elbow to the side of Garces's head.
Garces on the receiving end of some nice ground and pound.
Garces is breathing heavily.
That's one minute gone in the round.
Chigurh lands with an elbow from half guard - that looked like it hurt.

Garces is rocked!
Chigurh sitting in half guard here. He lands a big elbow that has hurt Garces! Oh, Garces is in big trouble! Chigurh lands more strikes and the ref dives in to save him! The fight is over!
Ladies and gentlemen, after 1:23 of round 1, we have a winner by way of KO (Strikes). Anton Chigurh!
|
|
|
|
|
|
|
|
|
|
|
|
|
|
|
|
|
|
|
|
|
|
|
| S |
C
A |
G |
S |
C
B |
G |
|
S |
C |
G |
|
energy
A | B |
|
hype
A | B |
|
pop
A | B |
|
mgr
A | B |
|
FIGHT
RATING
80% |
|
|
|
|
|
|
|
Main event
|
Coming up we have a middleweight MMA rules bout between Jithin Arakkaparambil (ranked 4453 p4p, 0 weight class) and Sedrick Edwin (ranked 4455 p4p, 0 weight class). We have two fighters making their debuts here, so let's see who comes out of this one with their first professional victory.
 |
|
 |
| 191 cm
18
148 lbs
0 - 0 - 0 |
|
183 cm
22
185 lbs
0 - 0 - 0 |
BJJ Blue Belt
Brawler
KO power |
|
BJJ Blue Belt
Solid Muay Thai
Solid chin |
|
| |
|
Ladies and gentlemen. This fight is 3 rounds, in the middleweight division.
Introducing the fighter to my left, fighting out of the red corner.
With a record of
0 - 0 - 0, fighting out of Sydney, Jithin Arakkaparambil!
And introducing the fighter to my right, fighting out of the blue corner.
With a record of
0 - 0 - 0, fighting out of Sydney, Sedrick Edwin!
The judges for this bout are Darius Henderson, Donatello Bradman and Bruno Hogan.
The bell rings for round one and we are underway!
Edwin throws the overhand right but ducks down into a quick takedown attempt. Arakkaparambil was covering up waiting for the punch and Edwin finishes the takedown easily into guard.
Arakkaparambil looking for a sweep. Not yet Arakkaparambil, not yet.
Arakkaparambil wants to control the position but Edwin says "no thanks buddy" and passes to half guard.
Well, if Edwin is going to just lie there, perhaps we should talk about what we're having for dinner tonight
I'm having a ham and pineapple pizza
Yum. Can't wait.
Edwin wants to pass to mount but Arakkaparambil is defending the position.
We've had a slow start to the round here - hopefully the action picks up.
Edwin is still trying to improve position.
Edwin seems very keen to just sit and control from half guard but Arakkaparambil does not like that idea so much and is remaining active off his back.
That's one minute gone in the round.
Arakkaparambil is trying to get back to full guard.
The referee calls for the fighters to work.
Edwin is looking to take a break and control but Arakkaparambil is keeping him honest, looking to work from the bottom.
Arakkaparambil moves into full guard.
The ref warns both fighters not to hold the cage as they work up against the meshing.
Arakkaparambil looking to sweep here. No luck so far.
That's two minutes gone in the round.
There's not a lot going on here and the crowd are letting the fighters know they're not willing to tolerate a lack of action.
Arakkaparambil really does look like a pencil wearing a pair of gloves. Let's hope he has a gameplan to suit that ridiculous body shape.
Edwin tries to free his leg and advance position but Arakkaparambil is retaining full guard.
The ref stands the fighters back up due to a lack of activity.
Edwin pushes Arakkaparambil away with a front kick.
Arakkaparambil stuffs the takedown attempt from Edwin. Edwin gets slowly back to his feet.
Edwin explodes with a nice body kick and back out of range. Nice work.
Edwin closes the distance and scores a nice trip takedown into half guard. Arakkaparambil did well to prevent Edwin getting side control.
Edwin perhaps working for something from half guard, or maybe not. It looks like he's just sitting there.
Edwin stands up out of the half guard.
Nice sprawl there from Edwin as Arakkaparambil shoots in.
Edwin tries to counter with a clinch but Arakkaparambil shakes him off and moves away.
Arakkaparambil is breathing heavily.
That's three minutes gone in the round.
Edwin displaying good standup as he scores with a three punch combination.
Edwin shoots in and scores a nice double leg takedown into half guard.
Arakkaparambil has a hand on Edwin's thigh, trying to get back to full guard. Edwin takes advantage of the position though and mounts him!
Arakkaparambil is in all sorts of trouble here.
Edwin trying to control but Arakkaparambil is having none of it.
Edwin sitting in mount, just looking to control for the moment.
That's four minutes gone in the round.
Edwin wants to control the action but instead Arakkaparambil gets a body lock and reverses into Edwin's guard! Nice work!
Edwin wants to control here, rather than go for any submissions from the bottom. At least for now.
The crowd thankful this round is nearly over.
Arakkaparambil trying to control but Edwin is working from the bottom.
And thats the end of the round the fighters go back to their corners.
Sedrick Edwin dominated that round.
Well, the break between rounds is over. Let's get back to the scrappin!
Arakkaparambil fails with a rather predictable takedown attempt.
Arakkaparambil doesn't succeed with the takedown
and Edwin counters with a left to the body.
Like a baseball bat into the meat of his leg there - nice leg kick by Edwin.
Edwin feints and as Arakkaparambil raises his hands in defense, Edwin changes levels and drives through with a takedown into guard.
Edwin gets to his feet - Arakkaparambil follows without any prompting.
Arakkaparambil has his takedown stuffed
and Edwin holds on and brings the fighters into a clinch.
That's three failed takedown attempts in the round for Jithin Arakkaparambil. That's going to take a lot out of him.
We've had a slow start to the round here - hopefully the action picks up.
Edwin tightens his grip and picks Arakkaparambil up, before dumping him to the ground. Arakkaparambil manages to land in guard.
Sedrick Edwin has got the better of the ground game so far.
Edwin slows down the pace of the fight, as he sits in guard.
Arakkaparambil wants to sweep but no luck.
Both fighters are absolutely exhausted here.
That's one minute gone in the round.
Edwin controls from within his opponent's guard.
Arakkaparambil wants to stand and escape but Edwin is having none of it.
Edwin stands and steps away. Arakkaparambil gets to his feet too and we're back to the striking game.
Edwin tries to score a power double leg takedown but Arakkaparambil sees that one coming and sprawls well. That will dishearten Edwin somewhat.
Edwin moves into the clinch.
That's two minutes gone in the round.
The crowd are starting to boo a lack of action.
Arakkaparambil is trying to slow down the pace in the clinch, to catch his breath.
Edwin just leaning against Arakkaparambil, taking a breather.
Arakkaparambil looking to slow down the pace here.
Arakkaparambil is trying to stall.
Maybe Arakkaparambil would be better served going for some more strikes rather than trying to control so much.
Edwin jumps guard.
Arakkaparambil won't allow Edwin to sweep him here.
That's three minutes gone in the round.
Arakkaparambil wants to pass the guard but Edwin is keeping the position.
Edwin has been the more effective fighter overall so far.
Edwin wants to stand and escape but Arakkaparambil is having none of it.
Edwin throwing some rather feeble looking strikes off his back.
Edwin wants to get back to his feet but Arakkaparambil is in a dominant position and won't allow it.
Edwin looking to hit a scissor sweep but Arakkaparambil is one step ahead there.
Arakkaparambil trying to control the position from guard on top but Edwin is wriggling around, looking for whatever he can.
The referee has decided to stand the fighters back up, so we'll restart on the feet.
That's four minutes gone in the round.
A few boos can be heard. I'm sure they will multiply if the fighters don't pick up the pace.
Edwin shoots in for a takedown but Arakkaparambil shows good takedown defense there and keeps this one on the feet.
Arakkaparambil is looking to clinch.
Jithin Arakkaparambil is looking to throw some combinations by the looks of things.
Arakkaparambil stuffs the takedown.
Arakkaparambil is trying to close the distance and clinch up, after that failed offence from Edwin.
Edwin shoots in for a takedown! He's got it and he's managed to land in side control! That's better than Edwin was expecting from the takedown attempt, I'm sure!
Edwin is trying to move to mount but Arakkaparambil reverses beautifully and ends up in Edwin's guard.
Edwin is working an open guard here, looking to improve his position. No doubt that will leave him open to counters but at least he's being more offensive.
The crowd thankful this round is nearly over.
Edwin looking for subs off his back but Arakkaparambil has passed one foot through into half guard.
And thats the end of the round the fighters go back to their corners.
Sedrick Edwin showed his class in that round. I'd imagine he'll take it on all the scorecards.
OK. That's time! The bell goes and we're back to the action. And we move into the final round!
Arakkaparambil shoots in for a double leg but Edwin sprawls well. That's going to sap some energy.
Arakkaparambil shoots for a double leg takedown but Edwin sprawls well. He's pushed Arakkaparambil's face into the mat and manages to get back to his feet relatively easily.
Edwin darts in and clinches Arakkaparambil up against the cage.
Edwin manages to break the clinch.
Edwin clinches.
Some stalling of biblical proportions here from Edwin.
Arakkaparambil is trying to push Edwin away but Edwin has him pressed against the cage, so he's going nowhere.
Arakkaparambil is trying to pull guard but being pressed up against the cage enables Edwin to keep the fight standing.
That's three failed takedown attempts in the round for Jithin Arakkaparambil. That's going to take a lot out of him.
Edwin unloads a knee to the mid-section.
We've had a slow start to the round here - hopefully the action picks up.
Edwin leaning against his opponent.
Both fighters working to control the clinch.
Edwin has clasped his hands together around Arakkaparambil's back... aaand, he's got a takedown into side control. Nicely done.
Both fighters are breathing heavily.
That's one minute gone in the round.
Edwin staying calm.
Arakkaparambil tries to control the position but he's not in luck - Edwin easily slips into full mount!
Arakkaparambil wants to improve position but instead he's given up his back.
Edwin has got his arm under Arakkaparambil's chin working for the choke
has he got it? It looks pretty tight! Oh! Arakkaparambil has spun round into Edwin's guard beautifully! Well done that man!
Edwin working a defensive guard here.
That's two minutes gone in the round.
Edwin is looking to get back to his feet but can't, whilst Arakkaparambil is controlling him.
Edwin looking to sweep here. No luck so far.
Arakkaparambil trying to control the position from guard on top but Edwin is wriggling around, looking for whatever he can.
Edwin is throwing his legs up, looking for submissions. Arakkaparambil is aware though and is defending well.
Edwin looking to sweep using the butterfly guard but Arakkaparambil puts pay to that idea as he passes nicely into half guard.
That's three minutes gone in the round.
Arakkaparambil is scoring with some nice ground and pound from the dominant position.
Edwin tries to get to full guard but Arakkaparambil has control of the leg.
The fighters are pressed up against the cage, both looking to find a bit of space to work.
Arakkaparambil is looking to advance position but Edwin won't allow it.
Arakkaparambil is looking for an arm triangle, whilst trying to pass to side control. Edwin doesn't seem that keen to cooperate though. No luck this time Arakkaparambil.
Edwin is refusing to be controlled, as Arakkaparambil sits in half guard.
That's four minutes gone in the round.
There's not a lot going on here and the crowd are letting the fighters know they're not willing to tolerate a lack of action.
The fighters are battling for position here. Edwin manages to regain full guard. Nice work.
Arakkaparambil landing some decent shots from guard.
Edwin is doing well to control the posture of his opponent and prevent any damage.
Boooooooooooooooooooo!!! God, this has been a terrible round. Come on you two, sort yourselves out!
Edwin is trying to keep Arakkaparambil in close.
The referee has motioned to the fighters to stand back up. He just wasn't happy with the level of activity.
And that's the end of the fight!
Sedrick Edwin comfortably won the final round on my scorecard.
Well Edwin has outworked and out performed his opponent in all aspects of the game today. He was simply too good and the decision should be no more than a formality. Over to the ring announcer for the scorecards.
Ladies and gentlemen, after 3 rounds of action, we go to the scorecards for a decision.
Judge Darius Henderson scores the fight for Sedrick Edwin!
Judge Donatello Bradman scores the fight for Sedrick Edwin!
Judge Bruno Hogan scores the fight for Sedrick Edwin!
Sedrick Edwin wins by unanimous decision!
Sedrick Edwin decided to go for the less than humble approach in his post fight interview, telling everyone how he is going to conquer the world. The crowd seemed to like it when really that sort of approach could have gone either way.
|
|
|
|
|
|
|
|
|
|
|
|
|
|
|
|
|
|
|
|
|
|
|
| S |
C
A |
G |
S |
C
B |
G |
|
S |
C |
G |
|
energy
A | B |
|
hype
A | B |
|
pop
A | B |
|
mgr
A | B |
|
FIGHT
RATING
33% |
|
|
|
|
|
|
|
|
|
|

