 |
QFC Tournament 974 Round 1 PBP Commentary |
Undercard bout
|
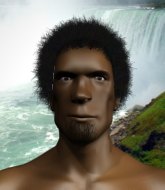
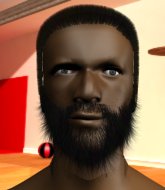
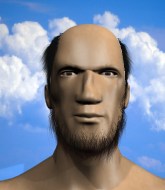
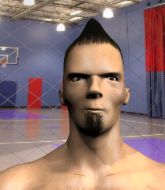
Coming up we have a featherweight MMA rules bout between Kribb Desania (ranked 4964 p4p, 0 weight class) and Dustin Webb (ranked 4870 p4p, 0 weight class). We have two fighters making their debuts here, so let's see who comes out of this one with their first professional victory.
 |
|
 |
| 192 cm
23
152 lbs
0 - 0 - 0 |
|
191 cm
18
145 lbs
0 - 0 - 0 |
BJJ White Belt
Solid Muay Thai
KO power |
|
BJJ White Belt
Brawler
Likes musicals |
|
| |
|
Ladies and gentlemen. This fight is 3 rounds, in the featherweight division.
Introducing the fighter to my left, fighting out of the red corner.
With a record of
0 - 0 - 0, fighting out of Las Vegas, Kribb Desania!
And introducing the fighter to my right, fighting out of the blue corner.
With a record of
0 - 0 - 0, fighting out of Las Vegas, Dustin Webb!
The judges for this bout are Chris Downing, Stewart Dunkirk and Robert Twigg.

The bell rings for round one and we are underway!
Webb wants to clinch.
Jab, cross, leg kick. Nice combination by Desania!

Webb is rocked!
Desania connects with a nice cross there... Webb is looking wobbly and Desania recognises it - he's rushed in and lands two more brutal shots that send Webb to the canvas, out cold! A brutal finish to the fight - Desania jumps onto the cage to celebrate with the crowd!
Ladies and gentlemen, after 0:30 of round 1, we have a winner by way of KO (Punches). Kribb Desania!
Kribb Desania decided to hype himself up post fight. It was going well but he went on about it a bit too long and the crowd turned on him a little.
|
|
|
|
|
|
|
|
|
|
|
|
|
|
|
|
|
|
|
|
|
|
|
| S |
C
A |
G |
S |
C
B |
G |
|
S |
C |
G |
|
energy
A | B |
|
hype
A | B |
|
pop
A | B |
|
mgr
A | B |
|
FIGHT
RATING
92% |
|
|
|
|
|
|
|
Undercard bout
|
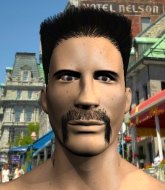
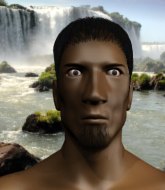
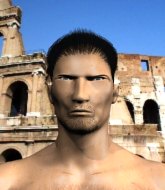
Coming up we have a featherweight MMA rules bout between Donny Whistler (ranked 4987 p4p, 0 weight class) and Rayleigh Dragon (ranked 2894 p4p, 304 weight class). We have two fighters making their debuts here, so let's see who comes out of this one with their first professional victory.
 |
|
 |
| 188 cm
18
153 lbs
0 - 0 - 0 |
|
175 cm
23
155 lbs
0 - 0 - 0 |
BJJ Purple Belt
Counter fighter
Big heart |
|
BJJ Brown Belt
Counter fighter
Experienced |
|
| |
|
Ladies and gentlemen. This fight is 3 rounds, in the featherweight division.
Introducing the fighter to my left, fighting out of the red corner.
With a record of
0 - 0 - 0, fighting out of Las Vegas, Donny Whistler!
And introducing the fighter to my right, fighting out of the blue corner.
With a record of
0 - 0 - 0, fighting out of Las Vegas, Rayleigh Dragon!
The judges for this bout are Robert Twigg, Chris Downing and Wesley Smith.
The bell rings for round one and we are underway!

Whistler manages to get an easy takedown there - catching Dragon on his heels. He'll look to pass Dragon's guard now, I'm sure.
Whistler wants to control from the top but Dragon keeps moving.
Whistler really does look like a pencil wearing a pair of gloves. Let's hope he has a gameplan to suit that ridiculous body shape.

Dragon looking for a guillotine here but Whistler defends easily.
Dragon looking for a sweep. Not yet Dragon, not yet.

Whistler postures up as if he's going to throw some strikes but drops back for an ankle! Dragon is in big trouble! He looks ready to tap! But no, he's escaped and dives on top of Whistler, into his guard.

We've had a slow start to the round here - hopefully the action picks up.
Whistler escapes his hips to the side and looks to be working for an armbar. Dragon gives him a little smile and shakes his head. No chance.
The ref warns both fighters not to hold the cage as they work up against the meshing.
Dragon passes Whistler's left leg - he's now in half guard.

That's one minute gone in the round.
Dragon is looking for a kimura here.
Whistler looks like he's trying to stand up.
Dragon is working for a kimura but Whistler is defending it quite comfortably.
The fighters are going at a pretty good pace and they're both starting to sweat now.
Dragon is sneakily working for an arm triangle but Whistler sees it coming and defends easily.
Whistler has guillotine here! It looks pretty tight! Could this be all over! No, Dragon escapes and passes into side control at the same time. Nice work there by Dragon!

That's two minutes gone in the round.
Dragon is looking for a kimura. He might have it! No, Whistler has escaped the position, nice work there.
Dragon goes for an armbar! This could be all over! Wait, no, Whistler rolls with the submission and now he's on top in Dragon's guard! Nice work there by Whistler!
Dragon looking for submissions from the bottom here. Moving his hips around, possibly looking for an armbar.
Dragon is working actively off his back, looking to secure an arm or perhaps work for a triangle.
Whistler has gone for a leg lock! Dragon slips out almost immediately though and dives into Whistler's guard.
The fighters are pressed up against the cage, both looking to find a bit of space to work.

That's three minutes gone in the round.
Whistler tries to land a sweep but no joy.
Dragon wants to pass the guard but Whistler is keeping the position.
Dragon advances to half guard.
Dragon is sneakily working for an arm triangle but Whistler sees it coming and defends easily.
Dragon is looking for a kimura but he's never going to get it from there.
Dragon is looking to pass Whistler's guard but actually Whistler recovers to full guard.
Dragon drops back looking for a leg! Whistler is in trouble here! The fighters roll with the hold and Whistler manages to kick Dragon off! Dragon jumps back into Whistler's guard.

That's four minutes gone in the round.
Whistler tries to land a sweep but no joy.
Dragon passes into half guard.
Whistler knows he needs to get back to his feet asap. He's simply no match for Dragon on the ground.
Dragon is thinking about going for an arm triangle but he can't free his leg.
Dragon is trying a forearm choke
I don't think that's going to do much at this level of the game.
The crowd thankful this round is nearly over.
Whistler actively working from the bottom here.
And thats the end of the round the fighters go back to their corners.
Rayleigh Dragon dominated that round.
That's time! Back to the action!

Dragon fails miserably with a takedown attempt.
Whistler scores a trip takedown into side control. Nice.
Dragon manages to get back to half guard.
Dragon actively working from the bottom here.
Whistler is working for submissions here but there's nothing on.
We've had a slow start to the round here - hopefully the action picks up.
Dragon makes his way to full guard. A much better position for Dragon.
Whistler is looking to stand up but Dragon won't let him.
That's one minute gone in the round.
Whistler drops back looking for a leg! Dragon is in trouble here! The fighters roll with the hold and Dragon manages to kick Whistler off! Whistler jumps back into Dragon's guard.
Dragon is working for submissions here. He's thrown up his legs looking for a triangle but Whistler frees his head nicely. Oh but Dragon has switched to an armbar! Whistler is tapping furiously! Lovely submission there!
Ladies and gentlemen, after 1:23 of round 2, we have a winner by way of Submission (Triangle Armbar). Rayleigh Dragon!
A relieved looking Rayleigh Dragon thanked the fans for their support and gave the usual line about them being amazing. They seemed to believe that he actually meant it.
|
|
|
|
|
|
|
|
|
|
|
|
|
|
|
|
|
|
|
|
|
|
|
| S |
C
A |
G |
S |
C
B |
G |
|
S |
C |
G |
|
energy
A | B |
|
hype
A | B |
|
pop
A | B |
|
mgr
A | B |
|
FIGHT
RATING
32% |
|
|
|
|
|
|
|
Undercard bout
|
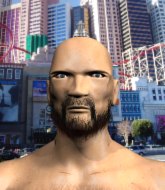
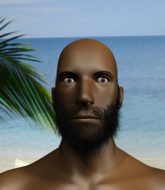
Coming up we have a featherweight MMA rules bout between Erik Hook (ranked 4972 p4p, 380 weight class) and AJ Diaz (ranked 5056 p4p, 385 weight class). We have two fighters making their debuts here, so let's see who comes out of this one with their first professional victory.
 |
|
 |
| 171 cm
23
150 lbs
0 - 0 - 0 |
|
180 cm
23
153 lbs
0 - 0 - 0 |
BJJ White Belt
Excellent boxer
Prefers standup |
|
BJJ Brown Belt
Brawler
Solid chin |
|
| |
|
Ladies and gentlemen. This fight is 3 rounds, in the featherweight division.
Introducing the fighter to my left, fighting out of the red corner.
With a record of
0 - 0 - 0, fighting out of Las Vegas, Erik Hook!
And introducing the fighter to my right, fighting out of the blue corner.
With a record of
0 - 0 - 0, fighting out of Las Vegas, AJ Diaz!
The judges for this bout are Gwen Towbar, Wesley Smith and Stewart Dunkirk.
The bell rings for round one and we are underway!

Diaz gets to the clinch - let's see what his plan is here.
Nice body punch from Hook.
Diaz jumps guard but Hook stands there with Diaz around his waist. Diaz gives up and drops back to his feet. We remain in the clinch.
A shot in the inside from Diaz.
Hook wants to break the clinch but can't.
Diaz doesn't land with the attempted body shot.
Diaz tries to pull guard but Hook holds him up against the cage and eventually Diaz drops back down to his feet.
Diaz is trying to pull guard but Hook turns him against the cage and we stay in the clinch.
Erik Hook has stuffed three takedown attempts in the round now. That's going to take a lot out of AJ Diaz.
Diaz fails to pull the fight into his guard.
We've had a slow start to the round here - hopefully the action picks up.
Diaz jumps guard but Hook turns him against the cage and keeps the fight standing.
Diaz struggles to land a body shot inside as Hook controls his hands.
Hook wants to break the clinch but can't.
Hook is trying to break the clinch but Diaz is controlling him.
Diaz tries to pull guard but can't drag his opponent to the mat. Hook just stands there and leans against the cage.
That's one minute gone in the round.
Hook is looking to break free of the clinch but Diaz has double underhooks.
Diaz has a couple of punches blocked by Hook.
Diaz tries to take the fight to the ground by pulling guard but can't manage it.
Hook will no doubt start fighting again in a minute but for now he's just having a little rest, leaning Diaz up against the cage.
Diaz jumps guard but Hook stands there with Diaz around his waist. Diaz gives up and drops back to his feet. We remain in the clinch.
Diaz jumps guard but Hook turns him against the cage and keeps the fight standing.
Hook is trying to force a seperation but Diaz has the dominant position.
Diaz jumps guard but Hook turns him against the cage and keeps the fight standing.
Diaz tries to pull guard but Hook forces him back to his feet, against the cage.
Diaz jumps guard but his hands slip and he falls flat on his back. Well, he's made himself look a right mug there, as Hook walks away with a smile on his face. Diaz gets slowly back to his feet and shakes his head.
Diaz wants to clinch.
That's two minutes gone in the round.
The crowd are getting on the fighters' backs, as the pace has dropped off in the last minute or so.
Diaz darts in and clinches Hook up against the cage.

Hook's corner calls for him to break the clinch, which he does.
Diaz tries to clinch up
letting Hook counter with a right hand.
Hook stooping low to avoid any incoming strikes and then lunges in with an uppercut come cross that lands flush.
Diaz wants to clinch but Hook slips to the side
and Hook counters with a nice uppercut.
Diaz wants to clinch
and Hook counters with a lovely shot to the body.
Diaz wants to clinch but Hook slips to the side
and Hook counters nicely by changing levels and landing a hook to the body.
Diaz clinches.
That's three minutes gone in the round.
Diaz tries to jump guard but he falls flat on his backside. Hook smiles and moves away.
Hook scores with a nice strike.
Diaz fails in his attempt to clinch.
Hook connects with a crisp jab.
Hook avoids the clinch attempt nicely.
Hook circles away from the clinch attempt.
Diaz is looking to clinch but Hook is avoiding it.
Diaz gets to the clinch - let's see what his plan is here.
Some stalling of biblical proportions here from Hook.
Diaz is trying to pull guard but Hook has him pressed against the cage.
Diaz fails to pull the fight into his guard.
That's four minutes gone in the round.
Diaz tries to jump guard but he falls flat on his backside. Hook smiles and moves away.
Diaz tries to clinch but Hook is having none of it.
Jab, jab by Hook - just one landing.

It looks like AJ Diaz has been cut.
Diaz darts in trying to clinch
and Hook counters with a lovely shot to the body.
Diaz tries to close the distance and clinch but Hook swats him to one side with an open hand palm strike and circles away.
Hook connects with a single shot there.
This is a great period of action - very entertaining stuff!
Hook circles away from the clinch attempt
and Hook counters with a quick right hand to the jaw.
Diaz closes the distance but Hook moves to the side
and Hook counters with a one-two to the body.
Diaz is rocked!
Diaz gets caught by a big overhand right and goes down! Hook gets on top of him and starts throwing some serious punches until the ref intervenes and stops the fight!
Ladies and gentlemen, after 4:57 of round 1, we have a winner by way of TKO (Strikes). Erik Hook!
|
|
|
|
|
|
|
|
|
|
|
|
|
|
|
|
|
|
|
|
|
|
|
| S |
C
A |
G |
S |
C
B |
G |
|
S |
C |
G |
|
energy
A | B |
|
hype
A | B |
|
pop
A | B |
|
mgr
A | B |
|
FIGHT
RATING
37% |
|
|
|
|
|
|
|
Undercard bout
|
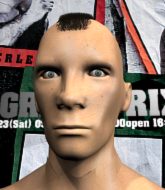
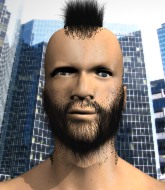
Coming up we have a featherweight MMA rules bout between Darius White (ranked 5118 p4p, 0 weight class) and Jonny Mullen (ranked 5130 p4p, 0 weight class). We have two fighters making their debuts here, so let's see who comes out of this one with their first professional victory.
 |
|
 |
| 175 cm
23
150 lbs
0 - 0 - 0 |
|
178 cm
23
149 lbs
0 - 0 - 0 |
BJJ White Belt
Excellent MT
Very strong |
|
BJJ Brown Belt
Counter fighter
Enjoys gardening |
|
| |
|
Ladies and gentlemen. This fight is 3 rounds, in the featherweight division.
Introducing the fighter to my left, fighting out of the red corner.
With a record of
0 - 0 - 0, fighting out of Las Vegas, Darius White!
And introducing the fighter to my right, fighting out of the blue corner.
With a record of
0 - 0 - 0, fighting out of Las Vegas, Jonny Mullen!
The judges for this bout are Daniel Franklin, Robert Twigg and Alan Glass.
The bell rings for round one and we are underway!

Mullen gets tackled into the cage by White. White maintains the clinch.
Mullen is working on a leg, looking for a takedown but White is defending well.
White turns his back and goes for a hip toss. It's a bit messy but it gets the job done and White manages to end up in side control.
Mullen sneaks back into half guard.
Mullen actively working from the bottom here.
White lands a big elbow from half guard. That looks like it's hurt Mullen quite badly. Mullen pulls White in close trying to recover. White postures up and lands two really hard shots that put Mullen on queer street! The ref takes a look and decides to call an end to the fight! Possibly an early stoppage but Mullen doesn't seem to be complaining too much.
Ladies and gentlemen, after 0:37 of round 1, we have a winner by way of TKO (Strikes). Darius White!
A less than humble Darius White misjudged his post fight interview somewhat and came across a little too arrogant whilst trying to hype up his own abilities.
|
|
|
|
|
|
|
|
|
|
|
|
|
|
|
|
|
|
|
|
|
|
|
| S |
C
A |
G |
S |
C
B |
G |
|
S |
C |
G |
|
energy
A | B |
|
hype
A | B |
|
pop
A | B |
|
mgr
A | B |
|
FIGHT
RATING
100% |
|
|
|
|
|
|
|
Undercard bout
|
Coming up we have a featherweight MMA rules bout between Jake Tyson (ranked 4989 p4p, 0 weight class) and Henry Gass (ranked 5119 p4p, 0 weight class). We have two fighters making their debuts here, so let's see who comes out of this one with their first professional victory.
 |
|
 |
| 160 cm
18
130 lbs
0 - 0 - 0 |
|
160 cm
23
145 lbs
0 - 0 - 0 |
BJJ Purple Belt
Brawler
Big heart |
|
BJJ White Belt
Excellent MT
Granite chin |
|
| |
|
Ladies and gentlemen. This fight is 3 rounds, in the featherweight division.
Introducing the fighter to my left, fighting out of the red corner.
With a record of
0 - 0 - 0, fighting out of Las Vegas, Jake Tyson!
And introducing the fighter to my right, fighting out of the blue corner.
With a record of
0 - 0 - 0, fighting out of Las Vegas, Henry Gass!
The judges for this bout are Chris Downing, Tiny Johnson and Daniel Franklin.
The bell rings for round one and we are underway!
Tyson shoots and misses
and Gass counters with a straight right hand.
Gass misses with a wild combination.
Tyson misses with a two punch combination.
Gass listening to his corner there, landing a nice uppercut.
Tyson tries to clinch but fails miserably
and Gass counters with a stiff right hand.
Gass connects with a single shot there.
Gass lands a nice shot to the body.
Tyson has his hands up protecting his head but a hook from Gass finds it's way round the side to connect with Tyson's head.
The crowd are loving this. Great action here.
Gass displays good takedown defense there as he swats away a double leg from Tyson.
Gass looked like he wanted to counter with a punch but didn't throw it.
Tyson tries a switch kick but it misses it's target.
That's one minute gone in the round.
Gass with a body punch. A glancing blow.
Tyson gets his takedown attempt stuffed easily
and Gass counters with a lovely straight right hand!
That's three failed takedown attempts in the round for Jake Tyson. That's going to take a lot out of him.
Gass scores with a shot to the body.
Gass should think about turning a few of those tyres round his middle into muscle if he wants people to take him seriously as an athlete.
Gass fakes low and throws an overhand right that catches Tyson on the side of the head.
Tyson looks to land a combination but Gass avoids it well.

Gass cracks Tyson with a big right hand that sends him to the floor! Tyson looks wobbly but he's sprung back up to his feet straight away
can Gass finish him?

Tyson is rocked!
Tyson is breathing heavily.
Wooooo! Give it up for these two warriors! They are putting on a show!
Gass lands with a nice body punch.
Oh Tyson is still all over the place! His legs are completely gone! Will he be able to recover?!!
Tyson darts in looking for a takedown but Gass gets double underhooks and turns Tyson into the cage.
Gass let fly with a counter punch to the body but it didn't land.
Tyson seems to have got his legs back now.
Tyson wants to clinch
and Gass counters with a shot to the ribs. That looked like it hurt.
That's two minutes gone in the round.
Gass throws a jab to the body, straight down the pipe. Boom. That sent Tyson stumbling backwards but he manages to regain his composure quickly.
Gass connects with a nice looking jab.
Gass drops Tyson with a beautiful combination! Tyson stares up at his opponent, who ushers him back to his feet - Gass is looking for the KO!

It looks like Jake Tyson has been cut.
Gass is landing a lot of head punches in this opening round! Tyson had better start moving his head a bit unless he wants his face to turn into pâté.
Tyson closes the distance but Gass moves to the side
and Gass counters with a stiff jab, followed by a cross and an uppercut! That's too much punishment for Tyson to take - he tumbles to the canvas, blood pouring from his nose, barely conscious. That's the end of the fight! Great knockout by Gass!
Ladies and gentlemen, after 2:30 of round 1, we have a winner by way of KO (Strikes). Henry Gass!
Henry Gass decided to thank the fans in attendance for making a great atmosphere. It seemed to go down pretty well.
|
|
|
|
|
|
|
|
|
|
|
|
|
|
|
|
|
|
|
|
|
|
|
| S |
C
A |
G |
S |
C
B |
G |
|
S |
C |
G |
|
energy
A | B |
|
hype
A | B |
|
pop
A | B |
|
mgr
A | B |
|
FIGHT
RATING
66% |
|
|
|
|
|
|
|
Undercard bout
|
Coming up we have a featherweight MMA rules bout between Simon Donaldson (ranked 4965 p4p, 381 weight class) and Solmorro Kente (ranked 5055 p4p, 0 weight class). Donaldson comes to the cage accompanied by Show Time . We have two fighters making their debuts here, so let's see who comes out of this one with their first professional victory.
 |
|
 |
| 179 cm
23
146 lbs
0 - 0 - 0 |
|
170 cm
23
153 lbs
0 - 0 - 0 |
BJJ White Belt
Solid boxing
Cuts easily |
|
BJJ White Belt
Excellent boxer
Granite chin |
|
| |
|
Ladies and gentlemen. This fight is 3 rounds, in the featherweight division.
Introducing the fighter to my left, fighting out of the red corner.
With a record of
0 - 0 - 0, fighting out of Las Vegas, Simon Donaldson!
And introducing the fighter to my right, fighting out of the blue corner.
With a record of
0 - 0 - 0, fighting out of Las Vegas, Solmorro Kente!
The judges for this bout are Gwen Towbar, Wesley Smith and Cecil Peabody.
The bell rings for round one and we are underway!
A combination from Kente does no damage.
Kente throws a series of punches but Donaldson moves out of range.
Jab from Kente.
Kente swings away but doesn't land with a series of punches.
Kente will need to tighten up his combinations if he doesn't want to gas himself out, swinging at thin air.
Kente throws a series of punches but Donaldson moves out of range.
Donaldson misses with a takedown
and Kente counters with a left and a right that stings Donaldson.
A combination from Kente does no damage.
Kente moves into range and throws a combination. A nice jab followed by a hook to the body.
This has been an exciting period of action!
Donaldson goes for a double leg but Kente avoids the attempt and the two fighters end up clinched against the cage as Kente continues to drive forward.
Kente throws a counter combo.
Some wild striking there from Kente.
Donaldson fails miserably with a takedown attempt.
That's three failed takedown attempts in the round for Simon Donaldson. That's going to take a lot out of him.
That's one minute gone in the round.
Kente lands a nice looking body shot.
Donaldson keeping a good distance there, avoiding the body shot.
Kente swinging wildly here.
Donaldson half commits to a counter takedown before pushing away, out of range.
Kente misses with a few strikes there.
Kente throws a hook to the body but it doesn't connect.
As Kente tries to get set, Donaldson tries to push him back and clinch up but Kente manages to avoid the attempt.
Kente swings for the body but Donaldson moves out of range.
Donaldson fails to land with a series of punches.
Kente lunges in with swinging rights and lefts but Donaldson circles away quickly and effectively.
Solmorro Kente is looking to keep the fight on the feet at all costs.
Donaldson fails with the takedown
and Kente counters with a three punch combination, finished off with a leg kick. Nice work.
Kente fails to land with a series of punches.
That's two minutes gone in the round.
Kente throws a left and a right that both miss
and Donaldson holds on and brings the fighters into a clinch.
Kente tries to break the clinch but Donaldson is controlling the position.
Kente working hard to break the clinch.
Donaldson has Kente pressed against the cage, preventing Kente from circling away and getting back to striking at range.
Kente is trying to break the clinch but Donaldson is controlling him.
Kente wants to break free. God knows he wants to breaaaak freeee.
Kente wants to push off and get back to the center of the mat but Donaldson has him pressed against the cage.
Kente wants to get back to striking at distance but Donaldson won't allow it.
Donaldson keeps control of Kente as he tries to wriggle out of the double underhooks.
Donaldson is working for a takedown up against the cage. He can't get it on this occasion though.
Kente wants to break free but Donaldson has control.
Donaldson keeps the fight in the clinch, despite Kente's efforts to push away.
Kente wants to push off and get back to the center of the mat but Donaldson has him pressed against the cage.
That's three minutes gone in the round.
Donaldson has Kente pressed against the cage, preventing Kente from circling away and getting back to striking at range.
Donaldson has Kente pressed up against the cage and is working for takedown. Kente manages to improve position though and keeps the fight standing.
Kente tries to break the clinch but Donaldson is controlling the position.
Kente tries to break the clinch but Donaldson is controlling the position.

Kente escapes the clinch and we're back to striking.
Donaldson shoots in for a takedown! He's got it and he's managed to land in side control! That's better than Donaldson was expecting from the takedown attempt, I'm sure!

Kente sneaks out the side door and pushes Donaldson away - he's back to his feet. The crowd show their appreciation for the escape.
Donaldson looks for a takedown here. Will he get it? Kente is fending him off so far but Donaldson persists. Nope, Kente circles away and we're back to standing.
Donaldson is breathing heavily.
Kente misses with a wild combination.
No luck with that takedown attempt from Donaldson.
That's four minutes gone in the round.
Donaldson dodges the punch combination from Kente.
Donaldson attempts a counter takedown but Kente avoids it well and moves away.
We've seen a great period of action over the last minute or so - credit to both fighters for going all out!
Donaldson shoots in but doesn't get the takedown
and Kente counters with a one-two to the body.
Some wild striking there from Kente.
Kente scores with a crisp jab that stopped Donaldson in his tracks.
Donaldson takes a punch right to his stomach. That took the wind out of him momentarily.
Kente connects with the punch.
Donaldson dodges the punch combination from Kente.
Donaldson drops down looking for a counter takedown but Kente sprawls and moves away.
And thats the end of the round the fighters go back to their corners.
Solmorro Kente dominated that round.
OK. That's time! The bell goes and we're back to the action.
Kente misses with a double jab.
Kente misses with a series of wild punches.
Donaldson is trying to close the distance and clinch up, after that failed offence from Kente.
Kente throws a series of punches but Donaldson moves out of range.
Kente will need to tighten up his combinations if he doesn't want to gas himself out, swinging at thin air.
It looked like Donaldson wanted to counter with a hook but didn't fully commit.
Donaldson swings away but doesn't land with a series of punches.
Donaldson has his head slapped from side to side by a 3 punch combination. That must have hurt him.
Kente is throwing a lot of body shots here, looking to wear down Donaldson rather than just go for the knockout.
Kente throws a combination that misses
and Donaldson counters with a three punch combo that has Kente backing up. Kente nods at Donaldson to acknowledge the strikes.
Kente throws a combination but it was largely blocked by Donaldson.
Donaldson tries to counter with a takedown but Kente is quick to defend against it.
Kente scores with a hook to the body. Donaldson takes a step back and tries to catch his breath.
Fantastic stuff here - a very entertaining period of action, which has drawn cheers from the crowd.
Kente misses with a double jab
and Donaldson counters with a shoot takedown. Kente fights it but they end up in guard.
Kente is breathing heavily.
That's one minute gone in the round.
Donaldson throwing strikes from guard but Kente blocks nicely.
The ref warns both fighters not to hold the cage as they work up against the meshing.
Kente wants to stand but Donaldson is controlling the position.
Kente has been the more effective fighter overall so far.
Donaldson makes a bit of distance and scores with some ground and pound, still in guard.
We get told so often about how wrestlers don't like to be on their backs. Let's see if Kente can do anything to dispel that myth.
Donaldson engaging in some classic timewasting tactics.
Kente is looking to stand up but Donaldson isn't so interested in that idea.
Donaldson has been looking to land a fair amount of strikes on the ground. He might be looking to soften his opponent up in order to work for a submission.
Kente preventing the ground and pound from doing any damage.
Donaldson prevents Kente from getting back to his feet.
Kente kicks Donaldson off and gets to his feet.
Donaldson takes one on the chin but seems OK.
That's two minutes gone in the round.
Donaldson dodges the punch combination from Kente.
Donaldson tries to counter with a takedown but Kente is quick to defend against it.
No joy there for Kente, who threw a few shots but didn't land.
A swing and a miss from Kente.
Donaldson appears to be looking for a counter takedown.
Left hook, right uppercut from Kente.
Kente ducks right into an uppercut from Donaldson.
The fans in attendance giving it up for the two fighters, who have really let it all hang out in the last minute or so!
Donaldson tries for a takedown but Kente sees it coming a mile off and avoids it easily.
Kente misses with a double jab.
Kente scores with a one two! Donaldson had his feet all tangled up there and couldn't avoid the strikes.
Kente throws a series of strikes that have Donaldson backpedaling.
Kente scores with a one two! Donaldson had his feet all tangled up there and couldn't avoid the strikes.
Solmorro Kente seems to be getting the better of the standup.
No luck with that takedown attempt from Donaldson.
That's three minutes gone in the round.
Kente lunges in with swinging rights and lefts but Donaldson circles away quickly and effectively.
Donaldson changes levels and looks for a double leg takedown. Kente tries to avoid it but Donaldson manages to keep hold of a leg and drag Kente to the ground. Kente escapes though and pops straight back up to his feet.
That's three failed takedown attempts in the round for Simon Donaldson. That's going to take a lot out of him.
Kente works Donaldson's body with a nice hook.
Kente looks to land a combination. Donaldson sees it coming but can only parry a couple of the shots.
Kente lands with a shot to the body.
Kente lands a straight punch to the body, keeping Donaldson at a distance.
Kente lands an overhand left. A wild punch that just about connected.
Kente throws a two punch combo that lands nicely.
Kente works Donaldson's body with a nice hook.
Simon Donaldson is looking to throw some combinations by the looks of things.
This has been an exciting period of action!
Kente moves into range and throws a lovely three punch combination.
Kente swinging wildly here.
That's four minutes gone in the round.
Donaldson shoots in but no luck this time.
Kente misses with a series of wild punches.
Donaldson drops down looking for a counter takedown but Kente sprawls and moves away.
Donaldson slips a jab and a cross from Kente.
Kente looks to land a combination but Donaldson avoids it well.
Kente misses with a two punch combination.
Donaldson shoots for a takedown but Kente saw that one coming a mile off and avoided it easily.
Kente thuds a left hand into Donaldson's body.
Kente throws a one two combo.
The crowd applaud the fighters' efforts here as the round comes to an end.
Kente lands a jab to the head.
Donaldson showing good head movement there, avoiding the strikes from Kente.
Donaldson tries to counter with a takedown but Kente is quick to defend against it.
And thats the end of the round the fighters go back to their corners.
Solmorro Kente showed his class in that round. I'd imagine he'll take it on all the scorecards.
The fighters' corners scream their final instructions, as the referee calls time. Here we go, back to the action! This is the final round!

Kente displaying good standup as he scores with a three punch combination.
Donaldson shoots in for a takedown but Kente shows good takedown defense.
Kente throws a jab, cross combination which is slipped
and Donaldson counters into the clinch. Nicely done.
Kente wants to break the clinch but can't.
Donaldson keeps control of Kente as he tries to wriggle out of the double underhooks.
Kente wants to get back to striking at distance but Donaldson won't allow it.
Donaldson goes for a takedown attempt but Kente pushes him away and we're back to fighting at a distance.
We've had a slow start to the round here - hopefully the action picks up.
Kente throws a series of punches but Donaldson moves out of range.
Nice body punch from Kente.
Kente misses with a jab and misses with a cross straight after too.
Both fighters are breathing heavily.
Kente throws a series of punches but Donaldson moves out of range.
Kente misses with a two punch combination.
That's one minute gone in the round.
Kente scores with a one two! Donaldson had his feet all tangled up there and couldn't avoid the strikes.
Some wild striking there from Kente.
Donaldson tries to counter with a takedown but Kente is quick to defend against it.
Kente tries to land with a swinging hook to the body but Donaldson was well out of range. Poor timing from Kente.
Kente looks to land a combination. Donaldson sees it coming but can only parry a couple of the shots.
Donaldson avoids a punch combination nicely.
Donaldson darts in looking for a takedown but Kente gets double underhooks and turns Donaldson into the cage.
That's three failed takedown attempts in the round for Simon Donaldson. That's going to take a lot out of him.
Kente lands with a shot to the body.
Kente lands a two punch combo.
Kente misses with a body punch
and Donaldson counters with a two punch combo.
That's two minutes gone in the round.
The crowd cheering loudly, showing their appreciation for the quality fight we're seeing here.
Kente looks to land a combination but Donaldson avoids it well.
Kente throws a nice looking combination but Donaldson bobs and weaves to avoid any damage.
Kente tries to keep at a distance but Donaldson has taken the fight into the clinch.
Kente wants to break free but Donaldson has control.
Kente is trying to break the clinch but Donaldson is controlling him.
Nice body punch from Donaldson.
Kente is trying to break the clinch but Donaldson has him pressed against the cage.
Donaldson pushes off and circles away, back to the middle of the mat.
Donaldson keeping a good distance there, avoiding the body shot.
Kente tries to bum rush Donaldson with a series of wild strikes but Donaldson uses good footwork to avoid the assault.
Donaldson looks like he's developed a pretty tasty lump over his left eye. He'll need to avoid taking much more damage to that.
A shot to the liver by Kente. Beautiful body shot.
That's three minutes gone in the round.
Donaldson takes a punch to the jaw and another one to the bread basket.
Kente misses with a two punch combination.
Solmorro Kente seems to be the more aggressive standup fighter in this bout.
Donaldson slips a jab and a cross from Kente.
Kente throws a jab when Donaldson was well out of range.
Kente will need to tighten up his combinations if he doesn't want to gas himself out, swinging at thin air.
Donaldson tries to counter by clinching up but Kente breaks away and moves out of range.
Solmorro Kente is fighting for a decision here - he's started to take the cautious approach.
Donaldson shoots for a double leg takedown but Kente sprawls well. He's pushed Donaldson's face into the mat and manages to get back to his feet relatively easily.
Kente scores with a nice looking left hook and follows it up with an uppercut!
Kente is working the combinations to good effect here.
Kente scores with a three punch combo!
Kente misses with a straight right.
Donaldson shoots in and drives through. Kente sprawls well.
That's four minutes gone in the round.
Donaldson dodges the punch combination from Kente.
We've seen a great period of action over the last minute or so - credit to both fighters for going all out!
Kente misses with the combination.
Donaldson appears to be looking for a counter takedown.
Kente swings away but doesn't land with a series of punches.
Donaldson showing good head movement there, avoiding the strikes from Kente.
Simon Donaldson has stepped it up - he knows he needs a finish here!
Kente closes the distance and lands a one-two.
Kente throws a wild combination but nothing lands.
Kente's corner calls for a 1, 2 combination and Kente duly obliges.
Jab, cross, leg kick. Nice combination by Kente!
And that's the end of the fight!
Solmorro Kente comfortably won the final round on my scorecard.
I've got Kente winning every round here. Surely the decision will go his way and he'll pick up a well deserved decision victory. Over to the ring announcer for the scorecards.
Ladies and gentlemen, after 3 rounds of action, we go to the scorecards for a decision.
Judge Gwen Towbar scores the fight for Solmorro Kente!
Judge Wesley Smith scores the fight for Solmorro Kente!
Judge Cecil Peabody scores the fight for Solmorro Kente!
Solmorro Kente wins by unanimous decision!
In defeat, Simon Donaldson stepped up to the mic, saying 'Shoot I blew it this time!'.
|
|
|
|
|
|
|
|
|
|
|
|
|
|
|
|
|
|
|
|
|
|
|
| S |
C
A |
G |
S |
C
B |
G |
|
S |
C |
G |
|
energy
A | B |
|
hype
A | B |
|
pop
A | B |
|
mgr
A | B |
|
FIGHT
RATING
70% |
|
|
|
|
|
|
|
Co-main event
|
Coming up we have a featherweight MMA rules bout between Avery Paul (ranked 2895 p4p, 0 weight class) and Kribbson Urmago (ranked 5098 p4p, 0 weight class). We have two fighters making their debuts here, so let's see who comes out of this one with their first professional victory.
 |
|
 |
| 169 cm
18
139 lbs
0 - 0 - 0 |
|
175 cm
23
154 lbs
0 - 0 - 0 |
BJJ Blue Belt
Brawler
Cuts easily |
|
Good wrestler
Basic striking
Likes musicals |
|
| |
|
Ladies and gentlemen. This fight is 3 rounds, in the featherweight division.
Introducing the fighter to my left, fighting out of the red corner.
With a record of
0 - 0 - 0, fighting out of Las Vegas, Avery Paul!
And introducing the fighter to my right, fighting out of the blue corner.
With a record of
0 - 0 - 0, fighting out of Las Vegas, Kribbson Urmago!
The judges for this bout are Alan Glass, Daniel Franklin and Wesley Smith.
The bell rings for round one and we are underway!
Paul scores with a one two! Urmago had his feet all tangled up there and couldn't avoid the strikes.

Paul gets taken down but at least he's managed to land in guard.
Urmago is stalling in the full guard.
Urmago wants to control from the top but Paul keeps moving.
Paul working the defensive guard well to avoid strikes from Urmago.
Urmago is working Paul over from the guard. He should look to pass the guard and do a little more damage with these strikes.
Paul keeping moving, preventing Urmago from controlling successfully.
We've had a slow start to the round here - hopefully the action picks up.
Urmago is taking a break and basically stalling. The referee will not allow him to do that for long.
Paul manages to sweep nicely, so he's now on top. Urmago manages to get himself to full guard.

That's one minute gone in the round.
Paul is looking to work some ground and pound but Urmago has wrist control.
Paul preventing the sweep.
Paul throwing elbows and punches but not connecting, as Urmago works some decent striking defense from the bottom.
We get told so often about how wrestlers don't like to be on their backs. Let's see if Urmago can do anything to dispel that myth.
Paul stands up out of Urmago's guard for a moment - Urmago manages to land a nice upkick.
Paul wanted to stand there but Urmago had control of the position.
Urmago wants to get back to his feet but Paul is in a dominant position and won't allow it.
Urmago thows some rabbit punches from the bottom but they don't do any damage.
Urmago is trying to control the position but Paul postures up.
Urmago throws some sloppy strikes off his back.
That's two minutes gone in the round.
Well. There's a bit of a lull in the action here and the crowd are starting to get restless.
Urmago scores with a nice shot.
Urmago is working the butterfly guard. He manages to land a nice scissor sweep and is now in half guard on the top. Nice move.
Paul is looking for a sweep. Urmago is wise to his cunning plan and keeps the top position.
Urmago is controlling the pace.
The fighters are starting to get a bit slippery now, which will make submissions a bit more difficult.
Urmago lands with a punch from half guard.
Urmago lands a big shot. The thud that echoes around the arena is like music to the fans' ears.
Paul taking some punishment here, with Urmago in his half guard.
Urmago is taking a breather. Paul says something to him but it's hard to make out. Perhaps he's telling him to get on with it and actually do something.
Ground and pound from Urmago.
That's three minutes gone in the round.
Urmago scoring with strikes to the body and head.
Urmago lands with an elbow from half guard - that looked like it hurt.
Urmago tries to pass to full mount but Paul defends it.
Urmago looks towards his corner to check for any instructions. The corner give him nothing to work with, so he cracks Paul with a short hammerfist. I guess that's as good as any advice he could get in this position.
Urmago slips a nice elbow through Paul's hands, connecting with Paul's forehead.
Well, if Urmago is going to just lie there, perhaps we should talk about what we're having for dinner tonight
I'm having a ham and pineapple pizza
Yum. Can't wait.
Urmago seems very keen to just sit and control from half guard but Paul does not like that idea so much and is remaining active off his back.
Urmago working over Paul with some ground and pound. Paul looks like he wants out of this position, which is understandable.
Paul is trying to defend against the ground and pound but Urmago scores with a couple of nice shots.
That's four minutes gone in the round.
Urmago working the head and body with strikes.
Urmago scores with a couple of good hammerfists.
The ref warns both fighters not to hold the cage as they work up against the meshing.
Paul is breathing heavily.
Urmago is trying a forearm choke
I don't think that's going to do much at this level of the game.
Paul trying to control but Urmago postures up.
Urmago content to sit in half guard and control for a moment.
Urmago working some ground and pound from close in. He's looking to maintain this position and strike for a while by the looks of things... although he'll probably advance to full mount in a minute now I've said that.
The crowd thankful this round is nearly over.
Urmago looks to score some points with some ground and pound.
Urmago is trying to work for a kimura but Paul is defending well.
And thats the end of the round the fighters go back to their corners.
Kribbson Urmago dominated that round.
The minute break is over - no more time for sponges and pep talks - back to the action!
Urmago gets the takedown into side control.
Paul tries to bench press Urmago off him but Urmago keeps the position.
The fighters are pressed up against the cage, both looking to find a bit of space to work.
Paul can't do much from the bottom here.
Urmago working the ground and pound from side control.
Urmago in side control lands a nice looking series of punches and elbows.
Urmago lands a knee to the body and follows it up with some ground and pound to the head. That will wear Paul down.
Urmago thinks about going for a far side armbar but bails out and retains the dominant position instead.
Kribbson Urmago has got the better of the ground game so far.
We've had a slow start to the round here - hopefully the action picks up.
Paul takes a big shot right to the temple there but he's taken it well.
Paul is rocked!
Urmago works to advance to full mount. Paul defends for a few seconds but eventually he succumbs.
Oh Paul is still in real trouble! Will he be able to recover?!!
Urmago pausing momentarily but resumes with a couple of decent strikes that do a bit of damage.
Wooooo! Give it up for these two warriors! They are putting on a show!
Urmago fakes a shot to the body and cracks his opponent in the head. Nice ground and pound there!
Both fighters are absolutely exhausted here.
Urmago postures up and connects with a big shot that has rocked Paul badly. He's trying desperately to grab hold of Urmago around the waist but Urmago pushes him off and unloads with more strikes, forcing the referee to jump in and save him! Urmago is the winner by TKO! Urmago jumps onto the cage and shouts into the camera. "We did it momma!"
Ladies and gentlemen, after 1:55 of round 2, we have a winner by way of TKO (Strikes). Kribbson Urmago!
During a confident post fight interview, Kribbson Urmago thanked all his fans. He seemed very genuine when describing how motivated his fans keep him.
|
|
|
|
|
|
|
|
|
|
|
|
|
|
|
|
|
|
|
|
|
|
|
| S |
C
A |
G |
S |
C
B |
G |
|
S |
C |
G |
|
energy
A | B |
|
hype
A | B |
|
pop
A | B |
|
mgr
A | B |
|
FIGHT
RATING
42% |
|
|
|
|
|
|
|
Main event
|
Coming up we have a featherweight MMA rules bout between Danny Mullen (ranked 5127 p4p, 0 weight class) and Mike Rolando (ranked 5054 p4p, 383 weight class). We have two fighters making their debuts here, so let's see who comes out of this one with their first professional victory.
 |
|
 |
| 178 cm
23
148 lbs
0 - 0 - 0 |
|
175 cm
23
150 lbs
0 - 0 - 0 |
BJJ White Belt
Excellent boxer
Self confident |
|
BJJ Blue Belt
Excellent boxer
Granite chin |
|
| |
|
Ladies and gentlemen. This fight is 3 rounds, in the featherweight division.
Introducing the fighter to my left, fighting out of the red corner.
With a record of
0 - 0 - 0, fighting out of Las Vegas, Danny Mullen!
And introducing the fighter to my right, fighting out of the blue corner.
With a record of
0 - 0 - 0, fighting out of Las Vegas, Mike Rolando!
The judges for this bout are Gwen Towbar, Wesley Smith and Chris Downing.
The bell rings for round one and we are underway!
Rolando slips a jab and a cross from Mullen.
Donk. Mullen catches Rolando right on the button with a cross.
It looks like Mike Rolando has been cut.
Rolando looks to land a combination but Mullen avoids it well.
Mullen forces Rolando back against the cage and clinches.
Rolando is trying to pull guard but being pressed up against the cage enables Mullen to keep the fight standing.
Mullen breaks the clinch and we're back to striking at distance.
Mullen throws out a token jab with nothing on it.
Rolando throws a series of punches but Mullen avoids them all with ease.
Rolando listening to his corner there, landing a nice uppercut.
Mullen avoids the body shot from Rolando.
Rolando gets his head snapped back by a nice shot there.
Mullen lands with a cross to side of his opponent's head.
Wooooo! Give it up for these two warriors! They are putting on a show!
Mullen clinches.
Rolando tries to pull guard but Mullen holds him up against the cage and eventually Rolando drops back down to his feet.
Mullen turns his hips and lands a very nice judo throw into side control!
You can see the frustration on Rolando's face, being in this tough position on the bottom.
That's one minute gone in the round.
Rolando tries to work a leg under to get back to half guard but Mullen wriggles his own leg back out and remains in side control.
Rolando tries to control the position but he's not in luck - Mullen easily slips into full mount!

Mullen is standing up out of mount! Strange tactic there - he must really want this one on the feet!
Rolando throws a hook to the side of Mullen's head but Mullen sees it coming and ducks under it beautifully.
Mullen has closed the distance and engaged Rolando in a clinch.
Rolando is trying to pull guard but being pressed up against the cage enables Mullen to keep the fight standing.
Danny Mullen has stuffed three takedown attempts in the round now. That's going to take a lot out of Mike Rolando.
Mullen manages to pull guard.
Mullen wants to stand and escape but Rolando is having none of it.

Mullen is scooting his butt against the cage and has managed to get back to his feet. Rolando presses him back against the cage, presumably looking to take the fight back to the mat.
Mullen has clasped his hands together around Rolando's back... aaand, he's got a takedown into side control. Nicely done.
Rolando struggling a bit here.
That's two minutes gone in the round.
This is a great period of action - very entertaining stuff!
Rolando gets back to half guard.
Rolando looking to work for a kimura from the bottom.
Rolando is trying to maintain the position but Mullen is very close to passing his half guard.
Rolando looking to work for a kimura from the bottom.
That's three minutes gone in the round.
Mullen decides he's had enough of the ground and stands up.
Rolando takes one on the chin but seems OK.
Sloppy strikes from Rolando. Those never looked like landing.
Rolando thuds a left hand into Mullen's body.
Rolando throws a combination but comes up with nothing but fresh air.
Mullen gets a clinch.
Mullen's corner calls for him to break the clinch, which he does.
Mullen has closed the distance and engaged Rolando in a clinch.
Mullen ties up his opponent against the cage and manages to drag the fight down to the ground. Mullen no doubt will be looking to work submissions from his guard.

Rolando stands up and waves to Mullen to follow him.
That's four minutes gone in the round.
Mullen lands a powerful looking uppercut that connected with his opponent's jaw.
This is a great period of action - very entertaining stuff!
Rolando tries to keep at a distance but Mullen has taken the fight into the clinch.
Mullen turns his hips and lands a very nice judo throw into side control!
Rolando trying to control but Mullen flips him over like a cheap hooker and has his back!
Mullen decides to stand up, even though he's got his opponent's back.
Mullen misses with a hook
letting Rolando counter with a right hand.
A nice combination there by Rolando.
Rolando connects with a lovely right hand, straight down the pipe.
Rolando misses with a double jab.
Mullen slips a jab and a cross from Rolando.
Mullen misses with a double jab
and Rolando counters with a left and a right that stings Mullen.
Rolando looks to score with a combo but nothing lands.
And thats the end of the round the fighters go back to their corners.
Danny Mullen dominated that round.
The cut man is working on Mike Rolando's cut.
The corners get their ten second warning. Both fighters stand from their stools and stare eachother down, ready to get back to the action.
Rolando lands a slapping body shot.
Rolando scores with a jab to the jaw.
Mullen misses with a straight right.
Rolando scores with a sloppy punch to the body. Not much technique there but it did the business.
Rolando on the wrong end of a decent looking cross there.
Mullen takes the fight into the clinch.
Mullen works for the underhooks and manages to get a trip takedown into guard.
Rolando trying to keep a closed guard but Mullen is proving a slippery customer.
Mullen gets to his feet. Rolando looking to butt scoot but the ref puts an end to that. On your feet son!
A swing and a miss from Mullen.
That's one minute gone in the round.
Rolando throws a right and a left that both miss.
Mullen moves into the clinch.
Mullen breaks from the clinch.
Rolando steps to the side to avoid the strikes from Mullen.
Mullen connects with a jab.
Mullen gets to the clinch - let's see what his plan is here.
Rolando is trying to pull guard but Mullen turns him against the cage and we stay in the clinch.
Mullen escapes the clinch and we're back to striking.
Rolando misses with the combination.
Mullen lands an overhand right.
That has opened up Mike Rolando's cut even more.
Mullen is really dominating this fight. Is there anything that Rolando can do to turn this around?
Mullen rushes Rolando and pushes him back against the cage in a clinch.
Mullen's corner calls for him to break the clinch, which he does.
Nice body punch from Rolando.
The crowd cheering loudly, showing their appreciation for the quality fight we're seeing here.
Mullen clinches up with Rolando and pushes him back against the cage.
That's two minutes gone in the round.
Mullen pushes off and circles away, back to the middle of the mat.
Mullen clinches up with Rolando and pushes him back against the cage.
Rolando is trying to pull guard but Mullen has him pressed against the cage.
Rolando tries to pull guard but Mullen won't allow it.
Danny Mullen has stuffed three takedown attempts in the round now. That's going to take a lot out of Mike Rolando.
Mullen has dropped down and is working for a takedown. Rolando is trying to keep an underhook but Mullen manages to get the takedown into half guard.
Rolando trying to hold on to Mullen's head to control him but Mullen postures up.
Rolando is trying to control but Mullen passes into side control!
You can see the frustration on Rolando's face, being in this tough position on the bottom.
That's three minutes gone in the round.
Rolando is looking for a sweep.
Rolando can't do much from the bottom here.
Rolando gets back to half guard.
Mullen decides to stand and escape the position.
Mullen has taken the fight to the clinch.
Rolando jumps guard but Mullen turns him against the cage and keeps the fight standing.
Mullen works for the underhooks and manages to get a trip takedown into guard.
Mullen would like to get this fight back to the feet but can't get free from the closed guard.
That's four minutes gone in the round.
Rolando looking for a guillotine here but Mullen defends easily.
Rolando has a loose triangle. He'll be looking to tighten that up but Mullen can see exactly what he's planning and manages to posture up and free himself.
Rolando working away from the bottom but not quite defensive enough there because Mullen has passed into half guard!
And thats the end of the round the fighters go back to their corners.
Danny Mullen dominated that second round.
The cut man is working on Mike Rolando's cut.
OK. That's time! The bell goes and we're back to the action. The crowd applaud as we get ready to start the final round!
Mullen rushes Rolando and presses him up against the cage.
Rolando tries to pull guard but Mullen forces him back to his feet, against the cage.
Rolando jumps guard but Mullen turns him against the cage and keeps the fight standing.
Rolando is trying to pull guard but Mullen has him pressed against the cage.
Danny Mullen has stuffed three takedown attempts in the round now. That's going to take a lot out of Mike Rolando.
Rolando fails to pull the fight into his guard.
Rolando is trying to pull guard but Mullen turns him against the cage and we stay in the clinch.
Mullen throws a knee to the head but misses.
Mullen has Rolando pressed up against the cage. He's trying to work for a single leg takedown. Mullen pulls back from the cage and twists to the side, sending Rolando tumbling to the mat - Mullen dives into Rolando's guard.
Rolando looking for submissions from the bottom here. Moving his hips around, possibly looking for an armbar.
We've had a slow start to the round here - hopefully the action picks up.
Rolando is working an open guard so Mullen takes the opportunity to get back to his feet.
That's one minute gone in the round.
Mullen gets to the clinch - let's see what his plan is here.
A left hand lands to the body for Mullen.
Rolando is trying to pull guard but being pressed up against the cage enables Mullen to keep the fight standing.
A right handed body shot lands from Mullen.
Mullen pulls guard effortlessly.
Mullen pushes Rolando off and gets back to his feet.
Rolando's jab looks to have found its range, popping Mullen under the eye.
Rolando falls off balance throwing a combination
and Rolando takes a counter punch right on the button for his troubles.
Danny Mullen seems to be the more aggressive standup fighter in this bout.
Rolando goes to the watering hole and comes back with a big thumbs up from the judges as he scores a three punch combo.
The crowd cheering loudly, showing their appreciation for the quality fight we're seeing here.
Mullen gets in close and instigates a clinch.
Rolando tries to pull guard but can't drag his opponent to the mat. Mullen just stands there and leans against the cage.
That's two minutes gone in the round.
Mullen has managed to pull guard. Let's see whether he can work an aggressive guard. It will also be interesting to see what tactics Rolando uses from the top position.
Mullen pushes Rolando off for just long enough to get back to his feet. Very athletic spring there.
Rolando rushes forward with a series of wild hooks but Mullen moves out of range and avoids them all easily.
Rolando ducks down and throws a hook to the body.
A combination from Rolando does no damage.
Rolando takes a big intake of breath there - he's definitely tired.
Rolando falls off balance throwing a combination
and Mullen counters with a left and a right that stings Rolando.
Rolando throws a combination but comes up with nothing but fresh air.
Mike Rolando has stepped it up - he knows he needs a finish here!
Mullen gets to the clinch - let's see what his plan is here.
Mullen tries to land knees in the clinch but Rolando avoids the damage to the body.
Mullen decides to pull guard.
Mullen pushes Rolando off and scrambles back to his feet.
Mullen with a hook.
Mullen with a nice cross.
Rolando throws a jab, cross combination which is slipped
and Mullen counters with a lovely straight right hand!
That's three minutes gone in the round.
Rolando throws a right and a left that both miss.
Rolando takes an uppercut right on the button but keeps his composure.
Mullen gets in close and instigates a clinch.
Rolando tries to pull guard but Mullen forces him back to his feet, against the cage.
Rolando tries to take the fight to the ground by pulling guard but can't manage it.
Rolando tries to pull guard but can't drag his opponent to the mat. Mullen just stands there and leans against the cage.
Mullen misses with an elbow over the top.
Mullen breaks from the clinch.
Mullen dips to his left and cracks Rolando with an uppercut!
Mullen gets a clinch.
Rolando is trying to pull guard but Mullen turns him against the cage and we stay in the clinch.
Mullen blocks a body shot from Rolando.
Mullen breaks the clinch and we're back to striking at distance.
Mullen showing good head movement there, avoiding the strikes from Rolando.
That's four minutes gone in the round.
Mullen has taken the fight to the clinch.
Mullen drags the fight down to the ground.
The crowd cheering loudly, showing their appreciation for the quality fight we're seeing here.
Rolando drops back looking for a submission - "I'm sorry sir, but I'm gunna break your leg" says Rolando as he cranks on the unfortunate limb! Mullen screams and taps out before any major damage is done! Don't mess with Rolando! Nice submission victory there!
Ladies and gentlemen, after 4:33 of round 3, we have a winner by way of Submission (Kneebar). Mike Rolando!
|
|
|
|
|
|
|
|
|
|
|
|
|
|
|
|
|
|
|
|
|
|
|
| S |
C
A |
G |
S |
C
B |
G |
|
S |
C |
G |
|
energy
A | B |
|
hype
A | B |
|
pop
A | B |
|
mgr
A | B |
|
FIGHT
RATING
85% |
|
|
|
|
|
|
|
|
|
|

