 |
Kings 16: Mongrel vs Gouging PBP Commentary |
Undercard bout
|
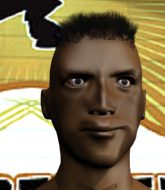
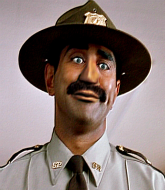
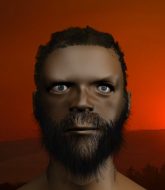
Coming up we have a welterweight MMA rules bout between Leon Edvard (ranked 8032 p4p, 686 weight class) and Joe Gilligan (ranked 25810 p4p, 736 weight class). The key to victory for Leon Edvard has got to be keeping the fight on the feet.
 |
|
 |
| 182 cm
22
170 lbs
0 - 2 - 0 |
|
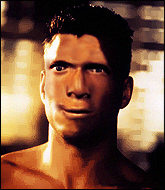
180 cm
25
175 lbs
0 - 2 - 0 |
BJJ White Belt
Great elbows
Very quick |
|
Decent wrestler
Good low kicks
Powerful |
|
| |
|
Ladies and gentlemen. This fight is 3 rounds, in the welterweight division.
Introducing the fighter to my left, fighting out of the red corner.
With a record of
0 - 2 - 0, fighting out of The Island, Leon Edvard!
And introducing the fighter to my right, fighting out of the blue corner.
With a record of
0 - 2 - 0, fighting out of The Island, Joe Gilligan!
The judges for this bout are Santiago Holmes, Daniel Franklin and Michael Johnstone.

The bell rings for round one and we are underway!
Gilligan looking to land some kicks to the body here.
Edvard misses with a takedown attempt

and Gilligan holds on and brings the fighters into a clinch.
Edvard misses with an elbow over the top.
Edvard has been working on his balance at Island Training Centre, so perhaps that has help him stuff some of the takedown attempts by Gilligan.
Gilligan has Edvard pressed against the cage, preventing Edvard from circling away and getting back to striking at range.
Gilligan with an attempt at a knee that misses.
Edvard looks to throw an elbow but misses.
Edvard is trying to pull guard but Gilligan turns him against the cage and we stay in the clinch.
Gilligan with a knee to the head.

It looks like Leon Edvard has been cut.
Gilligan with a knee to the head.
Gilligan misses with a knee strike.
Gilligan with a knee to the head.
Edvard is breathing heavily.
Edvard takes a knee to the side of the body.
Gilligan throws a vicious knee straight up the middle but Edvard blocks it with crossed arms.
Gilligan throws a knee to the head but misses.
Gilligan looks more muscular than last time we saw him. He must have been on the weights.
Wooooo! Give it up for these two warriors! They are putting on a show!
Gilligan tries to land a knee to the head but Edvard blocks with his arms.
Gilligan with the Thai clinch. He's looking to land a big knee but he's not managed it this time.
Gilligan tries a knee to the head but he's missed.
Gilligan lands a knee to the head there! That was nasty!
Gilligan unloads a knee to the mid-section.
Gilligan stalls.

That's one minute gone in the round.
A knee to the head by Gilligan.
Gilligan lands a knee to the body.
Gilligan lands a knee to the head.
Gilligan scores a nice knee to the body.
Gilligan with a knee to the head.
Gilligan landing knees to the body.
Knees to the body from Gilligan.
Gilligan lands a good knee to the midsection. Edvard won't want to take too many of those.
A knee to the head by Gilligan.
The crowd are loving this. Great action here.
A knee to the head by Gilligan.
Gilligan throws a vicious knee straight up the middle but Edvard blocks it with crossed arms.
Edvard jumps guard but Gilligan turns him against the cage and keeps the fight standing.
That's three failed takedown attempts in the round for Leon Edvard. That's going to take a lot out of him.
Gilligan with an attempt at a knee that misses.
Gilligan landing knees to the body.
Gilligan tries to land knees in the clinch but Edvard avoids the damage to the body.

That's two minutes gone in the round.
Edvard tries to land a knee to the head but Gilligan blocks with his arms.
Edvard wants to break free but Gilligan has control.
Gilligan trying to land knees to the body.
Edvard with the Thai clinch. He's looking to land a big knee but he's not managed it this time.
Edvard misses with a hook to the ribs.
Gilligan trying to land knees to the body.
Edvard misses with a short punch on the inside.
Gilligan connects with a knee to the head.
Gilligan tries to land a knee to the head but Edvard blocks with his arms.
Edvard fails to pull guard.
Gilligan with the Thai clinch. He's looking to land a big knee but he's not managed it this time.
Edvard managing to block the knees to the body from Gilligan.
Gilligan tries to land a knee to the head but misses.
Edvard on the defensive, avoiding the knees to the body.
Gilligan with the Thai clinch. He's looking to land a big knee but he's not managed it this time.
Gilligan blocking some punches.
Edvard tries to pull guard but Gilligan forces him back to his feet, against the cage.

That's three minutes gone in the round.
Gilligan tries a knee to the head but he's missed.

Edvard has managed to pull guard. Let's see whether he can work an aggressive guard. It will also be interesting to see what tactics Gilligan uses from the top position.
Edvard keeping moving, preventing Gilligan from controlling successfully.

Gilligan stands and steps away. Edvard gets to his feet too and we're back to the striking game.
A good leg kick by Gilligan.
Edvard tries to clinch up against the cage, rushing in to close the distance. Gilligan manages to break the clinch and circles back to the middle of the mat.
Edvard digs a good hook to Gilligan's body.
That kick from Gilligan tenderised Edvard's leg. Edvard is trying to keep his angry face on.
Gilligan tries to move into range but Edvard moves to the side and lands with a nice right hand.
Gilligan thows a leg kick but Edvard checks it
and Edvard counters with a series of strikes. Gilligan will be more careful next time no doubt.
Gilligan swats away the attempt to clinch by Edvard.

That's four minutes gone in the round.
Edvard moves in looking to clinch but Gilligan pushes him off.
Edvard tries to grapple but his opponent circles
and Gilligan makes him pay by landing a thudding low kick.
Edvard wants to clinch up but Gilligan keeps it at a distance.
Edvard misses with a double jab.
Gilligan tries a quick counter leg kick but Edvard is wise to it.
This is a great period of action - very entertaining stuff!
Gilligan throws a low kick but Edvard moves out of range easily.
Gilligan circles away from the clinch attempt.
Gilligan lets loose with a powerful body kick. Edvard will feel that in the morning.
Gilligan looking to throw a kick but he's pulled out of it.
Gilligan buckles his opponent's knee momentarily with a nice leg kick.
Gilligan is looking to land body kicks.
Edvard wants to clinch.
And thats the end of the round the fighters go back to their corners.
Joe Gilligan dominated that round.
The cut man is working on Leon Edvard's cut.
That's the end of the interval. I'm sure that seemed a lot quicker than a minute for our two fighters! Back to the action.

Edvard tries to score a power double leg takedown but Gilligan sees that one coming and sprawls well. That will dishearten Edvard somewhat.
Edvard on the wrong end of a kick to the body.
Gilligan thumps Edvard with a low kick.
Gilligan with a nice looking leg kick. You could hear that one land in a back row.
Edvard tries to clinch there but Gilligan circles away.
Edvard fails with an attempt to clinch.
Edvard tries to close the distance and clinch up but Gilligan swats him away and circles back towards the center.
We've had a slow start to the round here - hopefully the action picks up.
Gilligan has taken the fight to the clinch.
Gilligan landing knees to the body.
Gilligan tries a knee to the head but he's missed.
Gilligan utilising his Muay Thai to score with a knee to the body.
Gilligan looking to throw knees to the head but Edvard is blocking nicely.
Both fighters are absolutely exhausted here.
That's one minute gone in the round.
Gilligan tries a knee to the head but he's missed.
Gilligan connects with a knee to the head.
Gilligan using the Thai plumb to throw knees but Edvard has his back arched nicely, preventing the strike.
Gilligan connects with a knee to the head.
Gilligan connects with a knee to the head.
Leon Edvard's cut is getting worse.
Gilligan lands a nice knee to the body.
Gilligan with the Thai clinch. He's looking to land a big knee but he's not managed it this time.
Gilligan throws a knee to the head but misses.
Edvard drops down looking for an ankle pick but Gilligan pulls his leg out and moves away.
Gilligan throws a quick inside leg kick.
Gilligan pivots as if he's going to throw a leg kick but stops half way.
Edvard checks a leg kick.
Gilligan throws a body kick that misses.
That's two minutes gone in the round.
Edvard takes a step back and watches a body kick go sailing past his mid section.
Edvard is looking to counter the offense by Gilligan and move into the clinch.
Gilligan swats away the attempt to clinch by Edvard.
A decent looking body kick lands there for Gilligan.
Fantastic stuff here - a very entertaining period of action, which has drawn cheers from the crowd.
Gilligan fakes a jab and scores with a low kick.
Gilligan lands with a nice low kick. That'll leave a bruise.
Gilligan clinches up against the cage.
Gilligan with the Thai clinch. He's looking to land a big knee but he's not managed it this time.
Edvard is hobbling a little on that front leg after taking quite a few leg kicks so far in this fight.
Edvard tries for a takedown but Gilligan manages to get underhooks.
That's three failed takedown attempts in the round for Leon Edvard. That's going to take a lot out of him.
Edvard looking to stall.
Gilligan misses with a knee to the head.
Gilligan with a knee to the head.
Gilligan connects with a nasty looking knee right to Edvard's face.
Gilligan with the Thai clinch. He's looking to land a big knee but he's not managed it this time.
That's three minutes gone in the round.
Gilligan throws a knee to the head but misses.
Edvard fails to pull the fight into his guard.
Edvard goes for a takedown in the clinch but Gilligan prevents it.
Gilligan tries to land a knee to the body but he is off balance and Edvard avoids it.
Gilligan tries to land a knee to the head but Edvard blocks with his arms.
Gilligan with a knee to the head.
Edvard wants to stall.
Edvard misses with a body punch.
Edvard can't break the clinch.
Edvard changes levels and goes for a takedown here. Gilligan fights it off and pushes away nicely.
Gilligan pushes Edvard up against the cage in a clinch.
That's four minutes gone in the round.
Gilligan landing some nice looking knees to the body.
Edvard is trying to force a seperation but Gilligan has the dominant position.
Gilligan lands a nice knee to the body.
Gilligan throws a knee to the head but misses.
Edvard takes a knee right on the jaw!
Gilligan tries to land a knee to the head but misses.
Gilligan putting his Muay Thai to good use. He has Edvard in a tight clinch and is doing some damage with knees to the body.
Gilligan lands a knee to the head there! That was nasty!
We've seen a great period of action over the last minute or so - credit to both fighters for going all out!
Gilligan takes an elbow to the forehead.
Gilligan tries a knee to the head but Edvard blocks it.
Edvard tries to land a knee to the head but misses.
Gilligan landing some nice looking knees to the body.
Edvard lands a short shot on the inside that snaps the head of Gilligan backwards.
Edvard lands with a left to the head.
Edvard blocks a knee to the body. He'll have a nicely bruised forearm in the morning.
Gilligan dodges an elbow strike from Edvard.
And thats the end of the round the fighters go back to their corners.
Joe Gilligan showed his class in that round. I'd imagine he'll take it on all the scorecards.
The cut man is working on Leon Edvard's cut.
That's time! Back to the action! Let's hear some noise people - this is the final round!

Edvard tries to clinch but is not successful on this occasion.
Edvard sets himself, and Gilligan steps forward looking for the clinch! Edvard avoids it this time.
Edvard swinging wildly here.
Gilligan feints a counter leg kick.
Gilligan has been the more effective fighter overall so far.
Like a baseball bat into the meat of his leg there - nice leg kick by Gilligan.
Edvard wants to clinch
and Gilligan counters with an inside leg kick.
Leon Edvard is looking to throw some combinations by the looks of things.
Gilligan clinches with his opponent.
Edvard lands an elbow that stopped Gilligan in his tracks for a moment.
Gilligan tries to land a knee to the body but he is off balance and Edvard avoids it.
We've had a slow start to the round here - hopefully the action picks up.
Both guys are working to get underhooks.
Both fighters are breathing heavily.
Edvard lands a nice uppercut.
Gilligan looking to throw knees to the head but Edvard is blocking nicely.
Gilligan missing with knees to the body.
A frustrated look appears on Edvard's face as he tries to break the clinch.
Joe Gilligan seems to be working more effectively in the clinch in the fight so far.
Gilligan with an attempt at a knee that misses.
That's one minute gone in the round.
Gilligan tries a knee to the head but he's missed.
Gilligan is looking to score with knees to the body. Maybe he'll change it up and go body then head. Edvard is defending well for now.
Gilligan connects with a nasty looking knee right to Edvard's face.
Edvard jumps guard but his hands slip and he falls flat on his back. Well, he's made himself look a right mug there, as Gilligan walks away with a smile on his face. Edvard gets slowly back to his feet and shakes his head.
Edvard tries to clinch up.
Edvard fails with an attempt to clinch.
Gilligan slaps away a takedown attempt from Edvard, before circling back to the center of the mat.
The sound of bone on bone echoes around the arena as Edvard checks a leg kick.
Edvard looks to score with a combo but nothing lands.
Edvard takes a nice looking leg kick right on the meat of his thigh there.
Edvard shoots in for a double leg but Gilligan sprawls well. That's going to sap some energy.
That's three failed takedown attempts in the round for Leon Edvard. That's going to take a lot out of him.
Gilligan feints and then cracks Edvard's leading leg with a nice low kick. He's obviously looking to slow Edvard down.
Gilligan throws a body kick that sends a sickening thudding noise reverberating around the arena.
A chopping leg kick lands by Gilligan.
Joe Gilligan is fighting for a decision - hopefully he's judged it right and he's actually winning the fight.
That's two minutes gone in the round.
Gilligan connects with a solid leg kick.
Gilligan clinches.
Gilligan throws a knee to the head but misses.
The crowd are loving this. Great action here.
Gilligan landing knees to the body. They look like they could hurt.
Edvard is trying to pull guard but being pressed up against the cage enables Gilligan to keep the fight standing.
Edvard tries a knee to the head but Gilligan blocks it.
Edvard tries to take the fight to the ground by pulling guard but can't manage it.
Gilligan lands a knee to the head.
Gilligan tries to land a knee to the head but Edvard blocks with his arms.
Gilligan tries to land a knee to the head but misses.
That's three minutes gone in the round.
A short left from Edvard.
Edvard looking to stall.
Edvard trying to control the position but instead, Gilligan has worked for underhooks and has pushed Edvard into the cage.
Good anti-grappling being displayed by Gilligan as Edvard tries to tie him up.
Gilligan with an attempt at a knee that misses.
Edvard pushes off and fires off an elbow that misses, before clinching up again, against the cage.
That's four minutes gone in the round.
My god... these two guys really need to pick up the pace or everyone will leave to go get a beer.
Edvard jumps guard but Gilligan stands there with Edvard around his waist. Edvard gives up and drops back to his feet. We remain in the clinch.
Gilligan misses with a knee to the head.
Gilligan is pressed up against the cage. Edvard has hold of a leg and is looking to drag Gilligan down to the mat. Gilligan avoids the attempt though and has circled away. We're back to striking at a distance.
Gilligan gets to the clinch - let's see what his plan is here.
Gilligan landing knees to the body. They look like they could hurt.
Edvard tries to land a knee to the head but Gilligan blocks with his arms.
Gilligan tries a knee to the head but Edvard blocks it.
Gilligan crunches a lovely knee into Edvard's ribcage.
Edvard tries to take the fight to the ground by pulling guard but can't manage it.
Leon Edvard has stepped it up - he knows he needs a finish here!
Edvard throws a nice elbow but it doesn't land.
And that's the end of the fight!
Joe Gilligan comfortably won the final round on my scorecard.
Well Gilligan has outworked and out performed his opponent in all aspects of the game today. He was simply too good and the decision should be no more than a formality. Over to the ring announcer for the scorecards.
Ladies and gentlemen, after 3 rounds of action, we go to the scorecards for a decision.
Judge Santiago Holmes scores the fight 27:30
Judge Daniel Franklin scores the fight 26:30
Judge Michael Johnstone scores the fight 26:30
In favor of your winner, by unanimous decision... Joe Gilligan!
|
|
|
|
|
|
|
|
|
|
|
|
|
|
|
|
|
|
|
|
|
|
|
| S |
C
A |
G |
S |
C
B |
G |
|
S |
C |
G |
|
energy
A | B |
|
hype
A | B |
|
pop
A | B |
|
mgr
A | B |
|
FIGHT
RATING
59% |
|
|
|
|
|
|
|
Undercard bout
|
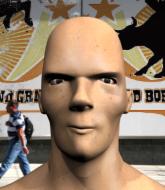
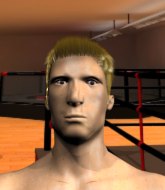
Coming up we have a welterweight MMA rules bout between Little Bitch (ranked 25784 p4p, 697 weight class) and Yoji Anjo Anjo (ranked 7816 p4p, 680 weight class). Both fighters look fresh as a daisy as they make their way towards the cage.
 |
|
 |
| 189 cm
18
181 lbs
0 - 3 - 0 |
|
188 cm
18
178 lbs
2 - 2 - 0 |
Powerful takedowns
Brawler
Very strong |
|
BJJ Purple Belt
Brawler
Granite chin |
|
| |
|
Ladies and gentlemen. This fight is 3 rounds, in the welterweight division.
Introducing the fighter to my left, fighting out of the red corner.
With a record of
0 - 3 - 0, fighting out of The Island, Little Bitch!
And introducing the fighter to my right, fighting out of the blue corner.
With a record of
2 - 2 - 0, fighting out of The Island, Yoji Anjo Anjo!
The judges for this bout are Dirk Anderson, Bart Greer and Daniel Franklin.
The bell rings for round one and we are underway!
Anjo fails miserably with a takedown attempt.
Bitch changes levels looking for a counter takedown but doesn't commit.
Bitch definitely looks more muscular than last time we saw him fight.
Bitch swats away the attempt to clinch by Anjo.
Anjo fails with a takedown attempt.
Anjo looks to score with a jab to the body but Bitch is just out of range.
Bitch tries to counter by moving into the clinch but Anjo manages to circle out of the way.
Anjo on the wrong end of a nice jab.

It looks like Yoji Anjo Anjo has been cut.
Anjo shoots in looking for a takedown but Bitch manages to keep the fight standing, pushing Anjo's face into the canvas for good measure before circling away.
Little Bitch has stuffed three takedown attempts in the round now. That's going to take a lot out of Yoji Anjo Anjo.
Bitch looking to score a takedown here. Anjo is defending well but Bitch drives through and ends up in Anjo's guard.

Anjo is edging up against the cage. He's using the cage to get back to his feet. Nice work there - the fighters are clinched.

Anjo has double underhooks and is working for a body lock takedown. He's got it. The fighters land in half guard but Bitch regains guard immediately.
This has been an exciting period of action!

Bitch is scooting his butt against the cage and has managed to get back to his feet. Anjo presses him back against the cage, presumably looking to take the fight back to the mat.
Anjo lands a nice trip takedown into half guard.
Bitch manages to create a bit of space in order to work his way back to his feet. Anjo keeps hold of his opponent and drives him back against the cage.
Anjo has clasped his hands together around Bitch's back... aaand, he's got a takedown into side control. Nicely done.
The fighters are pressed up against the cage, both looking to find a bit of space to work.
That's one minute gone in the round.
Bitch is trying to improve his position.
Bitch manages to work his way to half guard, despite Anjo's best efforts.
Bitch is looking for a sweep. Anjo is wise to his cunning plan and keeps the top position.
Bitch trying to control but Anjo postures up.

Bitch actively working from the bottom here.
Anjo prevents Bitch from improving his position.
That's two minutes gone in the round.
The crowd are hurling abuse towards the fighters... You can hardly blame them though because there isn't a lot going on in the fight.
Bitch trying to hold on to Anjo's head to control him but Anjo postures up.
Bitch on his back here. We all know that wrestlers don't like being on their back so let's see if Bitch tries to get out of the position.
Bitch makes his way to full guard. A much better position for Bitch.
Bitch keeping moving, preventing Anjo from controlling successfully.

Anjo thinks about going for a leg but decides against it, in order to maintain the position.
The fighters are starting to perspire pretty heavily.
Bitch working for submissions but it's allowed Anjo to get to half guard.
Bitch wants to get back to his feet.
That's three minutes gone in the round.
Anjo is thwarting Bitch's attempts to control the position.
Anjo is keeping good posture, landing some ground and pound.
Bitch wants to improve his position but Anjo is controlling well.
Anjo is looking for a kimura but Bitch is holding onto that half guard position, so it's hard for Anjo to get the leverage.
Bitch is looking to improve his position.
Bitch looking to work for a kimura from the bottom.
Bitch actively working from the bottom here.
That's four minutes gone in the round.
Neither fighter has done anything of merit for a good minute or two here and the crowd are not happy about it.
Bitch is trying to get back to full guard.
Anjo is trying a forearm choke
I don't think that's going to do much at this level of the game.
Bitch manages to get to full guard.
And thats the end of the round the fighters go back to their corners.
That was a close round but I would say that Little Bitch will probably get the nod.
The cut man is working on Yoji Anjo Anjo's cut.
That's the end of the round. The referee orders the cornermen out of the cage so we can get back down to business.
Anjo shoots for a takedown but Bitch saw that one coming a mile off and avoided it easily.
Anjo tries to close the distance and clinch but Bitch swats him to one side with an open hand palm strike and circles away.
Bitch appears to be looking for a counter takedown.
Anjo will have to do better than that with his takedown attempts.
Anjo keeps Bitch at a distance using the push kick.
Anjo misses with a half-hearted attempt at a head kick.
Bitch feints and then dives in with a takedown. That was a long way out but the feint bought him enough time to close the distance and complete the takedown. Now we'll play guard for a bit and see who can get the better of that position.
Anjo pushes Bitch off and gets back to his feet.
Bitch scores with a jab to the body.
The crowd are loving this. Great action here.
Anjo fakes an overhand right and shoots for a takedown. Bitch sprawls well initially but Anjo persists and gets the takedown into half guard.
Bitch is trying to get back to full guard.
Bitch regains full guard. Nicely done.
Anjo postures up.
Anjo is in close to Bitch's body, working some short punches and elbows.
Anjo is breathing heavily.
That's one minute gone in the round.
Anjo looking to sit in guard and control but Bitch gets the butterfly guard and sweeps. He's now in the guard on the top.

Anjo is throwing his legs up, looking for submissions. Bitch is aware though and is defending well.
Bitch trying to control the position from guard on top but Anjo is wriggling around, looking for whatever he can.
Bitch throws an elbow that misses. Anjo uses the momentum to reverse the position. He's now in Bitch's guard. Nice move by Anjo!

Anjo preventing the sweep.
Anjo gets to his feet and steps away from his opponent.
Nice straight punches there by Bitch. You know Roy Jones Jr respects the hands of Bitch.
Anjo shoots in for a takedown but doesn't get it.
Little Bitch has stuffed three takedown attempts in the round now. That's going to take a lot out of Yoji Anjo Anjo.
Bitch dives in and scores a takedown into Anjo's guard.
Bitch pressing down on his opponent's thigh, looking to pass guard. Anjo is keeping the position for now.
That's two minutes gone in the round.
Bitch drops back looking for a leg! Anjo is in trouble here! The fighters roll with the hold and Anjo manages to kick Bitch off! Bitch jumps back into Anjo's guard.
Bitch trying to pass the guard but can't manage it just yet.
Yoji Anjo Anjo has got the better of the ground game so far.
Bitch loading up with the ground and pound but he's missing more than he's landing in this flurry.
Anjo is working the butterfly guard. He manages to land a nice scissor sweep and is now in half guard on the top. Nice move.
Fantastic stuff here - a very entertaining period of action, which has drawn cheers from the crowd.
Bitch is looking to regain full guard. He's left an arm up in the air though and Anjo has latched onto it... Big trouble! Anjo pivots for an armbar - it's in tight and it Bitch is tapping in no time flat! Great counter grappling there from Anjo!
Ladies and gentlemen, after 3:58 of round 2, we have a winner by way of Submission (Armbar). Yoji Anjo Anjo!
|
|
|
|
|
|
|
|
|
|
|
|
|
|
|
|
|
|
|
|
|
|
|
| S |
C
A |
G |
S |
C
B |
G |
|
S |
C |
G |
|
energy
A | B |
|
hype
A | B |
|
pop
A | B |
|
mgr
A | B |
|
FIGHT
RATING
53% |
|
|
|
|
|
|
|
Undercard bout
|
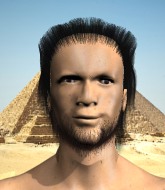
Coming up we have a super heavyweight MMA rules bout between Chong Jo (ranked 3836 p4p, 145 weight class) and Murska Puro (ranked 3730 p4p, 142 weight class). Murska Puro has the power to score a knockout today if he connects clean with Chong Jo's chin.
 |
|
 |
| 198 cm
25
300 lbs
1 - 1 - 0 |
|
192 cm
25
300 lbs
1 - 0 - 0 |
Decent wrestler
Solid boxing
Very strong |
|
BJJ White Belt
Excellent MT
Powerful |
|
| |
|
Ladies and gentlemen. This fight is 3 rounds, in the super heavyweight division.
Introducing the fighter to my left, fighting out of the red corner.
With a record of
1 - 1 - 0, fighting out of The Island, Chong Jo!
And introducing the fighter to my right, fighting out of the blue corner.
With a record of
1 - 0 - 0, fighting out of The Island, Murska Puro!
The judges for this bout are David Hoff, Michael Johnstone and Dirk Anderson.
The bell rings for round one and we are underway!
A combination from Puro does no damage.
Puro moves into the clinch successfully.
Puro gets double underhooks to prevent a takedown attempt from Jo.
Puro has managed to pull guard. Let's see whether he can work an aggressive guard. It will also be interesting to see what tactics Jo uses from the top position.
Puro is pulling down on Jo's head to control his posture.
Jo wants to stand but Puro is controlling his posture from full guard.
We've had a slow start to the round here - hopefully the action picks up.
That's one minute gone in the round.
Jo stopping the sweep attempt from Puro.
Puro is looking for a triangle but Jo pushes his legs off easily.

Jo decides he's had enough of playing guard and decides to stand. Come on Puro, up you get!
Jo will need to tighten up his combinations if he doesn't want to gas himself out, swinging at thin air.
Puro closes the distance and clinches.
Jo drops down for a takedown but doesn't get it.
Jo is looking for a takedown up against the cage. Puro gets underhooks though and prevents the takedown attempt.
That's three failed takedown attempts in the round for Chong Jo. That's going to take a lot out of him.
Jo wants a takedown but no success here.
That's two minutes gone in the round.
Puro is working on a leg, looking for a takedown but Jo is defending well.
Puro prevents a takedown attempt there.
Jo tries to score a body lock takedown but Puro shows good agility there to stay on his feet.
Jo is working on a leg, looking for a takedown but Puro is defending well.
Jo is looking for a takedown.

Puro pushes off and circles away, back to the middle of the mat.
Puro changes levels and looks for a double leg takedown. Jo tries to avoid it but Puro manages to keep hold of a leg and drag Jo to the ground. Jo escapes though and pops straight back up to his feet.
The fight stays on the outside here - Jo looks like he's thinking about clinching though.
Jo defends well against a solid takedown attempt from Puro.
Puro throws a head kick but Jo moves out of range.
Puro fakes high and shoots in for a takedown but Jo avoids it really well and circles away.
Jo misses with a series of wild punches.
That's three minutes gone in the round.
Puro shoots in with a takedown attempt and he has Jo pinned against the cage. Jo gets the underhooks and manages to circle away.
Jo throws a nice looking combination but Puro bobs and weaves to avoid any damage.
Jo fails in his attempt to clinch.
Jo tries to clinch up but Puro circles away and keeps his distance.
Puro avoids the clinch attempt nicely.
Jo misses with a low kick.
Jo swinging wildly here.
Jo tries to clinch but Puro moves out of range.
Puro swats away the attempt to clinch by Jo.
That's four minutes gone in the round.
Puro misses with a takedown attempt - Jo sprawls well and throws a nice strike on the way out which just misses.
No luck for Puro with that takedown attempt.
Jo tries a low kick but Puro avoids it.
Puro takes the fight into the clinch.
Puro just leaning against Jo, taking a breather.
Puro decides to pull guard.
Jo wanted to stand there but Puro had control of the position.
The crowd thankful this round is nearly over.
Jo stands up from Puro's guard - Jo perhaps looking for a knockout.
Jo fakes with the hands and throws a leg kick but Puro is out of range.
Puro drops down looking to force a counter takedown but Jo defends it well.
Puro misses with a low kick.
And thats the end of the round the fighters go back to their corners.
Murska Puro dominated that round.
That's time! Back to the action!
Puro tries to score a power double leg takedown but Jo sees that one coming and sprawls well. That will dishearten Puro somewhat.
Puro instigates a clinch.
Puro creates a bit of distance and throws an elbow that only just misses.
Puro pulls guard effortlessly.
The ref warns both fighters not to hold the cage as they work up against the meshing.
Jo would like to get this fight back to the feet but can't get free from the closed guard.
Jo stands up and waves to Puro to follow him.
We've had a slow start to the round here - hopefully the action picks up.
Puro has closed the distance and engaged Jo in a clinch.
Puro taking a breather.
Jo is looking to take this one to the mat.
That's one minute gone in the round.
Jo tries for a takedown but Puro manages to get underhooks.
Puro breaks the clinch and we're back to striking at distance.
Puro shoots in but no luck this time.
Puro misses with a head kick.
Puro rushes Jo and pushes him back against the cage in a clinch.
Jo can't get the takedown.
That's three failed takedown attempts in the round for Chong Jo. That's going to take a lot out of him.
Puro tries for a takedown but Jo manages to get underhooks.
Jo has dropped down and is looking to force the takedown but it's defended by Puro after a bit of a struggle.
Jo is trying to work for a single leg takedown but Puro pulls him back up using the underhooks.
Jo has hold of a leg and is looking for a trip takedown. Puro avoids it nicely though and we remain in the clinch.
Puro breaks the clinch and we return to the middle of the mat.
Puro has closed the distance and engaged Jo in a clinch.
Puro throws a nice elbow but it doesn't land.
Puro prevents a takedown attempt there.
Jo is trying to work for a single leg takedown but Puro pulls him back up using the underhooks.
That's two minutes gone in the round.
Jo is looking for a takedown.
Puro pulls guard successfully.
Puro is working an open guard so Jo takes the opportunity to get back to his feet.
Jo slips a straight right by Puro.
Jo falls off balance throwing a combination
and Puro counters with a series of strikes. Jo will be more careful next time no doubt.
Fantastic stuff here - a very entertaining period of action, which has drawn cheers from the crowd.
Jo wants to clinch up but Puro keeps it at a distance.
Puro has been the more effective fighter overall so far.
Puro dives in for a single leg takedown but Jo sprawls and the fighters end up clinched against the cage.
Jo is looking for a counter combo.
Jo fails to land with a series of punches.
Left hook, right uppercut from Jo.
It looks like Murska Puro has been cut.
Jo swinging wildly here.
Jo fails in his attempt to clinch.
Jo is looking to clinch.
That's three minutes gone in the round.
Puro tries a switch kick but it misses it's target.
Puro looks frustrated there after his takedown attempt is stuffed easily.
Jo seem to be loading up, looking for a big counter.
Puro is looking to take this fight into the clinch.
Puro misses with a few strikes there.
A combination from Puro does no damage.
The fight stays on the outside here - Puro looks like he's thinking about clinching though.
It looked like Jo was looking amped, ready to throw a big counter but didn't commit.
Jo looks to land a combination but Puro avoids it well.
Puro avoids the clinch attempt nicely.
Puro fails with the takedown.
Puro changes levels and looks for a double leg takedown. Jo tries to avoid it but Puro manages to keep hold of a leg and drag Jo to the ground. Jo escapes though and pops straight back up to his feet.
That's four minutes gone in the round.
Puro throws a head kick but Jo moves out of range.
Jo is looking to clinch but Puro is avoiding it.

Jo darts in and clinches Puro up against the cage.
Jo is working for a takedown up against the cage. He can't get it on this occasion though.
Puro is looking to take this one to the mat.
Puro pushes off and circles away, back to the middle of the mat.
Puro keeps the fight on the outside.
Puro throws a fast counter high kick but Jo manages to duck under it in time.
Puro tries to clinch up but Jo circles away and keeps his distance.
Jo fails with an attempt to clinch.
Puro dodges the punch combination from Jo.
Puro moves into range and clinches up with Jo.
Fantastic stuff here - a very entertaining period of action, which has drawn cheers from the crowd.
Puro misses with an elbow strike.
And thats the end of the round the fighters go back to their corners.
Murska Puro showed his class in that round. I'd imagine he'll take it on all the scorecards.
The cut man is working on Murska Puro's cut.
That's time! Back to the action! The crowd applaud as we get ready to start the final round!
Jo fails in his attempt to clinch.
Puro tries to score a power double leg takedown but Jo sees that one coming and sprawls well. That will dishearten Puro somewhat.
Chong Jo seems to be the more aggressive standup fighter in this bout.
Jo moves out of range of the body kick.
Jo fails to land with a series of punches.
Jo fails with an attempt to clinch.
Jo is looking to take this fight into the clinch.
Jo backing away here, and Puro unleashes a leg kick that just misses.
Jo stuffs the takedown.
Puro has tried to improve his agility in the runup to this fight.
We've had a slow start to the round here - hopefully the action picks up.
Jo stuffs the takedown attempt from Puro. Puro gets slowly back to his feet.
Chong Jo has stuffed three takedown attempts in the round now. That's going to take a lot out of Murska Puro.
Jo fakes with an overhand right and moves in to clinch with Puro, pushing him back against the cage.
Jo drops to a knee looking for a takedown but Puro gets the underhooks and prevents it.
That's one minute gone in the round.
Jo tries to score a body lock takedown but Puro shows good agility there to stay on his feet.
Jo gets underhooks to prevent Puro's takedown attempt.
The referee is keeping an eye on Puro - much more stalling and he will separate the fighters.
Puro gets double underhooks to prevent a takedown attempt from Jo.
Jo has a body lock and is looking for a takedown. Puro is bouncing around trying to prevent the takedown and somehow he has indeed managed to stay on his feet.
Puro drags the fight down to the ground.
Jo gets to his feet and steps away from his opponent.
Puro avoids the clinch attempt nicely.
Jo lunges in with swinging rights and lefts but Puro circles away quickly and effectively.
Chong Jo is looking to throw some combinations by the looks of things.
Jo throws a right hand that Puro ducks under and follows up with a left that Puro also avoids with ease.
That's two minutes gone in the round.
Jo fails in his attempt to clinch.
Puro shoots in for a takedown. "Ole!" shouts Jo as he jumps to the side.
Puro rushes Jo and pushes him back against the cage in a clinch.
Puro blocks an elbow strike.
Jo on the defensive, avoiding the knees to the body.
Jo wants to push off and get back to the center of the mat but Puro has him pressed against the cage.
Jo is looking for a takedown up against the cage. Puro gets underhooks though and prevents the takedown attempt.
Puro can't get the takedown.
Puro manages to get underhooks and slows down the pace for a moment.
Jo prevents a takedown attempt there.
That's three minutes gone in the round.
Puro scores with a nice hook to the head.
Jo goes for a takedown in the clinch but Puro prevents it.
Jo has hold of a leg and is looking for a trip takedown. Puro avoids it nicely though and we remain in the clinch.
Puro wants to take the fight to the mat but Jo manages to get underhooks and keep the fight in the clinch.
Puro manages to break the clinch.
Jo tries to close the distance and clinch up against the cage but Puro paws at him with a jab and circles away.
Puro feints a counter leg kick.
Puro gets a clinch.
Murska Puro seems to be working more effectively in the clinch in the fight so far.
Puro has hold of one of Jo's legs. Jo is fighting the takedown attempt but Puro gets the trip and lands the takedown into guard.
Jo wriggles free and stands up.
Jo slips a jab and a cross from Puro.
This is a great period of action - very entertaining stuff!
Jo tries to clinch up but Puro circles away and keeps his distance.
Puro tries to counter by closing the distance.
Puro moves into the clinch.
That's four minutes gone in the round.
Puro breaks from the clinch.
Puro fakes high and shoots in for a takedown but Jo avoids it really well and circles away.
Puro takes a big intake of breath there - he's definitely tired.
Jo misses with a jab, cross combination.
Puro fails with a takedown attempt.
Jo wants to clinch up but Puro keeps it at a distance.
A right-left combo lands from Jo.
Jo tries to close the distance and clinch but Puro swats him to one side with an open hand palm strike and circles away.
Puro fails to land with a series of punches.
Jo throws a low kick but Puro moves out of range easily.
Chong Jo has stepped it up - he knows he needs a finish here!
Murska Puro is fighting for a decision - hopefully he's judged it right and he's actually winning the fight.

Jo drops Puro with a beautiful combination! Puro stares up at his opponent, who ushers him back to his feet - Jo is looking for the KO!

Puro is rocked!
And that's the end of the fight!
Chong Jo showed his dominance in that final round.
I think Puro has won this one but let's see whether the judges agree with me. Over to the ring announcer for the scorecards.
Ladies and gentlemen, after 3 rounds of action, we go to the scorecards for a decision.
Judge David Hoff scores the fight 28:29
Judge Michael Johnstone scores the fight 28:29
Judge Dirk Anderson scores the fight 28:29
In favor of your winner, by unanimous decision... Murska Puro!
|
|
|
|
|
|
|
|
|
|
|
|
|
|
|
|
|
|
|
|
|
|
|
| S |
C
A |
G |
S |
C
B |
G |
|
S |
C |
G |
|
energy
A | B |
|
hype
A | B |
|
pop
A | B |
|
mgr
A | B |
|
FIGHT
RATING
44% |
|
|
|
|
|
|
|
Undercard bout
|
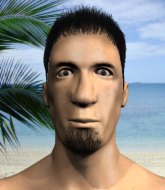
Coming up we have a light heavyweight MMA rules bout between Monty Don (ranked 3383 p4p, 417 weight class) and Rambo Slice (ranked 3416 p4p, 421 weight class). Both fighters look fresh as a daisy as they make their way towards the cage.
 |
|
 |
| 185 cm
25
215 lbs
1 - 0 - 0 |
|
182 cm
25
220 lbs
1 - 1 - 0 |
BJJ Blue Belt
Brawler
Very strong |
|
BJJ White Belt
Excellent MT
Granite chin |
|
| |
|
Ladies and gentlemen. This fight is 3 rounds, in the light heavyweight division.
Introducing the fighter to my left, fighting out of the red corner.
With a record of
1 - 0 - 0, fighting out of The Island, Monty Don!
And introducing the fighter to my right, fighting out of the blue corner.
With a record of
1 - 1 - 0, fighting out of The Island, Rambo Slice!
The judges for this bout are Michael Johnstone, Santiago Holmes and David Hoff.
The bell rings for round one and we are underway!
Don misses with a looping right.
Slice scores with a crisp jab that stopped Don in his tracks.
Don throws a jab when Slice was well out of range.
Slice thows a left - swing and a miss!
Well, he's not going to score with shots like that. A lazy body kick attempt from Don.
Monty Don seems to be the more aggressive standup fighter in this bout.
Slice slips a straight right by Don.
Slice swings wildly with a right hand that was never going to find it's target.
Slice blocks a head kick by Don.
And an attempted straight right on the counter from Slice! But no joy.
Don throws an uppercut from half a mile away. Slice sees it coming and avoids it easily.
Slice lands with a good body shot.
Don throws a combination but comes up with nothing but fresh air.
Don misses with a low kick.
Slice punishes Don's body with a nice straight punch.
Don shakes his hands off, looking to compose himself, but takes a jab to the jaw whilst he does it.
Don takes a body punch but keeps moving.
The crowd are loving this. Great action here.
A shot to the liver by Slice. Beautiful body shot.
Slice forces Don back against the cage and clinches.
Slice pushes off and circles away, back to the middle of the mat.
Slice scores with a hook to the body. Don takes a step back and tries to catch his breath.
That's one minute gone in the round.
Don takes an uppercut right on the jaw but it doesn't phase him.
Don gets cracked there but stands up to it.
Don pushing out the jab but it's not landing.
Don shoots in for a takedown from distance. He catches Slice napping and manages to drive through into side control!
Slice can't do much from the bottom here.
Slice really doesn't want to stay on the ground with Don. If he can't get it back to his feet, it's only a matter of time before he'll be tapping out.
Don prevents Slice from escaping the position.
Don tries for a kimura but Slice is defending well.
Don tries to land with some ground and pound but misses.
Don is looking to take a break and control but Slice is keeping him honest, looking to work from the bottom.
Don cracks Slice with a big right hand but Slice just smiles back at him and invites him to have another go.
Slice is not content to let Don control the position.
That's two minutes gone in the round.
Slice is trying to escape the position but Don is controlling the position.
Don tries for a kimura but Slice is defending well.
Don postures up a little and throws a couple of hammerfists but they don't connect properly.
This is a great period of action - very entertaining stuff!
Slice avoids any damage from the ground and pound of Don.
Slice tries to work a leg under to get back to half guard but Don wriggles his own leg back out and remains in side control.
Don goes for an armbar! This could be all over! Wait, no, Slice rolls with the submission and now he's on top in Don's guard! Nice work there by Slice!
Don escapes his hips to the side and looks to be working for an armbar. Slice gives him a little smile and shakes his head. No chance.
Don throwing his legs up looking for a triangle.
Slice trying to pass the guard but can't manage it just yet.
That's three minutes gone in the round.
Slice got a little sloppy there for a moment and Don has worked his way into a loose triangle - can he finish it?! No, Slice has managed to get both his arms back between Don's legs - danger averted.
Don had isolated an arm as going for a kimura. Slice defends it easily.
Don has been looking to land a fair amount of strikes on the ground. He might be looking to soften his opponent up in order to work for a submission.
Don manages to sweep nicely, so he's now on top. Slice manages to get himself to full guard.
Don trying to control but Slice is working from the bottom.
Don cracks Slice with a solid left hand.
That's four minutes gone in the round.
Slice seems keen to control rather than go for a submission, at least for now.
Don slows down the pace of the fight for a moment. He'll need to remain active if he doesn't want to see the fight stood back up.
We get told so often about how wrestlers don't like to be on their backs. Let's see if Slice can do anything to dispel that myth.
Don in full guard, throwing the ground and pound. No damage this time.
Slice not looking particularly offensive just at the moment.
Don content to stall in guard here.
Don scoring with punches to the head and body.
The fighters are pressed up against the cage, both looking to find a bit of space to work.
Don passes into half guard.
Slice trying to hold on to Don's head to control him but Don postures up.
Don trying to control the pace.
Slice is looking for a sweep. Don is wise to his cunning plan and keeps the top position.
And thats the end of the round the fighters go back to their corners.
A close round but Rambo Slice will probably get the nod.
The fighters get back to their feet, the hooter sounds and we're back to the action!
A shot to the liver by Slice. Beautiful body shot.
Don fails to land with a series of punches.
Don throws a series of punches but Slice moves out of range.
Nice body punch from Slice.
A slow jab from Slice misses its intended target.
Don looks to have improved his striking defense since last time we saw him fight.
Don on the wrong end of an overhand right that came out of nowhere.
Don on the wrong end of an overhand right that came out of nowhere.
Don is looking to slow Slice down with leg kicks.
Don throws a hook to the side of Slice's head but Slice sees it coming and ducks under it beautifully.
Slice bobbing and weaving, closes the distance and lands a hook to the side of Don's head.
Slice swings wildly with a couple of big hooks
so Don counters with a double leg into guard. Good agility.
This is a great period of action - very entertaining stuff!
Slice looking for a sweep. Not yet Slice, not yet.
Don slips effortlessly into side control - very nice.
Don working the ground and pound but he's contacting the mat, not the fighter.
Don wants to lay and pray for a moment but Slice keeps working.
Don in the domination position with Slice hanging on.
That's one minute gone in the round.
Slice is pushing Don's head away, looking to escape. Don manages to hold on to the position though.
Slice taking a bit of punishment here - Don scoring with strikes.
Slice is positioning himself to get back to half guard.
Slice managing to avoid any damage from the strikes thrown by Don.
Slice tries to improve position but can't.
Don working the ground and pound but he's contacting the mat, not the fighter.
Don lands a decent elbow from side control.
Don working the body and head with strikes.
Slice tries to bench press Don off him but Don keeps the position.
Don in side control lands a decent elbow.
Don landing with strikes to the head and body from side control.
Don lands a nice forearm strike.
That's two minutes gone in the round.
Don landing strikes.
Don lands a decent elbow from side control.
Don misses with the ground and pound.
Monty Don overall seems to be getting the better of the ground position in the fight so far.
Don working the ground and pound from side control.
Slice wants to control but Don postures up.
Slice is putting a lot of effort into getting back to his feet here.
The ref warns both fighters not to hold the cage as they work up against the meshing.
Slice struggling a bit here.
Don has worked his way into a potential kimura here. Slice is trying to get out of the position but his squirming has just got him deeper into trouble. Don yanks on the arm and Slice is forced to tap due to a very painful looking submission! Nice work by Don.
Ladies and gentlemen, after 2:49 of round 2, we have a winner by way of Submission (Kimura). Monty Don!
|
|
|
|
|
|
|
|
|
|
|
|
|
|
|
|
|
|
|
|
|
|
|
| S |
C
A |
G |
S |
C
B |
G |
|
S |
C |
G |
|
energy
A | B |
|
hype
A | B |
|
pop
A | B |
|
mgr
A | B |
|
FIGHT
RATING
53% |
|
|
|
|
|
|
|
Undercard bout
|
Coming up we have a heavyweight MMA rules bout between Jay Chandrasekhar (ranked 3811 p4p, 377 weight class) and Charlie Dorsh (ranked 3562 p4p, 355 weight class). Both these guys have solid standup skills and neither is particularly fantastic on the ground, so let's hope for a nice standup war!
 |
|
 |
| 188 cm
25
269 lbs
1 - 1 - 0 |
|
183 cm
25
264 lbs
1 - 1 - 0 |
BJJ White Belt
Excellent MT
Very strong |
|
BJJ White Belt
Excellent MT
Good gas tank |
|
| |
|
Ladies and gentlemen. This fight is 3 rounds, in the heavyweight division.
Introducing the fighter to my left, fighting out of the red corner.
With a record of
1 - 1 - 0, fighting out of The Island, Jay Chandrasekhar!
And introducing the fighter to my right, fighting out of the blue corner.
With a record of
1 - 1 - 0, fighting out of The Island, Charlie Dorsh!
The judges for this bout are Michael Johnstone, Winston Alpacca and Bart Greer.
The bell rings for round one and we are underway!
Dorsh moves out of range as Chandrasekhar strikes.
Dorsh ducks under a wild hook from Chandrasekhar.
Chandrasekhar slips under a jab.
Dorsh misses with a head kick.
Chandrasekhar dips down and scores with a jab to the body.
A head kick misses from Dorsh.
Chandrasekhar is looking to counter punch.
Chandrasekhar lands a beauty of a right hand that gets the crowd cheering.
Chandrasekhar throws a shot to the body.
Dorsh looks to land a left hand but Chandrasekhar moved out of range nicely.
Chandrasekhar lunges at Dorsh with a hook that half lands and is half blocked by Dorsh's hand.
Chandrasekhar throws an overhand right that drops Dorsh like a sack of potatoes! Chandrasekhar dives in to finish the fight with more strikes and this one is all over!
Ladies and gentlemen, after 0:33 of round 1, we have a winner by way of TKO (Strikes). Jay Chandrasekhar!
A very excited looking Jay Chandrasekhar made sure he remembered to thank all the fans both in the arena and on the internet. He said all the coolest people spend all day on MMA websites, which got a big reaction.
|
|
|
|
|
|
|
|
|
|
|
|
|
|
|
|
|
|
|
|
|
|
|
| S |
C
A |
G |
S |
C
B |
G |
|
S |
C |
G |
|
energy
A | B |
|
hype
A | B |
|
pop
A | B |
|
mgr
A | B |
|
FIGHT
RATING
100% |
|
|
|
|
|
|
|
Undercard bout
|
Coming up we have a light heavyweight MMA rules bout between Charles Bronson (ranked 3603 p4p, 443 weight class) and Tom Manner (ranked 2738 p4p, 341 weight class). Charles Bronson could well score a knockout today. He has the power to get to Tom Manner's chin.
 |
|
 |
| 193 cm
25
220 lbs
1 - 1 - 0 |
|
185 cm
25
212 lbs
1 - 1 - 0 |
BJJ White Belt
Excellent boxer
KO power |
|
Powerful takedowns
Counter fighter
Powerful |
|
| |
|
Ladies and gentlemen. This fight is 3 rounds, in the light heavyweight division.
Introducing the fighter to my left, fighting out of the red corner.
With a record of
1 - 1 - 0, fighting out of The Island, Charles Bronson!
And introducing the fighter to my right, fighting out of the blue corner.
With a record of
1 - 1 - 0, fighting out of The Island, Tom Manner!
The judges for this bout are Winston Alpacca, David Hoff and Santiago Holmes.
The bell rings for round one and we are underway!
Bronson changes levels and drives through with a really nice takedown into side control. Manner looks really pissed at himself for not defending that better.
We could do with one of the fighters taking the initiative a bit more on the ground - they're both waiting to capitalize on a mistake.
Manner manages to get back to half guard.
Manner tries to roll over but Bronson keeps him under control.
Manner works his way to full guard. Good work.
Bronson throwing elbows and punches but not connecting, as Manner works some decent striking defense from the bottom.
Bronson wanted to stand there but Manner had control of the position.
Bronson with a flurry of punches that miss.
Our spies down at at Prosper Training inform us that Manner has really been working on his submissions in the buildup to this fight. Will it pay off?
Bronson postures up.
Bronson won't allow Manner to sweep him here.
We've had a slow start to the round here - hopefully the action picks up.
Bronson is sitting in close to Manner's body. Manner has gone for a guillotine from the bottom. Oh damn, that looks pretty tight! Bronson is panicking - it looks like this one could be all over! Yes, Bronson is tapping! That was a very nice submission by Manner.
Ladies and gentlemen, after 1:56 of round 1, we have a winner by way of Submission (Guillotine). Tom Manner!
Tom Manner was full of energy after the big win and talked about how he thinks he can do big things in this sport. The crowd were appreciative of his determination to succeed.
|
|
|
|
|
|
|
|
|
|
|
|
|
|
|
|
|
|
|
|
|
|
|
| S |
C
A |
G |
S |
C
B |
G |
|
S |
C |
G |
|
energy
A | B |
|
hype
A | B |
|
pop
A | B |
|
mgr
A | B |
|
FIGHT
RATING
78% |
|
|
|
|
|
|
|
Undercard bout
|
Coming up we have a heavyweight MMA rules bout between Subject One (ranked 2687 p4p, 286 weight class) and Peetu Tam (ranked 3173 p4p, 322 weight class). Over to our ring announcer for the fighter introductions!
 |
|
 |
| 198 cm
23
258 lbs
2 - 0 - 0 |
|
198 cm
25
255 lbs
1 - 0 - 0 |
Good wrestling
Brawler
Good chin |
|
Decent wrestler
Basic striking
Tends to cut |
|
| |
|
Ladies and gentlemen. This fight is 3 rounds, in the heavyweight division.
Introducing the fighter to my left, fighting out of the red corner.
With a record of
2 - 0 - 0, fighting out of The Island, Subject One!
And introducing the fighter to my right, fighting out of the blue corner.
With a record of
1 - 0 - 0, fighting out of The Island, Peetu Tam!
The judges for this bout are Bart Greer, Peter Branson and Winston Alpacca.
The bell rings for round one and we are underway!
One misses with a hook.
One does a little shimmy and throws a leg kick. The leg kick missed by a considerable margin though, making him look a little bit silly for doing the shimmy.
Tam ducks under a wild hook from One.
Tam misses with a left hand
and One counters with a lovely shot to the body.
One throws a monster uppercut resembling something out of street fighter but it doesn't land.
One looks to score with a jab to the body but Tam is just out of range.
One drops Tam with a beautiful combination! Tam stares up at his opponent, who ushers him back to his feet - One is looking for the KO!
It looks like Peetu Tam has been cut.
This is a great period of action - very entertaining stuff!
One missing with a left hand there. Tam was out of range so wasted energy throwing that one.
Tam is the aggressor but that punch slipped nicely by One.
Tam is looking to clinch but One is avoiding it.
One defending well as Tam loads up on a big left hand.
Tam slips a jab from One.
One looks to land a body kick but Tam moved away.
Tam looked like he wanted to counter with a punch but didn't throw it.
One misses with a kick to the body.
One displays some good footwork, moving neatly out of range as Tam throws out the jab.
Tam moves in looking to clinch but One pushes him off.
Tam slips under a jab.
Tam checks a low kick from One.
That's one minute gone in the round.
Nice takedown defense from One. No joy for Tam on that attempt.
One throws a looping overhand right but Tam ducks down to avoid it.
One keeping his hands up high there, blocking the jab from Tam.
One pivots as if he's going to throw a leg kick but stops half way.
Tam throws a hook but One blocks it.
Tam ducks under a wild hook from One.
Tam closes the distance and after a bit of a stuggle, scores a takedown into One's guard.
One wants to stand but Tam is controlling the position.
Tam has been taking part in the yoga sessions down at Island Training Centre. Presumably he's going to look for a slick submission... Or maybe he's looking to avoid one.
Tam makes a bit of distance and scores with some ground and pound, still in guard.
One pulls Tam in close to prevent any damage.
One on his back here. We all know that wrestlers don't like being on their back so let's see if One tries to get out of the position.
Tam wants to control from the top but One keeps moving.
One is trying to stand up but he's not managed so far.
One wants to sweep here but Tam controlling him for the moment.
The ref warns both fighters not to hold the cage as they work up against the meshing.
Tam throws a big elbow that misses.
One knows he needs to get back to his feet asap. He's simply no match for Tam on the ground.
That's two minutes gone in the round.
One pulls Tam in close to prevent any damage.
Tam content to strike from guard, landing some decent shots.
Tam prevents One from getting back to his feet.
Tam passes One's left leg - he's now in half guard.
Tam lands a big shot. The thud that echoes around the arena is like music to the fans' ears.
One is trying to stand.
One is looking for a sweep. Tam is wise to his cunning plan and keeps the top position.
Tam drops an elbow to the side of One's head.
This has been an exciting period of action!
Tam wants to pass to mount but One is defending the position.
One trying to control here.
Tam controlling the pace.
That's three minutes gone in the round.
One is looking to regain full guard. Not this time though.
Tam passes the half guard and he's now in mount! Big trouble for One!
One is looking to get to half guard.
One wants to use the cage to get back to his feet here.
One is looking to improve his position but Tam isn't that keen on the idea.
One is looking to get back to his feet - it's going to be hard from this position.
One tries to lock up and control but Tam gives him a forearm to the face and pushes him away.
Tam tucks in and makes sure he doesn't lose the dominant position.
Tam postures up and cracks his opponent a couple of times before moving back into close ground control. One looks a forlorn figure.
Tam pausing momentarily but resumes with a couple of decent strikes that do a bit of damage.
One is squirming around, avoiding Tam's attempts to control the action.
One definitely looks more muscular than last time we saw him fight.
That's four minutes gone in the round.
Tam is still in mount, landing shots to his trapped opponent. One can't stay in a position like this for much longer.
It looks like Subject One has been cut.
One is really trying hard to get back to his feet.
Tam lands a nice shot to the head.
Tam working One over with strikes here.
Wooooo! Give it up for these two warriors! They are putting on a show!
One is wriggling around trying to escape.
Tam with good strikes from the mount here!
Tam fakes a shot to the body and cracks his opponent in the head. Nice ground and pound there!
Tam lands with some strikes.

One is rocked!
Subject One's cut is getting worse.
Tam controlling his opponent.
Oh One is still in real trouble! Will he be able to recover?!!
Tam lands a big shot to the head and One winces in pain. He's tapped out due to strikes!
Ladies and gentlemen, after 4:53 of round 1, we have a winner by way of Submission (Strikes). Peetu Tam!
|
|
|
|
|
|
|
|
|
|
|
|
|
|
|
|
|
|
|
|
|
|
|
| S |
C
A |
G |
S |
C
B |
G |
|
S |
C |
G |
|
energy
A | B |
|
hype
A | B |
|
pop
A | B |
|
mgr
A | B |
|
FIGHT
RATING
52% |
|
|
|
|
|
|
|
Undercard bout
|
Coming up we have a middleweight MMA rules bout between Chief Covid Nineteen (ranked 3518 p4p, 410 weight class) and Troy Bailey (ranked 2755 p4p, 335 weight class). Covid Nineteen comes to the cage accompanied by Fuck The Quarantine. Over to our ring announcer for the fighter introductions!
 |
|
 |
| 189 cm
25
196 lbs
2 - 2 - 0 |
|
185 cm
25
187 lbs
3 - 1 - 0 |
Good wrestling
Brawler
Very strong |
|
Good wrestler
Counter fighter
Powerful |
|
| |
|
Ladies and gentlemen. This fight is 3 rounds, in the middleweight division.
Introducing the fighter to my left, fighting out of the red corner.
With a record of
2 - 2 - 0, fighting out of The Island, Chief Covid Nineteen!
And introducing the fighter to my right, fighting out of the blue corner.
With a record of
3 - 1 - 0, fighting out of The Island, Troy Bailey!
The judges for this bout are Winston Alpacca, Michael Johnstone and Santiago Holmes.
The bell rings for round one and we are underway!
Covid Nineteen scores with a takedown into Bailey's guard.
Bailey throwing his legs up looking for a triangle.
Bailey has a loose triangle. He'll be looking to tighten that up but Covid Nineteen can see exactly what he's planning and manages to posture up and free himself.
Covid Nineteen forces his way into half guard.
Bailey taking some punishment here, with Covid Nineteen in his half guard.
Covid Nineteen is taking a breather. Bailey says something to him but it's hard to make out. Perhaps he's telling him to get on with it and actually do something.
Bailey looking for submissions off his back.
We've had a slow start to the round here - hopefully the action picks up.
Bailey is looking to sinch up a guillotine here but Covid Nineteen pulls his head out easily.
Bailey looking for submissions from an awkward position here.
The ref warns both fighters not to hold the cage as they work up against the meshing.
That's one minute gone in the round.
Bailey is looking to sinch up a guillotine here but Covid Nineteen pulls his head out easily.
Covid Nineteen is thinking about going for an arm triangle but he can't free his leg.
Covid Nineteen trying to mount his opponent but Bailey defends it.
Covid Nineteen working some ground and pound from close in. He's looking to maintain this position and strike for a while by the looks of things... although he'll probably advance to full mount in a minute now I've said that.
Neither fighter is being very active at the moment, with Covid Nineteen in particular looking to stall.
Bailey looking to work for a kimura from the bottom.
Covid Nineteen is looking for a kimura. It's going to be difficult to finish that from half guard though and Bailey defends it well.
Covid Nineteen takes advantage of the dominant position to land a couple of big hammer fists.
That's two minutes gone in the round.
The fighters are starting to get a bit slippery now, which will make submissions a bit more difficult.
Covid Nineteen drops an elbow to the side of Bailey's head.
The fighters are pressed up against the cage, both looking to find a bit of space to work.
Bailey looking for submissions off his back.
Covid Nineteen controlling the pace.
Covid Nineteen tries to stand and escape but Bailey is controlling the position.
Bailey actively working from the bottom here.
Bailey is looking to sinch up a guillotine here but Covid Nineteen pulls his head out easily.
Covid Nineteen controlling the action here.
Bailey has been taking part in the yoga sessions down at Island Training Centre. Presumably he's going to look for a slick submission... Or maybe he's looking to avoid one.
That's three minutes gone in the round.
Covid Nineteen moves nicely into side control.
Covid Nineteen remains in side control and seems content to stay there. It's a versatile position from which he can work both strikes and submissions, whilst maintaining that control, so maybe he'll sit here for a while.
Bailey gets back to half guard.
We get told so often about how wrestlers don't like to be on their backs. Let's see if Bailey can do anything to dispel that myth.
Bailey has a hand on Covid Nineteen's thigh, trying to get back to full guard. Covid Nineteen takes advantage of the position though and mounts him!
Bailey is working to get back to half guard.
Covid Nineteen putting on the heat here with some good ground and pound!
That's four minutes gone in the round.
Covid Nineteen prevents Bailey from getting the reversal.
Covid Nineteen controlling the pace for now.
Covid Nineteen prevents Bailey from getting the reversal.
Covid Nineteen is in the full mount, landing strikes.
Covid Nineteen looking to control and managing it successfully.
Bailey regains half guard.
Covid Nineteen slows the pace down in half guard.
The crowd thankful this round is nearly over.
Bailey looking to work for a kimura from the bottom.
Still in half guard, Covid Nineteen seems content to control.
And thats the end of the round the fighters go back to their corners.
Chief Covid Nineteen dominated that round.
The corners get their ten second warning. Both fighters stand from their stools and stare eachother down, ready to get back to the action.
Bailey avoids the body shot from Covid Nineteen.
Bailey drops his hands momentarily and Covid Nineteen takes advantage with a crisp shot to the head.
Covid Nineteen throws a hard body shot but it just misses.
Covid Nineteen seems to be moving with more speed, compared to his last bout. He must have been working on that in the gym.
Covid Nineteen shoots in looking for a single leg takedown. Bailey is trying to defend but Covid Nineteen finishes it well and ends up in half guard. Let's see if he can advance position further.
Covid Nineteen seems content to maintain position for now, rather than mounting any offense.
Bailey actively working from the bottom here.
We've had a slow start to the round here - hopefully the action picks up.
Bailey is looking for a sweep. Covid Nineteen is wise to his cunning plan and keeps the top position.
Covid Nineteen is really dominating this fight. Is there anything that Bailey can do to turn this around?
Bailey is looking to sinch up a guillotine here but Covid Nineteen pulls his head out easily.
Covid Nineteen performing his best blanket impression for a moment.
That's one minute gone in the round.
Bailey looking for submissions from an awkward position here.
Bailey is breathing heavily.
Covid Nineteen controlling the pace.
Bailey looking to force a kimura from the bottom here. He's concentrating on that move too much though and Covid Nineteen pushes past his half guard into mount!
Covid Nineteen prevents Bailey from getting the reversal.
Covid Nineteen lands a nice shot to the head.
Covid Nineteen sitting in mount, just looking to control for the moment.
A nice elbow there by Covid Nineteen.
Covid Nineteen looking to control and managing it successfully.
That's two minutes gone in the round.
Covid Nineteen wants to finish this one by submission but Bailey is holding onto his waist, trying to prevent any attacks from Covid Nineteen.
Bailey tries to reverse the position but Covid Nineteen maintains control.
Covid Nineteen controlling the position easily from mount.
Bailey bucks up and manages to get a nice reversal! He's in guard on the top - nicely done!
Covid Nineteen throwing his legs up looking for a triangle.
The crowd cheering loudly, showing their appreciation for the quality fight we're seeing here.
Bailey throws an elbow that misses. Covid Nineteen uses the momentum to reverse the position. He's now in Bailey's guard. Nice move by Covid Nineteen!
That's three minutes gone in the round.
Bailey looks to be working for a triangle here. Oh, it looks like he might have it! Covid Nineteen has picked Bailey up and slammed him! Bailey can't keep hold of the triangle and Covid Nineteen manages to pass to side control!
A bit of a lull in the action. I'm sure it will pick up again soon... even if the ref has to physically pick them up and put them back on their feet.
Bailey is looking for a sweep.
Covid Nineteen happy to just control the position for now.
Covid Nineteen gets to mount! Bailey was on the offensive and wasn't defending properly.
Bailey really trying hard to get back to half guard here.
That's four minutes gone in the round.
Covid Nineteen controlling from the full mount.
Covid Nineteen lands a heavy elbow.
Covid Nineteen controlling from the full mount.
Bailey is desperately trying to improve his position but Covid Nineteen has a good base and remains in mount.
Chief Covid Nineteen overall seems to be getting the better of the ground position in the fight so far.
Bailey is persisting with the attempt to improve his position.
Covid Nineteen controlling the position easily from mount.
Bailey keeping his composure momentarily, calmly looking to get back to half guard.
Covid Nineteen controlling his opponent.
And thats the end of the round the fighters go back to their corners.
Chief Covid Nineteen dominated that second round.
That's the end of the interval. I'm sure that seemed a lot quicker than a minute for our two fighters! Back to the action. And we move into the final round!
Covid Nineteen drives through and clinches with Bailey against the cage.
Bailey drops down for a takedown but doesn't get it.
Covid Nineteen trying to stall but Bailey improves his position.
Covid Nineteen successfully pulls guard.
Bailey stops Covid Nineteen from standing up.
Bailey won't allow Covid Nineteen to sweep him here.
Bailey throws a strike but Covid Nineteen rolls with it and manages to sweep. Now he's in guard on top.
Covid Nineteen with a nice head shot there.
We've had a slow start to the round here - hopefully the action picks up.
Covid Nineteen is intent on slowing down the pace of the fight, simply looking to control.
Covid Nineteen seems to have a rather negative gameplan on the ground. He seems keen to just score the takedown and hold down Bailey for as long as he can get away with.
Covid Nineteen connects with a couple of short punches.
That's one minute gone in the round.
Covid Nineteen got a little sloppy there for a moment and Bailey has worked his way into a loose triangle - can he finish it?! No, Covid Nineteen has managed to get both his arms back between Bailey's legs - danger averted.
Bailey can't keep his opponent in guard - Covid Nineteen advances to half guard, no doubt looking to mount.
Bailey actively working from the bottom here.
Bailey takes a big intake of breath there - he's definitely tired.
Neither fighter is being very active at the moment, with Covid Nineteen in particular looking to stall.
Covid Nineteen seems to have lost interest with the ground game and is thinking about standing back up.
Covid Nineteen content to sit in half guard and control for a moment.
Bailey is looking to get full guard. It looks like he might be successful but at the last minute Covid Nineteen jumps into side control!
Covid Nineteen working the ground and pound from side control.
Covid Nineteen works a knee to the body and follows up with a nice elbow to the head.
Bailey tries to bench press Covid Nineteen off him but Covid Nineteen keeps the position.
That's two minutes gone in the round.
Covid Nineteen tries to stand but Bailey is controlling his head.
Bailey tries to get back to half guard but can't.
Covid Nineteen tries to get to his feet but he's trapped momentarily.
Covid Nineteen tries for a kimura. Not really close to a finish though.
Covid Nineteen wants to stand but Bailey is controlling his arm.
A lull in the action here as Covid Nineteen stalls from top position.
That's three minutes gone in the round.
Covid Nineteen's ground tactics aren't going to win him many fans. Let's hope he's got fireworks for us if he gets back to his feet because he's not doing much on the ground.
Bailey is trying to get back to half guard.
Bailey sneaks back into half guard.
Ground and pound from Covid Nineteen.
Bailey looking for submissions off his back.
Covid Nineteen is trying to work for a kimura but Bailey is defending well.
Covid Nineteen is taking a breather. Bailey says something to him but it's hard to make out. Perhaps he's telling him to get on with it and actually do something.
That's four minutes gone in the round.
Covid Nineteen moves nicely into side control.
Bailey is trying to work for a sweep but Covid Nineteen has mounted him!
Covid Nineteen with shots to the head and body - Bailey looks very uncomfortable down there.
Covid Nineteen landing shots from mount.
Bailey is desperately trying to get back to half guard.
Bailey regains half guard.
Troy Bailey has stepped it up - he knows he needs a finish here!
The crowd thankful this round is nearly over.
Bailey regains full guard. Nicely done.
Covid Nineteen scoring with punches to the head and body.
Covid Nineteen sitting in guard here, content to control.
And that's the end of the fight!
Chief Covid Nineteen showed his dominance in that final round.
Well Covid Nineteen has outscored his opponent in every aspect of the fight today. Only a scarily incompetent judge or two will keep him from a well deserved win... Over to the ring announcer for the scorecards.
Ladies and gentlemen, after 3 rounds of action, we go to the scorecards for a decision.
Judge Winston Alpacca scores the fight 30:27
Judge Michael Johnstone scores the fight 30:27
Judge Santiago Holmes scores the fight 30:27
In favor of your winner, by unanimous decision... Chief Covid Nineteen!
An out of breath Chief Covid Nineteen thanked his loyal fans in his post fight interview, giving them credit for his success over the course of his career.
|
|
|
|
|
|
|
|
|
|
|
|
|
|
|
|
|
|
|
|
|
|
|
| S |
C
A |
G |
S |
C
B |
G |
|
S |
C |
G |
|
energy
A | B |
|
hype
A | B |
|
pop
A | B |
|
mgr
A | B |
|
FIGHT
RATING
34% |
|
|
|
|
|
|
|
Co-main event
|
Coming up we have a middleweight MMA rules bout between Ronaldo Souza (ranked 2035 p4p, 257 weight class) and Stan Shamrock (ranked 1904 p4p, 240 weight class). I'm sure you'll be fascinated to know that I was talking to some pointless Z list celebrity before the fight and he thought that Stan Shamrock was going to win. Let's see if he was right.
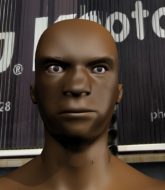 |
|
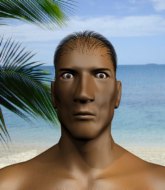 |
| 188 cm
25
195 lbs
3 - 0 - 0 |
|
187 cm
25
187 lbs
3 - 0 - 0 |
Good takedowns
Basic striking
KO power |
|
Good wrestler
Brawler
Heavy handed |
|
| |
|
Ladies and gentlemen. This fight is 3 rounds, in the middleweight division.
Introducing the fighter to my left, fighting out of the red corner.
With a record of
3 - 0 - 0, fighting out of The Island, Ronaldo Souza!
And introducing the fighter to my right, fighting out of the blue corner.
With a record of
3 - 0 - 0, fighting out of The Island, Stan Shamrock!
The judges for this bout are Dirk Anderson, Bart Greer and Winston Alpacca.
The bell rings for round one and we are underway!
A head kick misses from Souza.
Shamrock gets to the clinch - let's see what his plan is here.
Souza jumps guard but his hands slip and he falls flat on his back. Well, he's made himself look a right mug there, as Shamrock walks away with a smile on his face. Souza gets slowly back to his feet and shakes his head.
Shamrock ducks under a wild hook from Souza.
Shamrock forces Souza back against the cage and clinches.
Shamrock presses Souza against the cage and delivers a mid-strength body shot.
Shamrock stays in close to his opponent and throws a right hand to the body.
With the fighters clinched against the cage, Shamrock creates a bit of distance for himself and scores with a nice uppercut.
Shamrock lands with a good tight uppercut to the head.
Shamrock lands with a short shot to the head.
Souza has a body lock and is looking for a takedown. Shamrock is bouncing around trying to prevent the takedown and somehow he has indeed managed to stay on his feet.
Souza tries to score a body lock takedown but Shamrock shows good agility there to stay on his feet.
That's three failed takedown attempts in the round for Ronaldo Souza. That's going to take a lot out of him.
Shamrock scores with a shot to the side of Souza's head.
Shamrock lands with a short head shot on the inside.
It looks like Ronaldo Souza has been cut.
We've seen a great period of action over the last minute or so - credit to both fighters for going all out!
Shamrock scores with an uppercut up the middle.
Shamrock works on Souza's body with a couple of short punches.
We've been hearing reports that Souza has been drilling takedowns in recent sessions so let's see if that has an impact on the result of this fight.
Souza is breathing heavily.
Souza goes for a takedown attempt but Shamrock pushes him away and we're back to fighting at a distance.
Shamrock has Souza up against the cage in a clinch.
That's one minute gone in the round.
Shamrock lands a left hand that snaps the head of Souza backwards.
Shamrock lands a nice looking hook to the body, against the cage.
Shamrock is leaning against Souza and scores with a nice uppercut to the body.
Shamrock looks more muscular than last time we saw him. He must have been on the weights.
Shamrock scores with a shot to the side of Souza's head.
Shamrock softening up his opponent with strikes, against the cage.
A right hook to the body lands for Shamrock.
Shamrock lands with a left to the head.
Shamrock pushes Souza back against the cage and lands a hook to the side of the head.
Shamrock lands a shoulder strike.
Shamrock lands a nice looking hook to the body, against the cage.
Shamrock working some nice short punches in the clinch.
Wooooo! Give it up for these two warriors! They are putting on a show!
Shamrock lands a body punch in the clinch.
Shamrock lands a right hand.
Shamrock cracks Souza with a nice body shot.
Shamrock lands with a short punch from the clinch.
An uppercut to the body lands inside from Shamrock.
Shamrock lands a body shot.
A right hand to the body from Shamrock.
That's two minutes gone in the round.
A shot in the inside from Shamrock.
Shamrock lands a right uppercut that snaps the head of Souza backwards.
Souza is rocked!
Shamrock lands a right uppercut that snaps the head of Souza backwards.
Oh Souza is still all over the place! His legs are completely gone! Will he be able to recover?!!
Shamrock lands a body punch.
Souza seems to have got his legs back now.
A body shot lands from Shamrock.
Shamrock is leaning against Souza and scores with a nice uppercut to the body.
Shamrock lands a hook to the side of the head.
Shamrock lands with a short shot to the head.
Shamrock lands with a right to the head.
A short left from Shamrock.
Shamrock throws a hook to the body. More of an arm punch but it's all scoring with the judges.
Shamrock digs a right hand into Souza's ribs. Those have got to be taking their toll on Souza's gas tank.
Shamrock lands with a quick shot inside that doesn't really do much damage.
Souza's head jolts backwards as he takes an uppercut right on the button!
Shamrock unloads with a big right hand that wobbles Souza! He's leaning against the cage trying to keep his feet but Shamrock is unloading with more strikes now! Souza drops to his knees and the referee stops the fight for a TKO!
Ladies and gentlemen, after 2:58 of round 1, we have a winner by way of TKO (Strikes). Stan Shamrock!
|
|
|
|
|
|
|
|
|
|
|
|
|
|
|
|
|
|
|
|
|
|
|
| S |
C
A |
G |
S |
C
B |
G |
|
S |
C |
G |
|
energy
A | B |
|
hype
A | B |
|
pop
A | B |
|
mgr
A | B |
|
FIGHT
RATING
72% |
|
|
|
|
|
|
|
Main event
|
Coming up we have a middleweight MMA rules bout between Island Mongrel (ranked 1050 p4p, 128 weight class) and Price Gouging (ranked 1637 p4p, 205 weight class). Fingers crossed for an exciting fight - I'm sure both fighters are looking for a nice under the table bonus!
 |
|
 |
| 185 cm
25
190 lbs
4 - 0 - 0 |
|
180 cm
25
186 lbs
3 - 0 - 0 |
BJJ White Belt
Excellent boxer
Granite chin |
|
Good takedowns
Basic striking
Determined |
|
| |
|
Ladies and gentlemen. This fight is 5 rounds, for the middleweight championship of the world!
Introducing the champion to my left, fighting out of the red corner.
With a record of
4 - 0 - 0, fighting out of The Island, Island Mongrel !
And introducing the challenger to my right, fighting out of the blue corner.
With a record of
3 - 0 - 0, fighting out of The Island, Price Gouging!
The judges for this bout are Dirk Anderson, David Hoff and Michael Johnstone.
The bell rings for round one and we are underway!
Mongrel drops Gouging with a hook right on the temple. He thinks about going to the ground but Gouging looks back up at him and smiles so Mongrel waves him back to his feet - he obviously thinks he can knock him out after that shot landed.
Gouging is rocked!
It looks like Price Gouging has been cut.
Gouging with a poor takedown
and Mongrel counters with a massive hook, right on the button! He's out cold! Damn, that was naaaaaasty! Hopefully he'll be OK.
Ladies and gentlemen, after 0:05 of round 1, we have a winner by way of KO (Punch). Island Mongrel !
Island Mongrel retains his middleweight title!
Island Mongrel seemed lost for words in his post fight interview but he remembered to thank his fans and directed everyone to his website.
|
|
|
|
|
|
|
|
|
|
|
|
|
|
|
|
|
|
|
|
|
|
|
| S |
C
A |
G |
S |
C
B |
G |
|
S |
C |
G |
|
energy
A | B |
|
hype
A | B |
|
pop
A | B |
|
mgr
A | B |
|
FIGHT
RATING
100% |
|
|
|
|
|
|
|
|
|
|

