 |
Trash Boys 8 PBP Commentary |
Undercard bout
|
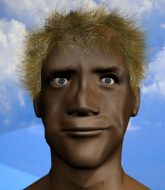
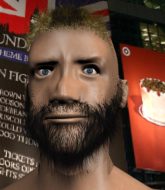
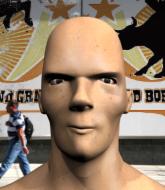
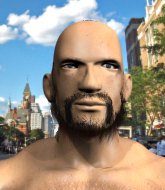
Coming up we have a middleweight MMA rules bout between Nathan Henderson (ranked 25574 p4p, 6521 weight class) and Eiji Okada (ranked 728 p4p, 619 weight class). Okada has chosen Tomoko Soryo - Hug me Chicago as his entrance music. Nathan Henderson is staring across the cage at his opponent, tweaking his nipples... Tweaking his own nipples that is.
 |
|
 |
| 190 cm
20
196
0 - 2 - 0 |
|
187 cm
24
193
0 - 1 - 0 |
BJJ Blue Belt
Brawler
Good chin |
|
BJJ Blue Belt
Brawler
Very confident |
|
| |
|
Ladies and gentlemen. This fight is 3 rounds, in the middleweight division.
Introducing the fighter to my left, fighting out of the red corner.
With a record of 0 - 2 - 0, fighting out of Las Vegas, Nathan Henderson!
And introducing the fighter to my right, fighting out of the blue corner.
With a record of 0 - 1 - 0, fighting out of Tokyo, Eiji Okada!
The judges for this bout are Josh West, Roger Salmon and Paul Gruel.

The bell rings for round one and we are underway!
The bell rings for round one and we are underway!
Henderson tries to clinch but fails miserably

and Okada counters with a driving takedown into guard. Nice work there by Okada.
Henderson is looking to get back to his feet but can't, whilst Okada is controlling him.

Okada is trying to work a guillotine from the top, or something like that? Don't know how he thinks he's going to get a finish from there.

Henderson pushes Okada off and scrambles back to his feet.
Okada fails to land with a series of punches.
Henderson is looking to clinch.
Okada lunges in with swinging rights and lefts but Henderson circles away quickly and effectively.
Henderson thinks about countering with a head kick.
Okada throws a combination but comes up with nothing but fresh air.
Okada looks winded!

Henderson clinches.
Henderson trying to land knees to the body.
We've seen a great period of action over the last minute or so - credit to both fighters for going all out!
Henderson has Okada pressed against the cage, preventing Okada from circling away and getting back to striking at range.
Henderson stalling the fight.
Henderson lands an elbow just above Okada 's eye.

That's one minute gone in the round.
Henderson lands a nice uppercut.
The referee calls for Henderson to work.
Okada tries to pull guard but Henderson forces him back to his feet, against the cage.
A shot in the inside from Henderson.
Okada tries to pull guard but Henderson holds him up against the cage and eventually Okada drops back down to his feet.
Okada dodges an elbow strike from Henderson.
Henderson gets an overhook and lands an elbow to the side of the head.
Henderson swings away with an uppercut that misses.
Okada pulls guard successfully.
Henderson wants to stand but Okada is controlling his posture from full guard.

Henderson stands up from guard. Let's bang!

That's two minutes gone in the round.
Henderson rushes Okada and pushes him back against the cage in a clinch.
Henderson pushes off an throws an elbow but Okada leans to the side and avoids it. We're back to clinching against the cage.
A frustrated look appears on Okada's face as he tries to break the clinch.
Okada tries to pull guard but Henderson holds him up against the cage and eventually Okada drops back down to his feet.
Nathan Henderson has stuffed three takedown attempts in the round now. That's going to take a lot out of Eiji Okada.
Okada is trying to drag Henderson to the mat but Henderson just about manages to keep his footing. He used the cage to his advantage there.
Okada is trying to pull guard but Henderson turns him against the cage and we stay in the clinch.
Henderson comes over the top with an elbow. That landed flush.
Henderson throws a head punch that misses.
This has been an exciting period of action!
Okada jumps guard but Henderson stands there with Okada around his waist. Okada gives up and drops back to his feet. We remain in the clinch.
A head punch blocked on the inside by Okada.

That's three minutes gone in the round.
Okada jumps guard but Henderson turns him against the cage and keeps the fight standing.
Henderson tries a body shot but Okada blocks it.
Okada's head jolts backwards as he takes an uppercut right on the button!
Okada tries to pull guard but can't drag his opponent to the mat. Henderson just stands there and leans against the cage.
Henderson stalling.
Okada is trying to pull guard but being pressed up against the cage enables Henderson to keep the fight standing.
Okada blocks an uppercut.
Come on Henderson - let's have some action - none of this stalling nonsense.
Okada blocks a punch to the side of the head.
Okada wants a takedown.
Okada drops down for a takedown but doesn't get it.
Henderson lands an elbow just above Okada 's eye.

That's four minutes gone in the round.
Okada jumps guard but Henderson stands there with Okada around his waist. Okada gives up and drops back to his feet. We remain in the clinch.
Okada fails to pull guard.
Okada prevents a body shot from Henderson.
Henderson misses with a hook to the ribs.
Henderson creates a bit of distance and throws an elbow that only just misses.
Okada tries to pull guard but can't drag his opponent to the mat. Henderson just stands there and leans against the cage.
A short right hand to the side of the head by Henderson.
Henderson lands an elbow inside.
Nice elbow from Henderson.
Henderson lands with a left to the head.
We've seen a great period of action over the last minute or so - credit to both fighters for going all out!
Henderson holding his opponent close, against the cage.
Okada fails to pull the fight into his guard.
And thats the end of the round the fighters go back to their corners.
Nathan Henderson dominated that round.
That's the end of the interval. I'm sure that seemed a lot quicker than a minute for our two fighters! Back to the action.

Henderson fails with an attempt to clinch.
Henderson doesn't manage to clinch there - Okada circles away.
Henderson takes the fight into the clinch.
Henderson is looking to score with knees to the body. Maybe he'll change it up and go body then head. Okada is defending well for now.
Henderson throws an elbow that misses.
Okada jumps guard but Henderson turns him against the cage and keeps the fight standing.
Okada tries to pull guard but can't drag his opponent to the mat. Henderson just stands there and leans against the cage.
Henderson lands an elbow just above Okada 's eye.
Henderson taking a break, stalling in the clinch.
We've had a slow start to the round here - hopefully the action picks up.
Okada tries to pull guard but Henderson won't allow it.
Nathan Henderson has stuffed three takedown attempts in the round now. That's going to take a lot out of Eiji Okada.
A short uppercut from Henderson.
Okada is breathing heavily.
Henderson pushes Okada back against the cage and lands a hook to the side of the head.
 Okada is rocked! Okada is rocked!
Henderson lands a nice elbow from the clinch.
Okada is still on wobbly legs! Can Henderson finish him?
Henderson leaning his opponent against the cage.
Okada is trying to pull guard but Henderson turns him against the cage and we stay in the clinch.
Henderson creates some distance and fires off a vicious elbow that drops Okada! He pounces and finishes the fight with more strikes! Nice KO for Henderson.
Ladies and gentlemen, after 1:55 of round 2, we have a winner by way of TKO (Strikes). Nathan Henderson!
Eiji Okada was interviewed post fight and said 'Losses are part of the game, I'll come back stronger.'.
|
|
|
|
|
|
|
|
|
|
|
|
|
|
|
|
|
|
|
|
|
|
|
| S |
C
A |
G |
S |
C
B |
G |
|
S |
C |
G |
|
energy
A | B |
|
hype
A | B |
|
pop
A | B |
|
mgr
A | B |
|
FIGHT
RATING
42% |
|
|
|
|
|
|
|
Undercard bout
|
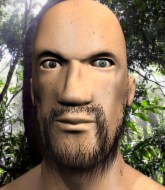
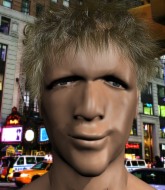
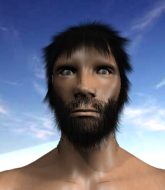
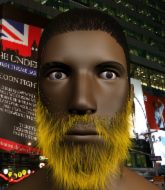
Coming up we have a light heavyweight MMA rules bout between Healthy Rob (ranked 7566 p4p, 25573 weight class) and Jon Bones (ranked 662 p4p, 705 weight class). Rob's entrance music is Blank Space. A fine choice. Bones has chosen I BEAT YO' ASS as his entrance music. Rob is coming into this fight with a significant injury, which will no doubt have an effect on his cardio. Jon Bones has the better chin. Will he look to stand and bang today?
 |
|
 |
| 190 cm
18
207
1 - 3 - 0 |
|
193 cm
18
205
0 - 3 - 0 |
BJJ Blue Belt
Counter fighter
Big heart |
|
BJJ Blue Belt
Brawler
Granite chin |
|
| |
|
Ladies and gentlemen. This fight is 3 rounds, in the light heavyweight division.
Introducing the fighter to my left, fighting out of the red corner.
With a record of 1 - 3 - 0, fighting out of Hilo, Healthy Rob!
And introducing the fighter to my right, fighting out of the blue corner.
With a record of 0 - 3 - 0, fighting out of Hilo, Jon Bones!
The judges for this bout are Chris Saunders, Paul Gruel and Josh West.
The bell rings for round one and we are underway!
The bell rings for round one and we are underway!
Bones shoots in looking for a takedown but Rob manages to keep the fight standing, pushing Bones's face into the canvas for good measure before circling away.
Rob is breathing heavily.

Bones has managed to clinch.
Bones has Rob pressed up against the cage and is working for takedown. Rob manages to improve position though and keeps the fight standing.
Bones is trying to work out of this bad position, with his back against the cage.
Bones has double underhooks and is working for a body lock takedown. He's got it. The fighters land in half guard but Rob regains guard immediately.
Bones forces his way into half guard.
Bones sitting and controlling from the half guard.
We've had a slow start to the round here - hopefully the action picks up.
Bones is looking for a kimura. It's going to be difficult to finish that from half guard though and Rob defends it well.
That's one minute gone in the round.
Bones is scoring with some nice ground and pound from the dominant position.
Bones content to sit in half guard and control for a moment.

Bones escapes and gets back to his feet.
Rob swats away the attempt to clinch by Bones.
That's two minutes gone in the round.
There's not a lot going on here and the crowd are letting the fighters know they're not willing to tolerate a lack of action.
Nice takedown defense from Rob. No joy for Bones on that attempt.
Healthy Rob has stuffed three takedown attempts in the round now. That's going to take a lot out of Jon Bones.
Bones misses with a takedown attempt - Rob sprawls well and throws a nice strike on the way out which just misses.
Bones shoots in for a takedown - he's clinched up with Rob but Rob pushes him off and we're back to square one.
Bones pulls out of a head kick attempt.
Bones shoots in for a takedown. "Ole!" shouts Rob as he jumps to the side.
A little feinted left hand from Rob on the counter but he doesn't commit to it.
Rob definitely looks more muscular than last time we saw him fight.
Bones goes for a double leg but Rob avoids the attempt and the two fighters end up clinched against the cage as Rob continues to drive forward.
Rob throwing a counter right hand but Bones manages to avoid it.
Healthy Rob is looking to keep the fight on the feet at all costs.
That's three minutes gone in the round.
Bones fails with a rather predictable takedown attempt.
Bones throws a half hearted mid kick.
Rob swung with a counter right hand that didn't connect.
Bones throws a right hand that misses
and Rob counters with a kick to the head that grazes his opponent. Bones is lucky that one didn't land flush.
Jon Bones seems to be the more aggressive standup fighter in this bout.
A really sloppy takedown attempt there from Bones.
Bones shoots in looking for a single leg takedown. Rob is trying to defend but Bones finishes it well and ends up in half guard. Let's see if he can advance position further.
That's four minutes gone in the round.
Bones tries to pass the half guard into mount. Rob knows what he's doing though and prevents the attempt.
Bones looks over to his corner - he wants some instructions but his corner are not responding.
Bones wants to work for an arm triangle but Rob is really keeping half guard well and defending the submission attempt.
Bones wants to lay and pray for a moment but Rob keeps working.
Boooooooooooooooooooo!!! God, this has been a terrible round. Come on you two, sort yourselves out!
Bones controlling the action here.
And thats the end of the round the fighters go back to their corners.
A close round but Jon Bones will probably get the nod.
The referee calls time. The cornermen exit stage left and we're back to business.
Bones slips a jab from Rob.
Bones bobs and weaves into range and then changes levels and scores with a nice takedown into side control.
Rob trying to remain calm as Bones controls from the top position.
Bones is looking to finish here, going for an Americana. Rob knows the correct defense though, so he's OK.
Bones tries for a kimura but Rob is defending well.
We've had a slow start to the round here - hopefully the action picks up.
Bones tries to advance to mount but can't.
Both fighters are absolutely exhausted here.
That's one minute gone in the round.
Bones lands some shots froms side control.
Bones decides to stand back up.
Rob tries to keep at a distance but Bones has taken the fight into the clinch.
Bones gets double underhooks and manages to take the fight to the ground.
Bones showing good wrestling skills to control the position.
Bones slips effortlessly into side control - very nice.
That's two minutes gone in the round.
Rob takes a nasty elbow to the side of the head.
Bones cracks Rob with an elbow. That is naaassty.
The ref warns both fighters not to hold the cage as they work up against the meshing.
You can see the frustration on Rob's face as Bones controls the position.
Bones scoring with punches and elbows.
Jon Bones has got the better of the ground game so far.
Bones works to advance to full mount. Rob defends for a few seconds but eventually he succumbs.
The fighters are pressed up against the cage, both looking to find a bit of space to work.
Rob is desperately trying to improve his position but Bones has a good base and remains in mount.
Rob in a bad spot here, taking shots to the head.
This has been an exciting period of action!
Bones is in the full mount, landing strikes.
Bones is still in mount, landing shots to his trapped opponent. Rob can't stay in a position like this for much longer.
That's three minutes gone in the round.
Bones lands with some vicious ground and pound - can Rob hang on?
Bones has his opponent pinned against the cage, landing some nasty ground and pound that is really making a bit of a mess out of Rob's face.
Bones trying to control but Rob is having none of it.
Rob in a bad spot here, taking shots to the head.
Bones get's back to his feet.
Bones tries to shoot in for a takedown. He's got hold of a leg but Rob swivels and escapes.
Rob leaves Bones with his face pressed against the mat as he sprawls beautifully, defending against a solid takedown attempt.
That's four minutes gone in the round.
Bones shoots in and drives through. Rob sprawls well.
Healthy Rob has stuffed three takedown attempts in the round now. That's going to take a lot out of Jon Bones.
Bones fails with a rather predictable takedown attempt.
Bones moves into the clinch successfully.
Bones blocks an uppercut.
Bones has Rob pressed up against the cage and is working for takedown. Rob manages to improve position though and keeps the fight standing.
Rob is defending well against a takedown attempt.
And thats the end of the round the fighters go back to their corners.
Jon Bones showed his class in that round. I'd imagine he'll take it on all the scorecards.
The minute break is over - no more time for sponges and pep talks - back to the action! This is the final round!

Bones misses with a jab, cross combination.
Rob was looking to counter that move with a punch but didn't quite pull the trigger.
Bones pushes Rob up against the cage in a clinch.
Bones is working for takedown but Rob is calmly controlling the position for now.
Bones lands a nice trip takedown into half guard.
Rob scrambles, trying to get to his feet, but Bones manages to mount him!
The referee warns Rob that he has to improve his position here as he takes two more clean shots to the head.
Bones pausing momentarily but resumes with a couple of decent strikes that do a bit of damage.
Rob tries to hold on but Bones pushes him away.
Rob is looking to improve his position but Bones isn't that keen on the idea.
Both fighters are breathing heavily.
This is a great period of action - very entertaining stuff!
Bones trying to control but Rob is having none of it.
That's one minute gone in the round.
Bones takes a little breather and maintains the position. The referee will be looking for him to stay active from such a dominant position though.
Rob in a bad spot here, taking shots to the head.
Rob is wriggling around trying to escape.
Rob takes a big shot to the head but keeps on trying to improve his position.
Bones landing punches.
Bones wants to control the pace but Rob is squirming around nicely.
Rob is desperately trying to get back to half guard.
Healthy Rob has stepped it up - he knows he needs a finish here!
That's two minutes gone in the round.
Bones controlling his opponent.
Bones with the ground and pound from mount.
Bones takes a little breather and maintains the position. The referee will be looking for him to stay active from such a dominant position though.
Bones trying to control but Rob is having none of it.
The referee warns Rob that he has to improve his position here as he takes two more clean shots to the head.
That's three minutes gone in the round.
Rob is writhing around trying to get back to his feet.
Bones prevents Rob from getting the reversal.
Bones has been the more effective fighter overall so far.
Bones lands with some strikes.
Rob tries to improve his position but instead Bones has taken his back!
Rob looking very determined here, making life difficult for Bones.
Bones working for a RNC but it's not happening just yet.
That's four minutes gone in the round.
Rob is trying to break free.
Bones biding his time, looking for the opening.
Rob trying to control the action but Bones just sinks the hooks in.
The crowd thankful this round is nearly over.
Bones is riding his opponent, not letting Rob buck him off.
Jon Bones is fighting for a decision - hopefully he's judged it right and he's actually winning the fight.
And that's the end of the fight!
Jon Bones comfortably won the final round on my scorecard.
I've got Bones winning every round here. Surely the decision will go his way and he'll pick up a well deserved decision victory. Over to the ring announcer for the scorecards.
Ladies and gentlemen, after 3 rounds of action, we go to the scorecards for a decision.
Judge Chris Saunders scores the fight 27:30
Judge Paul Gruel scores the fight 27:30
Judge Josh West scores the fight 27:30
In favor of your winner, by unanimous decision... Jon Bones!
Jon Bones opened up his post fight interview with a scream to camera that he wants a title shot! Whether he deserves the shot will be up to the management of the organization, so I guess he'll have to wait and see.
Healthy Rob was interviewed post fight and said 'Well, it's not like I really wanted to fight anyways. My opponent is racist so-.'.
|
|
|
|
|
|
|
|
|
|
|
|
|
|
|
|
|
|
|
|
|
|
|
| S |
C
A |
G |
S |
C
B |
G |
|
S |
C |
G |
|
energy
A | B |
|
hype
A | B |
|
pop
A | B |
|
mgr
A | B |
|
FIGHT
RATING
33% |
|
|
|
|
|
|
|
Undercard bout
|
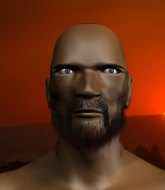
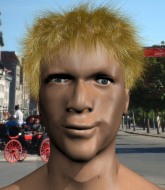
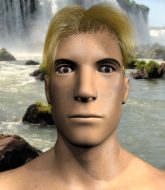
Coming up we have a middleweight MMA rules bout between Yuge Peennice (ranked 5654 p4p, 4153 weight class) and Fabreze Verdum (ranked 583 p4p, 494 weight class). The key to victory for Yuge Peennice has got to be keeping the fight on the feet.
 |
|
 |
| 185 cm
25
192
0 - 0 - 0 |
|
190 cm
25
194
1 - 0 - 0 |
BJJ Blue Belt
Excellent boxer
KO power |
|
BJJ Brown Belt
Basic striking
Granite chin |
|
| |
|
Ladies and gentlemen. This fight is 3 rounds, in the middleweight division.
Introducing the fighter to my left, fighting out of the red corner.
With a record of 0 - 0 - 0, fighting out of Hilo, Yuge Peennice!
And introducing the fighter to my right, fighting out of the blue corner.
With a record of 1 - 0 - 0, fighting out of Hilo, Fabreze Verdum!
The judges for this bout are Colin Fray, Jeff Smith and Roger Salmon.
The bell rings for round one and we are underway!
The bell rings for round one and we are underway!
Verdum shoots in but no luck this time.
Peennice's corner calls for a 1, 2 combination and Peennice duly obliges.
Peennice lands a jab-cross combination.
Verdum fakes a strike and closes the distance, dragging Peennice to the ground. Verdum is now in Peennice's guard.
Verdum drops back for a leg! It's a sloppy attempt though and Verdum jumps back into guard quickly, to retain the dominant position.
Peennice is trying to stand and escape. In the scramble, Verdum has locked hold of an arm and he's managed to lock on an armbar - Peennice taps out instantly and this one is all over!
Ladies and gentlemen, after 0:37 of round 1, we have a winner by way of Submission (Armbar). Fabreze Verdum!
|
|
|
|
|
|
|
|
|
|
|
|
|
|
|
|
|
|
|
|
|
|
|
| S |
C
A |
G |
S |
C
B |
G |
|
S |
C |
G |
|
energy
A | B |
|
hype
A | B |
|
pop
A | B |
|
mgr
A | B |
|
FIGHT
RATING
100% |
|
|
|
|
|
|
|
Undercard bout
|
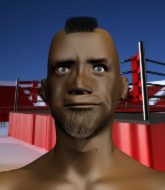
Coming up we have a middleweight MMA rules bout between Chyken Howse (ranked 3674 p4p, 6843 weight class) and George Madival (ranked 449 p4p, 632 weight class). Howse kept the crowd waiting but all that was forgotten when his ring entrance music started. The incomparable musical genius that is kill yourself. Over to our ring announcer for the fighter introductions!
 |
|
 |
| 187 cm
25
192
1 - 1 - 0 |
|
178 cm
25
195
0 - 1 - 0 |
BJJ Blue Belt
Solid Muay Thai
Self confident |
|
BJJ Blue Belt
Brawler
Intelligent |
|
| |
|
Ladies and gentlemen. This fight is 3 rounds, in the middleweight division.
Introducing the fighter to my left, fighting out of the red corner.
With a record of 1 - 1 - 0, fighting out of Hilo, Chyken Howse!
And introducing the fighter to my right, fighting out of the blue corner.
With a record of 0 - 1 - 0, fighting out of Hilo, George Madival!
The judges for this bout are Roger Salmon, Micheangelo Fripello and Josh West.
The bell rings for round one and we are underway!
The bell rings for round one and we are underway!
Madival closes the distance and gets a double leg, slamming Howse to the mat! Howse manages to get full guard.
Howse is edging up against the cage. He's using the cage to get back to his feet. Nice work there - the fighters are clinched.

Howse escapes the clinch and we're back to striking.
Howse gets tackled into the cage by Madival. Madival maintains the clinch.
Howse breaks from the clinch.
Madival closes the distance and scores a nice trip takedown into half guard. Howse did well to prevent Madival getting side control.
The crowd cheering loudly, showing their appreciation for the quality fight we're seeing here.
Howse pushes Madival off looking to stand but Madival dives back in and keeps control.
The fighters are pressed up against the cage, both looking to find a bit of space to work.
Madival tries to stand but can't do so whilst Howse controls his leg.
Howse has managed to escape just enough to sneak back to his feet but Madival is on him like a limpet, forcing Howse back against the cage.
Howse breaks the clinch and we're back to striking at distance.
George Madival seems to be the more aggressive standup fighter in this bout.
Howse lands the left hand.
Madival moves into the clinch.
Howse definitely looks more muscular than last time we saw him fight.
Howse's corner calls for him to break the clinch, which he does.
Madival has closed the distance and engaged Howse in a clinch.
That's one minute gone in the round.
Howse breaks the clinch.
Madival clinches up against the cage.
Madival is trying to force a seperation but Howse has the dominant position.
Madival wants to break free. God knows he wants to breaaaak freeee.
Howse breaks the clinch and we're back to striking at distance.
Madival has managed to clinch.
Howse breaks the clinch.
Madival has taken the fight to the clinch.

Madival breaks the clinch and we return to the middle of the mat.
Madival dives in and scores a takedown into Howse's guard.
Madival gets to his feet and steps away from his opponent.
A head kick misses from Howse.
Howse moves into the clinch.
Howse keeps control of Madival as he tries to wriggle out of the double underhooks.
Madival can't break the clinch.
Madival is looking to break free of the clinch but Howse has double underhooks.
That's two minutes gone in the round.
Howse breaks the clinch and we return to the middle of the mat.
Madival closes the distance and clinches.
This is a great period of action - very entertaining stuff!
Madival is looking to break free of the clinch but Howse has double underhooks.
Howse breaks from the clinch.
Madival closes the distance and pushes Howse back into the cage.
Howse breaks from the clinch.
Howse forces Madival back against the cage and clinches.
Howse escapes the clinch and we're back to striking.
Madival shoots in for a takedown from distance. He catches Howse napping and manages to drive through into side control!
Howse sneaks out the side door and pushes Madival away - he's back to his feet. The crowd show their appreciation for the escape.
Madival drives through and clinches with Howse against the cage.
Howse pushes off and circles away, back to the middle of the mat.
Howse gets tackled into the cage by Madival. Madival maintains the clinch.
Howse keeps the fight in the clinch, despite Madival's efforts to push away.
Howse breaks the clinch.
That's three minutes gone in the round.
Madival has Howse up against the cage in a clinch.
Howse breaks the clinch and we return to the middle of the mat.
Howse tries to clinch up.
Madival drives through with a takedown into guard.
Howse manages to escape and get back to his feet.
Madival looking to shoot here. He's gone for it and he's landed a takedown into side control! Oh, that's bad for Howse!
Howse sneaks out the side door and pushes Madival away - he's back to his feet. The crowd show their appreciation for the escape.
The crowd are loving this. Great action here.
Madival drives through and clinches with Howse against the cage.
Howse pushes off and circles away, back to the middle of the mat.
Madival has managed to clinch.
Howse breaks the clinch and we return to the middle of the mat.
That's four minutes gone in the round.
Madival fakes with an overhand right and moves in to clinch with Howse, pushing him back against the cage.
Howse pushes off and circles away, back to the middle of the mat.
Madival closes the distance and clinches.
Howse breaks from the clinch.
Howse throws a head kick that Madival semi-blocks.
Madival moves into the clinch successfully.
Howse manages to break the clinch.
Howse bobs and weaves and throws out a fast jab that snaps Madival's head backwards.
Madival shoots in for a takedown! He's got it and he's managed to land in side control! That's better than Madival was expecting from the takedown attempt, I'm sure!
Howse wants to get back to his feet but Madival is dominant here and he's now got Howse's back!
Howse is breathing heavily.
As the round comes to an end the crowd are showing their appreciation for a great round of action.
Howse wants to get back to his feet.
Madival is looking cool and calm here, just waiting for a good opportunity to attack and finish the fight from this dominant position.
And thats the end of the round the fighters go back to their corners.
Chyken Howse dominated that round.
The minute break is over - no more time for sponges and pep talks - back to the action!
Madival showing good head movement there, avoiding the strikes from Howse.
Madival closes the distance and gets a trip takedown into side control. Howse quickly recovers to half guard.
Howse kicks off Madival and gets to his feet.
Madival clinches.
Madival tries to break the clinch but Howse is controlling the position.
Howse manages to break the clinch.
Howse gets tackled into the cage by Madival. Madival maintains the clinch.
Madival wants to strike at distance but he can't break free of the clinch.
A frustrated look appears on Madival's face as he tries to break the clinch.
Howse prevents Madival from breaking the clinch.
Howse breaks the clinch and we're back to striking at distance.
This is a great period of action - very entertaining stuff!
Howse throws a nice looking combination but Madival bobs and weaves to avoid any damage.
Madival moves into the clinch successfully.
Madival breaks the clinch and we're back to striking at distance.
That's one minute gone in the round.
Howse with the inside leg kick.
Howse lands a front kick.
The fight moves into the clinch position.
Howse breaks the clinch and we return to the middle of the mat.
Madival changes levels and drives through with a really nice takedown into side control. Howse looks really pissed at himself for not defending that better.
Howse throws his opponent off and manages to get back to his feet! Nicely done!
This has been an exciting period of action!
Madival shoots in and gets a takedown into half guard. Madival showed some decent athleticism there.
Howse makes some distance and scrambles quickly back to his feet. Nice work!
Howse closes the distance and clinches.
That's two minutes gone in the round.
Howse's corner calls for him to break the clinch, which he does.
Madival closes the distance and pushes Howse back into the cage.
Howse breaks the clinch.
Madival closes the distance and clinches up, looking for a takedown. He shifts his weight and gets a nice trip into half guard.
Howse pushes Madival off and gets back to his feet.
Both fighters are absolutely exhausted here.
Howse throws a head kick that connects with a bit of head and a bit of hand.
Madival instigates a clinch.
Madival is trying to break the clinch but Howse is controlling him.
Howse breaks the clinch.
Madival looking for a takedown here - he's got it.
Howse has managed to wall walk up one of the corner posts to get back to his feet. Madival is pushing him up against the cage, looking to control the position.
Howse breaks the clinch.
That's three minutes gone in the round.
Madival forces Howse back against the cage and clinches.
Howse's corner calls for him to break the clinch, which he does.
Madival closes the distance and clinches.
Howse is really dominating this fight. Is there anything that Madival can do to turn this around?
Howse breaks the clinch.
Madival gets in close and instigates a clinch.
Howse breaks the clinch and we return to the middle of the mat.
Howse lands with a nice low kick. That'll leave a bruise.
Madival has managed to clinch.
Howse pushes off and circles away, back to the middle of the mat.
Madival shoots in from a long way out. He's driving through with the takedown attempt and he eventually gets it, landing in Howse's guard.
Howse manages to wriggle out and sneak his way back up to his feet, so the fighters are now clinched up against the cage.
Fantastic stuff here - a very entertaining period of action, which has drawn cheers from the crowd.
Howse breaks the clinch and we're back to striking at distance.
Madival moves into the clinch.
Howse breaks the clinch and we return to the middle of the mat.
That's four minutes gone in the round.
Madival rushes Howse and pushes him back against the cage in a clinch.
Madival tries to break free but Howse pushes him back against the cage.
Howse working hard to break the clinch.
Madival breaks the clinch.
Madival moves into range and clinches up with Howse.
Howse breaks the clinch.
Madival closes the distance and after a bit of a stuggle, scores a takedown into Howse's guard.
Madival won't allow Howse to get back to his feet.
Howse has his feet on Madival's hips. He pushes off and gets to his feet. Nice work.
Chyken Howse is looking to keep the fight on the feet at all costs.
Madival closes the distance and gets a double leg, slamming Howse to the mat! Howse manages to get full guard.
Howse is scooting his butt against the cage and has managed to get back to his feet. Madival presses him back against the cage, presumably looking to take the fight back to the mat.
As the round comes to an end the crowd are showing their appreciation for a great round of action.
Madival looks like he'd prefer to be striking at range right now.
And thats the end of the round the fighters go back to their corners.
Chyken Howse dominated that second round.
The fighters' corners scream their final instructions, as the referee calls time. Here we go, back to the action! This is the final round!
Madival swats away the attempt to clinch by Howse.
Madival gets to the clinch - let's see what his plan is here.
Madival is trying to break free.
Howse breaks the clinch and we're back to striking at distance.
Madival clinches with his opponent.
Howse pushes off and circles away, back to the middle of the mat.
Madival closes the distance and clinches.
Madival is trying to break free.
Madival wants to get back to striking at distance but Howse won't allow it.
We've had a slow start to the round here - hopefully the action picks up.
Madival working hard to break the clinch.
Howse breaks the clinch and we return to the middle of the mat.
Madival darts in and clinches Howse up against the cage.
Howse breaks the clinch.
Madival has closed the distance and engaged Howse in a clinch.
That's one minute gone in the round.
Madival wants to push off and get back to the center of the mat but Howse has him pressed against the cage.
George Madival seems to be working more effectively in the clinch in the fight so far.
Madival manages to break the clinch.
Madival has his head snapped back a nice jab. A little nod from Madival there as he acknowledges the shot.
Howse gets tackled into the cage by Madival. Madival maintains the clinch.
Howse's corner calls for him to break the clinch, which he does.
Howse moves into range and clinches up with Madival.
Madival tries to break the clinch but Howse is controlling the position.
Howse breaks from the clinch.
Madival drops down and drives through with a powerful takedown into guard.
Howse has managed to wall walk up one of the corner posts to get back to his feet. Madival is pushing him up against the cage, looking to control the position.
This is a great period of action - very entertaining stuff!
Howse breaks the clinch.
Madival gets a clinch.
Howse escapes the clinch and we're back to striking.
Madival has managed to clinch.
That's two minutes gone in the round.
Howse breaks the clinch and we're back to striking at distance.
Madival closes the distance and clinches.
Howse has Madival pressed against the cage, preventing Madival from circling away and getting back to striking at range.
Howse manages to break the clinch.
Madival slips a jab and a cross from Howse.
Despite the aggression on Madival's face he doesn't fully commit to the counter.
Both fighters are breathing heavily.
Howse tries a switch kick but it misses it's target.
Madival shoots in for a takedown from distance. He catches Howse napping and manages to drive through into side control!
Howse throws Madival to one side and escapes!
Madival darts in and clinches Howse up against the cage.
Madival working hard to break the clinch.
Howse breaks the clinch and we're back to striking at distance.
Madival closes the distance and clinches.
Howse wants to get back to striking at distance but Madival won't allow it.
Howse keeps control of Madival as he tries to wriggle out of the double underhooks.
Madival wants to strike at distance but he can't break free of the clinch.
That's three minutes gone in the round.
Madival has had enough of the clinch but Howse keeps him there for the moment.
Howse manages to break the clinch.
Madival closes the distance and clinches.
Madival working hard to break the clinch.
Howse pushes off and circles away, back to the middle of the mat.
Madival gets a clinch.
Madival is looking to break free of the clinch but Howse has double underhooks.
Madival wants to get back to striking at distance but Howse won't allow it.
Howse pushes off and circles away, back to the middle of the mat.
Madival pushes Howse up against the cage in a clinch.
Howse pushes off and circles away, back to the middle of the mat.
Madival on the wrong end of a vicious looking body shot.
Madival has taken the fight to the clinch.
Howse pushes off and circles away, back to the middle of the mat.
That's four minutes gone in the round.
Madival looks for a takedown. He's got it. We're now in half guard.
Howse has one foot on Madival's thigh - he pushes off and manages to get back to his feet.
The crowd cheering loudly, showing their appreciation for the quality fight we're seeing here.
Madival gets a clinch.
Howse breaks the clinch.
Chyken Howse is looking to throw some combinations by the looks of things.
Howse gets tackled into the cage by Madival. Madival maintains the clinch.
Howse breaks the clinch and we return to the middle of the mat.
Madival forces Howse back against the cage and clinches.
Madival's corner calls for him to break the clinch, which he does.
The fight moves into the clinch position.
The crowd applaud the fighters' efforts here as the round comes to an end.
Howse breaks the clinch and we're back to striking at distance.
George Madival has stepped it up - he knows he needs a finish here!
Chyken Howse is fighting for a decision here - he's started to take the cautious approach.
Madival pushes Howse up against the cage in a clinch.
And that's the end of the fight!
That was a close round. You could make an argument for either fighter but I would give it to Chyken Howse.
Well I reckon that's a shut out for Howse, winning every round. Will the judges agree? They are the ones who matter, even if they are often depressingly incompetent. Over to the ring announcer for the scorecards.
Ladies and gentlemen, after 3 rounds of action, we go to the scorecards for a decision.
Judge Roger Salmon scores the fight 30:28
Judge Micheangelo Fripello scores the fight 29:28
Judge Josh West scores the fight 30:28
In favor of your winner, by unanimous decision... Chyken Howse!
After the fight, Chyken Howse was humble in paying tribute to his opponent but made it clear he wants to go on to bigger and better things. It seemed to go down well with the crowd who cheered him loudly.
|
|
|
|
|
|
|
|
|
|
|
|
|
|
|
|
|
|
|
|
|
|
|
| S |
C
A |
G |
S |
C
B |
G |
|
S |
C |
G |
|
energy
A | B |
|
hype
A | B |
|
pop
A | B |
|
mgr
A | B |
|
FIGHT
RATING
97% |
|
|
|
|
|
|
|
Undercard bout
|
Coming up we have a welterweight MMA rules bout between Ben Nak Muay (ranked 4232 p4p, 7515 weight class) and Oscar De La Cunt (ranked 542 p4p, 716 weight class). Both fighters look fresh as a daisy as they make their way towards the cage.
 |
|
 |
| 182 cm
25
182
1 - 0 - 0 |
|
150 cm
21
181
2 - 2 - 0 |
BJJ Blue Belt
Solid Muay Thai
Granite chin |
|
BJJ White Belt
Brawler
Can Moonwalk |
|
| |
|
Ladies and gentlemen. This fight is 3 rounds, in the welterweight division.
Introducing the fighter to my left, fighting out of the red corner.
With a record of 1 - 0 - 0, fighting out of Hilo, Ben Nak Muay!
And introducing the fighter to my right, fighting out of the blue corner.
With a record of 2 - 2 - 0, fighting out of Hilo, Oscar De La Cunt!
The judges for this bout are Chris Saunders, Josh West and Jeff Smith.
The bell rings for round one and we are underway!
The bell rings for round one and we are underway!
Nak Muay closes the distance and clinches.
Nak Muay lands a damaging elbow.
De La Cunt on the defensive, avoiding the knees to the body.
De La Cunt fails to pull the fight into his guard.
De La Cunt is trying to break the clinch but Nak Muay is controlling him.
Nak Muay tries to land a knee to the body but he is off balance and De La Cunt avoids it.
De La Cunt blocks a knee to the body. He'll have a nicely bruised forearm in the morning.
Nak Muay trying to land knees to the body.
De La Cunt is working for takedown but Nak Muay is calmly controlling the position for now.
Nak Muay using the Thai clinch to land knees to the body.
Nak Muay gets double underhooks to prevent a takedown attempt from De La Cunt.
Ben Nak Muay has stuffed three takedown attempts in the round now. That's going to take a lot out of Oscar De La Cunt.
Knees in the clinch landing for Nak Muay.
We've had a slow start to the round here - hopefully the action picks up.
De La Cunt is trying to force a seperation but Nak Muay has the dominant position.
Nak Muay scores with a knee to the head.
Nak Muay lands a good knee to the midsection. De La Cunt won't want to take too many of those.
De La Cunt looks winded!
That's one minute gone in the round.
De La Cunt tries to pull guard but Nak Muay holds him up against the cage and eventually De La Cunt drops back down to his feet.
Kneeeeees! The crowd are calling for knees to the body. Nak Muay obliges.
Nak Muay creates a bit of space for himself and sneaks an elbow through De La Cunt's defenses.
Nak Muay crunches a lovely knee into De La Cunt's ribcage.
Nak Muay lands an elbow just above De La Cunt 's eye.
Nak Muay landing some nice looking knees to the body.
Nak Muay putting his Muay Thai to good use. He has De La Cunt in a tight clinch and is doing some damage with knees to the body.
We're hearing some news coming in from back stage. It's official - De La Cunt has eaten all the pies!
Kneeeeees! The crowd are calling for knees to the body. Nak Muay obliges.
Nak Muay lands a nice elbow from the clinch.
Kneeeeees! The crowd are calling for knees to the body. Nak Muay obliges.
The fans in attendance giving it up for the two fighters, who have really let it all hang out in the last minute or so!
Nice elbow from Nak Muay.
Knees to the body from Nak Muay.
Nak Muay crunches a lovely knee into De La Cunt's ribcage.
That's two minutes gone in the round.
Nak Muay lands a good knee to the midsection. De La Cunt won't want to take too many of those.
Nak Muay unloads a knee to the mid-section. De La Cunt lets out a prehistoric sounding urrrrgh.
Nak Muay working De La Cunt over with knees to the body.
De La Cunt takes an elbow to the forehead.
Nak Muay working De La Cunt over with knees to the body.
Nak Muay using the Thai clinch to land knees to the body.
Nak Muay utilising his Muay Thai to score with a knee to the body.
Knees in the clinch landing for Nak Muay.
Nak Muay lands an elbow inside.
Nak Muay working De La Cunt over with knees to the body.
Nak Muay lands a nice knee to the body.
Nak Muay using the Thai clinch to land knees to the body.
De La Cunt is trying to pull guard but Nak Muay turns him against the cage and we stay in the clinch.
That's three minutes gone in the round.
Nak Muay landing knees to the body.
De La Cunt takes an elbow to the temple.
De La Cunt is rocked!
Nak Muay lands a nice elbow.
De La Cunt is still on wobbly legs! Can Nak Muay finish him?
Clinched against the cage, Nak Muay lands a big elbow that drops De La Cunt! The ref dives in to save him from more shots - De La Cunt is complaining that he's OK but he was done.
Ladies and gentlemen, after 3:20 of round 1, we have a winner by way of TKO (Strikes). Ben Nak Muay!
|
|
|
|
|
|
|
|
|
|
|
|
|
|
|
|
|
|
|
|
|
|
|
| S |
C
A |
G |
S |
C
B |
G |
|
S |
C |
G |
|
energy
A | B |
|
hype
A | B |
|
pop
A | B |
|
mgr
A | B |
|
FIGHT
RATING
61% |
|
|
|
|
|
|
|
Undercard bout
|
Coming up we have a welterweight MMA rules bout between Yeti Baguetti (ranked 25575 p4p, 2670 weight class) and Josh Koscheck Jr (ranked 752 p4p, 380 weight class). Baguetti kept the crowd waiting but all that was forgotten when his ring entrance music started. The incomparable musical genius that is HEYYEYAAEYAAAEYAEYAA. The crowd giving both fighters a great reception on their way into the arena. That's good to see.
 |
|
 |
| 185 cm
25
172
0 - 3 - 0 |
|
180 cm
25
180
1 - 0 - 0 |
BJJ White Belt
Solid boxing
Self confident |
|
Good wrestler
Brawler
Can Moonwalk |
|
| |
|
Ladies and gentlemen. This fight is 3 rounds, in the welterweight division.
Introducing the fighter to my left, fighting out of the red corner.
With a record of 0 - 3 - 0, fighting out of Hilo, Yeti Baguetti !
And introducing the fighter to my right, fighting out of the blue corner.
With a record of 1 - 0 - 0, fighting out of Hilo, Josh Koscheck Jr!
The judges for this bout are Roger Salmon, Ryoma Takatsuka and Micheangelo Fripello.
The bell rings for round one and we are underway!
The bell rings for round one and we are underway!

Baguetti is looking for a takedown here. He's shot in and has managed to get it, finishing up in Koscheck Jr's half guard.
Koscheck Jr is looking to regain full guard. Not this time though.
Koscheck Jr is persisting with the attempt to improve his position.
Koscheck Jr is trying to control but can't.
Koscheck Jr tries to strike from the bottom but it doesn't land.
Baguetti wants to take a breather but Koscheck Jr is having none of it.
Koscheck Jr tries to roll over but Baguetti keeps him under control.
Koscheck Jr has no desire to be mounted, so is trying to control. Baguetti is working away from the top position though.
Baguetti wants to lay and pray for a moment but Koscheck Jr keeps working.
We've had a slow start to the round here - hopefully the action picks up.
Koscheck Jr missing with punches from the bottom.
Koscheck Jr gets full guard.
Baguetti scoring with some ground and pound.
That's one minute gone in the round.
Koscheck Jr is looking for a triangle but Baguetti pushes his legs off easily.
Koscheck Jr throwing some rather feeble looking strikes off his back.
Koscheck Jr pulls Baguetti in close to prevent any damage.
There's a bit of a scramble here and now Koscheck Jr is on top in guard.

Baguetti wants to stand up but Koscheck Jr is controlling him.
Koscheck Jr is looking to work some ground and pound but Baguetti has wrist control.
Koscheck Jr is in close to Baguetti 's body, working some short punches and elbows.
Koscheck Jr throws a big right hand that misses.
Baguetti looking to sweep here. No luck so far.
Koscheck Jr content to strike from guard, landing some decent shots.
Baguetti wants to stand and escape but Koscheck Jr is having none of it.
That's two minutes gone in the round.
Koscheck Jr looking to pass the guard.
Baguetti not looking particularly offensive just at the moment.
Koscheck Jr lands a couple of elbows.
Koscheck Jr lands a couple of decent looking shots.
Koscheck Jr stands up and looks to throw the legs aside to pass to side control. Baguetti swivels though and keeps the full guard.
Koscheck Jr postures up and lands a big shot to Baguetti 's brow.

Koscheck Jr got a little sloppy there for a moment and Baguetti has worked his way into a loose triangle - can he finish it?! No, Koscheck Jr has managed to get both his arms back between Baguetti 's legs - danger averted.
Baguetti keeping moving, preventing Koscheck Jr from controlling successfully.
Koscheck Jr lands a couple of decent looking shots.
That's three minutes gone in the round.
Koscheck Jr landing some decent shots from guard.
Baguetti controls Koscheck Jr momentarily but Koscheck Jr frees himself.
Koscheck Jr makes a bit of distance and scores with some ground and pound, still in guard.
Koscheck Jr working from the guard for now, landing some ground and pound.
Baguetti throws his legs up looking for a submission but Koscheck Jr uses it to pass to side control.
That's four minutes gone in the round.
Koscheck Jr grinds an elbow into Baguetti 's temple.
 Baguetti is rocked! Baguetti is rocked!
A big shot lands for Koscheck Jr! That's hurt Baguetti ! Will he recover? Koscheck Jr fires away with more strikes and the referee has to step in to stop the fight!
Ladies and gentlemen, after 4:31 of round 1, we have a winner by way of TKO (Strikes). Josh Koscheck Jr!
Yeti Baguetti was interviewed post fight and said 'I hurt my foreskin in camp but ill come back stronger'.
|
|
|
|
|
|
|
|
|
|
|
|
|
|
|
|
|
|
|
|
|
|
|
| S |
C
A |
G |
S |
C
B |
G |
|
S |
C |
G |
|
energy
A | B |
|
hype
A | B |
|
pop
A | B |
|
mgr
A | B |
|
FIGHT
RATING
30% |
|
|
|
|
|
|
|
Co-main event
|
Coming up we have a featherweight MMA rules bout between Chad Franco (ranked 7497 p4p, 3237 weight class) and Bingo Snapper (ranked 526 p4p, 332 weight class). Bingo Snapper has the power to score a knockout today if he connects clean with Chad Franco's chin.
 |
|
 |
| 175 cm
22
145
2 - 2 - 0 |
|
178 cm
25
155
0 - 0 - 0 |
BJJ Blue Belt
Solid Muay Thai
Big heart |
|
BJJ Brown Belt
Brawler
Likes musicals |
|
| |
|
Ladies and gentlemen. This fight is 3 rounds, in the featherweight division.
Introducing the fighter to my left, fighting out of the red corner.
With a record of 2 - 2 - 0, fighting out of Tokyo, Chad Franco!
And introducing the fighter to my right, fighting out of the blue corner.
With a record of 0 - 0 - 0, fighting out of Hilo, Bingo Snapper!
The judges for this bout are Jeff Smith, Paul Gruel and Ryoma Takatsuka.
The bell rings for round one and we are underway!
The bell rings for round one and we are underway!
Franco paws at his opponent with the jab and then lunges in with a straight, right on the button.
Franco lands with a two punch combination before moving back out of range.
Crunch! Franco slams his shin into Snapper's torso.
Franco is trying hard to land a takedown here. Snapper sprawls well and keeps this one on the feet.
Snapper shoots in for a takedown from distance. He catches Franco napping and manages to drive through into side control!
Snapper thinks about going for a far side armbar but bails out and retains the dominant position instead.
This has been an exciting period of action!
Snapper is looking for a kimura. He might have it! No, Franco has escaped the position, nice work there.
Snapper has worked his way into a potential kimura here. Franco is trying to get out of the position but his squirming has just got him deeper into trouble. Snapper yanks on the arm and Franco is forced to tap due to a very painful looking submission! Nice work by Snapper.
Ladies and gentlemen, after 0:53 of round 1, we have a winner by way of Submission (Kimura). Bingo Snapper!
|
|
|
|
|
|
|
|
|
|
|
|
|
|
|
|
|
|
|
|
|
|
|
| S |
C
A |
G |
S |
C
B |
G |
|
S |
C |
G |
|
energy
A | B |
|
hype
A | B |
|
pop
A | B |
|
mgr
A | B |
|
FIGHT
RATING
100% |
|
|
|
|
|
|
|
Main event
|
Coming up we have a light heavyweight MMA rules bout between Sick Guy (ranked 3193 p4p, 2478 weight class) and Maurice Rue (ranked 407 p4p, 322 weight class). Guy comes to the cage accompanied by bitches aint shit. Maurice Rue has the better chin. Will he look to stand and bang today?
 |
|
 |
| 193 cm
22
205
2 - 0 - 0 |
|
205 cm
25
215
3 - 0 - 0 |
BJJ Blue Belt
Solid boxing
Self confident |
|
Good takedowns
Counter fighter
Very confident |
|
| |
|
Ladies and gentlemen. This fight is 5 rounds, for the light heavyweight championship of the world!
Introducing the champion to my left, fighting out of the red corner.
With a record of 2 - 0 - 0, fighting out of Hilo, Sick Guy!
And introducing the challenger to my right, fighting out of the blue corner.
With a record of 3 - 0 - 0, fighting out of Hilo, Maurice Rue!
The judges for this bout are Micheangelo Fripello, Josh West and Chris Saunders.
The bell rings for round one and we are underway!
The bell rings for round one and we are underway!
Guy gets in close and instigates a clinch.
Rue tries for a takedown but Guy manages to get underhooks.
Rue lands a short shot on the inside that snaps the head of Guy backwards.
Guy pushes off and circles away, back to the middle of the mat.
Guy's corner calls for a 1, 2 combination and Guy duly obliges.
Rue avoids a lazy jab quite easily.
Rue feints the counter takedown.
Rue is a painfully thin specimen of a man. You do wonder whether a good body kick would snap him clean in two.
Guy lunges in with swinging rights and lefts but Rue circles away quickly and effectively.
Guy swinging wildly here.
Guy throws a series of punches but Rue moves out of range.
Rue drops his hands momentarily and Guy takes advantage with a crisp shot to the head.
A combination from Guy does no damage.
Rue drops down looking to force a counter takedown but Guy defends it well.
The crowd cheering loudly, showing their appreciation for the quality fight we're seeing here.
Rue bobs and weaves well there to avoid the strikes.
A combination from Guy does no damage.
That's one minute gone in the round.
Guy takes the fight into the clinch.
Guy wants to break free. God knows he wants to breaaaak freeee.
Rue looking for a takedown.
Guy wants to strike at distance but he can't break free of the clinch.
Guy gets double underhooks to prevent a takedown attempt from Rue.
Sick Guy has stuffed three takedown attempts in the round now. That's going to take a lot out of Maurice Rue.
Guy tries to circle away but Rue has him pinned against the cage.
Guy has had enough of the clinch but Rue keeps him there for the moment.
Rue is trying to drag Guy to the mat but Guy just about manages to keep his footing. He used the cage to his advantage there.
Rue is looking for a takedown.
Rue is working for a takedown up against the cage. He can't get it on this occasion though.
Guy is fighting off a takedown attempt but Rue is just too persistent for him and manages to trip Guy to the mat. Guy regains guard as soon as the fighters hit the mat.
Guy manages to wriggle out and sneak his way back up to his feet, so the fighters are now clinched up against the cage.
Rue has Guy pressed up against the cage and is working for takedown. Guy manages to improve position though and keeps the fight standing.
Rue looks winded!
That's two minutes gone in the round.
Rue tries for a takedown. No joy.
Rue drops down looking for an ankle pick but Guy pulls his leg out and moves away.
Guy will need to tighten up his combinations if he doesn't want to gas himself out, swinging at thin air.
And Rue tries to counter it with a takedown but Guy pushes his down on his head and steps out.
Fantastic stuff here - a very entertaining period of action, which has drawn cheers from the crowd.

Guy drops Rue with a beautiful combination! Rue stares up at his opponent, who ushers him back to his feet - Guy is looking for the KO!
Rue is rocked!
 It looks like Maurice Rue has been cut. It looks like Maurice Rue has been cut.
Guy misses with a two punch combination.
Rue feints the counter takedown.
BOOM! Guy lands a beautiful left hook that drops Rue. Rue tries to recover but Guy is having none of it, landing more punishing shots from mount. One final crushing shot and Rue lies motionless on the canvas. The fight is over!
Ladies and gentlemen, after 2:37 of round 1, we have a winner by way of TKO (Strikes). Sick Guy!
Sick Guy retains his light heavyweight title!
Sick Guy decided to go for the less than humble approach in his post fight interview, telling everyone how he is going to conquer the world. The crowd seemed to like it when really that sort of approach could have gone either way.
|
|
|
|
|
|
|
|
|
|
|
|
|
|
|
|
|
|
|
|
|
|
|
| S |
C
A |
G |
S |
C
B |
G |
|
S |
C |
G |
|
energy
A | B |
|
hype
A | B |
|
pop
A | B |
|
mgr
A | B |
|
FIGHT
RATING
54% |
|
|
|
|
|
|
|
|
|
|
