|
TWGC 30 (155lbs, D1): Las Vegas Qualifier - Round 1 PBP Commentary |
Undercard bout
|
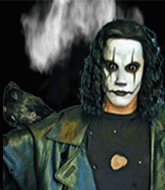
This TWGC bout is 1 fifteen minute round in the lightweight division. Introducing today's competitors. In the red corner, competing out of Las Vegas, with a TWGC record of 3 wins and 5 losses; Julian Gniewek! And in the blue corner, fighting out of Los Angeles, with a TWGC record of 13 wins and 14 losses; Mr Ward!
The judges for this bout are Cecil Peabody, Wesley Smith and Gwen Towbar.
The fighters bow as they face eachother in the middle of the mat and we are under way.#CL#
Ward tries to keep at a distance but Gniewek has taken the fight into the clinch.
Gniewek tries to score a body lock takedown but Ward shows good agility there to stay on his feet.
Gniewek is working for takedown but Ward is calmly controlling the position for now.
Gniewek is looking for a takedown.
That's three failed takedown attempts in the round for Julian Gniewek. That's going to take a lot out of him.#TD2#
Ward lands a takedown into guard.
Score +2 for takedown into guard / half guard: Gniewek (0) vs (2) Ward
Gniewek manages to sweep nicely, so he's now on top. Ward manages to get himself to full guard.
Score +2 for sweep to guard / half guard: Gniewek (2) vs (2) Ward#SUB2#
Ward is working actively off his back, looking to secure an arm or perhaps work for a triangle. #SUB2#
Gniewek got a little sloppy there for a moment and Ward has worked his way into a loose triangle - can he finish it?! No, Gniewek has managed to get both his arms back between Ward's legs - danger averted.
We've had a slow start to the round here - hopefully the action picks up.
Gniewek trying to control but Ward is working from the bottom.
Ward managing to control the position. #SUB2#
Ward looking for submissions from the bottom here. Moving his hips around, possibly looking for an armbar.
#T1#
Gniewek passes into half guard.
Ward wants to improve his position but Gniewek is controlling well.
Ward is in trouble now - Gniewek has advanced to mount! Score +3 for passing guard: Gniewek (5) vs (2) Ward
Gniewek will need to keep those long limbs tucked in whilst he's on the ground, to prevent any submissions.
Ward is squirming around, avoiding Gniewek's attempts to control the action. #T2#
Ward slips a leg in and gets back to half guard.
Ward is trying to control but Gniewek manages to pass to mount!
Score +3 for passing guard: Gniewek (8) vs (2) Ward
Ward is looking to improve his position but Gniewek isn't that keen on the idea.#SUB#
Gniewek is working for a guillotine from mount but Ward frees his head quite easily.
The ref warns both fighters not to hold the cage as they work up against the meshing.#SUB#
Gniewek goes for an armbar but he's fallen flat on his backside there and now Ward is on top in guard.
Score +2 for sweep to guard / half guard: Gniewek (8) vs (4) Ward
Ward won't allow Gniewek to sweep him here. #T3##SUB#
Gniewek is active off his back here, looking for submissions.
Ward looking to pass the guard.
Gniewek keeping moving, preventing Ward from controlling successfully.
We've been informed that Ward has been working hard on his conditioning in the buildup to the fight.
Gniewek working a defensive guard here.
Ward works a leg free and moves into half guard. #SUB2#
Ward is looking for a kimura. It's going to be difficult to finish that from half guard though and Gniewek defends it well.
Ward wants to pass the guard but Gniewek is defending well. #T4#
Gniewek is trying to control but can't.
#SUB2#
Ward maintaining the dominant position here and is working for a kimura. He's locked it up! Gniewek could be in real trouble here! He's trying to wriggle out but Ward has cracked it and Gniewek is screaming in pain - he's tapped out! Great finish by Ward!
Ladies and gentlemen, after 4:41 of round 1, we have a winner by way of Submission (Kimura). Mr Ward!
Mr Ward decided to go for the less than humble approach in his post fight interview, telling everyone how he is going to conquer the world. The crowd seemed to like it when really that sort of approach could have gone either way. |
|
|
|
Undercard bout
|
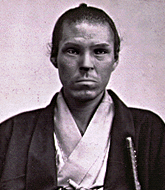
This TWGC bout is 1 fifteen minute round in the lightweight division. Introducing today's competitors. In the red corner, competing out of Las Vegas, with a TWGC record of 26 wins and 24 losses; Tobias Pancake! And in the blue corner, fighting out of New York, with a TWGC record of 26 wins and 18 losses; Dado Mata!
The judges for this bout are Stewart Dunkirk, Cecil Peabody and Tiny Johnson.
The fighters bow as they face eachother in the middle of the mat and we are under way.
Pancake fakes high and shoots in for a takedown but Mata avoids it really well and circles away.#TD2#
Mata throws the overhand right but ducks down into a quick takedown attempt. Pancake was covering up waiting for the punch and Mata finishes the takedown easily into guard. Score +2 for takedown into guard / half guard: Pancake (0) vs (2) Mata
Mata trying to control but Pancake is working from the bottom.
Pancake is trying to keep Mata in close.
We've had a slow start to the round here - hopefully the action picks up.
Mata sneaks a leg through and gets to half guard. That was like a knife through butter how easily he passed Pancake's guard.
Mata stalling.
Mata moves into full mount! Pancake won't be happy about that! Score +3 for passing guard: Pancake (0) vs (5) Mata#T1#
Pancake wants to hold on but Mata pushes him away.
Mata fails to take his opponent's back.
Pancake working to try and regain half guard.
Pancake is working hard here to advance position.
Mata content just to control the position here. #T2#
Mata can't quite control the action as he would like just now, as Pancake is looking to escape.
The fighters are pressed up against the cage, both looking to find a bit of space to work.
Pancake tries to get back to half guard but can't.
Mata can't quite control the action as he would like just now, as Pancake is looking to escape.
Pancake tries to hold on but Mata postures up.
Pancake is trying to escape the mount but Mata keeps good control and instead manages to take Pancake's back.
Score +3 for taking back: Pancake (0) vs (8) Mata#T3#
Mata trying to control.
Our spies down at at Mello MMA inform us that Mata has really been working on his submissions in the buildup to this fight. Will it pay off?
Pancake turns into Mata and is now in his guard.
Score +2 for sweep to guard / half guard: Pancake (2) vs (8) Mata
Pancake preventing the sweep.
Pancake pushing down on Mata's thigh, trying to pass to half guard. He's managed it... Nice work.
Mata is looking to regain full guard. Not this time though.
Mata makes his way to full guard. A much better position for Mata.
Pancake is frustrating his opponent with some stalling tactics from top position.
Pancake has controlled the position for a good 20 seconds, which will no doubt be starting to frustrate his opponent.#T4#
Mata trying to keep a closed guard but Pancake is proving a slippery customer.
Mata wants to sweep here but Pancake controlling him for the moment.
Pancake controlling from the guard. I say controlling but really, he's stalling.
The ref warns both fighters not to hold the cage as they work up against the meshing.#SUB2#
Mata is working actively off his back, looking to secure an arm or perhaps work for a triangle. #T5#
Mata tries to land a sweep but no joy.
Mata looking to control.
#SUB2#
Mata is looking for a triangle but Pancake pushes his legs off easily.
#SUB2#
Pancake got a little sloppy there for a moment and Mata has worked his way into a loose triangle - can he finish it?! No, Pancake has managed to get both his arms back between Mata's legs - danger averted.
Pancake trying to control but Mata is working from the bottom.
Mata tries to land a sweep but no joy. #T6#
Pancake trying to control the position from guard on top but Mata is wriggling around, looking for whatever he can.
Pancake passes into half guard.
Pancake prevents Mata from improving his position.#SUB#
Pancake seems to be looking for submissions.
Mata tries to roll over but Pancake keeps him under control.
Pancake is trying to control the action in half guard but Mata is working away on the bottom, looking perhaps to get back to full guard. #T7#
Mata is looking to regain full guard. Not this time though. #SUB#
Pancake is looking for a kimura. It's going to be difficult to finish that from half guard though and Mata defends it well.
Mata is working for an escape here. He's hooked one of Pancake's legs and he's managed to sneak out and take Pancake's back! Score +4 for clean sweep to past guard: Pancake (2) vs (12) Mata
I really don't envy Pancake right now.
Mata controlling the position well here. Pancake rolled but Mata kept the hooks locked in and stayed in the dominant position.
Pancake is trying to break free.
#T8##SUB2#
Mata has the hooks in. Pancake is starting to panic. He's trying to push off one of the legs but he's left his neck open to attack. Mata passes his arm under Pancake's neck and tightens up a rear naked choke! This one is surely all over! Yes, Pancake taps!
Ladies and gentlemen, after 8:25 of round 1, we have a winner by way of Submission (RNC). Dado Mata!
A very excited looking Dado Mata made sure he remembered to thank all the fans both in the arena and on the internet. He said all the coolest people spend all day on MMA websites, which got a big reaction. |
|
|
|
Co-main event
|
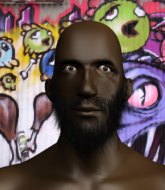
This TWGC bout is 1 fifteen minute round in the lightweight division. Introducing today's competitors. In the red corner, competing out of Las Vegas, with a TWGC record of 0 wins and 2 losses; Juu Dyon! And in the blue corner, fighting out of Los Angeles, with a TWGC record of 3 wins and 6 losses; Dominique Bell!
The judges for this bout are Cecil Peabody, Stewart Dunkirk and Robert Twigg.
Let's get this grappling contest under way! Who will be victorious?
Bell shoots in for a takedown. He's persisting with it as Dyon sprawls well. Dyon wins this battle and keeps the fight standing. Bell gets slowly back to his feet.
Dyon really is built like a bowling ball. I wonder if he'd roll if you pushed him down a hill...#TD#
Dyon shoots in and bounces Bell off the cage to secure the takedown into guard. Score +2 for takedown into guard / half guard: Dyon (2) vs (0) Bell
Bell is pulling down on Dyon's head. It's preventing any offense from Dyon, at least for the moment.
The ref warns both fighters not to hold the cage as they work up against the meshing.
Bell is trying to keep Dyon in close.
We've had a slow start to the round here - hopefully the action picks up.#SUB2#
Bell has his foot on Dyon's thigh. He's trying to push off and get in position for a triangle, I think. Dyon works his way back into a safe position though.#SUB#
Dyon drops back for a leg! It's a sloppy attempt though and Dyon jumps back into guard quickly, to retain the dominant position.
Dyon trying to control the position from guard on top but Bell is wriggling around, looking for whatever he can. #T1#
Dyon is really struggling to control Bell but he's trying to hold on to the position.
Dyon's corner is telling him to maintain position.
Bell trying to control the position.
Dyon wants to control from the top but Bell keeps moving. #SUB#
Dyon is trying to work a guillotine from the top, or something like that? Don't know how he thinks he's going to get a finish from there.
Bell keeping moving, preventing Dyon from controlling successfully. #T2##SUB#
Dyon is trying to work a guillotine from the top, or something like that? Don't know how he thinks he's going to get a finish from there.
Dyon trying to control the position from guard on top but Bell is wriggling around, looking for whatever he can. #SUB2#
Bell is working actively off his back, looking to secure an arm or perhaps work for a triangle.
Dyon trying to control but Bell is working from the bottom.
Bell is trying to control the position but Dyon postures up. #T3#
Dyon trying to control but Bell is working from the bottom.
Dyon might be looking to lock onto one of his opponent's long limbs for a submission, whilst we're on the ground.
Dyon is going to have to think about doing something other than just controlling because Bell is managing to avoid having the position dictated to him.#SUB#
Dyon is trying to work a guillotine from the top, or something like that? Don't know how he thinks he's going to get a finish from there.
Dyon's corner is telling him to maintain position.#SUB#
Dyon is trying to work a guillotine from the top, or something like that? Don't know how he thinks he's going to get a finish from there.
Bell not looking particularly offensive just at the moment.
Bell keeping moving, preventing Dyon from controlling successfully. #T4#
Dyon is taking a break and basically stalling. The referee will not allow him to do that for long.
Bell keeping moving, preventing Dyon from controlling successfully.
Dyon seems content to control from guard here. He's going to have to remain active though if he doesn't want to get stood back up. #SUB2#
Bell looking for a guillotine here but Dyon defends easily.
Bell keeping moving, preventing Dyon from controlling successfully.
Bell trying to control the position.
Dyon wants to control from the top but Bell keeps moving. #T5#
Bell seems keen to control rather than go for a submission, at least for now.
Dyon trying to control but Bell is working from the bottom. #SUB2#
Bell looking for a guillotine here but Dyon defends easily.
#SUB#
Dyon drops back looking for a leg! Bell is in trouble here! The fighters roll with the hold and Bell manages to kick Dyon off! Dyon jumps back into Bell's guard.
Dyon wants to control from the top but Bell keeps moving. #SUB#
Dyon thinks about going for a leg but decides against it, in order to maintain the position. #T6##SUB2#
Bell is working actively off his back, looking to secure an arm or perhaps work for a triangle.
Dyon trying to control but Bell is working from the bottom.
Bell not looking particularly offensive just at the moment.
The fighters are pressed up against the cage, both looking to find a bit of space to work.
Dyon trying to control but Bell is working from the bottom.
Bell managing to control the position. #SUB#
Dyon drops back for a leg! It's a sloppy attempt though and Dyon jumps back into guard quickly, to retain the dominant position. #T7#
Dyon postures up.
Dyon wants to control from the top but Bell keeps moving.
Bell trying to keep a closed guard but Dyon is proving a slippery customer.
Bell keeping moving, preventing Dyon from controlling successfully.
Bell trying to control the position.
Bell keeping moving, preventing Dyon from controlling successfully. #T8#
Bell is trying to control the position but Dyon postures up. #SUB#
Dyon is trying to work a guillotine from the top, or something like that? Don't know how he thinks he's going to get a finish from there.
Dyon wants to control from the top but Bell keeps moving. #SUB#
Dyon is trying to work a guillotine from the top, or something like that? Don't know how he thinks he's going to get a finish from there. #SUB#
Dyon drops back for a leg! It's a sloppy attempt though and Dyon jumps back into guard quickly, to retain the dominant position. #SUB#
Dyon drops back for a leg! It's a sloppy attempt though and Dyon jumps back into guard quickly, to retain the dominant position.
Dyon trying to control but Bell is working from the bottom. #T9##SUB2#
Bell looking for submissions from the bottom here. Moving his hips around, possibly looking for an armbar.
Dyon wants to control from the top but Bell keeps moving. #SUB2#
Dyon got a little sloppy there for a moment and Bell has worked his way into a loose triangle - can he finish it?! No, Dyon has managed to get both his arms back between Bell's legs - danger averted.
Bell keeping moving, preventing Dyon from controlling successfully.
Bell is trying to control the position but Dyon postures up.
Dyon wants to control from the top but Bell keeps moving. #T10#
Dyon's corner is telling him to maintain position.
Dyon has controlled the position for a good 20 seconds, which will no doubt be starting to frustrate his opponent.
Dyon trying to control the position from guard on top but Bell is wriggling around, looking for whatever he can. #SUB2#
Bell working from the bottom, still in full guard. He's managed to get a loose triangle. Dyon doesn't seem to be doing much to defend here, obviously he feels comfortable in the position. Dyon manages to throw the legs off his shoulder and he's back into guard - no problem.
Dyon wants to control from the top but Bell keeps moving. #T11##SUB#
Dyon drops back looking for a leg! Bell is in trouble here! The fighters roll with the hold and Bell manages to kick Dyon off! Dyon jumps back into Bell's guard.
Dyon wants to control from the top but Bell keeps moving. #SUB2#
Bell looking for a guillotine here but Dyon defends easily.
#SUB2#
Bell had isolated an arm as going for a kimura. Dyon defends it easily.#SUB2#
Bell has a loose triangle. He'll be looking to tighten that up but Dyon can see exactly what he's planning and manages to posture up and free himself.
Bell is the more experienced fighter here and he's going to need to draw on some of that experience if he's going to pull this one out the bag.#T12#
Dyon is intent on slowing down the pace of the fight, simply looking to control.
Dyon trying to control the position from guard on top but Bell is wriggling around, looking for whatever he can. #SUB2#
Bell has a loose triangle. He'll be looking to tighten that up but Dyon can see exactly what he's planning and manages to posture up and free himself.
Dyon trying to control the position from guard on top but Bell is wriggling around, looking for whatever he can. #T13#
Bell working a defensive guard here.
#SUB#
Dyon thinks about going for a leg but decides against it, in order to maintain the position.
Dyon controls from within his opponent's guard.
Bell trying to keep a closed guard but Dyon is proving a slippery customer.
#SUB#
Dyon thinks about going for a leg but decides against it, in order to maintain the position.
Bell keeping moving, preventing Dyon from controlling successfully. #SUB#
Dyon is trying to work a guillotine from the top, or something like that? Don't know how he thinks he's going to get a finish from there. #T14#
Dyon trying to control but Bell is working from the bottom.
Bell is controlling Dyon's posture.
Dyon wants to control from the top but Bell keeps moving. #SUB#
Dyon is trying to work a guillotine from the top, or something like that? Don't know how he thinks he's going to get a finish from there.
Boooooooooooooooooooo!!! God, this has been a terrible round. Come on you two, sort yourselves out!
Bell is trying to keep Dyon in close.
And that's the end of the fight!
Dyon takes the fight on points by 2 to 0.
After the big win, Juu Dyon made sure to do all the important stuff like thanking his sponsors Fenrir Fightgear - Anno 2013 and telling the interviewer how much he loves him. |
|
|
|
Main event
|
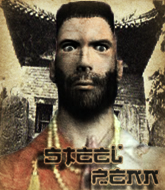
This TWGC bout is 1 fifteen minute round in the lightweight division. Introducing today's competitors. In the red corner, competing out of New York, with a TWGC record of 7 wins and 11 losses; Azar Qasi! And in the blue corner, fighting out of Las Vegas, with a TWGC record of 4 wins and 9 losses; Bjj Steel!
The judges for this bout are Cecil Peabody, Alan Glass and Wesley Smith.
The fighters bow as they face eachother in the middle of the mat and we are under way.
Steel changes levels and looks for a double leg takedown. Qasi tries to avoid it but Steel manages to keep hold of a leg and drag Qasi to the ground. Qasi escapes though and pops straight back up to his feet. #TD#
A momentary lapse in concentration from Steel enables Qasi to shoot in and score with a neat double leg. Steel manages to secure a closed guard as the fighters hit the mat. Score +2 for takedown into guard / half guard: Qasi (2) vs (0) Steel
Qasi tries to free his leg and advance position but Steel is retaining full guard.
Qasi forces his way into half guard.
Qasi is looking to advance position but Steel won't allow it.
Qasi stalling.
We've had a slow start to the round here - hopefully the action picks up.
Steel won't allow Qasi to pass to mount.
Steel is not content to let Qasi control the position.#T1#
Qasi controlling the action here.
Qasi will need to keep those long limbs tucked in whilst he's on the ground, to prevent any submissions.
Steel wants to improve his position but Qasi is controlling well.
The ref warns both fighters not to hold the cage as they work up against the meshing.
Qasi is taking a breather. Steel says something to him but it's hard to make out. Perhaps he's telling him to get on with it and actually do something.
Qasi looking to pass the half guard. Not this time. #T2#
Qasi trying to control the action but Steel is working from the bottom.
Qasi seems content to maintain position for now, rather than mounting any offense.
Steel slips a foot under and gets full guard. Nice work.
Steel keeping full guard, as Qasi tries to pass. #T3#
Steel keeping moving, preventing Qasi from controlling successfully. #T4#
Qasi pressing down on his opponent's thigh, looking to pass guard. Steel is keeping the position for now.
Qasi trying to control but Steel is working from the bottom.
The fighters are pressed up against the cage, both looking to find a bit of space to work.
Steel has Qasi pulled in close to control his posture.
Qasi trying to control but Steel is working from the bottom.
Steel looking to sweep here. No luck so far. #T5#
Qasi controlling from the top position.
Qasi trying to pass the guard but can't manage it just yet.
Qasi trying to control but Steel is working from the bottom.
Qasi slows down the pace of the fight, as he sits in guard.
Qasi wants to control from the top but Steel keeps moving. #T6#
Qasi looking to pass the guard.
Steel keeping moving, preventing Qasi from controlling successfully.
Qasi is stalling in the full guard. #T7#
Steel keeping moving, preventing Qasi from controlling successfully.
Qasi content to stall in guard here.
Qasi wants to pass the guard but Steel is keeping the position.
Qasi trying to pass the guard. He's being very persistent here but Steel manages to land a sweep and now he's on top! Score +2 for sweep to guard / half guard: Qasi (2) vs (2) Steel#T8#
Qasi is pulling down on Steel's head. It's preventing any offense from Steel, at least for the moment.#SUB#
Qasi is looking for a triangle but Steel pushes his legs off easily.
Qasi trying to control the position.
Qasi looking for a sweep. Not yet Qasi, not yet. #T9#
Steel sitting in guard here, content to control. #SUB#
Qasi working for submissions but it's allowed Steel to get to half guard.
#SUB#
Qasi actively working from the bottom here.
Qasi tries to roll over but Steel keeps him under control.#T10##SUB#
Qasi is looking to sinch up a guillotine here but Steel pulls his head out easily.
Qasi is looking to regain full guard. Not this time though.
Qasi makes his way to full guard. A much better position for Qasi.
Qasi lands a beautiful sweep and he's now moved into his opponent's guard. Score +2 for sweep to guard / half guard: Qasi (4) vs (2) Steel#T11#
Qasi trying to control but Steel is working from the bottom.
Qasi is looking to pass into half guard but Steel pushes him away with his feet and jumps on top - now Steel is in guard. Score +2 for sweep to guard / half guard: Qasi (4) vs (4) Steel
Qasi looking for a sweep. Not yet Qasi, not yet. #SUB#
Steel avoids a guillotine attempt easily.
Qasi not looking particularly offensive just at the moment.
#T12#
Qasi looking to sweep here. No luck so far.
Qasi has a butterfly guard looking to sweep but Steel has passed into side control.
Score +3 for passing guard: Qasi (4) vs (7) Steel
A lull in the action here.#T13#
Qasi is trying to get back to half guard.
Qasi is working hard here to advance position.
Steel staying calm.#T14#
Qasi tries to buck Steel off but Steel is having none of it.
Boooooooooooooooooooo!!! God, this has been a terrible round. Come on you two, sort yourselves out!
Qasi is sneaking out the side here. He's bucked Steel off and has taken his back! Score +4 for clean sweep to past guard: Qasi (8) vs (7) Steel#SUB#
Qasi looking to finish the fight with a rear naked choke. Steel is controlling Qasi 's left arm and he spins nicely into guard. Score +2 for sweep to guard / half guard: Qasi (8) vs (9) Steel
Qasi looking to sweep here. No luck so far.
And that's the end of the fight!
Steel wins on points by 9 to 8.
A relieved looking Bjj Steel thanked the fans for their support and gave the usual line about them being amazing. They seemed to believe that he actually meant it. |
|
|
|
|
|
|