|
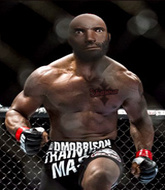
TWGC 30 (155lbs, D1): Montreal Qualifier - Round 2 PBP Commentary |
Co-main event
|
This TWGC bout is 1 fifteen minute round in the lightweight division. Introducing today's competitors. In the red corner, competing out of New York, with a TWGC record of 33 wins and 11 losses; David Morrison Jr.! And in the blue corner, fighting out of Montreal, with a TWGC record of 15 wins and 4 losses; Aaron Hoyle!
The judges for this bout are Yves DeLean, Elvis Blanc and Trevor Gratis.
The official calls the fighters to the middle and the contest is under way.#TD#
Morrison Jr. fakes an overhand right and shoots for a takedown. Hoyle sprawls well initially but Morrison Jr. persists and gets the takedown into half guard. Score +2 for takedown into guard / half guard: Morrison Jr. (2) vs (0) Hoyle
The ref warns both fighters not to hold the cage as they work up against the meshing.
Hoyle wants to get back to full guard.
Morrison Jr. really does look like a pencil wearing a pair of gloves. Let's hope he has a gameplan to suit that ridiculous body shape.
Morrison Jr. slows the pace down in half guard.
Morrison Jr. trying to control the action but Hoyle is working from the bottom.
Hoyle wants to control but Morrison Jr. is keeping busy.
The fighters are pressed up against the cage, both looking to find a bit of space to work.#SUB#
Morrison Jr. is looking for a kimura but Hoyle is holding onto that half guard position, so it's hard for Morrison Jr. to get the leverage.
We've had a slow start to the round here - hopefully the action picks up.
Morrison Jr. has freed up his trapped foot and advances to mount. Score +3 for passing guard: Morrison Jr. (5) vs (0) Hoyle
Hoyle tries to hold on but Morrison Jr. postures up.#T1##SUB#
Morrison Jr. is working for a guillotine from mount but Hoyle frees his head quite easily.
Hoyle is looking to get to half guard.#SUB#
Morrison Jr. is working on an americana here. Ooh, that looks pretty nasty! Nope, Hoyle has managed to escape the submission attempt.
Hoyle tries to get back to half guard but can't. #T2#
Morrison Jr. controlling his opponent.
Morrison Jr. manages to capitalize on a mistake by Hoyle to take his back! Score +3 for taking back: Morrison Jr. (8) vs (0) Hoyle
Hoyle is in bad spot here.
Hoyle breaks Morrison Jr.'s hooks off and manages to turn into his guard.
Score +2 for sweep to guard / half guard: Morrison Jr. (8) vs (2) Hoyle
Hoyle pressing down on his opponent's thigh, looking to pass guard. Morrison Jr. is keeping the position for now.
Morrison Jr. bucks up whilst keeping hold of a body lock, managing to reverse the position. Now he's in top in Hoyle's guard. Score +2 for sweep to guard / half guard: Morrison Jr. (10) vs (2) Hoyle
Morrison Jr. wants to control from the top but Hoyle keeps moving.
Morrison Jr. passes easily into side control. Nice work. Score +3 for passing guard: Morrison Jr. (13) vs (2) Hoyle
Hoyle wants to control but Morrison Jr. postures up.#T3#
Hoyle is moving his hips around well on the bottom and has managed to get back to half guard.
Hoyle tries to regain full guard. Instead though, Morrison Jr. has advanced to mount. Uh oh. Score +3 for passing guard: Morrison Jr. (16) vs (2) Hoyle
Hoyle tries to lock up and control but Morrison Jr. gives him a forearm to the face and pushes him away.
Morrison Jr. is looking to work his way around to Hoyle's back. He needs to be careful though, as he's in danger of losing this dominant position.
Morrison Jr. tries to control but Hoyle wriggling away.
Hoyle is trying to reverse the position but instead Morrison Jr. has taken his back - oops! Score +3 for taking back: Morrison Jr. (19) vs (2) Hoyle
Morrison Jr. keeps control of the position easily here as Hoyle tries to buck him off.
#T4#
Hoyle manages to reverse the position and now he's in Morrison Jr.'s guard. Nice work there by Hoyle.
Score +2 for sweep to guard / half guard: Morrison Jr. (19) vs (4) Hoyle
Morrison Jr. looking to hit a scissor sweep but Hoyle is one step ahead there. #SUB#
Morrison Jr. is throwing his legs up, looking for submissions. Hoyle is aware though and is defending well.
Morrison Jr. seems to have improved his submission grappling technique since last time we saw him. Let's see if he can pull off a submission.
Morrison Jr. is trying to control the position from the bottom.
Hoyle trying to pass the guard but can't manage it just yet.
Hoyle stopping the sweep attempt from Morrison Jr..#T5#
Hoyle wants to pass the guard but Morrison Jr. is keeping the position.
Hoyle won't allow Morrison Jr. to sweep him here.
Hoyle trying to control but Morrison Jr. is working from the bottom.
Hoyle tries to free his leg and advance position but Morrison Jr. is retaining full guard.
Morrison Jr. will need to keep those long limbs tucked in whilst he's on the ground, to prevent any submissions.
Morrison Jr. trying to control the position.
Hoyle trying to control the position from guard on top but Morrison Jr. is wriggling around, looking for whatever he can.
Morrison Jr. looking to control.
Morrison Jr. tries to land a sweep but no joy. #T6#
Morrison Jr. trying to keep a closed guard but Hoyle is proving a slippery customer.
Morrison Jr. being controlled here, momentarily.
Morrison Jr. is adopting a defensive guard.
Hoyle trying to control the position from guard on top but Morrison Jr. is wriggling around, looking for whatever he can.
Morrison Jr. wants to sweep but no luck.
Morrison Jr. lands a beautiful sweep and he's now moved into his opponent's guard. Score +2 for sweep to guard / half guard: Morrison Jr. (21) vs (4) Hoyle#T7##SUB2#
Hoyle has his foot on Morrison Jr.'s thigh. He's trying to push off and get in position for a triangle, I think. Morrison Jr. works his way back into a safe position though.
Morrison Jr. trying to pass the guard. He's being very persistent here but Hoyle manages to land a sweep and now he's on top! Score +2 for sweep to guard / half guard: Morrison Jr. (21) vs (6) Hoyle#SUB#
Morrison Jr. is looking for a guillotine. You can't force these things though and Hoyle defends well.
Hoyle is pushing down on Morrison Jr.'s leg trying to pass to half guard. Morrison Jr. is fighting to maintain full guard but Hoyle has managed to sneak the leg through.#SUB2#
Hoyle is looking for a kimura. It's going to be difficult to finish that from half guard though and Morrison Jr. defends it well.
Hoyle frees up his trapped foot and advances to mount. Score +3 for passing guard: Morrison Jr. (21) vs (9) Hoyle#T8#
Hoyle controlling the position easily from mount.
Morrison Jr. tries to hold on but Hoyle postures up.
Morrison Jr. is looking to improve his position but Hoyle isn't that keen on the idea.
Hoyle wants to take Morrison Jr.'s back here but Morrison Jr. is holding on to an arm, himself looking to escape.
Hoyle trying to control but he's not successful this time. #T9#
Morrison Jr. is desperately trying to improve his position but Hoyle has a good base and remains in mount.
Morrison Jr. tries to hold on but Hoyle postures up.#SUB2#
Hoyle moves into side control, trying to work for a kimura. That looks painful! Will he finish!!?? No, Morrison Jr. has worked his arm free - good work by Morrison Jr.!
You can see the frustration on Morrison Jr.'s face, being in this tough position on the bottom.
Morrison Jr. stops Hoyle from passing to mount. #SUB2#
Hoyle looking for an arm triangle but it's way too loose to do anything. #T10#
Morrison Jr. is looking for a sweep.
Hoyle trying to control the action but Morrison Jr. is working from the bottom.
Hoyle tries to advance to mount but can't.
Morrison Jr. tries to work a leg under to get back to half guard but Hoyle wriggles his own leg back out and remains in side control.
Morrison Jr. is sneaking out the side here. He's bucked Hoyle off and has taken his back! Score +4 for clean sweep to past guard: Morrison Jr. (25) vs (9) Hoyle#T11#
Hoyle rolls, trying to escape but Morrison Jr. keeps control of the position.
Hoyle tries to escape the position - he's now mounted. Is that better or worse? Hard to tell!
Morrison Jr. trying to control but he's not successful this time.
Morrison Jr. sitting in mount, just looking to control for the moment.
Morrison Jr. wants to control the pace but Hoyle is squirming around nicely. #T12#
Hoyle keeping his composure momentarily, calmly looking to get back to half guard.
Morrison Jr. can't control as he wanted to and Hoyle manages to get the fight back to his half guard.
The referee calls for the fighters to work.
Hoyle tries to roll over but Morrison Jr. keeps him under control.#T13#
Morrison Jr. passes to side control. Score +3 for passing guard: Morrison Jr. (28) vs (9) Hoyle
Hoyle tries to slip a leg under to move to half guard but Morrison Jr. presses down on the leg and jumps into full mount! Score +2 for reaching mount: Morrison Jr. (30) vs (9) Hoyle
Hoyle manages to regain half guard. Good work.
Hoyle is trying to maintain the position but Morrison Jr. is very close to passing his half guard.
Hoyle wants to get back to full guard.#SUB2#
Hoyle is looking to sinch up a guillotine here but Morrison Jr. pulls his head out easily. #T14#
Morrison Jr. is keen to just control but Hoyle is a slippery customer.
Morrison Jr. prevents Hoyle from improving his position.#SUB#
Morrison Jr. is looking for a kimura here.
Hoyle is looking to improve his position.
Boooooooooooooooooooo!!! God, this has been a terrible round. Come on you two, sort yourselves out!
Morrison Jr. works his way into full mount! Score +3 for passing guard: Morrison Jr. (33) vs (9) Hoyle
And that's the end of the fight!
Morrison Jr. takes the fight on points by 33 to 9.
After winning the bout, David Morrison Jr. thanked all his fans and promised he'd do even better in his next fight. The crowd seemed to love his humility. |
|
|
|
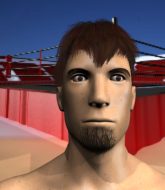
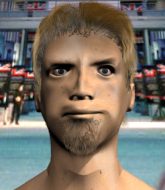
Main event
|
This TWGC bout is 1 fifteen minute round in the lightweight division. Introducing today's competitors. In the red corner, competing out of Las Vegas, with a TWGC record of 29 wins and 18 losses; Longfellow Deeds! And in the blue corner, fighting out of Las Vegas, with a TWGC record of 26 wins and 13 losses; Rodney Holzken!
The judges for this bout are Ian Loll, Yves DeLean and William Peck.
The fighters bow as they face eachother in the middle of the mat and we are under way.#TD#
Deeds closes the distance and gets a trip takedown into side control. Holzken quickly recovers to half guard. Score +2 for takedown into guard / half guard: Deeds (2) vs (0) Holzken
Deeds wants to pass the guard but Holzken is defending well.
Holzken tries to roll over but Deeds keeps him under control.
Holzken is doing well to control the position and prevent Deeds from advancing to side control.
We've had a slow start to the round here - hopefully the action picks up.
Deeds performing his best blanket impression for a moment.
Holzken is concentrating on defense, preventing Deeds from advancing position. #T1#
Deeds not doing much here.
Holzken is looking for a sweep. Deeds is wise to his cunning plan and keeps the top position.
Holzken gets full guard.
The ref warns both fighters not to hold the cage as they work up against the meshing.#T2#
Deeds stays in close to Holzken's body and controls the position.
Holzken is controlling Deeds's posture.
Deeds stands and throws Holzken's legs to the side, diving into side control. Score +3 for passing guard: Deeds (5) vs (0) Holzken
Holzken is trying to escape the position but Deeds is controlling the position. #T3#
Holzken regains half guard.
Holzken is looking for a sweep. Deeds is wise to his cunning plan and keeps the top position.
Holzken is doing well to control the position and prevent Deeds from advancing to side control.
Holzken felt the need to train up his defensive grappling in the buildup to the fight. Presumably he was expecting to be in a difficult position like this, so let's see if he can get out of it.#T4#
Holzken wants to improve his position but Deeds is controlling well.
Holzken keeps trying to improve his position.
The fighters are pressed up against the cage, both looking to find a bit of space to work.#T5#
Deeds working to pass to mount. He's got his hand pressing down on Holzken's thigh. Holzken counters though and makes it back to full guard.
Holzken looking to control the pace of the fight rather than finish it.
Deeds stopping the sweep attempt from Holzken.#T6#
Holzken managing to control the position.
Deeds sitting in guard, not really doing much.
Holzken is pulling down on Deeds's head to control his posture. #T7#
Deeds trying to pass the guard but can't manage it just yet.
Deeds sitting in guard, not really doing much.
Deeds pressing down on his opponent's thigh, looking to pass guard. Holzken is keeping the position for now.
Holzken has control of Deeds's left arm, preventing Deeds from doing any damage. #T8#
Deeds controls the pace of the fight for a moment.
We could do with one of the fighters taking the initiative a bit more on the ground - they're both waiting to capitalize on a mistake.
Deeds trying to control the position from guard on top but Holzken is wriggling around, looking for whatever he can.
Holzken pulls Deeds in close to prevent any damage.
Deeds slows down the pace of the fight for a moment. He'll need to remain active if he doesn't want to see the fight stood back up. #T9#
Deeds postures up.
Deeds slows down the pace of the fight, as he sits in guard.
Deeds won't allow Holzken to sweep him here. #T10#
Holzken is controlling Deeds's posture.
Deeds engaging in some classic timewasting tactics.
Holzken looking for a sweep. Not yet Holzken, not yet. #T11#
Deeds showing good wrestling skills to control the position.
Deeds has controlled the position for a good 20 seconds, which will no doubt be starting to frustrate his opponent.
Holzken is the more experienced fighter here and he's going to need to draw on some of that experience if he's going to pull this one out the bag.#T12#
Holzken tries to land a sweep but no joy.
Deeds wants to pass the guard but Holzken is keeping the position.
Holzken working a defensive guard here.
#T13#
Holzken seems keen to control Deeds's posture.
Deeds stands up and looks to throw the legs aside to pass to side control. Holzken swivels though and keeps the full guard.
Holzken is doing well to control the posture of his opponent and prevent any damage. #T14#
Deeds forces his way into half guard.
Well, if Deeds is going to just lie there, perhaps we should talk about what we're having for dinner tonight
I'm having a ham and pineapple pizza
Yum. Can't wait.
Boooooooooooooooooooo!!! God, this has been a terrible round. Come on you two, sort yourselves out!
Holzken is holding on to half guard well.
And that's the end of the fight!
Deeds takes the fight on points by 5 to 0. |
|
|
|
|
|
|