|
TWGC 30 (265+lbs, D4): Finals - Round 2 PBP Commentary |
Co-main event
|
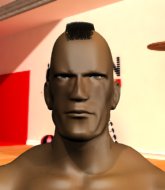
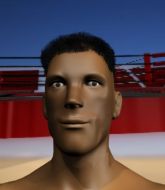
This TWGC bout is 1 fifteen minute round in the super heavyweight division. Introducing today's competitors. In the red corner, competing out of Las Vegas, with a TWGC record of 6 wins and 3 losses; Tor KillsInWater! And in the blue corner, fighting out of Las Vegas, with a TWGC record of 3 wins and 0 losses; Jack Jones!
The judges for this bout are Elvis Blanc, Robert Douchet and Alec Ball.
The fighters connect hands in the middle of the mat and we are under way.
KillsInWater will have to do better than that with his takedown attempts.#TD#
KillsInWater is looking for a takedown here. He's shot in and has managed to get it, finishing up in Jones's half guard. Score +2 for takedown into guard / half guard: KillsInWater (2) vs (0) Jones
Jones is trying to control but can't.
Well, if KillsInWater is going to just lie there, perhaps we should talk about what we're having for dinner tonight
I'm having a ham and pineapple pizza
Yum. Can't wait.
We've had a slow start to the round here - hopefully the action picks up.
KillsInWater trying to mount his opponent but Jones defends it.
Jones is trying to get back to full guard.#SUB2#
Jones looking for submissions off his back.#T1#
Jones is looking for a sweep. KillsInWater is wise to his cunning plan and keeps the top position.
Jones is controlling KillsInWater's trapped leg to prevent KillsInWater from advancing to side control.#SUB2#
Jones looking to work for a kimura from the bottom.
KillsInWater trying to control the pace. #T2#
Jones is looking to improve his position.
#SUB2#
Jones is looking to sinch up a guillotine here but KillsInWater pulls his head out easily.
Jones is looking for a sweep. KillsInWater is wise to his cunning plan and keeps the top position.
Jones is trying to control but can't.
#T3#
KillsInWater moves into full mount! Jones won't be happy about that! Score +3 for passing guard: KillsInWater (5) vs (0) Jones
Jones tries to hold on but KillsInWater pushes him away.
KillsInWater looking to control and managing it successfully.
We've been informed that Jones has been working hard on his conditioning in the buildup to the fight.
Jones is looking to improve his position but KillsInWater isn't that keen on the idea.
Jones is still trying to improve position.#T4#
KillsInWater controlling his opponent.
The fighters are pressed up against the cage, both looking to find a bit of space to work.
KillsInWater's ground tactics aren't going to win him many fans. Let's hope he's got fireworks for us if he gets back to his feet because he's not doing much on the ground.
Further stalling from KillsInWater.#T5#
If it seems like I'm not saying a lot, it's just because KillsInWater is stinking the place up with his stalling.
KillsInWater fails to advance to Jones's back.
Jones keeping his composure momentarily, calmly looking to get back to half guard.
The ref warns both fighters not to hold the cage as they work up against the meshing.
Jones tries to lock up and control but KillsInWater gives him a forearm to the face and pushes him away.#T6#
Jones is trying to escape the mount.
KillsInWater controlling his opponent.
Jones working to try and regain half guard.
KillsInWater wants to take his opponent's back but he's not managed it. #T7#
Jones is desperately trying to get back to half guard.
KillsInWater controlling from the full mount. #T8#
Jones is writhing around trying to get back to his feet.
KillsInWater controlling his opponent.
Jones is working to get back to half guard.
#T9#
Jones bucks up and manages to get a nice reversal! He's in guard on the top - nicely done! Score +2 for sweep to guard / half guard: KillsInWater (5) vs (2) Jones
KillsInWater pulls Jones in to control the position.
Jones tries to free his leg and advance position but KillsInWater is retaining full guard.
KillsInWater is working the butterfly guard. He manages to land a nice scissor sweep and is now in half guard on the top. Nice move. Score +2 for sweep to guard / half guard: KillsInWater (7) vs (2) Jones
KillsInWater wants to free his trapped foot but Jones is holding on for dear life with his legs.
Jones is looking to regain full guard. Not this time though. #T10#
KillsInWater controlling the action here.
Jones tries to get to full guard but KillsInWater has control of the leg.
KillsInWater performing his best blanket impression for a moment.
Jones is trying to control but can't.
#T11#
Neither fighter is being very active at the moment, with KillsInWater in particular looking to stall.#SUB2#
Jones actively working from the bottom here.
Still in half guard, KillsInWater seems content to control.
Jones is doing well to avoid being mounted. He's controlling the position at the moment.#T12##SUB2#
Jones is looking to sinch up a guillotine here but KillsInWater pulls his head out easily.
Jones trying to control here.
Jones tries to roll over but KillsInWater keeps him under control.
KillsInWater stalling.
KillsInWater passes to side control. Score +3 for passing guard: KillsInWater (10) vs (2) Jones#T13#
Jones manages to get one leg in to regain half guard.
KillsInWater perhaps working for something from half guard, or maybe not. It looks like he's just sitting there.
Jones trying to control here but he's found himself mounted! Oh no!
Score +3 for passing guard: KillsInWater (13) vs (2) Jones
Jones wants to improve position but instead he's given up his back. Score +3 for taking back: KillsInWater (16) vs (2) Jones#T14#
KillsInWater controlling from the back.
Jones rolls and manages to get back to half guard. Nicely done.
KillsInWater with a momentary lay and pray from half guard. #SUB2#
Jones looking for submissions off his back.
Jones looks winded!
Boooooooooooooooooooo!!! God, this has been a terrible round. Come on you two, sort yourselves out!#SUB2#
KillsInWater moves into side control, avoiding a weak kimura attempt from Jones. Score +3 for passing guard: KillsInWater (19) vs (2) Jones
And that's the end of the fight!
KillsInWater takes the fight on points by 19 to 2. |
|
|
|
Main event
|
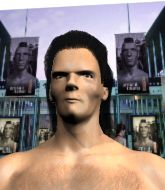
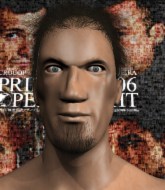
This TWGC bout is 1 fifteen minute round in the super heavyweight division. Introducing today's competitors. In the red corner, competing out of Tokyo, with a TWGC record of 5 wins and 1 losses; Clarence Frost! And in the blue corner, fighting out of Helsinki, with a TWGC record of 3 wins and 0 losses; Jack Tupp!
The judges for this bout are Steve Smith, Gregory Folan and Elvis Blanc.
The fighters bow as they face eachother in the middle of the mat and we are under way.
Frost stuffs the takedown attempt from Tupp. Tupp gets slowly back to his feet.
As Tupp tries to get set, Frost tries to push him back and clinch up but Tupp manages to avoid the attempt.#CL2#
Tupp gets a clinch.
Frost drops down looking for an ankle pick but Tupp pulls his leg out and moves away.
Tupp tries to close the distance and clinch up but Frost swats him away and circles back towards the center. #CL#
Frost moves into the clinch successfully.
Tupp goes for a takedown in the clinch but Frost prevents it.
Tupp tries to score a body lock takedown but Frost shows good agility there to stay on his feet.
Clarence Frost has stuffed three takedown attempts in the round now. That's going to take a lot out of Jack Tupp.
We've had a slow start to the round here - hopefully the action picks up.
Tupp is looking to take this one to the mat.#T1##TD#
Frost pulls guard.
Tupp trying to control the position from guard on top but Frost is wriggling around, looking for whatever he can.
Tupp pressing down on his opponent's thigh, looking to pass guard. Frost is keeping the position for now.
Frost looking to sweep here. No luck so far. #T2#
Tupp trying to control but Frost is working from the bottom.
Tupp pushing down on Frost's thigh, trying to pass to half guard. He's managed it... Nice work.
Neither fighter is being very active at the moment, with Tupp in particular looking to stall.
Frost wants to control but Tupp is keeping busy.
#T3#
Tupp trying to control from half guard but Frost is working away.
Frost wants to sweep but Tupp has passed to side control! Score +3 for passing guard: Frost (0) vs (3) Tupp
Frost is letting Tupp control him for a moment.
It looks like Tupp might be adopting somewhat of a lay and pray gameplan here, which I'm sure won't go down too well with the paying fans in attendance... Or the ring announcers come to think of it.
The fighters are pressed up against the cage, both looking to find a bit of space to work.#T4##T5#
Frost can't do much from the bottom here.
Tupp wants to control but Frost is keeping him busy.
Tupp is in a good position here but he's just trying to control... And he's not even managing to do that successfully.#T6#
Frost isn't going anywhere.
Frost trying to remain calm as Tupp controls from the top position.#SUB2#
Tupp is trying to get an arm triangle but Frost is defending well. #SUB2#
Tupp goes for an armbar here - this could be all over! But no, Frost has escaped beautifully and is now on top in side control! Oh, that's unlucky for Tupp but great work by Frost. Score +4 for clean sweep to past guard: Frost (4) vs (3) Tupp#T7#
Tupp can't do much from the bottom here.
Tupp is looking to reverse the position.
Tupp is persisting with the attempt to improve his position.#T8#
Tupp is being controlled here.
You can see the frustration on Tupp's face, being in this tough position on the bottom.
Tupp holding on.
Tupp is looking for a sweep.#T9#
Frost controls the position.
Tupp tries to get back to half guard but can't.
Frost will need to keep those long limbs tucked in whilst he's on the ground, to prevent any submissions.#T10#
Frost moving around in side mount but really he's just happy to control for now. #T11#
Tupp wants to control but Frost postures up.
Tupp felt the need to train up his defensive grappling in the buildup to the fight. Presumably he was expecting to be in a difficult position like this, so let's see if he can get out of it.
A bit of a lull in the action. I'm sure it will pick up again soon... even if the ref has to physically pick them up and put them back on their feet.
You can see the frustration on Tupp's face, being in this tough position on the bottom.
Frost controlling the position. #T12#
Tupp is looking for a sweep.
Frost is pausing for a moment. What's he doing? It looks like he's clearing his nose. Oh dude! He's shot a load of snot all down Tupp's shoulder. That is not cool.
Tupp is looking for a sweep.
Tupp is trying to control Frost's posture but Frost avoids it.
Tupp is looking to regain half guard here but Frost keeps moving and retains side control. #T13#
Tupp manages to get one leg in to regain half guard.
Tupp is trying to get back to full guard.
Frost is controlling the pace.
Frost is looking to advance position but Tupp won't allow it. #T14#
Tupp tries to get to full guard but Frost has control of the leg.
We could do with one of the fighters taking the initiative a bit more on the ground - they're both waiting to capitalize on a mistake.
Boooooooooooooooooooo!!! God, this has been a terrible round. Come on you two, sort yourselves out!
And that's the end of the fight!
Frost takes the fight on points by 4 to 3.
Clarence Frost thanked the fans post fight for their support. |
|
|
|
|
|
|