|
TWGC 31 (145lbs, D1): New York Qualifier - Round 1 PBP Commentary |
Co-main event
|
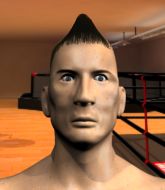
This TWGC bout is 1 fifteen minute round in the featherweight division. Introducing today's competitors. In the red corner, competing out of Las Vegas, with a TWGC record of 6 wins and 1 losses; Rob $tone! And in the blue corner, fighting out of Montreal, with a TWGC record of 15 wins and 5 losses; Aaron Hoyle!
The judges for this bout are Lou da Vinci, Alyssa Summers and Jorge Garcia.
The official calls the fighters to the middle and the contest is under way.
Hoyle tries to score a power double leg takedown but $tone sees that one coming and sprawls well. That will dishearten Hoyle somewhat.
$tone stuffs the takedown attempt from Hoyle. Hoyle gets slowly back to his feet.
$tone drops down looking for a counter takedown but Hoyle sprawls and moves away.
Hoyle fails miserably with a takedown attempt.
$tone tries to counter with a takedown but Hoyle is quick to defend against it.
Rob $tone has stuffed three takedown attempts in the round now. That's going to take a lot out of Aaron Hoyle.
We've had a slow start to the round here - hopefully the action picks up.
Hoyle is trying hard to land a takedown here. $tone sprawls well and keeps this one on the feet.
$tone appears to be looking for a counter takedown.
Hoyle fails with a rather predictable takedown attempt.
$tone half commits to a counter takedown before pushing away, out of range.
Hoyle shoots in but $tone avoids the takedown attempt easily.#T1##TD2#
Hoyle bobs and weaves into range and then changes levels and scores with a nice takedown into side control. Score +4 for clean takedown past guard: $tone (0) vs (4) Hoyle#SUB2#
Hoyle swings around for an armbar but $tone sees it coming a mile off and turns beautifully into Hoyle's guard. Score +2 for sweep to guard / half guard: $tone (2) vs (4) Hoyle
Hoyle is working the butterfly guard. He manages to land a nice scissor sweep and is now in half guard on the top. Nice move. Score +2 for sweep to guard / half guard: $tone (2) vs (6) Hoyle
$tone tries to roll over but Hoyle keeps him under control.
Hoyle wants to control but $tone is keeping him busy. #T2##SUB2#
Hoyle is looking for a kimura here.
#SUB#
$tone looking for submissions from an awkward position here.#SUB2#
Hoyle is looking for a kimura. It's going to be difficult to finish that from half guard though and $tone defends it well. #SUB2#
Hoyle wants to work for an arm triangle but $tone is really keeping half guard well and defending the submission attempt.
#SUB2#
Hoyle is trying a forearm choke
I don't think that's going to do much at this level of the game.
#T3#
Hoyle wants to control but $tone is keeping him busy.
Hoyle is looking for the mount but instead finds himself back in full guard.
$tone trying to control the position here. #SUB#
$tone looking for submissions from the bottom here. Moving his hips around, possibly looking for an armbar.
Hoyle is looking to advance position but $tone has hit a scissor sweep - now he's on top in mount! Score +4 for clean sweep to past guard: $tone (6) vs (6) Hoyle#T4#
$tone content just to control the position here.
The fighters are starting to perspire pretty heavily.
$tone wants to control the pace but Hoyle is squirming around nicely.
Hoyle gets back to half guard.
$tone wants to pass to mount but Hoyle is defending the position.
$tone trying to control from half guard but Hoyle is working away. #SUB#
$tone is trying to work for a kimura. This could be trouble! No, Hoyle has managed to free his arm - good work. #T5#
$tone wants to control but Hoyle is keeping him busy.
Hoyle felt the need to train up his defensive grappling in the buildup to the fight. Presumably he was expecting to be in a difficult position like this, so let's see if he can get out of it.
Hoyle wants to improve his position but $tone is controlling well.
Hoyle manages to get to full guard.
$tone is stalling in the full guard.
Hoyle has a butterfly guard looking to sweep but $tone has passed into side control.
Score +3 for passing guard: $tone (9) vs (6) Hoyle
$tone controlling the position from side mount. #T6#
Hoyle gets one leg under and gets the fight to half guard.
$tone performing his best blanket impression for a moment.
$tone prevents Hoyle from improving his position.
Hoyle is trying to control but $tone passes into side control!
Score +3 for passing guard: $tone (12) vs (6) Hoyle#T7#
Hoyle is positioning himself to get back to half guard. #SUB#
$tone looking for an arm triangle but it's way too loose to do anything.
Hoyle being controlled for a moment.
The ref warns both fighters not to hold the cage as they work up against the meshing.
$tone has controlled the position for a good 20 seconds, which will no doubt be starting to frustrate his opponent.
Hoyle is not content to let $tone control the position. #T8##SUB#
$tone tries for a kimura but Hoyle is defending well.
Hoyle is looking to reverse the position.
Hoyle is persisting with the attempt to improve his position.
Hoyle is trying to control $tone's posture but $tone avoids it.
$tone is looking to take a break and control but Hoyle is keeping him honest, looking to work from the bottom.
Hoyle stops $tone from passing to mount. #T9#
Hoyle gives up the full mount - oops, sloppy defensive grappling there! Score +2 for reaching mount: $tone (14) vs (6) Hoyle
Hoyle tries to reverse the position but $tone maintains control.
$tone can't quite control the action as he would like just now, as Hoyle is looking to escape.
$tone tucks in and makes sure he doesn't lose the dominant position. #T10#
Hoyle is trying desperately to improve position.
Hoyle sneaks a leg back under and regains half guard and is working straight away to try and get back to guard. He hasn't managed just yet though.
Hoyle is looking for a sweep. $tone is wise to his cunning plan and keeps the top position.#SUB2#
Hoyle looking for submissions from an awkward position here.
Hoyle is refusing to be controlled, as $tone sits in half guard. #T11#
Hoyle wants to control but $tone is keeping busy.
#SUB#
$tone is sneakily working for an arm triangle but Hoyle sees it coming and defends easily.
$tone trying to control the action but Hoyle is working from the bottom.
Hoyle makes his way to full guard. A much better position for Hoyle.
Hoyle can't do much from the bottom at the moment, as $tone controls the pace.
$tone trying to control but Hoyle is working from the bottom.
$tone's corner is telling him to maintain position.#T12#
Hoyle looking to sweep here. No luck so far.
Hoyle being controlled here, momentarily.
$tone stands up and looks to throw the legs aside to pass to side control. Hoyle swivels though and keeps the full guard. #SUB2#
Hoyle working from the bottom, still in full guard. He's managed to get a loose triangle. $tone doesn't seem to be doing much to defend here, obviously he feels comfortable in the position. $tone manages to throw the legs off his shoulder and he's back into guard - no problem.
Hoyle keeping moving, preventing $tone from controlling successfully.
Hoyle trying to control the position here. #T13#
Hoyle is trying to keep $tone in close.
#SUB#
$tone thinks about going for a leg but decides against it, in order to maintain the position. #SUB2#
Hoyle throws his legs up looking for a submission but $tone uses it to pass to side control.
Score +3 for passing guard: $tone (17) vs (6) Hoyle
Hoyle is trying to get back to half guard.
A lull in the action here.#T14#
Hoyle tries to buck $tone off but $tone is having none of it.
$tone just content to control the position.
Hoyle is positioning himself to get back to half guard.
Hoyle can't do much from the bottom here.
Hoyle is looking to regain half guard here but $tone keeps moving and retains side control.
Boooooooooooooooooooo!!! God, this has been a terrible round. Come on you two, sort yourselves out!
And that's the end of the fight!
$tone takes the fight on points by 17 to 6.
Rob $tone seemed lost for words in his post fight interview but he remembered to thank his fans and directed everyone to his website. |
|
|
|
Main event
|
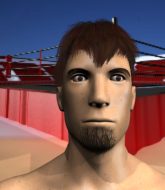
This TWGC bout is 1 fifteen minute round in the featherweight division. Introducing today's competitors. In the red corner, competing out of New York, with a TWGC record of 27 wins and 20 losses; Dado Mata! And in the blue corner, fighting out of Las Vegas, with a TWGC record of 27 wins and 19 losses; Matvey Pavlov!
The judges for this bout are Jonathan Paton, Chad Campbell and Dean Styles.
The official calls the fighters to the middle and the contest is under way.
A really sloppy takedown attempt there from Mata.
Mata shoots in but Pavlov avoids the takedown attempt easily.
Pavlov defends well against a solid takedown attempt from Mata.
That's three failed takedown attempts in the round for Dado Mata. That's going to take a lot out of him.
Pavlov misses with a takedown attempt. He shot from a bit too far out.
Mata shoots in for a takedown but Pavlov shows good takedown defense there and keeps this one on the feet.#TD#
Excellent takedown into side control there by Mata. Score +4 for clean takedown past guard: Mata (4) vs (0) Pavlov
Pavlov is trying to control Mata's posture but Mata avoids it.
The fighters are pressed up against the cage, both looking to find a bit of space to work.
Pavlov is looking for a sweep.
Pavlov manages to get back to half guard.
We've had a slow start to the round here - hopefully the action picks up.
Pavlov is looking to regain full guard. Not this time though.
Pavlov trying to control from the bottom.
#T1#
Pavlov controlling the leg, holding on to half guard.
Pavlov wants to get back to full guard.
Mata wants to pass to mount but Pavlov is defending the position.
Pavlov wants to control but Mata is keeping busy and won't allow it.
The ref warns both fighters not to hold the cage as they work up against the meshing.
The referee calls for the fighters to work.
Pavlov tries to roll over but Mata keeps him under control.
Mata is trying to control. Pavlov wants to improve his position but can't escape this time.
Pavlov won't allow Mata to pass to mount. #T2#
Pavlov trying to control here.
Pavlov is trying to avoid being dragged into an even worse position than he's already in but Mata is staying active.
Mata not doing much here.
Pavlov keeping control of the position.
Mata prevents Pavlov from improving his position.
Pavlov keeps trying to improve his position.#T3#
Mata trying to mount his opponent but Pavlov defends it. #SUB#
Mata is sneakily working for an arm triangle but Pavlov sees it coming and defends easily.
Mata wants to control but Pavlov is keeping him busy.
Pavlov tries to roll over but Mata keeps him under control.
Mata moves nicely into side control. Score +3 for passing guard: Mata (7) vs (0) Pavlov
Pavlov tries to improve position but can't.
Pavlov is not content to let Mata control the position.
Who's going to make the next move?#T4#
Pavlov is sneaking out the side here. He's bucked Mata off and has taken his back! Score +4 for clean sweep to past guard: Mata (7) vs (4) Pavlov
Mata can't escape the position.
Good control from Pavlov.
You can see the frustration on Mata's face
He knows he is in trouble unless he improves his position sooner rather than later.
Pavlov has the hooks sunk in and you can see the will to fight slowly draining out of Mata's body.
#SUB2#
Mata preventing the rear naked choke attempt from Pavlov.
You can see the frustration on Mata's face
He knows he is in trouble unless he improves his position sooner rather than later.
My spies in Marty Robbin's Fight Ranch inform me that Pavlov has been getting involved in the gym's BJJ sparring sessions. Let's see whether that pays dividends!#T5#
Pavlov gets his hands free as Mata looks to control.
Mata tries to escape the position.
Pavlov tries to keep control of the position but Mata is staying busy.
Pavlov is looking cool and calm here, just waiting for a good opportunity to attack and finish the fight from this dominant position.
Mata trying to control but he's just got himself in more trouble.
What can Mata do to escape this position? He's going to have to figure it out pretty quick if he wants to stay in the fight!
Mata tries to roll but Pavlov sticks to his back.
Pavlov has good solid back control here.
Let's hope that Pavlov has the urge to step up the pace any second now because for the last 15 or 20 seconds he's just been holding on tight.#T6#
We're seeing a lot of stalling here from Pavlov.
Pavlov's corner are shouting for him to control the position and he seems happy to oblige.
Yet more stalling tactics from Pavlov.
Mata is really stuck here.
Mata is working hard here to advance position.
Mata turns into Pavlov and is now in his guard.
Score +2 for sweep to guard / half guard: Mata (9) vs (4) Pavlov#T7#
Mata stopping the sweep attempt from Pavlov.
Mata trying to control the position from guard on top but Pavlov is wriggling around, looking for whatever he can.
Mata stands up and looks to throw the legs aside to pass to side control. Pavlov swivels though and keeps the full guard.
Mata trying to control but Pavlov is working from the bottom.
Mata looking to pass the guard.
Mata being controlled here momentarily.
Pavlov is working the butterfly guard. He manages to land a nice scissor sweep and is now in half guard on the top. Nice move. Score +2 for sweep to guard / half guard: Mata (9) vs (6) Pavlov#T8#
Pavlov perhaps working for something from half guard, or maybe not. It looks like he's just sitting there.
Pavlov looking to pass the half guard. Not this time.
Mata tries to get to full guard but Pavlov has control of the leg.
Pavlov not doing much here.
#SUB2#
Pavlov is trying a forearm choke
I don't think that's going to do much at this level of the game.
#T9#
Mata gets full guard.
Pavlov pushes down on Mata's leg and manages to get into half guard.
Pavlov passes the half guard and he's now in mount! Big trouble for Mata! Score +3 for passing guard: Mata (9) vs (9) Pavlov
Pavlov trying to control but Mata is having none of it.
Pavlov tucks in and makes sure he doesn't lose the dominant position. #T10#
Pavlov moves to the back. Score +3 for taking back: Mata (9) vs (12) Pavlov
Pavlov controls the action.
It looks like Pavlov might be adopting somewhat of a lay and pray gameplan here, which I'm sure won't go down too well with the paying fans in attendance... Or the ring announcers come to think of it.#T11#
Pavlov avoiding Mata 's attempts to control his hands.
Mata turns into Pavlov and is now in his guard.
Score +2 for sweep to guard / half guard: Mata (11) vs (12) Pavlov
Pavlov has Mata pulled in close to control his posture.
Pavlov is working the butterfly guard. He manages to land a nice scissor sweep and is now in half guard on the top. Nice move. Score +2 for sweep to guard / half guard: Mata (11) vs (14) Pavlov
Mata is looking for a sweep. Pavlov is wise to his cunning plan and keeps the top position.
Pavlov takes a deep breath and rests his weight momentarily on top of his opponent, to control the position.
Mata is trying to get back to full guard.#T12#
Pavlov keeping composed on the top, looking to control the action.
Mata is staying active underneath Pavlov, who seems content to just control the action from this position.
Pavlov is controlling the pace.
Mata is trying to maintain the position but Pavlov is very close to passing his half guard.
Pavlov stalling.
Mata wants to control but Pavlov is keeping busy and won't allow it. #T13#
Pavlov perhaps working for something from half guard, or maybe not. It looks like he's just sitting there.
Mata is looking for a sweep. Pavlov is wise to his cunning plan and keeps the top position.
Pavlov works his way into full mount! Score +3 for passing guard: Mata (11) vs (17) Pavlov
Mata is looking to get to half guard.
Pavlov controlling from mount.
Pavlov wants to control the pace but Mata is squirming around nicely.
Mata can't escape the position.
Pavlov works his way to his opponent's back.
Score +3 for taking back: Mata (11) vs (20) Pavlov
Pavlov has good solid back control here. #T14#
Mata is really stuck here.
Mata is being controlled on the ground here - he must escape this position otherwise surely the end is near.
More stalling from Pavlov.
Boooooooooooooooooooo!!! God, this has been a terrible round. Come on you two, sort yourselves out!
And that's the end of the fight!
Pavlov wins on points by 20 to 11.
After winning the bout, Matvey Pavlov thanked all his fans and promised he'd do even better in his next fight. The crowd seemed to love his humility. |
|
|
|
|
|
|